SEARCH FINESCALE.COM

Enter keywords or a search phrase below:

80 Years of Airfix GB

115238 views
1664 replies
1 rating 2 rating 3 rating 4 rating 5 rating
  • Member since
    June 2017
Posted by UnwaryPaladin on Monday, February 18, 2019 9:52 PM

stikpusher

Thank you UP. Your 262 cockpit is looking great! Did you scratch build that harness?


Thanks! The harness is made from some foil tags I had from a previous hobby. The tags are made so that any writing will be indented on the foil. You can use a pen point, pencil, even a sharp stick to write on them, and the writing will not wash off. They also have very good potential for seat harnesses! I don't do much with them on 1/72 scale, just paint. But on 1/48 they foil is just right for folds, wrinkles, and would look super with some buckles and clasps. I'm going to try it on an upcoming 1/48 P51. 

Everything is going together well on the Me262 kit. There is one spot that could be trouble, and I've seen other builds online run into this issue too. The cockpit tub is has three pins on the back that are supposed to fit into the sockets as shown below. There are also locators on the tub for the pegs on the spar.

They all fit and it looks good until the fuselage halves are joined. The tub sits too low in the rear giving the fuselage halves  poor fit. It also prevents the canopy from sitting flush. Fortunately the fix is easy. I snipped off the three pegs and filed off their three mating points. I also removed the square locators for the front of the tub. The tub has a tongue shaped recess on the front and that matches with a convex locator on a firewall. Just glue those two points together and it fits perfectly.

While the glue on the other parts was drying, I did a little work on the engines. Nothing real exciting here, but I did want to mention a paint that comes in handy but I haven't seen it mentioned here. 

I did the highlighting on the turbine fins with an oil paint stick. The color is about as thick as chapstick, so a little on a small brush makes it very easy to dry brush. I've swiped my finger over it to highlight instrument panels, works very well. 

The kit is going together nicely! Seams aren't too bad. The panel lines are a bit excessive, especially for an ME262. I'm going to fill them in with some Perfect Putty to tone them down a bit. 


  • Member since
    July 2004
  • From: Sonora Desert
Posted by stikpusher on Monday, February 18, 2019 1:12 PM

Thank you Jack. I know that many modelers have used black basing for a long time. It’s just something that I am starting to use and learning to do properly. A new thing in the bag of tricks for me. Figures are still very much a learning process for me as well. Finding what works and what does not. This time it all worked out well enough.


F is for FIRE, That burns down the whole town!

U is for URANIUM... BOMBS!

N is for NO SURVIVORS...

       - Plankton

LSM


  • Member since
    April 2006
  • From: ON, Canada
Posted by jgeratic on Monday, February 18, 2019 9:58 AM

Stik, great job on the 17-pdr, and congrats on the win. Yes

That black basing really worked out well, adding an additional depth of interest.   Was also impressed with the painting of the ropes on the shield, they look like they could have been separate parts.  The figures are also very well done.

regards,

Jack

  • Member since
    July 2004
  • From: Sonora Desert
Posted by stikpusher on Sunday, February 17, 2019 6:49 PM

Thank you UP. Your 262 cockpit is looking great! Did you scratch build that harness?


F is for FIRE, That burns down the whole town!

U is for URANIUM... BOMBS!

N is for NO SURVIVORS...

       - Plankton

LSM


  • Member since
    June 2017
Posted by UnwaryPaladin on Sunday, February 17, 2019 6:22 PM

Very nice gun, Stik! 


Slight change of plans for me regarding this GB. I have several Airfix kits on hand and was going to start with the Boeing Clipper. I was looking at the growing stack of models on the shelf and realized it has to get smaller. Or at least have a smaller footprint. So I'm going to try and work on the kits with the bigger boxes. At least that's the plan. The Clipper will have it's turn, in due time!

I should be finishing the Spooky gunship for another group build, but I needed a break from the cantankerous windshield. 

One of the bigger 1/72 Airfix boxes was this:

Both options are nice, but the blue and white checkers and silver intakes are appealing to me. 

Started with the cockpit, nothing unusual there. I added a seat harness and buttoned her up. I'll be building it with the canopy closed, so most of the details won't be seen. 

The cockpit is then enclosed in a tub that will be fit to the wing. 


  • Member since
    July 2004
  • From: Sonora Desert
Posted by stikpusher on Sunday, February 17, 2019 1:00 PM

Happy to have taken part Bish. Thanks for hosting and for your kind words on this build. I’m glad that you like it.


F is for FIRE, That burns down the whole town!

U is for URANIUM... BOMBS!

N is for NO SURVIVORS...

       - Plankton

LSM


  • Member since
    December 2002
  • From: Bury St Edmunds, Suffolk, England
Posted by Bish on Sunday, February 17, 2019 12:25 PM

I like that Stik, its come out really well. paint job is great and really nice touch with the mud splatter. Thats a well deserved award there.

Thanks for taking part and our first completed none aircraft.

I am a Norfolk man and i glory in being so


On the bench: Airfix 1/72nd Harrier GR.3/Fujimi 1/72nd Ju 87D-3

  • Member since
    July 2004
  • From: Sonora Desert
Posted by stikpusher on Sunday, February 17, 2019 11:37 AM

I am calling this one done. Overall it’s a nice kit, but the instructions are a bit ambiguous on the placement of many of the small parts on the carriage and breech area. Make sure that you have good photo references if you plan on building this kit. I black based the model and painted it in a mix of Tamiya colors for British Olive Drab SCC 15. I added a few tie down straps from painted Tamiya tape for the tow ropes and shovel. I used Mig pigments for weathering.


They liked it at OC IPMS this past Friday.


I am still planning to build a Bronco figures crew set and a different stand for this kit in the near future. The kit included multi pose figures do not quite work without some surgery.


Thanks for looking, comments and critiques welcome.


F is for FIRE, That burns down the whole town!

U is for URANIUM... BOMBS!

N is for NO SURVIVORS...

       - Plankton

LSM


  • Member since
    April 2015
Posted by Mopar Madness on Saturday, February 16, 2019 6:32 PM

I love those rivets on those vintage Airfix kits!  It is refreshing when building a kit of this vintage and it assembles just as good as something you could buy today.

Chad

God, Family, Models...

At the plate: 1/48 Airfix Bf109 & 1/35 Tamiya Famo

On deck: Who knows!

  • Member since
    July 2014
Posted by modelcrazy on Saturday, February 16, 2019 5:42 PM

Stick, surpurb job on the gun.  Yes Some of those old Airfix kits can build into a nice display.

In fact the BV here is really surprizing me. The seams are very good and will take very little time to work on. The canopy's fit could use a little help but with some Vallejo filler and some alcohol to smooth it out....

Steve

Building a kit from your stash is like cutting a head off a Hydra, two more take it's place.


http://www.spamodeler.com/forum/

  • Member since
    July 2004
  • From: Sonora Desert
Posted by stikpusher on Saturday, February 16, 2019 3:12 PM

Thanks Mopar. It’s a good kit that can be a great build with some good references to show the way. 


F is for FIRE, That burns down the whole town!

U is for URANIUM... BOMBS!

N is for NO SURVIVORS...

       - Plankton

LSM


  • Member since
    April 2015
Posted by Mopar Madness on Saturday, February 16, 2019 12:14 PM

Congratulations on your win! I have really been impressed with this old Airfix classic and what you’ve done with it. I may have to add one of these to the stash sometime soon! 

Chad

God, Family, Models...

At the plate: 1/48 Airfix Bf109 & 1/35 Tamiya Famo

On deck: Who knows!

  • Member since
    July 2004
  • From: Sonora Desert
Posted by stikpusher on Saturday, February 16, 2019 9:30 AM


Mopar, I was thinking the same thing about his lower hand. Sort of reminds me of a platoon sergeant I once had... we called him “Squeeze P”... he didn’t like that...  :whistle:  But the root of the figure situation lies in these being generic multi pose infrantry figures, and trying to adapt them to gun crew. It does not quite work. In the original kit, that arm is extended forward gripping the magazine for a Sten gun. It’s just kind of there on this guy. I could chop, cut, reposition and glue into a better pose. But I just wanted one guy fast for the gun last night to pose on my generic base for IPMS....


And it did work. It took 2nd Place in Master last nite. But was not the winner for the Airfix theme. That was a 1/72 Kingfisher that had been really upgraded and placed on a ship catapult for display. It was beautiful! And shows that presentation is a key factor. 


Once I get my Bronco figures all painted up, I’ll work on a proper display for my 17 Pounder as I have envisioned....


More photos of this to come. Perhaps this evening.


F is for FIRE, That burns down the whole town!

U is for URANIUM... BOMBS!

N is for NO SURVIVORS...

       - Plankton

LSM


  • Member since
    July 2004
  • From: Sonora Desert
Posted by stikpusher on Friday, February 15, 2019 7:49 PM

LMAO Mopar! No glove on that guy... hopefully you do not think that he looks so “King of Pop” now....

I’m calling the gun finished. I dry brushed some highlights here and there, added some tie down straps to the tow ropes and shovel, and added a bit of weathering around the wheels and trail spades.


I also finished up the Airfix figure to display it at IPMS for the Airfix theme. He was good practice. I still plan on doing a vignette/diorama base with the Bronco figures, but no rush there.


F is for FIRE, That burns down the whole town!

U is for URANIUM... BOMBS!

N is for NO SURVIVORS...

       - Plankton

LSM


  • Member since
    April 2015
Posted by Mopar Madness on Friday, February 15, 2019 5:48 PM

Looking good Stik! That guy on the bottom right looks like he’s busting out some fresh Michael Jackson moves!

Chad

God, Family, Models...

At the plate: 1/48 Airfix Bf109 & 1/35 Tamiya Famo

On deck: Who knows!

  • Member since
    July 2004
  • From: Sonora Desert
Posted by stikpusher on Friday, February 15, 2019 12:47 PM

So here is yesterday’s progress. It doesn’t feel like I accomplished much in the hours down there at my workbench. 


Anyways here are the tow ropes yesterday after my dry brushing. The colors and subtlety are more distinct in person.


And the shovel on the trail now painted up (of course the camera focused on the wheel...)


And basic work on the crew figures....


More to come in a day or two... lots of work ahead...


F is for FIRE, That burns down the whole town!

U is for URANIUM... BOMBS!

N is for NO SURVIVORS...

       - Plankton

LSM


  • Member since
    July 2004
  • From: Sonora Desert
Posted by stikpusher on Friday, February 15, 2019 11:48 AM

Frank, I’m really loving that Clipper. A true classic airliner with a distinct look. You are doing the kit and the aircraft justicein your build.

Svenne, that tiny Typhoon is coming along great. And the Hurricane... wow! What detail in there! 

Thanks to all for the kind words on my gun. Bish, the added colors do help this build become more life lifelike and break up the monotony of the color scheme. Mark, you should try painting the figures, if not for the practice and experience, if nothing else. Svenne, I do have a diorama or vignette setting in mind for this once I have all the figures completed. 


F is for FIRE, That burns down the whole town!

U is for URANIUM... BOMBS!

N is for NO SURVIVORS...

       - Plankton

LSM


  • Member since
    June 2017
  • From: Winter Park, FL
Posted by fotofrank on Friday, February 15, 2019 11:04 AM

Looking good, Svenne. I've always been a fan of the Typhoon.

For me, progress! The underside and the sponsons and the two outboard vertical tails are painted with the Alclad Aluminum. Looks like a nice smooth finish. I polished the primer with a 12,000 grit Micro-Mesh pad then cleaned the surface with alcohol. I sprayed the Alclad at 8 psi to make sure the paint didn't dry between the airbrush and the surface of the airplane. The finish looks good. I'll spray the topside tomorrow or Sunday.


OK. In the stash: Way too much to build in one lifetime...

  • Member since
    December 2005
  • From: Goteborg / Sverige
Posted by Svenne Duva on Friday, February 15, 2019 10:15 AM

Right,

so after my misshaps with the 1/72 Typhoon I sort of lost the will.
And the stencil chart.

Sure I could lift the frosty Tamiya coats with Windex - not a problem but the Vallejo primer sits like concrete.

Leasson learnt - don't mix anything but Tamiya with the Tamiya yellow cap thinner.

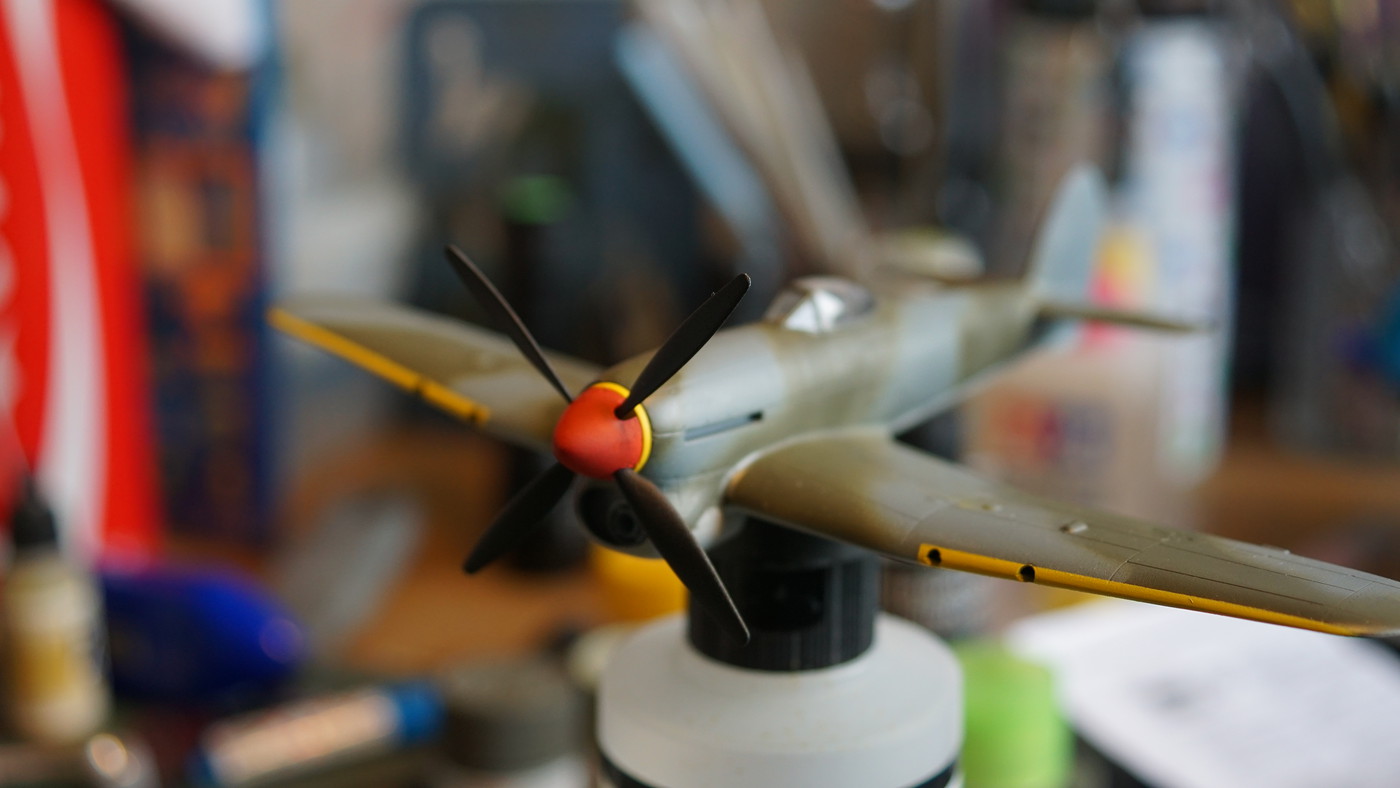
Anyway, after some contemplating I remembered myself why I was doing the 1/72 in the first place.

I wanted to learn more about the story behind the Typhoon;
Variants, history, units, basically anything worth knowing before I started the big 1/24.

And I have learned a lot. Shape up and bite the bullet.

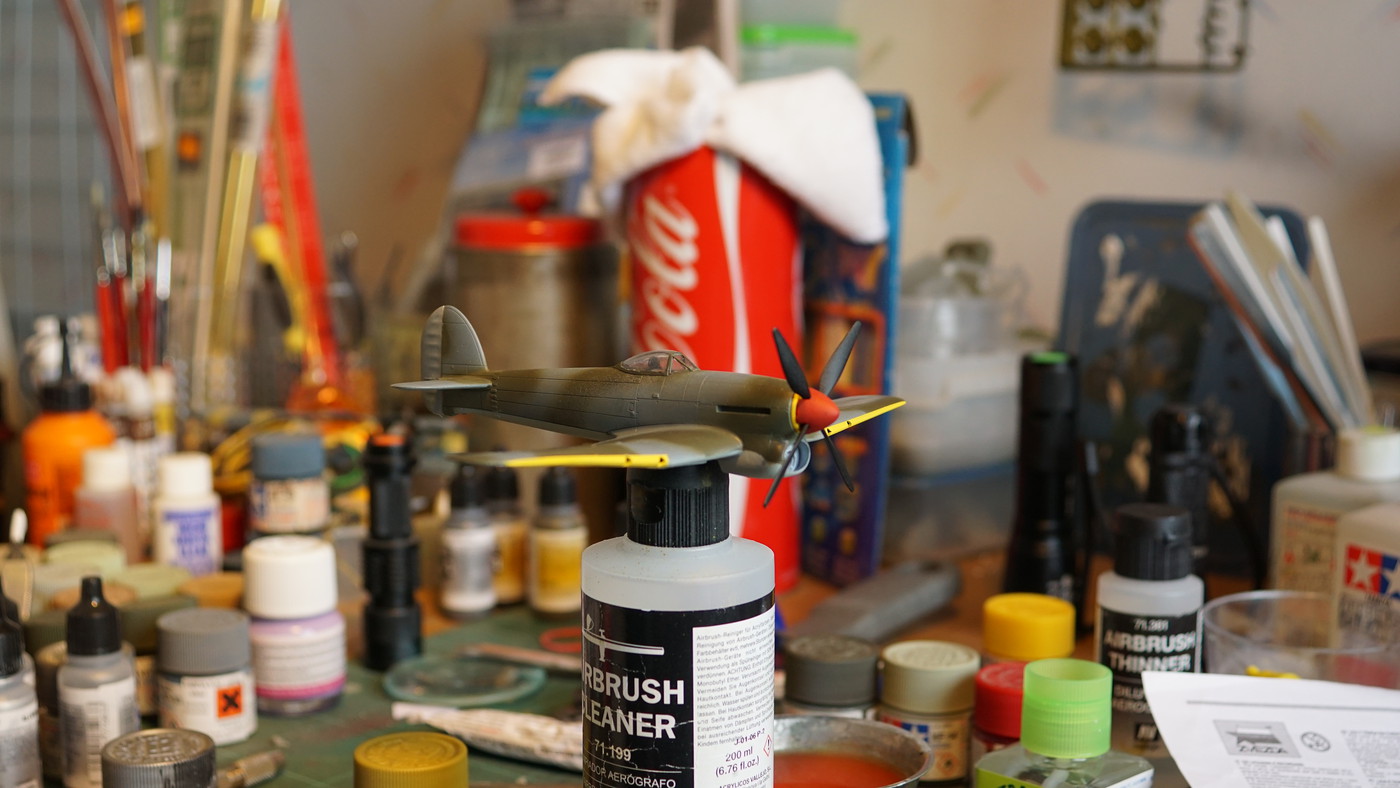
So I sanded down the worst frosting and gave the lady a camoflage coat.

Colors used are:
XF-80 Royal Light Gray
XF-81 Dark Green 2
XF-82 Ocean Gray 2

@ James - still waiting for the Vallejo RAF set to arrive from Hannants...
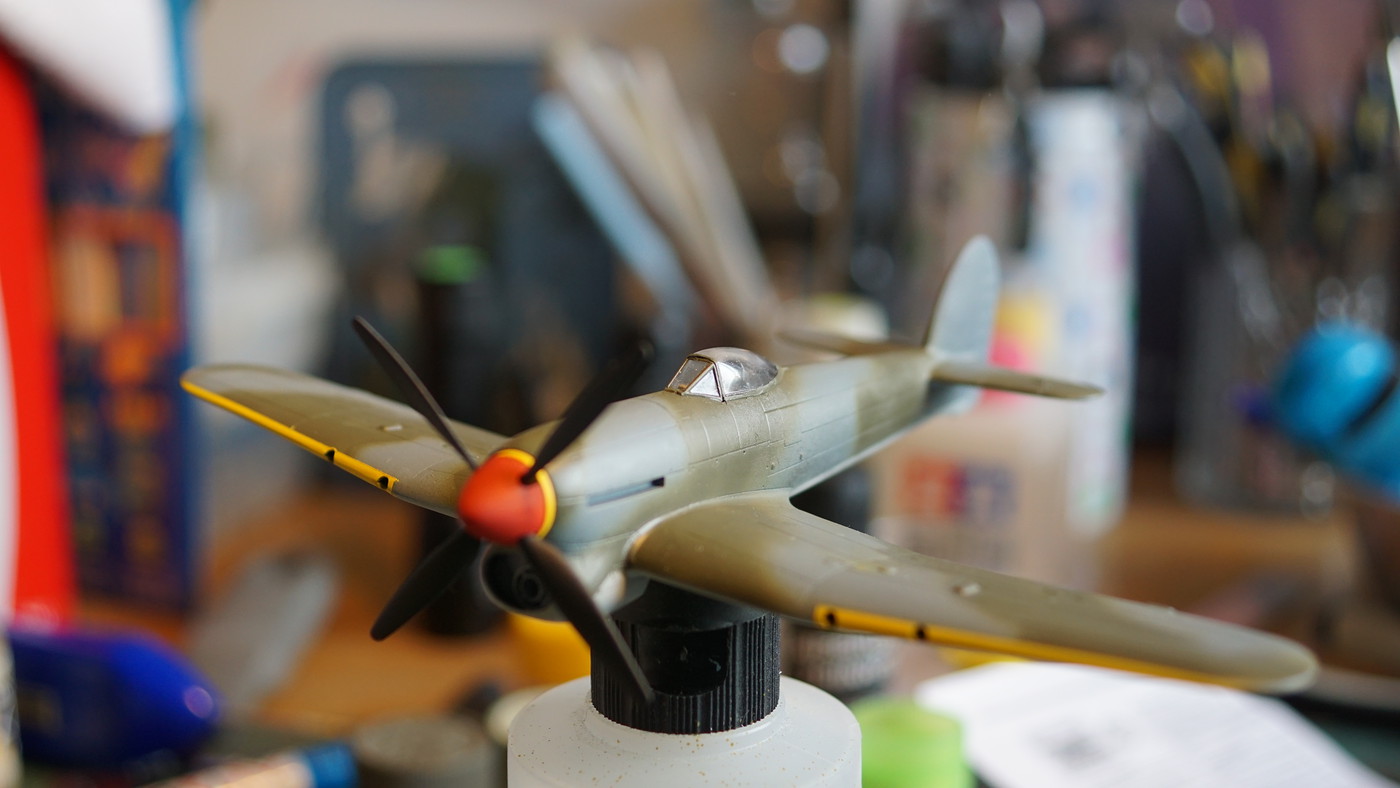

I did find a stencil set from Heller for a Tempest in 1/72 in the stash, must be at least 25 years old. I will get the exhausts painted and give the old stencils a go.
But that is not going to be a priority now.

On to the next (or previoues) Sidney Camm design, Airfix Hawker Hurricane 1/48.

This is a new release from 2017 (tool from 2015).
The kit includes optional parts to build either a Mk.1 or Mk.1B replacing the lower rear section of the airframe with a part including the arresting hook for the sea version.

This is a totally different kit.

It is difficult to belive that the Typhoon (tool from 2013) and the Hurricane come from the same manufacturer.
I would have guessed FineMolds or Hasegawa.
And belive me when I say I was impressed with the Typhoon!

But this is something completely different...

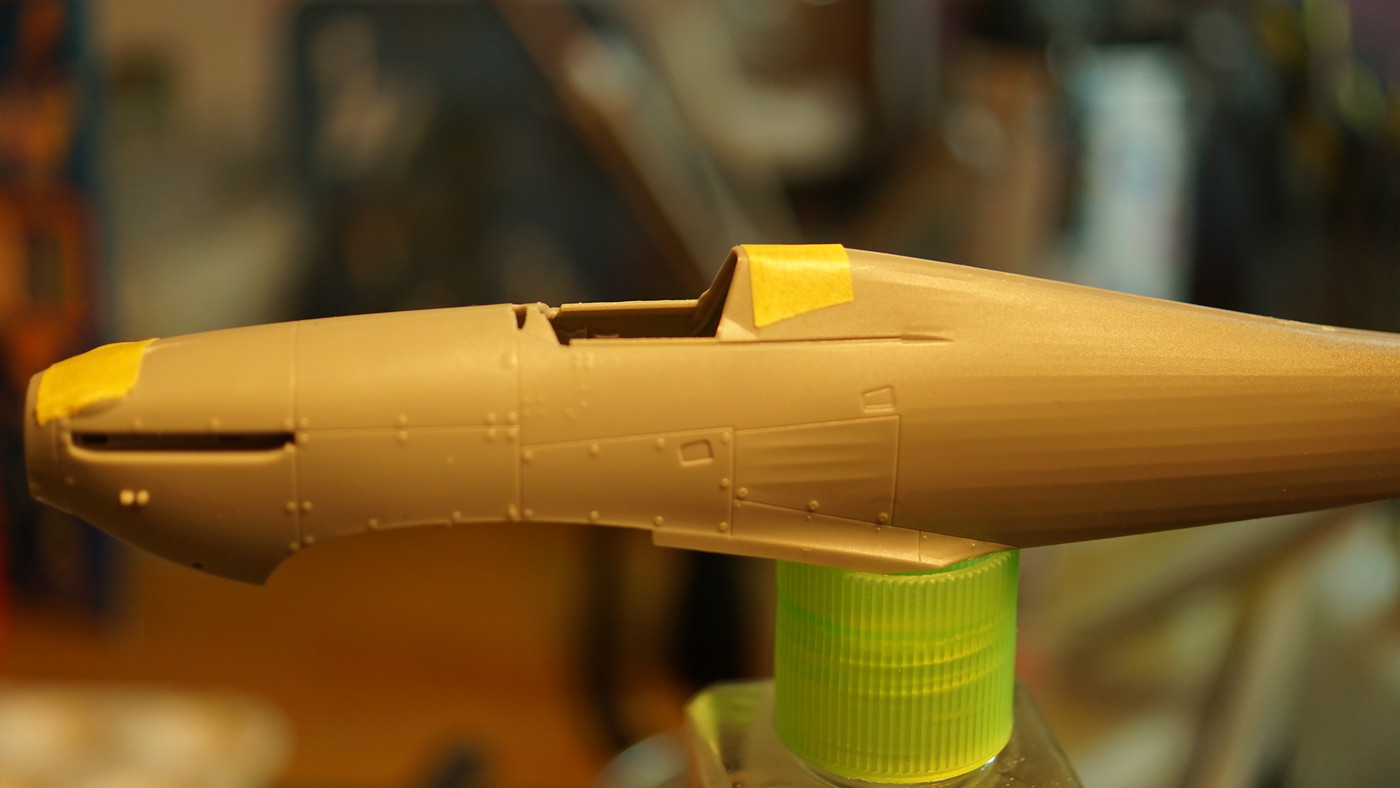
The plastic is finely molded and brittle:
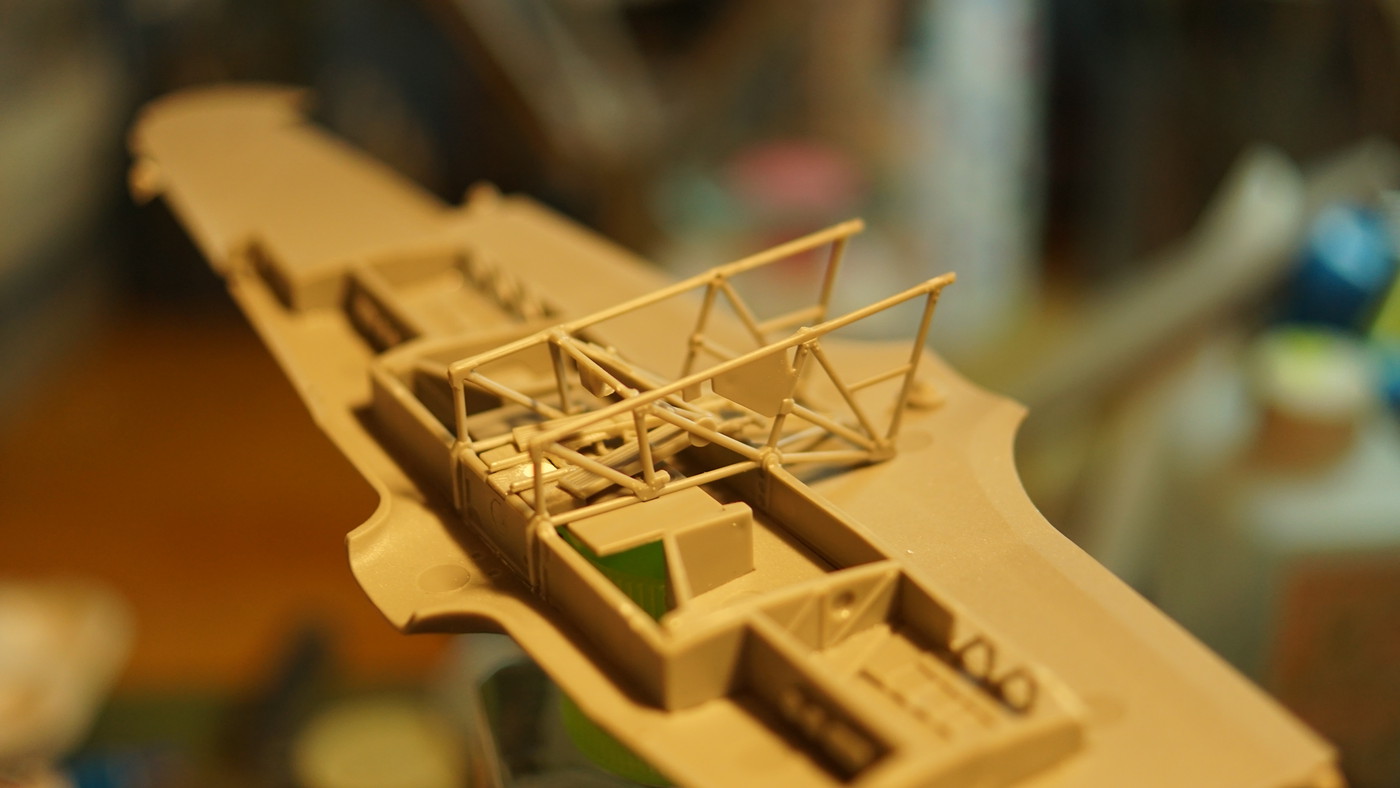
Details are very fine and crisp:
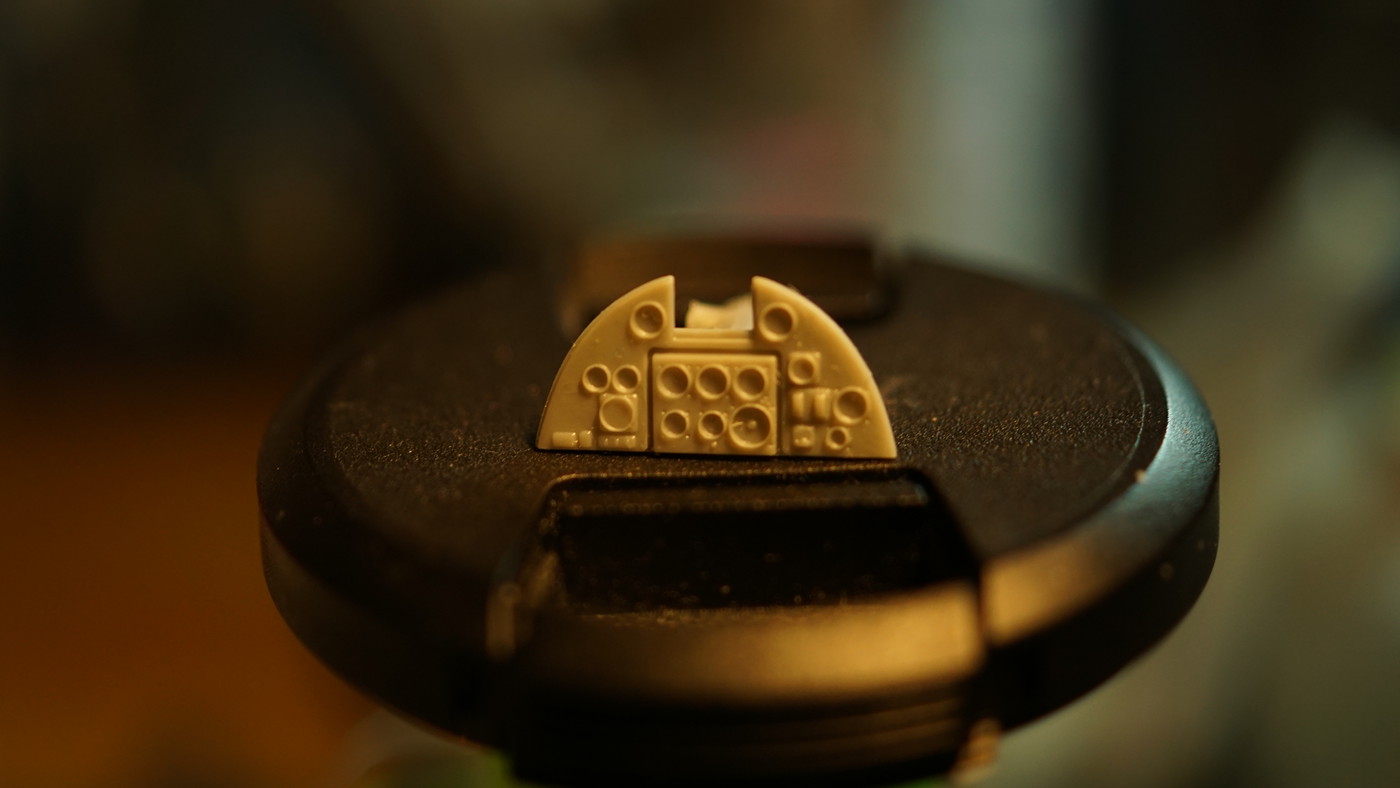
Not sure if this impression is going to, last but so far this is...

WOW!!!

Svenne

sic transit gloria mundi

  • Member since
    June 2017
  • From: Winter Park, FL
Posted by fotofrank on Friday, February 15, 2019 9:53 AM

Svenne Duva

Hello Frank,
Looking forward to see the Clipper in alloy - guess you are going to give the WB-29 the same treatment?

I guess the question about the primer was related to the Alclad coating, what did you end up using?

Svenne


Svenne, the Clipper will be painted with Alclad Aluminum. The primer is Alclad Black Primer and Microfiller. The WB-29 will get the same treatment as well. These two kits will be the fourth and fifth I have painted with an Alclad finish.

OK. In the stash: Way too much to build in one lifetime...

  • Member since
    December 2005
  • From: Goteborg / Sverige
Posted by Svenne Duva on Friday, February 15, 2019 9:20 AM

Hi Mark,

I do not enver you but your efforts are going to pay off for sure!

How do the figurines look?

Svenne

CG on your Butcher Bird btw :)


sic transit gloria mundi

  • Member since
    December 2005
  • From: Goteborg / Sverige
Posted by Svenne Duva on Friday, February 15, 2019 9:12 AM

Hello Frank,
Looking forward to see the Clipper in alloy - guess you are going to give the WB-29 the same treatment?

I guess the question about the primer was related to the Alclad coating, what did you end up using?

Svenne


sic transit gloria mundi

  • Member since
    December 2005
  • From: Goteborg / Sverige
Posted by Svenne Duva on Friday, February 15, 2019 9:03 AM

Hi Stick,

The 17 Pounder realy pops now. Great job!

This will look great with the figures added as well, planning a small diorama?

Svenne

sic transit gloria mundi

  • Member since
    December 2002
  • From: Bury St Edmunds, Suffolk, England
Posted by Bish on Friday, February 15, 2019 5:20 AM

Mark, i know scratchbuilding can be tedious and time consuming. But i do get satisfaction from adding bits myself. And i think the effort you are goiung to is already paying off in that extra detail. At least you have some kit parts to work from rather than trying to build somthing that isn't in the kit at all.

I am a Norfolk man and i glory in being so


On the bench: Airfix 1/72nd Harrier GR.3/Fujimi 1/72nd Ju 87D-3

  • Member since
    May 2017
  • From: Denver, Colorado
Posted by MrStecks on Thursday, February 14, 2019 11:23 PM

Tales of the Omnibus - Chapter 1  (cont.)

Moving slowly on the Omnibus, but making progress.  Got the floor and chasis members together, and everything is nice and true.  Glad I made the effort to fix that warped floor.
Put down some primer and a first pass of color for the interior floor.  Some fixing to do in there.

Then... I got sidetracked, and now this build has become much bigger and more challenging.  The thing is, I can live with the obscene number of ejector pin marks and warped parts.  But the absolute lack of any interior structure (other than the benches) is too much to bear. 
Here's a pic of the inside wall of the bus, without the "glass."

And here's a pic with the glass laying in place.

That's it.  That's what you'll see when you look inside.  A big slab of clear plastic glued on to a featurless wall.  Ugh...

So, as much as I dread scratch-building, it must be done.  I started by tracing out the shapes of the windows on plastic stock and carving them out.  These will become the interior sills for the glass.  I've also decided to dump the 1mm thick glass and go with some .010mm acetate.
I have the interior window framing mostly done on one side, about to start on the other:

Well, this should be interesting.  :)


Cheers,
Mark


On the bench:  Revel 1/48 B-25J Mitchell

In the queue: Tamiya 1/48 F4U-1A Corsair

  • Member since
    May 2017
  • From: Denver, Colorado
Posted by MrStecks on Thursday, February 14, 2019 11:08 PM


I can't keep up with all the great updates in this thread!
 
cwalker3 – Your Lancaster’s camo looks great.
 
Jacknewblll – Nice work on the F-14.  I built that plane when I was a kid.  I didn’t remember it at all until I saw Bish’s post about the plastic slabs sticking out of slots in the front of the wing gloves, then suddenly the memories of that plane came back to me.  Must have really traumatized me to make me black it out of my memory like that.  Hahaha….
 
Frank - Love how the Clipper is coming along.
 
Stik – The gun is looking awesome.  The figures look cool too.  Looking forward to seeing those painted up.  There are five figures in my Omnibus kit, but I’m not sure I’ll use them.  Kind of afraid of painting figures. 
 
Cheers,
Mark


On the bench:  Revel 1/48 B-25J Mitchell

In the queue: Tamiya 1/48 F4U-1A Corsair

  • Member since
    June 2017
  • From: Winter Park, FL
Posted by fotofrank on Thursday, February 14, 2019 9:03 AM

Thanks, Bish. Should be warm enough and dry enough to paint tomorrow. Stik, that gun looks really good.

On to "whatever it takes!" To fill the lower turret openings, I used wheel halves from an ESCI P-36 kit. I filed the inside of the wheel half with the curved side of a wood file then epoxied them in place. Then I used the flat side of the same wood file to curve the wheel halves to match the curve of the fuselage. Yeah, whatever it takes. Now I'll fill and sand and polish as needed. man, this is a lot of work!


OK. In the stash: Way too much to build in one lifetime...

  • Member since
    December 2002
  • From: Bury St Edmunds, Suffolk, England
Posted by Bish on Thursday, February 14, 2019 1:59 AM

Heres hoping for a rain free day frank. Be nice to see the paint on that.

I am a Norfolk man and i glory in being so


On the bench: Airfix 1/72nd Harrier GR.3/Fujimi 1/72nd Ju 87D-3

  • Member since
    December 2002
  • From: Bury St Edmunds, Suffolk, England
Posted by Bish on Thursday, February 14, 2019 1:58 AM

Nice detail painting Stik, itreally brings the gun to life.

I am a Norfolk man and i glory in being so


On the bench: Airfix 1/72nd Harrier GR.3/Fujimi 1/72nd Ju 87D-3

  • Member since
    July 2004
  • From: Sonora Desert
Posted by stikpusher on Wednesday, February 13, 2019 10:50 PM

Jack, your Tomcat is shaping up nicely.

Frank, I can’t wait to see some metal color over the black on your Clipper

As for my project... Detail painting today... enamels... the tires and base color of the tow ropes. Today was temps in the low 50’s in my work area and high humidity due to rain... the paints were drying very slowly...


I’ll get more done tomorrow...


F is for FIRE, That burns down the whole town!

U is for URANIUM... BOMBS!

N is for NO SURVIVORS...

       - Plankton

LSM


JOIN OUR COMMUNITY!

Our community is FREE to join. To participate you must either login or register for an account.

SEARCH FORUMS
FREE NEWSLETTER
By signing up you may also receive reader surveys and occasional special offers. We do not sell, rent or trade our email lists. View our Privacy Policy.