SEARCH FINESCALE.COM

Enter keywords or a search phrase below:

Vintage Armor Kit GB - 5/1/08 - 12/31/08 WIP

19230 views
150 replies
1 rating 2 rating 3 rating 4 rating 5 rating
  • Member since
    July 2006
  • From: San Francisco Bay Area
Posted by bufflehead on Sunday, January 11, 2009 8:42 PM

Thanks for all your kind comments fellas, it means a lot to me to have my efforts appreciated by someone!!  Have fun in all your future modeling endeavors and hope to see your work soon on other GBs or posts! 

Jmart, I'll be joining you soon (I hope) on the 1000 Roadwheels GB!

Ernest

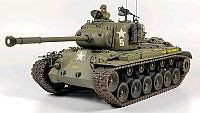
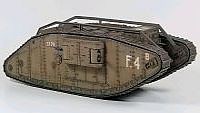
Last Armor Build - 1/35 Dragon M-26A1, 1/35 Emhar Mk.IV Female


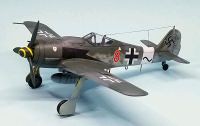
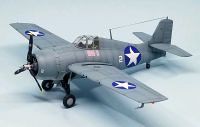
Last Aircraft Builds - Hobby Boss 1/72 F4F Wildcat & FW-190A8


  • Member since
    March 2007
  • From: NJ
Posted by JMart on Thursday, January 8, 2009 7:10 AM

bufflehead - cheers man! hey never need to apologize when real life gets in the way, happened to many of us in 2008! You did an absolutely GORGEOUS job on that old kit! brilliant!

Love the weathering... I am planning on doing the old Tamiya IV D in DAK markings for the 1,000 Wheels GB, will use your WIP/pics as reference and inspiration.

redleg12 - My apologies for not finishing my kit... work/family health issues slammed on me in 2008 and wiped most of my modelling build time. But I really enjoyed this GB and builds, coming back to the hobby last year after a 25 year break, was nice to get re-acquainted with the old classics.

Anyone that wants to start a Vintage II - I am in! :)

and happy new year everyone!


  • Member since
    July 2006
  • From: New Jersey
Posted by redleg12 on Monday, January 5, 2009 10:09 AM

I'm still watching!!!!!!

Nice job bufflehead. It does not matter when.....what matters is you finished and it looks great

To all, it was my pleasure to act as host. I am not a big "Group Build" person but I am an avid fan of the old kits.

It was an honor to have you as part of the build and what you did with the builds was special and shows you don't need super kits to build a super model.

Have a great 09 and have fun building.

Rounds Complete!!

End of Mission!!!!!

"The Moral High Ground....A Great Place to Emplace Artillery."

mmc
  • Member since
    February 2007
  • From: Newcastle upon Tyne, England
Posted by mmc on Monday, January 5, 2009 8:35 AM

Wasn't sure if anyone still posted in this thread.

Hey Phil_H I'd be up for "Vintage GB 2- Bring out the oldies", had fun doing the Puma and 6 Pounder, keep us posted.

Mark

  • Member since
    August 2005
  • From: Sydney, Australia
Posted by Phil_H on Monday, January 5, 2009 6:06 AM

Hey there Bufflehead,

I love these older kits and I think with this GB, we've shown that you don't always need the latest and greatest to build a great looking model. You really brought this and the PzIII to life.

Looking at your PzII makes me want to do another one, and I only did one of these about a year ago. Smile [:)]

Thanks once again to Redleg12 for hosting this GB - it's been great fun to participate in thsi one and to see everyone else's builds here. If anyone's interested in extending or doing a "Mk.II" of this GB, I've got more "classic" kits in the stash. Smile [:)]

  • Member since
    July 2006
  • From: San Francisco Bay Area
Posted by bufflehead on Monday, January 5, 2009 12:00 AM

Hello....anyone here?   Anyone?  Question [?]

Well, even though this GB is supposedly over I assume that someone from here will read this post.  If not..oh well!!Big Smile [:D]

I just wanted to let you all know I finally finished the Tamiya Pz. II Ausf. F!  Sorry, it sat stagnant for over two months while I finished up other GBs and dealt with work, family and holiday stuff.  All it took was one day, yesterday and a little bit this morning to finish it off (it was mostly done back in October).  JMart, sorry to be so late answering your question....for the holes in the exhaust sheild I used a drilling guide that came with some CMK bolts I bought a couple of years ago.  This allowed me to get perfect spacing between the holes, but then getting the rows of holes to line up....well that wasn't so perfect!! Laugh [(-D]

Although the model was done with no AM parts, only a little scratchbuilding, I did use Archer transers for some of the markings as the kit decals were pretty thick and prone to silvering.   Paint was mostly Tamiya acrylics with some Vallejo Model Color and Humbrol enamels thrown it where necessary.  I also used some MIG pigments for the dusty weathering.  The spare tracks assy is missing from the front plate....it disappeared sometime during the last two months!Shock [:O] 

So here she is all ready to do battle with Field Marshal Erwin Rommel and the Deutsche Afrika Korps:

Thanks Redleg12 for creating and hosting this GB!  I had a blast building these vintage kits and am eager to do another.  Well, as soon as I finish up all my other GBs!!Big Smile [:D]

Ernest

Last Armor Build - 1/35 Dragon M-26A1, 1/35 Emhar Mk.IV Female


Last Aircraft Builds - Hobby Boss 1/72 F4F Wildcat & FW-190A8


  • Member since
    March 2007
  • From: NJ
Posted by JMart on Saturday, October 25, 2008 7:47 PM

Phil_H - Looks GREAT! The weathering is spot on, enough to make it look interesting without hiding details. Fantastic paint job too. And extra points for the information about the Aussie vehicle, a great mini-lesson!

bufflehead - Love what you did with the muffler shield... will save this tip for future use. Ditto on the perforations..what did you use? very evenly spaced. Color basecoat looks great.


  • Member since
    July 2006
  • From: New Jersey
Posted by redleg12 on Tuesday, October 21, 2008 5:07 PM

bufflehead - Thumbs Up [tup] Nice......very nice work. can't wait to see the finish coats....

PINK....Hummmmm

Rounds Complete!!

"The Moral High Ground....A Great Place to Emplace Artillery."

mmc
  • Member since
    February 2007
  • From: Newcastle upon Tyne, England
Posted by mmc on Tuesday, October 21, 2008 11:37 AM

Sign - Ditto [#ditto] What Phil said!!!!

Looking forward to seeing this oldie.

Mark

  • Member since
    August 2005
  • From: Sydney, Australia
Posted by Phil_H on Tuesday, October 21, 2008 8:24 AM

Hi Bufflehead,

WOW!

Your work on this old kit is awesome. Thumbs Up [tup] The heat shield looks great - did you drill the perforations individually?

She's going to be spectacular when she's done. Cool [8D]

  • Member since
    July 2006
  • From: San Francisco Bay Area
Posted by bufflehead on Monday, October 20, 2008 12:28 AM

Wow Phil!!  That's great information!!  Thanks!  I had no idea that such mods existed for the M113.  The photo is awesome....you did a great job making your model look like the real thing!Approve [^]

Here's what I managed to get done this weekend on the Pz II.  Not much scratchbuilding done except for modifying the muffler and jack block.  I sanded off the poor representation of the perforated muffler shield and made a new one from a beer can (OK, I think it was Miller LiteBlush [:I]). Perforations are off, but I think it looks a heck of lot better than the kit job.   Did the same with the coaxial MG34.  The jack block looked like a storage box so I sanded, scraped, scribed and carved it to look more like wood and added banding straps made from lead foil (luved the wine!!Make a Toast [#toast])  Carved off the molded on tools and scratchbuilt new ones and stole one from that same Pz IV kit that I scavenged from for the Pz III that I just finished!

Primer/Under coat of Tamiya German Gray (rattle can)

Base coat of Tamiya's Desert Yellow + Buff + Flat White.  Allowed some of the gray undercoat to show through, though you can barely see it in the photos.

Muffler base coated in pink.....yes, pink!

Need to do some post shading and basecoat variations before markings are applied.  I hope I can finish it by next weekend!

Ernest

Last Armor Build - 1/35 Dragon M-26A1, 1/35 Emhar Mk.IV Female


Last Aircraft Builds - Hobby Boss 1/72 F4F Wildcat & FW-190A8


  • Member since
    August 2005
  • From: Sydney, Australia
Posted by Phil_H on Sunday, October 19, 2008 7:35 AM

Hi Bufflehead.

Thanks for the compliments.

No worries about the questions - I'll try to answer them as best I can.

The M113A1 FSV (Fire Support Vehicle), aka "The Beast" as it was known to its crews in Australian service, was developed in Australia around 1970-71 by the simple expedient of mating the turrets from a number of recently retired Alvis Saladin armoured cars to the hulls of US supplied M113A1's. Only about 15 vehicles were converted to this configuration.

The main gun is a low velocity 76mm. A number of these vehicles were "trialled" in Vietnam towards the end of that conflict. After the trials were concluded, the FSV did not see service outside of Australia.

Some of the FSV's were upgraded in 1977, replacing the Saladin turrets with Scorpion turrets and having additional flotation tanks added. A number of additional vehicles were built/converted, for a total of about 45 vehicles. The upgraded vehicles received a new designation. MRV, (Medium Reconnaissance Vehicle). These continued in Australian Army service until retierd in the late 1990's.

Here's one of the pics I used for reference - it's a vehicle at the Royal Australian Armoured Corps museum at Puckapunyal in Victoria.

PS: Looking forward to seeing your PzII - that's a classic little kit Big Smile [:D]

  • Member since
    July 2006
  • From: San Francisco Bay Area
Posted by bufflehead on Sunday, October 19, 2008 1:10 AM

Phil, that M113 is a real beauty!  Detail work, painting, markings, weathering are all first rate! Thumbs Up [tup]Thumbs Up [tup].  You've turned this old classic into a work of art!

I don't know much about this vehicle so I'm curious about some things;  What caliber gun is that?  Can you provide any info on the operational history of this Aussie M113?  Exactly what designation is this one?  Is it an Aussie modification or was it U.S. factory made and sold "Down Under"?  Sorry about the load of questions, but seeing this fine build just makes me want to know more about it!

Ernest

Last Armor Build - 1/35 Dragon M-26A1, 1/35 Emhar Mk.IV Female


Last Aircraft Builds - Hobby Boss 1/72 F4F Wildcat & FW-190A8


mmc
  • Member since
    February 2007
  • From: Newcastle upon Tyne, England
Posted by mmc on Saturday, October 18, 2008 11:13 AM

Phil_H: Your welcome, IMHO your 113 looks perfect.

Mark

  • Member since
    August 2005
  • From: Sydney, Australia
Posted by Phil_H on Saturday, October 18, 2008 2:23 AM

redleg12, JMart, mmc, bufflehead -  Thanks for the comments guys Big Smile [:D]

It could do with a little more weathering, but I'm calling it done.

Some of the kinks in the tracks wouldn't come out... Whistling [:-^]

  • Member since
    July 2006
  • From: San Francisco Bay Area
Posted by bufflehead on Wednesday, October 15, 2008 10:10 PM

Hey guys, I'm still hanging around here, checking out what else has turned up!

Phil_H, what a great looking M113!  Don't know much about them but that version with the turret is sweeet!  Love all the detail work you did, its really paying off! Thumbs Up [tup]

JMart, thanks for the kinds words on the Pz III!Big Smile [:D]  I really do like the way it turned out.

Its not real hard to turn one of these older kits into a looker!  This GB has got me interested again in such kits even though I have plenty of the "uber kits" in the stash!  So while I'm on the subject.....I just HAD to build another one!! Smile,Wink, & Grin [swg]  I already did my official build, but I figured I'd post this one here anyway.  I hope all of you and redleg12 don't mind.

This time its Tamiya's old Pz II Ausf F/G, another one from the early 70's.  I started it a couple of weeks ago, but I only managed to snap these quick photos before launching into the build.

SHHHHH!!!!  Don't tell anyone! Taped Shut [XX]  I'm SUPPOSED to be finishing my King Tiger for the Panzer Aces GB, but I couldn't resist working on this one too!  Its actually almost completely assembled, just a few minor parts and it will be ready for paint.  Maybe I can snap a quick photo before the evening is over...??

Ernest

Last Armor Build - 1/35 Dragon M-26A1, 1/35 Emhar Mk.IV Female
     

Last Aircraft Builds - Hobby Boss 1/72 F4F Wildcat & FW-190A8


mmc
  • Member since
    February 2007
  • From: Newcastle upon Tyne, England
Posted by mmc on Tuesday, October 7, 2008 3:30 AM

Phil_H: Yout 113 is looking great, never built any modern stuff before, but seeing your's has got me thinking about giving it a try.

JMart: I've only been back into the hobby for about 2 years now, but I'm having fun and enjoying learning along the way, I've just got my first PE set to have a go at.

Mark

  • Member since
    March 2007
  • From: NJ
Posted by JMart on Sunday, October 5, 2008 5:40 PM

bufflehead - that is a gorgeous build! I actually like the 'cleaner" type of build, lets you see more details and appreciate the engineering of the machine. paint job is fantastic!

I am still "here", so to speak, but a massive job project has sucked all my time and lifeforce, could not even attend the ASPMS in CT, have not been to the bench in more than a month :(

Hey marc, Im a newbie and OOB only and waaaaay behind the "skill" set of most in here..but I have fun and learn a lot, I add one new "technique" or angle to each build. I think all "newbies" or hobby-returnees like me should start with *exactly* this type of build.

Phil_H - love the paint job, the color gradient looks great!

Cheers all


  • Member since
    July 2006
  • From: New Jersey
Posted by redleg12 on Sunday, October 5, 2008 2:33 PM

Phil - It is coming along nicely. Always love to see a different M113. Can't wait to see it completed.

Rounds Complete!!

"The Moral High Ground....A Great Place to Emplace Artillery."

  • Member since
    August 2005
  • From: Sydney, Australia
Posted by Phil_H on Friday, October 3, 2008 10:54 PM

Base coats applied:

mmc
  • Member since
    February 2007
  • From: Newcastle upon Tyne, England
Posted by mmc on Friday, September 26, 2008 1:16 PM

Yeah I'm not the only one who hasn't bent any PE!!! One day I will sit down and tackle my nemisis.

Mark

  • Member since
    August 2005
  • From: Sydney, Australia
Posted by Phil_H on Friday, September 26, 2008 10:24 AM

Hi MMC,

Thanks for the compliment. Smile [:)] I'm usually an OOB builder too. This is actually the first time I've set out to extra detail to a kit and what you see here are really my first attempts at scratchbuilding at any level. I just wanted to make it a little different to the OOB builds I've seen of this kit. I just added little details here and there and got a bit carried away once I got a feel for it. So far it's been a great learning exercise.

I hear what you're saying about your Dragon 88 - I have a few kits in the stash which I would put in the "intimidating" class - I have yet to bend my first PE part Shock [:O].

It's all fun... Smile [:)]

mmc
  • Member since
    February 2007
  • From: Newcastle upon Tyne, England
Posted by mmc on Friday, September 26, 2008 9:30 AM

Seeing all the little details you've put in Phil, makes me realise how much of a novice I amBoohoo [BH]. All my builds to date have been OOB, I am starting to scratch build some scenery items but thats it so far, I'm to afraid to even tackle my Dragon 88 that I got for Christmas!!!!

Look forward to seeing your 113 all done and painted.

Mark

  • Member since
    August 2005
  • From: Sydney, Australia
Posted by Phil_H on Friday, September 26, 2008 2:35 AM

This puppy's about ready to hit the paint shop. Just a few odds and ends to put on.

I added the hinge pins/plates for the trim vane. They're a little crude, but they're there.

Many M113's in Australian service have (or have had at some stage) jerry can racks rather than simply having them strapped to the back.

The kit lacks the turret front lifting rings, so these were added using brass wire bent accordingly. Also added the wiring for the smoke grenade launchers, the lead-through plugs for the wires and the dust cover for the mantlet sleeve.

Still to add another antenna mount on the right rear quarter, as most pics show the FSV's with two antennas, but only the left mount is provided.

Time for some paint.. Big Smile [:D]

  • Member since
    July 2006
  • From: San Francisco Bay Area
Posted by bufflehead on Sunday, September 21, 2008 9:59 PM

Panther F, mmc, Phil _H, redleg12, thanks so much for the kind words guys!  It was very nice to "get back to basics" with this kit!  Thanks for hosting the GB redleg Thumbs Up [tup], I enjoyed every minute of my vintage kit!!

BTW, the rusting on the muffler was done using mostly oil washes.  For my exhausts I've been trying a technique I read about some time ago.  The exhaust is first hand painted with a light pink color.  Yep...PINK!  For this I used Vallejo Salmon Rose as I don't have any Tamiya acrylic red.  Then I painted dark brown "dots" on the bends and corners. These two colors were blended a little using the same dark brown mix I used for post shading.  Then burnt sienna and burnt umber oil washes were applied (a little thicker than the vehicle washes) , followed by a brownish/black wash.  Finally drybrushed with a light tan....and there you go.  Its more rusted looking than I would have preferred, but I'm still learning and experimenting with this technique.

I'll be keeping an eye on this GB to see how everyone else is doing.  Heck, if I have time I may even do a second vintage kit.  I've been eyballing my Tamiya PZ II Ausf F thinking it would look great as a DAK vehicle!Smile,Wink, & Grin [swg]

Ernest

Last Armor Build - 1/35 Dragon M-26A1, 1/35 Emhar Mk.IV Female
     

Last Aircraft Builds - Hobby Boss 1/72 F4F Wildcat & FW-190A8
     

  • Member since
    June 2005
  • From: Indiana U.S.A.
Posted by Panther F on Sunday, September 21, 2008 2:25 PM
 mmc wrote:

Panther F: c'mon you can do it.

Mark

Plenty of time.  Angel [angel]

  • Member since
    July 2006
  • From: New Jersey
Posted by redleg12 on Friday, September 19, 2008 11:56 AM

MMC - Your more than welcome and glad to have had you!

Phil-H - No problem, all are always welcome and you have no problem to work on it at your pace. We will be here!

Rounds Complete!!

"The Moral High Ground....A Great Place to Emplace Artillery."

  • Member since
    August 2005
  • From: Sydney, Australia
Posted by Phil_H on Friday, September 19, 2008 8:16 AM

Great job Bufflehead - you really took that kit to a whole new level. I like the light weathering - it's good to see the tank itself without the all the distractions of loads of mud and dirt and a whole lot of stuff piled on the back, including the kitchen sink.

Redleg, I'm still here and still working (slowly) on my FSV. It's coming together fairly well, but progress is pretty slow, but it will get there eventually. Smile [:)]

mmc
  • Member since
    February 2007
  • From: Newcastle upon Tyne, England
Posted by mmc on Friday, September 19, 2008 8:16 AM

Bufflehead: You are an artist, your III is stunning, I hope your going to post some pics in the armour forum so everyone can see it. I need to practice my weathering a bit more, I still do the basic stuff. I'm glad you stuck with it, it's been well worth the wait.

redlrg12: I know I've said it before but thanks for letting me take part in my first GB, it's a shame that more didnt stick to itMake a Toast [#toast].

Panther F: c'mon you can do it.

Mark

JOIN OUR COMMUNITY!

Our community is FREE to join. To participate you must either login or register for an account.

SEARCH FORUMS
FREE NEWSLETTER
By signing up you may also receive reader surveys and occasional special offers. We do not sell, rent or trade our email lists. View our Privacy Policy.