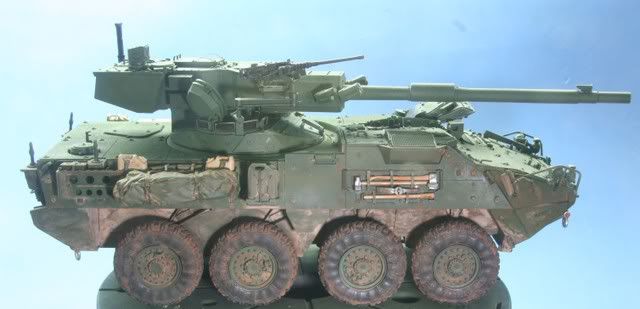
It's the end of my vacation and I'm still not finished. But, I have made good progress. I started the weathering process. I used 3 different MIG pigments, Industrial Dirt, Vietnam Earth and Dry Mud.
In the tire wells I used the Industrial City Dirt with water as the carrier to go around the edges and deep areas. I then stippled in a small amount of Vietnam Earth also with water carrier. Before it all dried I blended in a Dry Mud in the central areas. After the mix dried I wiped the excess away and with a damp cotton swab did some more blending and fading.
I used the Dry Mud and Vietnam Earth to create a wash which I applied to the tires and to the side of the vehicle. Where I wanted to accent the dirt I would stipple in some Dry Mud. Once this dried I would clean off the excess and also blend and fade using a damp cotton swab
Here is the right side of the vehicle completed
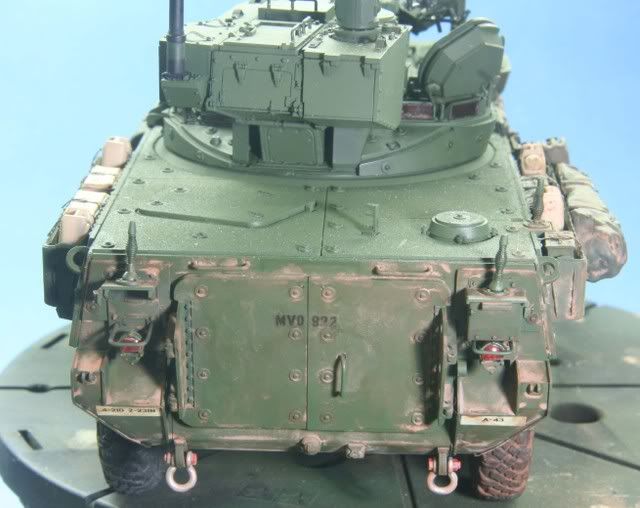
I used the same wash as above to weather the vehicle rear
Before I could continue the decal material I was waiting for arrived and my suspense could not wait any longer so.
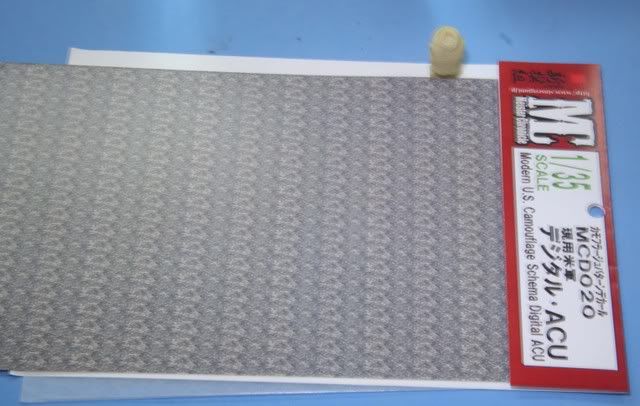
Here is the Sinsengumi Digital ACU decal MCD020 and the driver's chest. I figured I would learn by doing the driver since not much of him would be in plain view and thus hide my learning errors.
Before I attached the arms I wanted to apply the decal to the chest/ body armor. As per the directions I first coated the chest with clear future (gloss coat). To apply the decal you have to think like a seamstress. The decal needs to be cut, for the large sections in the same areas where seams in the material would occur. The main body armor would be two decals with the seams under the arms.
Since this was the first time dealing with these, the first I applied to the back. The decal is on thick paper, but the decal itself is VERY THIN. As I learned after the first one, you need to soak it in water and wait a good 30 seconds. Once it is loose it will move almost on its own. If you try to rush it, the decal will break into a number of small decals!!
Once it is loose, center it and begin applying decal set. You will need cotton swabs as you slowly move from the center to the edges, pressing down, apply more decal set, press some more, and so on until you have pushed down both the edges.
I did the same for the front, then cut some small strips and applied them to cover the collar.
Because it is so thin, it will bend, form to shape and with decal set is easy to apply. Because they are so thin, DO NOT RUB when applying as this again will break the decal. Use the cotton swab to press and push into shapes.
Here is the body armor complete and the arms then applied.
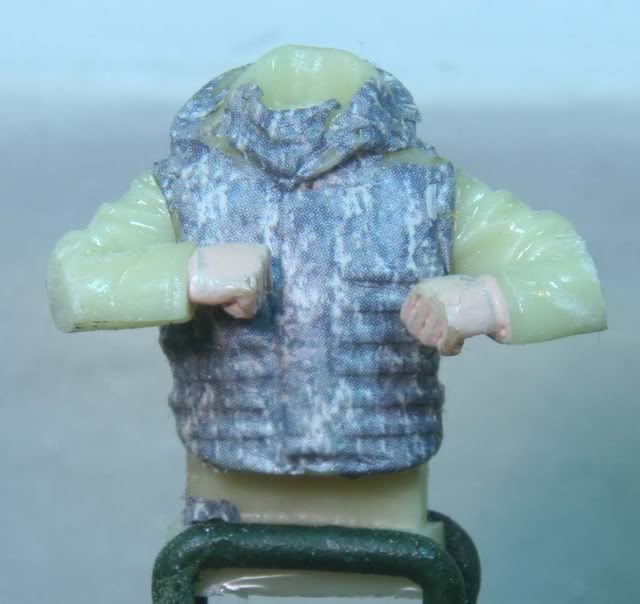
With the arms in place, I cut small strips to cover the upper and then lower arm. Here is a view of a completed arm and an arm in progress.
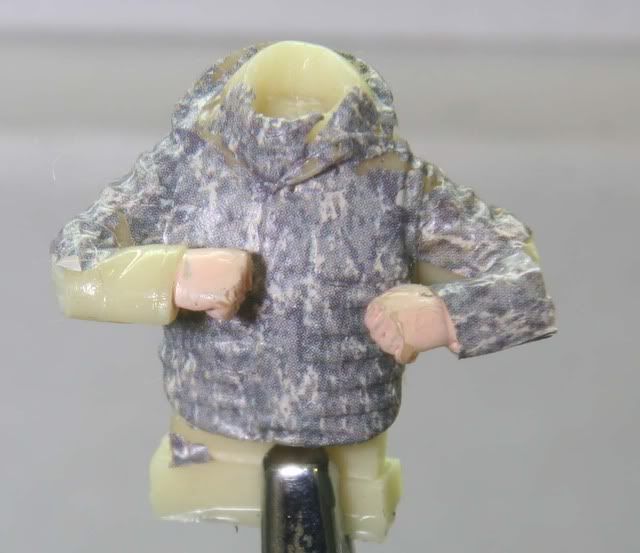
Once the arms were complete, I touched up some bare spots with small strips. The good thing is the decal is so thin, it sucks down real well and overlapping is not a problem. You can't find the overlap with the naked eye, and it is rough even with opti-grab goggles!
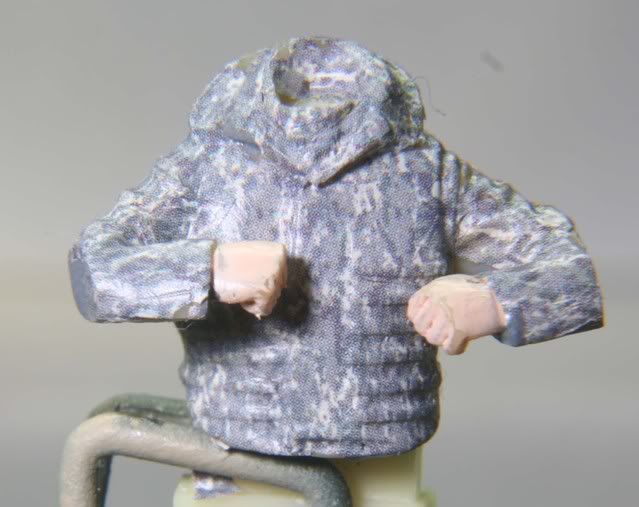
Here is the finished torso. I touched up some areas with Poly Scale British Ocean Grey F505256. it's not perfect but was good for learning.
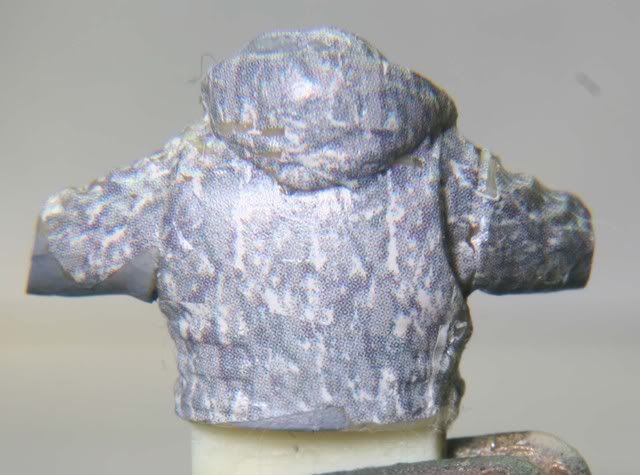
And the back view
Notes of learning....and teaching
The decal is very thin and it take time to learn to use it. This first torso took me 5 hours of which 2/3 of the work was in the last 2 hours. The TC who has a half body should only take the 2 hours.
Besides having a gloss surface to apply to, you need an undercoat of the predominant color of the decal. If you have some minor cracking, this will blend in the problem. I will be undercoating with the British Ocean Grey and may mix to lighten it with some sand for a better match.
You need plenty of decal set but it will suck down and take on shapes.
Have plenty of cotton swabs and a dental pick to push down or push in the decal
Keep track of the camouflage pattern. Be aware how the pattern would change direction on sleeves or on the collar.
Well I will head back to the MGS to finish weathering before I finish the TC and the packs.
All comments are welcome, thanks for looking.
Rounds Complete!!