SEARCH FINESCALE.COM

Enter keywords or a search phrase below:

Trumpeter 1/35 M198 155mm Howitzer, Finished, 8/09/09

60908 views
157 replies
1 rating 2 rating 3 rating 4 rating 5 rating
  • Member since
    July 2006
  • From: New Jersey
Posted by redleg12 on Tuesday, May 19, 2009 6:10 AM

David - thanks for stopping by and for your comments.

Constructor - Glad I could be of some help. The directions are not the best! Thanks again for your comments.

Manny - Yep, I looked through the pictures for research, but I thought for posting somehow this one was near and dear to my heart!! Thanks again.

Lexesbenz - Thanks for the comments. Now for your question....Yes, there is a firing pin.

On tank ammunition or semi-fixed artillery ammunition (which is the projectile, bullet, and a casing with powder bags), both have a primer stamed into the bottom of the casing. The breech block and firinglock has a firing pin. when the lanyard or trigger is pulled, just like a pistol the firing pin strikes the primer setting off the round.

On separate loading artillery ammunition the projectile is loaded, the powder bags are loaded. With the breech closed a primer is loaded into a "holder" which puts it in line with the firing pin and can set off the powder to propel the projectile.

On mortars that you see top loaded, they too have a firing pin. It is built into the base of the mortar. The mortar round has a primer built into the bottom of the round. In between the fins of the mortar round is the propellant which is more plastic like than powder. When the round hung and dropped down the tube, it slides down, the primer hits the firing pin, sets off the propellant and "bloop", the round fires.

So yes, there is a pin in all of them. Simple mortars have a fixed pin to artillery which has a mechanical pin which moves when a lanyard is pulled to a modern tank when the mechanical pin is electronically controlled. From WWII to today it has not changed much on the basics of how it works.

Lastly the Karl Morsers shell. This was a separte loading ammunition so the shell would be loaded the special powder bags would be loaded. The breech closed and a primer inserted. The lanyard pulled would actuate a mechanical system where a firing pin would strike the primer and set off the powder. BOOM...

Hope this helps. If you have more questions...feel free to pull my lanyard (a string or cord attached to the trigger mechanism of a large gun which allows you to fire it from a distance)

Rounds Complete!! 

"The Moral High Ground....A Great Place to Emplace Artillery."

  • Member since
    December 2005
  • From: Syracuse, NY
Posted by lexesbenz on Tuesday, May 19, 2009 1:00 AM
Nice works so far. I have a question, what actually makes these things fire off? same with tank rounds, there not a firing pin mechanism right? I especially wanna know how the Karl Morsers shell was fired, ya know the engineering aspect of it. They can't be like modern bullets with a firing pin are they? see I don't know that much about this stuff.
The flying hamster of doom rains coconuts on your pitiful city!!!!
  • Member since
    November 2005
Posted by Anonymous on Monday, May 18, 2009 10:05 PM
Very cool...how often do you get to "do" your avatar?
  • Member since
    July 2006
  • From: Philippines
Posted by constructor on Monday, May 18, 2009 9:24 PM
Thanks for this post. I have the kit and have been contemplating on building it soon. This will make a good guide for my build. The tips are very valuable as these are not included in the instructions. Looking forward to your finished M198!
  • Member since
    November 2006
  • From: United States
Posted by ww2modeler on Monday, May 18, 2009 8:47 PM

Looks pretty cool so far, looking forward to seeing more of it!

David

On the bench:

1/35 Tamiya M26 Pershing-0%

1/144 Minicraft P-38J Lightning-50%

Numerous 1/35 scale figures in various stages if completion.


  • Member since
    July 2006
  • From: New Jersey
Trumpeter 1/35 M198 155mm Howitzer, Finished, 8/09/09
Posted by redleg12 on Monday, May 18, 2009 7:38 PM

Gentleman - Welcome to the WIP of the Trumpeter 1/35 M198 "Early Version"

Background & Kit in-box review - Here was my kit in box review

http://www.armorama.com/modules.php?op=modload&name=Reviews&file=index&req=showcontent&id=3874

Reference
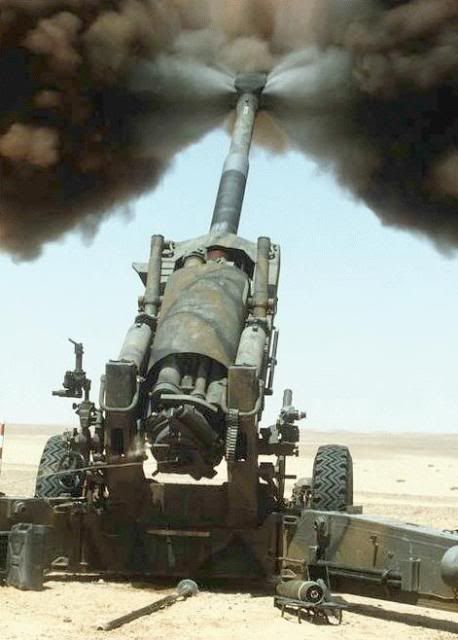
Hummmm.....where have I seen this picture before!!

Here is a little video to get the juices flowing (watch the door on the left side!!)

http://www.youtube.com/watch?v=v94qdpJqK9w

Also it is handy to have TM 9-1025-211-10

Kit Construction

The first step is to assemble the barrel and recoil system.  As noted in my review, the barrel is a two piece styrene barrel. Though the fit was quite good there was still the time and care to sand and in some places fill the seam without making the barrel into a football. Once completed, the recuperating cylinders and mounting brackets are assembled. The breech and breech block are assembled to the rear of the tube and the entire assemble is glued together.

(PS....Please excuse the color of these pictures. My camera setting were screwed up and did not catch up with it until I downloaded!)
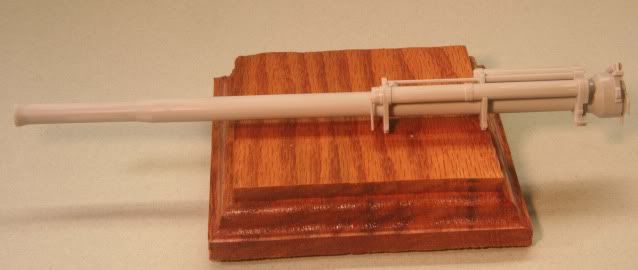
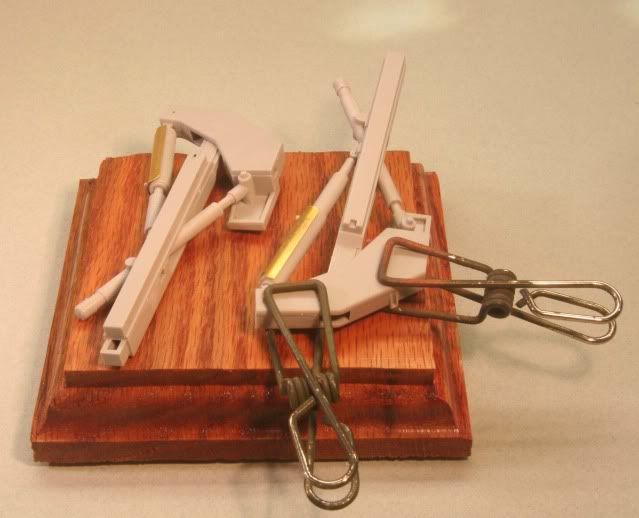
The next four steps are for the assembly of the equilibrators and the upper frames which hold the equilibrators. Step two of directions is poor as the give you a choice of two different length covers for the upper equilibrators.  They do not give any explanation as to which one to use, depending on the finished model.

If you are going to build the model in the emplaced, or as the instructions call it "combat" mode and intend to show the tube elevated, then use the shorter of the two choices (C5). If it will be depicted attached to a prime mover, then use the longer (C9).

In step 4 & 5 the recoil sled and frames are assembled with the equilibrators. Though the molding of the parts were clean they appear to have a very slight warp and require clamps or rubber bands to get a tight fit on the seams of the frame halves. The seams were then filled with Mr Surfacer 500 and sanded.
Step six is the assembly of the frames to the barrel assembly and the attachment of the muzzle brake. The muzzle brake has a flash line around the inside where the mold halves meet which needs removal. Also the flat sections were a bit depressed and required some minor filling with built up Mr Surfacer 500 to get flat and smooth.
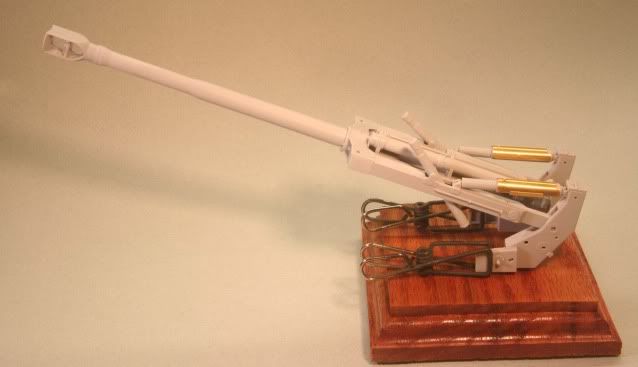
The next two steps finish the upper assembly but areas of the underside would become extremely difficult to paint. I will stop here to prime and base coat the upper assembly and remaining major parts. With that I will skip to the lower carriage/trails

Steps 9 thru 11 are the assembly of the two trails. This entails the attachment of numerous details, grab handles, etc. On both trails there are molded racks for the ramming staffs and aiming posts. I left these off for further detailing along with the sight case and case frame.  In general the fit of the parts are good except where the grab handles fit to the rear as the molded holes are bigger than the handles and require some minor filling.

Also, I left off the wire reel for the right trail as this may have been on the original plans and some "very" early units but nothing I have, even in the early days shows the reel assembly attached.    
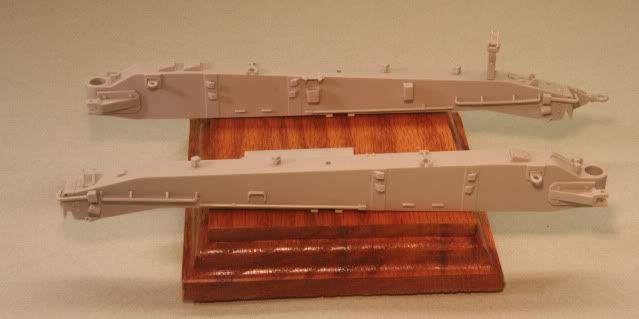
Step 12 has the two trails joined to the lower carriage section. Again, the larger pieces when joined require clamping, then filling and sanding. The directions in this step will be confusing (for a non artilleryman) as they show the trail guides (part C35) in the travel position. If the model is in the emplaced mode these guides need to be glued in place to match the trails when open. Also this step shows the application of a decal and then some handles which fit through the decal. Obviously these were left to be applied later after painting.
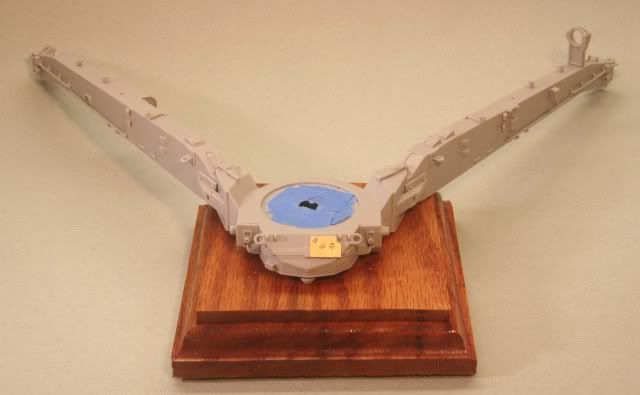
That's it for now. Off to the paint booth for some priming and base coat of NATO Green. (PS..Yes, I went for the "Bill" look with the base in the pics. For size reference, the base is 3 ½ inches square.)

Total hours this update - 6.0 hours

Total hours this overall build - 6.0

Thanks for looking and as always, all comments are welcome.

Rounds Complete!!

"The Moral High Ground....A Great Place to Emplace Artillery."

JOIN OUR COMMUNITY!

Our community is FREE to join. To participate you must either login or register for an account.

SEARCH FORUMS
FREE NEWSLETTER
By signing up you may also receive reader surveys and occasional special offers. We do not sell, rent or trade our email lists. View our Privacy Policy.