SEARCH FINESCALE.COM

Enter keywords or a search phrase below:

AMPS East Theme WIP; Zvezda BA3 Armored Car /update 7/21 Tracks on

18732 views
72 replies
1 rating 2 rating 3 rating 4 rating 5 rating
  • Member since
    January 2012
Posted by I make stuff on Monday, June 29, 2009 6:12 PM

I remember you posting about the rivets, I missed the middle part, but this is a awesome build, really, those headlights are something else.

Very very very nice.

  • Member since
    December 2002
  • From: Connecticut, USA
Posted by Aurora-7 on Tuesday, June 30, 2009 11:28 AM

Wonderful build. I look forward to seeing this in person this September.

That reminds me, anyone know where I can get images of a Japanese Type 97 in 1939 colors? 


  • Member since
    April 2007
  • From: Schroon Lake, NY
Posted by SMJmodeler on Wednesday, July 1, 2009 11:56 AM
 panzerguy wrote:
 

...I dropped the cab!

I feel your pain Steve...Disapprove [V]  I snapped off the darn width indicators, on one side or the other on my 251 at least, no joke...EIGHT TIMES!!!Banged Head [banghead] I was so darn careful tooGrumpy [|(]!  On my next build I'm going to leave off ALL the finicky details prone to breaking off until the VERY end!

 panzerguy wrote:
 

Earlier I commented on this truck being an ugly beast, but this photo makes her look OK.  You're doing a bang-up job too, no pun intended!  The scratchwork is great...and very creative!  How are you going to display her?..simple base, dio?...???

  • Member since
    July 2004
  • From: Texas
Posted by wbill76 on Wednesday, July 1, 2009 1:12 PM

This one slipped by me somehow Steve, glad to hear you were able to repair the drop damage...you'd never know by looking at the photos.

The head lamp idea is a neat one, would never have thought of that approach to create the pattern! Have to file that one away for future reference. Wink [;)]

  • Member since
    October 2007
  • From: N.H.
Posted by panzerguy on Wednesday, July 8, 2009 9:17 PM

    Thanks all! 

 Well since my only web access since last week has been with a Playstation PSP I haven't been able to post an update till now.

    On Saturday night and Sunday I was able to finish the painting and after giving it a coat of Future apply the decals. Next came the washes using some burnt umber oils. After the washes had dried it was highlighted using the base color that was lightened with some MM interior buff.  

   So without further ado,


   Still have to add some stowage and do some more weathering to the under carriage and wheels but that will wait till I decide on the type of terrain it will be in. I'm also in the process of scratching the tracks for the rear wheels. I just have to decide if I want them mounted on the wheels or stowed on the rear fenders. 

  Once its on the base I'll post some more pics till then thanks for looking in and all the great commentsBig Smile [:D]

        Steve

"Happiness is a belt fed weapon"

  • Member since
    December 2008
  • From: Las Vegas, Nevada
Posted by model maniac 96 on Wednesday, July 8, 2009 10:28 PM
WOW, that is awesome panzerguy! up to your usual standers I must say!


Thanks, Jim.
"Veni, Vidi, Vici" Julius Caesar: I came, I saw, I conquered.
  • Member since
    July 2006
  • From: New Jersey
Posted by redleg12 on Thursday, July 9, 2009 5:37 AM

Steve - Very nice, I love the look of the headlights. Can't wait to see it with luggage!!!

Rounds Complete!!

"The Moral High Ground....A Great Place to Emplace Artillery."

  • Member since
    April 2005
  • From: Piscataway, NJ!
Posted by wing_nut on Thursday, July 9, 2009 8:21 AM
WOW Steve.

Marc  

  • Member since
    December 2002
  • From: Connecticut, USA
Posted by Aurora-7 on Thursday, July 9, 2009 8:48 AM
Great work. Really nice finish.


  • Member since
    April 2009
  • From: Carmel, IN
Posted by deafpanzer on Thursday, July 9, 2009 9:33 AM
LOOKING GREAT!  Thumbs Up [tup] Good save fixing the broken parts as I can't tell if it ever happened!  I am not really into the Russian stuff but if I was forced to build one because my dog wants me to... I would have gone for this one because it is one really strange funny looking vehicle. 

Andy

  • Member since
    October 2007
Posted by White_R34 on Friday, July 10, 2009 7:35 AM
The attention to detail is magnificent, you turned out one award winning build there. An that Head-Light/Brass Mesh trick Loved it, I have to do that. An thanks for sharing. Thumbs Up [tup]Bow [bow]Bow [bow]
Building the Impossible Is my main goal!!
  • Member since
    August 2008
  • From: S.W. Missouri
Posted by Pvt Mutt on Friday, July 10, 2009 11:41 AM

This model and the Rolls are my favorites. Great job sir,looking forward to the finish.Thumbs Up [tup]

Tony the Mutt

Shoot Low Boys They're Ridin Ponys

  • Member since
    April 2007
  • From: Schroon Lake, NY
Posted by SMJmodeler on Friday, July 10, 2009 8:47 PM

Steve: This one is really coming together great!  All the extra work has definately paid off!  You mentioned the pin washes being completed but they seem a bit understated IMO.  Those rivets would pop even more with another wash or two...maybe even a streak or two would be in order.  Either way, she's a real looker...make sure you bring those in-progress scratch build shots so the judges see all the extra effortThumbs Up [tup].

BTW: Did you add those weld seams or were those part of the molding?

  • Member since
    March 2008
  • From: Steilacoom, Washington
Posted by Killjoy on Friday, July 10, 2009 9:49 PM

Amazing build!  I am in awe of all the scratchbuilding modifications!  If I may ask, what color did you use for your base coat?


A veteran is someone who, at one point in their life, wrote a blank check made payable to "The United States of America," for an amount of "up to and including my life."

  • Member since
    October 2007
  • From: N.H.
Posted by panzerguy on Friday, July 10, 2009 10:08 PM

  Mike  Marc  Michael  Jim  Andy  White  Tony and Steve

         Thanks for all the kind words guy'sBig Smile [:D].

     Andy I've become a big armored car fan and already have plans of adding more to the stash. I plan on picking up another one of these since they're pretty cheap and as long as you don't drop it they build up pretty nice with a little TLC.

   White, glad that the tip was helpful to you guys. I even submitted it to FSM, who knows maybe they'll be impressed alsoWhistling [:-^].


 SMJmodeler wrote:

Steve: This one is really coming together great!  All the extra work has definately paid off!  You mentioned the pin washes being completed but they seem a bit understated IMO.  Those rivets would pop even more with another wash or two...maybe even a streak or two would be in order.  Either way, she's a real looker...make sure you bring those in-progress scratch build shots so the judges see all the extra effortThumbs Up [tup].

BTW: Did you add those weld seams or were those part of the molding?

   Steve some of the details just did'nt show up to well in the pics. When you see it in person the pin washes and streaking will be more apparentWink [;)]. And yes I did the weld seams with a soldering iron.    

"Happiness is a belt fed weapon"

  • Member since
    October 2007
  • From: N.H.
Posted by panzerguy on Friday, July 10, 2009 10:13 PM
 Killjoy wrote:

Amazing build!  I am in awe of all the scratchbuilding modifications!  If I may ask, what color did you use for your base coat?


   Chris thank you.

  It was first primed with flat black and then given a coat of Model Master dark green. I lightened the base color with some buff and used that to highlight.  

"Happiness is a belt fed weapon"

  • Member since
    April 2007
  • From: Schroon Lake, NY
Posted by SMJmodeler on Tuesday, July 14, 2009 10:19 AM
 panzerguy wrote:
 SMJmodeler wrote:

Steve: This one is really coming together great!  All the extra work has definately paid off!  You mentioned the pin washes being completed but they seem a bit understated IMO.  Those rivets would pop even more with another wash or two...maybe even a streak or two would be in order.  Either way, she's a real looker...make sure you bring those in-progress scratch build shots so the judges see all the extra effortThumbs Up [tup].

BTW: Did you add those weld seams or were those part of the molding?

   Steve some of the details just did'nt show up to well in the pics. When you see it in person the pin washes and streaking will be more apparentWink [;)]. And yes I did the weld seams with a soldering iron.    

Pictures sometimes don't tell the story...I can't wait to see it in-person Steve!  Top-notch work on those weld seamsThumbs Up [tup]!

  • Member since
    July 2004
  • From: Texas
Posted by wbill76 on Tuesday, July 14, 2009 1:38 PM

Steve,

This one somehow sneaked by me, love the look of the finished item. Best of luck at AMPS! Thumbs Up [tup] Thumbs Up [tup]

  • Member since
    October 2007
  • From: N.H.
Posted by panzerguy on Tuesday, July 14, 2009 3:26 PM
 

  Steve thanks friend and I can't wait to see yours and the other guy's stuff eitherBig Smile [:D]

  Bill thanks also and I know you've been busy so I'll forgive youWink [;)]

  I've been working on the tracks and I should have some pics of the wip on those later this evening. Stay tuned.


"Happiness is a belt fed weapon"

  • Member since
    October 2007
  • From: N.H.
Posted by panzerguy on Wednesday, July 15, 2009 9:03 PM
  

   So after some trial and error I managed to get the tracks going.

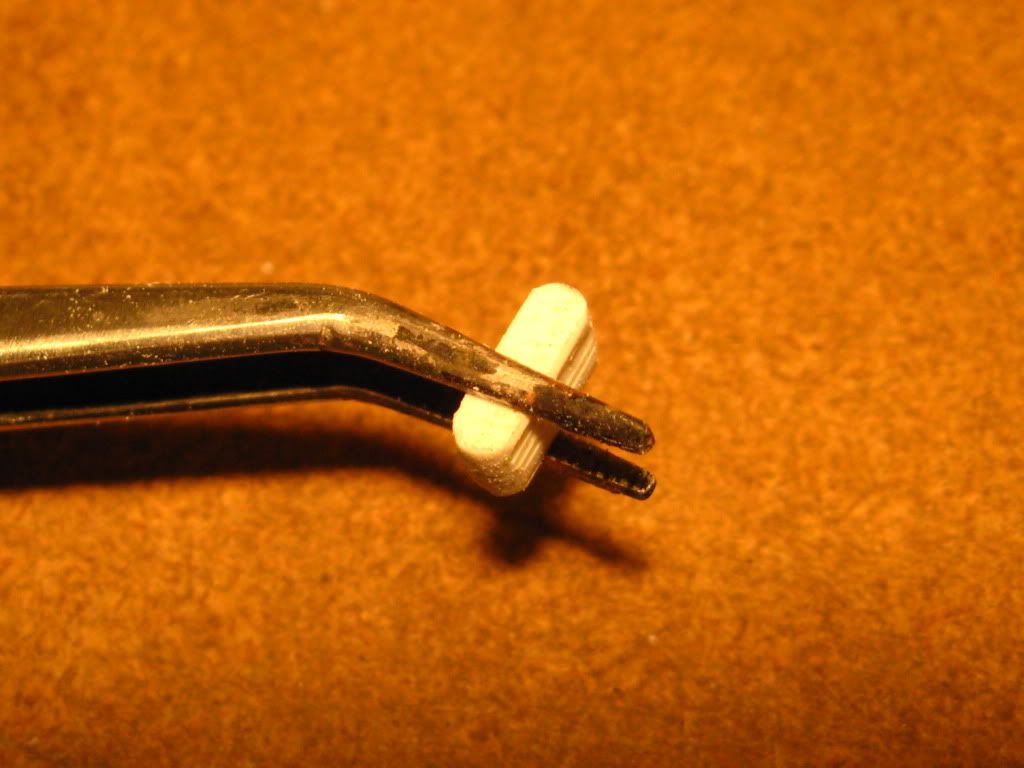
   Started out by cutting some strips of .20 Evergreen plastic 1/8 wide and cutting those into pieces a 1/4 in. long. By stacking seven or eight at a time I was able to sand them all to the desired shape rather quickly.
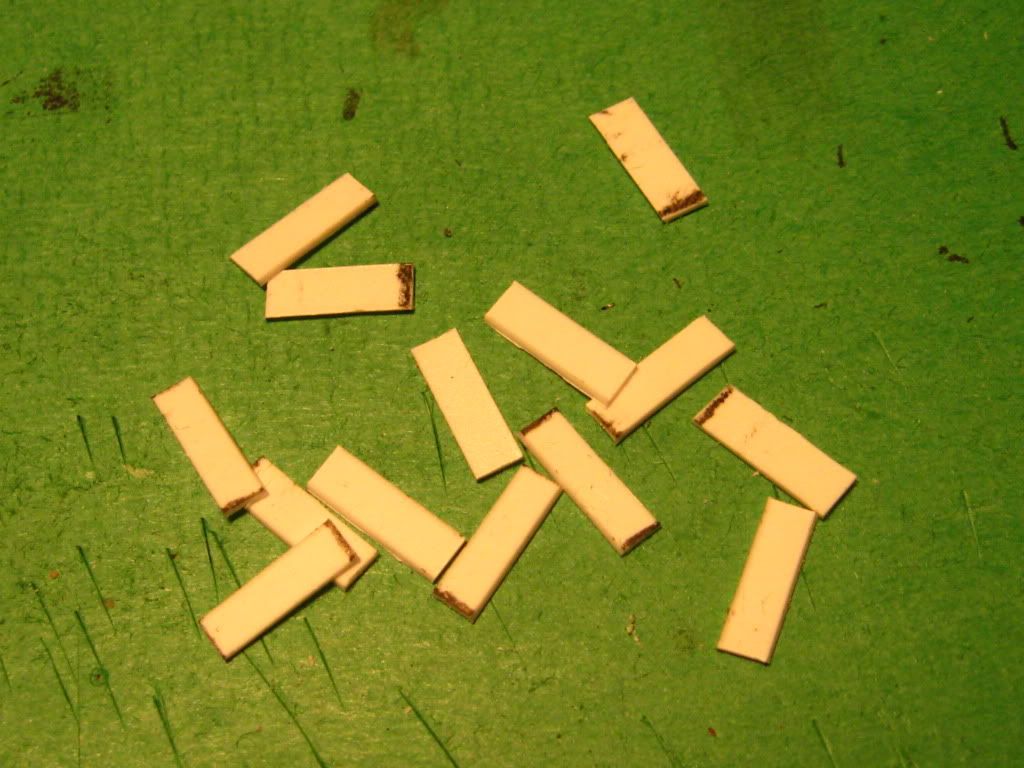
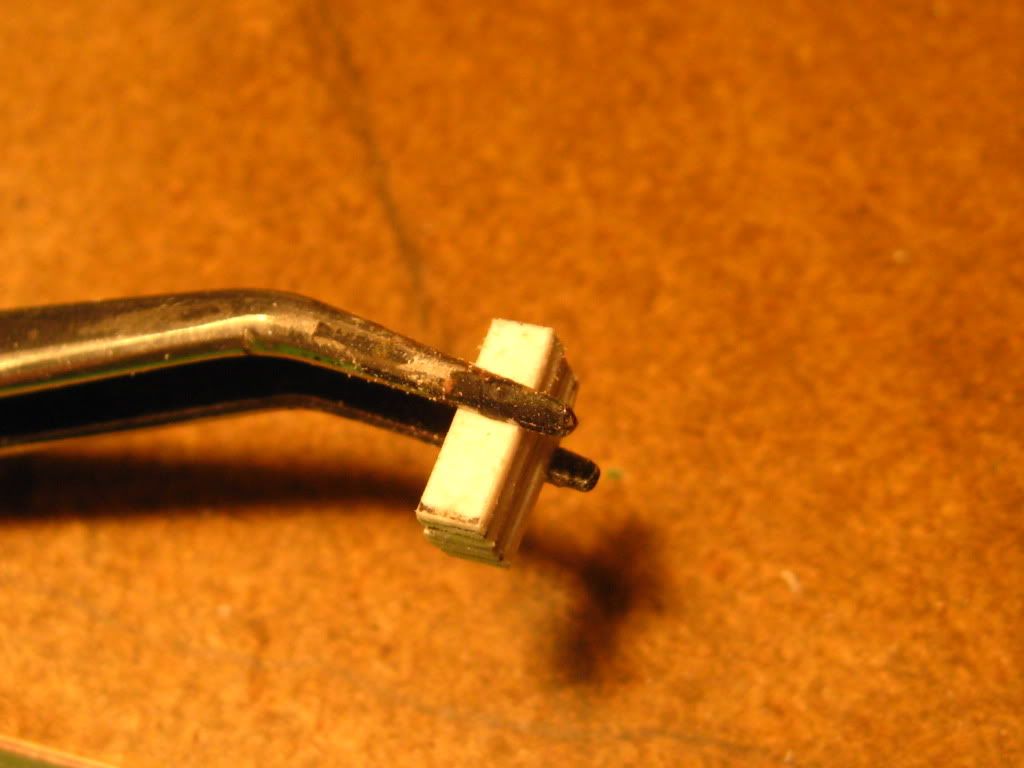


 Once I had twenty done I laid them out on some electrical tape using some plastic strip to line them up. Round plastic rod was shaved down on one side with a #11 blade. This was then glue to the links and allowed to dry over night.
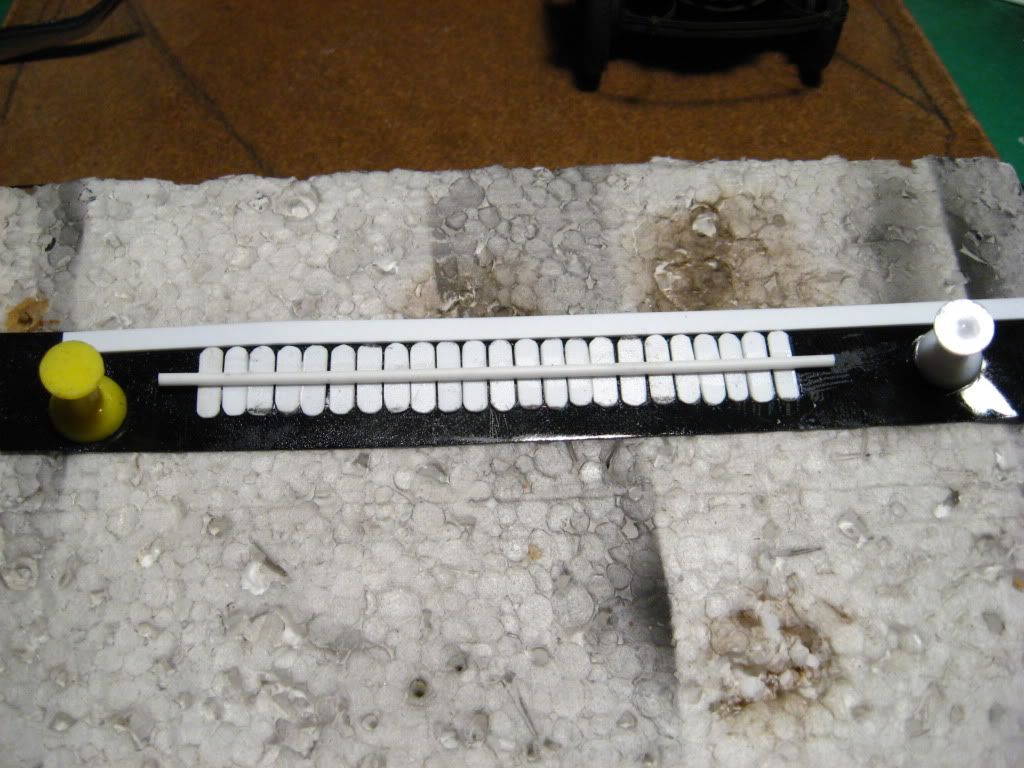
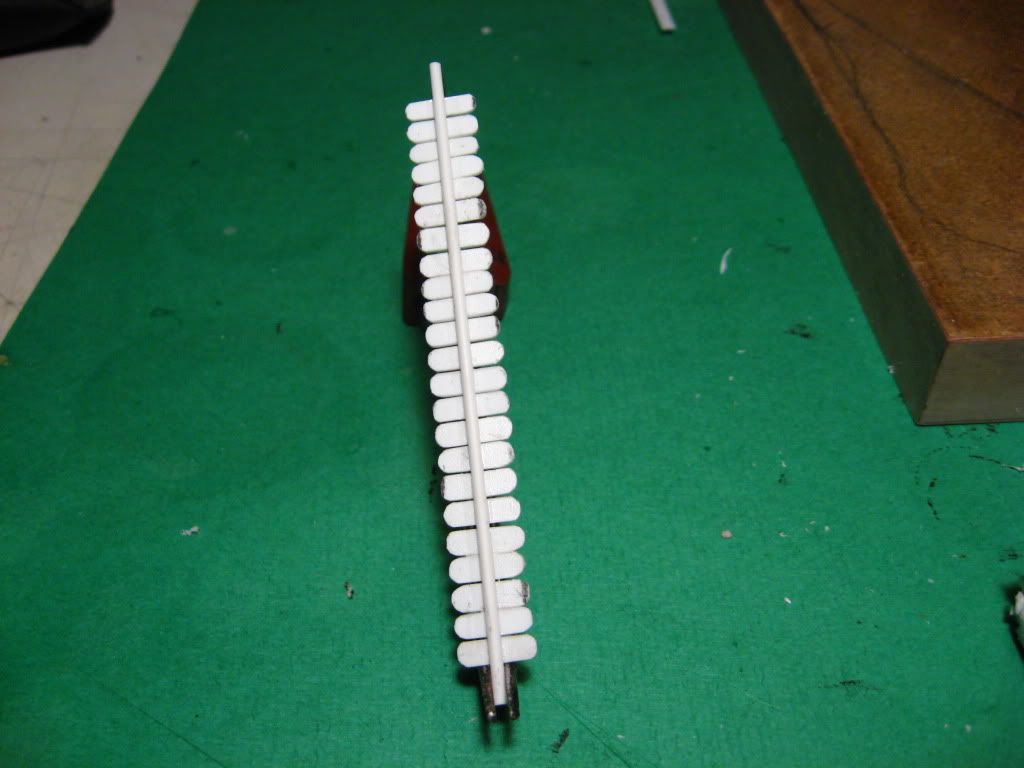


  The links were now cut apart and the edges were sanded with an emery board.
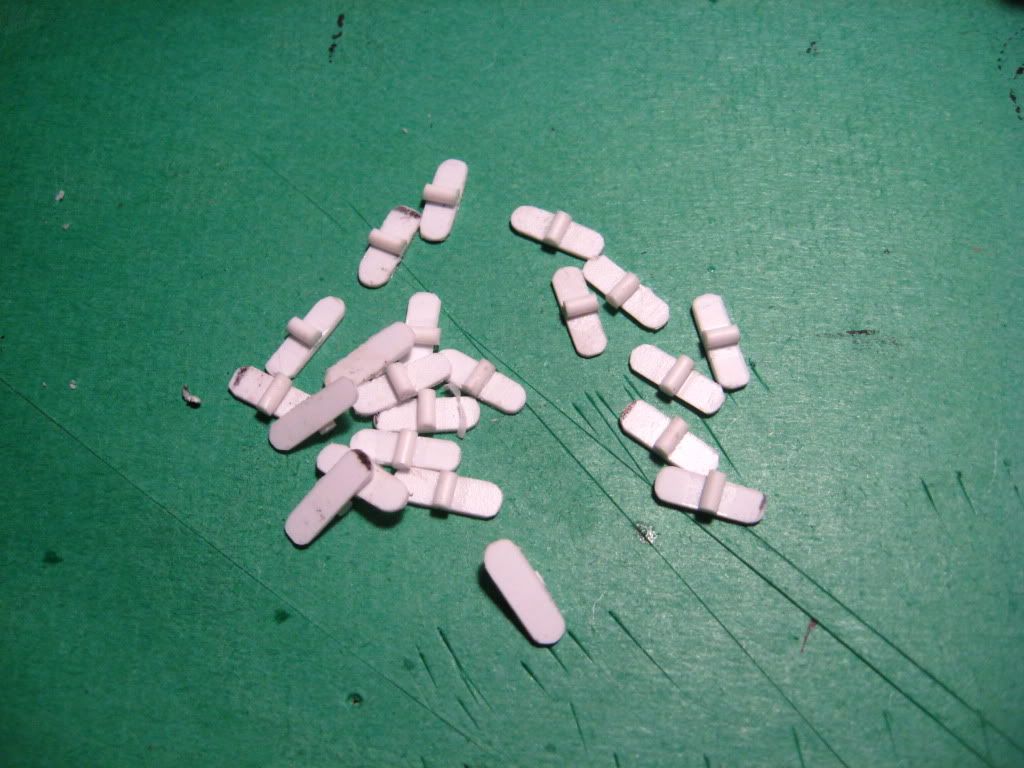
 

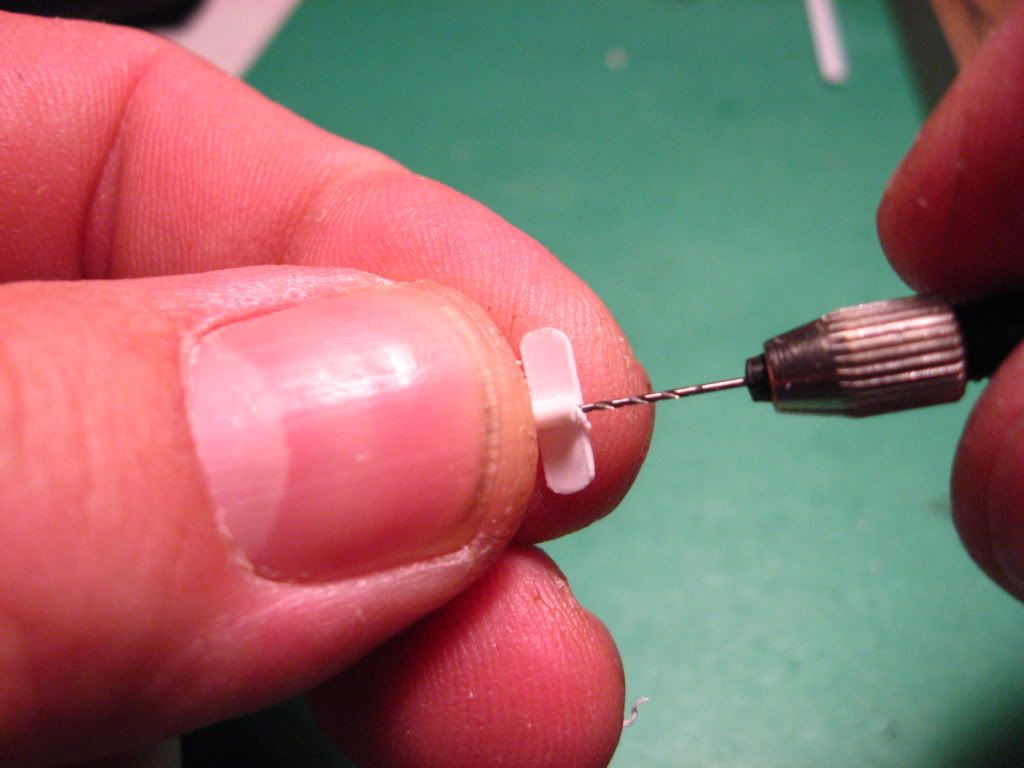
   Now comes the fun part, each one was drilled out with a pin vise drill to allow the cable to pass through. In this case the ‘cable' was some heavy-duty thread.
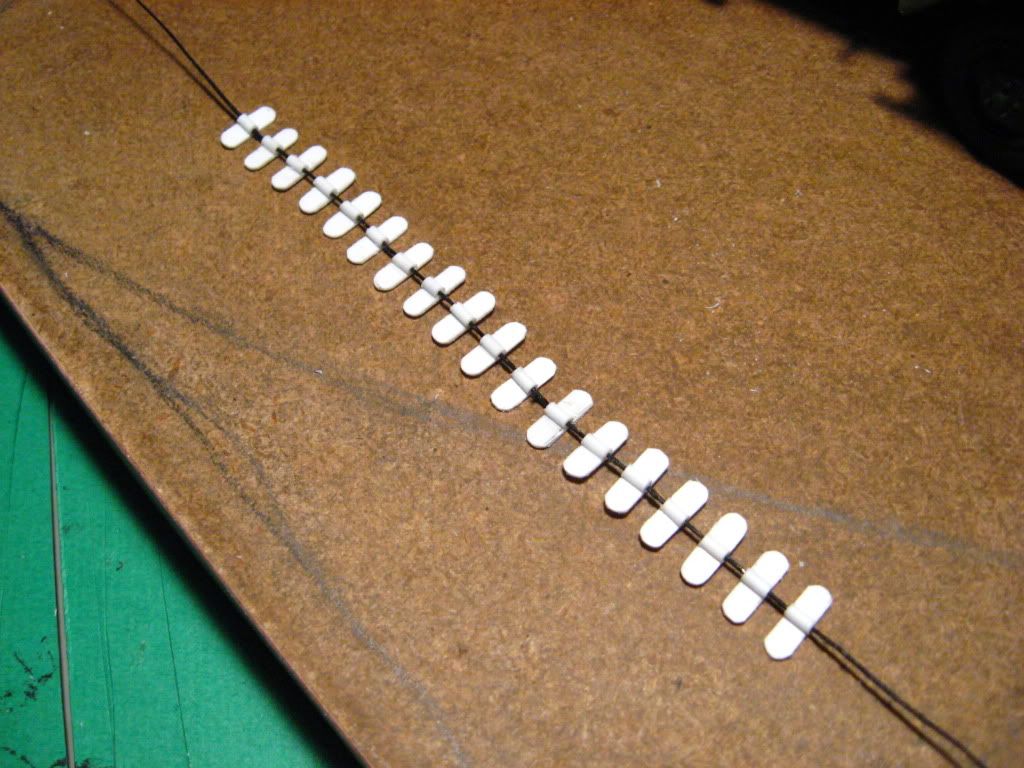
 

   I tried counting the links from some pics and drawings and it looked like there should have been 18 but when I wrapped it around the wheels I realized I was going to need 21.
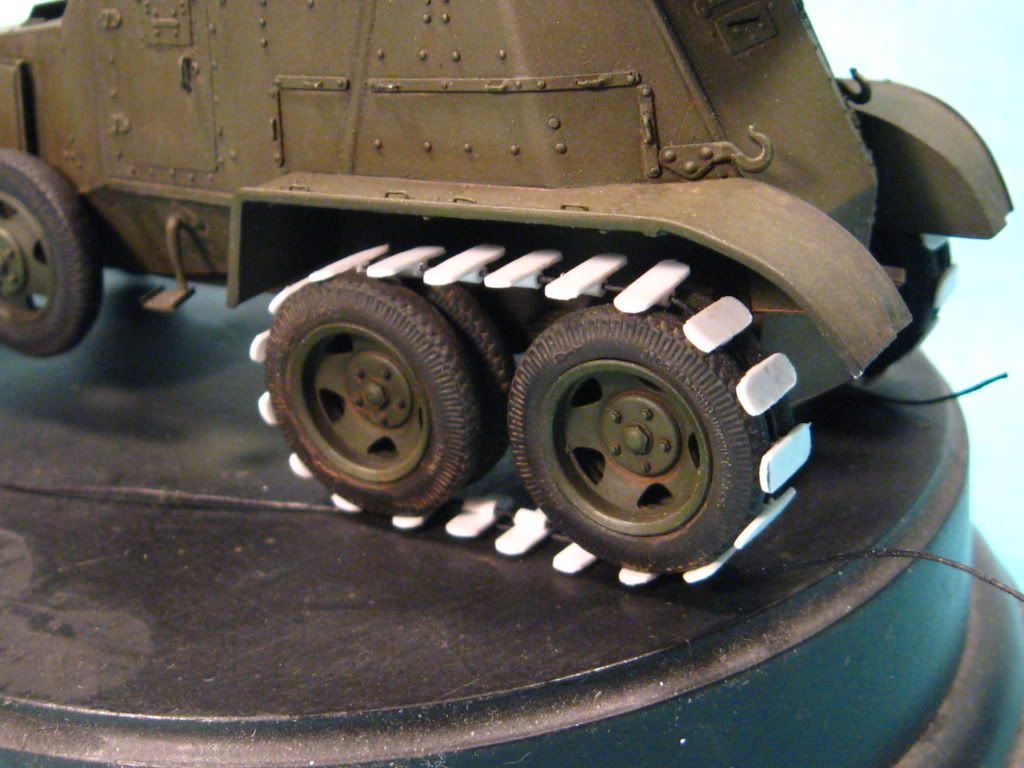
   Still have to do a little more sanding to round off the edges and then it's on to painting and the base.

    Steve

"Happiness is a belt fed weapon"

  • Member since
    May 2009
Posted by F Matthews on Wednesday, July 15, 2009 9:34 PM
I love it! I'm a huge fan of the early war stuff-time I did am armored car or two from this period.
  • Member since
    December 2007
  • From: Bridgeview, Illinois
Posted by mg.mikael on Thursday, July 16, 2009 10:07 AM
Stunning scratch work on the tracks, panzerguy!Cool [8D] Seriously, they look fantastic and the fact you have them attached to the wheels even makes it more unique. Since most builders simply stash the tracks on the fenders.

"A good plan executed now is better than a perfect plan next week." - George S. Patton

  Photobucket 

  • Member since
    July 2004
  • From: Texas
Posted by wbill76 on Thursday, July 16, 2009 1:20 PM
Never realised this one had tracks...but it makes sense I guess given the weight of the turret and the need for decreasing the overall ground pressure on the rear. Nice work on scratch-building your own Steve! Thumbs Up [tup]
  • Member since
    October 2007
  • From: N.H.
Posted by panzerguy on Thursday, July 16, 2009 11:13 PM

    Thanks guys

  F Matthews I'm becoming a big fan of early armored stuff myself and have been picking up a few early German and Russian kitsApprove [^].

 Michael At first I was going to just have them strapped to the fenders but after seeing a few pics with them on the wheels I knew that's the way I had to go.

 wbill76 wrote:
Never realised this one had tracks...but it makes sense I guess given the weight of the turret and the need for decreasing the overall ground pressure on the rear. Nice work on scratch-building your own Steve! Thumbs Up [tup]


  Bill that's the great thing about this place even the most knowledgeable of the members can come across something that's new to themWink [;)].

"Happiness is a belt fed weapon"

  • Member since
    August 2007
  • From: The Plains of Kansas
Posted by doc-hm3 on Friday, July 17, 2009 6:47 AM

 Steve, beautiful build! Your attention to detail is very much to be desired. This looks to be a show stopper in every aspect.

                                                                        doc

All gave some and some gave all.

  • Member since
    April 2005
  • From: Piscataway, NJ!
Posted by wing_nut on Friday, July 17, 2009 8:02 AM
A very cool detail to add to that Steve.

Marc  

  • Member since
    April 2007
  • From: Schroon Lake, NY
Posted by SMJmodeler on Friday, July 17, 2009 9:24 AM
 panzerguy wrote:

Great photo panzerguy and I love the scratchwork!  You're sure pullin' out all the stops on this oneThumbs Up [tup].  Any chance of making your build into a dio' depicting this photo?!

  • Member since
    October 2007
  • From: N.H.
Posted by panzerguy on Friday, July 17, 2009 10:09 AM

  Doc thanks for the kind words it's much appreciated.

   Marc thanks as always. September is coming up fast and I'm so looking forward to seeing everybody and their newest builds.

 SMJmodeler wrote:
 panzerguy wrote:

Great photo panzerguy and I love the scratchwork!  You're sure pullin' out all the stops on this oneThumbs Up [tup].  Any chance of making your build into a dio' depicting this photo?!

   Steve, funny you should mention that. I found this picture along with some great shots of the interior after I had already begun this build. I've become such a fan of these Russian buggies that one of my goals for next year is to build this same kit with a scratched interior and it will be depicting this photo.

"Happiness is a belt fed weapon"

  • Member since
    April 2007
  • From: Schroon Lake, NY
Posted by SMJmodeler on Saturday, July 18, 2009 10:47 AM
 panzerguy wrote:

...one of my goals for next year is to build this same kit with a scratched interior and it will be depicting this photo.

panzerguy: Cool!Cool [8D]  So that's a Russian vehicle "borrowed" by the Germans, huh?Wink [;)]  It would help the dio', to pull that hill closer..as a backdrop.  What's your tentative start/finish date?

  • Member since
    May 2005
  • From: Dublin Rep Of Ireland
Posted by terry35 on Saturday, July 18, 2009 1:07 PM

Stve this is going from strenght to strenght, simply astounding work. I really hope all this work pays off, which I'm sure it will.

Terry.

JOIN OUR COMMUNITY!

Our community is FREE to join. To participate you must either login or register for an account.

SEARCH FORUMS
FREE NEWSLETTER
By signing up you may also receive reader surveys and occasional special offers. We do not sell, rent or trade our email lists. View our Privacy Policy.