With the decals on, the next step was to proceed with the weathering. Since the camo colors are dark to begin with, I first applied an overall wash of enamel Raw Sienna with a large round sable brush.

This was followed by dot filters of enamel Flat Sea Blue, Flat White, and Italian Dark Brown to fade and add variation to the overall finish. The dots were blended together with a square tip blender brush moistened with clean thinner. I liked the results on the fenders from the Raw Sienna wash so I left those areas alone, applying the fading/streaking only to the hull and turret surfaces.

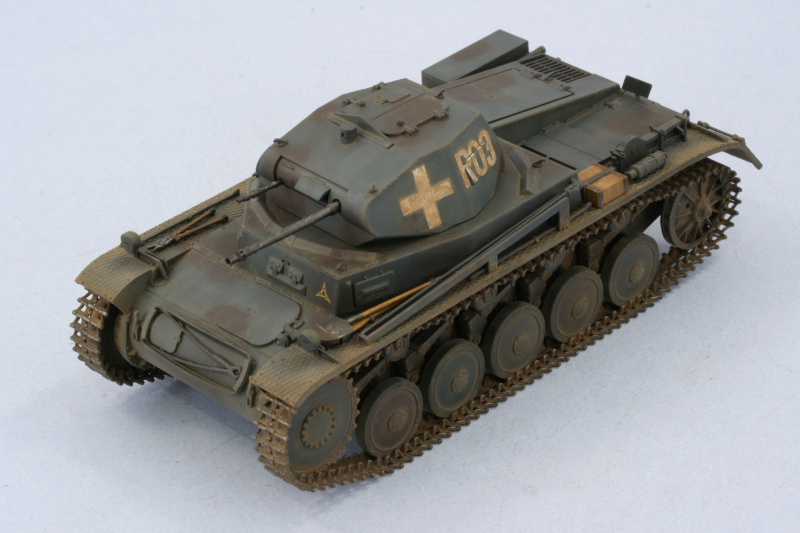
The Raw Sienna was a good compliment to the base coat colors and I applied it again as a pin wash to all of the raised detail and panel lines to simulate dust/dirt accumulation. I also used it to simulate the "mud" on the turret crosses and numbers by carefully building it up with multiple applications and fine-tuning along the way. I didn't want it so heavy that it obscured the underlying white totally and this required several attempts before I got it to look the way I wanted.


The entire vehicle was then given a sealing coat of Testors Lusterless Flat via spray can and allowed to dry for an hour before starting in with the pigments. I used Mig Europe Dust combined with regular tap water with a touch of dish washing soap added to break the surface tension. This wet mix was applied to the lower hull, running gear, and fender edges and then allowed to air dry.

The next step involved removing the excess pigment using a round stiff-bristled brush. I wore a dust/sanding mask during this phase to avoid inhaling the very fine pigment particles.

The next adjustment was done using a combination of wet and dry q-tips to further remove and position the pigments in the desired locations.

That completed the build and then it was off to the photo booth!