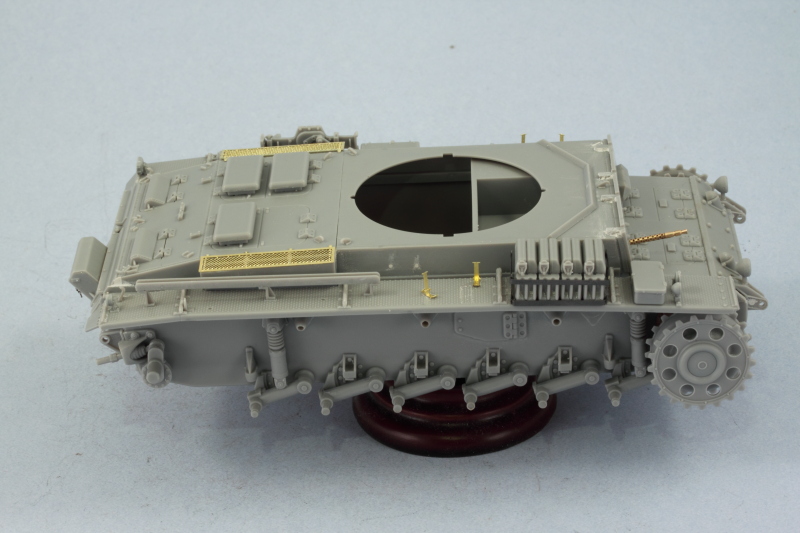
I started an extended Christmas vacation yesterday so was able to get some more time in on this one as a result. Work continued with the fenders and focused in on Steps 10-14.
To begin with, the instructions are not quite accurate in terms of the tool layout particularly on the left hand fender to represent the stowage as seen on a standard G. The instructions call for the jack block to be installed at the front behind the Notek light when in fact it belongs on the rear fender and the jack's position as well as the fire extinguisher's are not placed correctly on the second-to-last section. In that case, the jack should be moved forward to the point that the "claw" end overhangs the fender support rod slightly and the fire extinguisher moved to the rear of the same panel instead of the front. These mods are easily done without too much trouble, just a matter of filling the mount holes with putty and clipping off the pins and gluing the parts in the right positions. I replaced the kit-supplied FE with a better detailed spare from a DML Smart Kit from the spares bin.
Other modifications were called for in terms of removing the entire first full section of the fender to replicate the missing portion seen in the reference photo for this particular vehicle. This was done using sprue cutters and then carefully trimming down the remainder with a #11 blade in order to leave the mount tabs for the fender support in place at the junction of the lost section and remaining fender. This vehicle also had a spare road wheel mounted next to the tool box so this required moving the S-hooks forward one section and placing them next to the wire cutters. I used some generic Griffon clamps and "clean" S-hooks without molded on clamps also drawn from the spares bin. The photo also shows that the rear fenders were removed, so this was also cut down using sprue cutters and the stub plate added courtesy of spare parts from the DML Pz III N Smart Kit.
Other kit parts were also replaced with better detailed items including the jack block with one from a Tamiya Pz III L, the rear Notek light and spare road wheel from the DML Pz III-N Smart Kit, and wire cutters from the spares bin (these had to be trimmed slightly to fit the Griffon clamp).

The fender braces were added and then the fender was installed to the hull. I also found some spare wing-nuts while digging around in the spares bin and added a couple of those to the jack mount for a little extra detail. After reviewing the exposed area of the hull around the drive sprocket, I decided to use some putty and add a little bit of weld detail to the plate joins there as well.

The right side fender was not quite as complicated an area to work with...although it too needed some modifications. The rear mud flap was removed to match the left side and the stub plate added. The brake light was replaced with a modified spare part from the DML Pz III N kit that had better detail, ditto for the width indicator light and siren at the front of the fender. The front mud flap was carefully cut down and removed as well and the additional tool box added behind the siren/indicator light using the parts available on the F sprue as parts 20 and 21. These are marked as "not for use" but were commonly seen on Gs and Hs, so I added it for greater accuracy.
The axe was left off in favor of adding a field-installed jerry can rack...although that side of the vehicle isn't visible in the photo, this type of rack was a common feature in N. Afrika vehicles, particularly the 8th Regt. So even though this is a 5th Regt vehicle, I took a little license and decided to add it. The kit provided the jerry cans already and the rack was scratch built using strips from an Eduard PE fret cut to size and glued together with CA gel. The starter crank had its molded on clamps removed and Griffon clamps installed in their place. Last but not least, the antenna tray and supports were assembled and installed to complete the fender layout for the time being. The shovel will be added later after painting.

The braces were then added and the fender installed to the hull. Once it sets up, I will add the radio antenna mount and swivel arm to round things out and move on to the turret.
