SEARCH FINESCALE.COM

Enter keywords or a search phrase below:

BT-7 mod 1937

18508 views
77 replies
1 rating 2 rating 3 rating 4 rating 5 rating
  • Member since
    October 2009
BT-7 mod 1937
Posted by PANZERWAFFE on Monday, January 24, 2011 11:39 PM

OK Here we go with the new build.  Presenting the BT-7 mod 1937 late version by Eastern Express.

A little history:

The BT-7 was further improvement on the BT-5 with a new conical turret in all but the earliest vehicles (BT-7-1).  Thicker front armour, all-welded construction, a more powerful aero-type engine, a ball-mounted MG in the turret rear (in some vehicles), new gearbox, and extra fuel and ammunition stowage were other features.  The BT-7 was the major service type in the 1939-41 period.  A similar vehicle was the BT-7A close support tank which had a 76.2 mm howitzer replacing the 45 mm gun.  Dispensed with wheel running ability and car type steering.  13.8 tons; crew 3; 45 mm gun pluse 2 MG; armour 6-22 mm; engine (gasoline) 450 hp; 45 mph; 18.65 ft x 7.98 ft x 7.5 ft.  Other users: Finland and Germany (captured vehicles).

Now back to the kit.  It comes with 5 sprues of soft, light gray plastic.  This is my first Eastern Express build and upone opening the box, I was quite impressed with the fine, sharp detail.  It also comes with length and link track.  The track is very narrow and would appear to be more to scale than what have seen in other kits.  here is some flash on some of the parts but nothing bad and not much.  The instuctions are a bit poor.  They are printed on two loose leaf pieces of paper and do not show much detail but they may not need too because of the low part count.

Already have the paint scheme planed out.  It will be a unique winter pattern found in the fighting for Moscow.  Think it will be very intresting as long as I can pull it off properly.

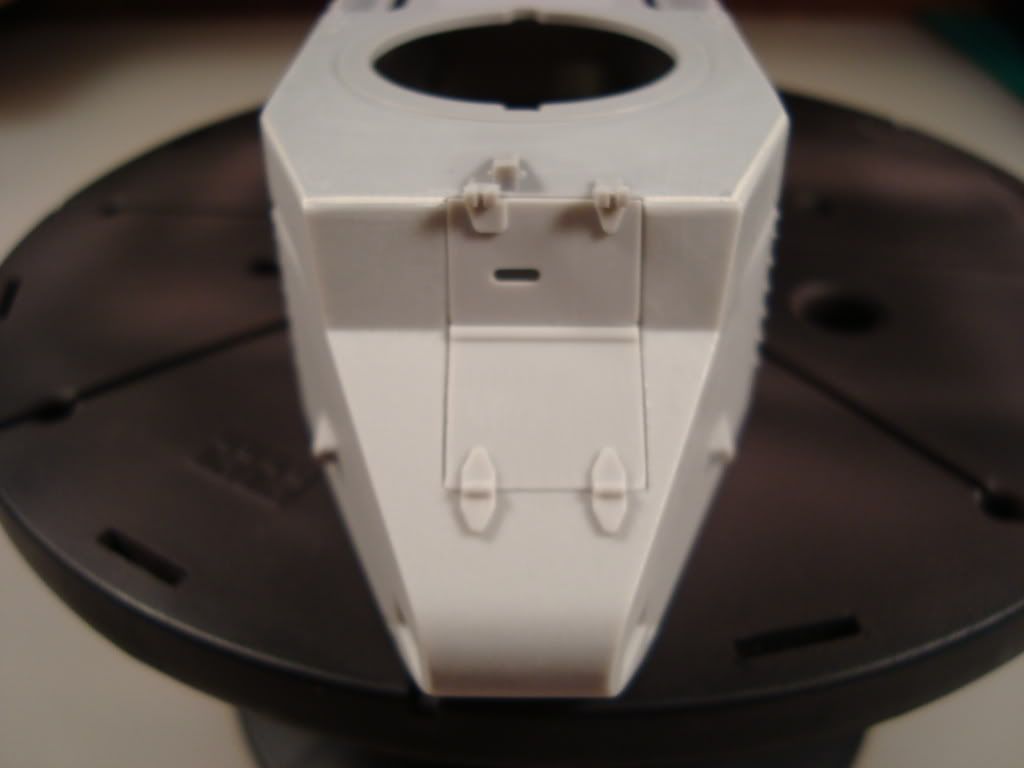
Starting with step 1 the instructions have miss labled the coil springs, part B7, the first one, should be part B8 and B8 should be B7.  Moving to step 2 and 3 is constuction of the hull.  The sides have fit and glued up with no problems but at the rear we run into problems.  The rear is made up of 3 plates and they do not fit well and will leave large gaps that will need to be filled and sanded.

Top, rear

Bottom, rear

The front cowling will need much shapping and filling to get it togther.

All of those pieces are dry fit at the moment, here is what is actually built at this time.

Thats it for now.  Work will not proceed full time until my T-26 is completed.  The T-26 is 99% complete so it will not be long for full attentions to be given to this build.

Rob

Rob

  • Member since
    March 2003
  • From: Rain USA, Vancouver WA
Posted by tigerman on Tuesday, January 25, 2011 1:18 AM

That does look like a bit of work, certainly not a shake-and-bake like Tamiya's new kit. I imagine this was quite affordable compared to the $60 + price tag on the Tamiya kit. Urghhhh.

Good luck and I'll be watching, becuase I like the series and we don't see too many of these kits here.

   http://i7.photobucket.com/albums/y269/wing_nut_5o/PANZERJAGERGB.jpg

 Eric 

  • Member since
    May 2009
  • From: Poland
Posted by Pawel on Tuesday, January 25, 2011 3:05 AM

Oh yeah, russian tanks are cool! I think you made an excellent start here. I'll stay around in case you have something russian to translate Cool. Good luck with your build and have a nice day

Paweł

All comments and critique welcomed. Thanks for your honest opinions!

www.vietnam.net.pl

  • Member since
    April 2005
  • From: Piscataway, NJ!
Posted by wing_nut on Tuesday, January 25, 2011 7:44 AM

You've got some work to do there but I am confident that it will look terrific

Now don't take this the wrong way but... I like your nuts.Stick out tongue  The nuts on the sides of the hull are very nicely molded.  Can even see a little bump for the bolt it looks like.

Marc  

  • Member since
    July 2003
  • From: On my kitchen counter top somewhere in central North Carolina.
Posted by disastermaster on Tuesday, January 25, 2011 12:06 PM

You're off to a good start.

http://th305.photobucket.com/albums/nn222/Draken_Draedell/th_Spore_GIF_2008-09-21_14-45-39.gif

I'll be watching to see how it develops.

Here is the BT I did a while back to give you some visual help.

http://i20.photobucket.com/albums/b232/gluetank/Decorated%20images/th_Smileyavatar-bettereye.jpg?t=1294093447

 https://i.imgur.com/LjRRaV1.png


  • Member since
    July 2004
  • From: Texas
Posted by wbill76 on Tuesday, January 25, 2011 5:48 PM

Will be watching this one eagerly Rob...now be sure to guard your nuts well, Marc's starting to envy them. Big Smile

  • Member since
    April 2015
Posted by spadx111 on Tuesday, January 25, 2011 7:04 PM

Nice start will also be watching this build.Ron

  • Member since
    October 2009
Posted by PANZERWAFFE on Saturday, January 29, 2011 7:55 PM

Tigerman - It does appear there will be extra work in this kit.  Picked this kit up about a year ago for around $10.00 and for that amount figured would give it a go.  Would love to have the new Tamiya fit but for $60 + it may be a while.

Pawel - It's going to be nice to have you and good to know I will have a translator.  I have much around here that needs translated.

Wing Nut - Thanks for the confidence.  Was a bit traumatized at first but your right, I do have some mighty fine nuts. Cool

DM - Thanks for that thread of your old BT!  It is a fine example, very nice work, and it will definatley make a good visual.

WBill - GUARD IS UP Yes

Ron - Thanks for stopping in.

Well it's been a long week and not much has been done.  It is the weekend though so should be able to get some work done on this one.  Here it is.

Finally got the hull togther but there is still much work to be done.  Will be a lot of putty and sanding to come.

Here is a shot of the rear.  Filled the gaps with some extra styrene from and old kit.  Once again still putty to come to smooth things out.

In hind sight, think it would have been easyier to just make new back plates rather than fill the gaps but did not what to have to try making new nuts, I like the ones I have.  There should be a better up date soon.

Rob

Rob

  • Member since
    May 2005
  • From: Dublin Rep Of Ireland
Posted by terry35 on Saturday, January 29, 2011 8:09 PM

Your off to a great start, as the other guys said these kits take a lot of work but I never knew that $60 was the price of a new Tamiya kit, for the love of God thats what the resin kit cost when I was a young chap.

Good luck with the rest of your build.

Terry.

  • Member since
    July 2003
  • From: On my kitchen counter top somewhere in central North Carolina.
Posted by disastermaster on Saturday, January 29, 2011 8:45 PM

wbill76

Will be watching this one eagerly Rob...now be sure to guard your nuts well, Marc's starting to envy them. Big Smile

Yeah, watch out Rob....     envy.gif image by lakegal

http://i20.photobucket.com/albums/b232/gluetank/Decorated%20images/th_Smileyavatar-bettereye.jpg?t=1294093447

 https://i.imgur.com/LjRRaV1.png


  • Member since
    March 2003
  • From: Rain USA, Vancouver WA
Posted by tigerman on Saturday, January 29, 2011 11:07 PM

wbill76

Will be watching this one eagerly Rob...now be sure to guard your nuts well, Marc's starting to envy them. Big Smile

Indifferent

   http://i7.photobucket.com/albums/y269/wing_nut_5o/PANZERJAGERGB.jpg

 Eric 

  • Member since
    August 2003
  • From: Connecticut, USA
Posted by Nachtflieger on Sunday, January 30, 2011 3:54 AM

Good start Rob. I'll be following along too.

Nate


TRM
  • Member since
    May 2010
  • From: Massachusetts
Posted by TRM on Sunday, January 30, 2011 10:01 AM

Great start Rob.  Looking forward to watching as we are with the T-26/BT-2

Cheers!

Regards,

T


In Flanders fields the poppies grow
Between the crosses, row on row,
That mark our place, and in the sky,
The larks, still bravely singing, fly,
Scarce heard amid the guns below.

~John McCrae

  • Member since
    April 2009
  • From: Carmel, IN
Posted by deafpanzer on Sunday, January 30, 2011 10:18 AM

Another interesting WIP to follow... looks like this one will keep you very busy for next few weeks.  No, my mistake... few days.  Good luck!

Andy

  • Member since
    July 2003
  • From: Toronto, Ontario, Canada
Posted by zokissima on Sunday, January 30, 2011 10:45 AM

Glad to see that people will still use these old kits besides the new Tamiya offering. Will  be watching with interest.

  • Member since
    January 2010
Posted by parkadge on Wednesday, February 2, 2011 6:04 PM

Hi Rob aftre reading through your T-26 thread I'll be following this one too

  • Member since
    October 2009
Posted by PANZERWAFFE on Friday, February 4, 2011 10:51 PM

Hello everyone.  Sorry for the long time between response.  The cold has finally made it to the south and when the weather gets bad, thats when I have to go to work.  Spent the last few days straight at work with very little sleep.  The city is covered in ice and there are accidents everywhere.  Thats my excuse.

Terry, DM, Tigerman, Nate, TRM, Andy, Zokissima and Parkadge thanks for stopping in.  I will be starting up on this build in high gear now.

Did get some work done today after making it home.  Used squadron putty on the hull and sanded to shape.
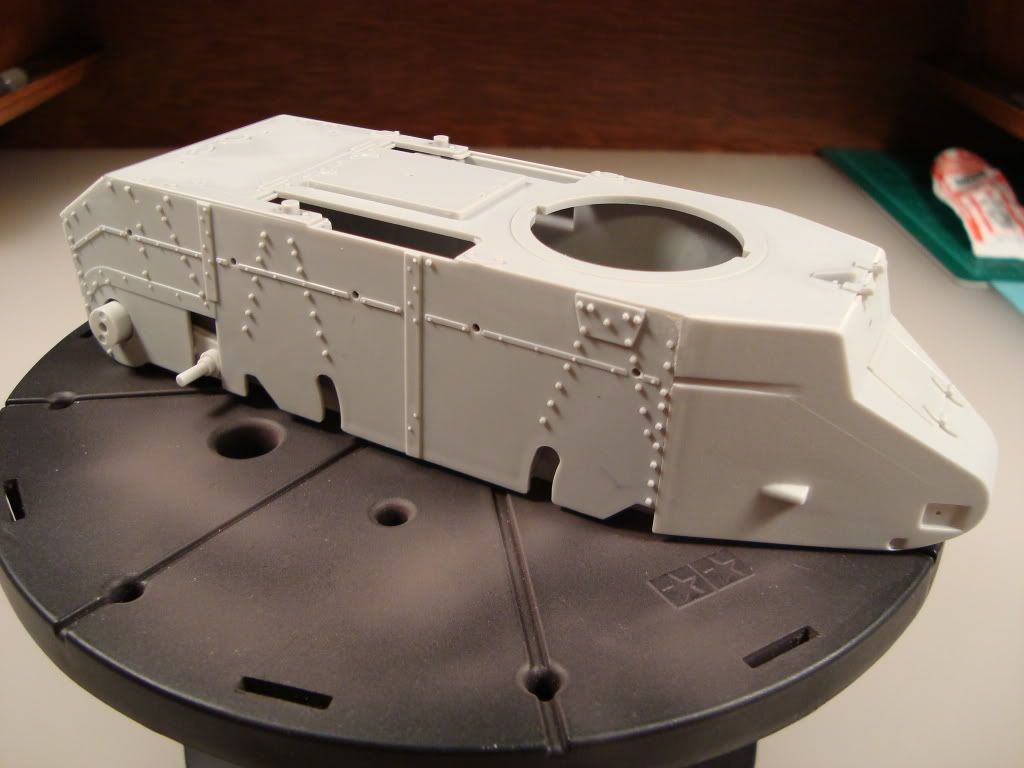
Had to put another styrene strip in the rear to make the corner where the two plates meet, putty then sand some more.
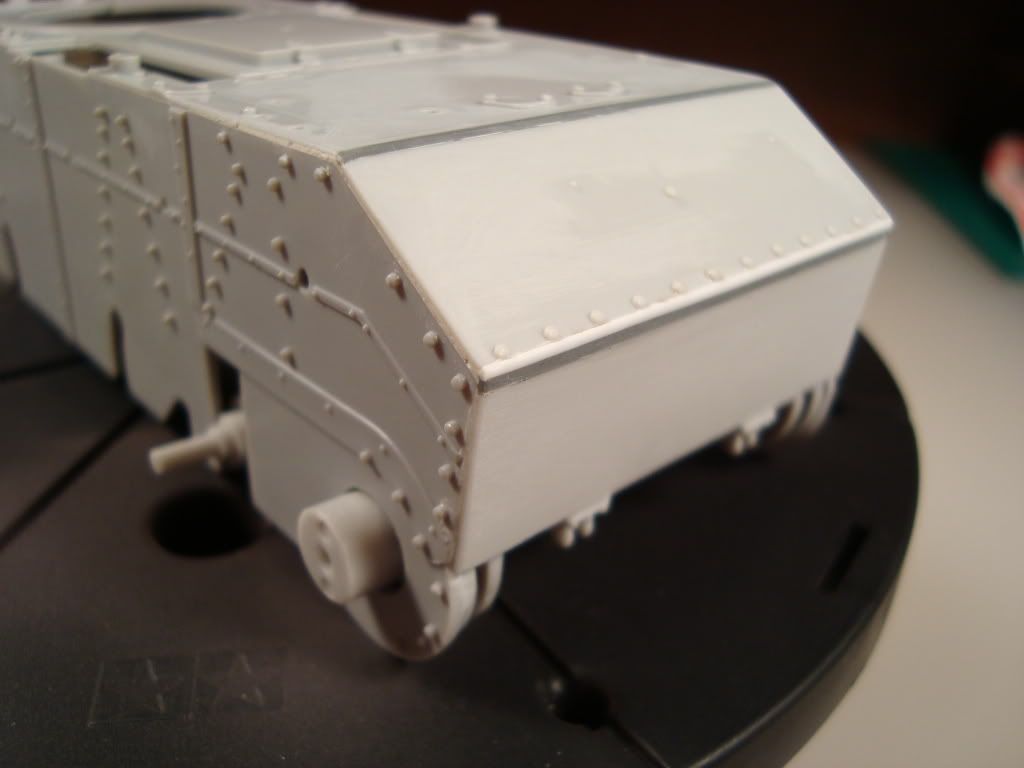
Leaving the hull for a while, went to work on the turret.  Once again, think the kit itself had some nice detail to it.
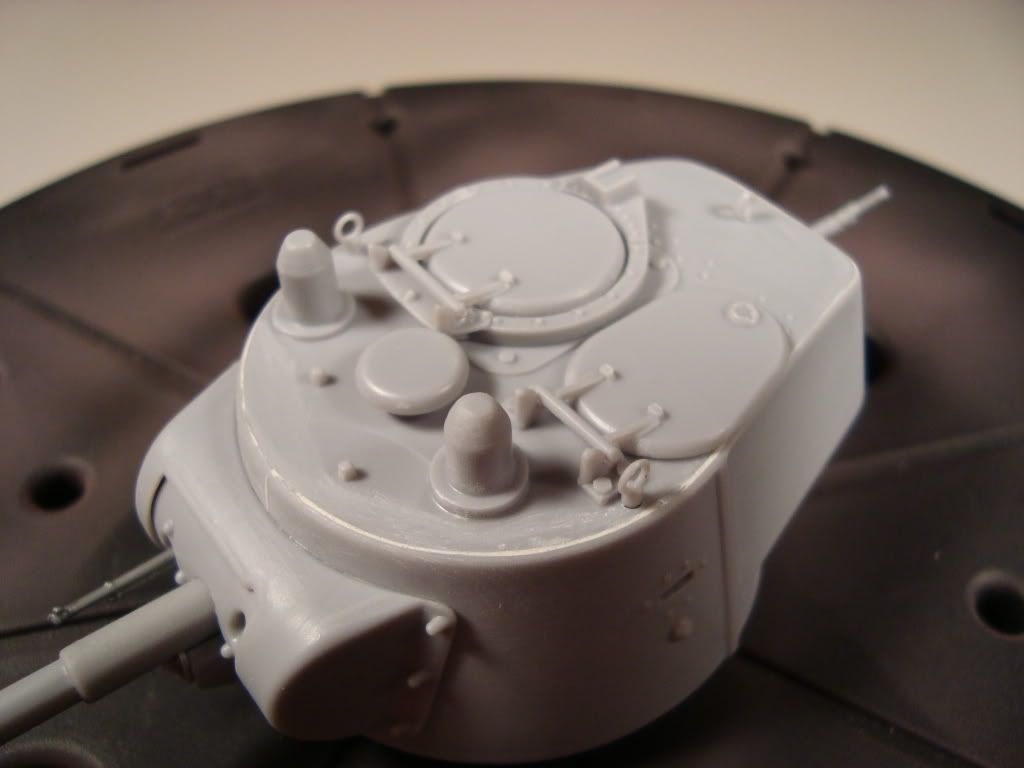
There was some minor fit issues with the turret hatches.  Had to thin out the hatch arms and shape them a bit in order to get them to close (if left open they would have worked perfect).  In the rear of the turret there was more filling to do.
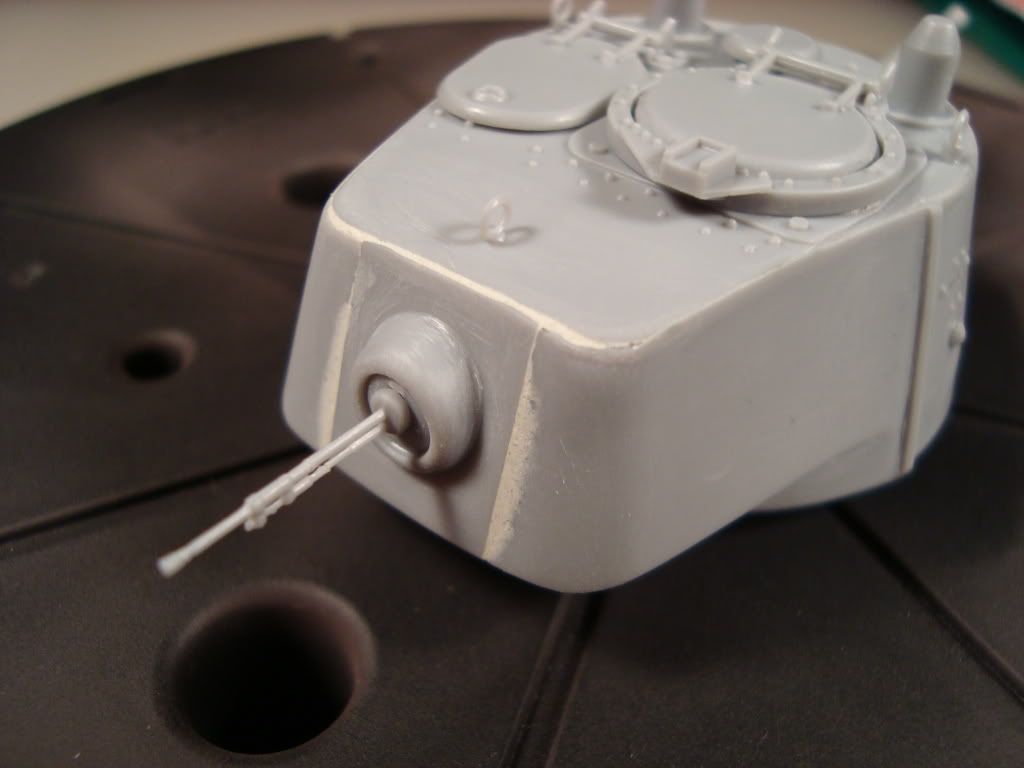
Drilled out the gun barrel and added a new MG, the one that came with the kit was broken in a few places.
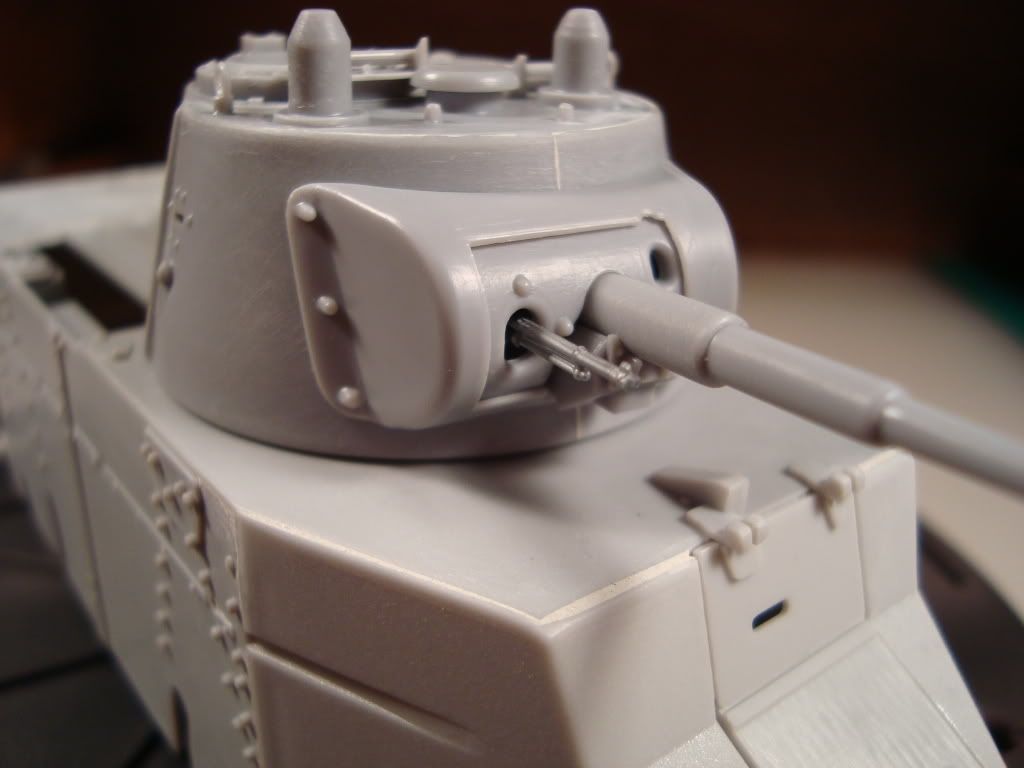
Here is a shot with turret and hull
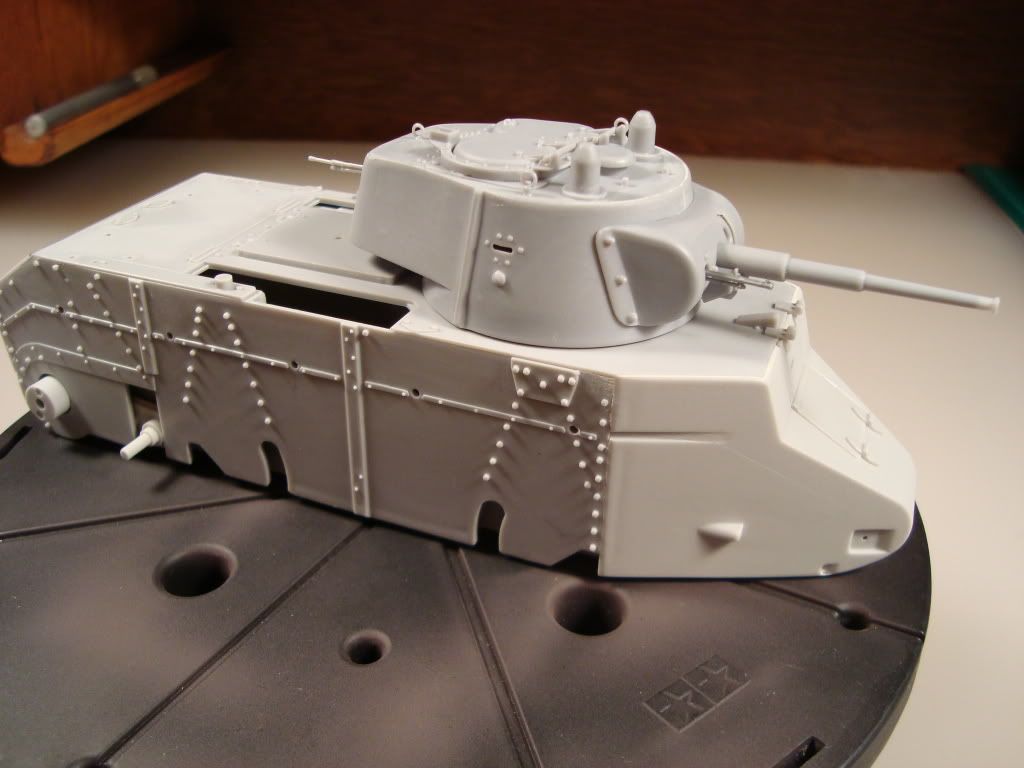
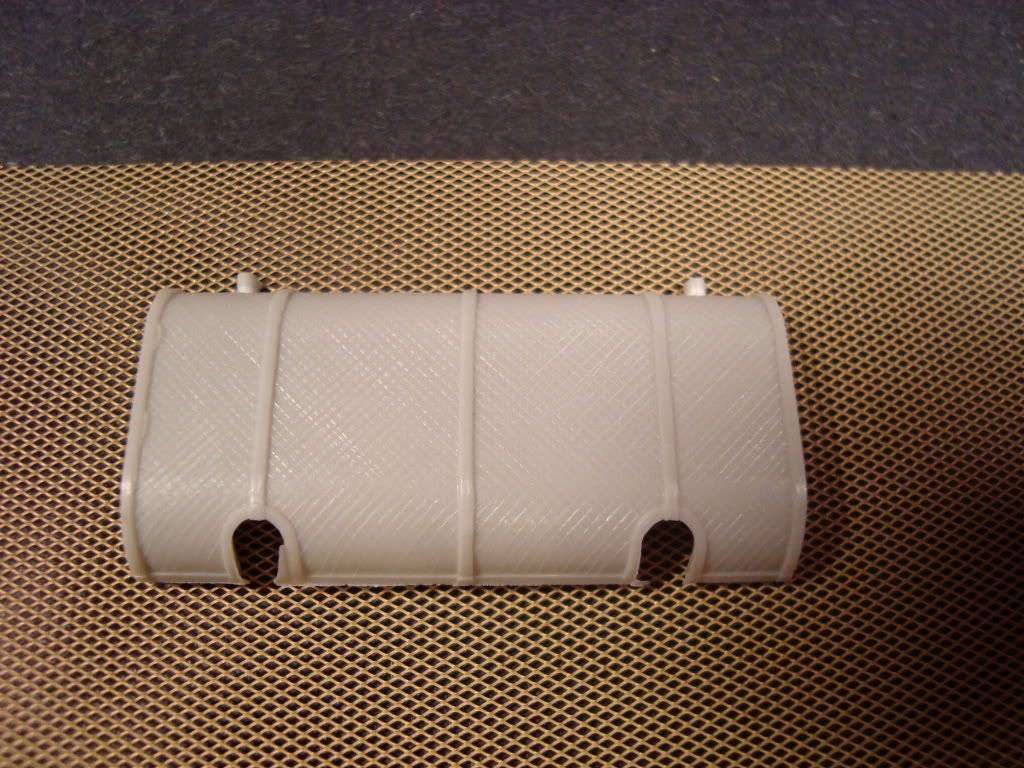
Dont plan on doing a lot extra with this kit but there are a few small details I will be adding to the turret.  The one big thing I will have to replace is the engine screen.  Does anyone know of a good PE one?  I probably wont wait for PE.  I plan on cutting the plastic screen out leaving the frame and replacing it with some fine mesh tomorrow.  This is what it looks like now and the brass mesh I plan on useing.
Thats it for now, plan on a more exciting update at the end of the weekend.

Rob


Rob

  • Member since
    March 2003
  • From: Rain USA, Vancouver WA
Posted by tigerman on Saturday, February 5, 2011 1:22 AM

Great idea replacing the screen. It will definitely pay off.

   http://i7.photobucket.com/albums/y269/wing_nut_5o/PANZERJAGERGB.jpg

 Eric 

  • Member since
    August 2003
  • From: Connecticut, USA
Posted by Nachtflieger on Saturday, February 5, 2011 6:21 AM

Looks very good Rob. Nice job fairing in the nose to the hull. Yes

Nate


  • Member since
    July 2004
  • From: Texas
Posted by wbill76 on Saturday, February 5, 2011 3:36 PM

Putty work and modifications turned an ill-fitting set of hull slabs into a nice hull Rob, looking forward to more! Wink Definitely think your mesh plan will be a big improvement over the kit part for sure. You've already got it handy so no need to go the PE/AM route an incur the additional expense IMHO.

  • Member since
    October 2009
Posted by PANZERWAFFE on Sunday, February 6, 2011 3:39 PM

Nate - Thanks , the hull had to be the worst part of the kit.  The fit was so bad I was losing faith in this build but now that it is togther, I am very happy with it.

WBill, Tigerman - Agree the mesh will be the biggest improvement on this kit as long as I can get it trimed out without breaking the frame.  About halfway and the frame is getting very fragile also have not really figured out how I'm going to get the mesh in there.

Just in case this thing breaks, does anyone know of PE that would handle this?  I still plane on not using a PE one just like to have a back up plan.

I'll post an update tonight.  Have all of the suspenssion on and all remaining parts cut, trimed and ready to put on just need to finish the work on the engine screen.

Rob

  • Member since
    March 2003
  • From: Rain USA, Vancouver WA
Posted by tigerman on Sunday, February 6, 2011 4:11 PM

Need a motor saw, like a jigsaw or bandsaw. Amazing job so far.

   http://i7.photobucket.com/albums/y269/wing_nut_5o/PANZERJAGERGB.jpg

 Eric 

  • Member since
    January 2006
  • From: California
Posted by SprueOne on Sunday, February 6, 2011 4:30 PM

Great job on that engine screen cover part modification so far. Looks nerve racking 


Anyone with a good car don't need to be justified - Hazel Motes


Iron Rails 2015 by Wayne Cassell Weekend Madness sprueone

  • Member since
    May 2009
Posted by F Matthews on Monday, February 7, 2011 4:17 PM

Photobucketp>I agree that this kit looks MUCH better with the screen added.  There are two louvered vents under the screen leading to the engine bay that are easily fabricated.  I cut the top out on my BT-7A, but don't have any pics handy.  I can try to take a couple to post.  Here is a photo of my recently completed BT-5 with the same arrangement, just without the exhausts. On my BT-7A, I used the Eduard PE set which is really nice.


  • Member since
    May 2009
Posted by F Matthews on Monday, February 7, 2011 7:48 PM

I really like the early war Soviet stuff.  Clunky but cool!  Here's a shot of my BT-7A (this one's an Eastern Express kit).  You did a great job dealing with the fit issues-this one was ok, but I have a few more in the stash and I stopped forward progress (for now) on one because of the gaps.  The 1937 model looks great.  You can see the louvres a little better here as well as the cutout of the hull top for the engine compartment.  This also shows off some of the Eduard PE well.


Photobucket

  • Member since
    May 2003
  • From: fort mill SC
Posted by Robert92562 on Monday, February 7, 2011 8:12 PM

I also like the Russian armor. I'm looking forward to seeing the final product.

My SU 100.

Bob

  • Member since
    October 2009
Posted by PANZERWAFFE on Tuesday, February 8, 2011 12:39 PM

Did not make my Sunday night up date as promised.  Had some bad news here.  The last cold front we had here put my mother in the hospital and things were looking bad for a while.  Just talked with the doctor and things are getting better now.  I'm off of work now and will be heading to stay at the hospital.  Not sure when I will get back to things here, so this is were it's at.  Just wanted to reply to you guys sence all of you took the time for me.

Tigerman, SprueOne - Thanks for the comps. It was nerve racking at times.

F Matthews - Thanks for checking in.  Looks like you might be the guy to talk to about these early Soviet tanks.  I agree the early ones are really cool.  Nice BT's you have there.  Found some pictures of the louvers you are talking about, plan on putting them in.  Good to know about the Eduard PE set, it looks very nice.  Do plan on having more BT's.

Bob - Thanks for stopping in.

There some spots that still need work and the pictures showed other spots that I missed, I'll get to them when I can.

Thanks again to all of you

Rob

Rob

TRM
  • Member since
    May 2010
  • From: Massachusetts
Posted by TRM on Monday, February 14, 2011 3:54 PM

Nice progress Rob!  Hope to see you back at it soon.  How is your Mother doing?  Hope all is well.

Regards,

T


In Flanders fields the poppies grow
Between the crosses, row on row,
That mark our place, and in the sky,
The larks, still bravely singing, fly,
Scarce heard amid the guns below.

~John McCrae

  • Member since
    April 2009
  • From: Carmel, IN
Posted by deafpanzer on Monday, February 14, 2011 4:45 PM

Great looking little tank! Yes I think I want to build it despite the fact I am not really into Russian tanks. 

Andy

  • Member since
    July 2004
  • From: Texas
Posted by wbill76 on Monday, February 14, 2011 8:32 PM

Hope things improve for your mother Rob, hang in there and the bench/models will always be waiting when you can get back to them. Beer

Nice work on the grills and looks like you did a great job of carving out the intake frames on the rear deck as well. Yes

JOIN OUR COMMUNITY!

Our community is FREE to join. To participate you must either login or register for an account.

SEARCH FORUMS
FREE NEWSLETTER
By signing up you may also receive reader surveys and occasional special offers. We do not sell, rent or trade our email lists. View our Privacy Policy.