SEARCH FINESCALE.COM

Enter keywords or a search phrase below:

GERMAN RAILWAY GONDOLA TYP OMMR

43971 views
134 replies
1 rating 2 rating 3 rating 4 rating 5 rating
  • Member since
    July 2004
  • From: Texas
Posted by wbill76 on Saturday, May 5, 2012 6:57 PM

Nice work on the details...can't say about the packing material in the crates but it's a nice detail either way IMHO! As for the figures, I would say hold off on them until the move is complete if you think there's a chance they could go AWOL in an attempt to go sight seeing in Paris when you're not looking! Wink

  • Member since
    October 2009
Posted by PANZERWAFFE on Saturday, May 5, 2012 6:11 PM

ERIC, CARL - Thanks guys !  ............me in a magazine............i kant even spel Dunce

BILL - Thank you too Yes  The unfortunate thing is that the large tarp is hardly noticeable when the gun deck is put on Sad  I tried it knowing the majority would not be seen but was a little disappointed at how little..OH well.

Slow but sure, here is the latest.

Finished up with the large crate and accessories.  Spent a little extra time making a sling from a sliver of paper but can hardly see this when in place so thought would give you a closer look.
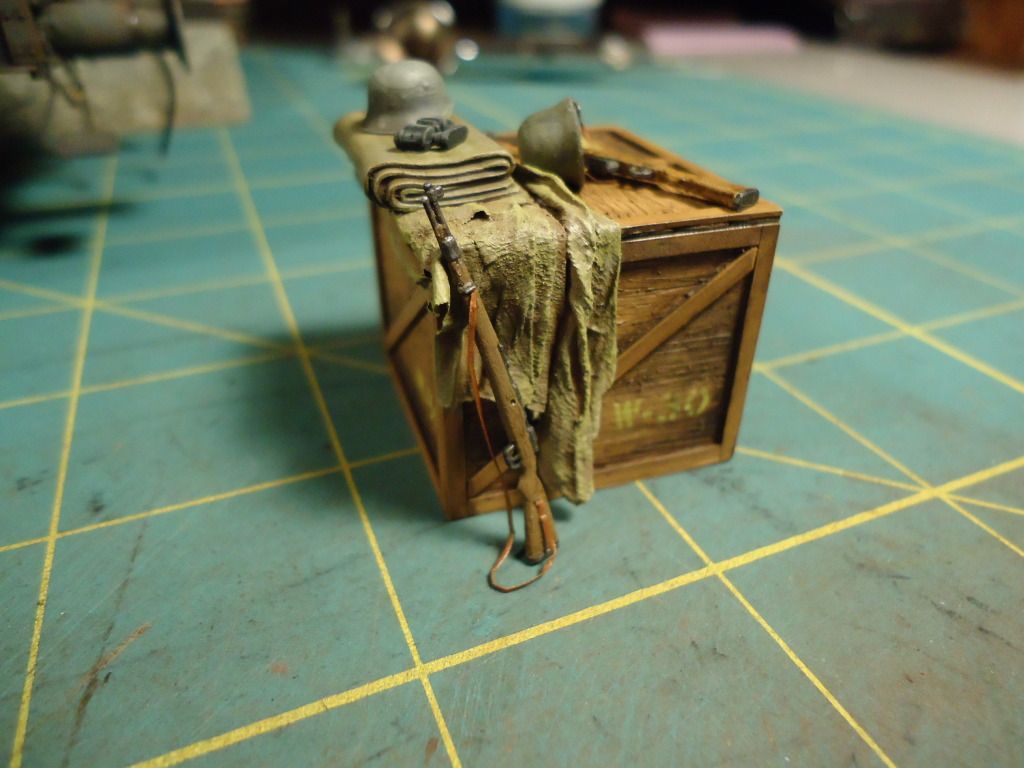
Also a bit closer look at the completed helmets.
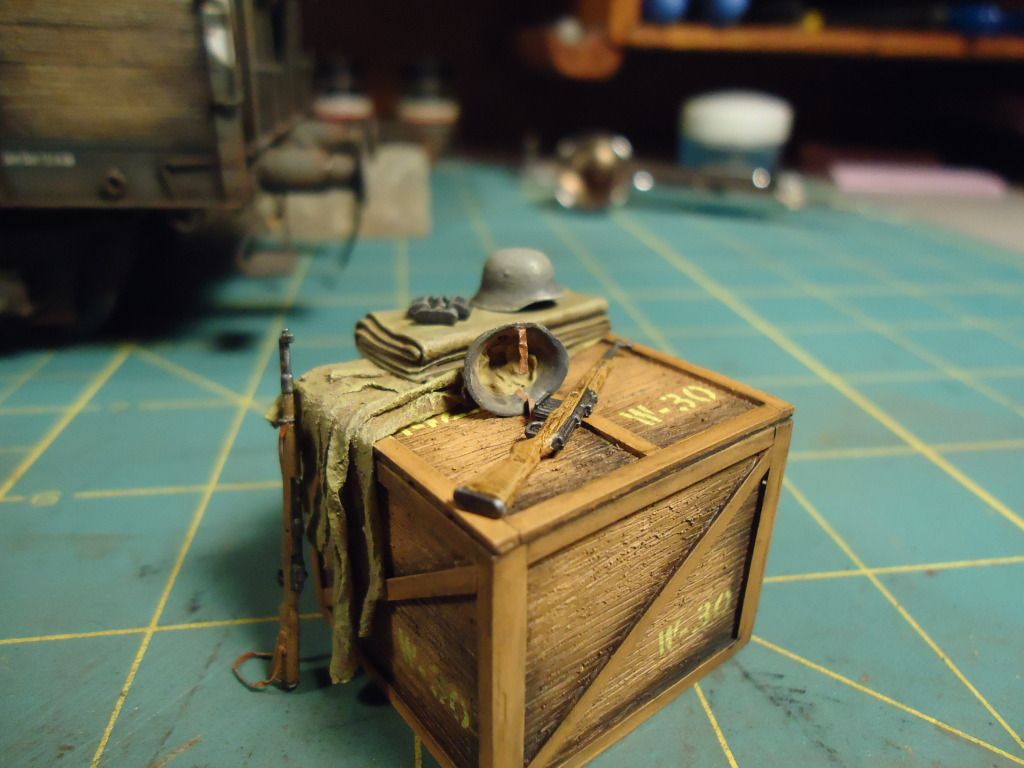
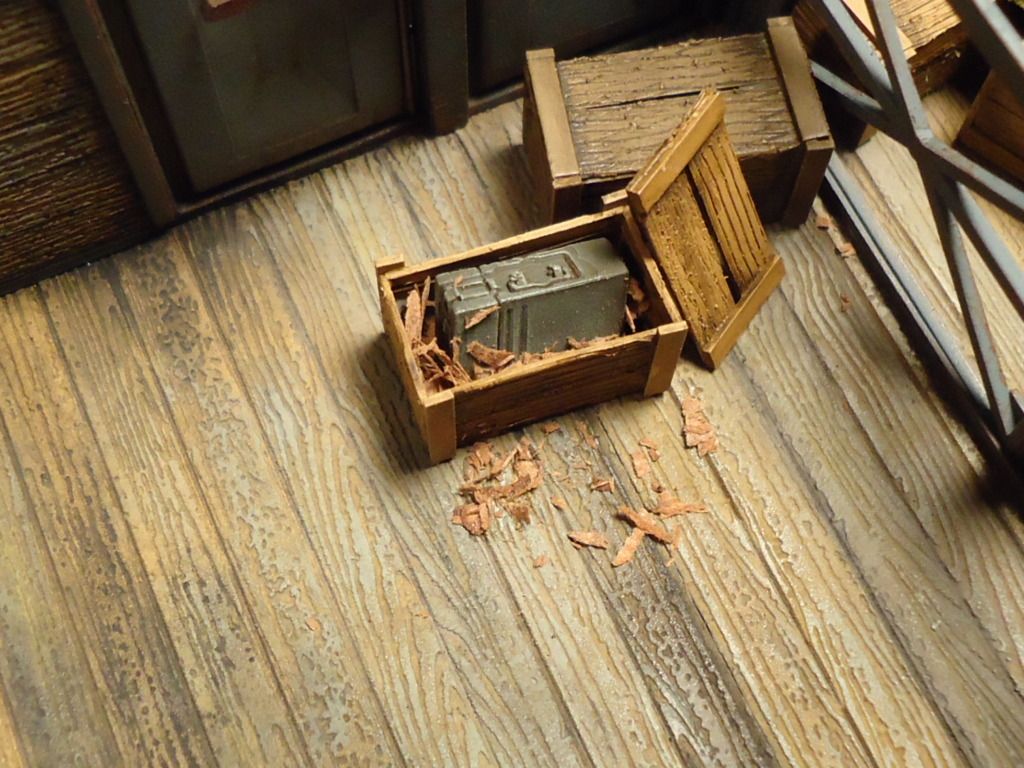
A lot of ammo crates depending on the type of ordnance will have a packing filler.  Was not sure if this would be found in the ammo for the Flak Gun but had put it in there anyway, I liked it.  Used pencil shavings and cut them up further with scissors.

And the finished product in place in the car
The large crate and most of the gear permanent in place in the car
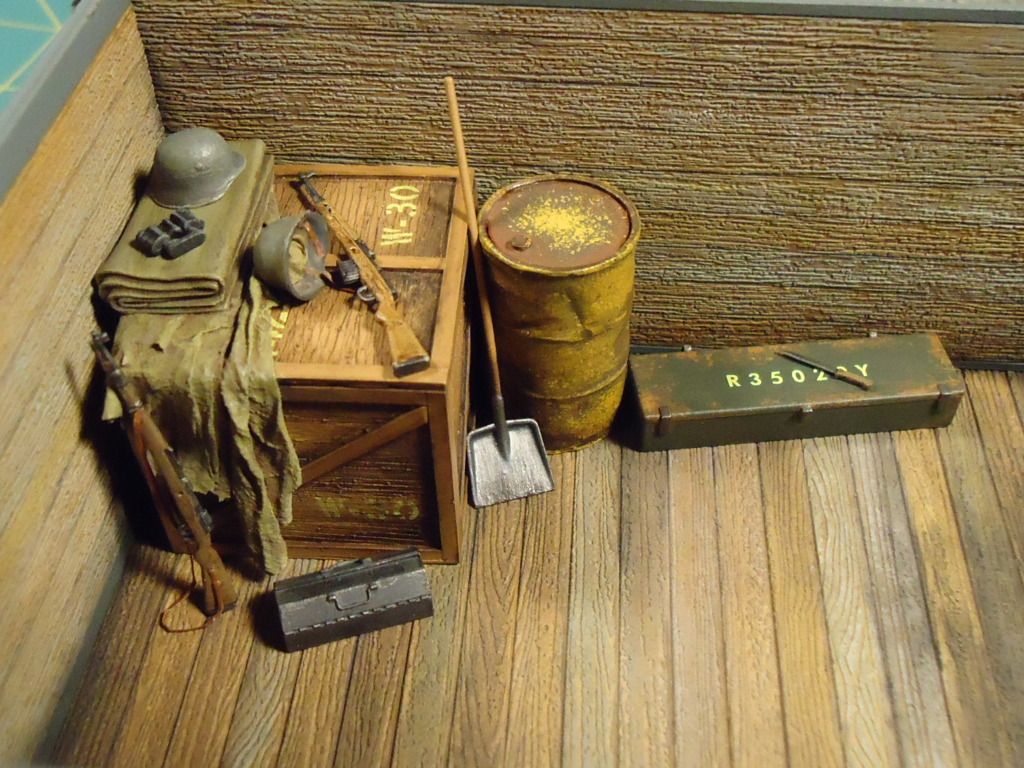
Ammo crates permanently in place
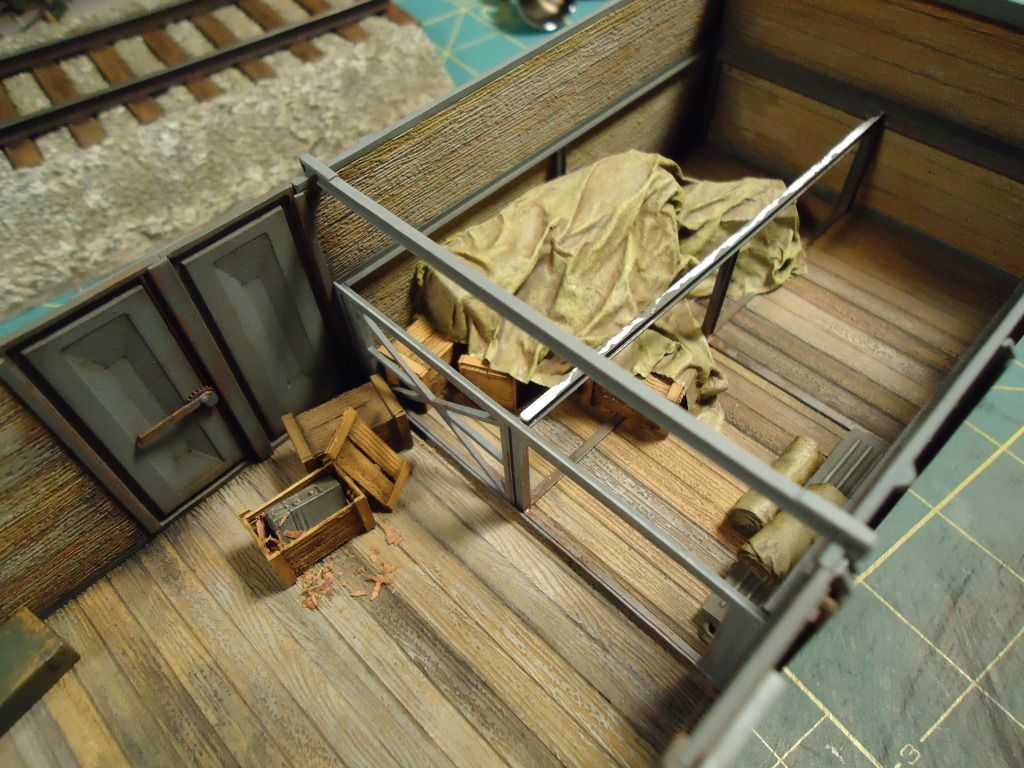
Overview so far

Still a few flak gun ammo cans to place in put they will be on the gun deck.  Of course the gun deck to put in and the AA gun on the tripod...and a few more helmets.  Also have the chair to put in the car but think I will build and finish this figure first in order to fit him to the chair properly.
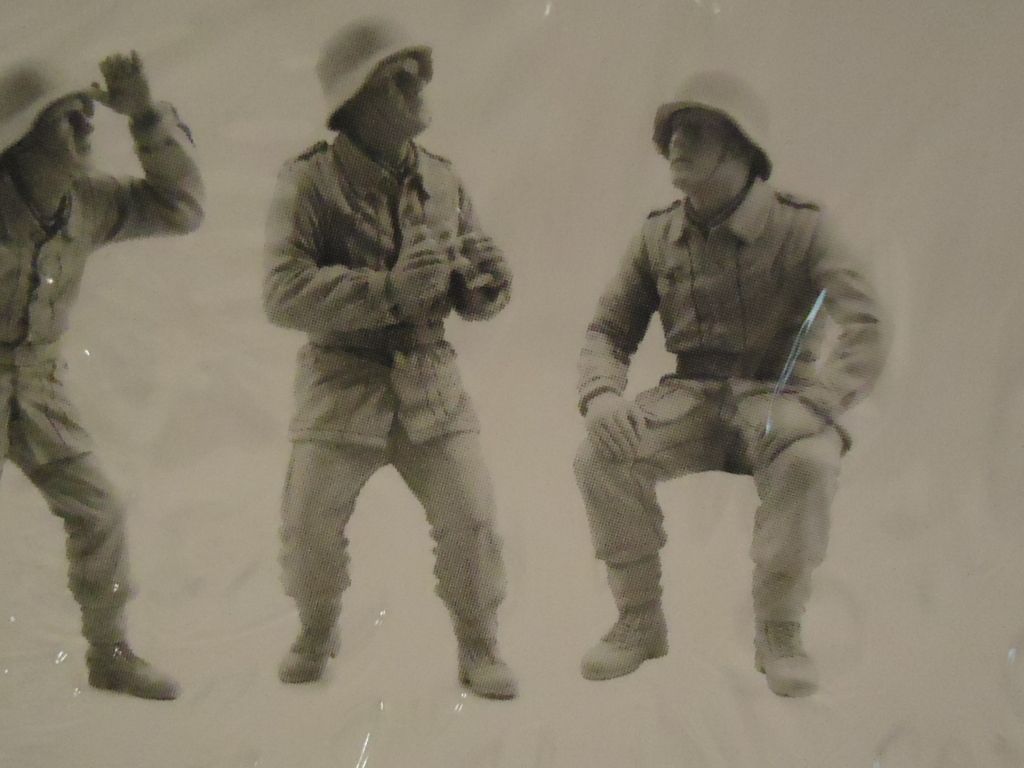
Now the question is, do I dare try to finish the figure now or wait until I move?  For those that do not know, I am packing up after this weekend and will be moving Tongue Tied  so not sure if I should pull figs out yet or not.  Wont do no good to have them laying in pieces in a box.  Who knows, might have an update tomorrow?

Rob

  • Member since
    July 2004
  • From: Texas
Posted by wbill76 on Saturday, May 5, 2012 11:41 AM

Nice work on the details Rob, the helmet liners and small tarps just add that much more depth to the project! Beer

  • Member since
    March 2006
  • From: Right Side of a Left State
Posted by Shellback on Friday, May 4, 2012 8:57 PM

tigerman

 Shellback:

Hmmmm ...Hmm......which one ?Whistling


Well there is only one isn't there?

tigerman

 Shellback:

Hmmmm ...Hmm......which one ?Whistling


Well there is only one isn't there?

Eric ..................Yes

  • Member since
    March 2003
  • From: Rain USA, Vancouver WA
Posted by tigerman on Friday, May 4, 2012 8:43 PM

Shellback

Hmmmm ...Hmm......which one ?Whistling

Well there is only one isn't there?

   http://i7.photobucket.com/albums/y269/wing_nut_5o/PANZERJAGERGB.jpg

 Eric 

  • Member since
    March 2006
  • From: Right Side of a Left State
Posted by Shellback on Friday, May 4, 2012 7:40 PM

Hmmmm ...Hmm......which one ?Whistling

  • Member since
    March 2003
  • From: Rain USA, Vancouver WA
Posted by tigerman on Friday, May 4, 2012 6:05 PM

This seriously needs to get into a magazine. Big Smile Great stuff to watch with envy.

   http://i7.photobucket.com/albums/y269/wing_nut_5o/PANZERJAGERGB.jpg

 Eric 

  • Member since
    March 2006
  • From: Right Side of a Left State
Posted by Shellback on Thursday, May 3, 2012 7:36 PM

Tarps and helmets are cool Rob Cool..............great looking progress man .Yes

  • Member since
    October 2009
Posted by PANZERWAFFE on Thursday, May 3, 2012 6:38 PM

ERIC - Easy tiger Smile

Little weathering on the trap

Then decided to put a small one on the large crate

Base coat, after dry the same process as the other tarp will follow

When the crate and tarp are complete will stack some more small personal gear on top of it.

Also started the helmet liners and straps

Beer


Rob

  • Member since
    March 2003
  • From: Rain USA, Vancouver WA
Posted by tigerman on Wednesday, May 2, 2012 10:08 PM

PANZERWAFFE

It's been a loooong day, no work at the bench tonight.

Angry

   http://i7.photobucket.com/albums/y269/wing_nut_5o/PANZERJAGERGB.jpg

 Eric 

  • Member since
    October 2009
Posted by PANZERWAFFE on Wednesday, May 2, 2012 9:48 PM

Thanks guys Yes

Bill, the tissue is the Walmart brand "Great Value" (soft).  It's there own make facial tissue.  There are no identifying marks on the box to tell you any better.  Have found this to be cheaper and it works very well for bed rolls, tarps, etc.

It's been a loooong day, no work at the bench tonight.

Rob

  • Member since
    July 2004
  • From: Texas
Posted by wbill76 on Wednesday, May 2, 2012 12:42 PM

Neat trick with the tarp. What type of tissue did you use?

  • Member since
    March 2006
  • From: Right Side of a Left State
Posted by Shellback on Tuesday, May 1, 2012 10:30 PM

Agreed , snot rag looks .....Oops Whistling........i mean tarp is looking good Rob .

  • Member since
    March 2003
  • From: Rain USA, Vancouver WA
Posted by tigerman on Tuesday, May 1, 2012 8:13 PM

The tarp is a great addition.

   http://i7.photobucket.com/albums/y269/wing_nut_5o/PANZERJAGERGB.jpg

 Eric 

  • Member since
    October 2009
Posted by PANZERWAFFE on Tuesday, May 1, 2012 8:00 PM

ERIC - Thats what I said about the Quad-20's.  It will be mounted on one of the flat cars if all goes right.  Thanks for the input Yes

REDLEG - As long as you armor guys are happy then I am too.....well lets keep our RR guys happy too Smile  I know your not much for German but you are Artillery, may need some help when I start the 15cm Field Howitzer.  It will be stowed on one of the flat cars for transport.

DOOG - Thanks man Big Smile  It's good to have you and all the other guys checking in and keeping an eye on things.  Please do, if you see anything that can be improved while closing in on the end, let me know Yes  It's real good to hear things are looking good.

CARL - Beer

Thank you all for your great words.

Sneak peak of what is happening tonight.  Stocking the car.

Did not want to use all crates under the gun deck and did not want to make more.  Placed a few crates in place and then added some wood pieces for filler.

OK, dont let this next picture scare you.  Looks like someone blew there nose in the car but it is the beginning of a tarp made of tissue.  Looks a lot better here in person.  Here goes

Used 50 / 50 water and white glue mix and spread it all over the tissue.  Let dry and then gave it a base coat.  Now looks like this

When this dries completely will start weathering it and adding some shadow.  Thats it for now.

Rob

  • Member since
    March 2006
  • From: Right Side of a Left State
Posted by Shellback on Tuesday, May 1, 2012 1:24 AM

Rob, gotcha Yes

  • Member since
    January 2007
Posted by the doog on Monday, April 30, 2012 10:14 PM

I'm honestly speechless! I can't see a thing I would change or improve upon!

Absolutely SUPERIOR work! Bow Down

  • Member since
    July 2006
  • From: New Jersey
Posted by redleg12 on Monday, April 30, 2012 7:23 PM

I'm speechless.....the model RR guys would be drooling......as for the armor guys.....fantastic

Rounds Complete!!

"The Moral High Ground....A Great Place to Emplace Artillery."

  • Member since
    March 2003
  • From: Rain USA, Vancouver WA
Posted by tigerman on Monday, April 30, 2012 7:00 PM

What's a German train without quad-20's? 

Excellent work sir.


   http://i7.photobucket.com/albums/y269/wing_nut_5o/PANZERJAGERGB.jpg

 Eric 

  • Member since
    October 2009
Posted by PANZERWAFFE on Monday, April 30, 2012 6:49 PM

CARL - OMG is right...........lets see if I can make it too all those rail cars Indifferent  I am REALLY enjoying this build but I am missing my armor Heart

All the markings were the kit supplied decals.  The ones on the wood texture were applied with micro set / sol and the ones on the car frame with Future.  Thanks for the great words.

DISASTER MASTER - As always, Thanks.......you are too kind with your words.

Beer

Rob

  • Member since
    October 2009
Posted by PANZERWAFFE on Monday, April 30, 2012 6:27 PM

TREAD hey man !  Thanks for that great complement.  That has to be about the best one could get.....cant get no better than looking real.  Lets see how everything looks when all components are put together.

Thats a good question with armor scale to train scales and not an easy answer.  This has been my first experience with train related items and am not very familiar with them.  I have often looked at some of the accessories in the train department, they have so much, and once in a great while find something that works for a diorama.  About 3 weeks ago had stopped by a train store here and asked the owner the same question you have asked.  His answer was ...It is difficult to say, train manufactures competing with each other went the wrong route and messed up the scales in the process.  There was one company that intermixed parts on there trains with different scales in order for there trains to fit on others tracks and then this eventually carried over to other parts and so on and so on.  Now scales for even trains is kinda off.  The closest to 1/35 should be I scale = 1/32.  Here is a chart that may be more useful then me blabbing Smile

1:12 Large Scale
1:13.7 7/8 inch scale
1:20.3 G, Three-Foot Gauge on Gauge 1 Track
1:22.5 LGB and Bachman
1:24 Half scale
1:29 Aristo-Craft, USA Trains, standard gauge on #1 gauge
1:32 I scale
1:48 O scale
1:64 S scale
1:87.1 HO scale
1:120 TT scale
1:160 N scale
1:220 Z scale

This is from this site which also has a scale calculator on the page.  May be useful for you.  http://www.csgnetwork.com/modrrscalecalc.html

Rob

  • Member since
    July 2003
  • From: On my kitchen counter top somewhere in central North Carolina.
Posted by disastermaster on Sunday, April 29, 2012 11:38 PM

Absolutely Masterfully Gorgeous.

http://forums.digitalpoint.com/image.php?u=187332&dateline=1324488554  A REAL treat and treasure.

 https://i.imgur.com/LjRRaV1.png


  • Member since
    March 2006
  • From: Right Side of a Left State
Posted by Shellback on Sunday, April 29, 2012 9:48 PM

OMG, this is going to be an impressive train !

Rob , did you use dry transfers or decals for the rail car markings ? I cant tell , they look painted on (complement) though !Yes

  • Member since
    September 2005
  • From: beacon falls , Ct.
Posted by treadwell on Sunday, April 29, 2012 9:44 PM

Hi Rob :  )

Man what a fantastic job you are doing on thisYes  I gotta say that the chassis (under carriage) on this just looks real..... I can't think of a better adjective !   even without the gun and extras it's great.

On a side note , I was wondering what scale in model rail roading does 1/35 translate to ?  I know H.O. is 1/87 I think...

nice man !

treadCool


  • Member since
    October 2009
Posted by PANZERWAFFE on Sunday, April 29, 2012 9:34 PM

ANDY, BILL, CARL - Thanks for the feedback and it's good to hear you guys like it.  I like the idea of the mirror but dont think I will use it in the end when everything is done.  If this was the only car I would use a mirror.  Believe it or not, I have a stack of mirrors of different shapes and sizes that I have collected just for the purpose of placing under models.  Funny, I have not yet used one of them for this purpose........on day.  Will not use the mirror because back to what I had mentioned early on in this WIP when finished there will be several cars connected and things going on around the train.  Here are some of the other cars waiting to be connected.  There are also a few other small kits included in this pic that will be on the train or in the scene when complete.  There is also some more stuff buried in the stash that will be pulled out at a later date.

Rob

  • Member since
    March 2006
  • From: Right Side of a Left State
Posted by Shellback on Sunday, April 29, 2012 7:14 PM

Holy mackeral  !!!!

Rob , beautiful detail and weathering !!!

I agree with Andy and Bill about putting a mirror under the model .........all of that super detail has got to be seen !!!

I impressed Rob Yes

  • Member since
    July 2004
  • From: Texas
Posted by wbill76 on Sunday, April 29, 2012 6:24 PM

Rob,

I was going to suggest the same thing as Andy but he beat me to the punch! Very nice work on the underside. Yes

  • Member since
    April 2009
  • From: Carmel, IN
Posted by deafpanzer on Sunday, April 29, 2012 5:10 PM

Looking great with all of those scratch building... good move replacing the air line!  Beer

At AMPS Auburn a guy put a mirror under his truck so we could see the scratch built details so I thought maybe you can add thin strip of mirror between the rails so your friends can see your work better.  It may sound corny but it worked... 


Andy

  • Member since
    October 2009
Posted by PANZERWAFFE on Sunday, April 29, 2012 5:05 PM

ERIC - Thanks!  Almost to the point of loading the gear in........almost.  Stat tuned Smile

TONY - Agree about the MG case.  Look in the last pic, the case under the MG came with it and I believe the intention was that is suppose to be the MG case.  Will try to come up with something better, may cut some barrels off some extra MG 34's and use them for spare barrels?

CARL, WBILL - Thanks guys Beer

Lots of pictures here, hope not too many.  Pics were hard to take and still did not come out as well as wanted because of lighting.  When I get to my new place, next month, will make a photo booth.  This is the main reason for so many pics and different backgrounds.  Weathering has started.  There were several applications of washes, pin washes, various powders and pigments and paints.  Almost there........

There was one last modification done before going any further.  Did not care for the kit supplied air line connector so had cut the hose off and replaced with wire.  Added some metal valve handles and then slide a rubber tube over the wire to simulate the hose.  The advantage of the wire is that it is flexible and should make things easier when connecting to the future cars.

went back to the undercarriage, to bad it wont be seen.

And now back topside

Thanks to all for taking a look.  Until next time Beer


Rob

  • Member since
    July 2004
  • From: Texas
Posted by wbill76 on Wednesday, April 25, 2012 12:01 PM

Sharp work on the details and gear Rob, look forward to seeing the car equipped and ready for action. Yes

JOIN OUR COMMUNITY!

Our community is FREE to join. To participate you must either login or register for an account.

SEARCH FORUMS
FREE NEWSLETTER
By signing up you may also receive reader surveys and occasional special offers. We do not sell, rent or trade our email lists. View our Privacy Policy.