SEARCH FINESCALE.COM

Enter keywords or a search phrase below:

1/6th scale M4A4 sherman tank Project

26599 views
44 replies
1 rating 2 rating 3 rating 4 rating 5 rating
  • Member since
    January 2012
  • From: Hatfield
Posted by Misty on Tuesday, March 4, 2014 2:42 AM

sitting here with a stupid big grin on my face watching the monster trundle around in the snow. reminds me of the motorised tanks i built when i was a kid but on a mahoosive scale. i soooo want one but cant get anyone to buy the wife off me.

  • Member since
    April 2005
Posted by armourguy on Monday, March 3, 2014 10:25 PM

Thanks Misty, It seems like ages since I had an update on this one, but I was able to make a significant amount of headway on this project. The tracks, motors, and electronics have been installed... and the tank is now running!

The large box with all of the RC equipment was sorted out and was installed to the tank. Starting with the tank's motors, Like all armortek models the tank uses two heavy duty 24V electric motors to propel the model.

These are the same motors that are used on the other heavier armortek german tanks, which perform very well. These units are also the new High efficiency units which have more engineering in them.

The come pre assembled with their gearbox and are ready to mount OOB. Before mounting a quick smear of grease was added and off they went.

After the motors were mounted it was then time to turn to the electronics.

Unlike my older RC sherman builds where I mounted the electronics to the bottom floor plate, because of the added under hull detailing this was not a viable option. So instead I designed a subfloor which is elevated off the floor plate and uses the fasteners from the under hull details to suspend and firmly mount the unit.

The subfloor is fabricated out of Lexan plastic and for strength Aluminum angle.

One key purpose for the subfloor is for the battery tray. This model (like all armoteks) will be using two 12V lead acid batteries wired in series to obtain 24V. Unlike my older builds in which I would have the batteries towards the rear of the tank, On this model they are located in the center of the vehicle. The advantage of this is that the weight is centered on the model's suspension, and in the event I need to replace the batteries they are in a easy to get location beneath the turret. To charge these cells a recharge jack will be fitted to the model.

For mounting the other electronic equipment I fabricated aluminum angle mounts. The Speed Controller and the aux. component controller are mounted to one of these frames, which is then bolted to the model's sponsons. For the fasteners I simply utilized the armortek kit fastener and fastener locations for mounting the new braces like an erector set. This system saves space, and doesn't touch the bottom floor pan.

This same system was utilized for mounting on the speaker system.

Because the speed controllers were mounted low in the hull in a cluster that freed up room towards the upper hull, I took advantage of this real estate by mounting the power supply box and sound system amp box on two elevated shelves.

These shelves allow me to mount the power supply to where the main power switch is located directly beneath the driver's hatch. To mount these shelves I simply adapted the holes that were pre drilled into the side plates by armortek. These holes are originally designed for the mounting of the kit supplied side armor plate slabs. Because this model will not be using these parts these holes were to be deleted anyway, so they were a perfect location for these two parts.

After the machinery were installed I then turned to assembling the tracks, This kit uses the same links from their 06 M4A3 release. These tracks are very durable and run very well.

The tracks assemble like the real sherman tank in that the tooth / pin clamp system is all bolt together assembly. Assembly was very time consuming, but therapeutic at the same time .

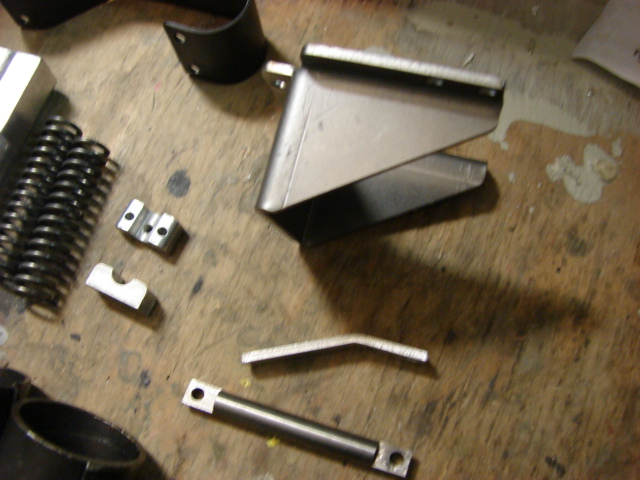
the only change from the 06 release is that the small pin clamp on this version is made out of CNC Aluminum, while on the older release it was a small pressed steel plate. The new unit is more realistic in appearance, and it is amazing how such small precise parts can be made in such volume!

After the track was assembled it was time to take the tank out for it's maiden test run. I temporarily pinned the top deck in place and off I went.

The tank made it's paces in the snow and performed well on the ice.

Two youtube videos were made showing the unboxing of the electronics

http://youtu.be/RGEuuyhY2Ys

and of the mode's electronics and test run.

http://youtu.be/1D77BqCJubw

More pics were also added to the facebook page

https://www.facebook.com/EastCoastArmory

With the tank running and with the sound system working properly I can now focus on the recharge system, smoke, and other added functions... More to come!

  • Member since
    January 2012
  • From: Hatfield
Posted by Misty on Friday, December 27, 2013 8:07 AM

absolutely brill, never seen anything like it.

  • Member since
    March 2006
Posted by TD4438 on Friday, December 27, 2013 7:10 AM

This is insanely awesome!

  • Member since
    April 2005
Posted by armourguy on Tuesday, December 24, 2013 9:35 PM

More progress was made on the sherman. The model's sprockets and idlers were mounted.   The model's sprockets are almost identical to the sprockets on the first sherman release. The only difference between the two releases is that the teeth ring on the firefly release is made out of Aluminum while the first release was made out of steel.  The sprockets are all bolt together assembly, and are very durable. To aid in the assembly of the sprockets I assemble a small length of track and use it as a timing guide. While the track is threaded onto the sprocket the track aligns the teeth perfectly. Once the bolts are tightened the track is removed and the sprocket is complete.   After the sprockets are primed / painted they are mounted to the tank via the taper brush lock. The sprocket mounts on very smoothly and no mods are needed.  The model's idlers were also mounted with few mods added. Like the Idler mounts on the tiger the adjustable rear idler mount is made out of Steel. They are strong and no mods are needed for this part. They were simply primed, painted, and weathered.    Like the road wheels the Idler wheels are made out of CNCed Aluminum. They represent the stamped pattern idler wheel. The wheels feature both back and face details and basic zerk fitting wells. Like the road wheels the idlers have some tooling marks on them.  The tooling marks were removed, and the zerk fitting wells were enlarged. To buff away the marks I utilized a dremel with a sandpaper cutting disc, and a Mill to enlarge the wells. Zerk fittings were also added.    Before installation I added the weathering to the rear portions of the idler wheels as they will not be accessible when mounted to the tank. As of note, after installation I was doing some research and found out that there are no zerk fittings and wells on the rear portion of the idler. I will leave the wheel as is as the wheel rear detailing is not noticeable when the track is on and at proper tension.  The wheels mount to the tank via a single bolt and disc. A small smear of thread lock and the idler is mounted.   The kit also supplies you with a basic aluminum hubcap. In it's place I will be using one of my resin sherman hub caps.    I also was able to rotate the hull to get access to weather the lower hull. Once the model progresses from this stage it will be very impracticable to get to this location on the model.   A youtube update video was made for the project. http://youtu.be/jPn3pshiMpU more pics of the tank's progress have been added to the facebook page. http://www.facebook.com/EastCoastArmory The tank is now ready for it's mechanical innards. Once the tank is up and running I will have another update...more to come! Also To Everyone Have a merry Christmas!

  • Member since
    September 2006
  • From: Dripping Springs, TX, USA
Posted by RBaer on Tuesday, December 10, 2013 10:54 AM

Goodness gracious!

Apprentice rivet counter.

  • Member since
    April 2005
Posted by armourguy on Saturday, December 7, 2013 3:05 PM

Thanks Bufflehead, I usually store the completed model in the shop covered up with a tarp or old bedsheet to keep from getting dusty.

I've been slow with updates recently, with all of the orders and commission builds going on I have had little time for my own projects :S


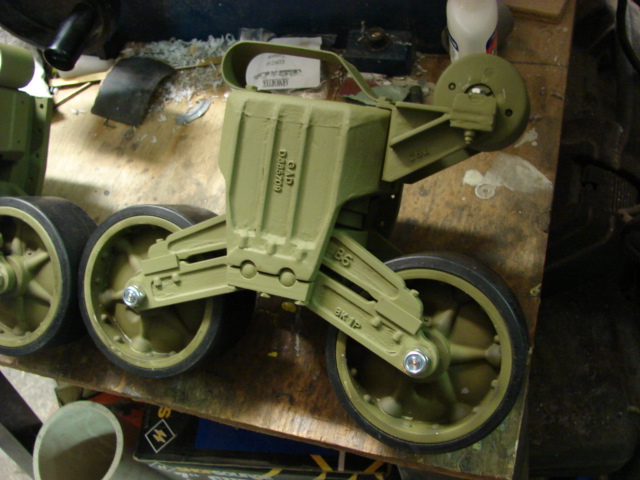
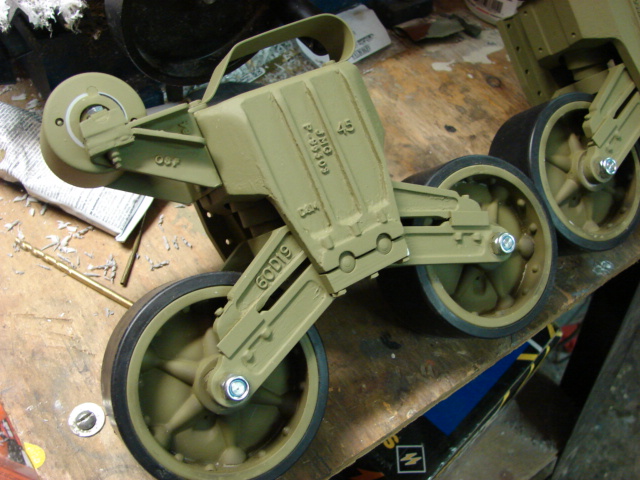
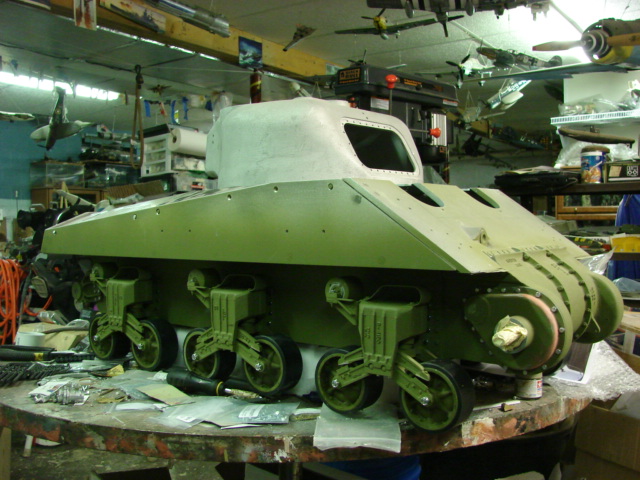
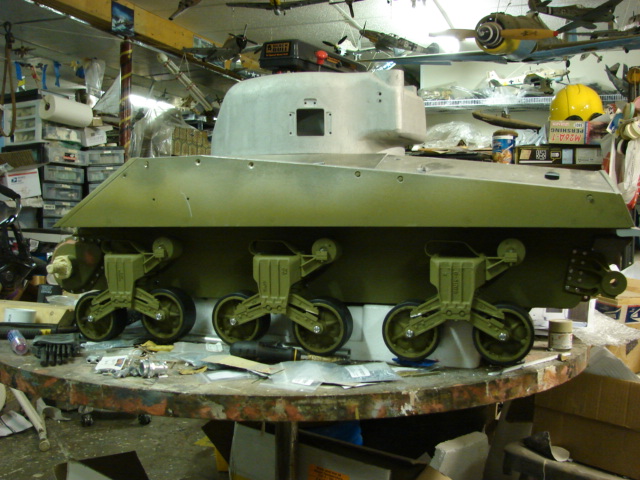
I was able to complete and install the tank's suspension.
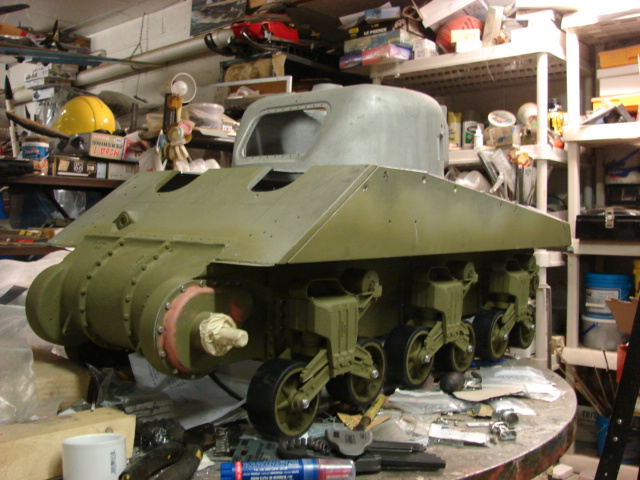


Like I mentioned in the last update post several surface mods were made to the armortek VVSS suspension.
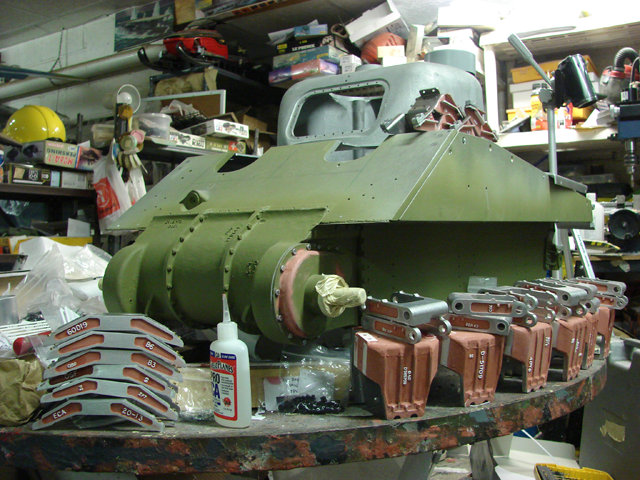


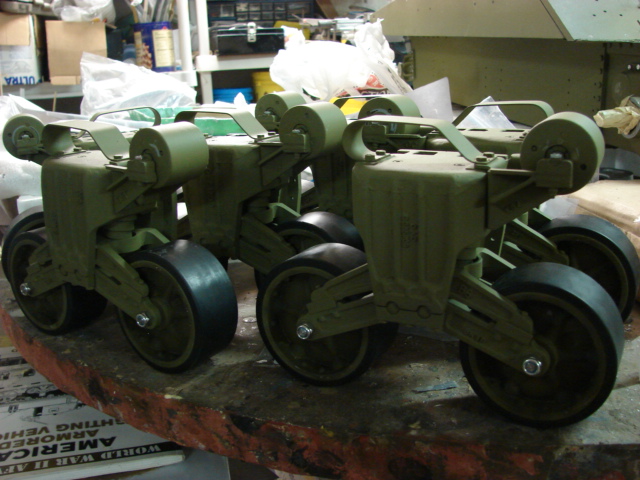
The VVSS suspension on this version on the armortek sherman has almost the exact same layout of their first offering, but with a few minor differences. The biggest is that the bogie housing and the wheels on the first release was made out of cast aluminum, while this release utilizes CNCed Aluminum it their place. 
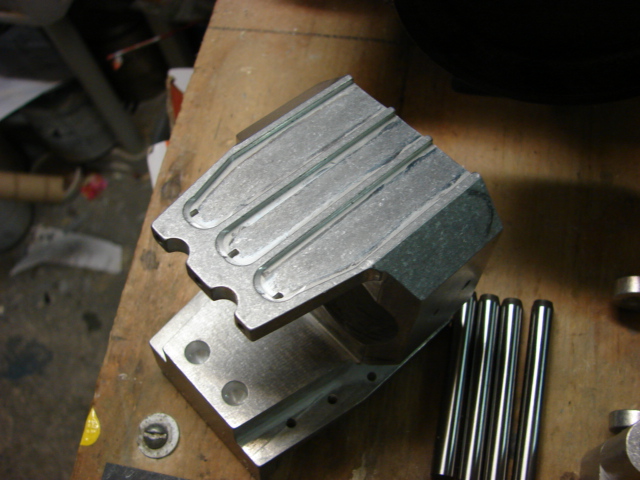


The CNCed parts are just as, if not more durable as their cast alloy predecessor. Some other improvements include Brass CNC slide rails for the H frame mount, as well as limit restricted swing arms and spring tension bolt cover caps. All of these were not present on the first release.
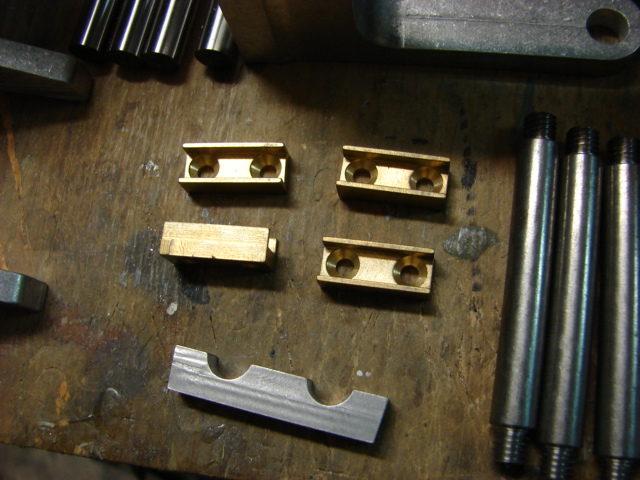
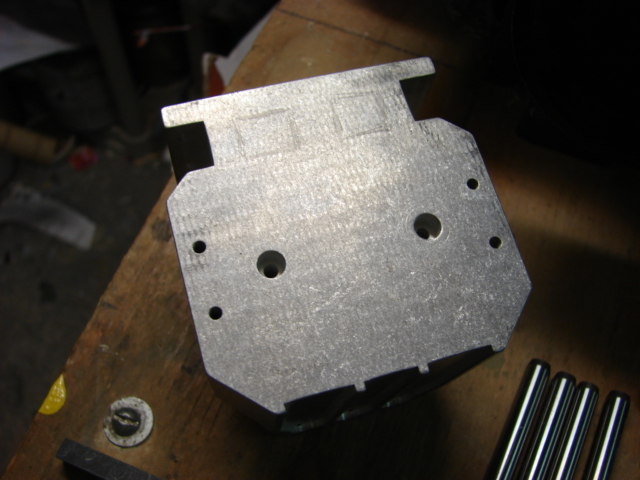


Besides the listed above the rest of the suspension parts were kept the same, and worked very well on the first release. This includes the Volute springs, return roller, skid rail, and H frame.
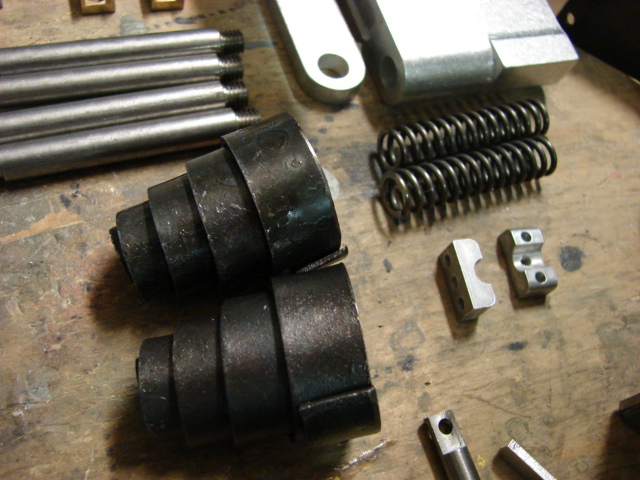
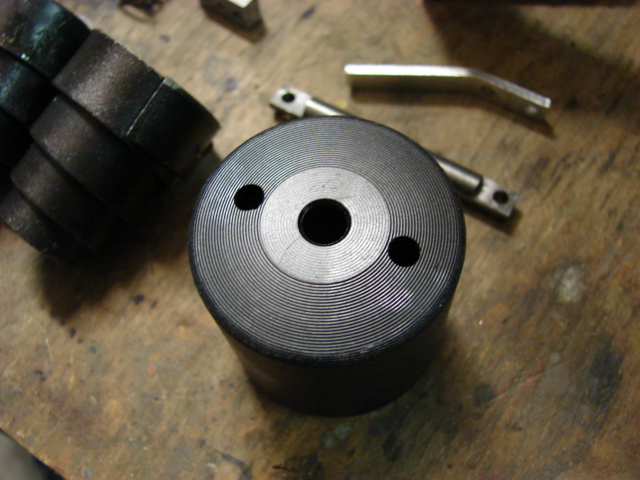


The armortek kit VVSS suspension is a solid well designed and proven unit, The unit is the right shape and scale, and assembles easily. You can mount the unit to the model OOB, and it will give a lifetime of reliable trouble free service. The unit was also a good base to start with to add the surface details resulting in the completed unit below.
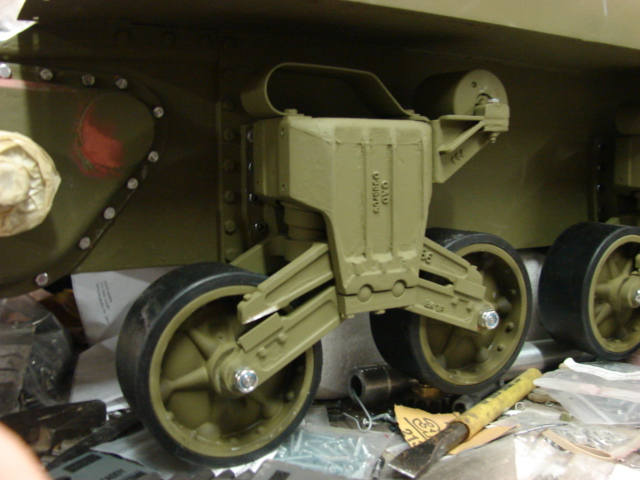


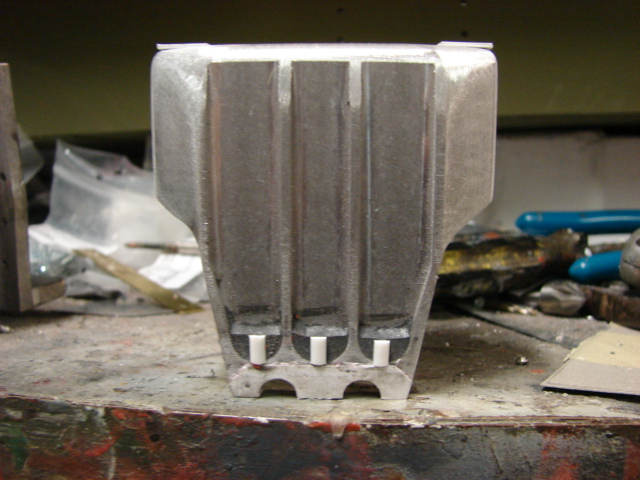
To start the transformation I wanted to add the top bogie fastener wells.

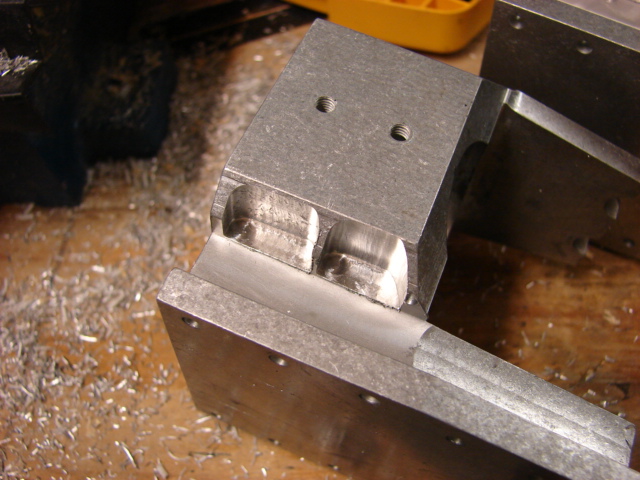
On the real sherman bogie the bogie casting had two rectangular squares integrally casted into the top rear portion of the bogie to allow two fasteners to be fitted in to bolt the unit to the tank.
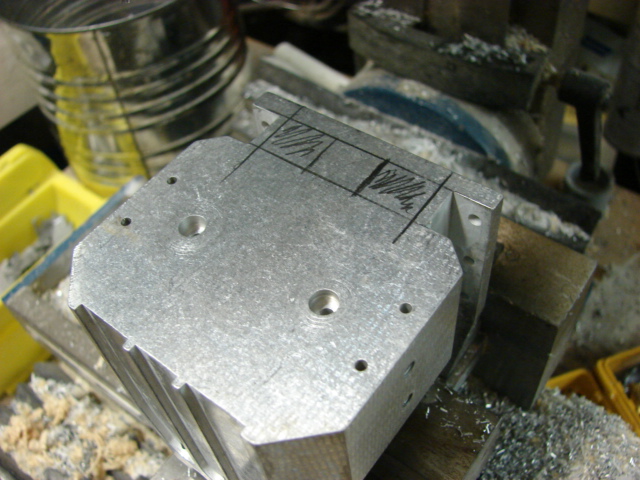


After marking the locations I first drill a hole to the proper depth, once the hole is drilled I then square off the round hole on the Mill.

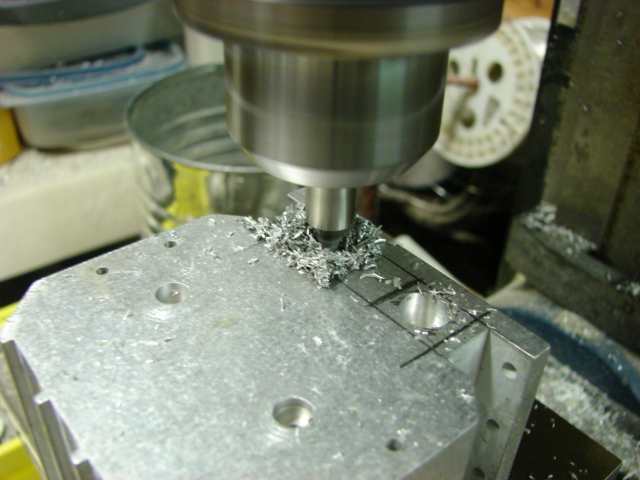


The drill bit that I use is the same diameter as the hole which also saves time in squaring off the recess.
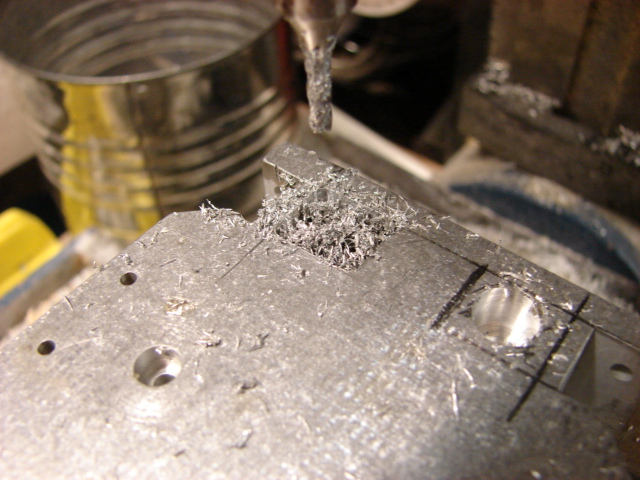
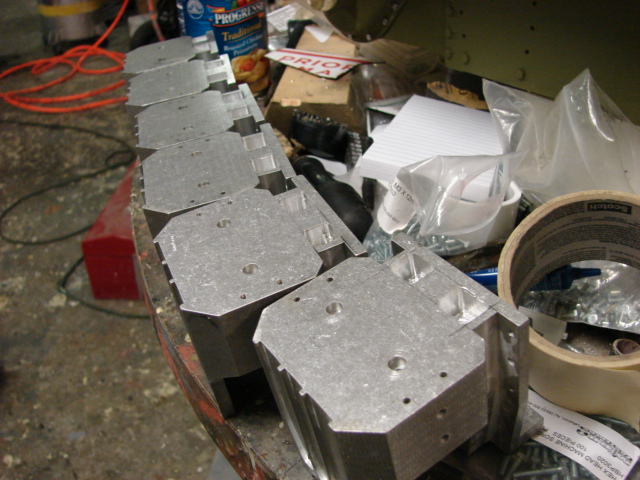


After the holes were added two small hex bolts were fitted. These bolts are for detail purposes only and are not needed for structural strength.
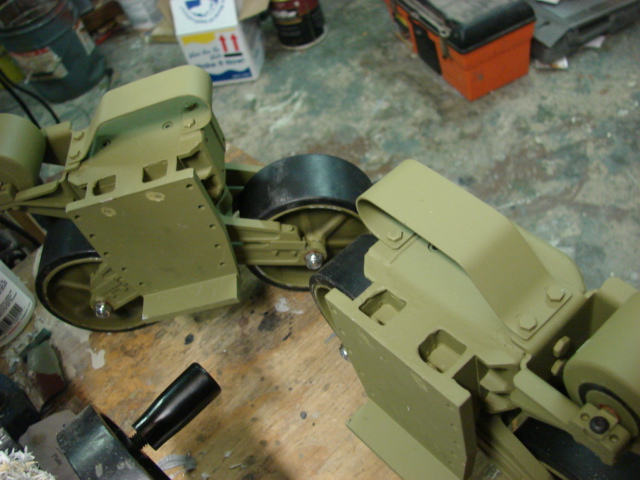


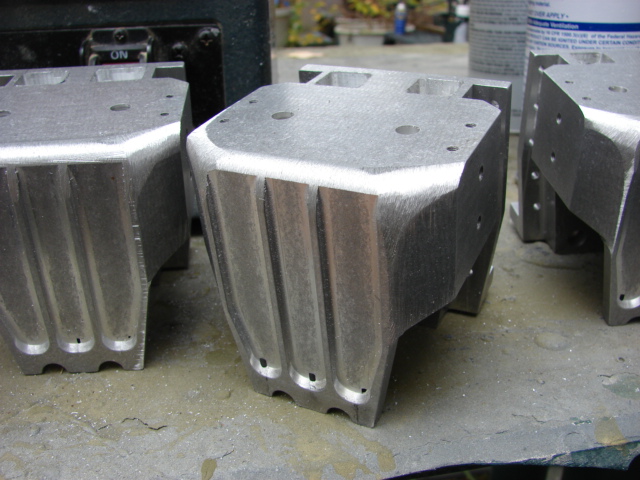
Another mod that was made to the bogie housing was adding the rear wrench wells. On the real sherman the rear portion of the bogie housing had recess casted into the housing to allow the mounting bolts and the wrench more clearance when installing the unit. To add this feature I milled away the needed material.
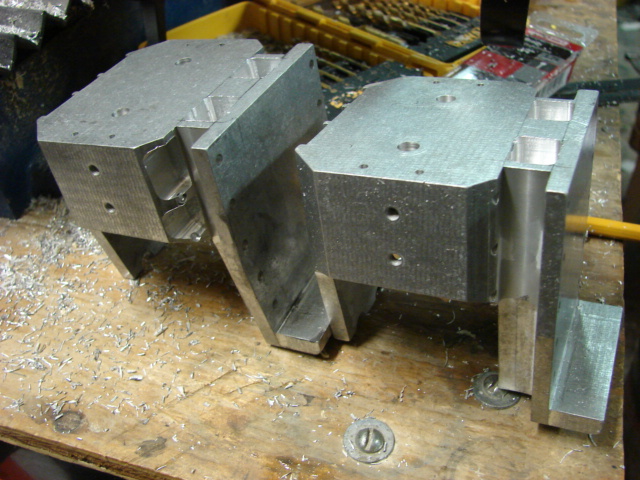
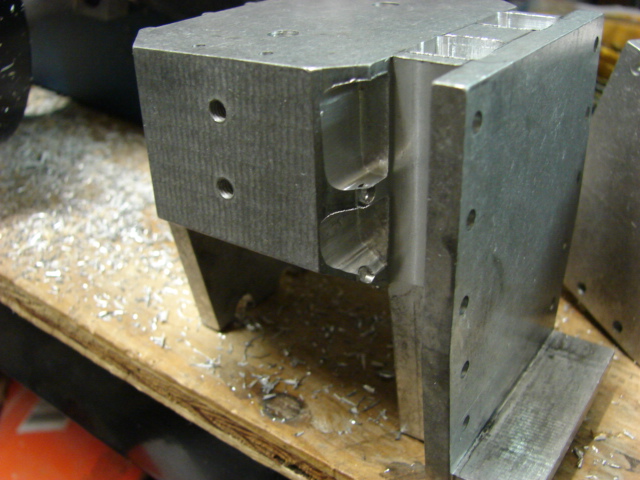


Because of the CNC machining process the bogie bodies have a squared off appearance to them. I decided to round off the bogie bodies on the belt sander to give them a more rounded edge look to them.
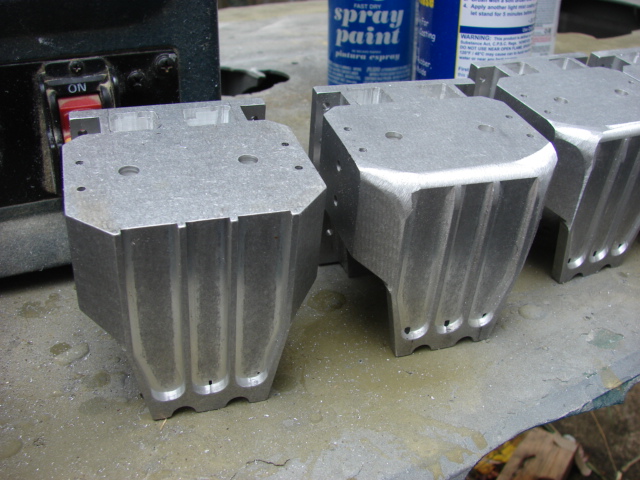
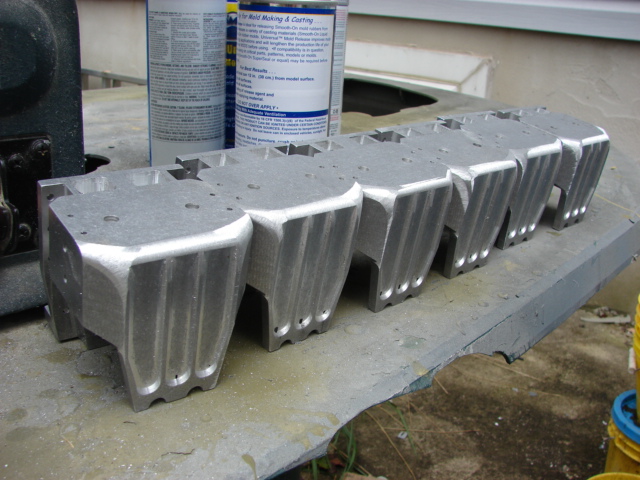


Another common feature that the bogie housing has on the real tank is that the roller mounting area features a milled center, and on top two elevated casted in mounts for the skid rail / roller mount to mount to. Rather than milling these details into the housing I instead added sheet streyne strips to the alluminum housing, as well as adding the other integrally molded in detail (rigidity nubs) to the body.
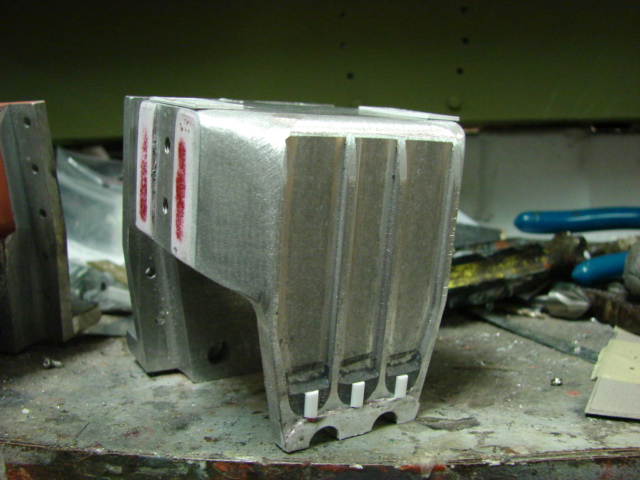
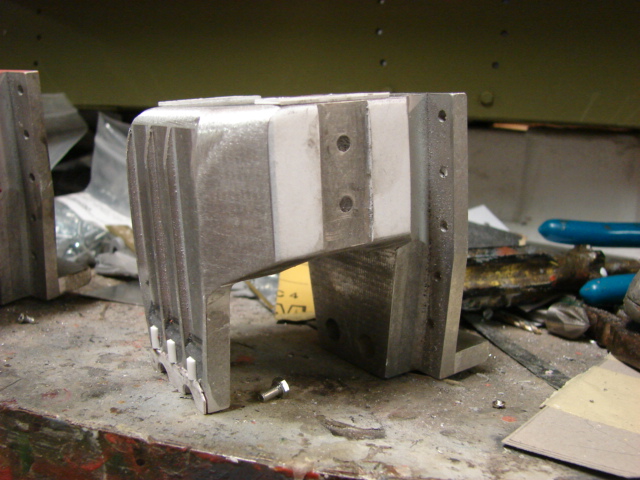


After the plastic parts were all added they were all blended into the bogie face via the body work. In addition to blending in the surfaces the bodywork also gave the bogies the cast texture appearance. In addition to the bodywork cast and foundry numbers were added to the parts.
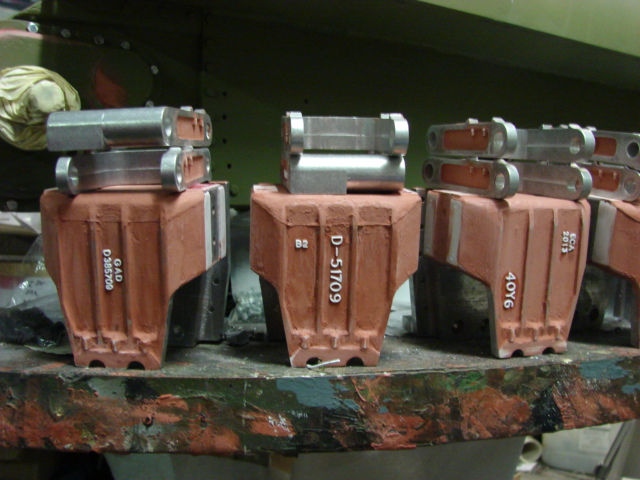


The casting texture and foundry marks were also added to the other suspension parts as well including the swing arms, H frame, and roller mount.
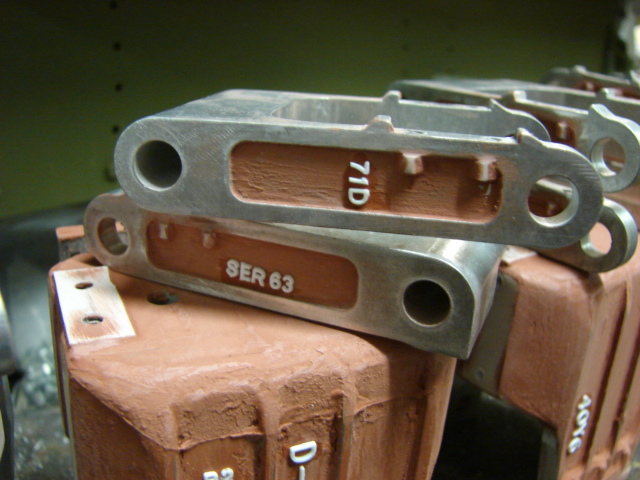


Another feature that is common on the sherman bogies is depending on the foundry some bogies have a cast seam line that runs along the top portion of the unit. I built both seamed and seamless units into my model as having different foundry marks / features was common on these vehicles.
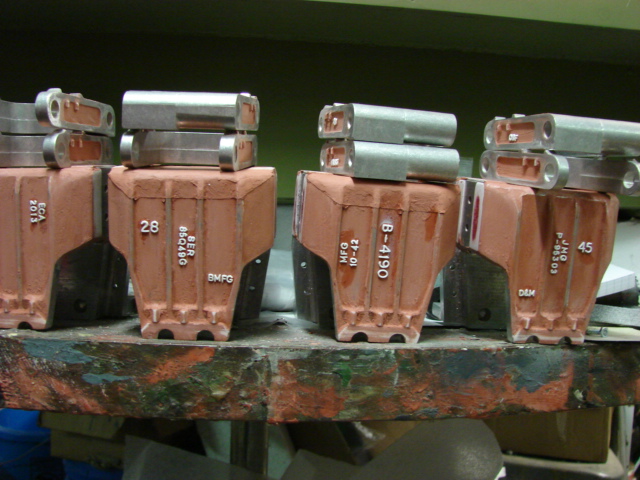
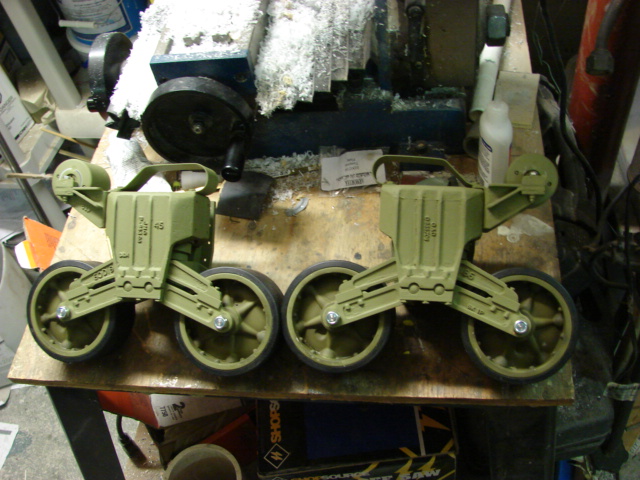


As I mentioned above the return roller mount uses the same design as the first release. That design uses two cap screws to Bolt together the roller shaft mount, and sandwiches the rigidity strip to the roller mount. On my model I replaced the cap screws with counter sunk Allen bolts to lower the profile of the fasteners which will help them blend in better with the bodywork. I only did this mod to the axles that are on the visible portion of the mount.
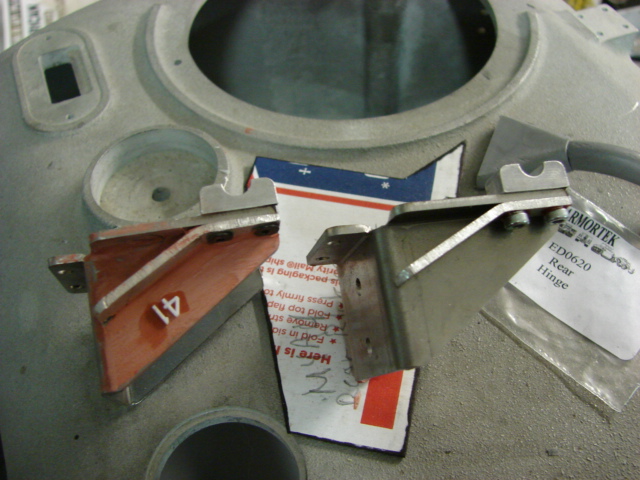


Once the bogie body mods were complete I turned my attention to the road wheels. The kit supplied wheels are all CNC and are very strong / durable.
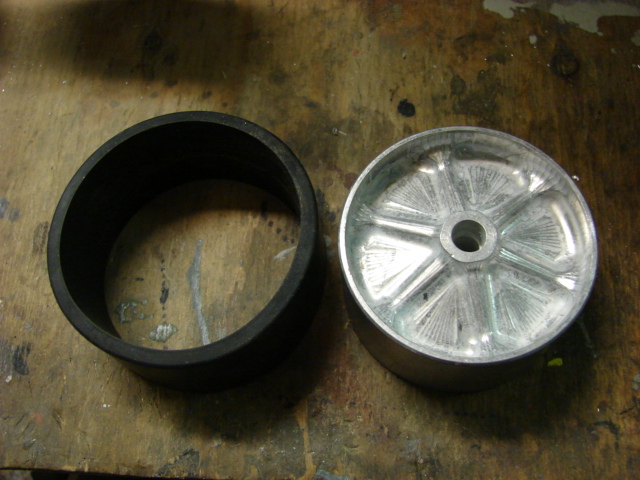
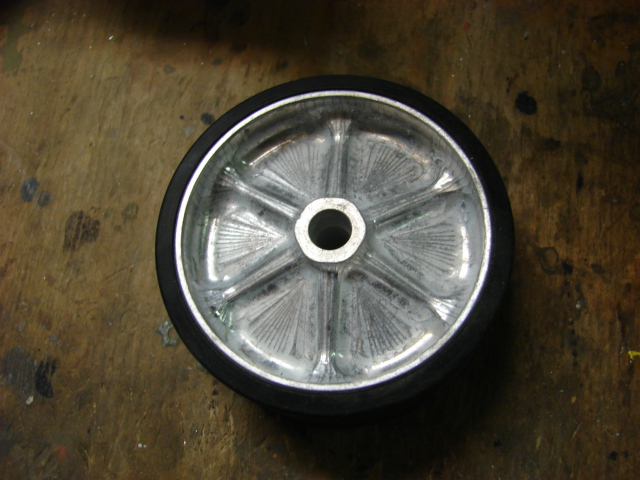


Like the DML sherman the wheels have face detailing only.
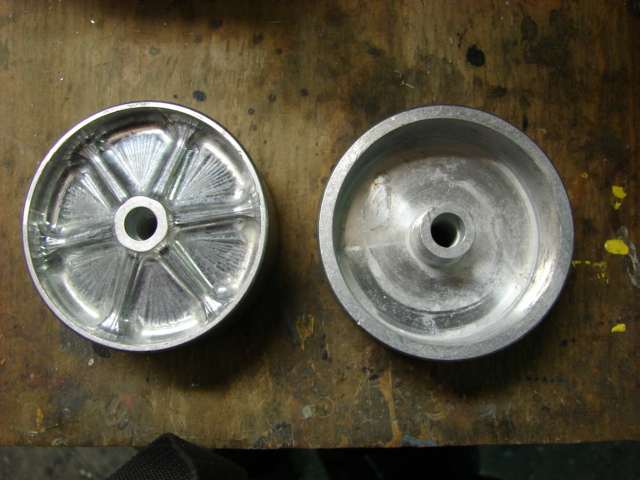


Along with developing a DML wheel insert (coming monday ;) ) )I also tooled up and used a similar design for the Armortek sherman tank.
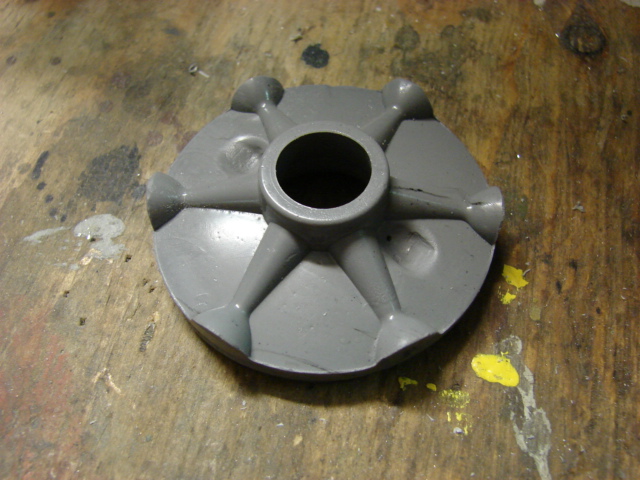


The pre sized insert simply drops into the wheel well filling up the space that was left in the kit. The wheel also has it's zerk fitting wells added.
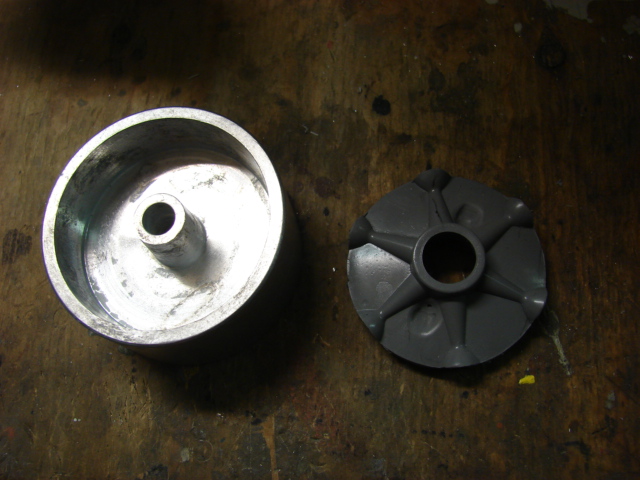


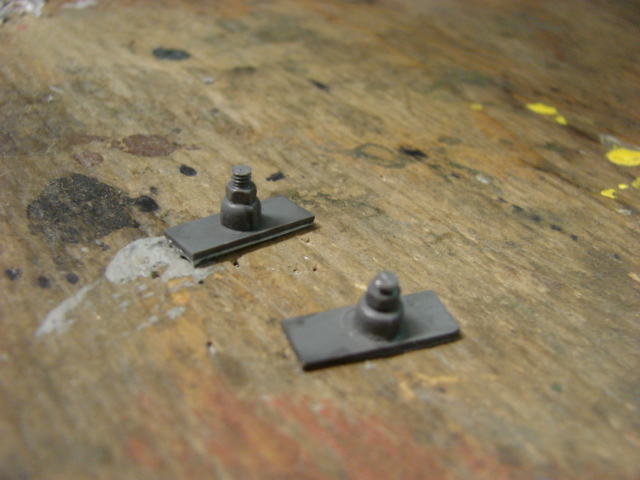
Also included in the set are covers for the return roller fasteners, The set has been added to the sherman parts catalog, http://eastcoastarmory.com/m4.htm


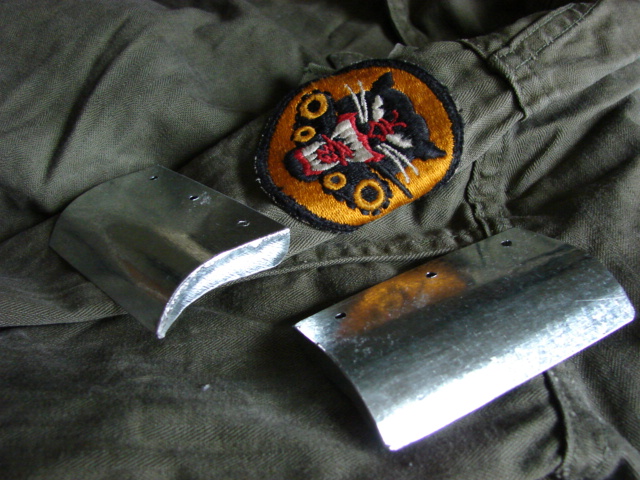
Also added to the product line was the early war style mini rear fenders. The fenders are fabricated out of sheet metal, and are all soldered together. They will also work on other early war ear shermans such as the Viper.



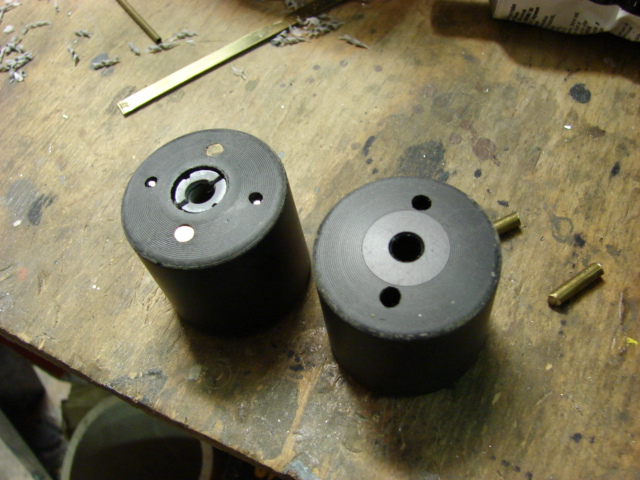
The return rollers also had some detail improvements made to them. On the rollers I added the zerk fittings, collar detail, and I plugged the two plug holes. On the collar I recycled my resin Vantex bogie detail set collar for use on the armortek. To install I had to first machine in a recess into the wheel, to allow the resin collar to fit flush and out of the way from debris impact.
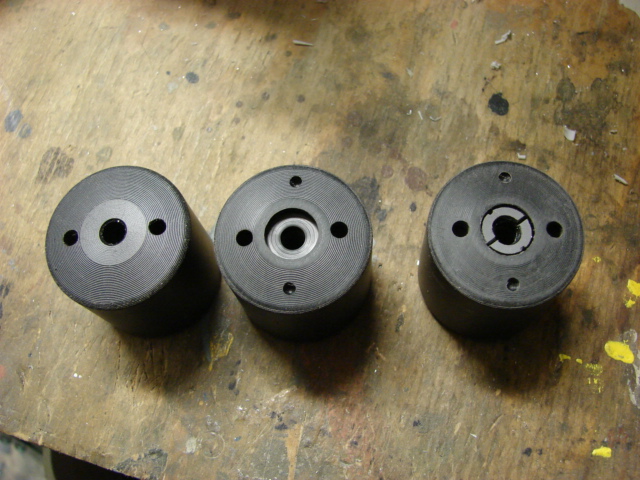


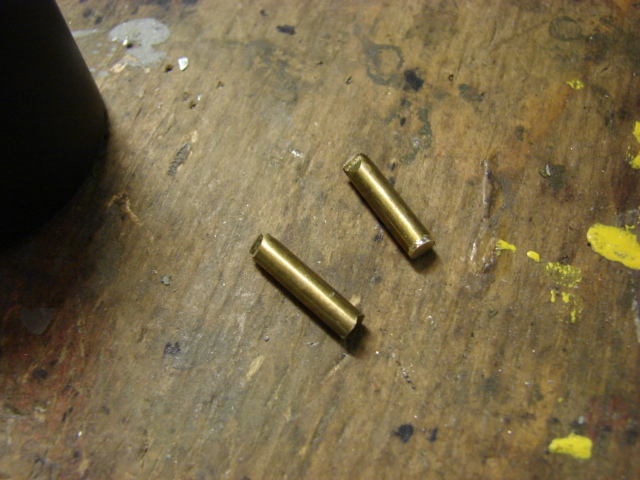
As for the plugs I snipped several lengths of 5/32nd brass rod and inserted the new pins into the pre drilled holes on the kit rollers.


Before everything gets assembled / installed the parts all get primmed, painted. In the case of the road wheels they also got their weathering as once they are installed getting access to them is more difficult.
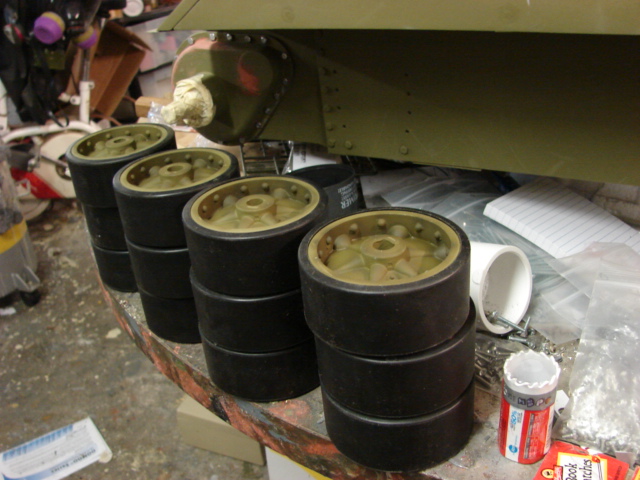
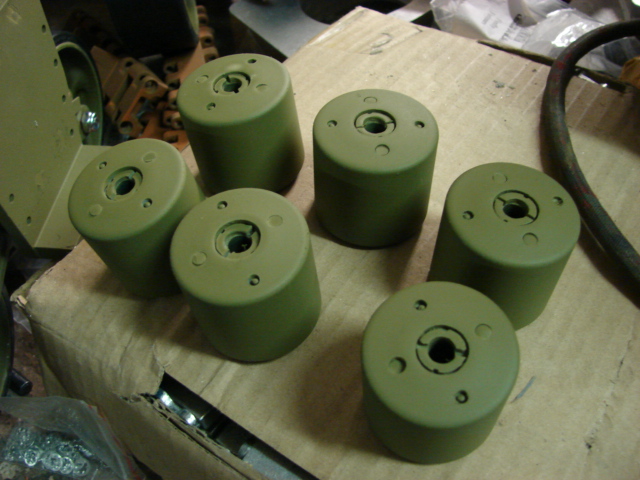


Once all of the paint work is complete the suspension is affixed to the model.


A youtube video update was created showcasing the progress and discussing other details that I left out of this post, http://youtu.be/yQA4gP87SY0


Also more pics were posted on the facebook page,

http://www.facebook.com/EastCoastArmory


with the suspension now out of the way I can focus on working one the drive sprockets and the rear idlers. More progress to come!


  • Member since
    July 2006
  • From: San Francisco Bay Area
Posted by bufflehead on Tuesday, October 29, 2013 11:27 PM

Your work always blows me away Armourguy!!  I can't even IMAGINE working on a 1/6 scale, scale thickness, full aluminum tank model!!  What do you do with these beasties once they're complete??  

Ernest

Last Armor Build - 1/35 Dragon M-26A1, 1/35 Emhar Mk.IV Female


Last Aircraft Builds - Hobby Boss 1/72 F4F Wildcat & FW-190A8


  • Member since
    April 2005
Posted by armourguy on Tuesday, October 29, 2013 3:55 PM

I made some more progress on the tank,


the tank's final drives were added, the final drives like on all the armortek tanks have a CNCed final drive casing, a CNCed Steel drive gear, bearings and a rubber seal.


The final drives were very basic and no external detailing. What was added was the cast texture details and the integral cast disc.


Because of the CNC process there is a small burr on the gear, I always like to remove the burr, other than that the final drive was assembled as the instructions.


Before the gear is installed I lubricated the final gear with grease.


After the final drives were made, I then focused on the rear idler mounts. The kit final drives are all made out of CNC aluminum are one piece, and are very strong. They have the overall correct basic shape and size. 


To upgrade the kit parts I reworked the shape by adding the missing axle clamp, rough cast texture, cast number, and milled faced for the mounting fasteners.


After the reworks the mounts were remounted.


Because I reworked the lower portion of the idler mount I had to adjust the holes for the three clamp fasteners.


On these shermans the idler was adjusted and would be tightened into position via the three locking bolts that when tightened the mount would grab onto the axle


Also as of note every sherman that I have seen the center clamping bolt is not bolted on all the way and emerges slightly from the mount.  


After the mounts were added I then focused on the model's rear wall and rear wall detailing. One portion that was not supplied with the armortek kirt was the small sand guards that are found on the rear portion of the tank.


The guards themselves are fabricated out of sheet aluminum, and are bolted to the tank's hull via counter sunk fasteners.


body work covered up the fasteners and the was used for the welds.


once the sand guards were added I turned my attention to correcting the rear wall area on the tank.

I completed the work on the engine hatch. The hatch itself is the armortek one, The kit hatch is all CNC aluminum, and brass. The hatches have integral hinges and locking strip.


The hatch's integral strip is found on both hatches, this is inaccurate, to correct the hatch I milled away the two strips.


It was replaced with one Brass strip. The brass strip was mounted to the right hand hatch, and it was affixed via counter sunk fasteners. To conceal up the fasteners I used solder. A brass rod handle was also soldered to the strip. In addition to adding the strip I sculpted on the welds completing the hatch work.


The engine hatch hole that is pre cut into the rear plate is smaller that it should be. It's not a problem, but when I added the fasteners to the hatch they nuts made contact with the wall. Instead of just grinding down the area where the impact is, I enlarged the hole to the proper size.


Even though there is no engine detail, I can display the engine hatch in the open position for diorama use. Unlike other versions of the sherman family like the A3 which has the large fold able exhaust grill, the A4 has a clean exposed rear hatch area. Later on the A4 entered a rebuild phase where a folding grill was added, but this model is not being built to depict a tank from that period.


The wall on the armortek model ends too prematurely and is squared off. Because of this the lower hull rear wall is shorter than it should be. Also missing are the bulkheads witch thoroughly isolate the area  


to add the missing portions of the wall I fabricated an extender. the extender is made out of 1/8th inch thick lexan plastic, this material is the same thickness as the Aluminum hull plates. To affix the two plates together they are mounted to each other via straps and counter sunk fasteners that are concealed with the body work.


Built into the wall extender is the proper shape for the grill work. The M4A4 had a grill work layout that was similar to the M4, but was larger.


Before I can mount the meshwork I had to fabricate the mesh frame. The frame is made out of 1/4 inch Brass strip, that's all soldered together.


The frame is bolted to the tank. via small brass hex bolts and nuts. The mesh will be affixed later in the build when I get to the installation of the exhaust manifold system.


Currently I've been working on the VVSS suspension.


The majority of all the mods have been made, and they are currently being assembled.


I will more on the suspension in my next post.


An update video was posted on youtube,


http://youtu.be/zMvZYsZKGpc


More pics were also posted on the facebook page


https://www.facebook.com/EastCoastArmory


More to come!

  • Member since
    April 2005
Posted by armourguy on Friday, September 27, 2013 11:59 AM

Thanks guys, I made some more progress on the model, and completed the under hull details / revisions.


All of the lower hull weld lines were added, as well as the sponson access caps, and the fuel tank bracket fasteners. From what I have seen it appears that only the M4A4 has the row of external fasteners for the internal fuel tank bracket.


On the front portion of the tank I replaced the kit mounting bolts for the transmission cover. the kit uses allen cap screws for this procedure, however the real tank used hex bolts. This was a simple swap that helps the look of the tank.


the lower hull transmission bolts also were revised. The kit used the same cap screws for the mounting here too. In addition to swapping out the bolts I increased the number of bolts that were missing on the kit original.


Because the tank is RC all components are bolted the hull, then for detail the fasteners are covered up with bodywork. the added under hull details that were added include, the second front plate, escape hatch, rigidity strips, drain plugs, and engine access panels.


Because this is an early period tank I went with the rounded rigidity strips. The strips themselves are made out halved PVC tubes.


For the engine access panels I fabricated them out of resin, and added the set to the catalog.
http://eastcoastarmory.com/m4.htm

Last last mod that was made to the lower hull was in revising the rear wall. The armortek kit has a straight angle for the lower hull corner plate. This design is common on the other Sherman variants including the M4A3, M4, and M4A2.

However on the M4A4 the angled back is not correct, as all of the M4A4s that I have seen have a rounded back. To do the conversion was a simple fix. I removed a section from a PVC pipe, the pipe segment was then bolted to the angle plate on the kit.

the pipe's gaps and fastener locations were then eliminated and flared into the hull via body work. After the welds were added the conversion was complete. and seamless.

On the tank's front hull I

completed the work to the transmission cover.

As I mentioned in the last post the armortek kit is missing the top portion of the bolt strip. A new dummy strip was fabricated and mounted along with the cast numbers.

The strip itself is fabricated out of styrene and the flange parts are made out of tow sections of 1/8th inch thick styrene and are glued together to simulate and match the flange strips on the cover.

Also what was added was the bow M1919 mount. Because the kit was designed to be a firefly the 1919 mount was not present. This is because the firefly didn't have the co driver position as that compartment was used to hold ammo racks for the longer rounds of 17 pounder ammo. To back date the kit to a standard A4 I need to add the 1919 mount.

To add the mount I used a hole saw to cut out a plug from the aluminum plate, once removed I fabricated the 1919 mount out of a resin filled PVC pipe that was turned down on the lathe.

To install the new pipe I used the mounting hole form the original armortek firefly 1919 mount cover plug. after bolted on body work was added to the mount to flare it in. As the build goes on I will be revising this part improving it and making it more finalized. [

img]http://eastcoastarmory.com/forumpic/m4a4/back/DSC00945.JPG[/img]

The hull was then primed and had it's base coat of early period OD added.

Before I added the base

coat I masked up the area of the final drive so that only primer is on the surface and not the base coat.

a tutorial was made on how

to make the mask for the final drive and was posted on youtube

http://youtu.be/PkKr-8i2WlU

another video update was made and added to youtube.

http://youtu.be/lbsLmLKg8So

also more pics were posted on the facebook page.

https://www.facebook.com/EastCoastArmory

I will now be turning my attention to the final drives, idler mounts, and the VVSS suspension...more to come!

  • Member since
    November 2009
  • From: SW Virginia
Posted by Gamera on Monday, August 26, 2013 9:00 AM

Wow, now that is something else!!!

"I dream in fire but work in clay." -Arthur Machen


  • Member since
    November 2010
  • From: Florida-West Central
Posted by Eagle90 on Monday, August 26, 2013 5:53 AM

That's a model!!!!!!!!!   Holy Cow dude!  You rock!  That is past impressive.  I can't wait to see the finished product!  Great job so far and I must also say, you have one rockin hobby room!

Eagle90


  • Member since
    May 2004
  • From: Mount Bretherton Model Aircraft Observatory
Posted by f8sader on Sunday, August 25, 2013 10:03 PM

The tank is ultra cool...but so is the rest of your "hobby shop"!!!!

Lon-ski

  • Member since
    October 2010
  • From: Chambersburg, Pa.
Posted by Bob H. on Sunday, August 25, 2013 9:58 PM

WOW !!! I will be following this closely as well. And yes, I'm an Airplane guy. Someday I'll try my hand at Armor... Plastic only !!

  • Member since
    March 2003
  • From: Towson MD
Posted by gregbale on Sunday, August 25, 2013 5:26 PM

You don't need me to tell you this, but that is some seriously impressive craftsmanship. I appreciate your posting, and will follow with great interest. (And I'm not even that much of an "armor guy.")

Greg

George Lewis:

"Every time you correct me on my grammar I love you a little fewer."
 
  • Member since
    April 2005
1/6th scale M4A4 sherman tank Project
Posted by armourguy on Sunday, August 25, 2013 11:41 AM

Hi guys, After building a series of german tanks I decided to go back and build some more allied. With just about everyone cranking out 1/6th DML M4A3s these days I decided to spice things up a bit by building a lesser appreciated Sherman variant, the M4A4.


For the base model I will be using the Armortek RC Firefly VC kit.


When I purchased the kit two years ago I requested that they trade out the turret / gun for the firefly with the single hatch low bustle turret and 75mm gun and M34 mantlet from their first early production M4A3 sherman release from 2005. With the simple swap out of the turret backdating the firefly to M4A4 became very simple.


Like with all armortek kits the model's hull plates are to scale thickness, and are all bolt together construction.


Another thing that is interesting about this build is that armortek produced only 25 of these firefly kits, of those this will be the only one to be built as an American M4A4. Also I believe that this is the first 75mm M4A4 represented in 1/6th scale.


When sorting out all the panels, I noticed that the models hull components are all made out of aluminum plate. On their first sherman release the top deck, sponsons, and lower hull plate were made out of steel, this change in material will make the model lighter.


On this build the whole tank pretty much builds on the front transmission cover, so this part of the model must be started first. For the transmission cover the model uses the early production 3 piece flange cover. One unique feature of the kit is that the transmission cover is in three sections and must be bolted together like the real unit.


The kit transmission cover is all fabricated out of solid CNCed aluminium, and CNCed aluminum flange plates...which get bolted to the covers via counter sunk fasteners. 


Even though the the bolts are countersunk, the heads still protrude slightly over the cover, this can cause fit issues because the cover flanges need to be flush. To remove these protruding heads I simply ground off the extra material with a bench top grinder.


The real tank utilized cast parts for the cover, while the kit's supplied parts are CNCed machined. To replicate the cast texture I added the texture with the bodywork.


After the texture was added I needed to remove the texture around the areas of the mount that are for mounting the final drives, and for fitting to the hull. To get the perfect amount of material removed I placed the final drive over the housing, and with a pencil I traced where the final drive sits.


Once the drive is removed I now have an outline of where the drive sits on the mount.


With some sandpaper I can now remove the material that is in the way of the mount, while keeping the texture on the places where it still can be seen.


In addition to adding the cast texture I also added the trans fluid drainage bolts, tow eyes, and the Side mounting blister that was missing on the kit housing. For the two eyes, I used the set that I have on the ECA catalog, and blended it into the trans casing.


The curve of the cover's top portion was also improved, as the kit mount's curve was not curved enough. The curve was built up with plastic and body work.


After the revisions were made the mount was installed to the tank's hull. Now all the remains will be the addition of the casting and foundry marks / numbers which will be added soon.


While assembling the hull, on the rear plate a few mods were needed. Due to the cnc process the sponson sections of the rear plate were not squared off.


This was a simple fix with a file.


Another mod that was made to the rear was for the mounting fastener. The kit is designed so that an exposed hex bolt is used to hold the plates together.


The real tank had no exposed fasteners on the rear hull I replaced the exposed bolt with a counter sunk one. To add the countsink bolt I drilled a countersink well into the plate making for a flush appearance.


With the hull now together you can get to see just how much longer the long hulled M4A4 is compared to an A3


Two project update videos were created and were posted on youtube.


http://youtu.be/PpBHXEbMyvo


http://youtu.be/O5xfdMOszYM


Also more pics were posted on the facebook page, http://www.facebook.com/EastCoastArmory


I will now be turning my attention to the model's suspension...more to come!!

JOIN OUR COMMUNITY!

Our community is FREE to join. To participate you must either login or register for an account.

SEARCH FORUMS
FREE NEWSLETTER
By signing up you may also receive reader surveys and occasional special offers. We do not sell, rent or trade our email lists. View our Privacy Policy.