SEARCH FINESCALE.COM

Enter keywords or a search phrase below:

MENG A7V "Death to the Defiler!" FINISHED PICS!

16243 views
141 replies
1 rating 2 rating 3 rating 4 rating 5 rating
  • Member since
    January 2007
Posted by the doog on Tuesday, July 28, 2015 4:31 PM

Hi guys,


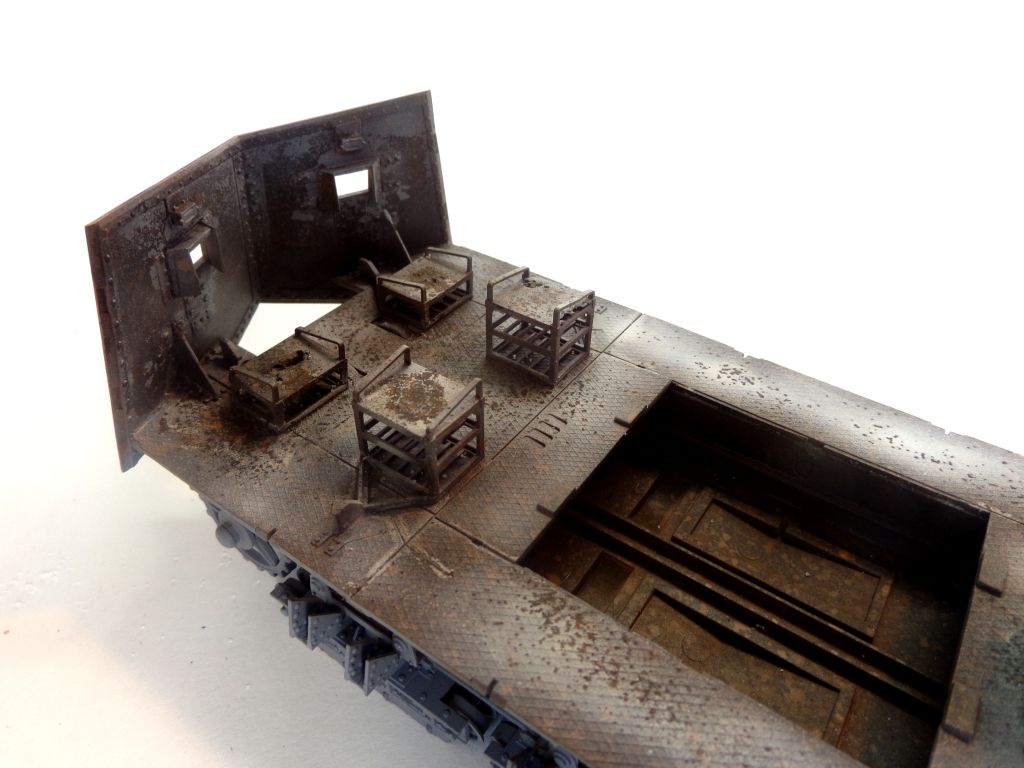
Been busily working away on this,and it's been a real task to plan the construction vs painting necessities. I have decided that I need to paint the interior first now at this point and then worry about finishing up the exterior. I'm going to go for an unrestored, rusted-out interior and a fresher exterior paint scheme, like you would expect of a monument in a park somewhere.

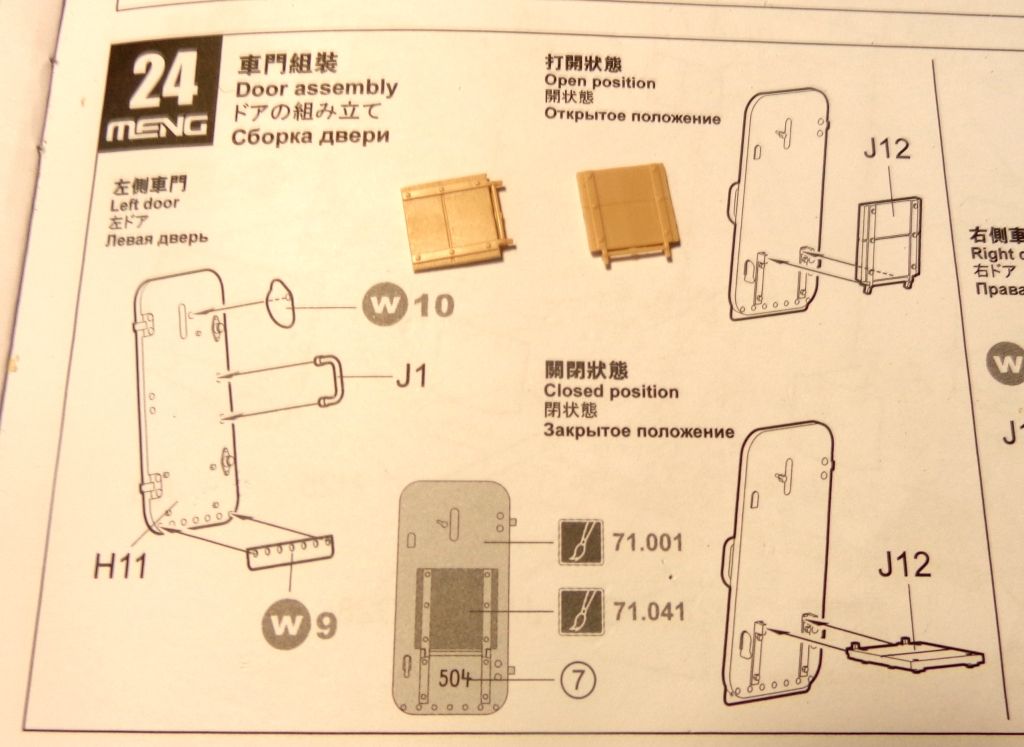
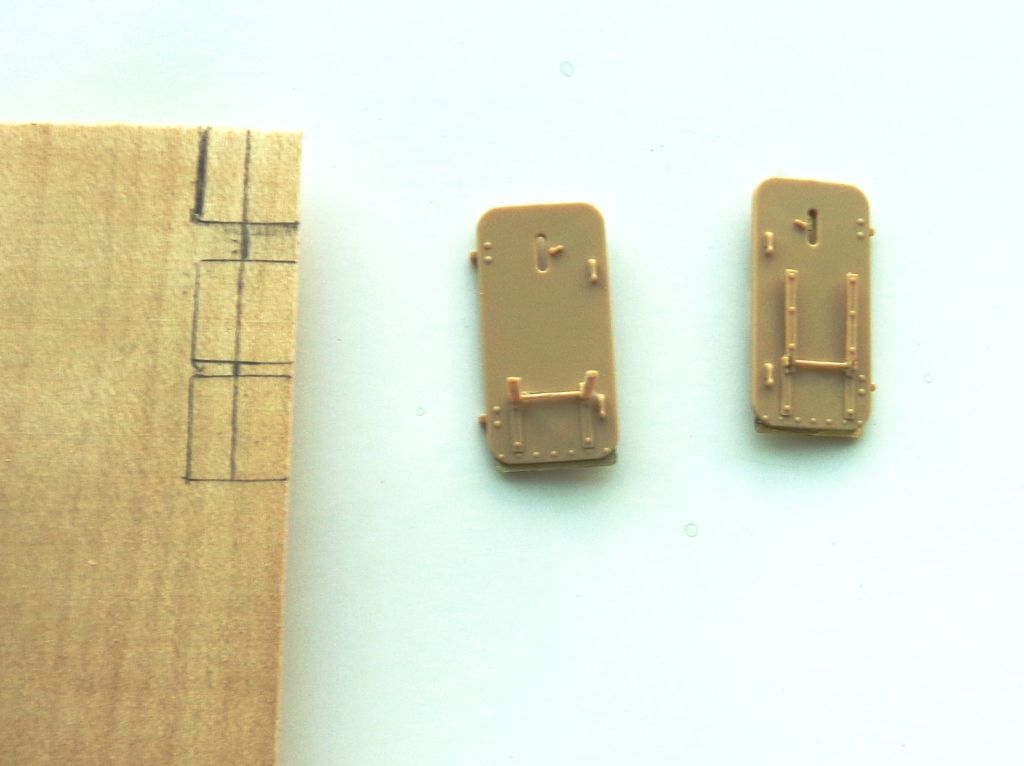
Finishing up the detailing, these door-seats look like wood to me, so I'm going to replace them wth real wood from a few detail sheets that I got from a friend. I removed the plastic "wood" with a Dremel and sandpaper. Ugh, that was tedious duty!
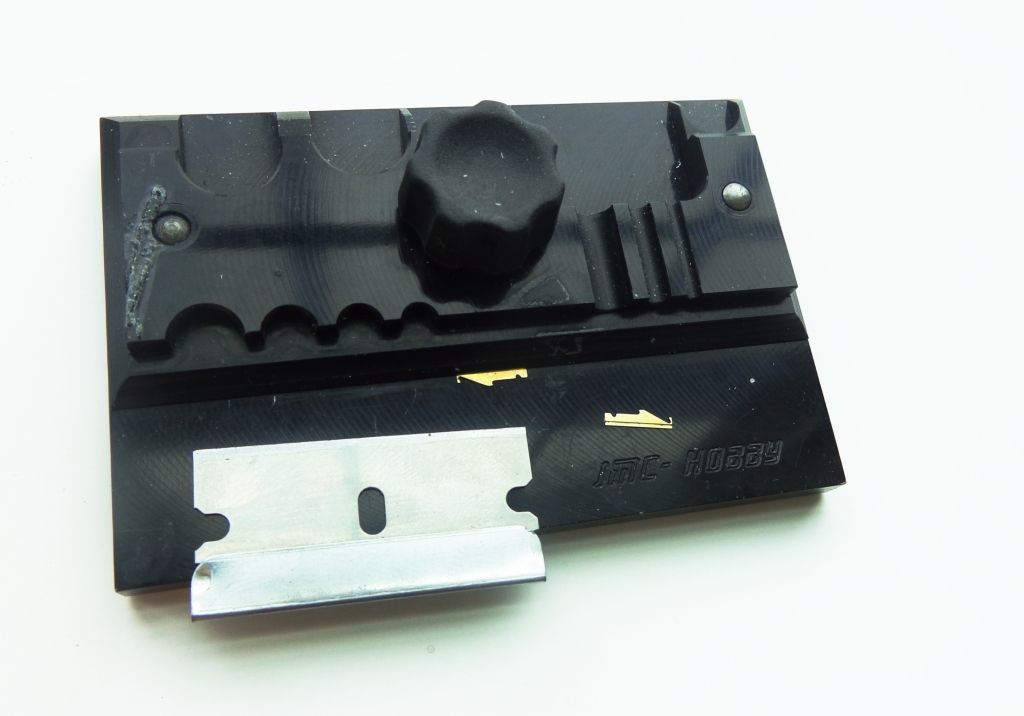
These little PE pieces that support the driver's portals can be tricky to bend, but if you use a small bending tool with a razor blade, it's not hard at all. Did I mention that I hate PE? Big Smile

I'm starting off with a rusty base. First, a spray of dark brown over the gray primer, shot wit an airbrush.
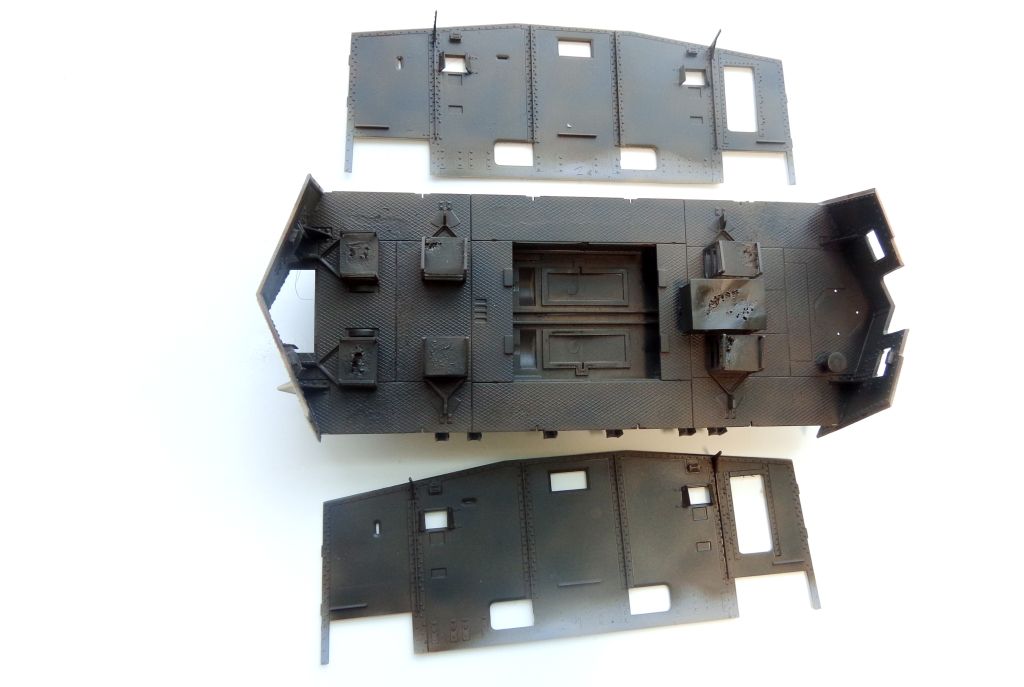
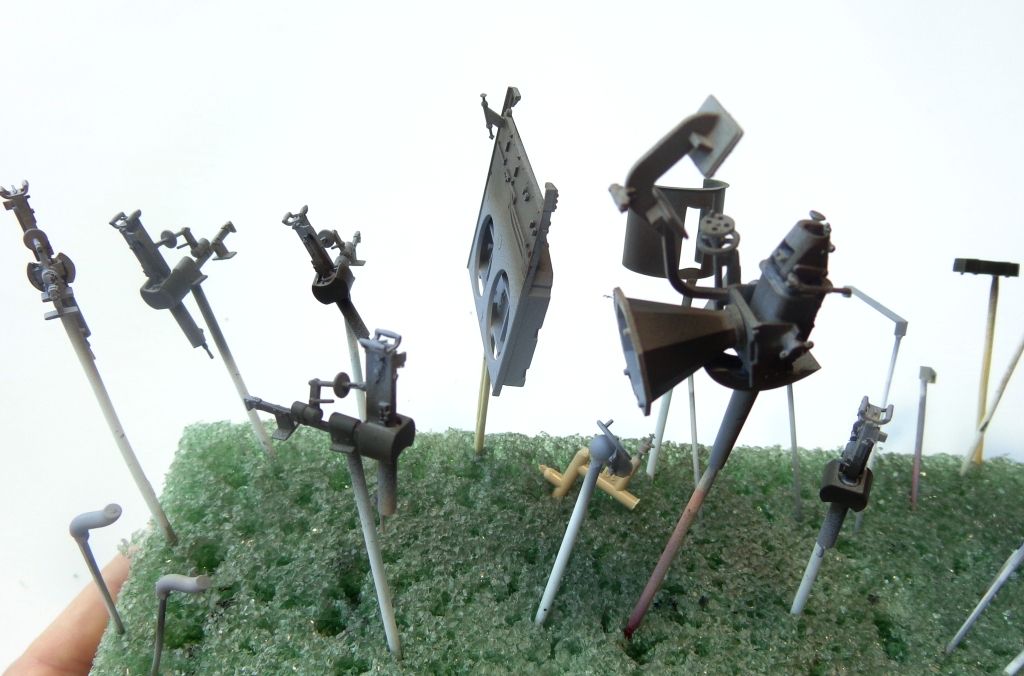
Parts forest..
I used Adam Wlder's Nitro line "Rust Effects" to spatter some rust against the brown. This is so that when I salt and hair spray the parts, what will show through is not just bland brown rust.
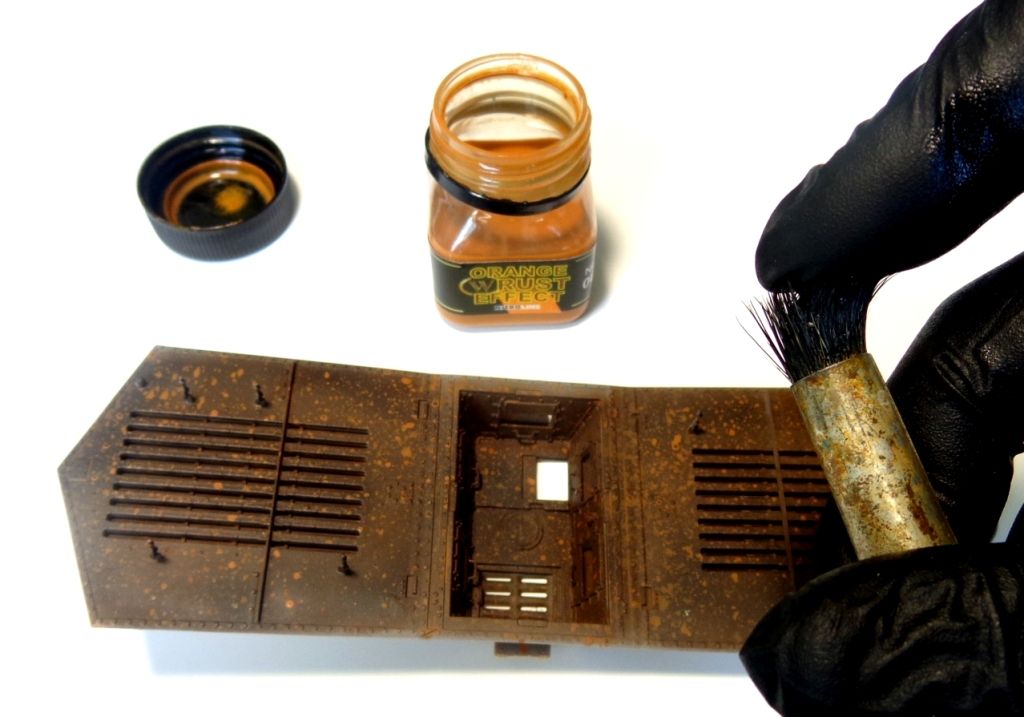
The results
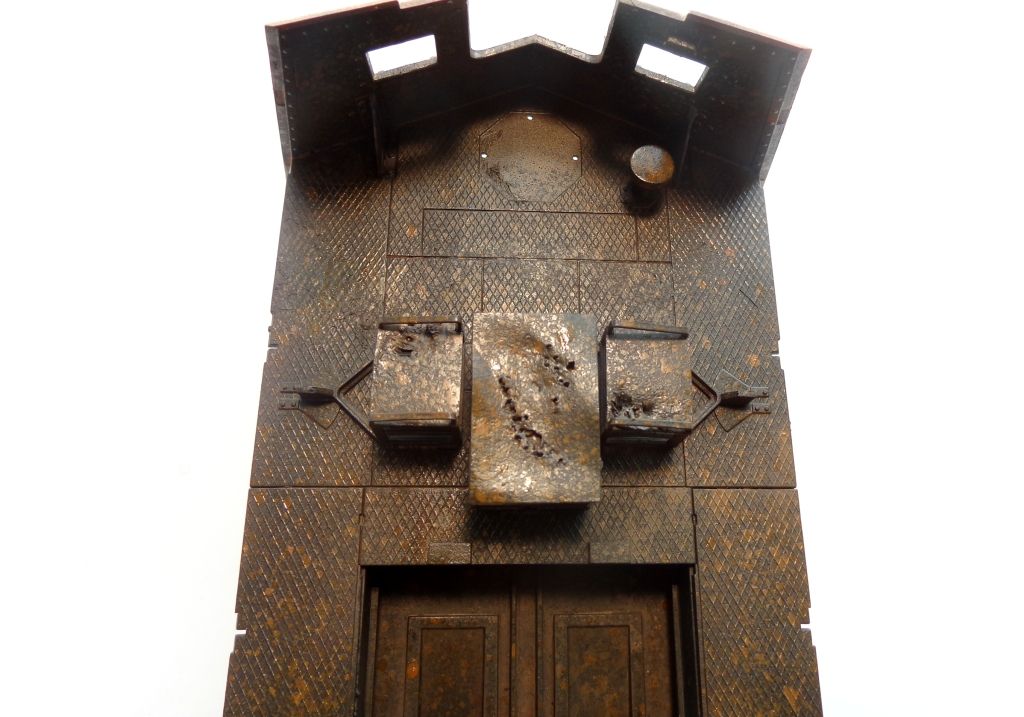
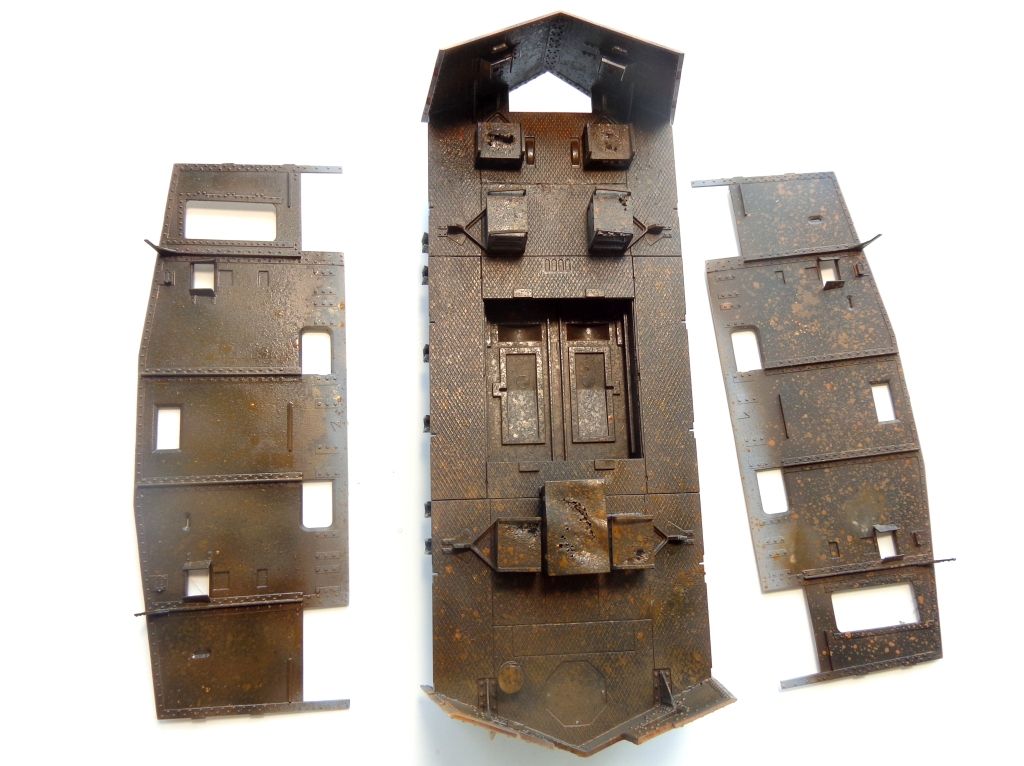
And now, I have used a coat of hair spray and attached regular iodized slat by sprinkling it on the wet hair spray.
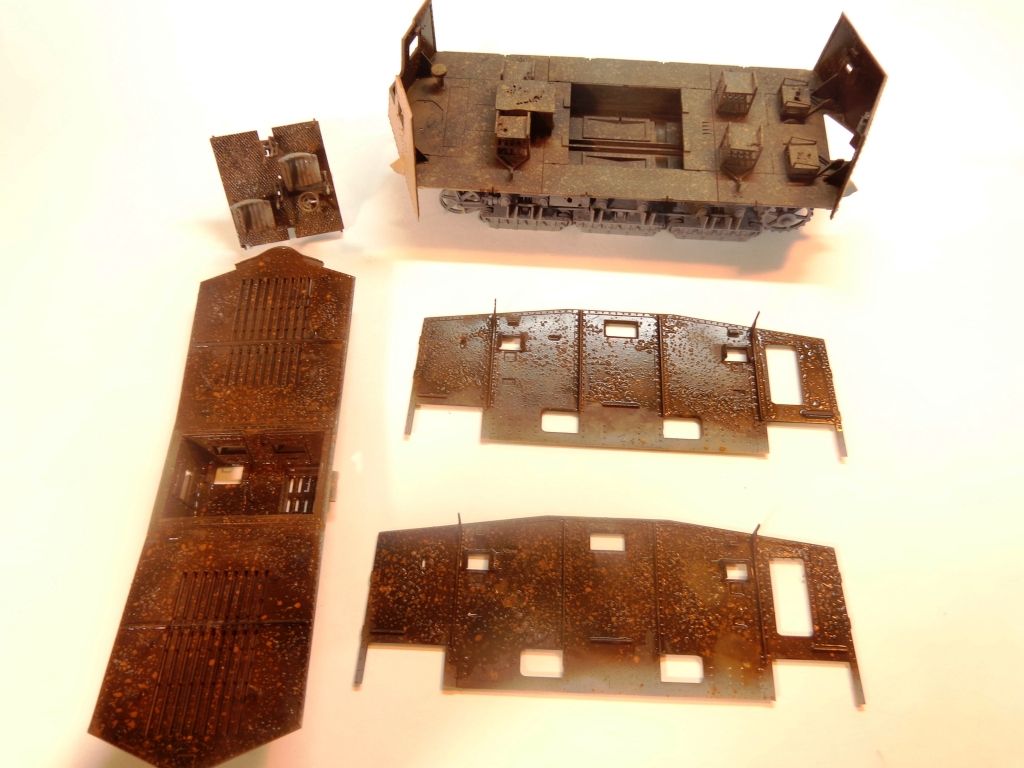
Let it dry before painting...
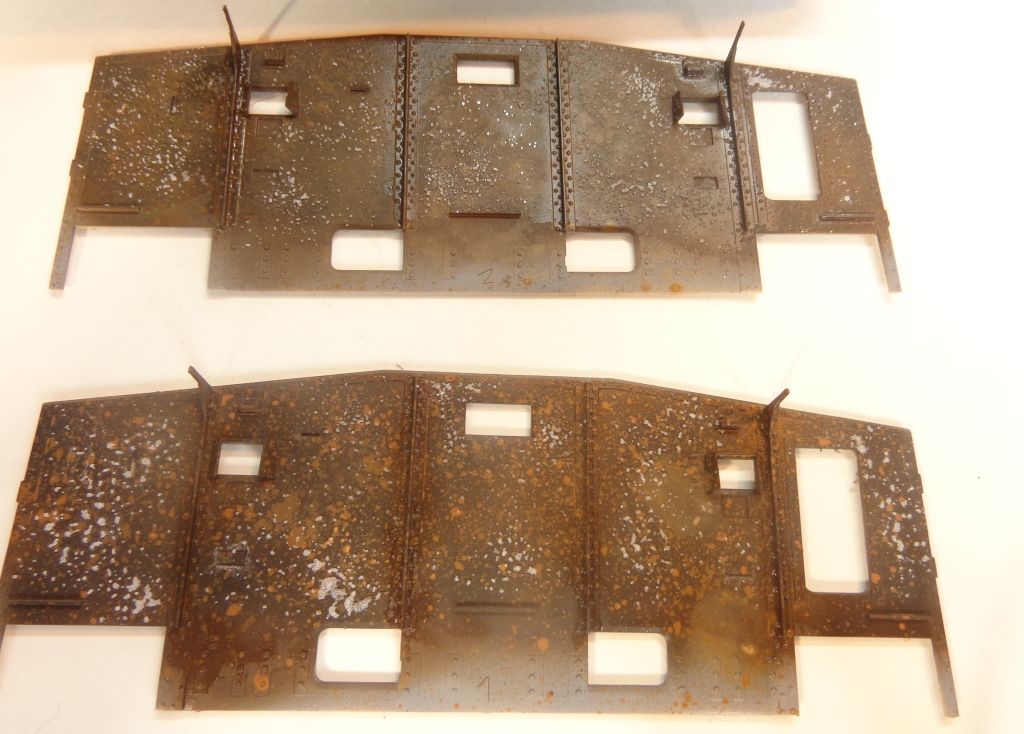
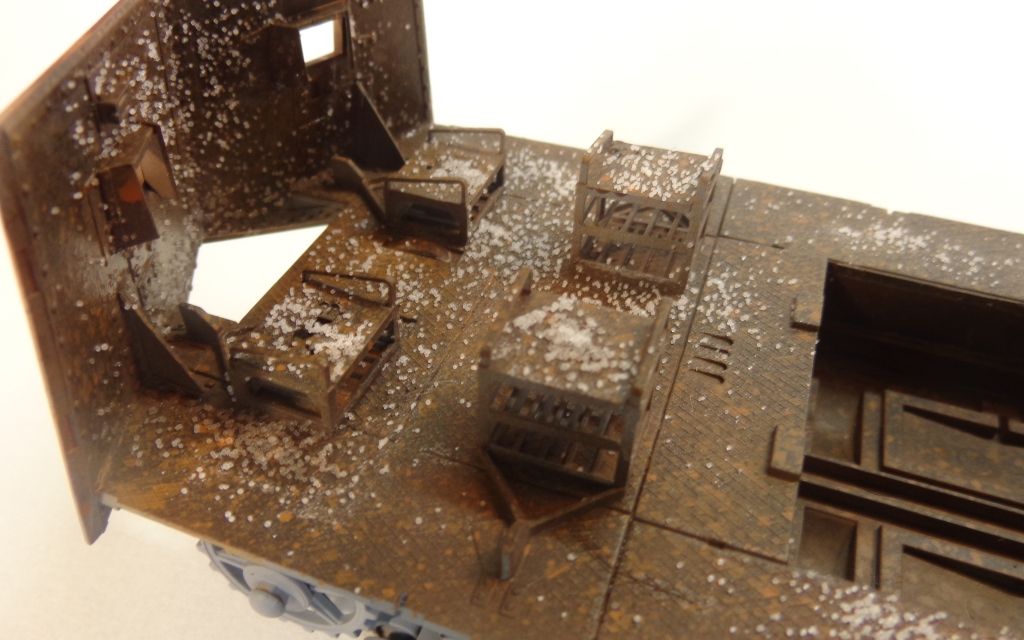
Next, I sprayed a light and varied coat of Model MAster flat White.
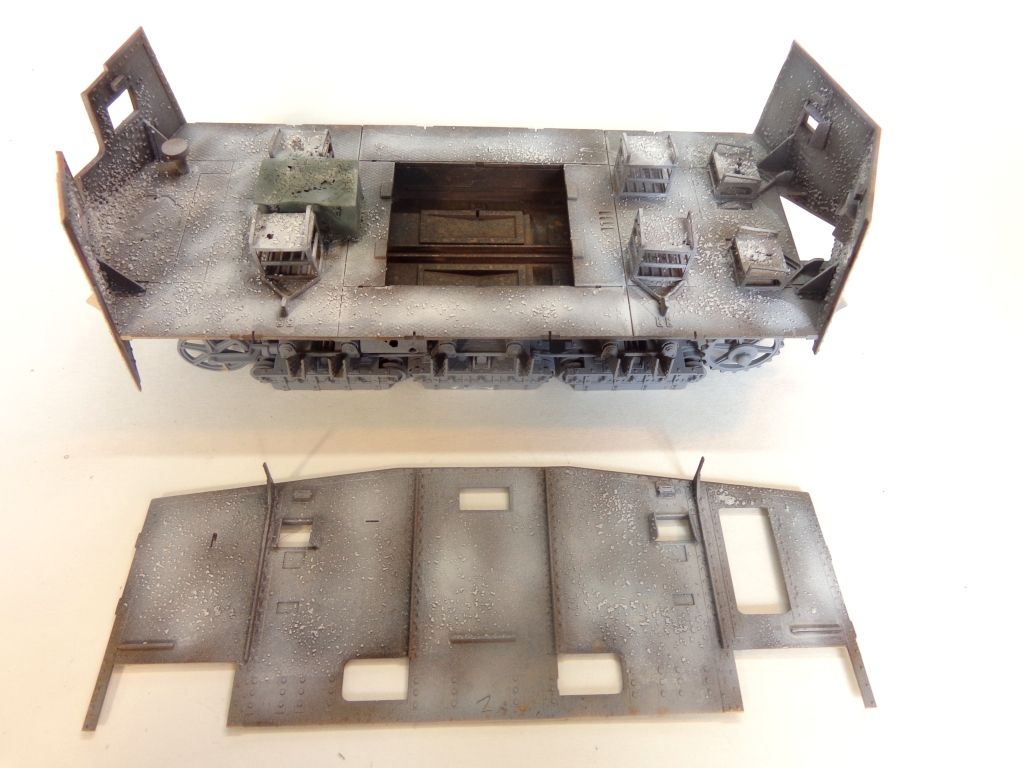
Some of the parts required different colors; I mixed up a grayish-green mix for some of these parts. There is no definite consensus on the actual colors used in the interiors of these tanks, so there's a lot of leeway to play with.
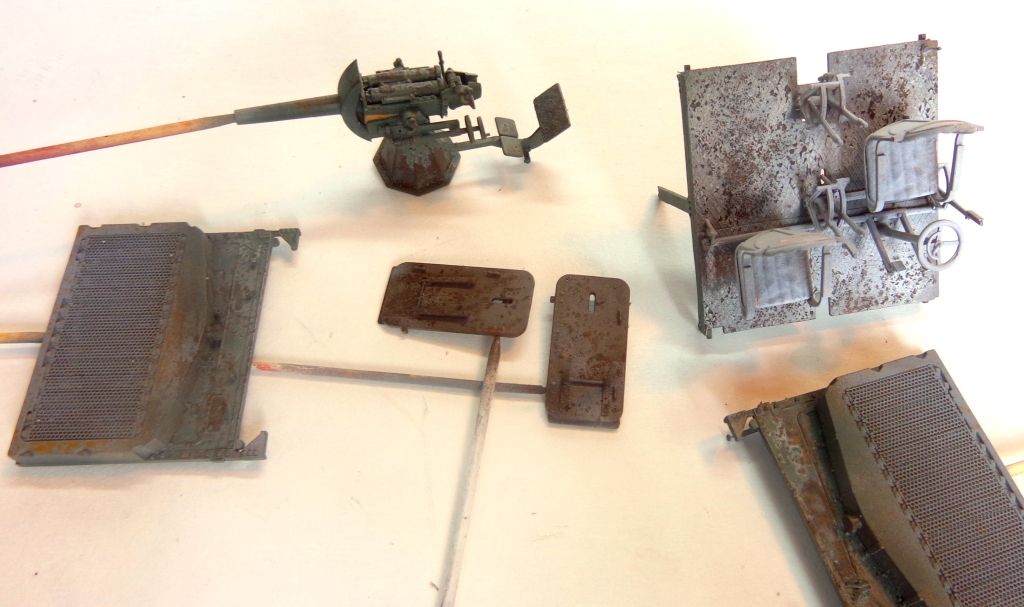
The hull interior: the lower wall has had the salt brushed off.
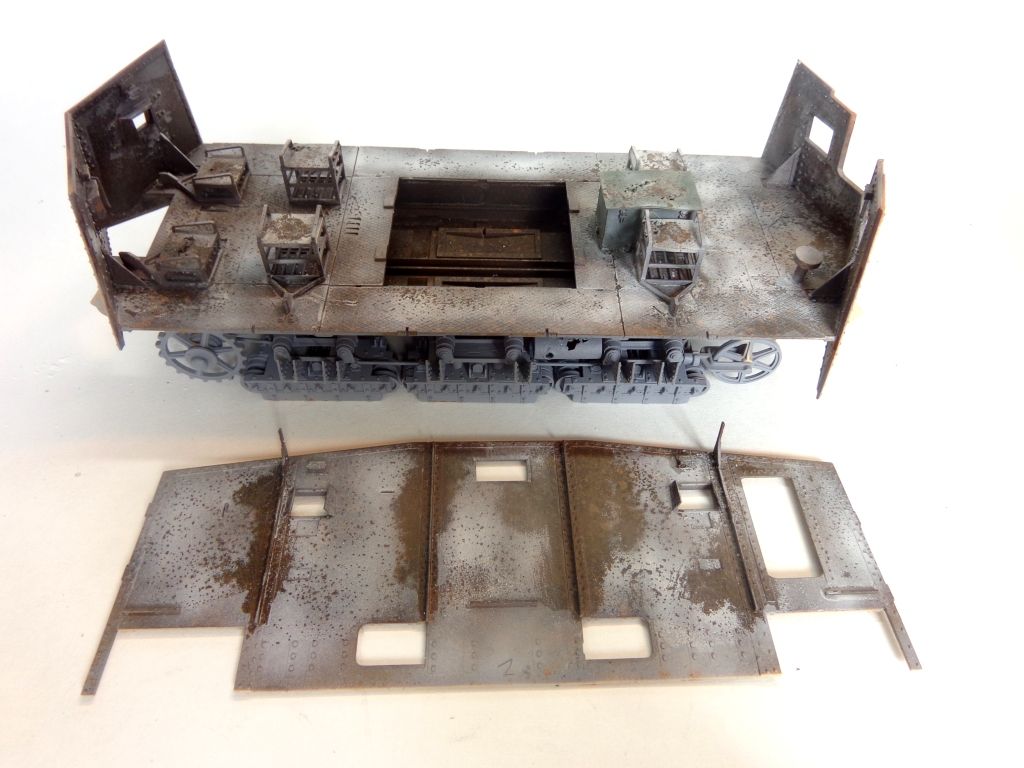
After scraping the salt off, here's what I have so far. This is without any extra detailing or weathering.
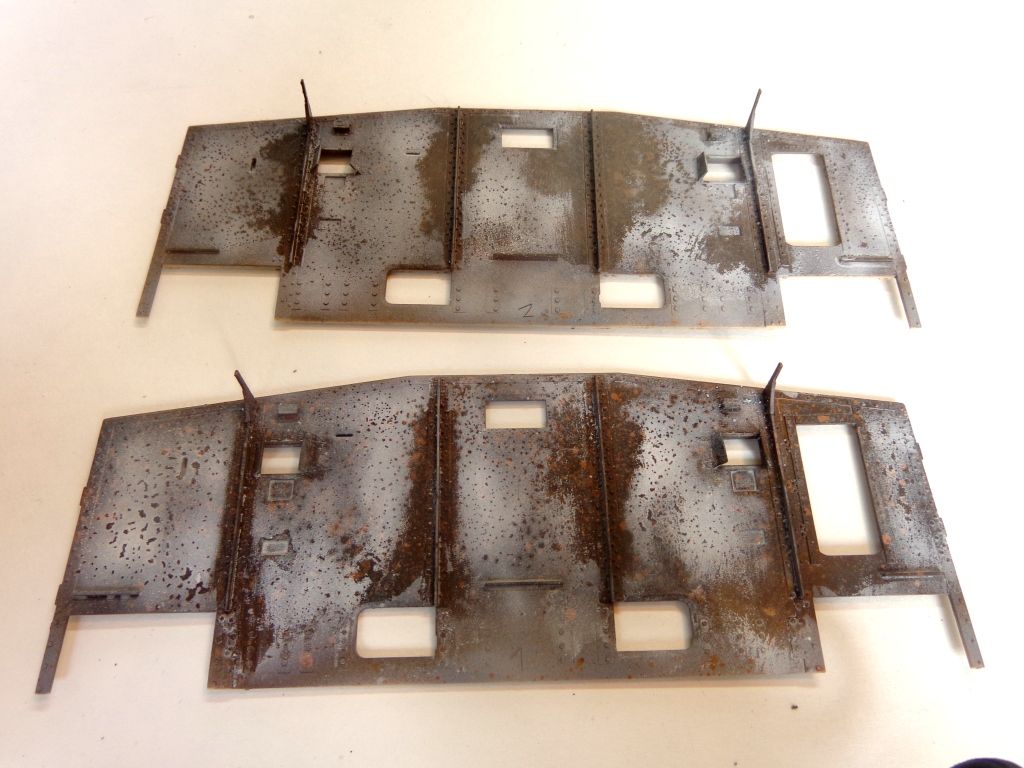
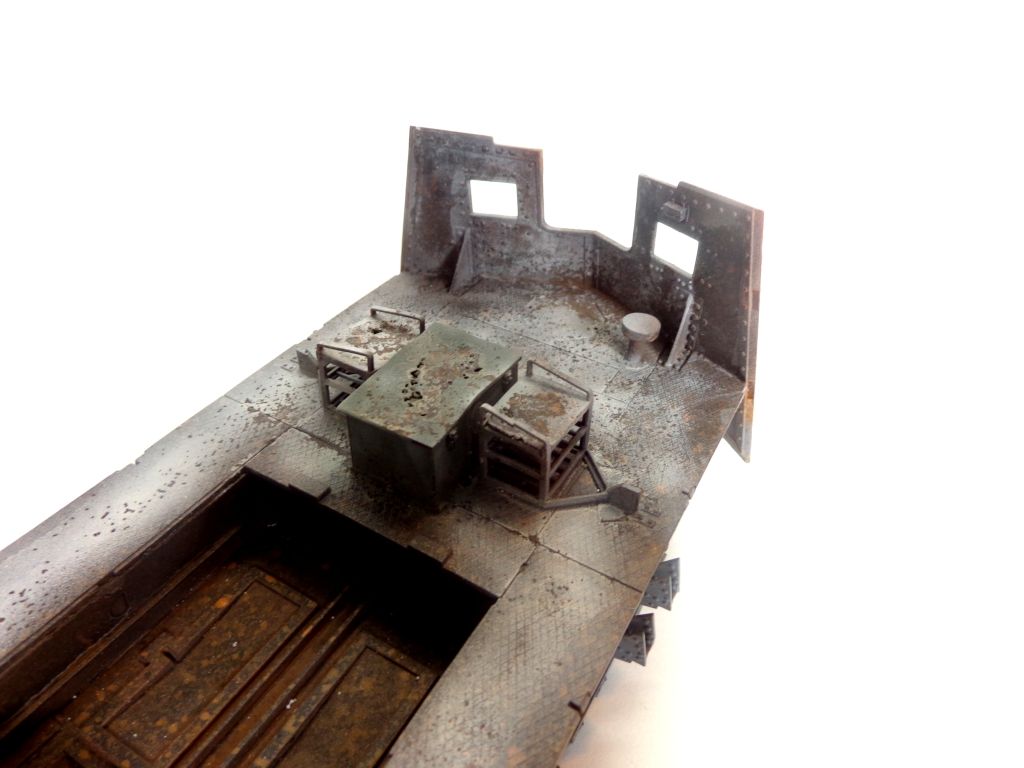
I will now go back and add some more white patches with a sponge and brush. Washes and filters, pigments and streaking to come. Then I can finally put the walls on and get finishing the exterior, which should be a lot easier than the inside!

Thanks for looking in, guys! Lemme hear from ya if you have any suggestions or criticisms! Wink

  • Member since
    July 2003
  • From: On my kitchen counter top somewhere in central North Carolina.
Posted by disastermaster on Tuesday, July 28, 2015 11:14 PM

He heh.......

http://i170.photobucket.com/albums/u244/heydoog/A7V%20Diorama/DSC05146_zpskeosru2r.jpg

"Parts and recreation".

                     Looking good.

                       http://a.deviantart.net/avatars/w/h/whitesheep150.gif?9     http://forum.magicmaman.com/nfs/smilies/8/alanisalareglisse.gif https://smileyshack.files.wordpress.com/2011/11/wolf_2.gif             

Hey, I found an old page here on finescale that has some credible info on the exterior colors.

 https://i.imgur.com/LjRRaV1.png


  • Member since
    January 2011
  • From: Springfield, MA
Posted by TigerEP1 on Wednesday, July 29, 2015 2:18 AM

wow... just wow man. Looks amazing. I only wish i could be half as talented as you :/ (i need to learn how to airbrush) Keep up the great work!

On the bench:

1/35th Tamiya Willi's MB


  • Member since
    November 2009
  • From: SW Virginia
Posted by Gamera on Wednesday, July 29, 2015 7:49 AM

Yeah, looks great Karl. I just rusted out two mufflers and wish they'd come out half as well as what you've got here.

"I dream in fire but work in clay." -Arthur Machen


  • Member since
    December 2002
  • From: Bury St Edmunds, Suffolk, England
Posted by Bish on Wednesday, July 29, 2015 1:26 PM

That does look really nice Karl, love that rusty finish.

I am a Norfolk man and i glory in being so


On the bench: Airfix 1/72nd Harrier GR.3/Fujimi 1/72nd Ju 87D-3

  • Member since
    January 2007
Posted by the doog on Wednesday, July 29, 2015 6:26 PM

disastermaster

He heh.....Hey, I found an old page here on finescale that has some credible info on the exterior colors.

Cool beans, Steve! Thanks for that cool link! It's always good to find info before yo're actually looking for it! THANKS!!

  • Member since
    January 2007
Posted by the doog on Wednesday, July 29, 2015 6:28 PM

TigerEP1, thank you kindly, ANd don't worry--you can learn to be a superb modeler here. Heck, this is where I learned a lot of my skill!

Cliff, thanks for the king words, I'm sure your mufflers turned out fine. You put out some cool wrk yourself!

Thanks too, Bish. I appreciate you following along!

  • Member since
    January 2007
Posted by the doog on Wednesday, July 29, 2015 6:43 PM

OK< got some more details to show...

I touched up the white a bit inside the walls, I didn't care for those large rust patches. I just laid down some more salt and sprayed the patches...I think it looks more like what I had envisioned....

I decided to do some sponge chipping next. I tore a little piece off of gray packing sponge and dabbed it into a rust color....this is some ancient bottle of "AccuFlex something-Brown"--the label is worn away...

For anyone looking to try this the first time, make sure you do a little test before each pass to make sure that your paint is of the proper liquidity to transfer that way you want it too. If the paint is to thick it will be tougher to get a good pattern---test it on a piece of paper, As the paint dries in your bottle top or wherever you put it, add a LITTLE bit of water to it to thin it a bit and it will be easier to use.

And apply it to the parts you want to chip...doing the seat backs..

The driver's floor and area..still need to do spot-washes...notice that I've used a Dremel tool to "age" the seats...

I have found that you can not only dab the sponge, but drag it along to make various effects. I've dragged it here down from some of the apertures to simulate rust streaks. Note the weird variety of colors and paints that I'm using. Basically whatever catches my eye. Mix it on the brush to get different tones and go to town!

The top panels have been done, the bottom, not...

Close up...

 And some of the other parts..

Radiators..

The gun...

The driver deck so far...the seats have yet to be painted....still thinking on these...I have to add some kind of stuffing..

Still LOTS to do on the interior. Lot of little detail parts to do and then I have to assemble it and make sure it all fits...

Stay tuned, and thanks to all for looking in! Comments and questions always welcomed! Big Smile

  • Member since
    July 2003
  • From: On my kitchen counter top somewhere in central North Carolina.
Posted by disastermaster on Wednesday, July 29, 2015 7:56 PM

http://i600.photobucket.com/albums/tt84/SVT-GT500/smileys/woohoo2smiley-1.gif~originalWunderbar!

                    Excellent results............

 https://i.imgur.com/LjRRaV1.png


  • Member since
    May 2013
  • From: From the Mit, but live in Mason, O high ho
Posted by hogfanfs on Wednesday, July 29, 2015 8:09 PM

Looks fantastic, Karl!

 Bruce


 On the bench:  1/48 Eduard MiG-21MF

                        1/35 Takom Merkava Mk.I


  • Member since
    February 2010
  • From: Maine
Posted by Stage_Left on Wednesday, July 29, 2015 10:28 PM

Hey Karl- looks fantastic, as usual. Your photos are very good as always, but I want to make sure I understand your thought process: did you use the hairspray and salt techniques together to give the chipped/worn paint effect more fidelity than either technique might produce individually?

Dave

  • Member since
    June 2013
  • From: Bay Area, CA
Posted by Reaper420 on Thursday, July 30, 2015 12:30 AM
Simply amazing good sir. Nuff said.

Kick the tires and light the fires!

  • Member since
    January 2013
Posted by jibber on Thursday, July 30, 2015 7:20 AM

Karl your work is second to none and very inspiring. We're so lucky to have all different types of builders here but your techniques stand apart. Its not only the techniques but the vision to see through a piece of plastic on a sprue and what your looking for. So cool..

Terry

  • Member since
    January 2007
Posted by the doog on Thursday, July 30, 2015 7:48 AM

Thanks, Steve, Reaper, and Bruce!! :)

Thanks for following along!! Yes

  • Member since
    January 2007
Posted by the doog on Thursday, July 30, 2015 7:49 AM

Thanks, too, Terry. Very kind words from you, and I appreciate the nice compliment!

  • Member since
    January 2007
Posted by the doog on Thursday, July 30, 2015 7:56 AM

Stage_Left

Hey Karl- looks fantastic, as usual. Your photos are very good as always, but I want to make sure I understand your thought process: did you use the hairspray and salt techniques together to give the chipped/worn paint effect more fidelity than either technique might produce individually?

Dave

Dave, yeah, I could explain that more..thanks for asking. Smile

What I did as to brush hairspray down the sides of the braces on the wall--I wanted to allow for big rust streaks in the creases of the braces-- and then I also attached salt to it while wet. I THEN wet down the rest of the walls with water, cut with a dab of liquid soap to help dispersion, and then salted that while wet. No plan or formula to speak of beyond that, just really kinda experimenting and rolling with it.

The hairspray came off a little more than I wanted, so I re-did the areas where it was too much. I just wet it and salted it.

If I were more patient, I would have done that in separate steps, and sealed between coats, but I wanted to get something happening with the paint already. Also, I'm confident enough at his stage to know that anything that got screwed up---like the too-big patches of rust--I could fix with little effort. And besides, some of my best finishes have been preceded by minor mistakes, Smile

  • Member since
    September 2006
  • From: Dripping Springs, TX, USA
Posted by RBaer on Thursday, July 30, 2015 9:41 AM

Verrrr-ee eeeenteresting!

I still wanna know where the graffiti decals came from, I'm thinking a T-34 rotting away somewhere.....

Apprentice rivet counter.

  • Member since
    January 2007
Posted by the doog on Thursday, July 30, 2015 7:45 PM

RBaer

Verrrr-ee eeeenteresting!

I still wanna know where the graffiti decals came from, I'm thinking a T-34 rotting away somewhere.....

THose are from "Uschi".  (click it!--link)  I won a voucher for them in a Facebook contest. Cool stuff!

  • Member since
    January 2007
Posted by the doog on Thursday, July 30, 2015 7:55 PM

Today's work:

The importance of pinwashes. The panels on the bottom have them, the one on top dos not. Note the difference in definition.

I used some embossing powder on the seats to make it look like shredded fabric and moss,

Here's the seats painted up to look like rotted, smelly, old moss-covered fabric seats...

That's work for today! Hope to show more tomorrow!

Thanks for looking in!! Big Smile

  • Member since
    July 2003
  • From: On my kitchen counter top somewhere in central North Carolina.
Posted by disastermaster on Thursday, July 30, 2015 8:28 PM

https://encrypted-tbn0.gstatic.com/images?q=tbn:ANd9GcQ8Z1w3zTXmh37tsuab_hoJ8_uBrFBJQDtgQC2yJQtNyPjsaIgVAA Smells like my old basement.......http://i283.photobucket.com/albums/kk302/herekitty1960/smilies/ththYouStink.gif~original

 https://i.imgur.com/LjRRaV1.png


  • Member since
    February 2010
  • From: Maine
Posted by Stage_Left on Thursday, July 30, 2015 10:14 PM

Karl- thanks for the explanation! Very helpful. I agree, sometimes just 'going for it' can lead to some welcome results.

Dave

  • Member since
    July 2006
  • From: San Francisco Bay Area
Posted by bufflehead on Thursday, July 30, 2015 10:44 PM

Man, I'm gone for a few months and look what I get to come back to!  Karl building the newest A7V kit!!  Wunderbar!!  I'm so envious that you have this kit, been wishing for a new kit of the A7v for years!  I was a bit taken aback when I read and saw what you're doing to this fine kit, but after seeing the initial results all I can say is AUSGEZEICHNET!!!   YesYes Looks to be another outstanding doog build!

BTW, did I miss any other builds of yours this year?  I seem to remember you working on a Panzer earlier this year (or was it last year)?

Ernest

Last Armor Build - 1/35 Dragon M-26A1, 1/35 Emhar Mk.IV Female


Last Aircraft Builds - Hobby Boss 1/72 F4F Wildcat & FW-190A8


  • Member since
    March 2003
  • From: Rain USA, Vancouver WA
Posted by tigerman on Friday, July 31, 2015 2:17 AM

Stunning work Karl. Can't wait ti see the final product.

   http://i7.photobucket.com/albums/y269/wing_nut_5o/PANZERJAGERGB.jpg

 Eric 

  • Member since
    January 2007
Posted by the doog on Friday, July 31, 2015 7:01 AM

Thanks, Steve, Dave, and Eric! I'm so happy to have you guys looking in and giving me some support!

Ernest, it's good to see you back too! Yeah, I was surprised to see this model come out, and it's a beauty to be sure. I still have the old Tauro kit; man, there's no comparison especially with the interior.

MY builds this year have been a few---here's some links to what I've been up to...

1/72 ESCI M1 Abrams

1/72 E100

1.35 Vorpanzer

Two 1/35 Leopards, 1A1 and 2A4

TAKOM Object 279

I think that's it. Hope you enjoy them! :)

  • Member since
    March 2012
  • From: Corpus Christi, Tx
Posted by mustang1989 on Friday, July 31, 2015 7:13 AM

Now THIS..........is cool!!!! Watching.........


 Forum | Modelers Social Club Forum (proboards.com) 

  • Member since
    March 2003
  • From: Western North Carolina
Posted by Tojo72 on Friday, July 31, 2015 7:25 AM

Very cool looking,are you leaving the roof loose,or will the only view of that fantastic interior be from the open hatches.

  • Member since
    November 2009
  • From: SW Virginia
Posted by Gamera on Friday, July 31, 2015 8:14 AM

Looking awesome so far! Love the seats.

"I dream in fire but work in clay." -Arthur Machen


  • Member since
    March 2013
  • From: Puebla, Mexico
Posted by garzonh on Friday, July 31, 2015 10:44 AM

Hey Karl,

Im trying to catch up on things, since work has been a nightmare.

This looks freaking awesome.

An exceptional building model we are looking at.

Congrats my friend.

  • Member since
    February 2003
  • From: Thailand
Posted by Model Maniac on Friday, July 31, 2015 10:54 AM

Very impressive WIP photos, Karl! This gonna be a very nice WWI diorama!

Impressive Songs:

All 10 Playlists that I created on Youtube:

http://www.youtube.com/user/ModelManiacThailand/playlists

Pan Flute Music (300 songs) (Most Popular, over 100K views):

https://www.youtube.com/playlist?list=PLUNb2zPxGTZO7alagEPsEMzgBkWt4-vKV

El Condor Pasa (Top 50) (World's most famous and my most favorite song):

http://www.youtube.com/playlist?list=PLUNb2zPxGTZOLKHbju350mLle4HkMhsb8

  • Member since
    January 2007
Posted by the doog on Saturday, August 1, 2015 8:18 AM

Thank you, Mustang, Cliff, Hugo, and Phaisal! Thanks for coming along on this ride!

Hugo, don't work too hard. Life ain't worth living if you forget to actually "Live"!. Take a break! :)

JOIN OUR COMMUNITY!

Our community is FREE to join. To participate you must either login or register for an account.

SEARCH FORUMS
FREE NEWSLETTER
By signing up you may also receive reader surveys and occasional special offers. We do not sell, rent or trade our email lists. View our Privacy Policy.