SEARCH FINESCALE.COM

Enter keywords or a search phrase below:

Italeri 1/35th Panzerwerfer 42 Completed page 2

5596 views
57 replies
1 rating 2 rating 3 rating 4 rating 5 rating
  • Member since
    December 2002
  • From: Bury St Edmunds, Suffolk, England
Posted by Bish on Friday, July 22, 2016 4:16 PM

A lot of photo's show few or no markings on these. The only image i have of the one i am doing is side on and there is no black cross. So the only decals i will add will be the number plate, and as i don't have a pic of it, i will make up my own number.

I am a Norfolk man and i glory in being so


On the bench: Airfix 1/72nd Harrier GR.3/Fujimi 1/72nd Ju 87D-3

  • Member since
    May 2015
Posted by Griffin25 on Friday, July 22, 2016 4:04 PM

 Are you going to use the stock decals on the hull or do you more AM up your sleave?


Griffin

  • Member since
    December 2002
  • From: Bury St Edmunds, Suffolk, England
Posted by Bish on Thursday, July 21, 2016 4:11 PM

Thnaks Bob. I was glad i found those decals. I wasn't sure what i was going to do with the rockets and only found them last week. They only took a few days to get here from Germany. And now i have some nice markings for other rocket vehicles as well.

I am a Norfolk man and i glory in being so


On the bench: Airfix 1/72nd Harrier GR.3/Fujimi 1/72nd Ju 87D-3

  • Member since
    February 2014
  • From: Michigan
Posted by silentbob33 on Thursday, July 21, 2016 4:08 PM
Great progress Bish! I really like how used and dirty it looks inside. And those decals really add a lot to the rockets.

On my bench: Academy 1/35 UH-60L Black Hawk

  • Member since
    December 2002
  • From: Bury St Edmunds, Suffolk, England
Posted by Bish on Thursday, July 21, 2016 3:51 PM

Right, time for a more hefty update. And time to hit the spray booth. Starting with the chassis and running gear, it got a primer coat and the DY.

And then an overall wash of AK wash for DAK vehicles.

And then i was able to get the bogies together.

Then it was the turn of the inside of the hull. For the floor i mixed up a German red primer with Tamiya and the rest got a coat of Xtracolor interior cream.

Then the floor got an raw umber oil wash. I had to be careful i didn't damage the Enamel paint on the side, which i would used flory washes on.

Now i know what you thinking, why not use flory on the whole thing. The answer is simple.

Because i am stupid. It just never occured to me to use flory on the floor, i usually leave that wash for aircraft but just wanted to avoid a future coat.

So the rest got a wash, the floor, after removing excess wash, got a dry brush for chipping and the wood parts were painted. For the wood, i painted tamiya red brown and went over it with a sepia ink wash. This matches nicley the wood parts in the photo's and is a tip i found out by accident when i tried to paint my 251/6 leather seats a red leather. That was a bad idea that turned good. I also added the final parts includeing a few bit of crew equipment.

The final bit to add before i can close up is the rockets. These have been painted and decal added useing a set from Peddinghaus which has a nice selection of German rocket markings.

Also got the tracks together.

And painted tamiya NATO black.

And finally the base. A piece of chipboard glued to a bit of MDF to get the thickness i wanted surrounded by my usual balsa wood.

Then stained and varnished. This can now be put to one side until i am ready to add the celluclay.

And thats all for now. I am hopeing by the end of the weekend, i can start on painting the outside of the hull.

I am a Norfolk man and i glory in being so


On the bench: Airfix 1/72nd Harrier GR.3/Fujimi 1/72nd Ju 87D-3

  • Member since
    December 2002
  • From: Bury St Edmunds, Suffolk, England
Posted by Bish on Sunday, July 17, 2016 1:58 AM

Thnaks guys, should have a decent update in a day or so, managed to get a lot of painting done last couple of days.

I am a Norfolk man and i glory in being so


On the bench: Airfix 1/72nd Harrier GR.3/Fujimi 1/72nd Ju 87D-3

  • Member since
    March 2003
  • From: Western North Carolina
Posted by Tojo72 on Saturday, July 16, 2016 6:05 AM

Hi Bish,looks like some pretty extensive additions to dress it up.Looking good so far on that tiny detailed stuff.

  • Member since
    October 2015
Posted by Modelrob on Saturday, July 16, 2016 5:10 AM

Bish glad to hear the parts came in.  The tubes are looking great. The extra detail is paying off. Can't wait to see how the base comes along.


Robert

  • Member since
    December 2002
  • From: Bury St Edmunds, Suffolk, England
Posted by Bish on Friday, July 15, 2016 12:30 PM

Thanks guys.

Griffin, yes, they are Italian. They do some nice stuff, a good range of figures, buldings and AM sets. I will make a start on the base this weekend for that.

And just a word about RM. They did come through, the missing pieces arrived today, just in the kick of time. And to their credit, it was posted on the 2nd, so not there fault it took 13 days.

So well done Royal Model, another good example of customer service from Europe.

I am a Norfolk man and i glory in being so


On the bench: Airfix 1/72nd Harrier GR.3/Fujimi 1/72nd Ju 87D-3

  • Member since
    May 2015
Posted by Griffin25 on Friday, July 15, 2016 9:21 AM

 That is a heck of a PE set! Is Royal Models Italian? Can't wait to see this in a finished diorama. No pressure


Griffin

  • Member since
    July 2003
  • From: On my kitchen counter top somewhere in central North Carolina.
Posted by disastermaster on Friday, July 15, 2016 1:06 AM

                  http://oi45.tinypic.com/33xubts.jpg

      Stuff

 https://i.imgur.com/LjRRaV1.png


  • Member since
    December 2002
  • From: Bury St Edmunds, Suffolk, England
Posted by Bish on Thursday, July 14, 2016 3:35 PM

Just a short update as its been over a week now. Firtsly, i still have not recieved those mssing parts from RM. I did e-mail them at the weekend but have had no reply. So i have turned to plan B. The Eduard set has the metal parts but does not include the wooden blocks that hold the rockets in place. So i used so resin to make the blocks and have used those. So i have now been able to get the inside primed and can start paiting, so some pic sof that at the weekend. But my main focus has been the launcher which was a long slow and tedious process.

But now its all done.

The two tubes on the types right as you look here, which will be bottom left once fitted, have had the locking clamps left off. These will have rockets loade so the clamps will be added later.

I gave this a coat of primer tonighg as i want to see how much clean up was neded, and its not looking as bad as i thought.

I also got the turret built and that was primed tonight as well. The white rod replaces the kit parts. Its the elevating rod but it was the wrong shape and set in the lowered position. I can trim this to correct length once i determne the angle.

And thats it. But hopfeully now i can get some good progress. No doubt the RM parts will turn up as soon as i close up the hull, sod's law.

I am a Norfolk man and i glory in being so


On the bench: Airfix 1/72nd Harrier GR.3/Fujimi 1/72nd Ju 87D-3

  • Member since
    December 2002
  • From: Bury St Edmunds, Suffolk, England
Posted by Bish on Monday, July 4, 2016 12:31 PM

Ye, they used the same tracks in real life. The rest of the running gear is differant, just the tracks are the same. This vehicle was based on the Maultier halftrack trucks which were introdiced in 1941 and used Pz I tracks.

I am a Norfolk man and i glory in being so


On the bench: Airfix 1/72nd Harrier GR.3/Fujimi 1/72nd Ju 87D-3

  • Member since
    May 2015
Posted by Griffin25 on Monday, July 4, 2016 12:27 PM

Bish

 So the Panzer I tracks fit this kit or were they interchangeable in real life? The two vehicles used the same running gear? Thanks 


Griffin

  • Member since
    December 2002
  • From: Bury St Edmunds, Suffolk, England
Posted by Bish on Monday, July 4, 2016 12:23 PM

SprueOne

Bish, Thanks for introducing me to Royal Model. I'm going to stick around here if you don't mind


More than welcome. I have been aware of them for a few years now. And while i have a few of their sets and have used some small detail bits such as headphones, this is the first full AM set i have used. They do have a nice range, a lot of German, but some other stuff as well, worth checking out.

I am a Norfolk man and i glory in being so


On the bench: Airfix 1/72nd Harrier GR.3/Fujimi 1/72nd Ju 87D-3

  • Member since
    December 2002
  • From: Bury St Edmunds, Suffolk, England
Posted by Bish on Monday, July 4, 2016 12:21 PM

Modelrob
Bish it’s coming along great. The tracks look very nice. The rocket launcher looks a little fiddly but it will have great detail.


Robert
 

Thnaks Robert. Ye, it was a little fiddley geting the tubes into the PE frames. The next bit will be the more tricky one thoguh, lots of little PE parts.

I am a Norfolk man and i glory in being so


On the bench: Airfix 1/72nd Harrier GR.3/Fujimi 1/72nd Ju 87D-3

  • Member since
    December 2002
  • From: Bury St Edmunds, Suffolk, England
Posted by Bish on Monday, July 4, 2016 12:20 PM

Thnaks Steve, its only a little dio, but hopefuly will give the right impression.

I am a Norfolk man and i glory in being so


On the bench: Airfix 1/72nd Harrier GR.3/Fujimi 1/72nd Ju 87D-3

  • Member since
    December 2002
  • From: Bury St Edmunds, Suffolk, England
Posted by Bish on Monday, July 4, 2016 12:19 PM

silentbob33
Looking good so far Bish! That also looks like a really nice AM set with all kinds of goodies, though working with PE in that size is a little mind boggling. Can't wait to see what comes next.
 

Thnaks Bob. Being used to 72nd aircrfat PE, this is not to bad. Now i do have some 350 PE for a ship kit, they will be fun Bang Head

I am a Norfolk man and i glory in being so


On the bench: Airfix 1/72nd Harrier GR.3/Fujimi 1/72nd Ju 87D-3

  • Member since
    January 2006
  • From: California
Posted by SprueOne on Monday, July 4, 2016 9:37 AM

Bish, Thanks for introducing me to Royal Model. I'm going to stick around here if you don't mind


Anyone with a good car don't need to be justified - Hazel Motes


Iron Rails 2015 by Wayne Cassell Weekend Madness sprueone

  • Member since
    October 2015
Posted by Modelrob on Monday, July 4, 2016 5:41 AM
Bish it’s coming along great. The tracks look very nice. The rocket launcher looks a little fiddly but it will have great detail.


Robert
  • Member since
    July 2003
  • From: On my kitchen counter top somewhere in central North Carolina.
Posted by disastermaster on Sunday, July 3, 2016 9:14 PM


 I'm a watching Bish. I know the detail is gonna be

great....   even better on a Dio.                                    
                                                 http://i20.photobucket.com/albums/b232/gluetank/Animated/Disastermastermotion-3.gif

 https://i.imgur.com/LjRRaV1.png


  • Member since
    February 2014
  • From: Michigan
Posted by silentbob33 on Sunday, July 3, 2016 8:34 PM
Looking good so far Bish! That also looks like a really nice AM set with all kinds of goodies, though working with PE in that size is a little mind boggling. Can't wait to see what comes next.

On my bench: Academy 1/35 UH-60L Black Hawk

  • Member since
    December 2002
  • From: Bury St Edmunds, Suffolk, England
Posted by Bish on Sunday, July 3, 2016 2:42 PM

After finishing of the lower portion of the inside, it was time to work on the top half. I started off with the vision slits. The AM set has you block these off with plastic card and then re-open them with provided templates to correct the shape.

Once all these were open again, the outer resin pieces were added.

So there is not much left to add to the inside, i can finish that and hopefully the missing parts will be here from RM soon.

So last night i made a start on the launcher. My hope was that i could finish that and the tracks today. I have had the whole day to myself with the Mrs at work and all the kids away. So i have had about 7 hours at the bench today. But, things did not go quite to plan.

The 10 resin launch tubes are each in 2 parts.Each part of hollow at its open end, but 2/3's of each once is soid resin. So, they all had to be drilled and filed out, and of course being resin they are rather brittle and i had to get them very thin. So after a few hours and with a large pile of resin dust on the bench, they were ready to go together. I put all 10 of the lower sections and 2 of the top sections into the PE frames.

These were then fitted together and the other 8 tubes fitted.

A couple of the tubes are a little kinked so will need to be straightened up. And then there is a lot more PE detail and wiring to add.

And i did manage to get one track finished. This were not as fiddly as i was expecting given the size, certainly not as bad as their 251 tracks.

Just got the other one to do. But no rush as the tracks won't go on until at the end.

I am a Norfolk man and i glory in being so


On the bench: Airfix 1/72nd Harrier GR.3/Fujimi 1/72nd Ju 87D-3

  • Member since
    December 2002
  • From: Bury St Edmunds, Suffolk, England
Posted by Bish on Saturday, July 2, 2016 12:30 PM

Thanks for dropping in guys. I hope to have some more tomorrow.

I am a Norfolk man and i glory in being so


On the bench: Airfix 1/72nd Harrier GR.3/Fujimi 1/72nd Ju 87D-3

  • Member since
    February 2003
  • From: Bucks county, PA
Posted by Bucksco on Saturday, July 2, 2016 11:36 AM

Looking forward to seeing your progress. I have always liked the looks of this vehicle.

  • Member since
    March 2013
  • From: Puebla, Mexico
Posted by garzonh on Friday, July 1, 2016 8:40 AM

Wow!, that looks just like a lot of work Tongue Tied, however, it will be worth the time and patience devoted to it. In a Dio it will just look great.

  • Member since
    December 2002
  • From: Bury St Edmunds, Suffolk, England
Posted by Bish on Wednesday, June 29, 2016 8:07 PM

Thanks Robert, ye, its a nice set with plenty in it. Doing the rocket launcher looks like it will be fun, thats a good chunk of the AM set.

I am a Norfolk man and i glory in being so


On the bench: Airfix 1/72nd Harrier GR.3/Fujimi 1/72nd Ju 87D-3

  • Member since
    October 2015
Posted by Modelrob on Wednesday, June 29, 2016 5:53 PM
Bish the inside is coming along very nicely. It looks like a very nice detail set.  Those figures are going to look great.


Robert
  • Member since
    December 2002
  • From: Bury St Edmunds, Suffolk, England
Italeri 1/35th Panzerwerfer 42 Completed page 2
Posted by Bish on Wednesday, June 29, 2016 4:23 PM

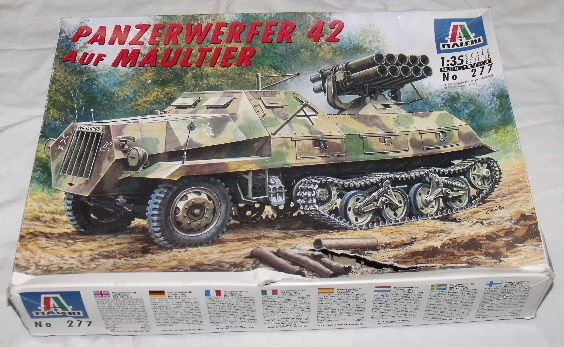
After an Italeri aircrfat, its time for some Italeri armour. I have had this kit in the stash longer than just about any other. I think a couple of AMT Star Wars kits might have been there longer. So, after sitting there 20 years, its about time this one got built.
I originally got an Eduard PE set for this. But then i found a set from Royal Model which has PE and plenty of resin.
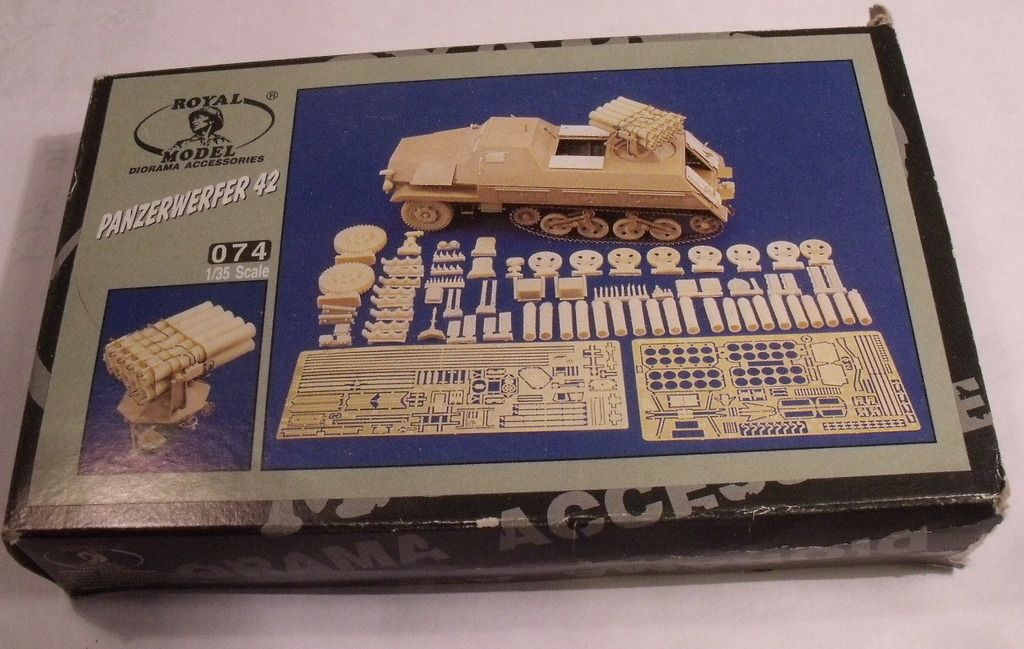
I am still keeping the Eduard set to hand, it has already come in handy.

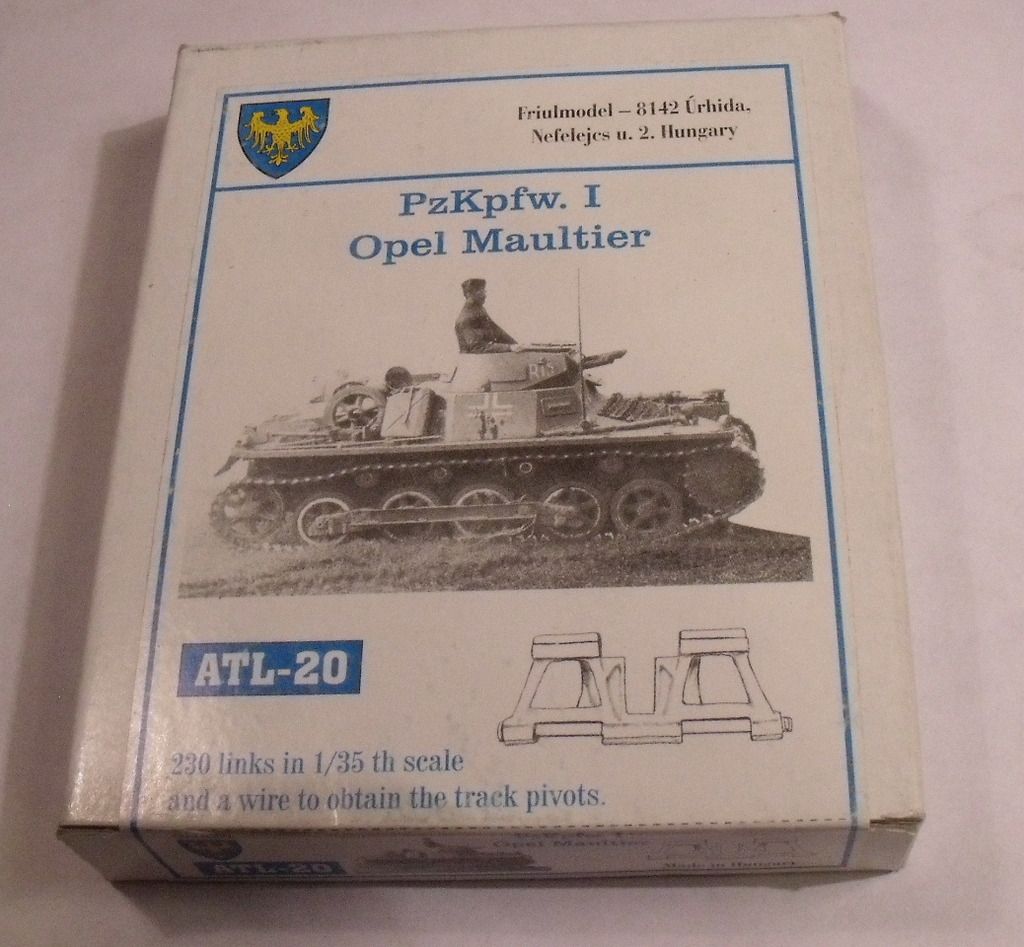
As well as the RM set, i have a set of fruil tracks.]
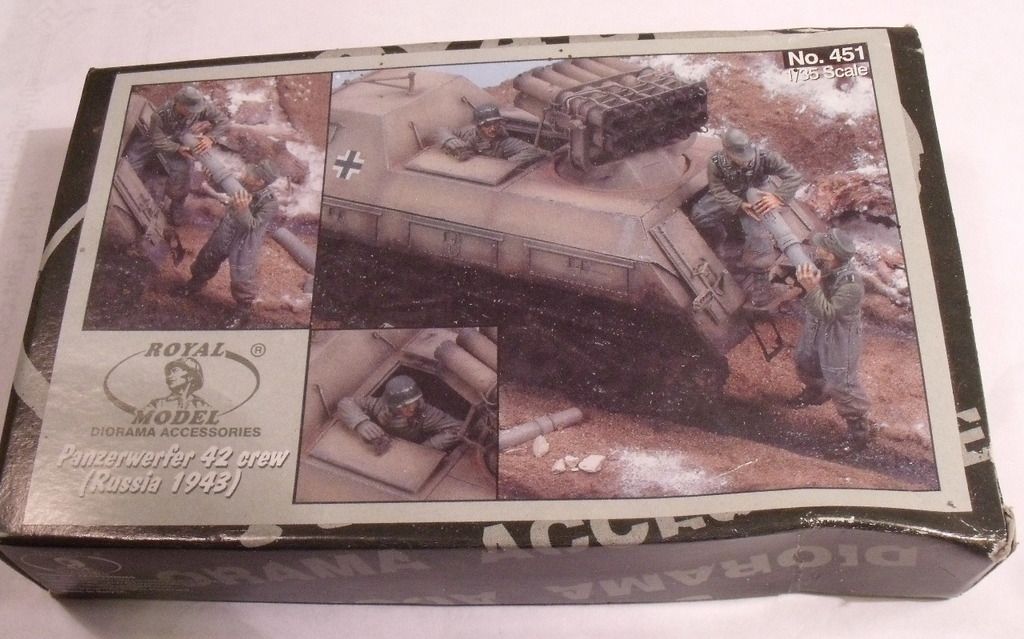
And some RM figures.
I started working on both the interiour lower half and the chassis. First, the inside. This is how it looks before i start removing bits. You can see a sink mark which runs along the sides and rear of the floor.
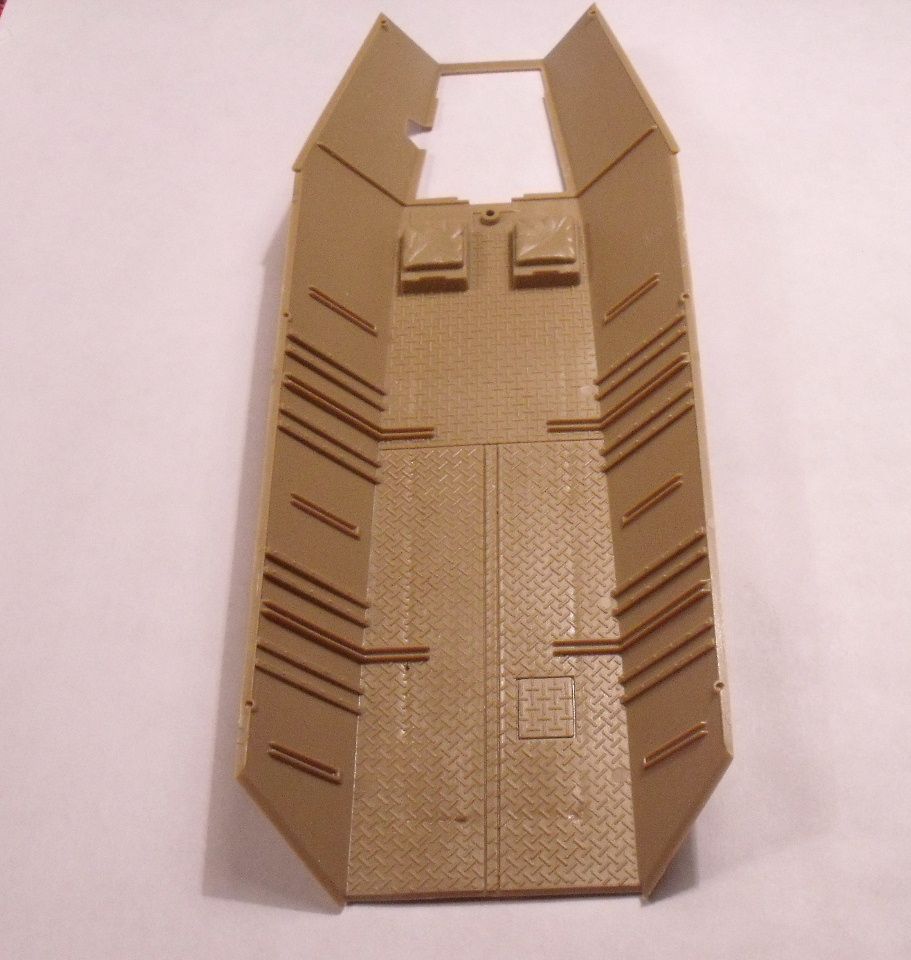
This corresponds with the raised parts to mount the hull to the chassis.
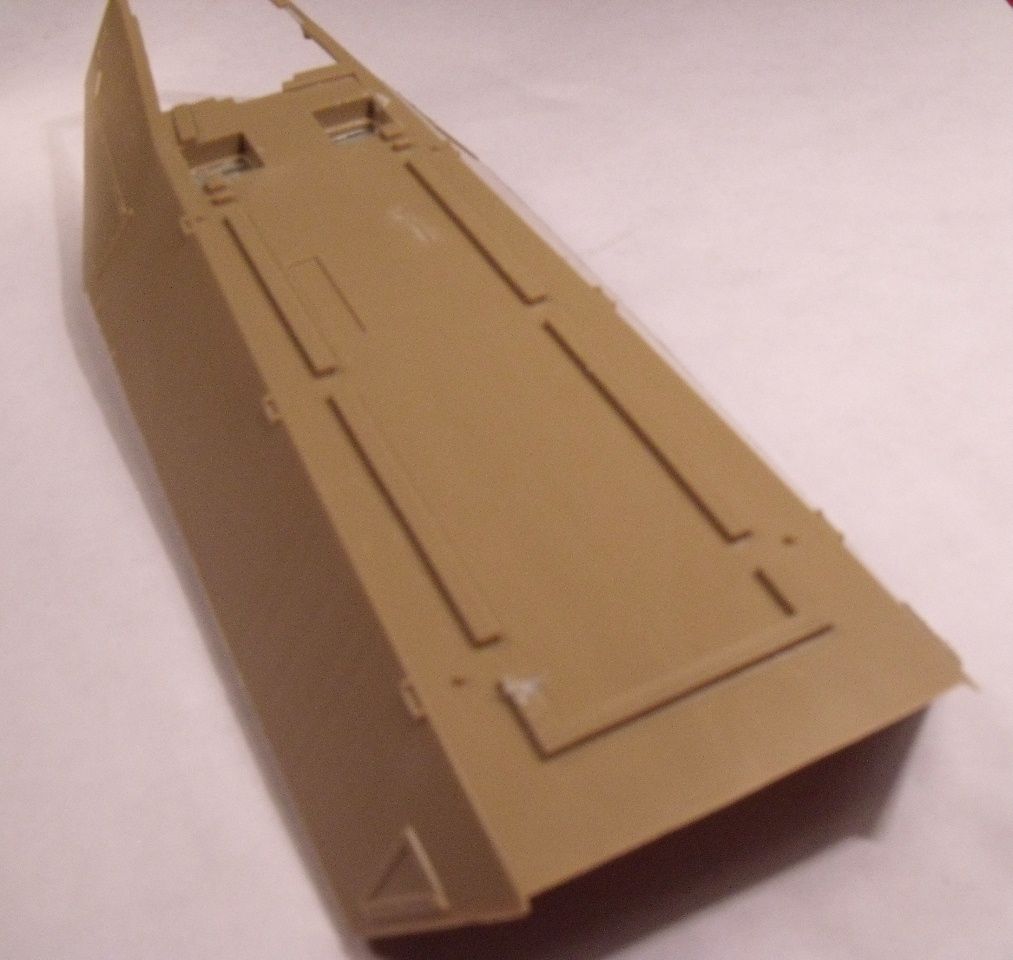
From what i can see of Modelrod's build of the tamiya boxing of this kit, this has been rectified, either by Italeri later on or by Tamiya. RM does make PE floor plating and give the number of the set to use on this. Had i been doing this with the doors open and un-obstructed, i would have used that. But the floor will be covered with rockets waiting to be loaded and the figures will be blocking the hatch's, so i will not worry about that.

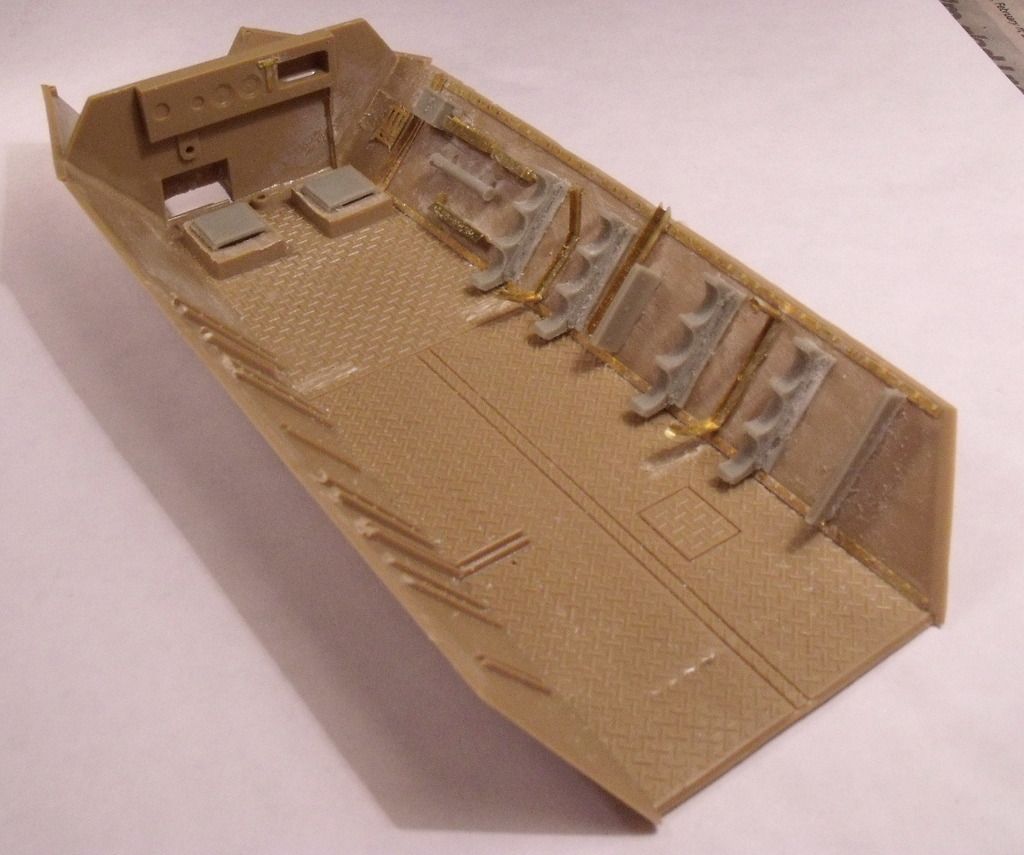
I stared by removing the mouldings on the right and adding the AM parts. This way i could use the mouldings on the left as a guide.
I then repeated for the left and added the parts at the front, including a couple of resin bits.
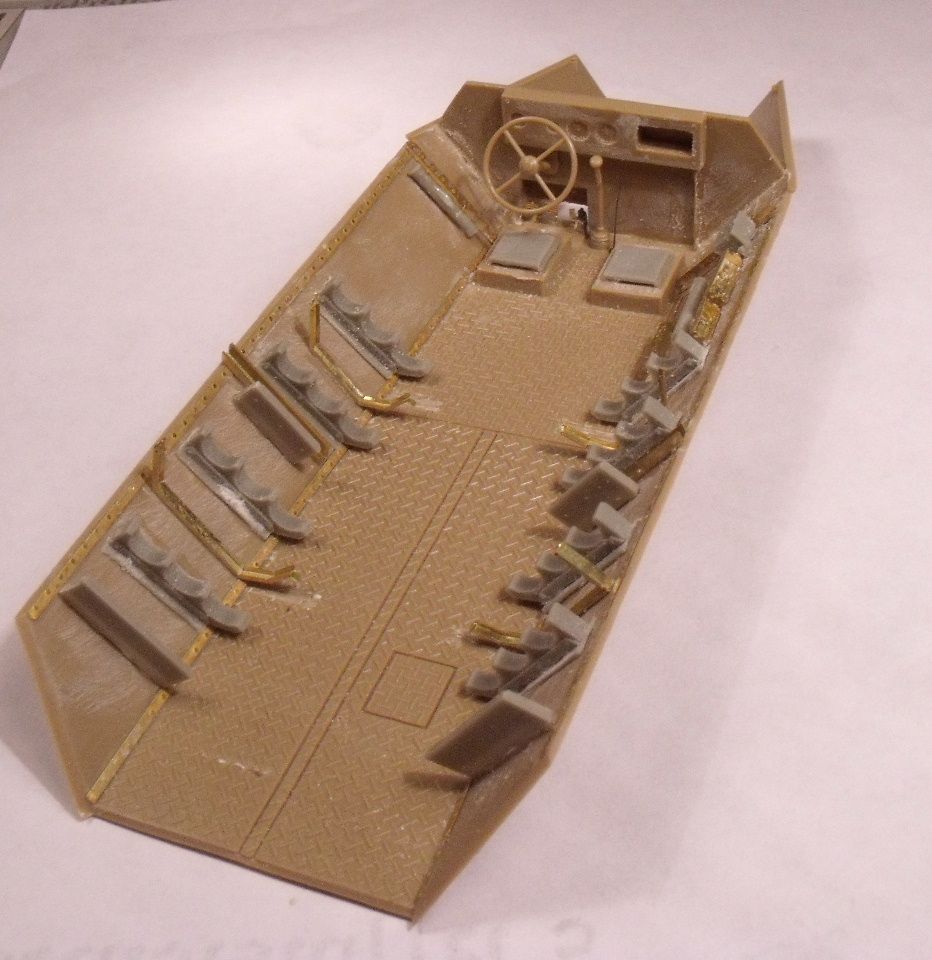
When i opened the RM resin parts at the weekend i found a couple of parts missing. These are the top of the securing brackets that hold the rockets in place. I have contacted RM and they are sending me the parts, great service from them. So apart from those and the frame for the radio, the lower part is done. I have taken a radio from the spares box as neither kit or AM set includes one.

And then the chassis. I am leaving the roadwheels and bogies of for painting, so this went together quickly.
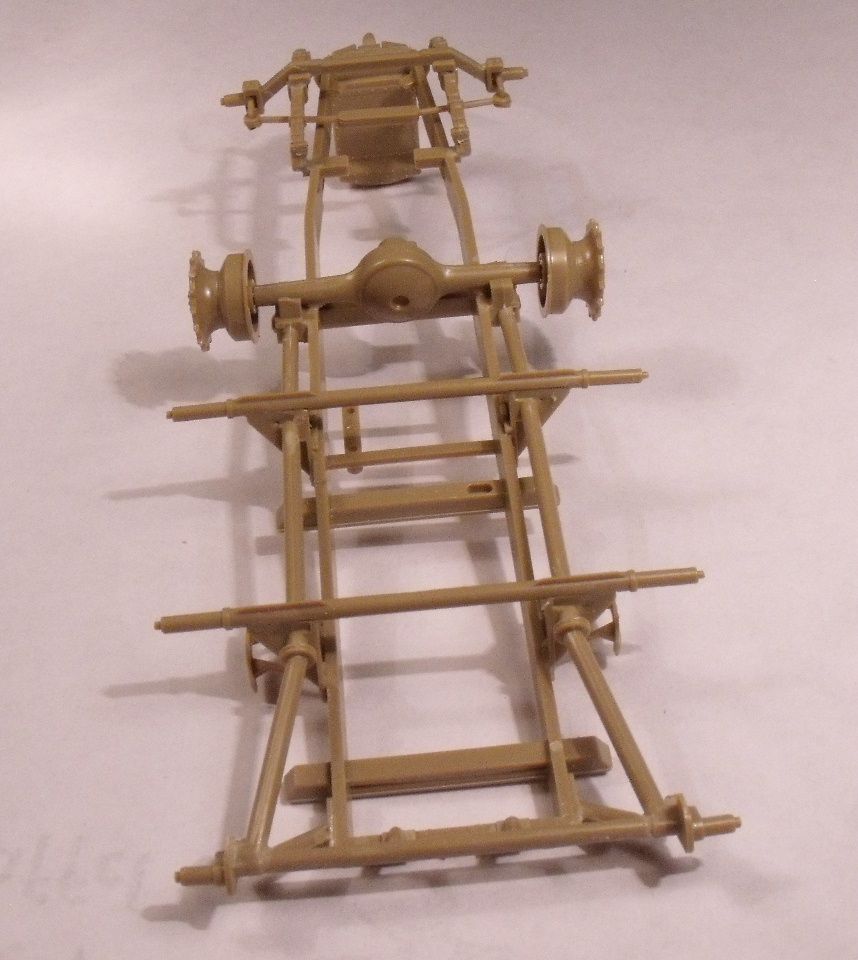
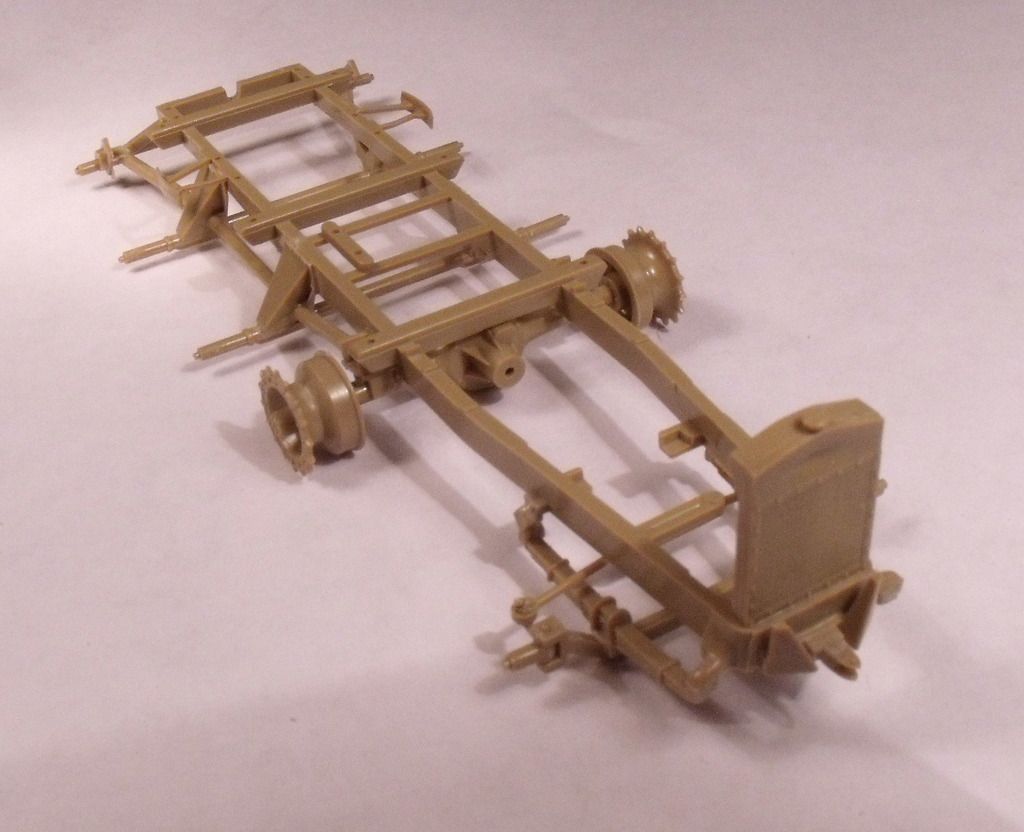
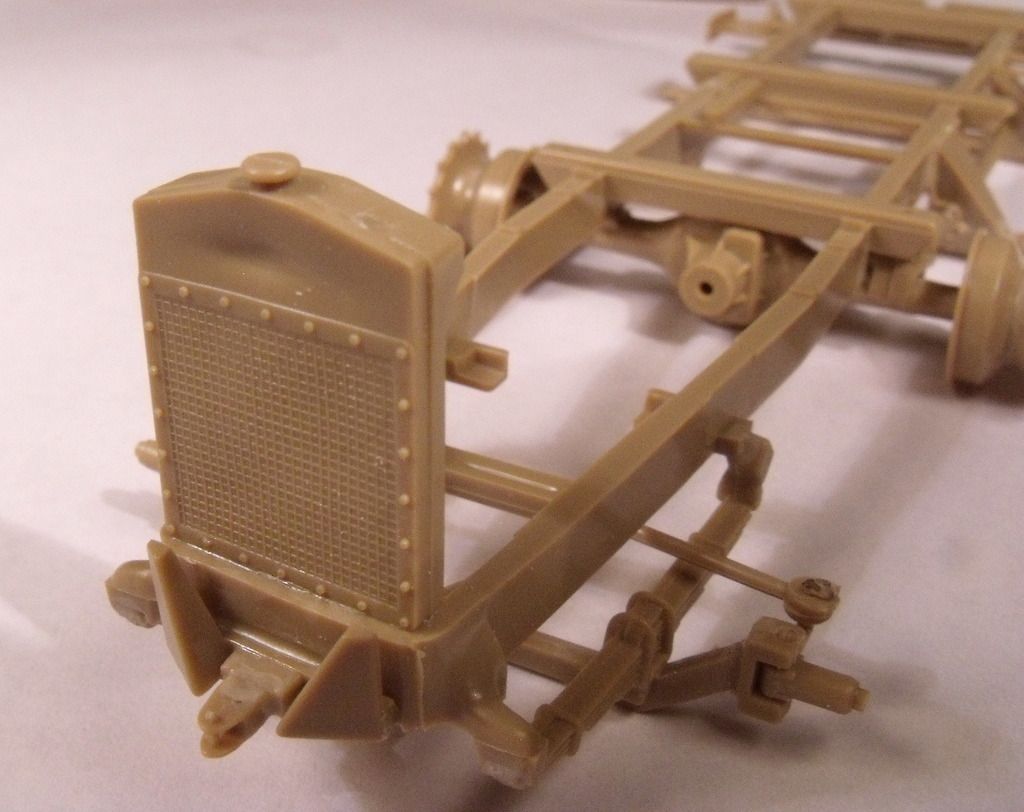
I won't be bothering with the engine which comes with the kit. I do have a litle filling to do, includeing this sink mark on the radiator.
So, next up will be the internal upper half and hopefully the missing parts will be here soon so i can get some paint on.


I am a Norfolk man and i glory in being so


On the bench: Airfix 1/72nd Harrier GR.3/Fujimi 1/72nd Ju 87D-3

JOIN OUR COMMUNITY!

Our community is FREE to join. To participate you must either login or register for an account.

SEARCH FORUMS
FREE NEWSLETTER
By signing up you may also receive reader surveys and occasional special offers. We do not sell, rent or trade our email lists. View our Privacy Policy.