SEARCH FINESCALE.COM

Enter keywords or a search phrase below:

Academy 1/35 Magach 7

3353 views
40 replies
1 rating 2 rating 3 rating 4 rating 5 rating
  • Member since
    April 2010
Posted by Theuns on Monday, September 23, 2019 12:25 PM

Thanx :-)

  • Member since
    November 2009
  • From: SW Virginia
Posted by Gamera on Monday, September 23, 2019 11:32 AM

Whoa! That's some really, really, nice work!!! Love the weathering- the dirty, dusty look is perfect!!! 

"I dream in fire but work in clay." -Arthur Machen


  • Member since
    April 2010
Posted by Theuns on Monday, September 23, 2019 4:19 AM

Thanx Mike


Theuns

  • Member since
    January 2015
  • From: Tumwater, WA.
Posted by M. Brindos on Sunday, September 22, 2019 4:07 PM

Wow! That turned out really freaking cool!

I wants one now lol.

- Mike Brindos "Lost Boy"

  • Member since
    April 2010
Posted by Theuns on Sunday, September 22, 2019 12:07 AM

Thanx, I may have gone a tad heavy on the weathering/dust but I had to try break the monotone look of the paint. 

As for black basing (I used it here for the first time) I worked out very well and give good shadow effect. However for planes where there are not as many deep creveses to get into I think I would most likely stick to normal pre shading and marbling to get depth.


Now I want to try another piece of armour but my local shop does not have what I want, or the ones I like is way out of my budger range :-( 

I Will have to save up a little it seems LOL


Theuns

  • Member since
    July 2014
  • From: Rifle, CO. USA
Posted by M1GarandFan on Saturday, September 21, 2019 2:09 PM

Great looking build. Outstanding!

  • Member since
    September 2006
  • From: Dripping Springs, TX, USA
Posted by RBaer on Saturday, September 21, 2019 10:36 AM

Well done! And you've noted something that actually happens with the real thing: the color appears to change with ambient lighting.

Apprentice rivet counter.

  • Member since
    April 2010
Posted by Theuns on Saturday, September 21, 2019 8:45 AM

Calling this one done, all nice and dusty...

 Academy 1/35 Magach 7 by Theunis van Vuuren, on Flickr

 Academy 1/35 Magach 7 by Theunis van Vuuren, on Flickr

 Academy 1/35 Magach 7 by Theunis van Vuuren, on Flickr

 Academy 1/35 Magach 7 by Theunis van Vuuren, on Flickr

 Academy 1/35 Magach 7 by Theunis van Vuuren, on Flickr

 Academy 1/35 Magach 7 by Theunis van Vuuren, on Flickr

 Academy 1/35 Magach 7 by Theunis van Vuuren, on Flickr

 Academy 1/35 Magach 7 by Theunis van Vuuren, on Flickr


My camera makes it lighter in direct sunlght, imagine it a little more green indoors.


Theuns

  • Member since
    November 2009
  • From: SW Virginia
Posted by Gamera on Tuesday, September 17, 2019 11:34 AM

Yeah, she's coming along nicely! Yes

"I dream in fire but work in clay." -Arthur Machen


  • Member since
    December 2002
  • From: Fort Knox
Posted by Rob Gronovius on Sunday, September 15, 2019 10:29 AM
that's looking good, I like the metal showing through the tan
  • Member since
    April 2010
Posted by Theuns on Sunday, September 15, 2019 9:49 AM

Looking at loads of magach pix I tried my habd at doing the dust weathering using a mix of different chalk pastles and the "wear surface" I used a graphite pencle to look like bare steel.

The tracks I had to tie together with cotton thread as onlt one set of the pins reached the holes but kept comming off, lucky the sideskirts will hide this

 IMG_20190915_150253 by Theunis van Vuuren, on Flickr

 IMG_20190915_150204 by Theunis van Vuuren, on Flickr

 IMG_20190915_144505 by Theunis van Vuuren, on Flickr


Theuns

  • Member since
    April 2010
Posted by Theuns on Sunday, September 15, 2019 12:07 AM

Thanx, i must admit it came out better than I hoped, my cellphone does not take the best pix though and in real life it is a tad more green.


I now just need to be carefull not to overdo the weathering, I think only a pinwash in some areas and dust will work for what I want to do.


Theuns

  • Member since
    January 2015
  • From: Tumwater, WA.
Posted by M. Brindos on Saturday, September 14, 2019 11:00 PM

Now that's a beautiful paint job. Good tonal shift in the proper lighting.

- Mike Brindos "Lost Boy"

  • Member since
    April 2010
Posted by Theuns on Saturday, September 14, 2019 5:42 AM

This time Im hapy with the colour. I ysed my Tamiya buff and added about 25% humbrol green 155. Ths gave a nice sand with a subttle green heu to it in shade and a grey /sand in sunlight.

 IMG_20190914_122247 by Theunis van Vuuren, on Flickr

 IMG_20190914_122307 by Theunis van Vuuren, on Flickr

 IMG_20190914_120702 by Theunis van Vuuren, on Flickr


Theuns

  • Member since
    April 2010
Posted by Theuns on Friday, September 13, 2019 11:12 PM

Thanx, however I need to re spray the turet, I meesed up the whole look by trying to weather it with paint chipping it to look like a used tank :-(

  • Member since
    November 2009
  • From: SW Virginia
Posted by Gamera on Friday, September 13, 2019 12:33 PM

That looks really good! Yes

"I dream in fire but work in clay." -Arthur Machen


  • Member since
    April 2010
Posted by Theuns on Friday, September 13, 2019 11:05 AM

Thanx for the info, I will go check it out.

As an experiment I looked at Humbrol yellow sand but was to "yellow to me" so I tried Tamiya 74 enamels. 

Here is the base with the highlights on it

 IMG_20190913_141724 by Theunis van Vuuren, on Flickr

Then I sht the tamiya over it in thin coats till I got an even look with shadows just showing through, the sides and bottom O added a drop of black to look like it is bleached a little less. 

This is an interesting colour indeed, in bright sun it looks very grey

 IMG_20190913_144230 by Theunis van Vuuren, on Flickr

But indoors where it will be viewed mostly the clopor changes to a more tan.

 IMG_20190913_171529 by Theunis van Vuuren, on Flickr
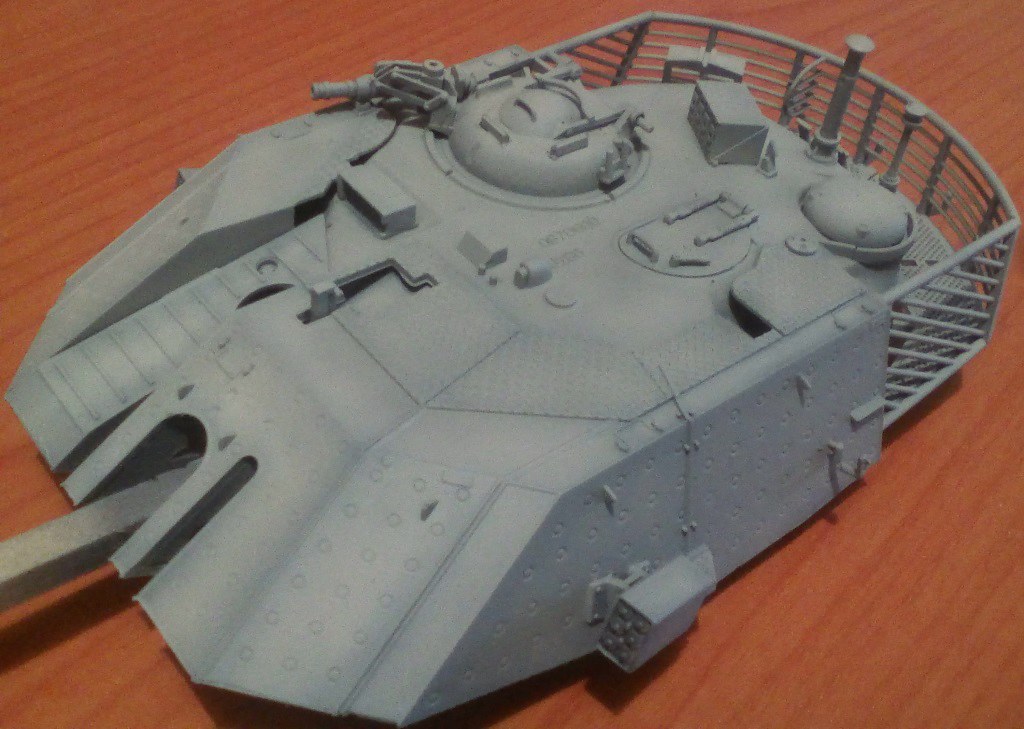
 IMG_20190913_171553 by Theunis van Vuuren, on Flickr


Now I need to weather it a little and complete the hull.


Theuns

  • Member since
    September 2006
  • From: Dripping Springs, TX, USA
Posted by RBaer on Friday, September 13, 2019 8:35 AM

IDF sand gray is an odd color, hard to nail down. I've used a variety of different colors, and since I'm limited to using rattle cans, I depend on washes and pigments to get the "right" end result. It's really difficult to call any out of the can color wrong, but the reference above is a good start. MIG has a few IDF colors that I think are really close, and Humbrol does an enamel that's good for the later color, almost a brown/gray/tan. For your Magach7, there's a couple of good videos on Youtube, one in particular that features track maintenance, that not only is a good color example, it's also got some weathering tidbits.

Link: https://www.youtube.com/watch?v=Wt-V77hmym4

Apprentice rivet counter.

  • Member since
    July 2014
  • From: Rifle, CO. USA
Posted by M1GarandFan on Thursday, September 12, 2019 3:15 PM

Yeah, they can all be that way from time to time.

Good looking build going on!

  • Member since
    April 2010
Posted by Theuns on Thursday, September 12, 2019 11:31 AM

Indeed I plan to do a slightly faded not to badly weatherd tank. I will highlight faded areas with white over the black and then slowly build up the color till Im happy with it. 


That "day job" is cool but can be a PITA sometimes belive me :-)


Theuns

  • Member since
    November 2009
  • From: SW Virginia
Posted by Gamera on Thursday, September 12, 2019 11:24 AM

Great job there- on both the 1/35th and 1/1th scale models! 

Yeah, for an Israeli desert subject you might just try what you're doing and add a little sun bleaching to the upper surfaces. You can go with a filter- I forget the term by mixing a little sand/dust coloured paint and mixing it 50/50 with matte finish and then overspraying the whole model when done. It's supposed to tie everything together. 

"I dream in fire but work in clay." -Arthur Machen


  • Member since
    July 2014
  • From: Rifle, CO. USA
Posted by M1GarandFan on Thursday, September 12, 2019 11:10 AM

That looks like a pretty cool day job!

  • Member since
    April 2010
Posted by Theuns on Thursday, September 12, 2019 11:05 AM

I got primer on and then a black basecoat over all , this will be lightened in some areas to give "shade" effect when the colour goes on.

 IMG_20190912_161148 by Theunis van Vuuren, on Flickr

 IMG_20190912_173806 by Theunis van Vuuren, on Flickr


This is my "day job" since I cant build models for a living LOL

 IMG_20190911_090523 by Theunis van Vuuren, on Flickr

 IMG_20190910_113952 by Theunis van Vuuren, on Flickr


Theuns


  • Member since
    April 2010
Posted by Theuns on Wednesday, September 11, 2019 11:21 PM

This tank will be a "desert dweller" so not muck mud on it ,just loads of dust LOL


Theuns

  • Member since
    November 2009
  • From: SW Virginia
Posted by Gamera on Tuesday, September 10, 2019 8:27 AM

Hopefully someone else will comment here. I've used pastels but they never seem to work out the way I want so I switched to using mud coloured paint instead. I coat the running gear with hair spray and then add a layer of mud paint. Then I can wipe off the excess with a moist paintbrush. 

"I dream in fire but work in clay." -Arthur Machen


  • Member since
    April 2010
Posted by Theuns on Monday, September 9, 2019 10:13 AM

I did see the dot filtering "spanish school" idea but also dont quite like the look of it. 

Maybe just same shading and dust on the correct places will be OK. Some light rusting on a few spots should do.

What do you guys use as a fixer for the weathering powders on the tracks ect?

I am planning on using ground up chalk pastels as my "dust"


Theuns

  • Member since
    November 2009
  • From: SW Virginia
Posted by Gamera on Monday, September 9, 2019 8:51 AM

I normally use colour modulation in starting with dark shades at the bottom and adding a little few drops of white or tan as I move up the model. Other than that I just use a pin wash to bring out the details. 

I've tried dot filtering a few times but never got the results I wanted. Bish would be the guy to talk to about that. 

"I dream in fire but work in clay." -Arthur Machen


  • Member since
    April 2010
Posted by Theuns on Sunday, September 8, 2019 4:28 AM

I use water color for my pin washes but will geive the oils a try thanx.

I made some progress with the "stuff" that goes onto the hull, the sideskirts and extra armour plating. There is a vague indication of where the sideskirt mound brackets go onto the hull but I had to play around with them to get it in correct place. 


Theuns

  • Member since
    January 2015
  • From: Tumwater, WA.
Posted by M. Brindos on Sunday, September 8, 2019 12:08 AM

I'd stick with oils for streaking. Watercolors are good for staining and tonal changes. Say you have a green that is in the yellow spectrum, but you wanted it more in the blue spectrum. Then a light wash with blue watercolor would change that tone.

Fuel stains? No problem. Brown watercolor for a nice brownish stain spot.

I highly recommend playing with other mediums lol. Especially ones you don't see people use a lot.

Watercolors don't usually help too much over gloss surfaces either. They rub off onto your fingers. But they will stick like mad to a matte finish so be sure you want to use watercolor for an application. 

- Mike Brindos "Lost Boy"

JOIN OUR COMMUNITY!

Our community is FREE to join. To participate you must either login or register for an account.

SEARCH FORUMS
FREE NEWSLETTER
By signing up you may also receive reader surveys and occasional special offers. We do not sell, rent or trade our email lists. View our Privacy Policy.