SEARCH FINESCALE.COM

Enter keywords or a search phrase below:

M6A2 Linebacker Bradley build

9370 views
72 replies
1 rating 2 rating 3 rating 4 rating 5 rating
  • Member since
    December 2002
  • From: Valrico, FL
Posted by HeavyArty on Monday, January 30, 2023 7:11 AM

Thanks Gamera.  Always good to have you pop in.

Gino P. Quintiliani - Field Artillery - The KING of BATTLE!!!

Check out my Gallery: https://app.photobucket.com/u/HeavyArty

"People sleep peaceably in their beds at night only because rough men stand ready to do violence on their behalf." -- George Orwell

  • Member since
    November 2009
  • From: SW Virginia
Posted by Gamera on Sunday, January 29, 2023 7:28 PM

Looks awesome Gino! Thanks for letting us follow along. 

"I dream in fire but work in clay." -Arthur Machen


  • Member since
    December 2002
  • From: Valrico, FL
Posted by HeavyArty on Wednesday, January 25, 2023 6:47 PM

The build continues.

I added a bit more detail in the crew area with PE straps on the Battery Charger/Stowage box.
IMG_2291

I also built up the Meng turret interior and added parts to complete the details on the kit turret interior. These included a front wall, vision blocks, kidney and arm pads, a seat (that Meng missed), and detail parts from Meng. I also built a radio shelf at the rear of the turret.
IMG_2288
IMG_2289
IMG_2290

I added vision blocks and a handle to release/lift the hatch with.
IMG_2292

On the exterior, I added some PE and detail parts up top. I also added shocks and detail parts to the lower hull. I will be using the sprockets, idlers, and roadwheels from the Oroche/Kinetic kit as well as their indi-link tracks.
IMG_2294
IMG_2293

Next up is paint and adding a bunch of detail parts on the interior.

Gino P. Quintiliani - Field Artillery - The KING of BATTLE!!!

Check out my Gallery: https://app.photobucket.com/u/HeavyArty

"People sleep peaceably in their beds at night only because rough men stand ready to do violence on their behalf." -- George Orwell

  • Member since
    December 2002
  • From: Valrico, FL
Posted by HeavyArty on Friday, January 20, 2023 8:48 AM

Thanks armornut.  It is a build I have been wanting to do for a while.  I should have an update after the weekend.

Gino P. Quintiliani - Field Artillery - The KING of BATTLE!!!

Check out my Gallery: https://app.photobucket.com/u/HeavyArty

"People sleep peaceably in their beds at night only because rough men stand ready to do violence on their behalf." -- George Orwell

  • Member since
    March 2007
  • From: Northeast WA State
Posted by armornut on Friday, January 20, 2023 7:44 AM

   Wow Heavy, you are off to an awesome start to 2023. Wish I had your motivation and skill. Looks like it's gonna be another amazing build good sir. Quietly watching from the sidelines....pun for fun.

we're modelers it's what we do

  • Member since
    December 2002
  • From: Valrico, FL
Posted by HeavyArty on Friday, January 20, 2023 7:19 AM

Thanks Gamera

Gino P. Quintiliani - Field Artillery - The KING of BATTLE!!!

Check out my Gallery: https://app.photobucket.com/u/HeavyArty

"People sleep peaceably in their beds at night only because rough men stand ready to do violence on their behalf." -- George Orwell

  • Member since
    November 2009
  • From: SW Virginia
Posted by Gamera on Thursday, January 19, 2023 10:44 PM

Looks cool Gino, always enjoy your builds! 

"I dream in fire but work in clay." -Arthur Machen


  • Member since
    December 2002
  • From: Valrico, FL
Posted by HeavyArty on Wednesday, January 18, 2023 4:39 PM
Thanks Capn

Gino P. Quintiliani - Field Artillery - The KING of BATTLE!!!

Check out my Gallery: https://app.photobucket.com/u/HeavyArty

"People sleep peaceably in their beds at night only because rough men stand ready to do violence on their behalf." -- George Orwell

  • Member since
    November 2005
  • From: Formerly Bryan, now Arlington, Texas
Posted by CapnMac82 on Wednesday, January 18, 2023 12:28 PM

This look like it will be a cool build.

  • Member since
    December 2002
  • From: Valrico, FL
Posted by HeavyArty on Wednesday, January 18, 2023 9:07 AM

Thansk gents.  It is starting to shape up.


Pawel
Do  I remember it right, that you have built an M6 before?


No, this is my first M6 Linebacker.  I have done numerous M2s, M2A2s, M3A1, M7A2 BFIST, and a couple M7A3 BFISTs, but not an M6A2 Linebacker.  You can see some of them here:  

M2/M3 Bradley Reference - Reference by Subject - KitMaker Network


Gino P. Quintiliani - Field Artillery - The KING of BATTLE!!!

Check out my Gallery: https://app.photobucket.com/u/HeavyArty

"People sleep peaceably in their beds at night only because rough men stand ready to do violence on their behalf." -- George Orwell

  • Member since
    April 2003
  • From: USA
Posted by keavdog on Wednesday, January 18, 2023 8:07 AM

Cool project!

Thanks,

John

  • Member since
    February 2011
Posted by GreySnake on Wednesday, January 18, 2023 7:57 AM

Looking very nice. I've always liked the look of the Bradley. 

  • Member since
    May 2009
  • From: Poland
Posted by Pawel on Wednesday, January 18, 2023 2:02 AM

Hello Gino!

Cool, another track with interior - maybe I can build one too, some day!

Do  I remember it right, that you have built an M6 before?

Good luck with your newest one and have a nice day

Paweł

All comments and critique welcomed. Thanks for your honest opinions!

www.vietnam.net.pl

  • Member since
    December 2002
  • From: Valrico, FL
M6A2 Linebacker Bradley build
Posted by HeavyArty on Tuesday, January 17, 2023 8:02 PM

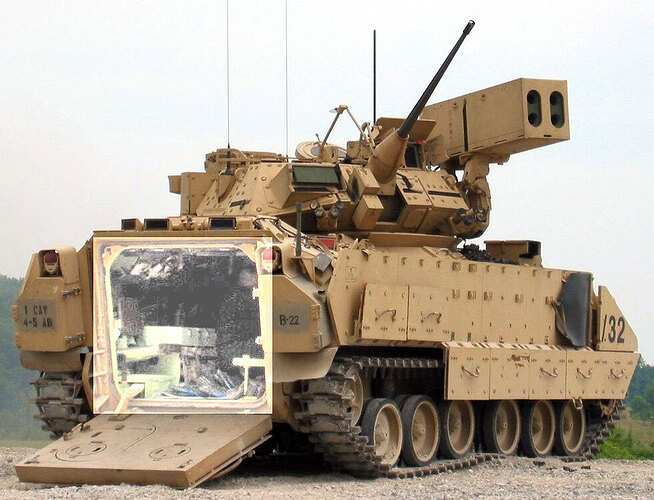
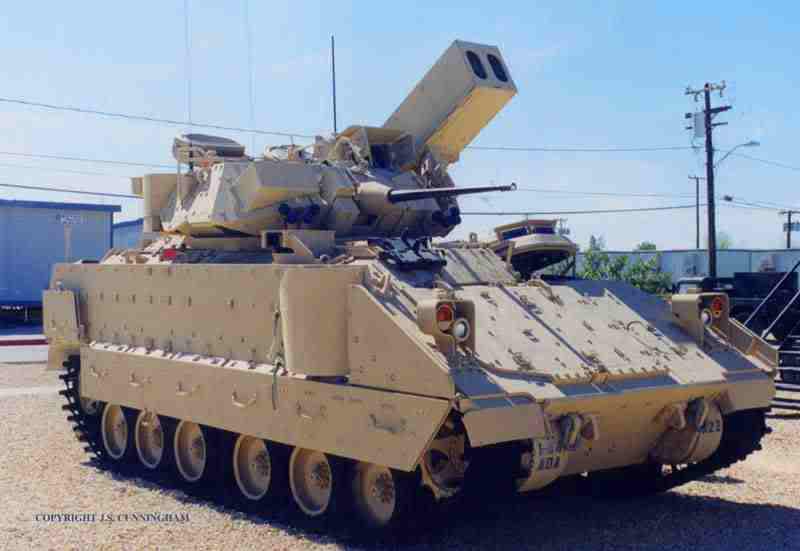
I have started another Bradley project. This time it is the M6A2 Linebacker ADA Bradley. It is a standard Bradley with the TOW box replaced by a 4-shot Stinger Missile launcher and an IFF antenna on the right front of the turret. It was used as a SHORAD (SHort Range Air Defense) vehicle in armored units from the mid-90s through the mid-2000s. After the wars in Afghanistan and Iraq started and there was no air threat, all SHORAD was cut to almost nothing. The Linebacker was a casualty of this and all were turned back into regular M2A2 ODS Bradleys. They have not yet been replaced, but a new version has been considered, we shall see.

Here is what I will be modeling. It is an M6A2 Linebacker with ODS mods as seen in the initial invasion of Iraq, 2003. It is from 3ID, 1-3ADA.
312332_496148837104283_492371506_n

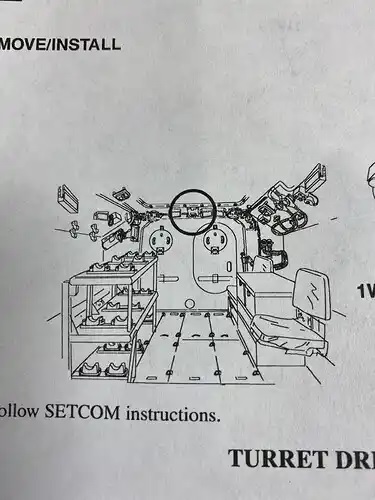
I will be building it with a full interior. I found a few pics and a drawing of the interior layout. I was also in one while at the NTC at Ft. Irwin, CA in the late '90s.

The rear has seating for only two operators on the left side, along with a storage box/charger for stinger dismount batteries. The right side is taken up by a rack that stores 6 Stinger reloads for the launcher.

Here are some interior shots of an M6A2 Linebacker.
M6 Interior


I am using the Academy M2A2 Iraq kit as a base since it represents a new-build M2A2 ODS, which is what the M6A2s were built from. I am also using the original Tamiya M2 Bradley interior and parts of the Meng M3A3 Interior set. I will also update the running gear and tracks and some other areas using parts from a Kinetic M3A3 and some PE.

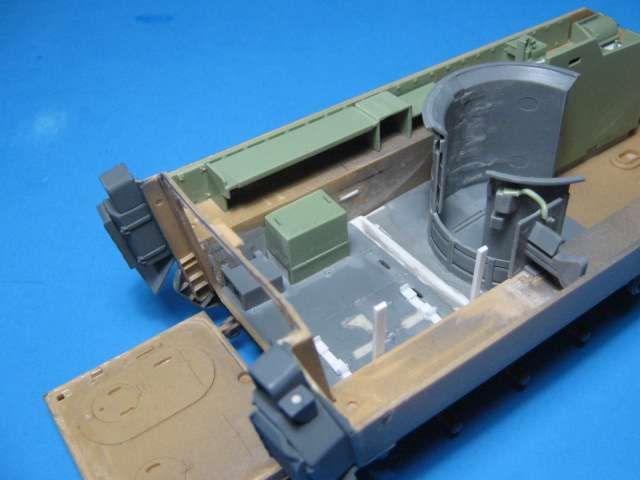
I started by modifying the Tamiya interior floor by removing the molded on boxes on the right side. I filled them in and sanded them smooth, along with the slots for the seat mounts.

I also found a potential issue with the Tamiya floor as it pertains to the Academy M2A2 Iraq kit that I am using for the hull. The Tamiya pieces fit fine in the lower hull, but the opening for the turret in the upper hull and the turret circular walls didn’t line up. The walls were almost 4mm too far to the rear. I ended up cutting the floor into three sections and adjusting them from there. First, I cut 4mm from the floor where the side part and the forward raised area meet. I then cut across the rear floor where the removable stowage panels meet and added a 4mm piece to restore the overall length. This did two things for me. First it aligned the turret opening w/the walls. Second, it gave enough room in the back for the Stinger storage containers. 

I am guessing the Academy upper hull may be off as the turret opening is too far to the rear. The Tamiya and Meng kit hulls have the turret opening in the same place and the interiors can be swapped and fit between the two without modifications.
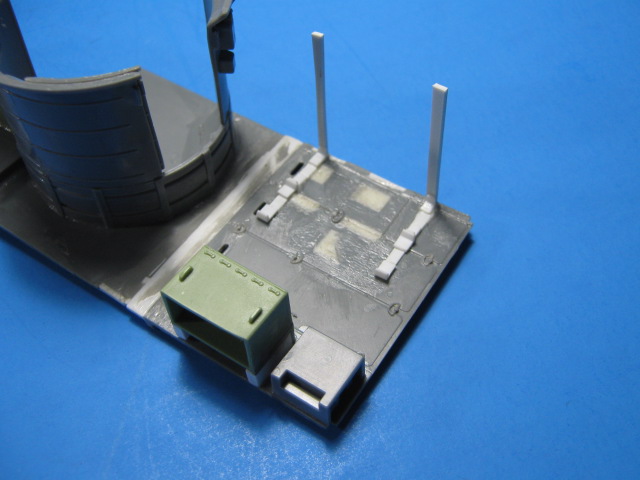
IMG_2279

I then modified a couple interior boxes from the Meng M3A3 Interior set to make the storage box/charging station on the left side.
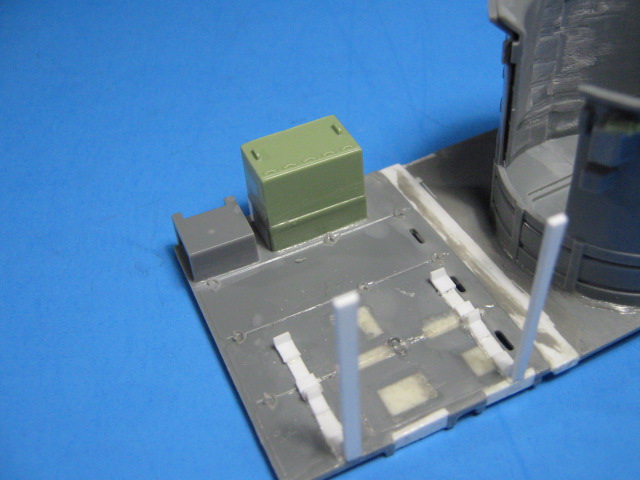
IMG_2280

And I started adding the rack for the Stinger stowage boxes.  The Stinger Storage Boxes are 3D printed items from Shapeways.
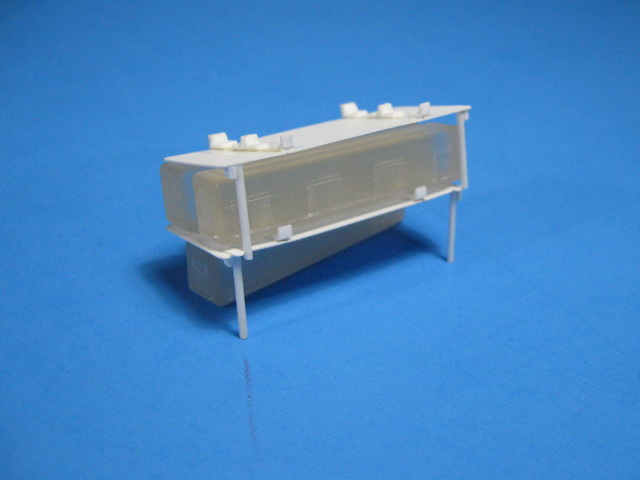
IMG_2285

I used the forward wall by the driver and much of the left side interior pieces from the Meng set since they are more detailed than the old Tamiya parts. You still have to use some of the Tamiya parts (shift lever and box) as some of Meng’s are too new, being for an A3 version.
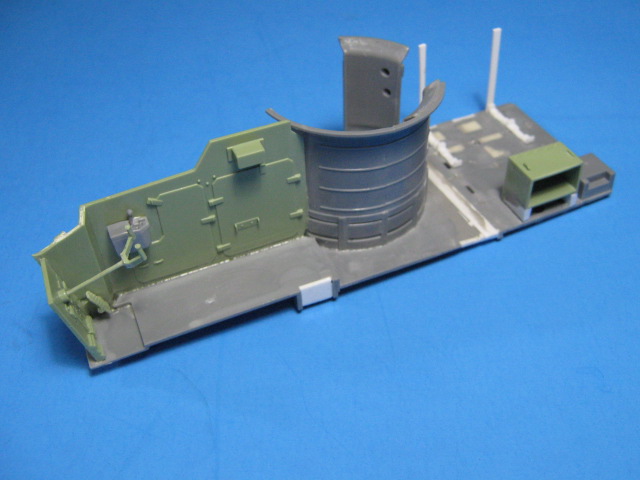
IMG_2281
IMG_2283


I started adding details to the upper hull interior as well.
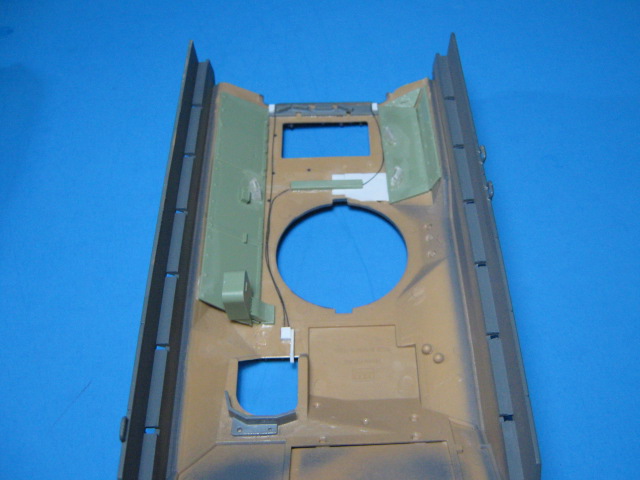
Next up is continuing with the interior and starting adding parts to the exterior. I will be adding the complete Meng turret interior to it as well. More to come.

Gino P. Quintiliani - Field Artillery - The KING of BATTLE!!!

Check out my Gallery: https://app.photobucket.com/u/HeavyArty

"People sleep peaceably in their beds at night only because rough men stand ready to do violence on their behalf." -- George Orwell

JOIN OUR COMMUNITY!

Our community is FREE to join. To participate you must either login or register for an account.

SEARCH FORUMS
FREE NEWSLETTER
By signing up you may also receive reader surveys and occasional special offers. We do not sell, rent or trade our email lists. View our Privacy Policy.