SEARCH FINESCALE.COM

Enter keywords or a search phrase below:

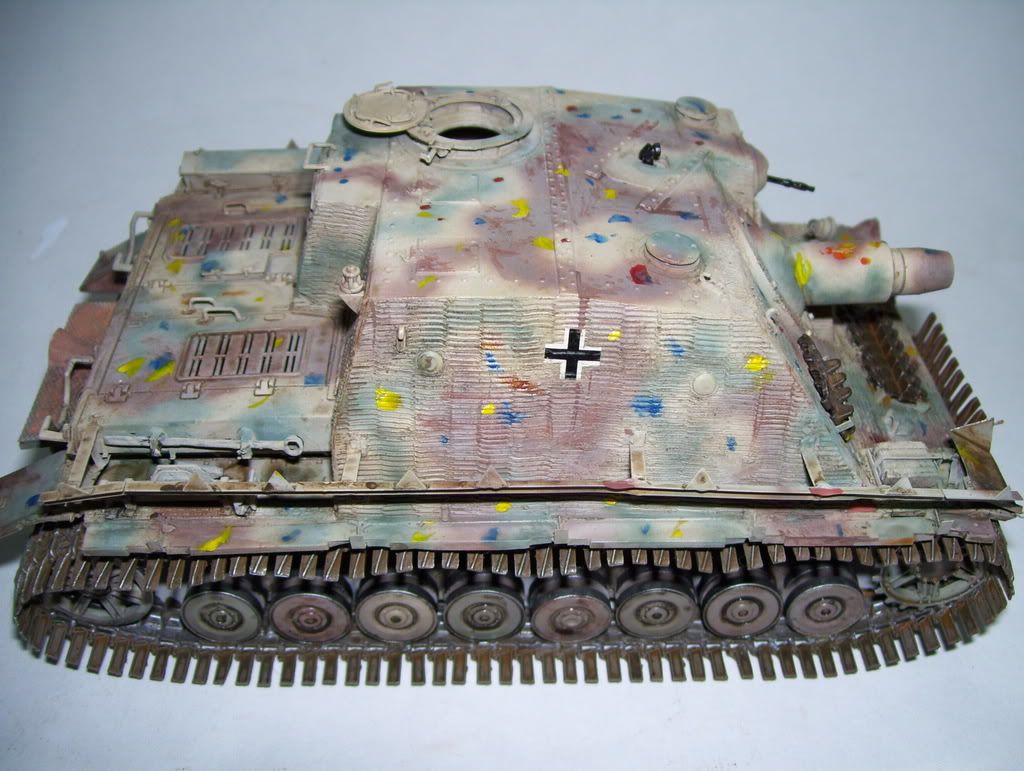
FINISHED PICS! "Bigfoot Brummbar"

11921 views
43 replies
1 rating 2 rating 3 rating 4 rating 5 rating
  • Member since
    January 2007
Posted by the doog on Saturday, February 2, 2008 5:06 PM
 dupes wrote:

Wow Doog, VERY cool. Know you've been slaving away on this one for quite a while, certainly worth the time! Thumbs Up [tup]Approve [^]Thumbs Up [tup]

Brings up a question I've been meaning to ask you - any changes that need to be made to the oil dot method when using it over zim? I've got a Panther A in the works and I've been wondering what I would need to do differently (if anything) so as not to have oil paint all over the place? Wink [;)]

Nope--exactly the same method--you control the dispersion of the paint with the amount of thinner; you WANT it to go "all over the place"! It should just be extremely diluted, but ALL over the tank to be sure!

Bodge--thanks for the compliments! 

SMJ--I've actually done the identical tank in the exact same camo scheme! Looks fine to me! 

  • Member since
    April 2007
  • From: Schroon Lake, NY
Posted by SMJmodeler on Saturday, February 2, 2008 6:17 PM

doog and dupes: (great name for a rock band or a kids cartoon, by the way)Laugh [(-D]:  I'd like to add some more tips on that oil dot wash technique.  I started with a medium wet brush and then stippled/swirled the dots on each camo' color separately, cleaning the brush before moving to the other color(s).  I also did areas that would be in "shadow", see my photo of the underside of hull, with a clean brush too.  Do this a couple-few times, adding more thinner to the brush on each pass.  This keeps the accent oil dots concentrated within the borders of the camo' colors.  Then, let it dry a bit, NOT completely...be careful, it dries very fast.  The LAST pass is a "full lather" of the whole model with a pretty wet brush, but don't lather so much that the oil smears totally "disappear", those high chroma areas come in handy later (see "color accents" section of my tutorial for more info).  When the colors dry the chroma goes way down and the usual washes will tone it down too.  I think this technique is a gutsyMischief [:-,] way of adding depth to the colors without relying solely on the traditional washes...

One last thing, my oil color dot selection wasn't random,(doog, didn't you use a wide variety of colors more randomly? I kind of recall that from the Hetzer toot')  I specifically chose colors based on the location I was placing them, if you care to have me expand on that, unless doog doesn't mind it here on his thread, I'll post a PM or something, let me knowWink [;)].

SMJmodeler

  • Member since
    January 2007
  • From: Iowa
Posted by IA Novice on Saturday, February 2, 2008 10:02 PM

Doog.

Love the build and I love all the info in it (thanks Bill!). 


The definition of insanity: doing the same thing over and over and expecting different results.
  • Member since
    February 2007
Posted by Slightly Altered on Sunday, February 3, 2008 6:25 AM

Hey Doog, another masterpiece! The work you've put into this really shows, it's beautiful. I think I especially like the wear on the dust coat. Subtle and very realistic. Did you use red oxide primer for the metal showing in the chipped Zimm?

Sorry I haven't posted up on this earlier, it's been a nightmare at the shop lately so I haven't had much free time.

Dale 

  • Member since
    November 2006
  • From: Coastal Maine
Posted by dupes on Sunday, February 3, 2008 9:40 AM
 SMJmodeler wrote:

doog and dupes: (great name for a rock band or a kids cartoon, by the way)Laugh [(-D]

HAAAAAAAaaaaahahahha...too funny! Laugh [(-D]

Now that I go back, I definitely see what you mean about the "non-random" placement of the oil dots. Interesting technique. BTW, you're starting to scare me with terms like "chroma". This is getting to be "real" art when you drag that stuff into the equation! Wink [;)]

  • Member since
    January 2006
  • From: California
Posted by SprueOne on Sunday, February 3, 2008 9:53 AM

Good looking paint on that model, Doog.

I especially appreciate the step by step with pics and text.

Very helpful.  

Anyone with a good car don't need to be justified - Hazel Motes


Iron Rails 2015 by Wayne Cassell Weekend Madness sprueone

  • Member since
    January 2007
Posted by the doog on Sunday, February 3, 2008 11:16 AM

Dale, IA novice and Sprue One--thanks guys, I appreciate the Thumbs Up [tup]'S! Thank you!

dupes and SMJ--I actually disagree with the need to "plan" the dots and the oil dispersion--this is "over-thinking" it, in my opinion. (what???--SMJ over-thinking a weathering step??? Laugh [(-D]

Seriously, here's a shot of mine right before I commenced the messin'. ALL of these colors are going to just be randomly swept into a harmonious glaze of the most subtle filters; you DON'T want to have any kind of approach that "plans" any color variations with anything approaching a predictable result or a methodical application of one specific shade over a particular base color, because you're really defeating the whole purpose of the "random yet all-encompassing" chromaticism of color filters. 
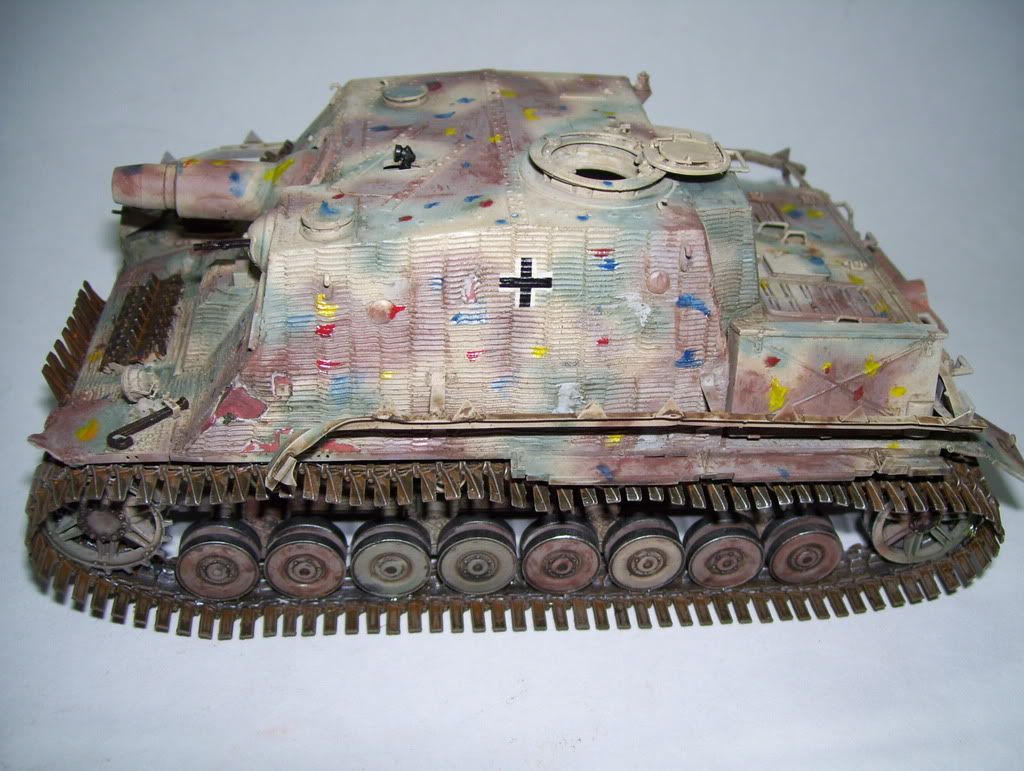
 

Also, SMJ,--you're really rather defeating the purpose and intent of this method by applying similar colors over similar base colors--green over green, browns over browns, etc--you should be putting blues, red, orange, white, yellow--PRIMARY colors, not necessarily complex purples or subtle green-over-green. The red and blue will give you subtle purple shades, and the other colors provide subtle, almost-imperceptible tints over the base coat that provide the depth; simply altering the base with like-colors is missing the objective here.

  • Member since
    July 2003
  • From: Toronto, Ontario, Canada
Posted by zokissima on Sunday, February 3, 2008 2:06 PM

Nice work. I think you pulled it off well. I'm not really sure about the scratching using the base colours, particularily on top of the hull, some of those look fairly large. I tried several times to use very light colour washes, but found that the technique works better if you still apply a typical dark brown wash, then when fully dry apply a very very thin dust shade wash. It gets a great looking overall dusty finish.

  • Member since
    January 2007
Posted by the doog on Sunday, February 3, 2008 2:17 PM
 zokissima wrote:

Nice work. I think you pulled it off well. I'm not really sure about the scratching using the base colours, particularily on top of the hull, some of those look fairly large. I tried several times to use very light colour washes, but found that the technique works better if you still apply a typical dark brown wash, then when fully dry apply a very very thin dust shade wash. It gets a great looking overall dusty finish.

Thanks, zokissima--the scratching with the base colors would be appropriate for say, shoe-scuffing as a crewman walked on top of the vehicle, or even knelt to retrieve something from ground level? It's intended to show wear through the simple later of dust--entirely superficial, not something that is actually scoring the base paint. Smile [:)]


  • Member since
    June 2006
  • From: Michigan
Posted by ps1scw on Sunday, February 3, 2008 2:38 PM
 the doog wrote:
 zokissima wrote:

Nice work. I think you pulled it off well. I'm not really sure about the scratching using the base colours, particularily on top of the hull, some of those look fairly large. I tried several times to use very light colour washes, but found that the technique works better if you still apply a typical dark brown wash, then when fully dry apply a very very thin dust shade wash. It gets a great looking overall dusty finish.

Thanks, zokissima--the scratching with the base colors would be appropriate for say, shoe-scuffing as a crewman walked on top of the vehicle, or even knelt to retrieve something from ground level? It's intended to show wear through the simple later of dust--entirely superficial, not something that is actually scoring the base paint. Smile [:)]


It's a great effect.

  • Member since
    December 2003
  • From: Los Angeles
Posted by dostacos on Sunday, February 3, 2008 3:09 PM
 the doog wrote:


Bow [bow]

what a piece of junk...don't they know about preventative maintiance? Smile,Wink, & Grin [swg]

another beautiful job DOOG please send me a small amount of your talentWhistling [:-^]

Dan support your 2nd amendment rights to keep and arm bears!
  • Member since
    July 2003
  • From: Philippines
Posted by Dwight Ta-ala on Sunday, February 3, 2008 5:04 PM

Would you accept an "atta-boy" comment on this one?


Cause there is nothing else I can say but GREAT JOB! Thumbs Up [tup]


Sorry, I don't think you can get any comment of historical importance from an OOB Builder like me. But I do know how to appreciate a job very well done.Big Smile [:D]

  • Member since
    January 2005
  • From: in the tank factory in my basement
Posted by biffa on Sunday, February 3, 2008 5:26 PM
Another fine build Doog i really like the scuffing method you used and will be remembering that one for down the road those tracks also look great on this particular vehicle, great all round job.
Ron g.
  • Member since
    January 2007
Posted by the doog on Sunday, February 3, 2008 8:10 PM

dostacos and Dwight--thanks, guys; I appreciate you taking the time to comment! Big Smile [:D]

biffa--thanks, man--hey if you "borrow" my "scuffing" it will be just one "payback" for the many great techniques that I've learned from you along the way! Smile,Wink, & Grin [swg] (Hell of a job on that T-34!) Thanks for the compliments! Make a Toast [#toast]

JOIN OUR COMMUNITY!

Our community is FREE to join. To participate you must either login or register for an account.

SEARCH FORUMS
FREE NEWSLETTER
By signing up you may also receive reader surveys and occasional special offers. We do not sell, rent or trade our email lists. View our Privacy Policy.