SEARCH FINESCALE.COM

Enter keywords or a search phrase below:

MODEL T--"Unfinished Project"--FINISHED! Pg 6

25583 views
87 replies
1 rating 2 rating 3 rating 4 rating 5 rating
  • Member since
    January 2007
Posted by the doog on Monday, November 9, 2009 11:20 PM
 vespa boy wrote:

Very cool build Doog. The way you make plastic look like wood is amazing. Have you ever thought about using basswood to build a bed, or does that not give the right appearance?


Can't wait to see the body corrosion on this one.

THANKS A LOT, GUYS!! Big Smile [:D]

Narayan, I was going to use lumber, but the challenge of making it loook real from plastic and the thought of using the new tool made me stay with the plastic. I would rather model it all in plastic anyway. I rather get annoyed at mixing media sometimes. with the gluing issues sometimes encountered.

Here comes an update! Big Smile [:D]

  • Member since
    April 2004
  • From: Boston MA
Posted by vespa boy on Monday, November 9, 2009 12:16 PM

Very cool build Doog. The way you make plastic look like wood is amazing. Have you ever thought about using basswood to build a bed, or does that not give the right appearance?


Can't wait to see the body corrosion on this one.

http://public.fotki.com/nkhandekar

This ain't no Mudd Club, or C.B.G.B.,
I ain't got time for that now

  • Member since
    October 2009
  • From: Minnesota
Posted by ScottN on Monday, November 9, 2009 11:21 AM
sharp looking bed.

Workbench: Lord of the Rings, Fellowship Figures. Panzer II dio, Crimson Skies inspired 1/72 plane.

  • Member since
    May 2009
  • From: Brizioland
Posted by Brizio on Monday, November 9, 2009 8:25 AM
Looks very good! :)
  • Member since
    September 2005
  • From: North Pole, Alaska
Posted by richs26 on Monday, November 9, 2009 1:02 AM

Doog,

Here is an example for you of a 25 T truck that is here in Fairbanks, AK that still runs in the annual Golden Days parade.  The fenders are cracked and stitched together with baling wire just like thread.


http://www.northpolecabins.com/pictures.html

I will try to find some better pictures of it.

WIP:  Monogram 1/72 B-26 (Snaptite) as 73rd BS B-26, 40-1408, torpedo bomber attempt on Ryujo

Monogram 1/72 B-26 (Snaptite) as 22nd BG B-26, 7-Mile Drome, New Guinea

Minicraft 1/72 B-24D as LB-30, AL-613, "Tough Boy", 28th Composite Group

  • Member since
    January 2007
Posted by the doog on Sunday, November 8, 2009 11:25 PM

Lee (and Mike) --

That's excellent advice and a great observation! Thanks for that first-hand knowledge!

The rails have been "worn" a bit, and I'l have new pics tomorrow when I can take them in the daylight! 

Thanks for the great suggestion! 

  • Member since
    September 2004
  • From: Tulsa, Oklahoma
Posted by mm23t on Sunday, November 8, 2009 10:37 PM
Doog, the bed is looking good, but I'll have to agree with subfixer, the top rails should should show some damage, if nothing else, some wood rot. Thats my 2 cents worth.

Medals are not "Won", they are "Earned".

Mike..


  • Member since
    March 2004
  • From: Spartanburg, SC
Posted by subfixer on Sunday, November 8, 2009 4:11 PM

Looking very good so far, doog. One bit of advice though; The upper edge of the top railing of the cargo box will be very worn on a stake body truck. We use a modern version of this type of stake box at the shipyard where I work and everything that goes in the cargo box damages this edge to some extent. I've seen big ol' chunks taken off and broken railings just dangling. And after extended use, the corners rarely meet flush anymore. Also, when the sides are removed for use as a flatbed truck, the railings are just tossed onto the ground and damaged further.

Yours are a bit too perfect, unless that is what you are going for.

I'm from the government and I'm here to help.

  • Member since
    January 2007
Posted by the doog on Sunday, November 8, 2009 11:58 AM

Thanks, terry!

Here's an update; the bed is finally finished!

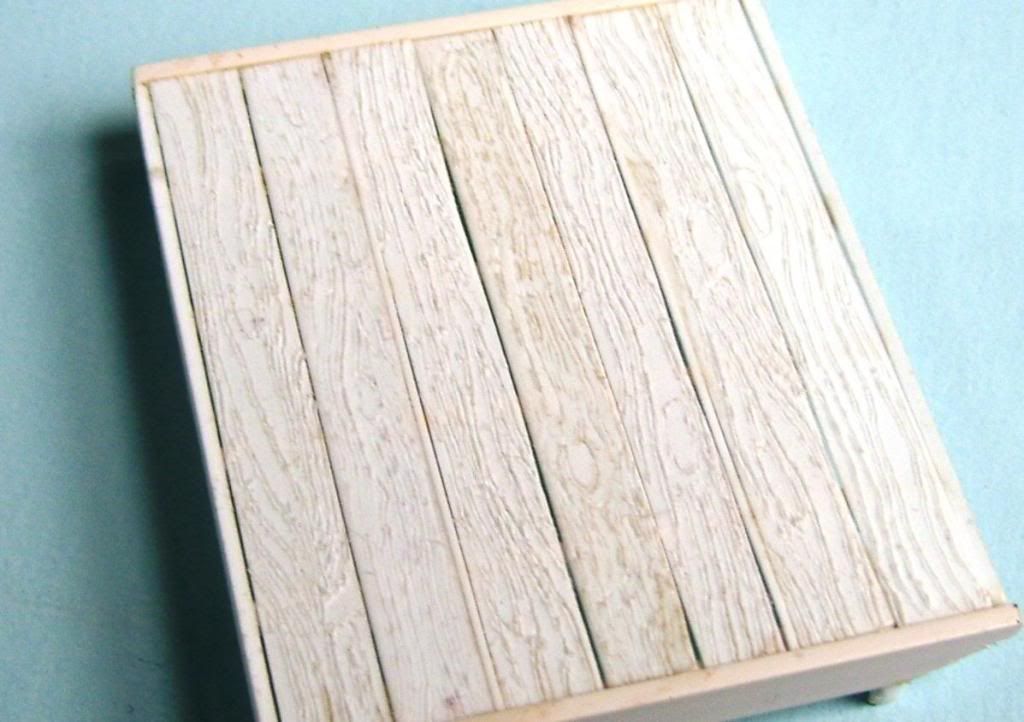
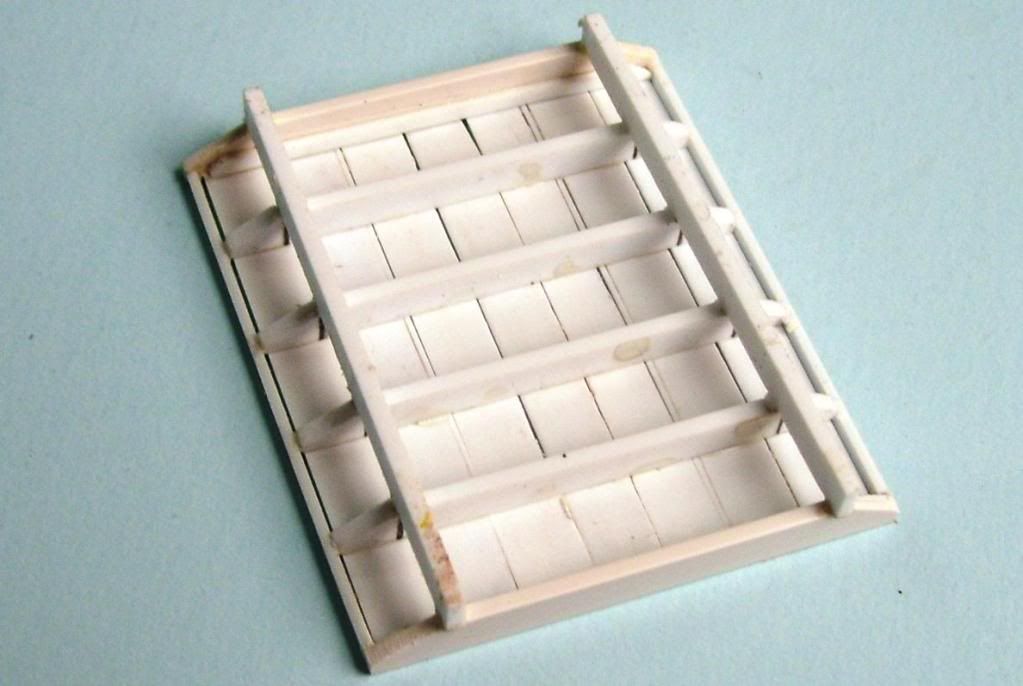
I made the bed entirely from styrene strip and rod. The planks of wood were all scribed with the hot tool. I cut up some of them to simulate rot. The T-bars on the sides are available through  Plastruct. Each plank has 12 bolts on the outside cut from .020 rod, and inside, those 12 "bolts" are secured by 12 "nuts" of .040 x 1mm hex rod "nuts" and then further, 12 more "bolt ends" of the same .020 rod. 36 X 11 posts = 396 boltd/nuts alone! It took me the better part of three-and-a-half hours to cut, position, and glue all of them last night! 

Here's some pics.

The end piece fits into some brackets there, made from strip as well.

I also re-did the bed support; the last one looked skewed somewhat, and didn't provide enough surface area to secure the bed--just like the real thing! You can also see the pedals plate there that I drilled out.

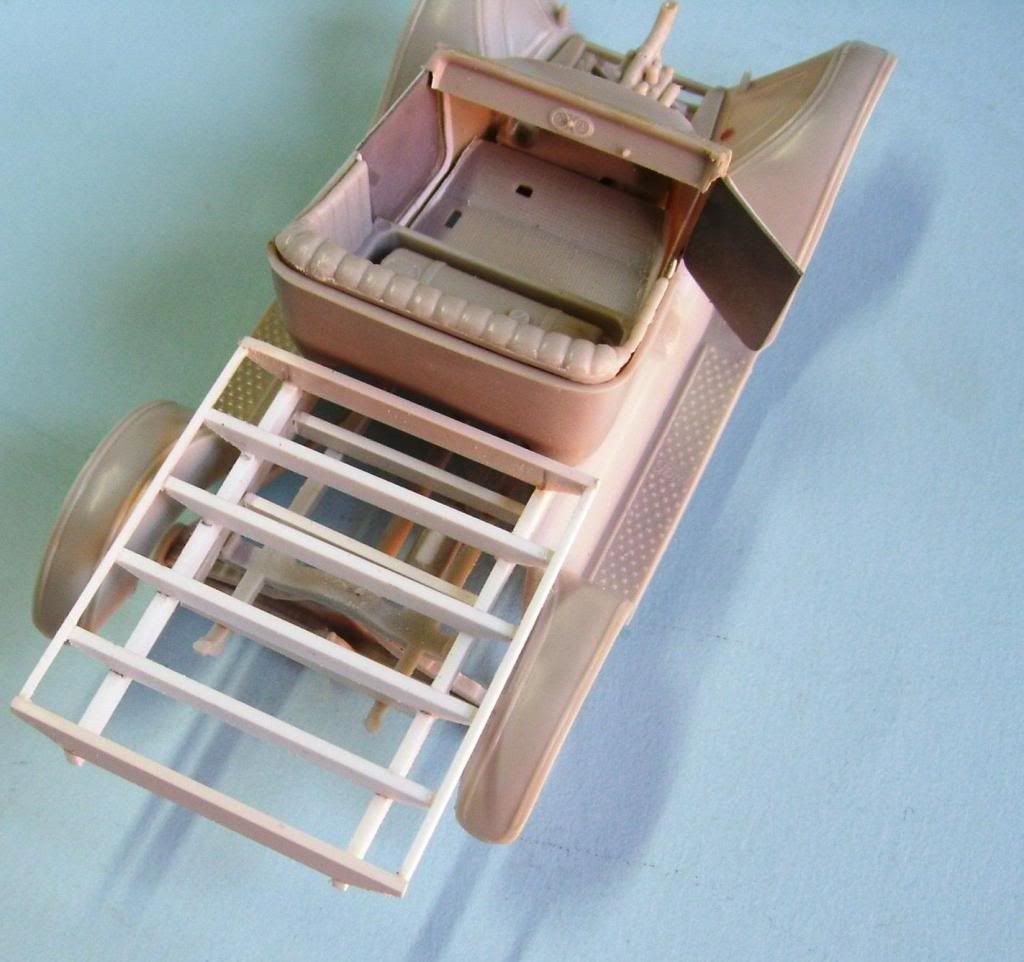
And here, with the bed just sitting on the chassis, is where I am so far.

Next, I'll be tackling the interior more, and then the engine detailing! Comments always welcomed! Big Smile [:D]


  • Member since
    May 2005
  • From: Dublin Rep Of Ireland
Posted by terry35 on Saturday, November 7, 2009 3:12 PM

Cool Karl, your right to keep changing subjects keeps everything fresh.

Terry.

  • Member since
    January 2007
Posted by the doog on Saturday, November 7, 2009 7:42 AM
 mm23t wrote:
doog...where are you finding these kits? I find myself wanting to build something thats not od in colorBig Smile [:D]
Thanks, Mike! I usually get most of my auto kits from eBay---there's so many old, cool kits on there! I recently picked up an AMC Javelin, and an old Mustang II prototype. Check out eBay!
  • Member since
    September 2004
  • From: Tulsa, Oklahoma
Posted by mm23t on Friday, November 6, 2009 5:43 PM
doog...where are you finding these kits? I find myself wanting to build something thats not od in colorBig Smile [:D]

Medals are not "Won", they are "Earned".

Mike..


  • Member since
    September 2004
  • From: Tulsa, Oklahoma
Posted by mm23t on Friday, November 6, 2009 4:54 PM
I do like what you have done to the bed with your leetle friend. I'll be working on a cckw 353 and will try that on the bed. I'm off to Hobby Lobby to see if I can find one. I will be checking out this build as I too like to change tempo and build something different from time to time.

Medals are not "Won", they are "Earned".

Mike..


  • Member since
    January 2007
Posted by the doog on Friday, November 6, 2009 11:18 AM

Hey, thanks again, guys! I appreciate all the support! Big Smile [:D]

I'm certainly having fun on this build! Smile [:)]


  • Member since
    April 2007
  • From: Canada
Posted by JTRACING on Thursday, November 5, 2009 9:04 PM
this should be cool! look forward to following along
  • Member since
    October 2003
  • From: Albuturkey New Mexico
Posted by modelmaniac1967 on Thursday, November 5, 2009 8:14 PM
Your a master at armor but i always love to see your auto builds they are the best!!!!!!! Be watching this one with interest as always.

Life is an illusion, if you can master the art of illusion you have it made.[View:http://sdfusioninc.blogspot.com/]

  • Member since
    September 2006
Posted by aussiemuscle308 on Thursday, November 5, 2009 6:44 PM
pretty nice scratchbuilding so far. should look excellent when done. i'm looking forward to seeing more.
  • Member since
    January 2007
Posted by the doog on Thursday, November 5, 2009 6:05 PM

Thanks, Andy and Rob!

I should have an update over the weekend. I'm getting the bed finished now...

Not sure about how much I'm going to rust it out, Rob....I have to think about the condition it's going to build up to, and then figure what's appropriate. It may be a lighter rust treatment than you might expect; I hope I don't disappoint!

I appreciate you guys bopping over here from the Armor forums! Big Smile [:D]


  • Member since
    February 2009
  • From: mass,USA
Posted by scratchmod on Thursday, November 5, 2009 3:25 PM

Looking good so far Karl and I can't wait to see the painting and weathering, you know I have a thing for rust Big Smile [:D].

Rob

  • Member since
    January 2008
  • From: Bournemouth UK
Posted by Bodge on Thursday, November 5, 2009 10:57 AM
Great little project Karl and may i say that plastic is the best looking wood ive seen if that makes any sense.Confused [%-)]
  • Member since
    January 2007
Posted by the doog on Wednesday, November 4, 2009 7:34 PM

Thanks, guys!

Perhaps I should clarify, Greg--I'm not going to rust this one to death, like a hulk. It's going to be more like, abandoned for a few years--not enough to rot the boards, although I DID think of doing that. Smile [:)]

I have seen the cracked fenders though--and thanks for confirming that that ws a common problem! I shall have to work it in somehow...Big Smile [:D]

Glad you like the wood, Bill and Brizio! That little scriber tool is a godsend!


  • Member since
    May 2009
  • From: Brizioland
Posted by Brizio on Wednesday, November 4, 2009 7:29 PM
Cool project, and nice idea for the wood!
  • Member since
    May 2005
  • From: Left forever
Posted by Bgrigg on Wednesday, November 4, 2009 7:25 PM

Wow, those wooden boards look fantastic! I can almost smell the wood.

So long folks!

  • Member since
    December 2006
  • From: t.r.f. mn.
Posted by detailfreak on Wednesday, November 4, 2009 7:15 PM
A little insight.the beds rotted away and the sheetmetal in the fenders was notorious for cracking.So beat er up there.I'm certain that any way you do this will be great.Thumbs Up [tup]

[View:http://s172.photobucket.com/albums/w1/g-earl828/]  http://i158.photobucket.com/albums/t104/cycledupes/1000Roadwheels4BuildBadge.jpg

  • Member since
    January 2007
MODEL T--"Unfinished Project"--FINISHED! Pg 6
Posted by the doog on Wednesday, November 4, 2009 2:56 PM

Hi Guys!

I have a new project going here, while my Modified body is curing and being masked. This is going to be a fun little mod project in its own right. I plan on doing a rusted-out Model T truck. I'm going to do it in the style of my "Rust Bunnies" dio. I have a "theme" for it, but that will have to wait to be revealed! Wink

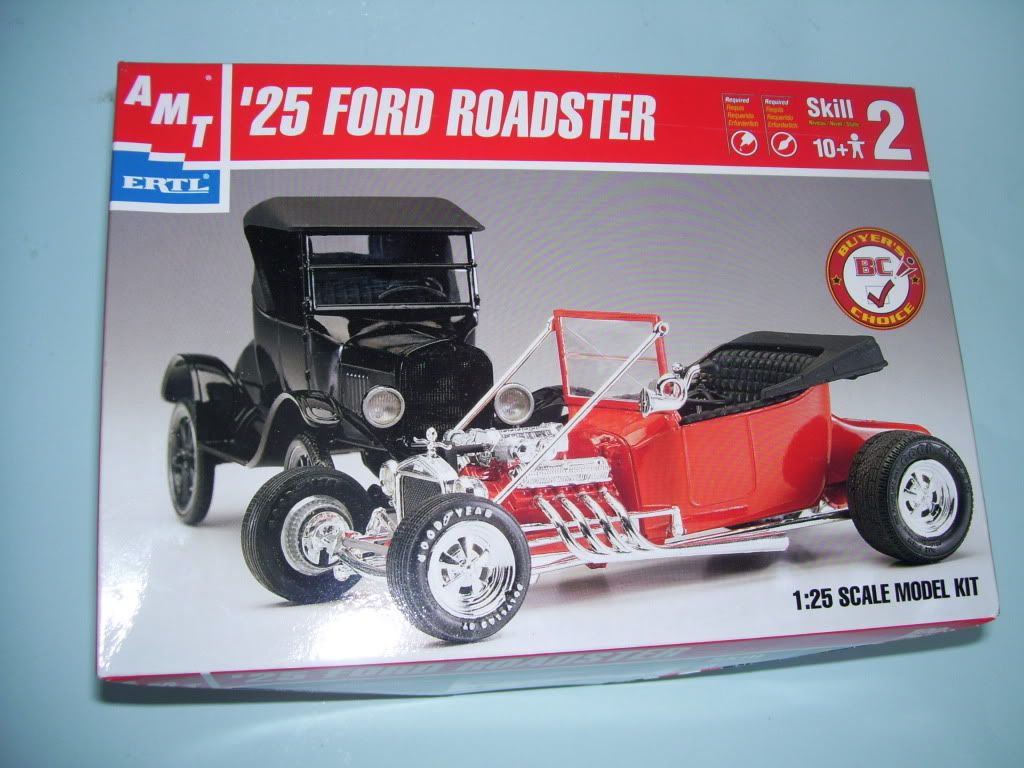
Here is the kit;

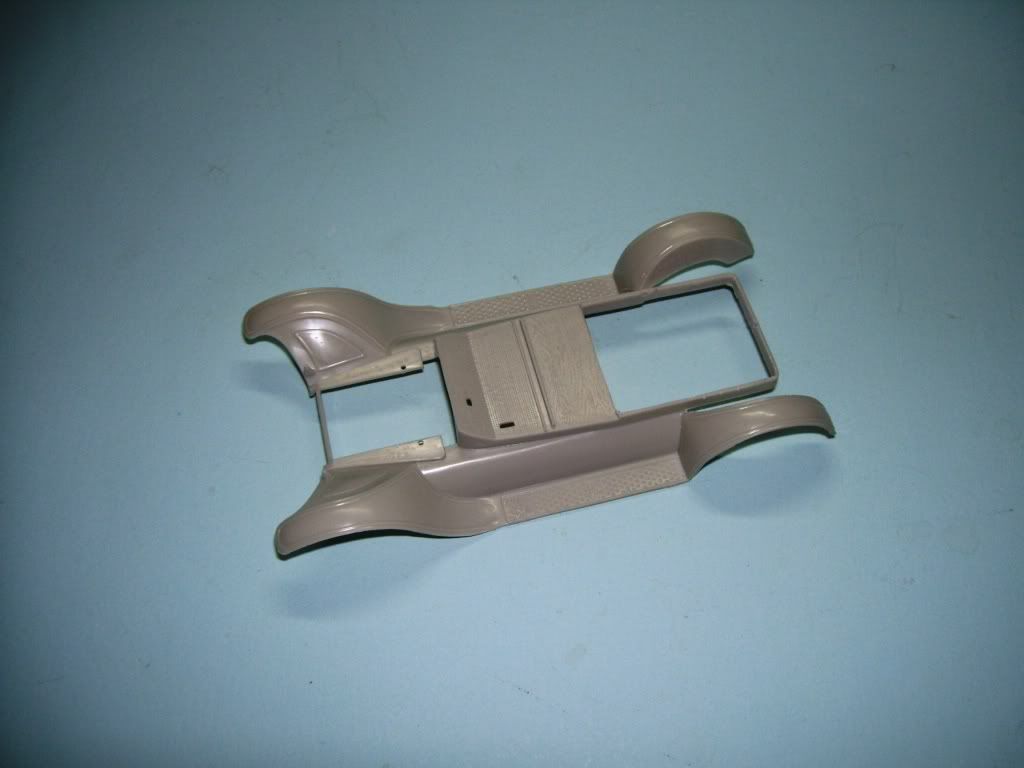
It's a somewhat crude kit, and can be built in a number of ways--a coupe, a truck, a regular car,. I am choosing the truck option, and after looking at the kit, I see a lot of improvements that can be made.

The bed is pretty crude. I decided I will attempt a new one.
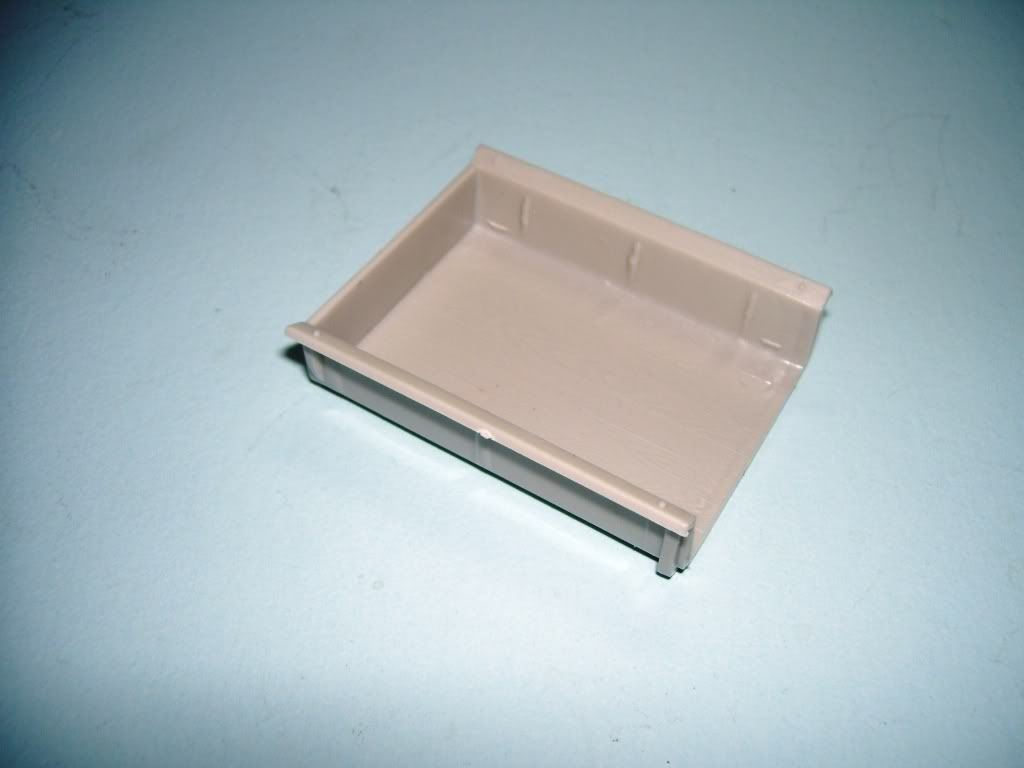
I will remove the frame interior, as it won't fit into my construction plans...
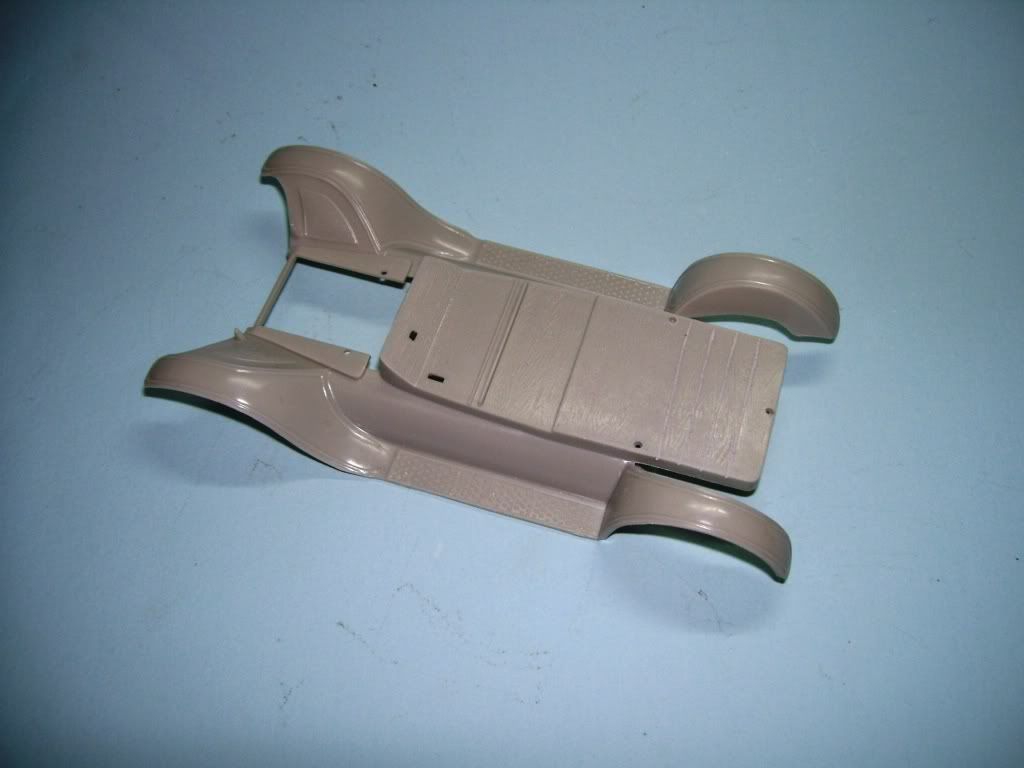
The ol' Dremel does the trick...
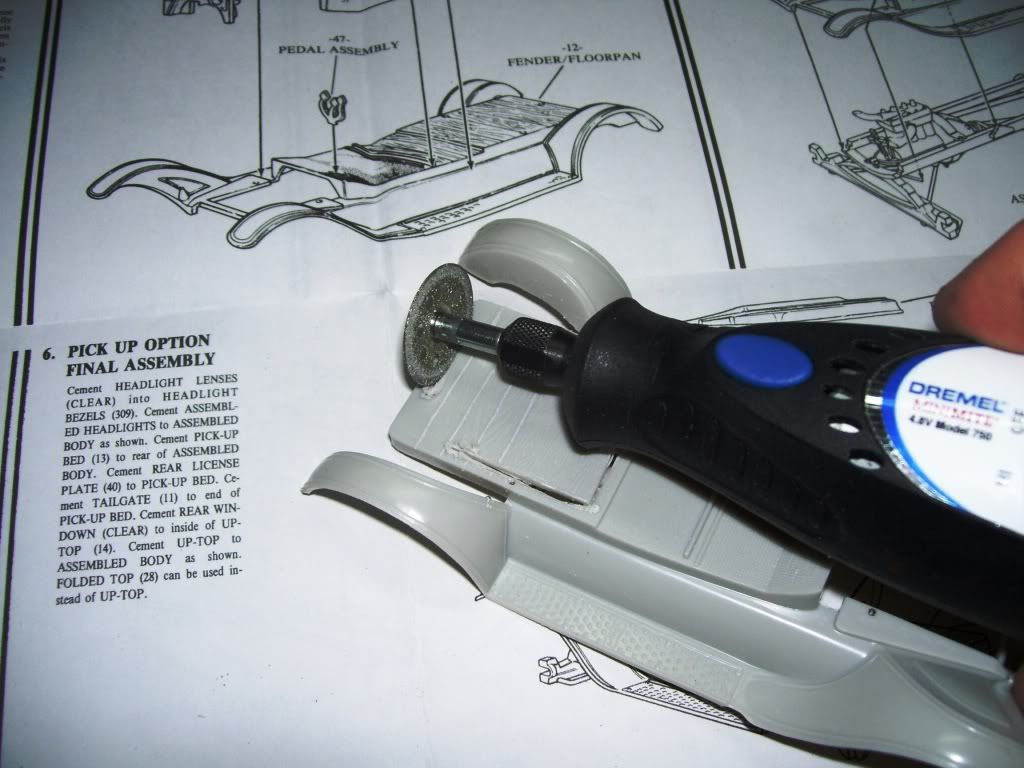
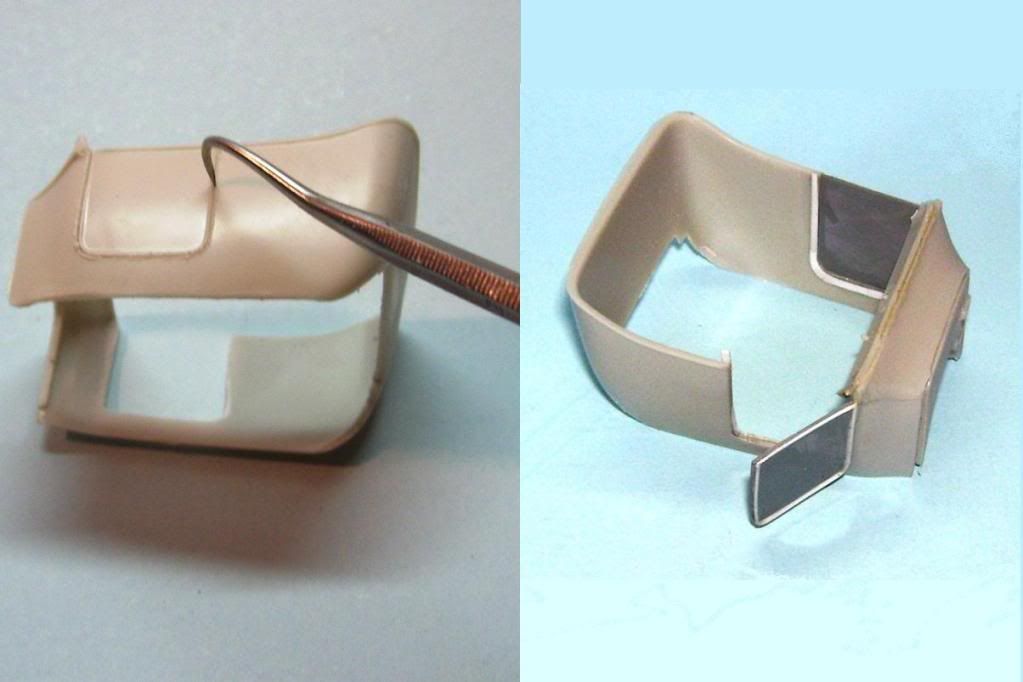
I cut out the doors, and added some strip to them, and some "lips" to them as well, as per my references. There are some excellent online sites with photos.
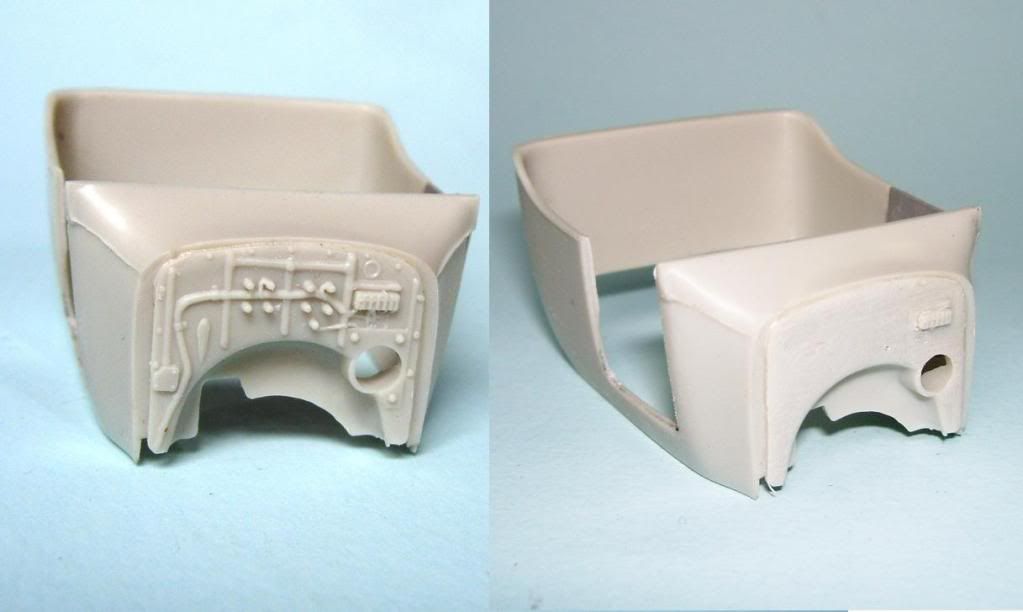
I'm also going to redo the firewall, so all that detail has to go...
The frame is being built up with strip.
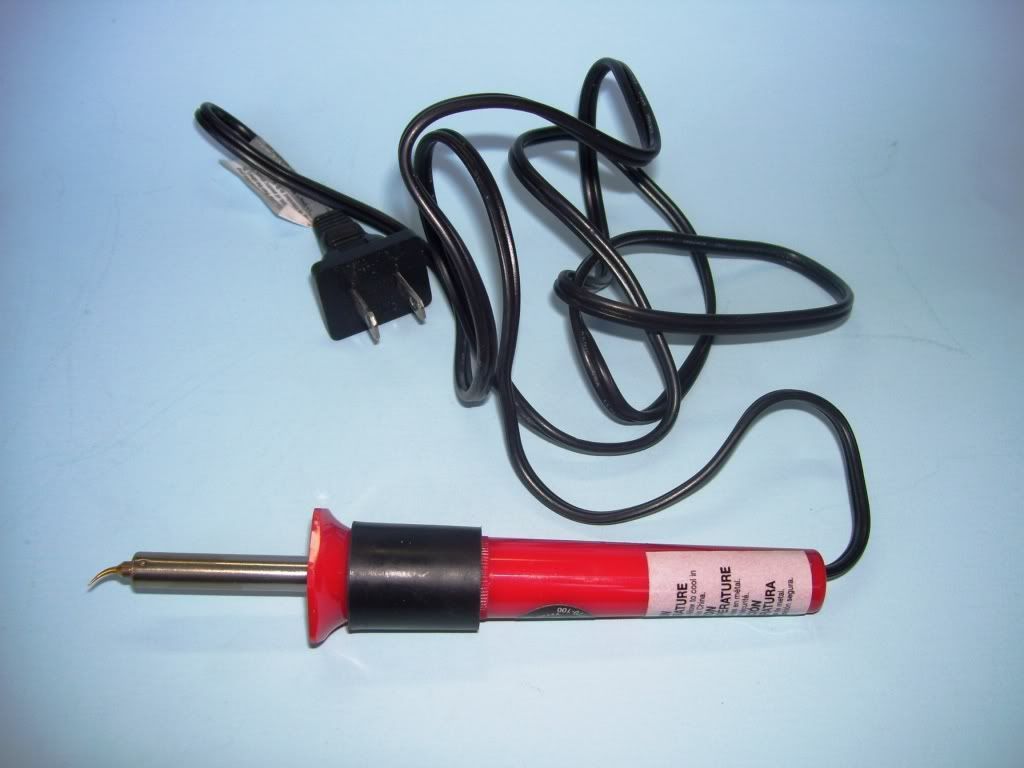
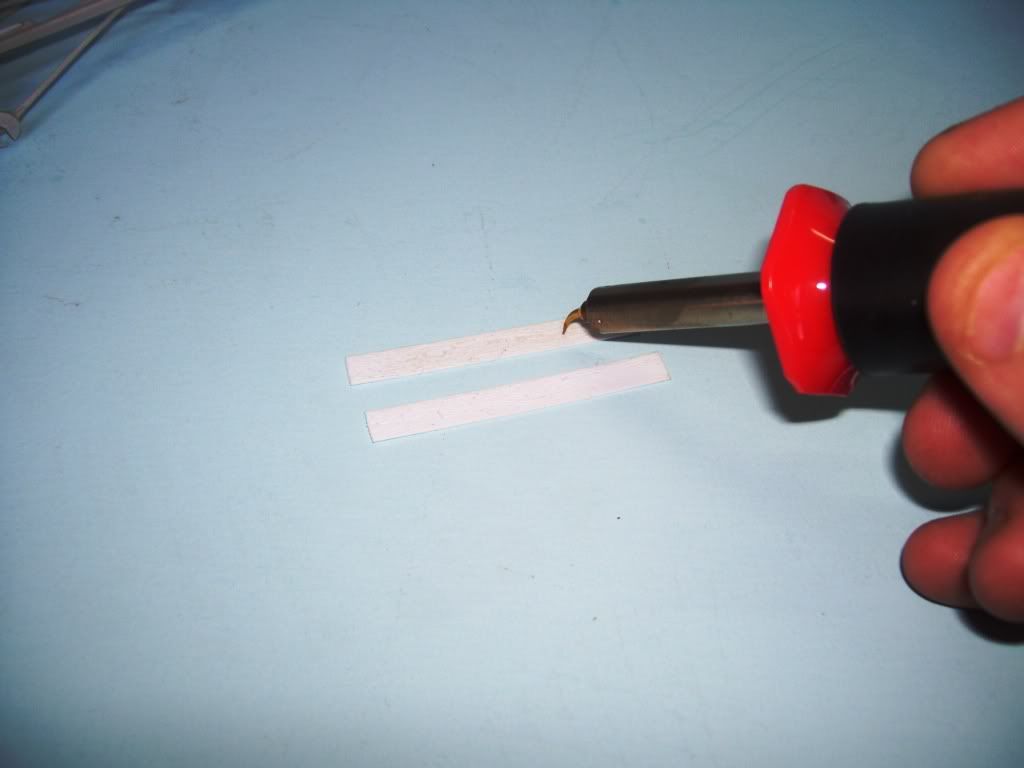
Let me introduce you to my leetle friend! This is a low-heat scrapbooking tool available at AC Moore's---I'm going to use it to make woodgrain for the lumber to build the bed. Originally, I thought about using real balsa or bass wood, but wanted to use all plastic for the weathering effects and possibilities.
Making wood....
And the bed top finished--I'm going to add an upper frame as well...
The frame construction. No wood grain on the bottom, as this will be on a base...
I added pulleys and a belt to the engine--much to do here yet...
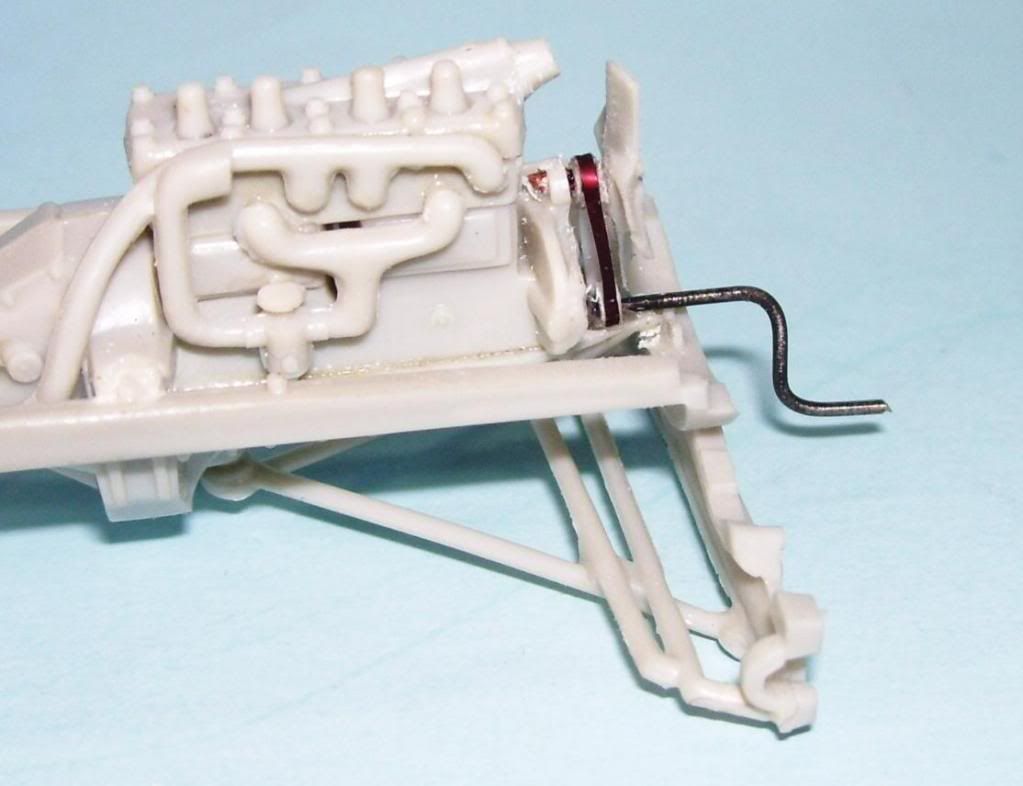
And so far, what I've got..
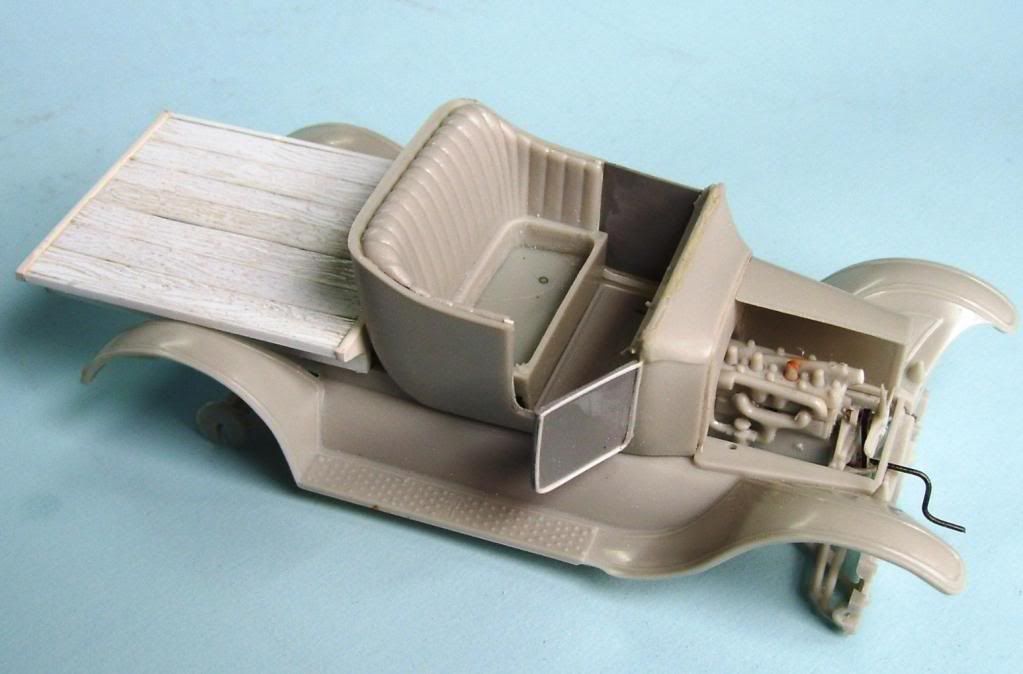
I also cut out the gas tank under the seat there; I'm going to use James' trick and BMF it! Thanks for that great tip, James!

Hope you like it so far! Questions or comments welcomed! More to come!!!


JOIN OUR COMMUNITY!

Our community is FREE to join. To participate you must either login or register for an account.

SEARCH FORUMS
FREE NEWSLETTER
By signing up you may also receive reader surveys and occasional special offers. We do not sell, rent or trade our email lists. View our Privacy Policy.