SEARCH FINESCALE.COM

Enter keywords or a search phrase below:

Revell 41 Willys "Demon II"-Completed 09/07

10558 views
94 replies
1 rating 2 rating 3 rating 4 rating 5 rating
  • Member since
    March 2012
  • From: Corpus Christi, Tx
Posted by mustang1989 on Thursday, June 7, 2018 8:41 PM

Thanks John and BK. It's expensive stuff but I feel like I'm addicted to it. lol

Got the stance about where I want it with this mock up:

Image

Here's the rolling chassis with the powertrain test fitted. This car is ALL motor and tire!!!

Image

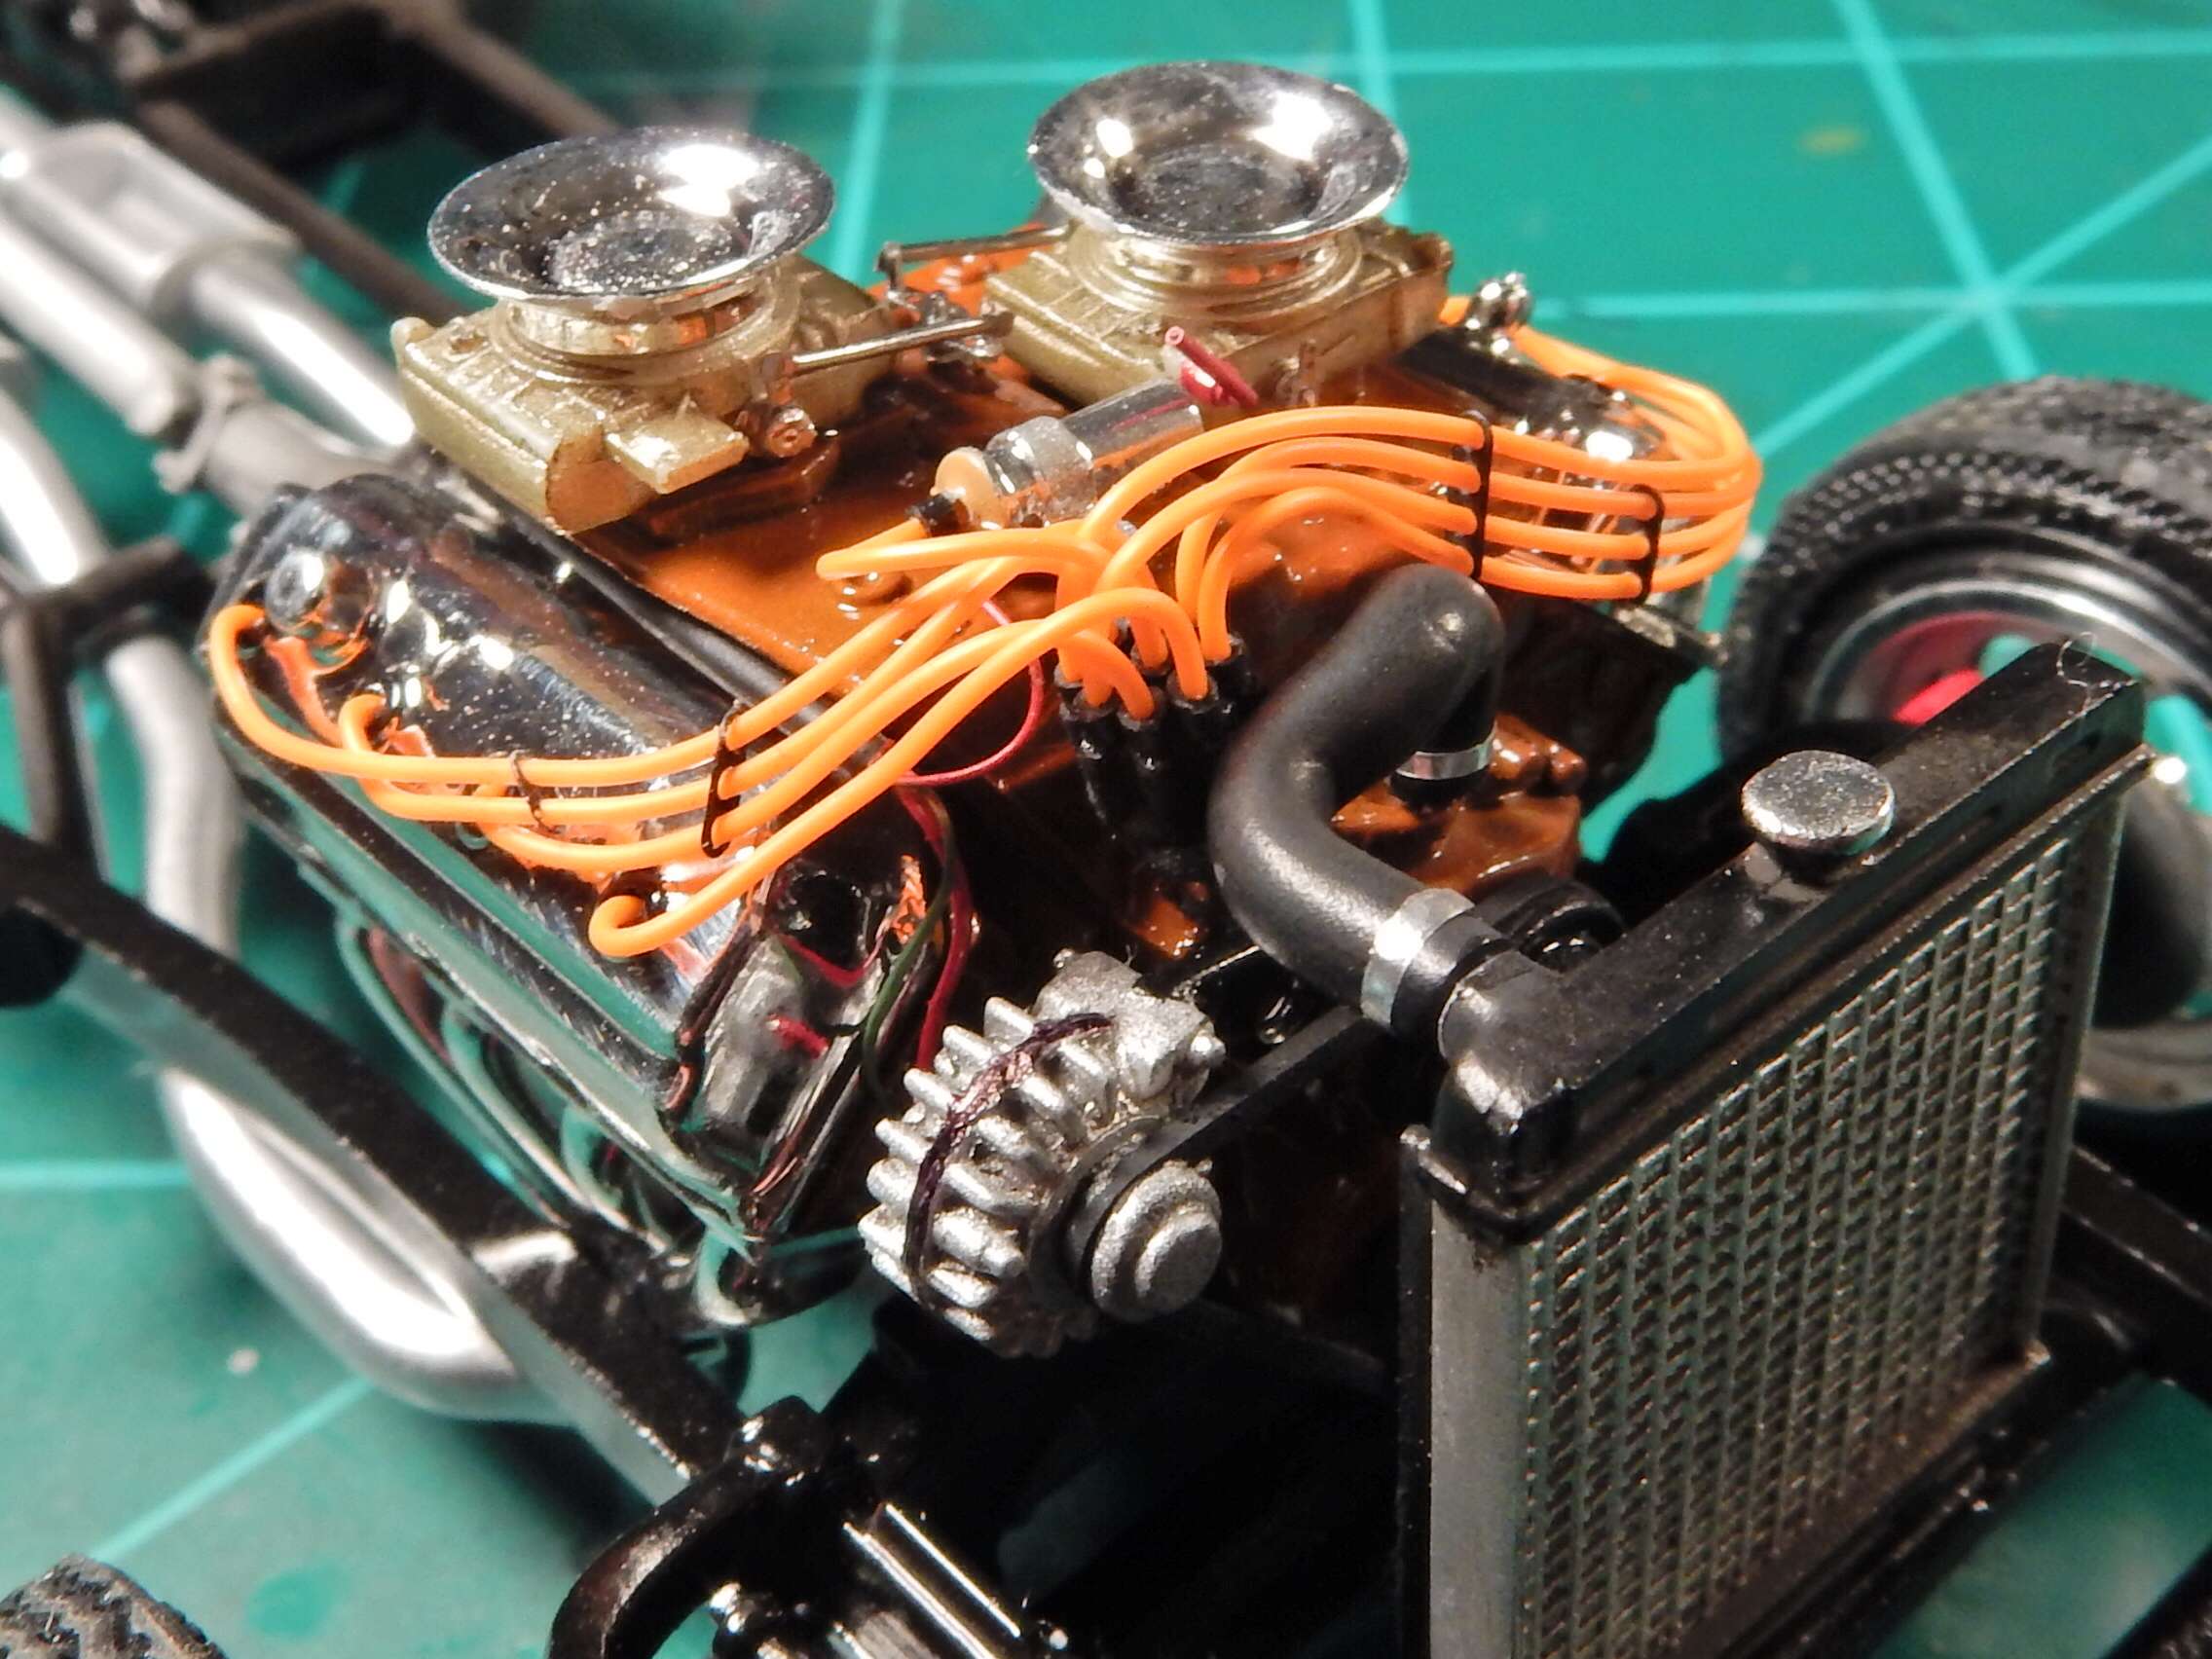
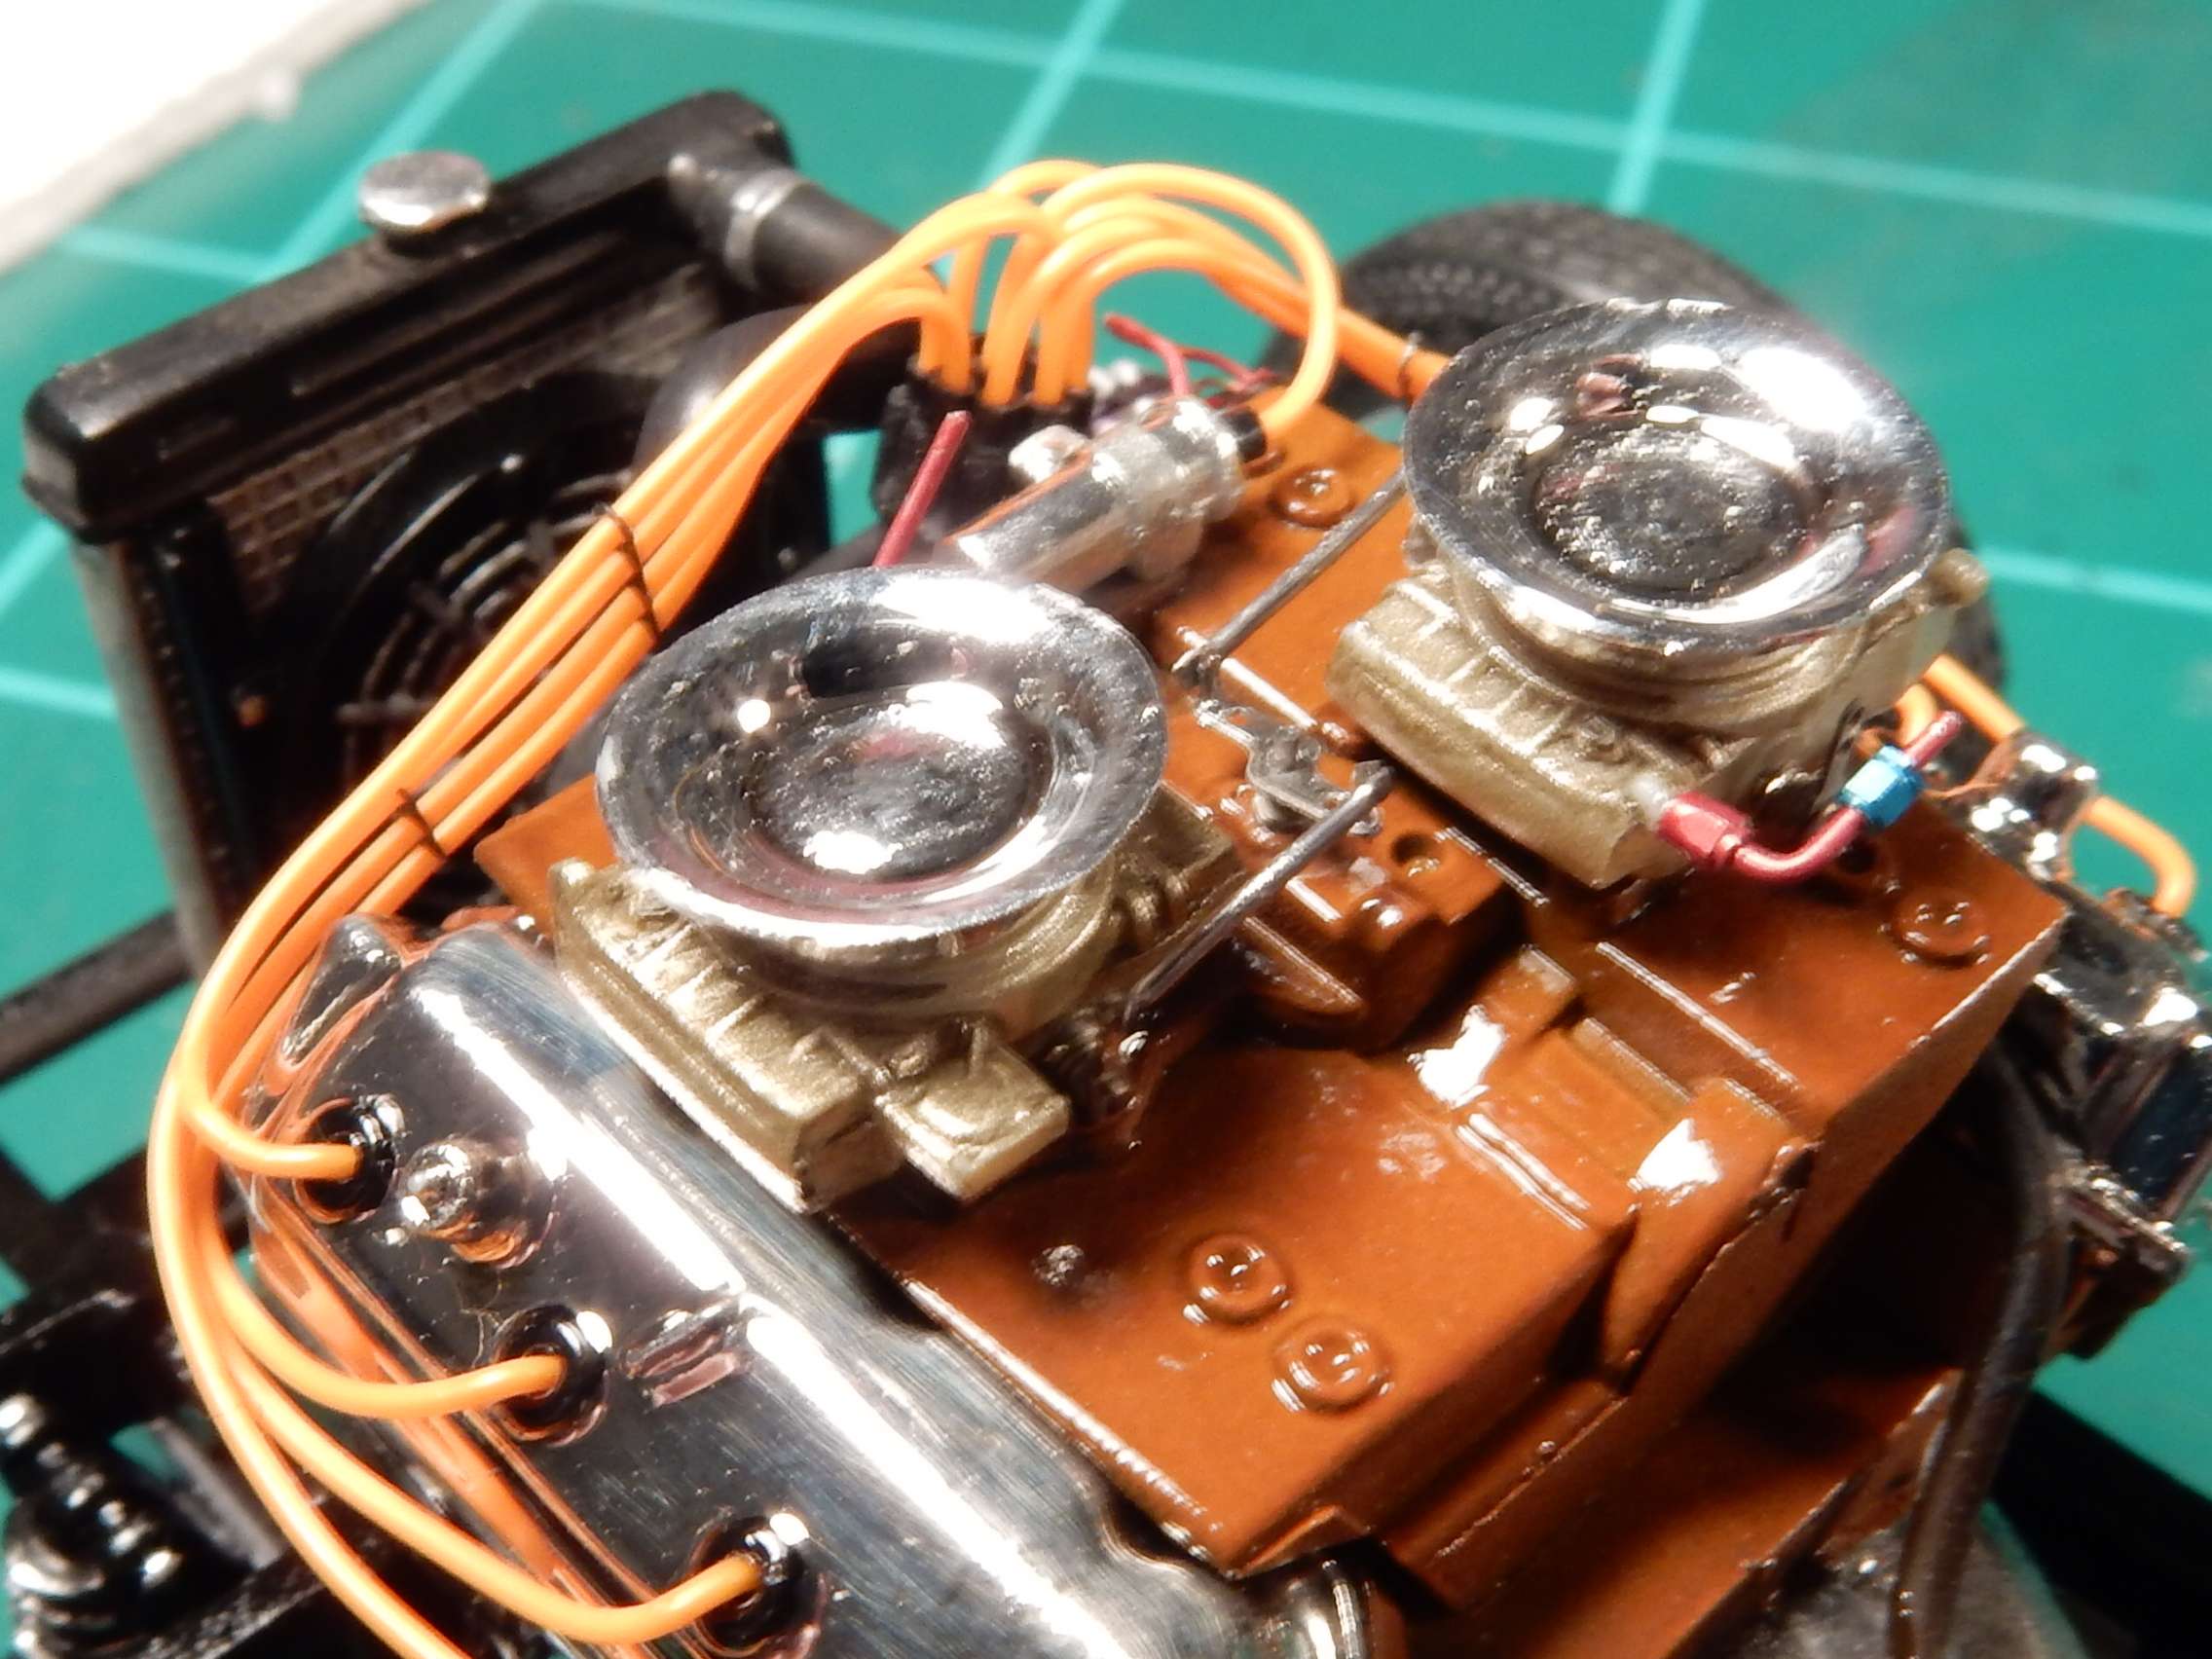
Got the distributor drilled a few days ago in anticipation for the orange spark plug wire arrival in the mail. I got the wires yesterday so I went to work on that this morning.

Image

I also received my "banjo" fittings for the carburetors so I can run those fuel lines now.

Image

My intention was to go with the stock routing and lines for the fuel delivery but this is a custom ride. I found some photos that I took at the San Antonio speedway that may suit this build even better.

A nicely built Hemi with the super stock manifold in a Belvedere:

Image

Image

Image

Image

Image

BTW..............I'll be saving the stock routing for the kit that I robbed this motor from. Oh but wait................there's no motor in that kit any more. :hmm: No worries about that......I got the replacement kit yesterday. :giggles:


 Forum | Modelers Social Club Forum (proboards.com) 

  • Member since
    April 2016
  • From: Parsons Kansas
Posted by Hodakamax on Thursday, June 7, 2018 9:48 PM

Just checkin' in again! Motor/tire=Cool!

Maxie

  • Member since
    August 2007
  • From: back country of SO-CAL, at the birth place of Naval Aviation
Posted by DUSTER on Friday, June 8, 2018 12:15 AM

 Well it is good to reroute your fuel lines every once in a while. It keeps you fresh and in your part of the country, fresh, is a bonus. 


Oh and stance is gonna be totally “***-en”


Steve

Building the perfect model---just not quite yet  Confused

  • Member since
    April 2003
  • From: USA
Posted by keavdog on Friday, June 8, 2018 12:24 AM

Looking awesome!  Ya those meats on those wheels... like crack.

That intake manifold is the Mopar crossram right?

I've got the Dart on my wish list - in real life too.  Considering selling my 09 Charger and doing a knockoff 426 Dart with the factory drag car fenders/scoop etc.

Thanks,

John

  • Member since
    March 2012
  • From: Corpus Christi, Tx
Posted by mustang1989 on Saturday, June 9, 2018 7:56 AM

Thanks Max, John and Steve.

John: You are correct. That is the cross ram intake. What engine are you considering putting in the Dart? That would be a resto that you would have to do in here under the general section.

I didn't like the hole that was cut in the hood. I'm not much of a fan of that kind of stuff because most of the time it just looks cheap and half done. There are those cars that do look cool with a hole in the hood and a big tunnel ram dual quad setup coming out of the hood but this aint that car.

I cut some black Evergreen styrene to match the hole, glued it into place with Tamiya cement, filled in the cracks and low spots with super glue and sanded everything flush nice and purdy.

Image

Hemi is still coming along as well:

Image

Image

an "in chassis" shot with the engine wire harness installed:

Image

It's gonna take up the whole engine bay opening when it's all said and done. Still gotta work on the stance some. :hmm:

Image

Image


 Forum | Modelers Social Club Forum (proboards.com) 

fox
  • Member since
    January 2007
  • From: Narvon, Pa.
Posted by fox on Saturday, June 9, 2018 9:20 PM

Toast Toast Toast

Jim  Captain

 Main WIP: 

   On the Bench: Artesania Latina  (aka) Artists in the Latrine 1/75 Bluenose II

I keep hitting "escape", but I'm still here.

  • Member since
    March 2015
  • From: Close to Chicago
Posted by JohnnyK on Sunday, June 10, 2018 11:53 AM

Those are really nice quality photos. What kind of lighting do you use? There are no harsh shadows and no over the top highlights.

Your comments and questions are always welcome.

  • Member since
    August 2015
  • From: the redlands Fl
Posted by crown r n7 on Monday, June 11, 2018 11:06 AM

awesome engine !! and very nice chassis Im not going to ask the body color Zip it!


 Nick.

  • Member since
    March 2012
  • From: Corpus Christi, Tx
Posted by mustang1989 on Sunday, June 17, 2018 5:19 AM

Thanks Jim, Johnny and Nick!

Johnny: I use two incandescent lighting fixtures, one on each side. I'll usually take the photos and then edit them out for just a shade or two of lighting adjustments so I don't throw the color off too awful much.

I've got the chassis finished except for the chrome exhaust tips install:
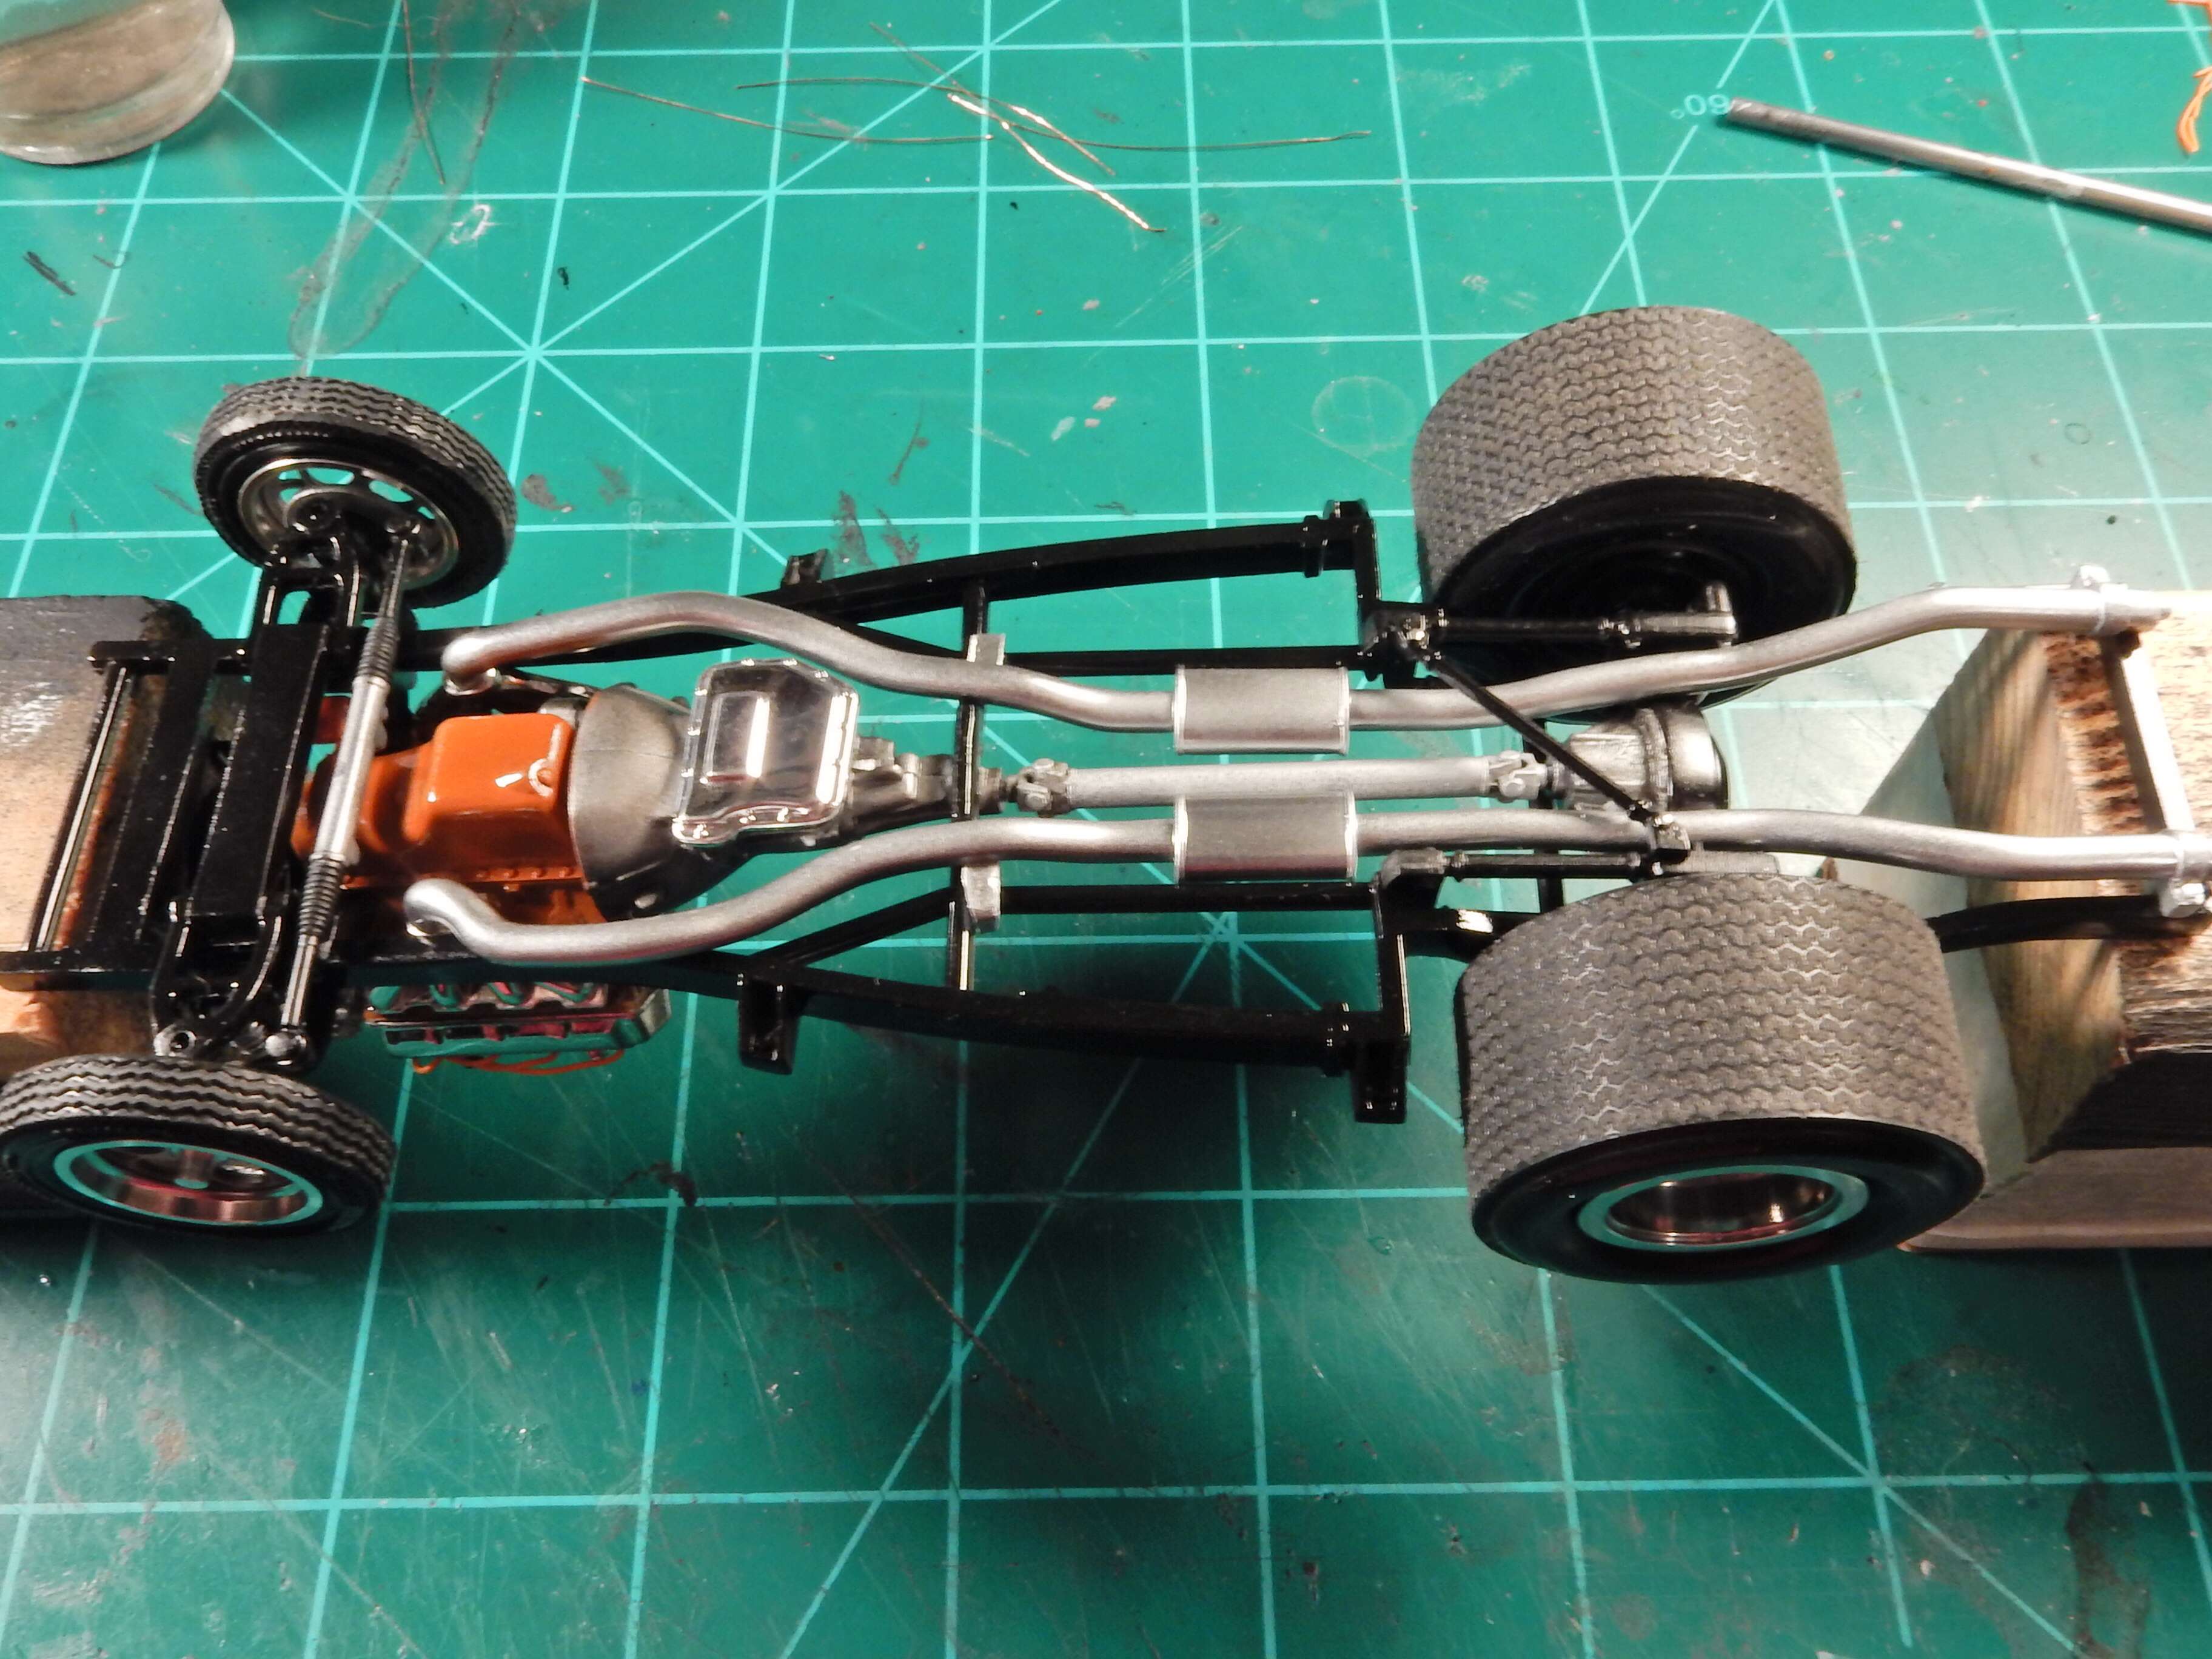
Image

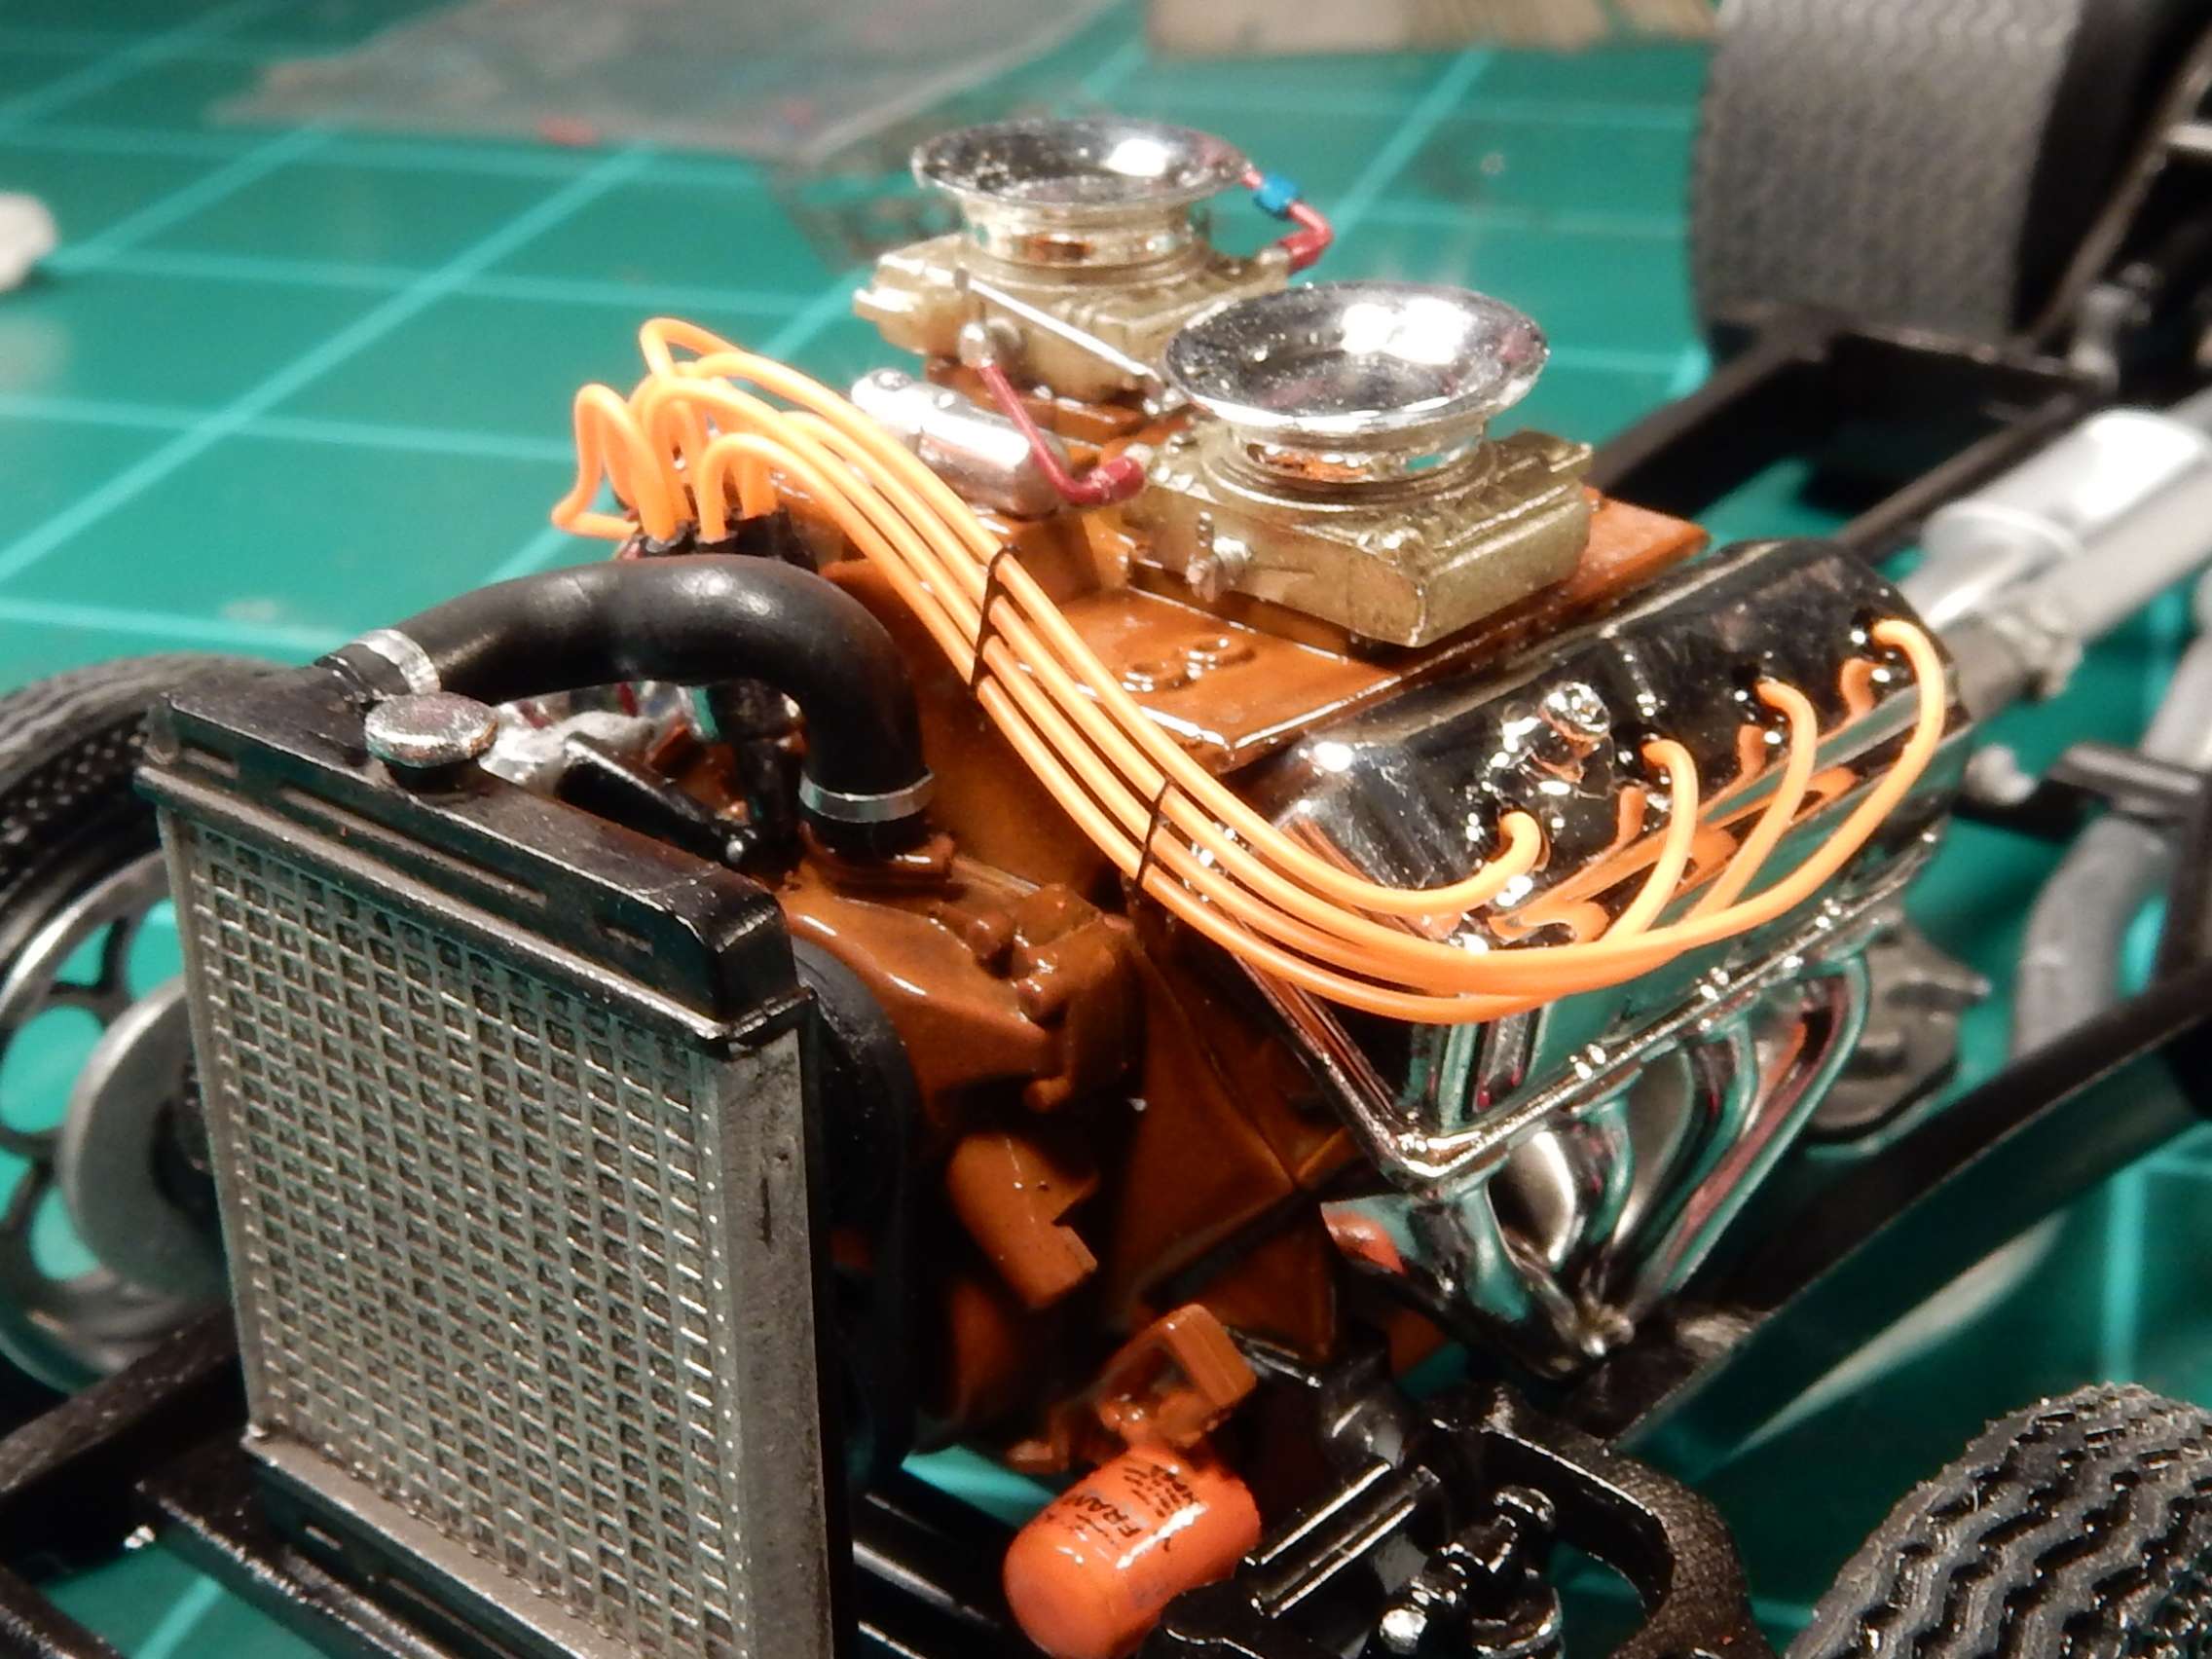
Got the throttle linkage done and have been working on other stuff like the fuel delivery system and radiator hose(which took three hose fabrications until I got a hose and clamp assembly that looked half decent!    ). Still have the throttle return springs to install, fuel lines from the fuel junction block and gotta clean up those air horns which I have temporarily installed for effect.

Here's where we're at now:
Image

Image

Image

Image


 Forum | Modelers Social Club Forum (proboards.com) 

  • Member since
    February 2003
  • From: East Bethel, MN
Posted by midnightprowler on Sunday, June 17, 2018 8:19 AM

Stunning work as usual Joe.

Hi, I am Lee, I am a plastiholic.

Co. A, 682 Engineers, Ltchfield, MN, 1980-1986

1 Thessalonians 4:13-18 1 Corinthians 15:51-54

Ask me about Speedway Decals

  • Member since
    August 2007
  • From: back country of SO-CAL, at the birth place of Naval Aviation
Posted by DUSTER on Thursday, June 21, 2018 2:54 PM


Looks so cool, the refrigerator is jealous Yes

Steve

Building the perfect model---just not quite yet  Confused

  • Member since
    March 2012
  • From: Corpus Christi, Tx
Posted by mustang1989 on Monday, July 2, 2018 12:25 PM

Thanks alot guys:

I dry brushed on a little ground up brown pastel to tone the plug wires down for a little more realistic look. I've still got a little tweaking to do and one throttle return spring to install on the rear carburetor but here's the fruits of today's labor:


 Forum | Modelers Social Club Forum (proboards.com) 

  • Member since
    June 2014
Posted by BrandonK on Monday, July 2, 2018 1:19 PM

This one is coming along very well. The level of detail you've added to that Hemi is amazing. It looks like is will run. I can't wait to see the body on this monster.

BK

On the bench:

A lot !! And I mean A LOT!!

2024 Kits on deck / in process / completed   

                         14 / 5 / 2  

                              Tongue Tied

  • Member since
    June 2018
  • From: Ohio (USA)
Posted by DRUMS01 on Monday, July 2, 2018 7:35 PM

Looking real nice.... and I want to say you have a nice eye for details like the fittings, linkage, plug wire droop, hose clamps, etc. I'm watching this one to its conclusion.

GREAT JOB.....

"Everyones the normal until you get to know them" (Unknown)

LAST COMPLETED:

1/35 Churchill Mk IV AVRE with bridge - DONE

NEXT PROJECT:

1/35 CH-54A Tarhe Helicopter


  • Member since
    April 2003
  • From: USA
Posted by keavdog on Tuesday, July 3, 2018 12:01 AM

Dude!  Looking stellar.  Really nice details

Thanks,

John

  • Member since
    March 2012
  • From: Corpus Christi, Tx
Posted by mustang1989 on Wednesday, July 4, 2018 10:04 PM

Thanks Brandon, DRUM and John.

I'm going out of town AGAIN this week. Good LORD!!! I can't seem to make ANY progress on this thing this last month. I'll be taking the body with me on the trip with an X-acto knife, sanding sticks and finishing pads. I'll see if I can get the body cleaned up over the next few days and come back and hit this thing hard. Man this has really been a tough month for any kind of progress or rest with all the traveling and obligations that I've had. Hopefully July will be much kinder in the way of benchtime.


 Forum | Modelers Social Club Forum (proboards.com) 

  • Member since
    March 2012
  • From: Corpus Christi, Tx
Posted by mustang1989 on Friday, July 6, 2018 6:56 AM
 

A small updare that I didnt get posted before leaving town yesterday...

 I managed to get the rear carburetor throttle return spring and bracketry put into place and cleaned up that front fuel line a bit this morning. Pretty much all done with the engine now except for the carburetor air horns.


Stance is about where I want it too:


 Forum | Modelers Social Club Forum (proboards.com) 

  • Member since
    March 2012
  • From: Corpus Christi, Tx
Posted by mustang1989 on Monday, July 9, 2018 4:40 PM

What happened there I will never know. I'll re post and see what happens though:

Managed to get the rear carburetor throttle return spring and bracketry put into place and cleaned up that front fuel line a bit this morning. Pretty much all done with the engine now except for the carburetor air horns.

Image

Image

Stance is about where I want it too:

Image

Image

.


 Forum | Modelers Social Club Forum (proboards.com) 

  • Member since
    March 2012
  • From: Corpus Christi, Tx
Posted by mustang1989 on Monday, July 9, 2018 4:42 PM

Is it me or is this all coming out jacked up?


 Forum | Modelers Social Club Forum (proboards.com) 

  • Member since
    November 2008
  • From: Far Northern CA
Posted by mrmike on Monday, July 9, 2018 5:19 PM

No, not just you. The last couple of posts are showing up as "overlays" as if two posts or three are stacked with type under photos, etc. If it matters I use Firefox as my browser on a Dell PC.

I'm enjoying your build - your level of detail is incredible!

Mike

  • Member since
    May 2011
Posted by Mr Mike on Monday, July 9, 2018 8:02 PM

Looking good Joe!  I'm liking the detail on the engine!

  • Member since
    August 2009
  • From: MOAB, UTAH
Posted by JOE RIX on Friday, July 13, 2018 8:24 AM

All right, I may be a bit late but, I'm on board for the finale. Good to see that you are up to your usual amazing shinannigans. Terrific stuff Bro.

"Not only do I not know what's going on, I wouldn't know what to do about it if I did". George Carlin

  • Member since
    March 2012
  • From: Corpus Christi, Tx
Posted by mustang1989 on Wednesday, July 18, 2018 2:43 PM

Thanks Mike, Mr. Mike and Joe. I appreciate all the comments.


 Forum | Modelers Social Club Forum (proboards.com) 

  • Member since
    March 2012
  • From: Corpus Christi, Tx
Posted by mustang1989 on Saturday, July 21, 2018 5:35 AM

It's been a while since I've posted any real updates but the beginnings of the interior construction are under way. Here's the progress on the door panels. I mixed up some dark grey and thinner and outlined all the recessed areas so when I shot the white over the door panels it would make those areas stand out a little more. A pre-shading of sorts.

Image

I found a piece of adhesive backed blue metallic sheet that I applied and cut out around the edges for a neat and clean door insert panel. Then I masked off and painted the door speaker grilles black. I'm still planning out the rest of the interior scheme.

Image

I did the same thing with the seats as I did with the door panels on pre-shading all the cracks and crevices with a dark gray, then a medium coat of white followed by a coat of semi-gloss clear. I'm trying to accent the blue lightly throughout the interior without overdoing it. Keep in mind that the seat belts and dash will be blue as well. I had some soda bottles so I drilled two holes to simulate cup holders and slipped a couple of sodas in the center console. Window switch and shifter bezels were picked out with Chrome BMF.

Image

Radio face with CD halfway out of the slot will be going on the blue panel at the front of the console. Weird how Revell didn't have a decal slide or radio face molded on it.

Image


 Forum | Modelers Social Club Forum (proboards.com) 

  • Member since
    January 2015
Posted by PFJN on Saturday, July 21, 2018 7:05 PM

Hi,

That looks really sharp Smile.  Can't wait to see more.

1st Group BuildSP

  • Member since
    August 2009
  • From: MOAB, UTAH
Posted by JOE RIX on Saturday, July 21, 2018 11:40 PM

Excellent progress Joe. I like the use of a gray wash to pre-shade. Seems to work quite well.

"Not only do I not know what's going on, I wouldn't know what to do about it if I did". George Carlin

  • Member since
    March 2012
  • From: Corpus Christi, Tx
Posted by mustang1989 on Monday, July 23, 2018 11:04 AM

Thanks PFJN and Joe!! I appreciate the encouraging comments fellas.

Phase one of the color balance. There'll be a light blue flocking applied to the floor by tomorrow and some extra details added.Then the floor mats will also be thrown on both sides of the floor.
I removed the soda bottle from the passengers cup holder and glued a piece of black sheet styrene on the bottom of the interior tub at that location to simulate that little black foam pad that's usually at the bottom of cup holders. I may put a bottle cap opener in there as well.

Image


 Forum | Modelers Social Club Forum (proboards.com) 

  • Member since
    May 2013
  • From: Indiana, USA
Posted by Greg on Monday, July 23, 2018 11:21 AM

Dunno how I missed so many updates one this one, Joe.

Coming along great. The interior sure looks sharp, really sharp.

Your motor makes me drool.

Funny you mention your techique for the nice clean door panel cutouts. Masking those darned things is what has had me hung up on my VW for months. I sit down, look at it, and walk away......

  • Member since
    April 2016
  • From: Parsons Kansas
Posted by Hodakamax on Monday, July 23, 2018 12:15 PM

Just checking in. Things are lookin' cool! 

Maxie

  • Member since
    August 2009
  • From: MOAB, UTAH
Posted by JOE RIX on Monday, July 23, 2018 7:51 PM

Most impressive progress my friend. Looks sharp.

"Not only do I not know what's going on, I wouldn't know what to do about it if I did". George Carlin

JOIN OUR COMMUNITY!

Our community is FREE to join. To participate you must either login or register for an account.

SEARCH FORUMS
FREE NEWSLETTER
By signing up you may also receive reader surveys and occasional special offers. We do not sell, rent or trade our email lists. View our Privacy Policy.