SEARCH FINESCALE.COM

Enter keywords or a search phrase below:

1/72 TIE Defender buildup

8703 views
40 replies
1 rating 2 rating 3 rating 4 rating 5 rating
  • Member since
    March 2007
  • From: Atlanta, Ga.
Posted by MrSquid2U on Friday, August 28, 2009 1:24 AM

 darkwolf29a wrote:
Very nice build, man. :) Being a Star Wars Fan, I can't wait to see htis one finished. :)


And it's been a very fun build on a subject that holds alot of possibilities for "making it your own".

Thanks for the kind words.Smile [:)]


  • Member since
    August 2009
Posted by darkwolf29a on Thursday, August 27, 2009 11:16 AM
Very nice build, man. :) Being a Star Wars Fan, I can't wait to see htis one finished. :)
  • Member since
    March 2007
  • From: Atlanta, Ga.
Posted by MrSquid2U on Wednesday, August 26, 2009 11:08 PM

Rounded out the arsenal by adding the chin guns in similar fashion from aluminum and brass.


  • Member since
    March 2007
  • From: Atlanta, Ga.
Posted by MrSquid2U on Wednesday, August 26, 2009 8:24 PM
Getting back to the rebuilt wingtip guns I thought they could stand a lil more 'dressing up'. So first I inserted a smaller barrel tip within the existing ones and also whittled up lil 'muzzle bands' to place upon them. There's the everpresent "Gag Shop Novelty Penny" to mislead you into thinking this stuff might be small.Smile,Wink, & Grin [swg]

And Lincoln is wearing a Monacle and preparing to shoot a monkey out of a tree with his 'blowgun' equipped with poison tipped darts??


  • Member since
    March 2007
  • From: Atlanta, Ga.
Posted by MrSquid2U on Tuesday, August 25, 2009 10:04 PM

It was time for a really quick and easy effort at lighting up the three "thruster engines" upon the rear plate.

First drilled out the resin openings and then came in from behind with a larger bit until nearly reaching the opening. This gave enough room for some slightly modified 'micro-surface mount LEDS' which are merely pressed into the new receptacles. A lil bit of tempy wire and power and we have a light test.


And, that's a "regular" LED (the green one) along with a penny to guage the size of these parts.


  • Member since
    March 2007
  • From: Atlanta, Ga.
Posted by MrSquid2U on Sunday, August 23, 2009 8:58 PM

Using those lil photoetched "razor saws" really didn't do much damage or remove much material when I cut apart the wings. A lil bit of Milliput and some sanding smoothed over the "wounds" pretty well. Then I masked the 'wing panels' to save their fine pattern/details and shot em with some "thick primer". A lil block sanding, detail attention , maybe a repeat, and they'll be back to fine form I hope.Whistling [:-^]


  • Member since
    March 2007
  • From: Atlanta, Ga.
Posted by MrSquid2U on Sunday, August 23, 2009 1:55 AM

With the gun barrels made went ahead and made the fiber optic pathways for each wing. Some are shown with wire used as 'place holders' till everything is fitted together.

Then went ahead and made more room within the "ball" since I'll be fitting a full cockpit.


  • Member since
    March 2007
  • From: Atlanta, Ga.
Posted by MrSquid2U on Saturday, August 22, 2009 1:41 PM

Making six new gun barels isn't hard but if you're like me you have your good days and your not so good days for putting things on straight. If you ever struggle to get a band wrapped around a barrel, just cut a sleeve to but your styrene up against as you lay/wrap it into place.


  • Member since
    March 2007
  • From: Atlanta, Ga.
Posted by MrSquid2U on Friday, August 21, 2009 2:55 PM

Here's a shot of the new rebuilt wingtip gun with FO run through the pylon and hub to a remote light source just for this test.


  • Member since
    March 2007
  • From: Atlanta, Ga.
Posted by MrSquid2U on Thursday, August 20, 2009 9:27 PM

To ready it for further goodies I drilled through each engine/wing pylon and then bored out the hub itself-


  • Member since
    March 2007
  • From: Atlanta, Ga.
Posted by MrSquid2U on Wednesday, August 19, 2009 11:46 PM

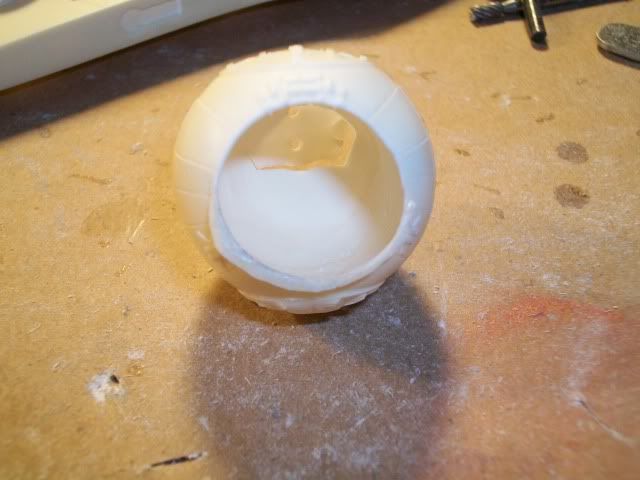
Started "attacking" the resin with some of my favorite "weapons", a quick bore drill bit and then the ever trusty Dremel!

Hollowed out the ball until it is fairly uniform with less than an 1/8" thickness left to make room for some goodies.

Heres a shot showing that I went in from the backside and kept grinding until the "open" area of the cockpit was wafer thin and eventually popped out.
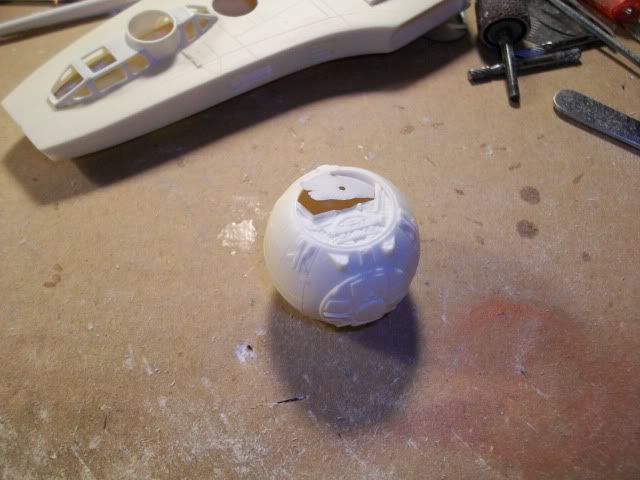
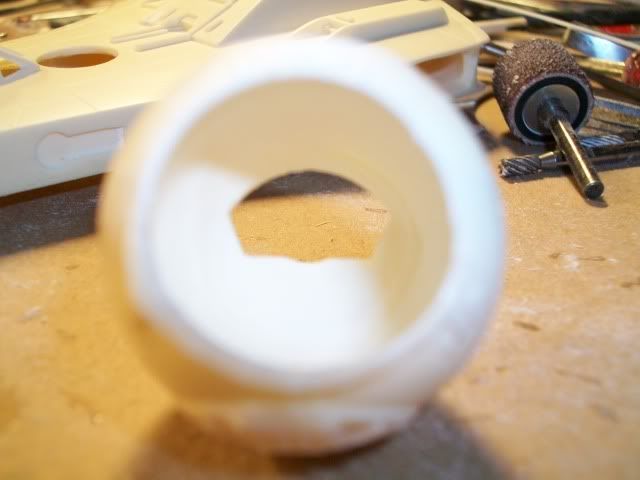
And so it goes.


  • Member since
    March 2007
  • From: Atlanta, Ga.
1/72 TIE Defender buildup
Posted by MrSquid2U on Tuesday, August 18, 2009 11:39 PM

Got ahold of the new TIE Defender from Sovereign Repicas and this is one sweet lil kit. It's packed with details and while 'everything' is nice the wings are particularly impressive for the crisp details of the panel material, guns with nice lil wiring conduits and mostly, for how thin they are to have been rendered in resin.

This thing will practically build itself so that will leave me to focus on adding some "goodies" of my own.Dinner [dinner]


JOIN OUR COMMUNITY!

Our community is FREE to join. To participate you must either login or register for an account.

SEARCH FORUMS
FREE NEWSLETTER
By signing up you may also receive reader surveys and occasional special offers. We do not sell, rent or trade our email lists. View our Privacy Policy.