SEARCH FINESCALE.COM

Enter keywords or a search phrase below:

AMT/TOS Romulan BOP

10254 views
39 replies
1 rating 2 rating 3 rating 4 rating 5 rating
  • Member since
    March 2007
  • From: Atlanta, Ga.
Posted by MrSquid2U on Friday, January 1, 2010 3:18 AM

 I've wanted to leave the bridge removable. At least for myself up through the very last of assembly to ease the joining of the hull halves and such. Not sure if I'm so worried about it remaining that way but just in case, I fashioned up a receiver within the hull that accepts the bridge with a VERY tight fit and now due to the channel effect it will also block light so I do have that option.


  • Member since
    March 2007
  • From: Atlanta, Ga.
Posted by MrSquid2U on Thursday, December 31, 2009 8:20 AM

And did the rough in for reshaping the bridge.


  • Member since
    March 2007
  • From: Atlanta, Ga.
Posted by MrSquid2U on Wednesday, December 30, 2009 7:49 PM

Added the engine vents to the rear panel-


  • Member since
    March 2007
  • From: Atlanta, Ga.
Posted by MrSquid2U on Wednesday, December 30, 2009 1:27 AM

Since many windows need adding and others are now being relocated I fashioned up lil "frames" for them. That's part of the charm for me of the BOP- all the frames.


  • Member since
    March 2007
  • From: Atlanta, Ga.
Posted by MrSquid2U on Tuesday, December 29, 2009 2:46 PM


 Due to the sidewalls being tapered now had to refit the wings to the body and they are now ready to mount after being beveled, if you wanna call it that. Also separated the bridge to allow some reshaping, further drilling and so I could button up the hull and retain access to the interior to the very end.


  • Member since
    March 2007
  • From: Atlanta, Ga.
Posted by MrSquid2U on Monday, December 28, 2009 7:58 AM

The sidewalls were rebuilt with a taper allowing the top half of the saucer with it's newly beveled edges to sit into that with an interference fit which will aid final finishing after all interior work is done. There's also a comparison of a stock BOP and you'll see the overall thickness has also been adjusted.


  • Member since
    March 2007
  • From: Atlanta, Ga.
Posted by MrSquid2U on Sunday, December 27, 2009 6:24 PM

Decided to go ahead with the kit mods to "bring it up to date" working off of the blueprints and also using the 1/350th AW (EX SR) piece as a references.


That "step" around the circumference of the upper saucer after it was cut down in diameter was added in styrene and will eventually join to new "angled" sidewalls. The upper hull itself was cut apart to account for the concave rear section.

Meanwhile the electronics have been made for the Photon Torpedo effect as well which will be added to the lit nacelle effects.


  • Member since
    March 2007
  • From: Atlanta, Ga.
Posted by MrSquid2U on Monday, December 21, 2009 2:39 AM

Maybe if you and I keep after the builder we can both see it soo.......


Oh.Confused


Um, thanks!Smile Burger


  • Member since
    July 2004
  • From: Sonora Desert
Posted by stikpusher on Monday, December 21, 2009 12:59 AM

This is one I want to see finished... "Balance of Terror" was one of the best episodes.


F is for FIRE, That burns down the whole town!

U is for URANIUM... BOMBS!

N is for NO SURVIVORS...

       - Plankton

LSM


  • Member since
    March 2007
  • From: Atlanta, Ga.
Posted by MrSquid2U on Sunday, December 20, 2009 11:55 PM

Up front on the nacelle I used a kit supplied piece to replace the evetual dome location. Recontoured it's taper, drilled it out and sleeved it in brass. This will give a nice receiver for the blue lens to be sunk into and with a green LED behind will shine nicely through the clear dome- a cutdown piece from a PL Enterprise.


  • Member since
    March 2007
  • From: Atlanta, Ga.
AMT/TOS Romulan BOP
Posted by MrSquid2U on Sunday, December 20, 2009 12:05 PM

Yes, Swanny's build motivated me to finally knock the dust off and crack the box open! I hope SWanny doesn't mind if a small attack group starts forming up?

Decided to pull one out of the stash and get to it.

Started on some nacelle mods first by replacing the rear portion with brass tube to improve the uniformity which will look better after lighting. Sank the bologna cut sleeve into the trimmed nacelle which will not only look a lil better at that joint but also help with light leakage more than if I had just glued it to the end cap.
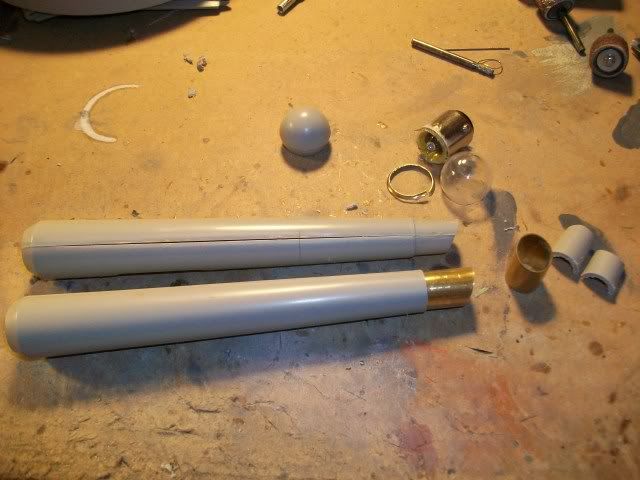
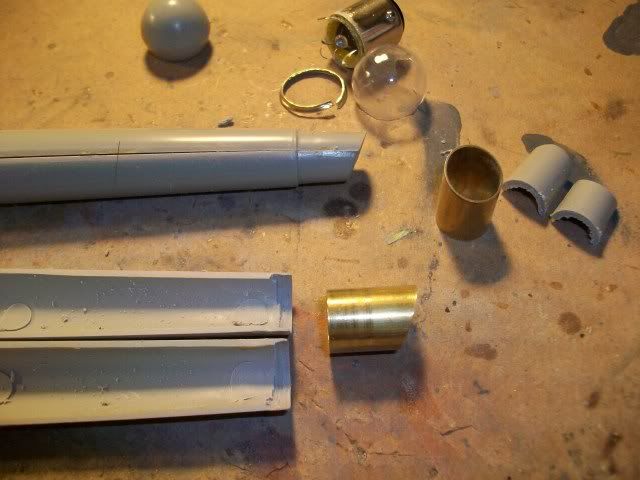
Started to search for a replacement "dome" on the front end and when I first looked at some references I thought the dome was almost an entire sphere perched atop the end. SO, I actually cut apart an automotive bulb (seen in background) and was pretty happy with the effect. Then the majority of references I eventually looked at went contrary to my perception and it appears a 'half sphere/dome cap' is closer. No need to seperate the lightbulb assembly and dress it with diamond bits that way so I'll forego the work.

Opened up the kit's molded in portholes while leaving the lil surrounds (frames?) of each just because I like that look.
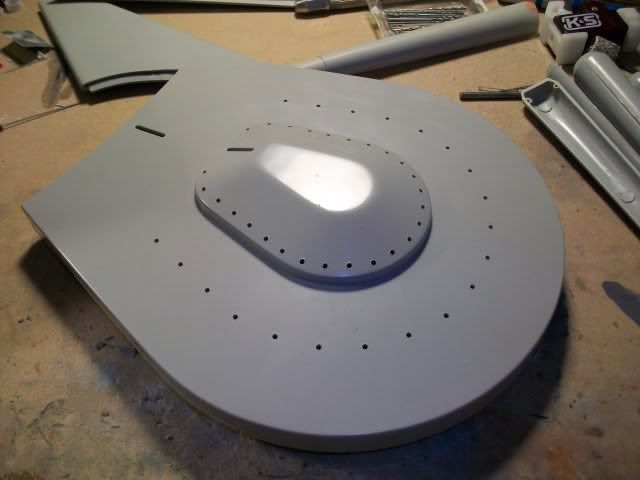
And I'm now scratching my head on how much further I wanna go to accurize the various missing portholes/windows and sensor openings? That includes pondering wether or not to rebuild all the sidewalls to include the missing angle and step from the surround into the plane of the top surface?
This will be lit for the "interior", nacelles, weapon, and thrusters.

If anyone is interested in stepping in now and getting it built to your own specs please PM me while changes can be accomodated.

Thanks for looking in.


JOIN OUR COMMUNITY!

Our community is FREE to join. To participate you must either login or register for an account.

SEARCH FORUMS
FREE NEWSLETTER
By signing up you may also receive reader surveys and occasional special offers. We do not sell, rent or trade our email lists. View our Privacy Policy.