SEARCH FINESCALE.COM

Enter keywords or a search phrase below:

Artesania Latina 1805 Swift pilot boat

26113 views
65 replies
1 rating 2 rating 3 rating 4 rating 5 rating
  • Member since
    May 2009
  • From: Poland
Posted by Pawel on Tuesday, March 19, 2013 4:01 AM

Well awright - the "houses" look good! Good luck with your project and have a nice day

Paweł

All comments and critique welcomed. Thanks for your honest opinions!

www.vietnam.net.pl

  • Member since
    March 2005
Posted by philo426 on Monday, March 18, 2013 5:42 PM

Assembled both deck houses and planked one of them.   

  • Member since
    March 2005
Posted by philo426 on Sunday, March 17, 2013 5:40 PM

I had to curve the roof of the main deckhouse.So I got creative with a coffee cup and quadruple clamps.  

  • Member since
    March 2005
Posted by philo426 on Sunday, March 17, 2013 12:59 PM

Cut the scupper slots with a Dremel and a reinforced cut off wheel.    

  • Member since
    March 2005
Posted by philo426 on Friday, March 15, 2013 10:37 PM

Cut and installed the timberheads.   

  • Member since
    March 2005
Posted by philo426 on Friday, March 15, 2013 4:29 PM

Thanks!I I am pretty adept with the dremel and k now to keep a light touch and minnimum rpm to avoid destroying the part.I will use the cut off wheel to cut the scupper slots soon.

  • Member since
    May 2009
  • From: Poland
Posted by Pawel on Friday, March 15, 2013 10:51 AM

Sorry philo426 - where I am currently, I don't have my ship model handy, so I can't do any photos of it for some time now. But if you take a look at google images (look for "wooden tiller") you even get some dimensions you could scale down. Be careful with that dremel, so as not to take away too much. I did it by hand, and didn't use the kit part, built it from scratch as the kit part had grain going the wrong way. It's a half hour work with fine sandpaper. Good luck and have a nice day

Paweł

All comments and critique welcomed. Thanks for your honest opinions!

www.vietnam.net.pl

  • Member since
    March 2005
Posted by philo426 on Friday, March 15, 2013 9:16 AM

Yes it does look too thick.I will machine it down with my Dremel.

  • Member since
    March 2005
Posted by philo426 on Friday, March 15, 2013 9:07 AM

That is why I am asking!Can you post a pic of your tiller?

  • Member since
    May 2009
  • From: Poland
Posted by Pawel on Friday, March 15, 2013 7:51 AM

Come on, philo426, you can do better than that! Try to make the tiller thinner at the handle! If you take the scale into account - would you be able to comfortably grip a bar this thick? You might also consider drilling the holes for the belaying pins at this time, later it might get difficult! Good luck with your build, have a nice day

Paweł

All comments and critique welcomed. Thanks for your honest opinions!

www.vietnam.net.pl

  • Member since
    March 2005
Posted by philo426 on Thursday, March 14, 2013 10:29 PM

  • Member since
    March 2005
Posted by philo426 on Thursday, March 14, 2013 10:29 PM

Got the tiller bar together.   i235.photobucket.com/.../003-8_zpsdece5d5c.jpg

  • Member since
    March 2005
Posted by philo426 on Tuesday, March 12, 2013 12:31 PM

The kit supplied dog legs did not fit the stern deck so I made new ones out of basswood.   

  • Member since
    March 2005
Posted by philo426 on Tuesday, March 12, 2013 8:28 AM

Will do!

  • Member since
    May 2009
  • From: Poland
Posted by Pawel on Tuesday, March 12, 2013 3:06 AM

Hello!

While the photo of the stern doesn't really convince me, I like the looks of the hull from the last post, it looks nice! Keep up the good work and watch out for those kit errors! Have a nice day

Paweł

All comments and critique welcomed. Thanks for your honest opinions!

www.vietnam.net.pl

  • Member since
    March 2005
Posted by philo426 on Monday, March 11, 2013 10:52 PM

Polyacrylied the deck and hull.While not perfect,I am generally pleased with my first planked hull.        

  • Member since
    March 2005
Posted by philo426 on Sunday, March 10, 2013 8:39 PM

Putting the stern together.  Some roughness has to be smoothed out and refining required.       

  • Member since
    March 2005
Posted by philo426 on Sunday, March 10, 2013 12:29 PM

Put 2 pieces of shaped wood on the stern to make walnut planking easier.       

  • Member since
    March 2005
Posted by philo426 on Friday, March 8, 2013 11:16 PM

I sanded down with 150.i willsand it down to 220 before I Polyacylic it.

fox
  • Member since
    January 2007
  • From: Narvon, Pa.
Posted by fox on Friday, March 8, 2013 8:46 PM

Coming along very nicely. Keep up the good work.That side looks like it should sand very well.

Jim Captain

 Main WIP: 

   On the Bench: Artesania Latina  (aka) Artists in the Latrine 1/75 Bluenose II

I keep hitting "escape", but I'm still here.

  • Member since
    March 2005
Posted by philo426 on Friday, March 8, 2013 5:04 PM

Finished the one side and will start the other.    

  • Member since
    March 2005
Posted by philo426 on Thursday, March 7, 2013 10:24 AM

  • Member since
    March 2005
Posted by philo426 on Thursday, March 7, 2013 10:18 AM

Yeah but i decided to put the keel on first and see how it will work out.Hope it will be all right but I will see!

  • Member since
    May 2009
  • From: Poland
Posted by Pawel on Thursday, March 7, 2013 10:03 AM

Looking good, philo426! But I believe the instructions have it the other way 'round, first the planking, then the keel - might be wrong, though, it's years since I read them myself. Keep up the great work and have a nice day

Paweł

All comments and critique welcomed. Thanks for your honest opinions!

www.vietnam.net.pl

  • Member since
    March 2005
Posted by philo426 on Wednesday, March 6, 2013 11:26 PM

I glued on the keel before I put on the second layer of walnut planking.   

Moderator
  • Member since
    September 2011
Posted by Tim Kidwell on Wednesday, March 6, 2013 11:34 AM

It's coming along nicely! Good work so far.

--

Timothy Kidwell
tkidwell@firecrown.com
Editor
Scale Model Brands
Firecrown Media


  • Member since
    March 2005
Posted by philo426 on Wednesday, March 6, 2013 10:12 AM

Yes I am planking the inside of the bulwarks.Looks a lot better.  

  • Member since
    May 2009
  • From: Poland
Posted by Pawel on Wednesday, March 6, 2013 9:49 AM

Hello!

Well I used one of the supplied wood strips for the stiffeners (i mean the short vertical ones), they are mentioned in the instructions and on the plans. Where I diverted from the instructions was to plank also the insides of the bulwarks - I didn't like to see plywood on my model. But what you meant was probably the bulwark rail - I got that wood from my local exotic wood merchant for free, it's some kind of bamboo used as spacers between the planks they actually sell, so he gave it to me for free. I cut it in thin strips and built the rail this way, replacing the kit's plywood parts.

Have a nice day

Paweł

All comments and critique welcomed. Thanks for your honest opinions!

www.vietnam.net.pl

  • Member since
    March 2005
Posted by philo426 on Wednesday, March 6, 2013 9:09 AM

Looks good.Did you use walnut for the bulwark stiffeners.?I kind of like the look.Yes the instructions leave much to be desired but what can you do?MY kit did not come with sails so I'l have to see if I can find them.

  • Member since
    May 2009
  • From: Poland
Posted by Pawel on Wednesday, March 6, 2013 2:09 AM

Hello philo426!

Good to know somebody else is building this! Watch out, this model is peppered with errors, some things, as shown in the plans, just don't make no sense at all, like for example the chain plates. I still have to finish mine after five years (granted, I only build it in the summer), but maybe I could help you if you have any questions. Here's a photo of my build:
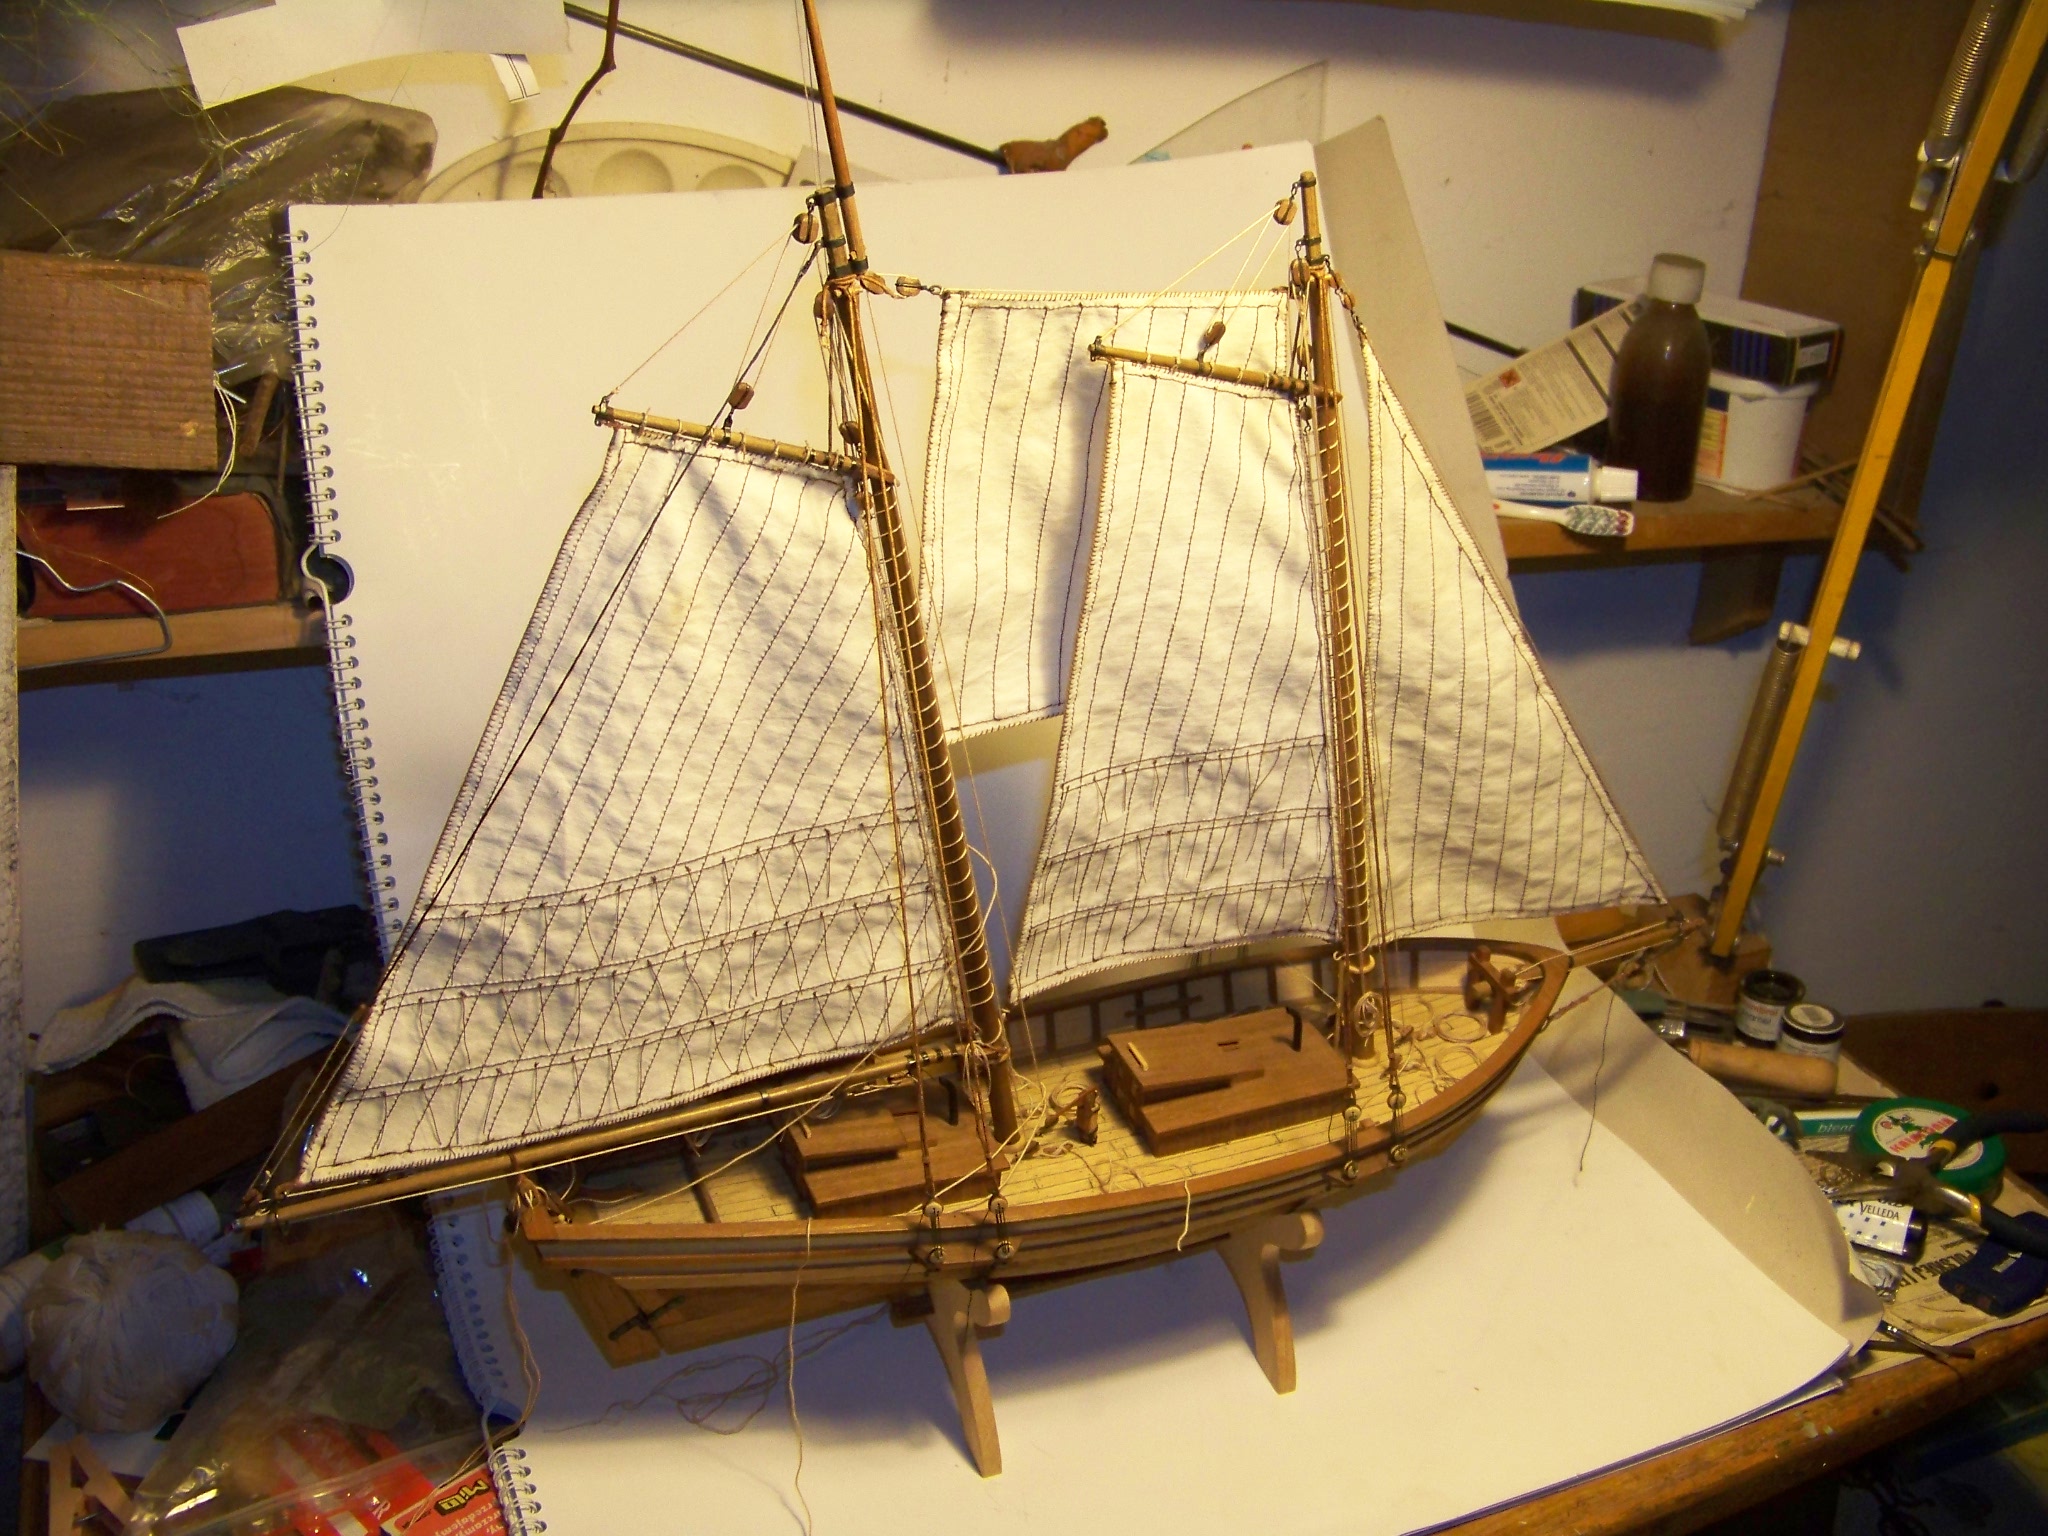
More info in this thread:

http://cs.finescale.com/fsm/modeling_subjects/f/7/t/150494.aspx

Good luck with your build and have a nice day

Paweł

All comments and critique welcomed. Thanks for your honest opinions!

www.vietnam.net.pl

JOIN OUR COMMUNITY!

Our community is FREE to join. To participate you must either login or register for an account.

SEARCH FORUMS
FREE NEWSLETTER
By signing up you may also receive reader surveys and occasional special offers. We do not sell, rent or trade our email lists. View our Privacy Policy.