SEARCH FINESCALE.COM

Enter keywords or a search phrase below:

USS Constitution build II - 35 years later

38707 views
257 replies
1 rating 2 rating 3 rating 4 rating 5 rating
  • Member since
    March 2018
  • From: Chicago suburbs
USS Constitution build II - 35 years later
Posted by Luvspinball on Friday, April 13, 2018 6:57 PM

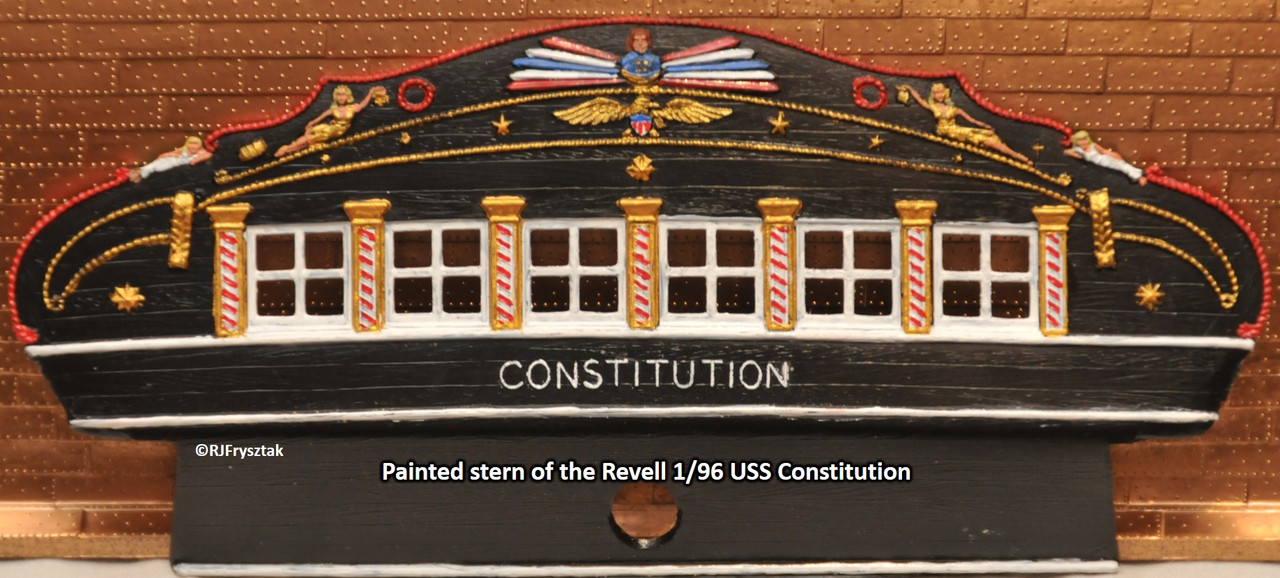
I built the Revell 1/96 USS Constitution over 35 years ago.  Dragged a half-finished hull down to college my junior year (I was renting the upstairs of an old farm house) and brought home a nearly completed ship.  My brother had to sit in the back seat of the car holding it during the 3+ hour trip home.  Finally finished it in late 1983.  It survived 2 more moves before finally being damaged beyond repair and scuttled.  I did manage to save the stern and a few of the men, but that was it.

About 15 years ago, my brother found one at a garage sale that had never been opened and gave it to me, where it sat for the last 15 years.  So I have finally opened the box and started in on it.  Again.

Not wanting to repeat the errors of my youth, I did quite a bit of research, and came across Force9's build.  Impressive to say the least.  Not wanting to piggy-back on his build, I decided to share some of my own parts of the build.  I have decided to go with quite a few scratch-built pieces, and a few from ModelMonkey to help with the realism.  I also scrapped the plastic, multi-piece decks for scratch-built wooden decks as well.  I also have corrected several of the "errors" in hatch placements and added the walls for the Commodore's area and pantry.  Finally, since I am somewhat of a wiz with LEDs (I have been using LEDs to light pinball toys for the last 15 years), The berth deck and gun deck will be lit, as well as the Captain's and Commodore's cabins.

So join me if you want to jog down memory lane with me as I rebuild this classic for the second time.

Painted stern of USS Constitution

Bob

Bob Frysztak

Luvspinball

Current builds:  Revell 1/96 USS Constitution with extensive scratch building

  • Member since
    July 2006
Posted by Michael D. on Friday, April 13, 2018 7:26 PM

Hi Bob,

Your story almost mirrors mine regarding the ole Connie, in my case a ceiling register decided to come loose and fall onto the ship that was 90% complete totally destroying it, so I'll be jogging down memory lane with ya.!


Michael D.

  • Member since
    March 2018
  • From: Chicago suburbs
Posted by Luvspinball on Friday, April 13, 2018 7:36 PM

Michael:  Happy to share the journey with you!  Cool

So I have been busy for the last 5 or 6 weeks, so I have some catching up to do.

I started with the hull, and followed Force9's lead to beef up the gun deck ports.  I added a layer of .060 styrene around the ports and along the bottom edge where the final planks would go.  I then added .040 x .125 styrene "planks" over the top.  I left the bottom row off for now, so I would have a bit more room to slip the deck in.  I plan on added a portion of the berth deck below that as well, but only in the areas that will be seen through the open deck hatches and ladder areas.  Since it will be lit (dimly), I need to add this.

gun port 1st layer

gun deck planking


Bob Frysztak

Luvspinball

Current builds:  Revell 1/96 USS Constitution with extensive scratch building

  • Member since
    March 2018
  • From: Chicago suburbs
Posted by Luvspinball on Friday, April 13, 2018 7:53 PM

I decided to go with wooden decking, so I had to build some.  I used 1/8" wide basswood strips and "painted" the edge with a dry erase marker before gluing together with wood glue.  Held it all together with 2" wide masking tape spaced every 3 inches  While that was drying, I started with the gun deck from the box.  I glued up the plastic deck and traced it exactly onto paper, including all the deck openings.  Using the drawings from the USS Constitution museum, I then edited the cutouts to better match the plans rather than the model's version.  I then traced this onto the wooden deck and cut everthing out very carefully with a new #11 blade.  Finally, I added the gun stop around the deck.

making the wooden gun deck

I scratch built the necessary new hatch openings out of styrene, and cut out those from the plastic deck that didn't need to be altered, and checked the fit.  Finally, I added the board ends and nail holes with a small chisel and a T-pin.  I then stained the deck "Early American" and gave it 3 coats of polyurethane (sanding in between).

board ends and nail holes

stained deck

In between, I have been painting gun carriages, stairs, and most other parts needed for the early stages of the build.  More to follow.

Bob


Bob Frysztak

Luvspinball

Current builds:  Revell 1/96 USS Constitution with extensive scratch building

  • Member since
    July 2014
  • From: Philadelphia Pa
Posted by Nino on Friday, April 13, 2018 8:25 PM

Great work on the deck. Individual Basswood strips seems like quite a daunting task.

 I have quite a few photo's of the Constitution, collected from the usual sources, and your deck color/tonality seems like a great match to the 2011 Change of Command  event.

Here's closeup from a Public domain pic:


 The deck is a bit worn/dirty in spots.  You can make out the 2 different "shades" where different wood was used.

  • Member since
    September 2012
Posted by GMorrison on Friday, April 13, 2018 10:29 PM

That is very well done. It's not so hard to go with individual strips. And the difference is remarkable.

 Modeling is an excuse to buy books.


  • Member since
    March 2018
  • From: Chicago suburbs
Posted by Luvspinball on Saturday, April 14, 2018 12:07 AM

Thanks Nino.  Not so daunting once you get it all set up and get in a rhythm.

The color in your picture was exactly what I had in my mind's eye.

Thanks GM.  It makes all the difference.  I also run a fine sanding block down one edge before gluing so that there is a distinct board edge.  I also did the same with the styrene planking on the inner hull for the same reason.  Creates a nice shadow line.  For the plastic, I use a cardboard emory board my wife uses on her nails.

Bob

Bob Frysztak

Luvspinball

Current builds:  Revell 1/96 USS Constitution with extensive scratch building

  • Member since
    March 2018
  • From: Chicago suburbs
Posted by Luvspinball on Saturday, April 14, 2018 1:47 PM

Needed bits and a stove, so I decided to try my hand at building one.  I used an image of the BlueJacket camboose to get the size right, and then put this together:

camboose

Added the vent pipe as well, as the original kit version just seemed way too small.

I couldn't decide on how I wanted to do the chain bits, so I made one of each.  Finally decided on a hybrid - pair of each.  Then I stumbled upon ModelMonkey's 1/96 stuff and purchased his stove, some barrels, and the capstans.  Since his 3D printing is clear, it seemed easier to light his stove, so I have decided to go with that instead.

Stove and chain bits

bit construction

final version

Moving on to bilge pumps next.

Bob

Bob Frysztak

Luvspinball

Current builds:  Revell 1/96 USS Constitution with extensive scratch building

  • Member since
    February 2016
  • From: Western No. Carolina
Posted by gene1 on Monday, April 16, 2018 11:55 AM

Luv, You do really beautiful work. I am anxious to see the hull when you get it painted.

  • Member since
    March 2018
  • From: Chicago suburbs
Posted by Luvspinball on Monday, April 16, 2018 11:59 AM

Thanks Gene.  Debating on whether or not to patina the copper plating.  Seen so many variations on that, from painstakingly altering individual plates, to the generic green wash.  Still haven't decided on what to do. Hmm Suggestions welcomed!

Bob Frysztak

Luvspinball

Current builds:  Revell 1/96 USS Constitution with extensive scratch building

  • Member since
    July 2014
Posted by modelcrazy on Monday, April 16, 2018 12:46 PM

Hi Bob, I just found this thread and think you are doing a fantastic job. My first Constitution was with my father back in the late 60's. He would spin tails of the old girl's exploits while we built her. I have been tooking at the kit as of late to do her justice. I must say that you are setting the bar high. I don't believe I could do as good a job.

I'll be watching and taking notes.

Steve

Steve

Building a kit from your stash is like cutting a head off a Hydra, two more take it's place.


http://www.spamodeler.com/forum/

  • Member since
    March 2018
  • From: Chicago suburbs
Posted by Luvspinball on Monday, April 16, 2018 1:05 PM

This may be one reason why it takes me twice as long to complete something than I planned - daddy's little helper!

helping nose

Bob Frysztak

Luvspinball

Current builds:  Revell 1/96 USS Constitution with extensive scratch building

  • Member since
    March 2018
  • From: Chicago suburbs
Posted by Luvspinball on Monday, April 16, 2018 1:12 PM

Thanks Steve.  I definitely have a Type-A personality, and am a bit of a perfectionist, so once I have a goal or a picture in my mind's eye (that I have usually pirated from the internet), I strive to get it to look like that.  Did the same with all my pinball mods, which is probably why folks liked them as much as they did.  My wife says I should have been an artist, but I am my own worst critic, and probably would never have sold anything due to my own stubborness.

Bob

Bob Frysztak

Luvspinball

Current builds:  Revell 1/96 USS Constitution with extensive scratch building

  • Member since
    March 2018
  • From: Chicago suburbs
Posted by Luvspinball on Wednesday, April 18, 2018 11:29 PM

So using the plans from the museum and many pictures from the ship, I started first with the copper portions of the pumps on the gun deck.  I used plastic beads I purchased at HobbyLobby (a bag of 100+ beads of various sizes for $1.99) and selected six that looked about the right size.  Painted them the metallic copper I used on the hull.  But once I placed them next to the 1/96" figure, they just looked too large.  So I picked out the next smaller size and that looked much better.  I flattened the bottom with a file and added the outflow pipe and a base and repainted.  I then built the pump handles and stands out of strip styrene.  Painted that all black, and then added the "wooden" handles - painted 1/32" styrene rod.  Set it up as in the pics and drawings - 4 on one set, and 2 on the other.  Below is a photo of the set of 4 with one of the crew:

bilge pumps

And here is one on the deck with all 6 pumps.

pumps on deck

Bob Frysztak

Luvspinball

Current builds:  Revell 1/96 USS Constitution with extensive scratch building

  • Member since
    June 2014
  • From: New Braunfels , Texas
Posted by Tanker - Builder on Thursday, April 19, 2018 7:40 AM

Hi;

 I like that you said , and I quote " I am my own worst critic " !  I have been saying that for years ! To every modeler I talk to . You'r edition of the old Girl is awesome .I do like everything you've done to date . T.B.

  • Member since
    March 2018
  • From: Chicago suburbs
Posted by Luvspinball on Friday, April 20, 2018 9:18 AM

Thanks for the kind words, TB.  Here is a funny Calvin & Hobbs that pertains to this:

Calvin builds a plane

Bob Frysztak

Luvspinball

Current builds:  Revell 1/96 USS Constitution with extensive scratch building

  • Member since
    March 2018
  • From: Chicago suburbs
Posted by Luvspinball on Friday, April 20, 2018 2:31 PM

Started working on the spar deck walls last night.  I am using .015 x .125 styrene strips (.156 for top board and trimming) for the planking.  I tried .010 and .020 - .010 too thin, and .020 was tough to get the bolt pattern imprint through.  .015 works great.  To get an even pattern, I tried a 5/16" pounce wheel, but couldn't get straight lines on such a thin width strip.  So I made a jig out of .030 x .125 strip stock and drilled holes exactly where I wanted them, slightly larger than the blunted T-pin I was using to press into the .015 strip.  Took a couple of tries to get the jig just how I wanted, but now I can press about an inch of strip stock per minute.  Mounted and painted a few to show how it looks:

bolt pattern on main deck walls

Below you can see the thickened gun deck walls.

Bob Frysztak

Luvspinball

Current builds:  Revell 1/96 USS Constitution with extensive scratch building

  • Member since
    March 2018
  • From: Chicago suburbs
Posted by Luvspinball on Saturday, April 21, 2018 8:39 AM

Sorry, but this Calvin is even MORE appropriate.  He has caught the modeling bug!

calvin clipper ship

Bob Frysztak

Luvspinball

Current builds:  Revell 1/96 USS Constitution with extensive scratch building

  • Member since
    July 2014
Posted by modelcrazy on Saturday, April 21, 2018 2:32 PM

I know how he feels.

Steve

Building a kit from your stash is like cutting a head off a Hydra, two more take it's place.


http://www.spamodeler.com/forum/

  • Member since
    December 2010
  • From: Salem, Oregon
Posted by 1943Mike on Saturday, April 21, 2018 11:37 PM

Yes, I understand completely! Except in the 1950's the Aurora and other models I built were most likely under $5.00 Smile.

The sentiment, I believe, must be quite common among young modelers - and even much older ones Big Smile.

Mike

"Le temps est un grand maître, mais malheureusement, il tue tous ses élèves."

Hector Berlioz

  • Member since
    March 2018
  • From: Chicago suburbs
Posted by Luvspinball on Wednesday, April 25, 2018 9:44 AM

I know I can probably find the answer to this question in Force9's build log, but I will ask again anyway. 

Was the rudder on the Constitution copper plated like the hull in 1812, or was it left "bare" as depicted in the Revell model? 

Any answers appreciated.

Bob


Bob Frysztak

Luvspinball

Current builds:  Revell 1/96 USS Constitution with extensive scratch building

  • Member since
    December 2005
  • From: San Diego
Posted by jgonzales on Wednesday, April 25, 2018 12:48 PM

Hi Bob,

I love your build, your attention to detail, and your technique for building up the decks from wood is astounding!

There are valid arguments on both sides for why the rudder should or should not be coppered and they have been made in various threads throughout this forum. My argument for coppering the rudder comes from the appearance on the Isaac Hull model housed at the Peabody Essex Museum. Here is a previous thread with pictures:

http://cs.finescale.com/fsm/modeling_subjects/f/7/t/138375.aspx

Note that the rudder is painted green, just as the coppered portion of the hull. I was also hoping to find some evidence in the Michel Felice Corne paintings of the Constitution vs Guerriere paintings, but even zooming in on the pics in Force9's thread did not yield any solid evidence. 


Cheers,

Jose

Jose Gonzales San Diego, CA
  • Member since
    September 2012
Posted by GMorrison on Wednesday, April 25, 2018 3:02 PM

I think it looks better sheathed.

 Modeling is an excuse to buy books.


  • Member since
    March 2018
  • From: Chicago suburbs
Posted by Luvspinball on Wednesday, April 25, 2018 3:38 PM

Jose - thanks for the research.  Interesting to me is the green paint on hatch comings and deck fittings.

GM - I agree - it will look better with it sheathed.

Bob Frysztak

Luvspinball

Current builds:  Revell 1/96 USS Constitution with extensive scratch building

  • Member since
    December 2012
Posted by rwiederrich on Friday, April 27, 2018 8:16 AM

Fantastic job...love the inventive mods.....


Rob

  • Member since
    March 2018
  • From: Chicago suburbs
Posted by Luvspinball on Monday, April 30, 2018 9:22 AM

Thanks Rob.

Working on putting together the spar deck now.  Finished (for the most part) the gun deck add-ons and the inside of the hull, including beefing up the bow near the anchor gussets.  Any other things I might need will be installed once I get the hull together and the gun deck mounted.  I will be hanging the berth deck below the gun deck beneath the open areas of gun deck and installing the 34 portholes listed on the plan.  So the question now is, will any of the hammocks be visible, and if so, should I put a light or two on the berth deck?

Bob Frysztak

Luvspinball

Current builds:  Revell 1/96 USS Constitution with extensive scratch building

  • Member since
    March 2018
  • From: Chicago suburbs
Posted by Luvspinball on Thursday, May 10, 2018 2:22 PM

I have just about completed the berth and gun decks before mounting them.  Images of the berth deck and the pumps I built for it are included.

pump1

pump2

pump3

pump4

I also have a couple of photos of the (nearly) completed berth deck below.

berthdeck1

berthdeck2

Bob Frysztak

Luvspinball

Current builds:  Revell 1/96 USS Constitution with extensive scratch building

  • Member since
    March 2018
  • From: Chicago suburbs
Posted by Luvspinball on Thursday, May 17, 2018 11:57 PM

Since the berth and gun decks are fairly complete, I decided to start with a bit of the lighting.  Since I have to work my way up, I started with the berth deck.  This will be lit by 8 4x4mm yellow LEDs.  Each LED is only 1.5mm thick so they will not get in the way of anything on the berth deck.  They are (will be) mounted to the underside of the gun deck using a hot glue gun and 2 hour cure clear gorilla glue.  The photos tell the story:

LEDs & resistors

soldering

more soldering

After completing the soldering, I insulated any exposed wiring with liquid tape (rubbery stuff that acts like electrical tape).  Testing of the wiring:

test of LEDs

there are only 4 lights attached to the bottom of gun deck at this point, but you get the idea!

Once the gun deck is in place, I will install the captain's cabin and wire up those lights, including the orage glow for the camboose.

Bob

Bob Frysztak

Luvspinball

Current builds:  Revell 1/96 USS Constitution with extensive scratch building

  • Member since
    July 2013
Posted by steve5 on Thursday, May 31, 2018 4:40 AM

this is such a great model to follow bob , your a very talented modeler mate ,


  • Member since
    March 2018
  • From: Chicago suburbs
Posted by Luvspinball on Monday, June 4, 2018 10:19 AM

Thanks Steve.

Working on the cannons and carriages right now.  Also working on laying out the circuit board to power the lighting.  Found a decent one that will fit in the hull, but now I have to lay out the various circuits that need power.  I will take pictures when I have it all worked out.  All those years repairing circuit boards at the bowling alley will finally pay off.  I hope.

Bob


Bob Frysztak

Luvspinball

Current builds:  Revell 1/96 USS Constitution with extensive scratch building

JOIN OUR COMMUNITY!

Our community is FREE to join. To participate you must either login or register for an account.

SEARCH FORUMS
FREE NEWSLETTER
By signing up you may also receive reader surveys and occasional special offers. We do not sell, rent or trade our email lists. View our Privacy Policy.