M4 18 ton High Speed Tractor
FIRE MISSION!!
Introduction
The M4 was based on the chassis and drive train of the obsolescent M2 Light Tank. This common practice of re-using old vehicles simplified design, allowed for easy production, and made maintenance in the field easier.
One variant was designed to tow anti-aircraft guns and another for howitzers. The rear compartment carried the gun crew and other equipment. The howitzer variants included a crane to assist with heavier projectiles
The M4 was manufactured by Allis-Chalmers of Milwaukee, starting in 1942 and was in U.S. military service until approximately 1960.
The M4 version I will be building will be the howitzer version with the ammunition box designed to carry 8 inch howitzer ammunition.
My building reference is the book High Speed Tractors by David Doyle
The Kit
The kit I wil be using is the Hobby Boss M4 Tractor 155mm/240mm (which is incorrect as the 8 inch projectile is 203mm), kit #82408
I will also be adding the Eduard PE sets 36072 which is the outside details and 36073 which is the cab doors. I will also replace the M2 MG with a Tasca MG.
By the start of building this kit I quickly realized it will also require, liquid putty, Mr. Surfacer, .010, .020 & .040 styrene sheet and lots of sandpaper as you will see below.
The Build
Because of the nature of this kit and how it is assembled, the instructions are for guidance but it has to be assembled and painted in small sub assemblies otherwise it will be almost impossible to paint all the details.
First I began with lower hull assembly. This included the hull front plate, rear plate and interior floor plate. The side panels which cover the tracks were completely covered with large deep pin marks, about 6 on each side. After trying to fill and sand, I went the route of using .010 styrene sheet and just covering the marks.
I then primed the top half with Vallejo OD primer and painted with Poly Scale Olive Drab 505 370. The engine compartment was weathered to prepare for the engine and winch installation with AK track wash.
The same problem exists with the inside of the engine roof, covered with part position holes and big pin marks. I covered it again with .010 styrene sheet. Here it is with a roof part added.
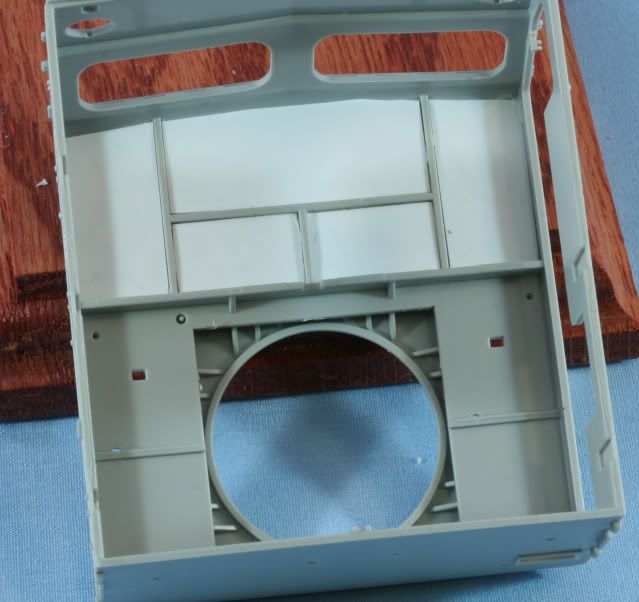
While I have the styrene out, the inside roof of the cab is a mess of pin marks and part holes. It is a bit more complicated and requires panels. Here is the roof in process.

As a break from the styrene sheet puzzle, I assembled the engine. The engine on the M4 was painted OD with black hoses and steel hose clamps. After assembly and priming the main engine was painted with Poly Scale OD. The hoses and belts are painted with a rubber mix of Flat & NATO Black. The clamps and belt pulleys are painted with Alclad Steel. The engine was then weathered with AK Track wash.
Also in the engine compartment is the winch assembly. Again after assembly and priming I painted with Poly Scale OD. I then wound some wax coated ship builders string onto the winch spool to create the winch cable. Then I painted the cable with Alclad Steel. Also the PTO connection on the winch was also painted with Alclad Steel.
That’s it for now. Working in 9 different directions at one time on this model. See what I get done for the next update.
As always all comments are welcome.
Rounds Complete!!