SEARCH FINESCALE.COM

Enter keywords or a search phrase below:

Tamiya 1:48 Pacific P-51D Mustang (Complete)

28108 views
69 replies
1 rating 2 rating 3 rating 4 rating 5 rating
  • Member since
    June 2013
Posted by bvallot on Tuesday, August 5, 2014 4:09 PM

Chanter

Hi guys,

According to Osprey (Very Long Range Mustang Units of the Pacific War), those were bomb aiming stripes on the wings.

Beautiful build by the way BVallot


Allen

Chanter, I can't thank you enough for filling in the blanks here on this one.  I've been searching high and low without anything to show for it.  Did the book go on to mention more about how the lines facilitated a bombing run?

Tex:  I'm so happy to hear some encouraging words right now. This P-40 is kicking my butt!!  I'm only just now getting on top of it.  That NMF was fun figuring out.  It was a lot of fun putting together too.  I look forward to making a few more PTO mustangs before moving on to the ETO.

On the bench:  

Tamiya F4U-1  Kenneth Walsh


  • Member since
    February 2003
  • From: Cameron, Texas
Posted by Texgunner on Tuesday, August 5, 2014 3:00 PM

I don't know how I missed this, but wow!   I love the presentation, in-flight, of just a superbly done warbird.  Well done Brett!Bow DownBow Down

Gary


"All you mugs need to get busy building, and post pics!"

  • Member since
    February 2013
Posted by Chanter on Tuesday, August 5, 2014 2:49 PM

Hi guys,

According to Osprey (Very Long Range Mustang Units of the Pacific War), those were bomb aiming stripes on the wings.

Beautiful build by the way BVallot


Allen

ButcherbirdBadgesmall_zps1d50c6bb1944 GB

  • Member since
    April 2005
  • From: Piscataway, NJ!
Posted by wing_nut on Friday, June 27, 2014 5:12 PM

A fine looking little pony thereBeer

Marc  

  • Member since
    February 2011
  • From: Bent River, IA
Posted by Reasoned on Thursday, June 26, 2014 7:47 AM

Excellent build BV, that is a rendering of the Pony not seen much, thanks for the detailing of your work!

Science is the pursiut of knowledge, faith is the pursuit of wisdom.  Peace be with you.

On the Tarmac: 1/48 Revell P-38

In the Hanger: A bunch of kits

  • Member since
    June 2013
Posted by bvallot on Thursday, June 26, 2014 7:34 AM

lawdog114

 I've always been curious as to what the lines and numbers on the wings of Pacific subjects are for.  A compass of some sort?

Joe

Sorry I forgot to mention this earlier in my post.  It was late over here and it must've slipped my notice.  I still have no idea what they were for.  I've looked and asked on here...but nothing's turned up.  My best guess is exactly what you mentioned above.  I've only seen these markings for FG's associated with the very long range escort missions in the Pacific.  So it's possible they served as reference for islands or objects that they would see off in the distance so as to stay on course and not waste fuel.  It's not like they had GPS back then LOL.

Which makes me think...could you imagine Saddam Hussein's surprise at those very three letters when he was told how his western front and Republican Guard was decimated at the Battle of 73 Eastings.  It's amazing how important "where" and "when" you are can be.  =D

On the bench:  

Tamiya F4U-1  Kenneth Walsh


  • Member since
    June 2013
Posted by bvallot on Wednesday, June 25, 2014 10:44 PM

Ha! I'm not much of a fan of needles either.  From the beginning it was always my idea to leave a pilot out.  Mostly, (at first) was because I figured them for detracting from the aircraft both in the detail of the figure and also the pilot would block what would be visible of the cockpit.  I've since had some second thoughts about all that.  Others have mentioned it on the forum as well.  On the Wildcat I did, I found the pilot I tried using wouldn't fit.  I might try him out here and see what I think.  =]

But I am fond of the thought of these old ghosts still roaming the skies they once fought in.

On the bench:  

Tamiya F4U-1  Kenneth Walsh


  • Member since
    February 2012
  • From: Olmsted Township, Ohio
Posted by lawdog114 on Wednesday, June 25, 2014 10:18 PM

Very impressive build bvallot.  Your NMF and weathering is phenomenal.  I also like your "Ghost pilot" displays.  Perhaps it scares me a little bit.  Things that scare me are in this order.  1. Spiders 2. Ghosts 3. Needles (any kind).  I know, I have issues, they're checking in to it.  I've always been curious as to what the lines and numbers on the wings of Pacific subjects are for.  A compass of some sort?

Joe

 "Can you fly this plane and land it?...Surely you can't be serious....I am serious, and don't call me Shirley"


  • Member since
    June 2013
Posted by bvallot on Wednesday, June 25, 2014 9:17 PM

Me too Big Blue.  I can't wait to see what everybody comes out with.  I've been itching to try out some wire rigging on one of them old birds. =]

And thanks to everyone else for stopping to peek. =]

On the bench:  

Tamiya F4U-1  Kenneth Walsh


  • Member since
    October 2013
Posted by Big Blue on Wednesday, June 25, 2014 7:37 AM

Looks great, BV!  All that work really paid off.

I'm looking forward to watching your Camel build.

  • Member since
    October 2004
  • From: Northern Virginia
Posted by ygmodeler4 on Monday, June 23, 2014 11:48 PM

That is one gorgeous plane

-Josiah

  • Member since
    April 2014
Posted by r13b20 on Monday, June 23, 2014 9:15 PM

She's seen some mileage. Good job. Definitely needs a pilot, and a spinning prop. Bob

  • Member since
    November 2003
  • From: State of Mississippi. State motto: Virtute et armis (By valor and arms)
Posted by mississippivol on Monday, June 23, 2014 8:33 PM

Great job, BV!!

  • Member since
    January 2014
  • From: Toronto
Posted by Rob S. on Monday, June 23, 2014 6:05 PM

Simply glorious!! Wow, that is some spectacular work. Very impressive, thanks for sharing!!

______________________________________________________________________________


On the Bench: Nothing on the go ATM

  • Member since
    June 2013
Posted by bvallot on Monday, June 23, 2014 5:20 PM

Alright, here it is.  Finally finished.  I's dotted and t's crossed.  I finally got my light box in to film with better than I'd been doing.  This post will be a bit pic heavy, but I wanted the NMF to show what it can do.  I had a lot of fun on this build and learned a lot from it.  I'd give this kit 5 out of 5 stars.  =]  It's a real winner.

 image by brittvallot, on Flickr

 image by brittvallot, on Flickr

 image by brittvallot, on Flickr

 image by brittvallot, on Flickr

 image by brittvallot, on Flickr

 image by brittvallot, on Flickr

 image by brittvallot, on Flickr

 image by brittvallot, on Flickr

 image by brittvallot, on Flickr

 image by brittvallot, on Flickr

 image by brittvallot, on Flickr

 image by brittvallot, on Flickr

 image by brittvallot, on Flickr

 image by brittvallot, on Flickr

 image by brittvallot, on Flickr

 image by brittvallot, on Flickr

Thanks for stopping to take a look.  =]  Any comments questions or tips are always welcome.

On the bench:  

Tamiya F4U-1  Kenneth Walsh


  • Member since
    June 2013
Posted by bvallot on Monday, March 24, 2014 4:58 PM

Thanks for the tip.  I've actually just recently been turned onto the albion tubes/rods that are fit to slide with each other.  Quite handy!  I may just try to fit some and modify the base of the prop and prop reduction box to accept one of these.

Thanks again wolfhammer1.  Any suggestions on the drop tanks?!  =]  Are you a mustang guy at all?

On the bench:  

Tamiya F4U-1  Kenneth Walsh


  • Member since
    March 2009
  • From: Yorkville, IL
Posted by wolfhammer1 on Saturday, March 22, 2014 11:53 PM

One idea to make an easily spinning prop is to use 2 different sizes of brass tubing that just fit one inside the other.  The outer tube forms a bearing surface that allows the prop to spin easily, plus allows the prop to be removed for transport.  I am not sure if you could do it with the fuselage complete, but it could be worth a try.  Good luck

Beautiful build!

John

  • Member since
    June 2013
Posted by bvallot on Friday, March 21, 2014 2:44 PM

Is there anybody out there that knows for sure how the fuel lines for the drop tanks were set up on these very long range escort missions out of Iwo Jima?  I have some photos to work from...but there are so many variations.  

Any help I can get is more than appreciated.  =]

On the bench:  

Tamiya F4U-1  Kenneth Walsh


  • Member since
    June 2013
Posted by bvallot on Friday, March 7, 2014 1:05 AM

Ha!  I did the same thing.  Kept my airbrush on it why I shot away with the camera.  =]  I guess it's useless hoping to always be that lucky....maybe I'll find a way to standardize it so it will always do that.  

Didn't Jim have a radio line that was rigged up funny?

On the bench:  

Tamiya F4U-1  Kenneth Walsh


  • Member since
    February 2012
  • From: Olmsted Township, Ohio
Posted by lawdog114 on Friday, March 7, 2014 12:55 AM

My Wildcat prop spins freely too.  I used my airbrush (empty) to make my prop move when I took pictures of it.  I just took a bunch pictures and kept the good ones.  Check it out....

Look out! the runaway pilotless Wildcat!...............Surprise

Joe

 "Can you fly this plane and land it?...Surely you can't be serious....I am serious, and don't call me Shirley"


  • Member since
    June 2013
Posted by bvallot on Thursday, March 6, 2014 10:50 PM

Thanks guys.  =]  Yeah, Reasoned...I looked far and wide to ensure I had everything right for this build.  I still have two more things to add to the undersurface.  I'll highlight them in the next post.  I save the most delicate parts for last after I've gotten everything ready to mount it.

Joe, I'd like to do something like that in the future for smaller dioramas.  I lucked out with my wildcat and the prop fits on it just so that it will spin easily.  I've been trying to play with this one so that it loosens up a bit.  I'd like to take a couple of photos with the prop moving.  I think it's too late to do anything more about it now huh?  Do you know something about hooking it up that I don't?!  Any tricks out there?

On the bench:  

Tamiya F4U-1  Kenneth Walsh


  • Member since
    February 2014
Posted by USMC6094 on Thursday, March 6, 2014 7:34 AM

NICE the NMF look weathered and natural

  • Member since
    February 2011
  • From: Bent River, IA
Posted by Reasoned on Thursday, March 6, 2014 6:37 AM

Very sweet work Bvallot, hadn't seen that antenna setup before, great scratch work!

Science is the pursiut of knowledge, faith is the pursuit of wisdom.  Peace be with you.

On the Tarmac: 1/48 Revell P-38

In the Hanger: A bunch of kits

  • Member since
    February 2012
  • From: Olmsted Township, Ohio
Posted by lawdog114 on Thursday, March 6, 2014 12:53 AM

Shes a beaut Bvallot.   Looks dead on for an operational P-51.  You should hook that prop up to a motor....

Joe

 "Can you fly this plane and land it?...Surely you can't be serious....I am serious, and don't call me Shirley"


  • Member since
    June 2013
Posted by bvallot on Wednesday, March 5, 2014 11:42 PM

Back with an update.  I still have to fit the fuel lines to fix up and match them to the wing surface.   But for now I have just about everything done for this one...

I managed to fit the cockpit with the APS-13 light.  I drilled a very tiny hole to set the base of it into the dash.

Here's the APS-13
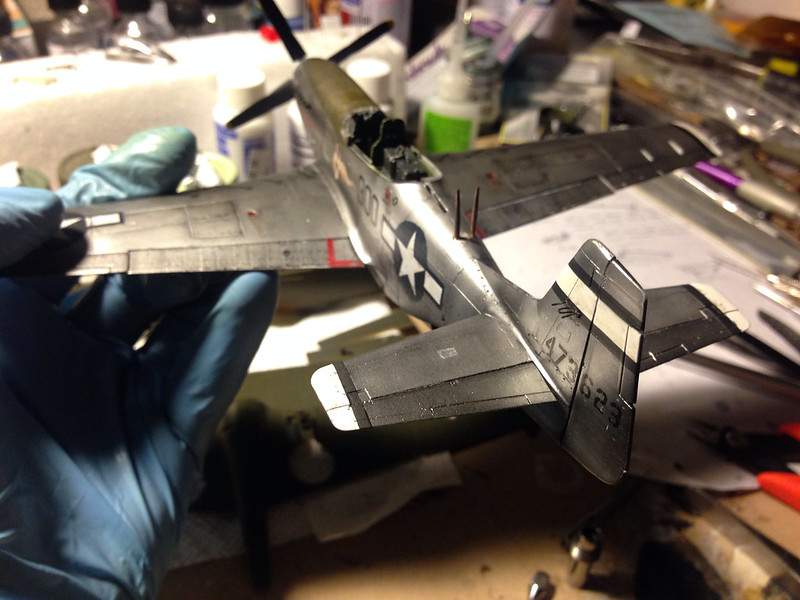

image by brittvallot, on Flickr
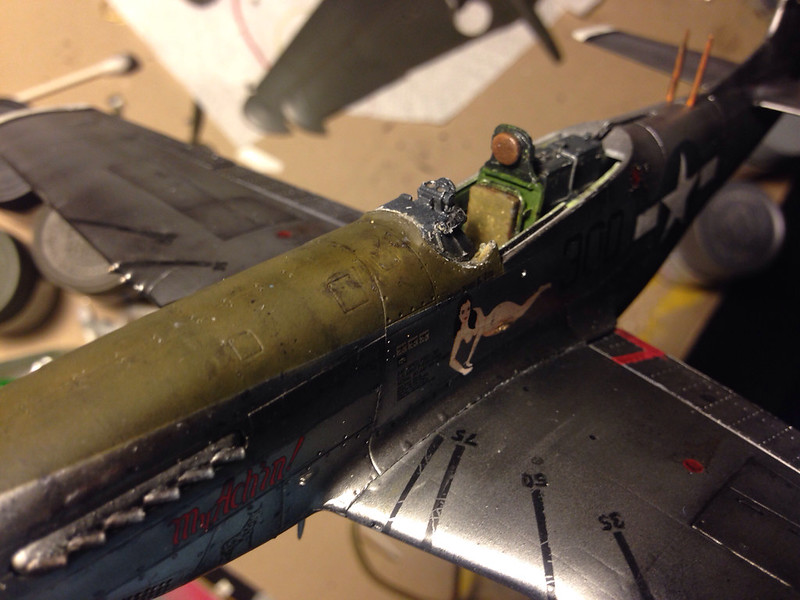

image by brittvallot, on Flickr
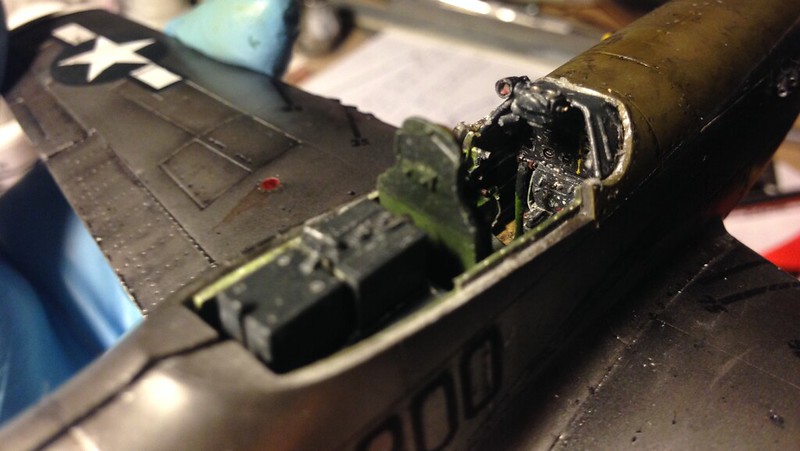

image by brittvallot, on Flickr
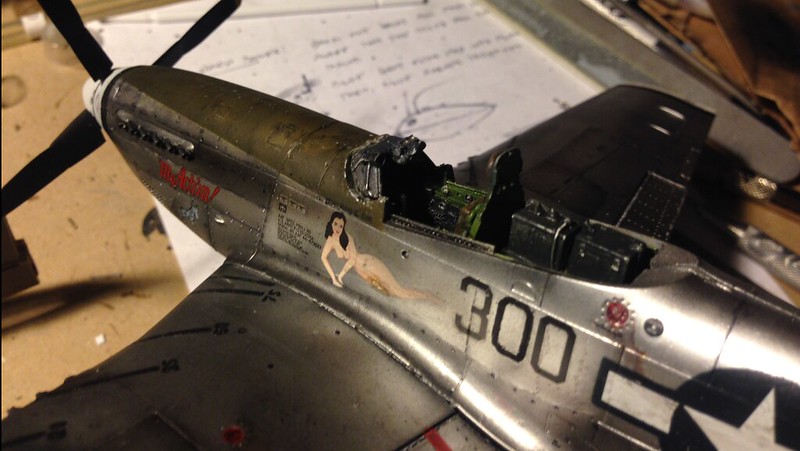

image by brittvallot, on Flickr
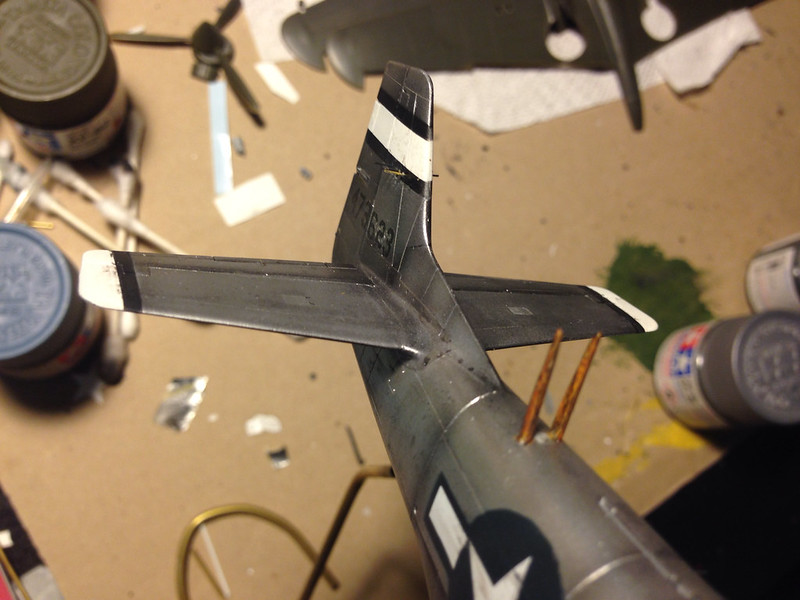

image by brittvallot, on Flickr

The antenna is made from very tiny brass rod.  To solve the problem of inserting them I used a brand new exacto blade and made a very small hole straight down.  The sharp tip ensures the hole's low profile.  The light on the dash was made from a female end of a pin that connects a fuselage part.  It was originally the pin part to the P-40 I'm working on.  I cut it out from the cowl flaps and thought I might make it of some use.  So, I filed and sanded it down into shape and I think it worked out fairly well.  It's a bit difficult to tell here with the light.  It'll be more visible when I'm completely finished and film it in the light box.  I'd like to have gotten the thickness down a bit more...but I think it's a good first attempt.

Radiator...
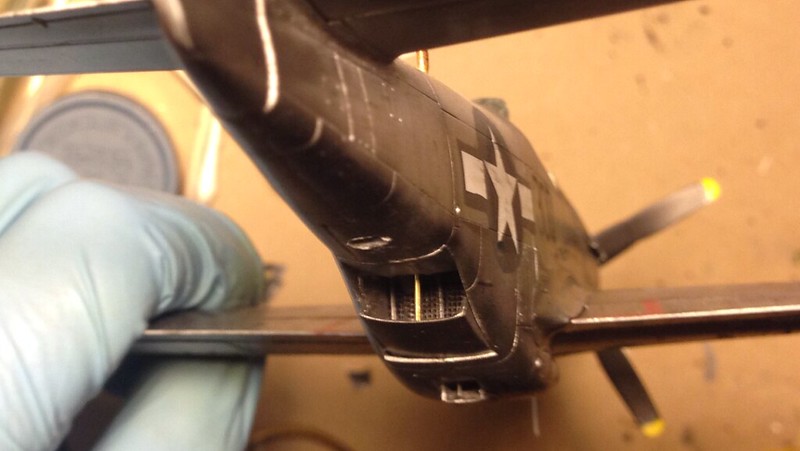

image by brittvallot, on Flickr
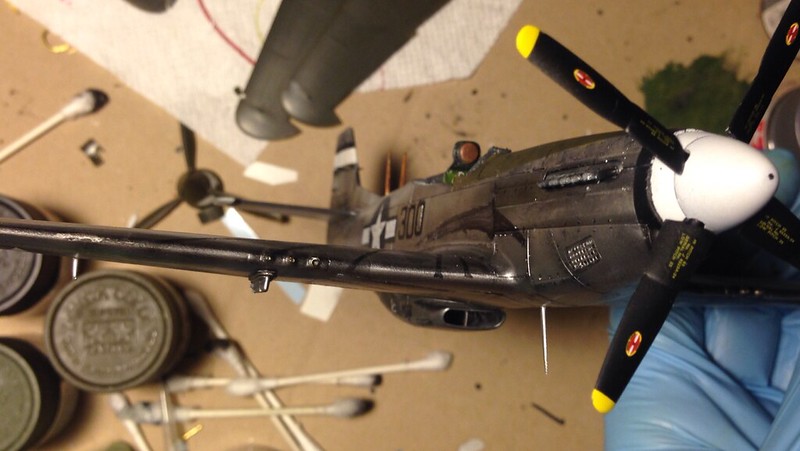

image by brittvallot, on Flickr
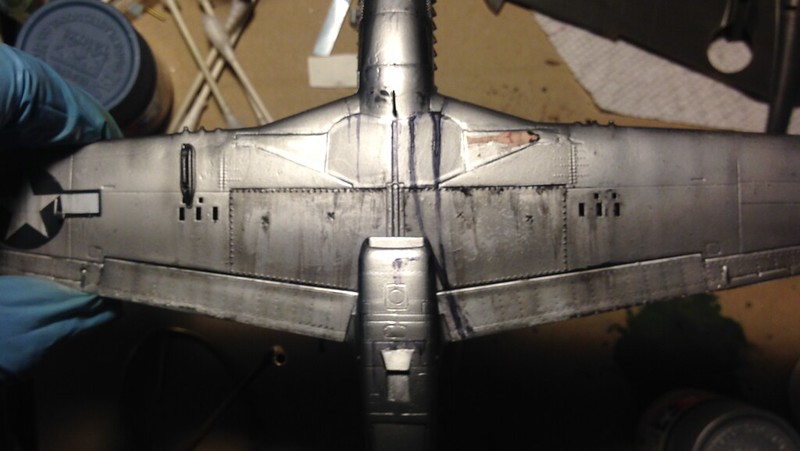

image by brittvallot, on Flickr

Didn't want to overdo the weathering here.  I kept it simple and let what I'd previously done with the NMF surface to stand up on it's own.

Glass for the gun site.
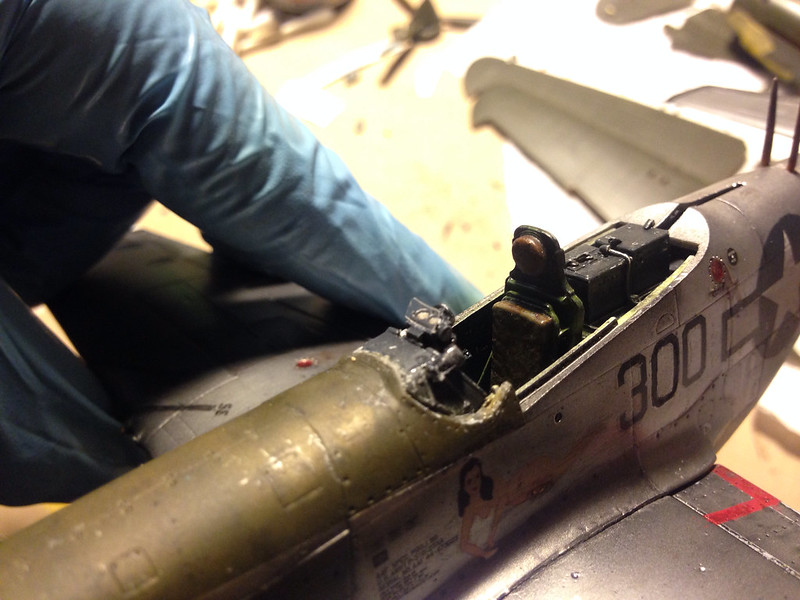

image by brittvallot, on Flickr

I haven't finished the wooden base yet.  I've got a piece of oak to cut and stain, but for now I've got it on a temporary stand.
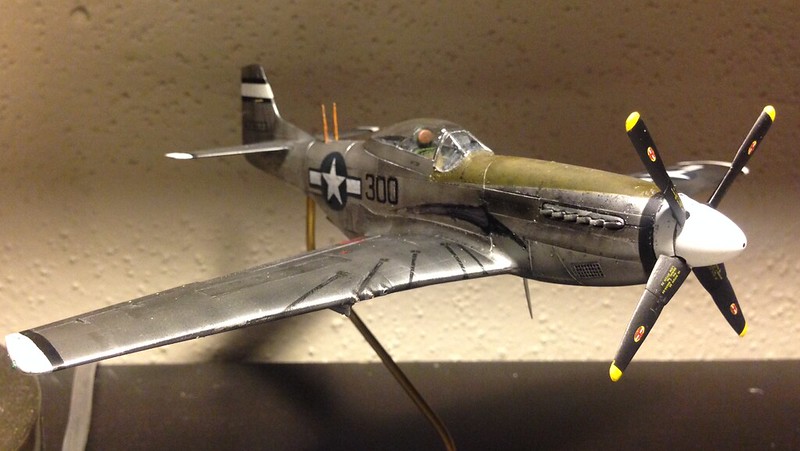

image by brittvallot, on Flickr
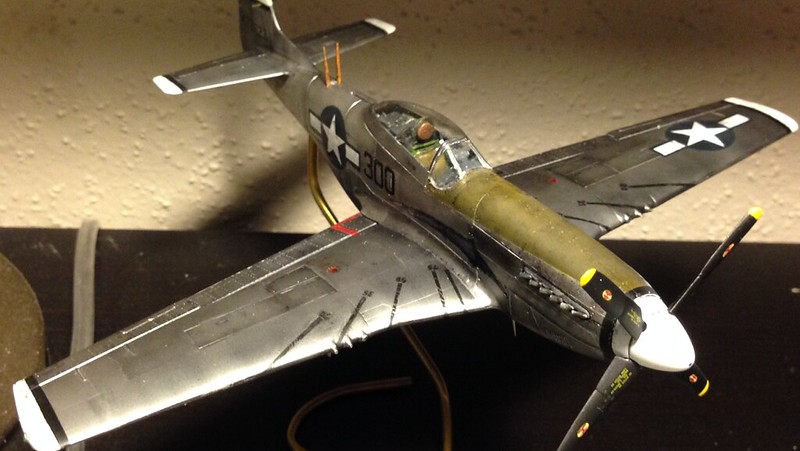

image by brittvallot, on Flickr

I put a coat of Alclad's Light Sheen which did take the shine down some.  If you compare it to photos of war time P-51's, it's actually a pretty good fit for what you come out with.  I also, used Alclad's Flat Klear Kote on the anti-glare surface and markings.  

=]

Tags: Mustang , NMF GB V

On the bench:  

Tamiya F4U-1  Kenneth Walsh


  • Member since
    June 2013
Posted by bvallot on Wednesday, February 19, 2014 2:15 PM

After some time away from the mustang, I've given some thought as to how I would approach some of the last touches regarding any weathering and sealing before calling it done.  While I wait for some supplies to come in the mail, I went ahead and picked back up on weathering the radiator and engine area on this mustang. 

Here's what I've started so far...


image by brittvallot, on Flickr

More to come.... =]

On the bench:  

Tamiya F4U-1  Kenneth Walsh


  • Member since
    February 2012
  • From: Olmsted Township, Ohio
Posted by lawdog114 on Monday, January 20, 2014 2:03 AM

Your welcome.  Go with "Black" and "Dark Dirt" for our purposes.   I usually slosh the two together on the model.  The black comes in handy for darker colors, like OD or IJN/IJN greens.   Experiment....

Joe

 "Can you fly this plane and land it?...Surely you can't be serious....I am serious, and don't call me Shirley"


  • Member since
    June 2013
Posted by bvallot on Sunday, January 19, 2014 7:28 AM

Thanks Joe.  I've been hearing more and more about the Flory wash, and it's obvious how nice it works.  I've been wanting to try it out.  I don't think my local hobby carries it.  I'll likely order some here from Sprue Brothers as well.  I haven't considered looking there yet so thanks for mentioning.

On the bench:  

Tamiya F4U-1  Kenneth Walsh


  • Member since
    February 2012
  • From: Olmsted Township, Ohio
Posted by lawdog114 on Saturday, January 18, 2014 9:21 PM

Bvallot, I must say I'm loving that NMF.  I've been using that Detailer wash for years in my cockpits and gear bays and have yet to find anything better for this.  I usually mix the black and brown to come up with a dirty look.  You should try the "Flory" wash on the exterior.  It leaves a nice grungy war-weary appearance and is also user friendly. I got mine from Sprue Brothers (and I'm about due for a refill).   I can't wait to see this one done.  

Joe    

 "Can you fly this plane and land it?...Surely you can't be serious....I am serious, and don't call me Shirley"


JOIN OUR COMMUNITY!

Our community is FREE to join. To participate you must either login or register for an account.

SEARCH FORUMS
FREE NEWSLETTER
By signing up you may also receive reader surveys and occasional special offers. We do not sell, rent or trade our email lists. View our Privacy Policy.