SEARCH FINESCALE.COM

Enter keywords or a search phrase below:

1:48 Academy P-38J Lightning (Completed)

26961 views
71 replies
1 rating 2 rating 3 rating 4 rating 5 rating
  • Member since
    June 2013
1:48 Academy P-38J Lightning (Completed)
Posted by bvallot on Tuesday, December 31, 2013 12:29 PM

Hey guys,

I'm carrying this build from a GB, but as I'm just starting I figured I'd post here too.  You never know when somebody out there has a handy tid bit to offer.  I'll be building Richard Bong's "Down Beat" Lightning.  I found a few good photos to help me along with this NMF and there's a book by Kagero that's hard to come by now but I was able to find one online in the UK.  Now I finally have a something set up and started to actually post. so here goes:


image by brittvallot, on Flickr

Great kit to build.  All my test fitting shows promise. The joints around the engine nacelles and wings may take some care, but they look fine really.  I am upgrading this with and Aires cockpit and Quickboost superchargers and intakes.  I've been wanting to see these superchargers up close for a while now to see if they'd fit on a B-17E I'm looking to do.


image by brittvallot, on Flickr

Here is some of the prep work I'm doing before I begin glueing things together.  Opening up some intakes/thinning some doors and vents. =]  You'll note the difference here:


image by brittvallot, on Flickr

Here is the nose.  I wasn't really confident in the fit onto the cockpit part of the plane so I added my own sleeve to fit into to keep things on track as I set it into place.  Once the glue hardens, I touch up a few spots and clean up the seams.  I've also covered up the shell chutes on the inside as I've opened them up to better represent that space.  I got a little lazy here and didn't want to build a more accurate drop for the chute.  I'm already having to give up on placing this landing gear inside the bay as the bay isn't deep enough for the wheel. Sooo...I figure I'll just learn some lessons here with this one this time, and make improvements on the next one.  Hopefully saving some sanity in the process (since now I'm planning a wedding...)


image by brittvallot, on Flickr


image by brittvallot, on Flickr


image by brittvallot, on Flickr

Here at least this bay door closes up real tight without any problems.  How bout that!

Now begins the long arduous process of accurately selecting the rivets to portray.  =D Here's a sneak peak at that and I'll probably begin painting the cockpit today.   


image by brittvallot, on Flickr


image by brittvallot, on Flickr

On the bench:  

Tamiya F4U-1  Kenneth Walsh


  • Member since
    April 2010
Posted by Theuns on Tuesday, December 31, 2013 1:16 PM

Ah yes! I have been drooling over this kit for a while now. Will be subscribed to your thread .

Theuns

  • Member since
    June 2013
Posted by bvallot on Saturday, January 4, 2014 1:01 PM

Okay. Snag!!  I just found out that the book I was getting to reference happened not to be in stock.  It's the Kagero Mini Top Colors 10: P-38 Lightnings at War.  If anybody out there in the modeling world knows where to find it or has a copy they'd be willing to part with, then I'd be happy to compensate you for your trouble.

I appreciate any help I can get.  =]

On the bench:  

Tamiya F4U-1  Kenneth Walsh


  • Member since
    March 2010
  • From: MN
Posted by Nathan T on Saturday, January 4, 2014 1:09 PM

That book is out of print. Kagero's lightnings part II might have it? Topcolors #33.


  • Member since
    June 2013
Posted by bvallot on Saturday, January 4, 2014 9:22 PM

That part I already knew.  The ONLY place I could find that "had" it apparently didn't.  =[   The part 2 of the P-38 Lightnings does not include Richard Bong's "Down Beat."  If I can't find it some how I might just hand paint the nose art and say screw the decals.

We'll see...

On the bench:  

Tamiya F4U-1  Kenneth Walsh


  • Member since
    February 2013
Posted by Chanter on Saturday, January 4, 2014 10:07 PM

BVallot,

That's funny, I just started the same kit, and am looking for the same book, as I have the Superscale decals to do St Louis Blues.

Allen

ButcherbirdBadgesmall_zps1d50c6bb1944 GB

  • Member since
    February 2012
  • From: Olmsted Township, Ohio
Posted by lawdog114 on Sunday, January 5, 2014 9:58 PM

Nice work so far Bvallot.  P-38's can be tough just by shear design of the plane itself.  I built two Hasegawa examples so far and they were certainly no walk in the park  I'll be following your progress......and congratulations on your upcoming nuptials....

Joe

 "Can you fly this plane and land it?...Surely you can't be serious....I am serious, and don't call me Shirley"


  • Member since
    June 2013
Posted by bvallot on Monday, January 6, 2014 1:17 AM
Chanter: let me know if you have any luck. =]

Joe: Thanks! I've actually read thru your build that you did on Robin Olds quite thoroughly. I've been looking forward to doing his P-38 as well. Maybe even his Phantom. And maybe his Mustang. The guy was a legend in his own day. =D any tips you might have along the way are more than welcome of course. I'll be on the road for work till Wednesday but when I come back I hope to have the cockpit finished and secured to the fuselage pod. I'll have some picks up then.

On the bench:  

Tamiya F4U-1  Kenneth Walsh


  • Member since
    January 2014
Posted by Silver on Monday, January 6, 2014 2:05 PM
Nice job.
  • Member since
    June 2013
Posted by bvallot on Thursday, January 9, 2014 12:23 AM

Here's a few photos of the cockpit that's mostly completed.  I've read that early variants sometimes had an OD green seat as these parts came from all over and the distributors often had delays in delivering, but by the time the J's rolled out everything was kept in the typical Interior Green.  This time I tried a play out of Lawdog's handbook and painted everything Flat Black, then came back with my interior green.  So far I like it!!


image by brittvallot, on Flickr


image by brittvallot, on Flickr

I returned to my latest way of painting the various equipment inside by mixing my Flat Black with a little Medium Blue.  I paint it thinned out onto everything...radio equipment, etc. and used a Light Grey to dry brush the corners of things.  A little Flat Aluminum dry brush over certain items that get stepped on and worn...and some dabs of red and white to display the placards that go over this and that.


image by brittvallot, on Flickr


image by brittvallot, on Flickr


image by brittvallot, on Flickr

I didn't feel so safe about the way Aires decided to construct this piece so i reinforced it with some brass rod.  I recommend it.  =]


image by brittvallot, on Flickr

Here's a test fit:


image by brittvallot, on Flickr


image by brittvallot, on Flickr

In order to fit the cockpit, I had to file down the two round female tabs that receive the dash/IP.  I filed them smaller from underneath and closer in to fit the cockpit tub. I also just went ahead and cut one side off for now to allow it to squeeze in.  I'll put it back on later.

Also, my head rest was painted the same as my wildcat and mustang.  It's a mix of Tamiya's Red, Flat Red Brown and some Flat Black.  None of this is mixed evenly.  It's thinned and painted quite spontaneously.  Nothing too fixed and planned.

On the bench:  

Tamiya F4U-1  Kenneth Walsh


  • Member since
    April 2005
  • From: Piscataway, NJ!
Posted by wing_nut on Thursday, January 9, 2014 8:32 AM

Having just seen what you can do to a blue Corsair I look forward to seeing the NMF treatment here.

Marc  

  • Member since
    June 2013
Posted by bvallot on Friday, January 10, 2014 11:06 AM

Well, all good things must come to an end right??  I'm finding a fit problem with the dash/IP onto the cockpit tub.  The width seems to be part of the problem.  I think with the tub in place it's slightly spread the sides of the fuselage pod on the kit that receives it.  So now the dash wont grab both sides.  And of course this throws the nose off.  With the dash not sitting right, the nose has a gap about 2-3mm wide down the length of the this whole piece.  =[


image by brittvallot, on Flickr


image by brittvallot, on Flickr

Any suggestions. So far my instinct is to just mash it down the rest of the way and glue it with something hard!  ...Plasticard the gap and move on.   But then again, I don't want to be rash now!! 

On the bench:  

Tamiya F4U-1  Kenneth Walsh


  • Member since
    March 2010
  • From: MN
Posted by Nathan T on Friday, January 10, 2014 11:55 AM

It seems I've read about this issue on other build logs (Britmodeller). Eduard even acknowledged it in one of their newsletters, and said they corrected the resin piece in later releases. But that doesn't help you. Sorry, I have no ideas atm...


  • Member since
    June 2013
Posted by bvallot on Wednesday, April 23, 2014 2:19 PM

So here's what is new with the P-38:

Fixed up the gap that was plaguing my build.  Here's the left side.

 image by brittvallot, on Flickr

There's a line that is left over from the joint that needed to be filled.  The line from the door to the gun bay needs to remain.  There's also another gap from the two wing halves that has been filled with CA.  There is a line just above it that needs to be scribed in however.

 image by brittvallot, on Flickr

The view of the other side was originally worse.  This side calmed down a bit better after seating the IP/dash more properly.  It was filled with plasitcard and CA and filed down.  The correct lines were re-worked and kept and I'm still "ironing" out the some of the rough spots.

 image by brittvallot, on Flickr

Now that I've got those gaps fixed, I can bring myself out of this screeching halt...as soon as I get moved. =[

On the bench:  

Tamiya F4U-1  Kenneth Walsh


  • Member since
    December 2003
  • From: Charleston, SC
Posted by sanderson_91 on Wednesday, April 23, 2014 7:56 PM

What a PITA!  Nice save there!

Steve


  • Member since
    November 2008
  • From: Central Florida
Posted by plasticjunkie on Thursday, April 24, 2014 7:29 AM

Some times the resin pieces take tons of effort to make them fit properly but it looks like you were able to recover from the bad fit issue. The pit looks really good.

 GIFMaker.org_jy_Ayj_O


Too many models to build, not enough time in a lifetime!!

  • Member since
    October 2009
  • From: Oil City, PA
Posted by greentracker98 on Thursday, April 24, 2014 4:08 PM

This seems to be a popular kit.

While it was originally earmarked for the Pacific Theatre, I got it transferred in the last minute to the European Theatre. LOL It's now waiting for the big day to begin shooting down the Nazi War machine.

A.K.A. Ken                Making Modeling Great Again

  • Member since
    November 2003
  • From: State of Mississippi. State motto: Virtute et armis (By valor and arms)
Posted by mississippivol on Thursday, April 24, 2014 5:03 PM

Nice recovery, BV!

  • Member since
    June 2013
Posted by bvallot on Thursday, April 24, 2014 8:53 PM

Thanks guys! =]  I appreciate the encouragement.  This build had me so excited only to have really bummed me out when that misfire on the nose occurred.  And since our move date got pushed back 10 days... =] ... I figured I'd take advantage of this renewed motivation and get some more work done here since the P-40 has been coming along so slowly.

I'm trying something new here.  This is my first attempt at stressed skin on the plane's surface.  I don't mean to overwork this too much, but I may spend a little more time tweaking this look.  Critiques, opinions, and any advice is certainly welcome.

Here's the first series of photos from what I have so far:

 image by brittvallot, on Flickr

 image by brittvallot, on Flickr

On this next pic of the right wing, it's a little difficult to tell but the entire surface has been riveted and only the leading edge of the wing has been lightly stressed.

 image by brittvallot, on Flickr

I think I'm going to rework some of this walk way area near the cockpit.  I'm not entirely happy with the current outcome...I wanted to first try out how the primer would settle into the divots.  I'll play with this a bit more.  The left side has come out a little better I think. =/

 image by brittvallot, on Flickr

That's it for now.  

On the bench:  

Tamiya F4U-1  Kenneth Walsh


  • Member since
    June 2013
Posted by bvallot on Thursday, April 24, 2014 8:58 PM

Greentracker98:  I meant to say also how I can't wait to have one of these too.  I think the first ETO Lightning I do will be Robin Olds' "Scat II."  I just really can't wait to paint some G*D DAMN invasion stripes!!!

=D

On the bench:  

Tamiya F4U-1  Kenneth Walsh


  • Member since
    June 2013
Posted by bvallot on Tuesday, April 29, 2014 2:21 PM

Trying to take care of some of the little things to make this Lightning shine a little brighter.  Right now I'm scratching out the radiators on the booms. I first cut some plasticard and sanded it down into shape to make up a backing for the mesh I have from Eduard.  All of this will also receive a primer before Alclad's Gloss Black.  So far I'm thinking these surfaces will get painted in the Alclad Semi matte Aluminum.

 image by brittvallot, on Flickr

 image by brittvallot, on Flickr

Here's a view that will be more commonly seen.  The actuating arm for the radiator door is visible too.

 image by brittvallot, on Flickr

I've also including some thin strips of brass rod to approximate the ribbing that I've seen in photos of this radiator wall.  If you look close, in the walkarounds of Lightnings there are two on both the top and bottom of the radiator housing. This will be more evident after it's primed.  The shadow from it will show better... =]

On the bench:  

Tamiya F4U-1  Kenneth Walsh


  • Member since
    February 2011
  • From: Bent River, IA
Posted by Reasoned on Wednesday, April 30, 2014 2:41 PM

Great work thus far bv, not sure what you mean by "stressed skin".  Your build makes me want to jump into the old Revellogram P-38.

Science is the pursiut of knowledge, faith is the pursuit of wisdom.  Peace be with you.

On the Tarmac: 1/48 Revell P-38

In the Hanger: A bunch of kits

  • Member since
    August 2012
  • From: Parker City, IN.
Posted by Rambo on Wednesday, April 30, 2014 4:12 PM

that radiator looks great

Clint

  • Member since
    June 2013
Posted by bvallot on Wednesday, April 30, 2014 6:43 PM

Rambo:  =D Thanks.

Reasoned: I'm actually borrowing the term from another.  I'd seen a photo while digging thru something somewhere on Google and had come across a site discussing it and how to do it.  Then, I found another site showing a similar but better looking (more user friendly too) method for showing this pattern of behavior from the panels that would get taken off and put on over and over again, as well as the wind speeds and friction beating up the "skin" of the plane as they stay riveted onto the framework of the plane.  This is the site I referenced for the it:

http://www.clubhyper.com/reference/stressedskineffectkh_1.htm

It's not hard to pull off, but you do have to take your time with it.  It's a bit like cutting hair.  You can't put it back once you take it off. =]

Here's a bit more that I was fooling with last night to try to finish up one of these booms.  

If you look closely you can see a small gap between the boom and the radiator housing:

 Screen Shot 2014-04-30 at 5.48.33 PM by brittvallot, on Flickr

Here's my attempt.  I made a small slice into it with my exacto blade and used the back side of it to widen it slightly:

 image by brittvallot, on Flickr

Same on the front side of this:

 p-38j-20-lo_44-23314_skidoo_34_of_57 by brittvallot, on Flickr

Mine:

 image by brittvallot, on Flickr

annnnd one more look at this boom together:

 image by brittvallot, on Flickr

Hopefully, I can get the other one done tonight and get them both riveted so they can be married to the wings.

On the bench:  

Tamiya F4U-1  Kenneth Walsh


  • Member since
    February 2012
  • From: Olmsted Township, Ohio
Posted by lawdog114 on Wednesday, April 30, 2014 7:39 PM

Nice to see you back on this one bvallot.  I like your stressing technique.  I see the clamshell seam is an issue on the Academy kit too.  I don't think its so much the kit design, but more of the plane's design which makes these  tricky builds.  Careful with the booms for I hear they are tricky on this kit.  

Joe  

 "Can you fly this plane and land it?...Surely you can't be serious....I am serious, and don't call me Shirley"


  • Member since
    June 2013
Posted by bvallot on Wednesday, April 30, 2014 8:59 PM

Glad to hear from you Joe!  Yes, I forgot to include a picture of it here, but I spent a good 20 minutes taking care of the seam that runs on top and bottom of the boom.  I'll throw it in a later post.  I wanted to ask you more about your thoughts on better navigating the booms to the wing.  I really don't want things to warp on me and tug things out of place.

On the bench:  

Tamiya F4U-1  Kenneth Walsh


  • Member since
    June 2013
Posted by bvallot on Tuesday, May 6, 2014 8:43 PM

Alright!!  Got some work done.  =]

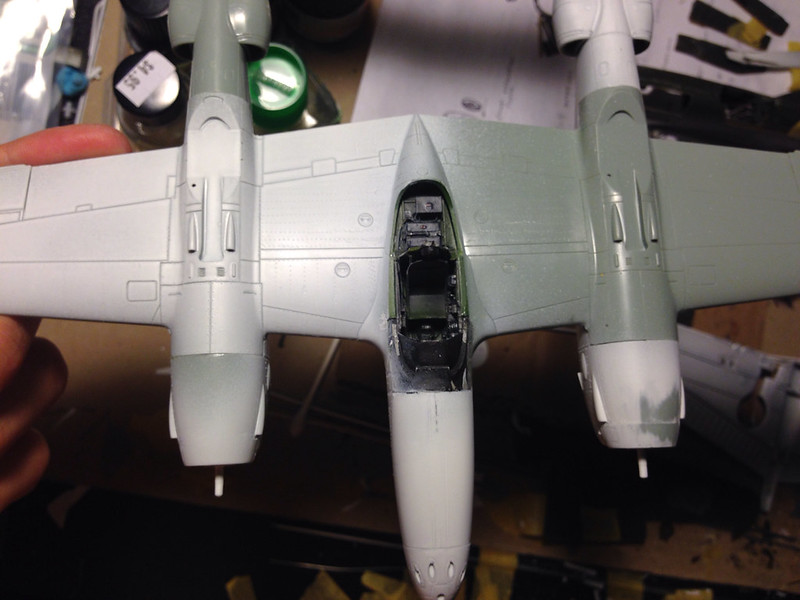
I got the boom halves mated together and attached to the wing.  I first set them up on the horizontal stabilizer/elevator.  That way I was able to keep them perpendicular and prevent them from warping and twisting on the wing.  Once they set, I used Tenax to attach them to the wing and followed up with a 2 part epoxy to ensure they stay put.  =]

Here it is:
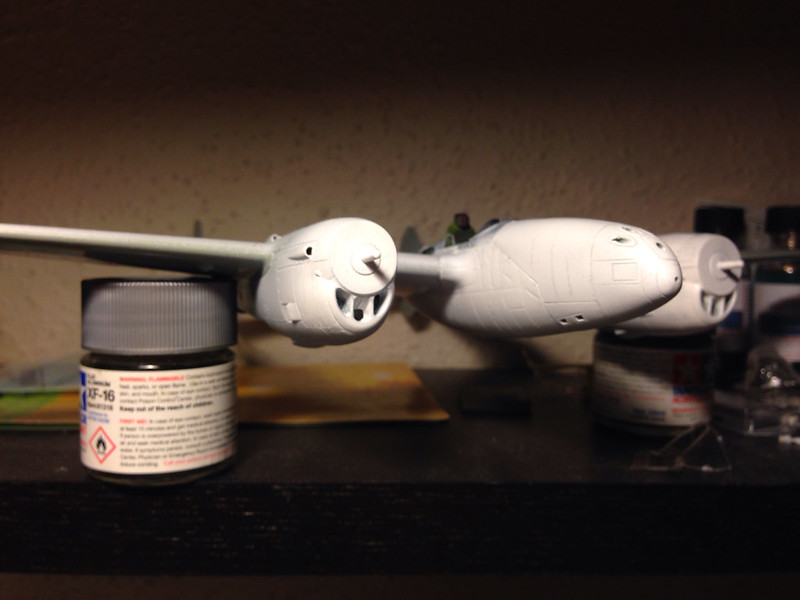
 image by brittvallot, on Flickr

 image by brittvallot, on Flickr
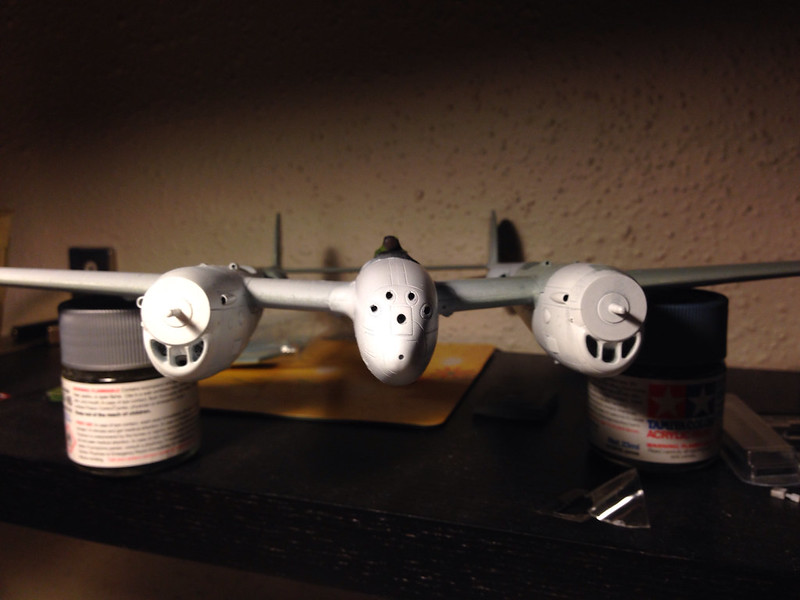
 image by brittvallot, on Flickr
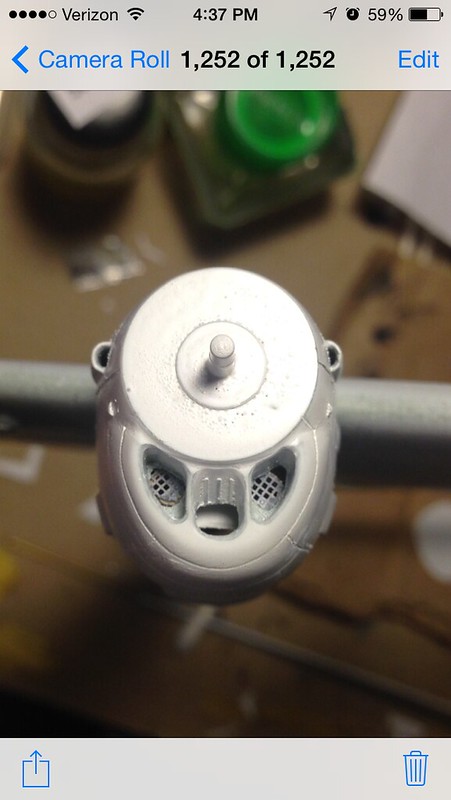
For the intercooler intakes, I scratched out a bulkhead to hold the housing for the intakes.  I realize that there isn't a real bulkhead here and the housing doesn't extend this far up, but seeing as none of it is visible I cut it to fit the area of the nacelle to allow for more contact to make it a stronger fit. 
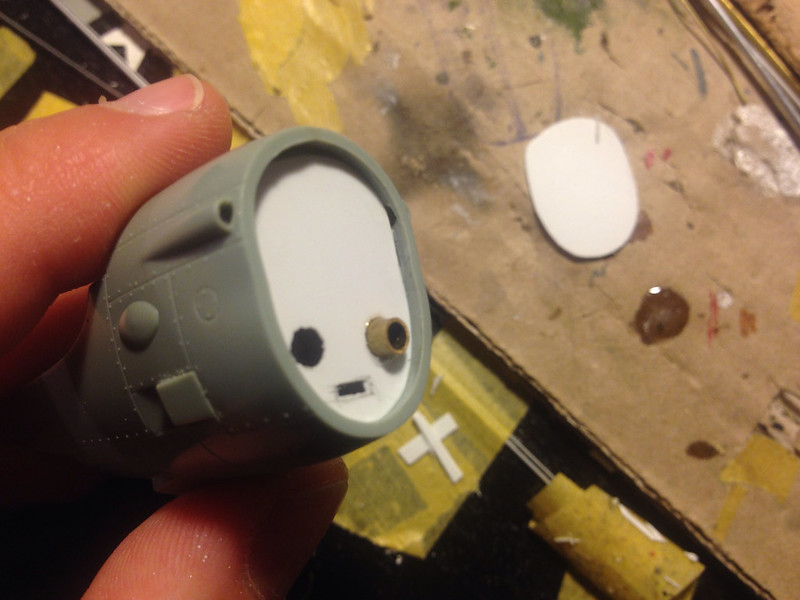
 image by brittvallot, on Flickr

 image by brittvallot, on Flickr
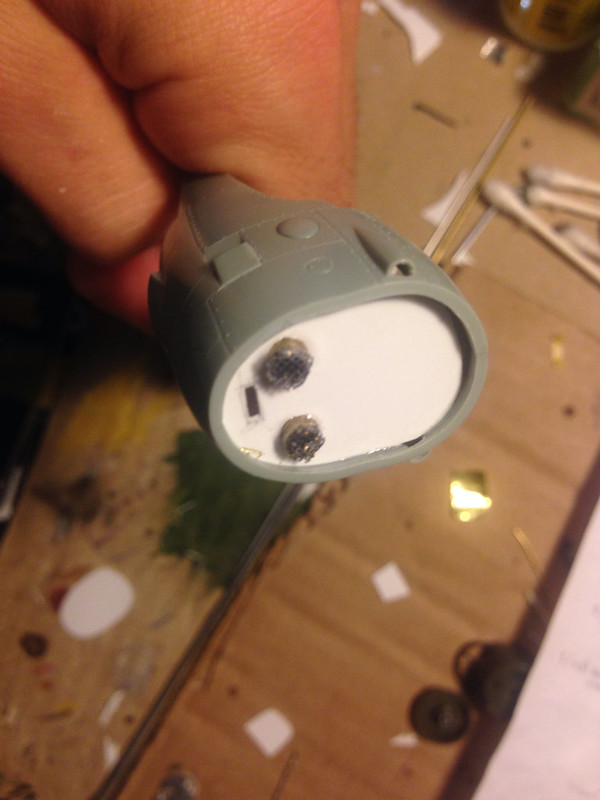
 image by brittvallot, on Flickr
Here's a seam that needs fixin up:
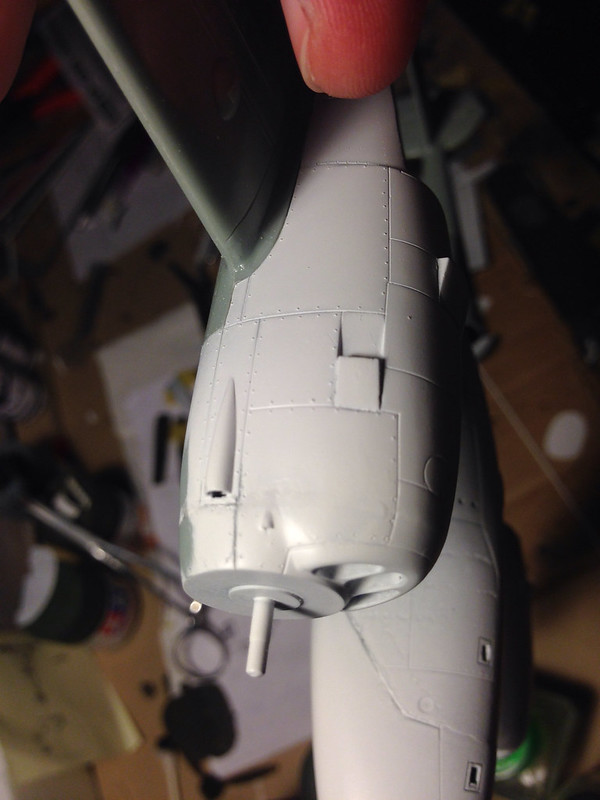
 image by brittvallot, on Flickr

 image by brittvallot, on Flickr
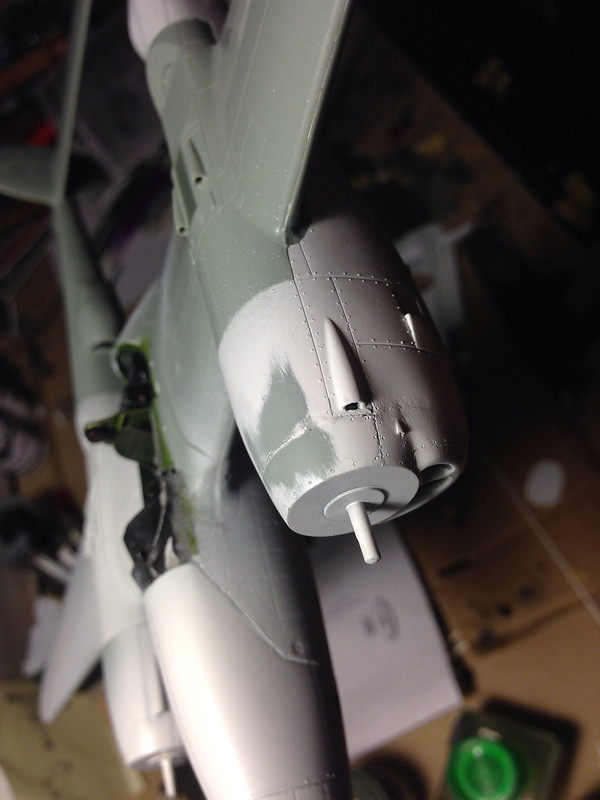
The panel here has been sanded and rescribed a little lower. There is also two panel lines that need to be extended to meet the front face of this engine nacelle:
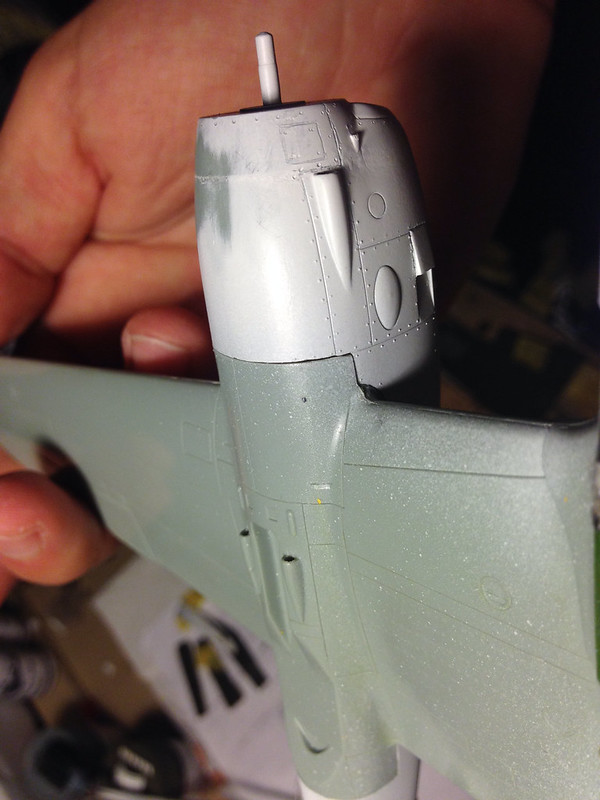
 image by brittvallot, on Flickr

AM parts:
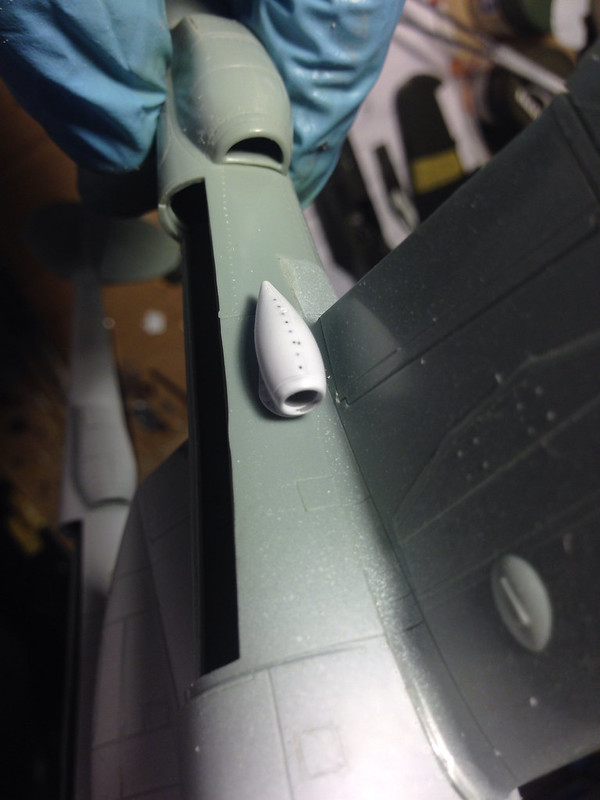
 image by brittvallot, on Flickr

 image by brittvallot, on Flickr
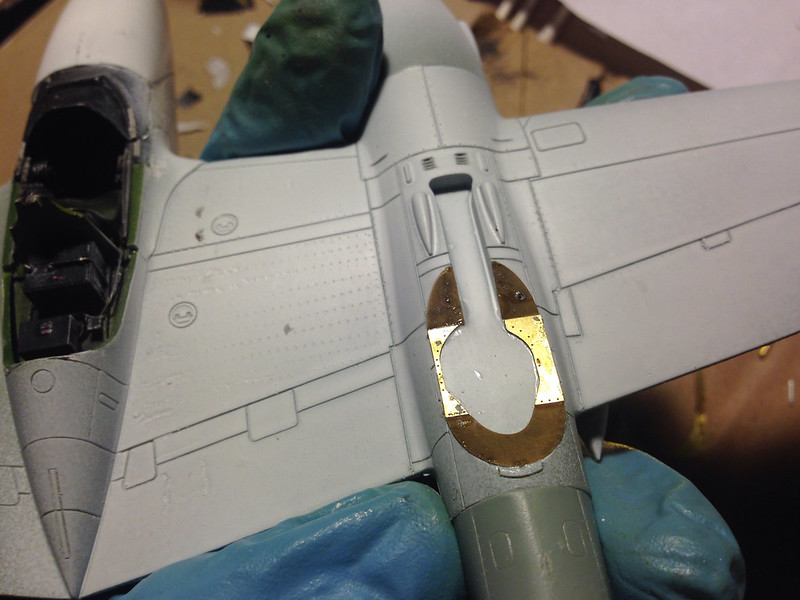
 image by brittvallot, on Flickr
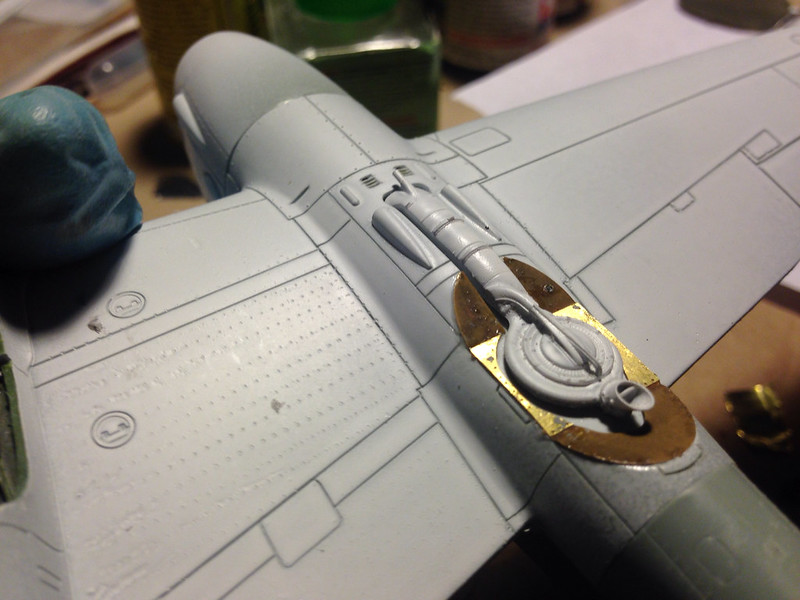
Happy to see these superchargers working out! 

Comments, suggestions... =]

On the bench:  

Tamiya F4U-1  Kenneth Walsh


  • Member since
    June 2013
Posted by bvallot on Saturday, May 17, 2014 12:15 AM

Okay! So, I've got everything riveted, sanded, and tweaked and then primed.  It took a while to finally get here but I've finally got my Gloss Black coat on.  =]

 image by brittvallot, on Flickr

 image by brittvallot, on Flickr

Even got me a new cutting mat! 

 image by brittvallot, on Flickr

I love laying down this gloss coat.  

 image by brittvallot, on Flickr

I'll let this set over night.  I'm still trying to figure out just what kind of metal scheme I'll be doing for this lightning.  Most likely Duraluminum over most of the wing surfaces...some Polished Aluminum in places...and Semi-Matte Aluminum to pick on certain high traffic areas.

Any thoughts or suggestions?  Any other NMF P38 veterans out there?

On the bench:  

Tamiya F4U-1  Kenneth Walsh


  • Member since
    June 2013
Posted by bvallot on Saturday, May 17, 2014 3:56 PM

Here's a quick repost from the NMF Group Build page:

I managed to get a little painting done on one of the nacelles.  Here I'm using the White Aluminum.

 image by brittvallot, on Flickr

I've torn some Tamiya tape to mask off each panel briefly while I paint and I move from panel to panel that way.  I'll start painting in the middle of the panel and move the AB around while leaving a bit of the sides and corners alone some.  I've found this helps the paint to look more like metal bending around the aircraft.

 image by brittvallot, on Flickr

On the bottom, I move a little more quickly and since I trust my hands I can paint a little haphazardly to fill in spaces as I find needed.  I still taped off what I don't want overspray on though.

 image by brittvallot, on Flickr

 image by brittvallot, on Flickr

And that's a wrap for the weekend.  =]

On the bench:  

Tamiya F4U-1  Kenneth Walsh


  • Member since
    February 2012
  • From: Olmsted Township, Ohio
Posted by lawdog114 on Monday, May 19, 2014 6:37 PM

Looking great Bvallot, especially the pit.  reference the nose issue.  I would've just squeezed it and then super glued it.  The line could then be rescribed.  Looks like you got it though.  P-38's are fun yeah?

Joe

 "Can you fly this plane and land it?...Surely you can't be serious....I am serious, and don't call me Shirley"


JOIN OUR COMMUNITY!

Our community is FREE to join. To participate you must either login or register for an account.

SEARCH FORUMS
FREE NEWSLETTER
By signing up you may also receive reader surveys and occasional special offers. We do not sell, rent or trade our email lists. View our Privacy Policy.