SEARCH FINESCALE.COM

Enter keywords or a search phrase below:

1:48 Sally B B17G

19724 views
58 replies
1 rating 2 rating 3 rating 4 rating 5 rating
  • Member since
    October 2004
  • From: NE Oklahoma
Posted by Allen109 on Monday, February 23, 2015 12:51 PM

Me likey.

  • Member since
    August 2014
Posted by Richard Spreckley on Friday, February 13, 2015 1:58 AM

Thanks for all the great comments, as for the AK interactive metallic paste. It worked pretty well, easy to use on such a great model, i think that with any metallic finish the prep is still essential, but well worth a go at.

  • Member since
    March 2005
  • From: Lancaster, South Carolina
Posted by Devil Dawg on Monday, February 9, 2015 10:35 PM

In the words of Freddie Prinze: "Looking Good!!"

Devil Dawg

On The Bench: Tamiya 1/32nd Mitsubishi A6M5 Model 52 Zeke For Japanese Group Build

Build one at a time? Hah! That'll be the day!!

  • Member since
    August 2009
  • From: Borlando Fla home of the rat
Posted by TREYZX10R on Monday, February 9, 2015 8:47 PM

Awesome looking Fort Richard !

  • Member since
    February 2012
  • From: Olmsted Township, Ohio
Posted by lawdog114 on Monday, February 9, 2015 8:22 PM

Well done Richard.  Very convincing and your OD is spot on.  Just enough brown.  I agree that the raise lines present a weathering challenge.  I built my Grandfather's fort years ago decided to scribe those lines in...which gets tricky around the nose.......never again!  Next time I try this kit I'm going to just preshade the panel lines for weathering.   Thanks for sharing...

Joe

 "Can you fly this plane and land it?...Surely you can't be serious....I am serious, and don't call me Shirley"


  • Member since
    December 2003
  • From: Charleston, SC
Posted by sanderson_91 on Sunday, February 8, 2015 8:37 AM

Richard,

Very nice build and cool looking diorama.  Your paint and weathering look great and I especially like your cowl checkers.

You mentioned that you used AK Interactive metallic paste.  How did you like it and was is difficult to use?  Thanks for sharing!

Steve


  • Member since
    February 2003
  • From: Cameron, Texas
Posted by Texgunner on Saturday, February 7, 2015 7:08 PM

Very nice work here!   I'd love to have a B-17 in 1/48 but man, I'd have to have a special cabinet for her.  Great job on Sally.

Gary


"All you mugs need to get busy building, and post pics!"

  • Member since
    February 2014
  • From: Michigan
Posted by silentbob33 on Saturday, February 7, 2015 4:42 PM

Very cool! That is some amazing work on the Fort

On my bench: Academy 1/35 UH-60L Black Hawk

  • Member since
    August 2014
Posted by Richard Spreckley on Saturday, February 7, 2015 4:14 PM

I am making some nice progress with the diorama so I thought I would try out my thoughts for positioning...... (not including the 17 figures I have to work out where to put!)

  • Member since
    June 2014
Posted by BrandonK on Saturday, January 24, 2015 11:05 AM

That is one very nice build. You motivate me to get started on the two I have in my stash. I found a picture of this plane in theater on Pinterest the other day and you did it justice. Nice work. Yes

On the bench:

A lot !! And I mean A LOT!!

2024 Kits on deck / in process / completed   

                         14 / 5 / 2  

                              Tongue Tied

  • Member since
    August 2014
Posted by Richard Spreckley on Saturday, January 24, 2015 3:25 AM

A labour of love! After 8 months Sally B is finsished! I have added a life raft and finished the weathering, sealing everything with a satin coat. So now onto the dioaram:=- 18 figures, 1 follwo me jeep, 1 x crw jeep, 1x refueller, 1x bomb tractor with 2 x D type trollies, along with a few airfield accessories to bring it alive!!

  • Member since
    August 2014
Posted by Richard Spreckley on Tuesday, January 20, 2015 12:06 PM

So onto weathering and wash..quite difficult to do with raised rivetts,a nd Im not so sure about the exhaust stains either....ce la vie!

  • Member since
    August 2014
Posted by Richard Spreckley on Saturday, January 17, 2015 6:20 AM

Thanks for all the comments, I will post more pics as I go, nearly into month 8!!

  • Member since
    June 2013
Posted by bvallot on Thursday, January 15, 2015 4:22 PM

That's certain come a long way! =]  I can't wait to start mine.  Weeeell...maybe I can. lol  It sure looks great Richard.

On the bench:  

Tamiya F4U-1  Kenneth Walsh


  • Member since
    August 2014
Posted by Richard Spreckley on Thursday, January 15, 2015 8:03 AM

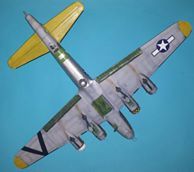
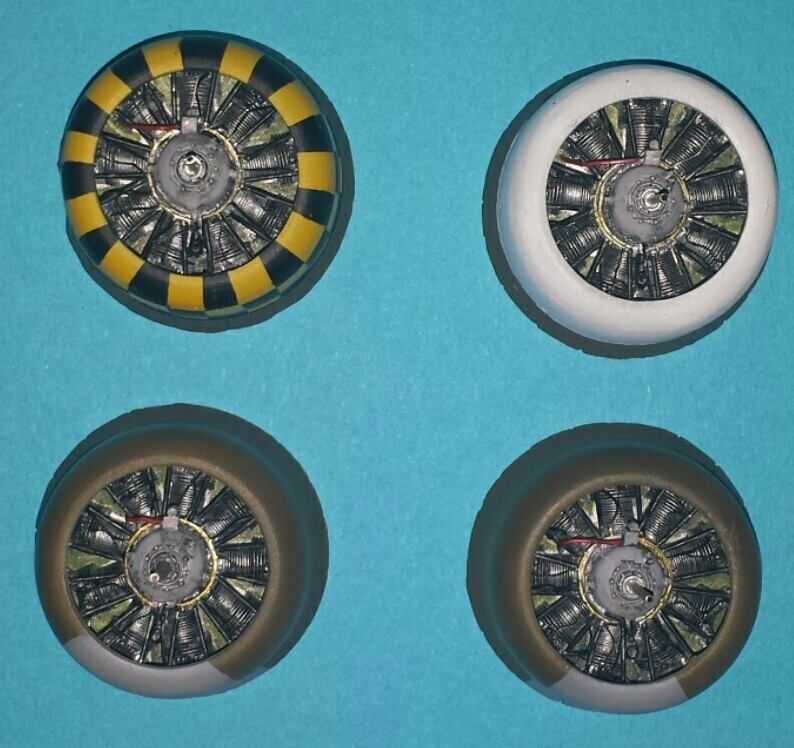
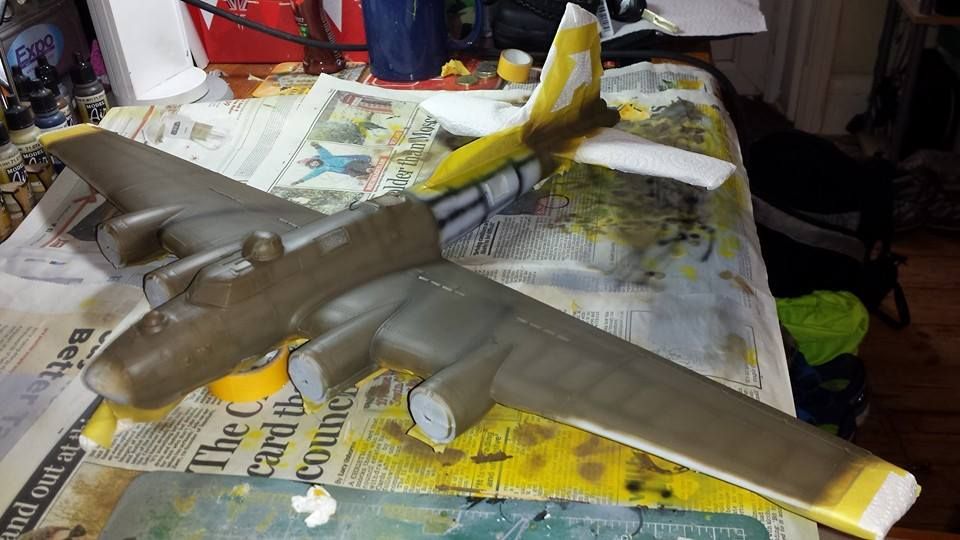
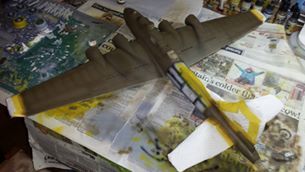
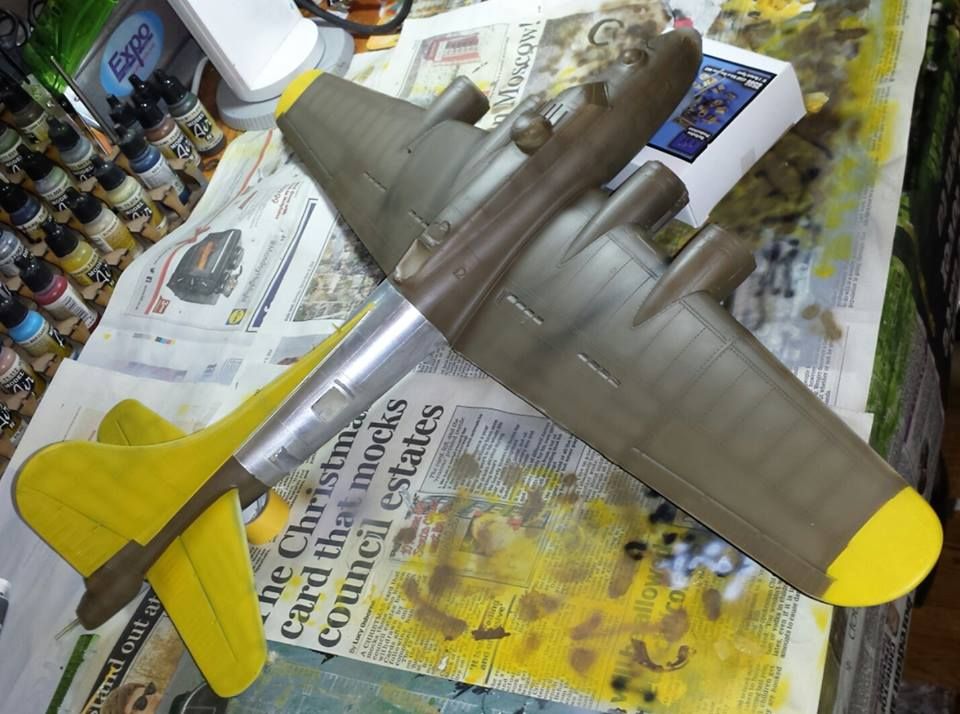
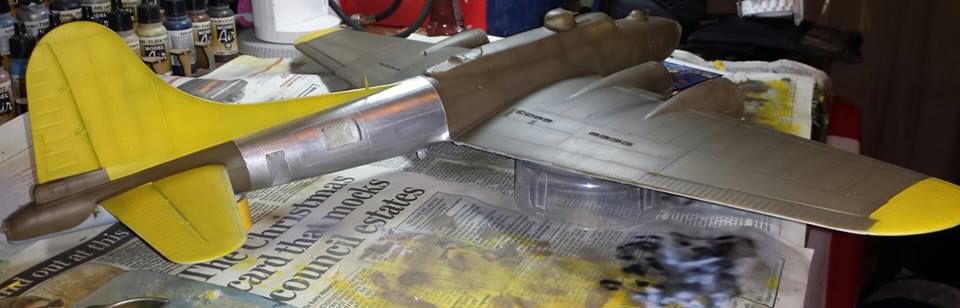
Lots of progress this week. The engine cowlings have been done, using my own mask 9which I am particularly proud of, Vallejo Air paints used for the majority of the fuselage and I gave AK interactives True metallic paste ago, and I have to say I am rather impressed by it!

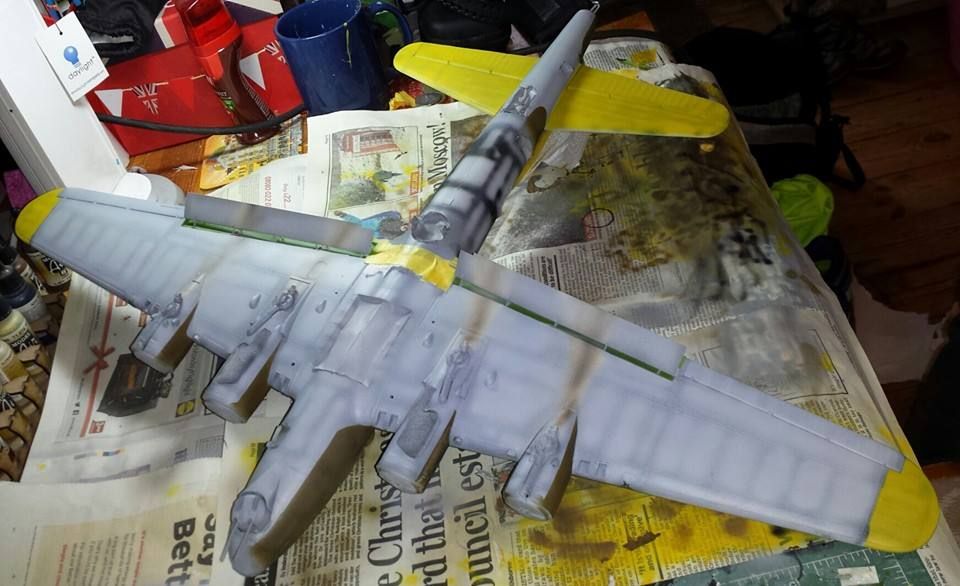
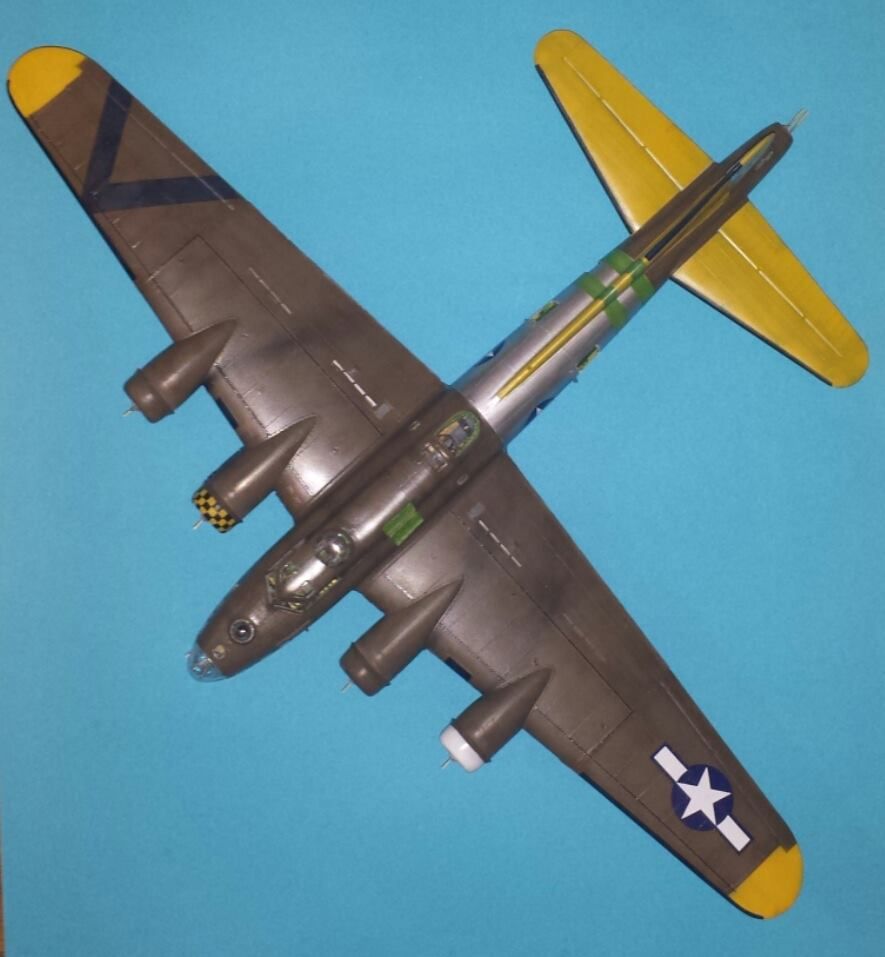
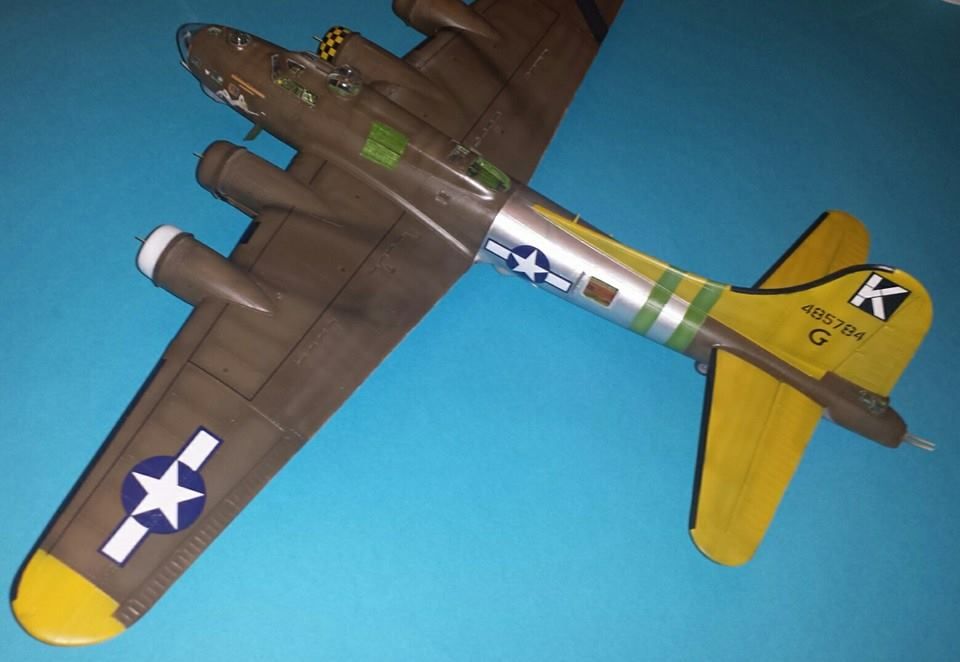
So, the paintwork complete, a coat of goss and decals applied.....

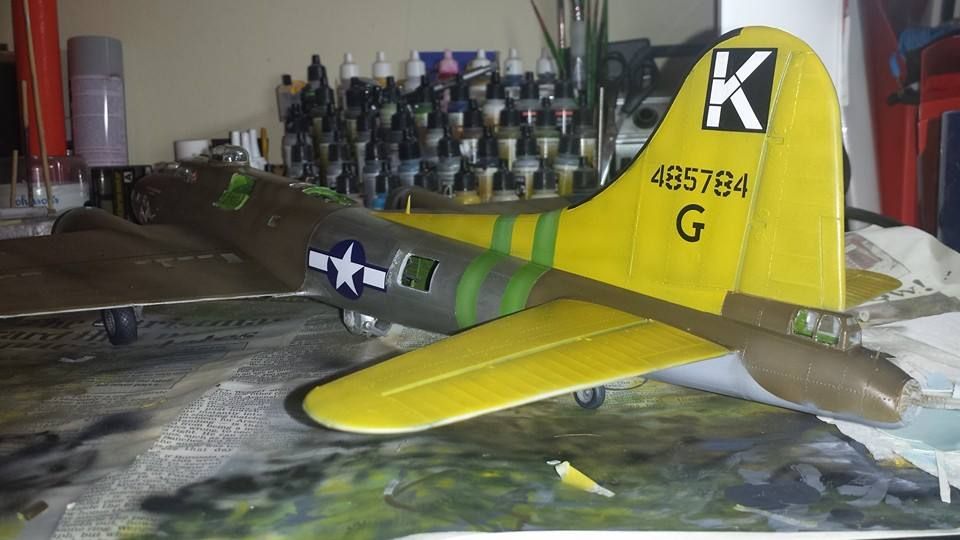
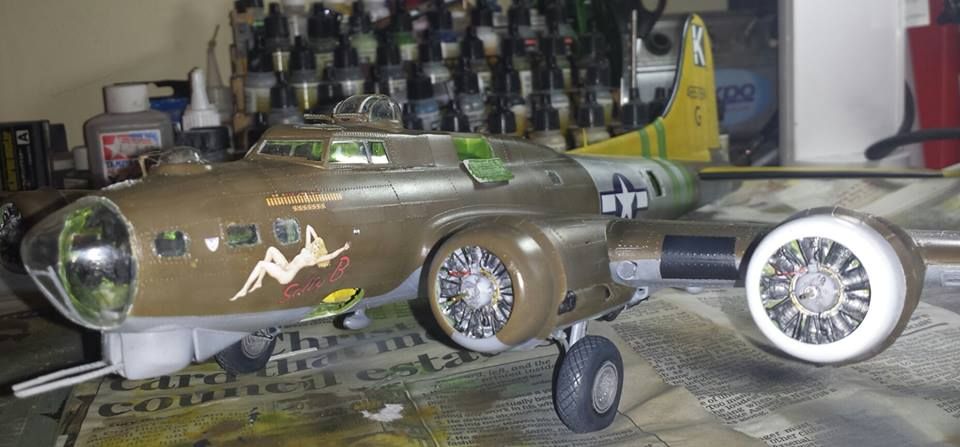
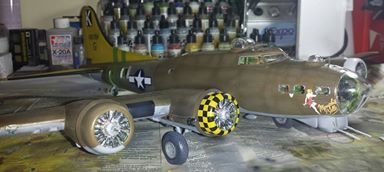
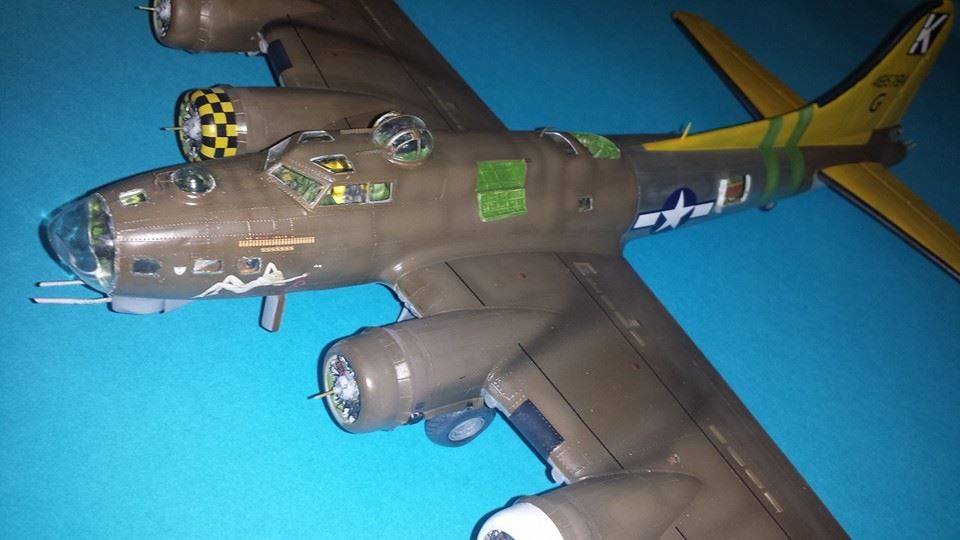
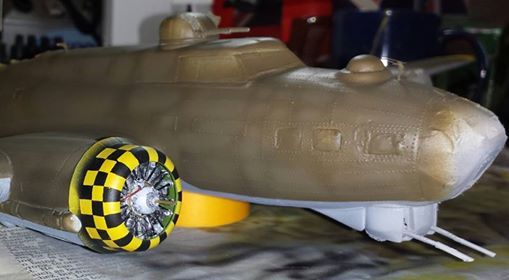
and some final shots..

  • Member since
    August 2014
Posted by Richard Spreckley on Saturday, January 10, 2015 11:03 AM

She is now looking like a B17! Primer and pre shading completed, lower fuselage done and yellow wing tips and tail completed! Just the bare metal mid section and olive drab to do!

  • Member since
    August 2014
Posted by Richard Spreckley on Tuesday, January 6, 2015 3:14 AM

Great progress made over the holidays, the fuselage is now closed up, it was a bit of a trial and I ended up using quite alot of putty to make things right, but I am very happy with the result.

I also finished off the quick boost engines and found a delightful Signiofier generator (put put) used for starting the starter batteries!

  • Member since
    August 2014
Posted by Richard Spreckley on Tuesday, January 6, 2015 3:13 AM

Jay

I shall lookforwward to seeing your build, it is a great subject to do!

  • Member since
    August 2013
Posted by Jay Jay on Friday, December 19, 2014 12:11 PM

I have a 1/48 Mngrm B-17 in the stash and with your inspirational posts I'm planning big things for it.  TY so much for posting all this and i saved it all for a reference for my humble efforts on this great kit.


 I'm finally retired. Now time I got, money I don't.

  • Member since
    August 2014
Posted by Richard Spreckley on Friday, December 19, 2014 4:12 AM

Thats all the detail completed inside the fuselage, so now time to close her up..

  • Member since
    August 2014
Posted by Richard Spreckley on Monday, December 15, 2014 11:28 AM

I have finally started painting the interior; I decided to go with an interior green with a dark green wash. I have also started to pick out some of the instrument detail insulation and I have attempted my first wood effect using light brown, with a darker wash and finished of using a shortened brush; applying a brown ochre oil paint.

  • Member since
    October 2004
  • From: NE Oklahoma
Posted by Allen109 on Friday, December 12, 2014 7:52 PM

Holy crap!

  • Member since
    April 2004
Posted by Jon_a_its on Wednesday, December 10, 2014 4:40 AM

cracking work so far!

East Mids Model Club 32nd Annual Show 2nd April 2023

 http://www.eastmidsmodelclub.co.uk/

Don't feed the CM!


  • Member since
    August 2014
Posted by Richard Spreckley on Wednesday, December 10, 2014 2:52 AM

Well I have finally completed the pre-assembly build, the fuselage is fully rivetted with Archers resin decals, the interior pre-built, now for primer and paint....

  • Member since
    August 2014
Posted by Richard Spreckley on Thursday, November 27, 2014 11:14 AM

Archer transfers are looking great on the wing..only took 2hrs, I have also treated myself to a set of ultracast props..they will make the extra detail on the engines worth it.

  • Member since
    February 2012
  • From: Olmsted Township, Ohio
Posted by lawdog114 on Sunday, November 23, 2014 7:38 PM

Looking great so far...

Joe

 "Can you fly this plane and land it?...Surely you can't be serious....I am serious, and don't call me Shirley"


  • Member since
    August 2014
Posted by Richard Spreckley on Saturday, November 22, 2014 1:47 AM

Great progress made these past few days, undercarriage done, and I also tackled the quickboost engines. I added some scratch building and I think they win hands down compared to the kit parts..

  • Member since
    June 2014
Posted by BrandonK on Tuesday, November 18, 2014 10:56 AM

I've got two of these in my stash and all the bits with it. I love watching you put it together. Makes me believe that I might get going on mine sometime. I can't wait to see this come together. Keep posting. I'm loving it.

On the bench:

A lot !! And I mean A LOT!!

2024 Kits on deck / in process / completed   

                         14 / 5 / 2  

                              Tongue Tied

  • Member since
    August 2014
Posted by Richard Spreckley on Monday, November 17, 2014 10:34 AM

The verlinden resin kit and the eduard PE external kit for this B17 makes all the difference, I am very pleased how the wing is now looking...just need to rivet it now...

JOIN OUR COMMUNITY!

Our community is FREE to join. To participate you must either login or register for an account.

SEARCH FORUMS
FREE NEWSLETTER
By signing up you may also receive reader surveys and occasional special offers. We do not sell, rent or trade our email lists. View our Privacy Policy.