SEARCH FINESCALE.COM

Enter keywords or a search phrase below:

Phantom kitbash- Happy Hooligans ND ANG F-4D-Finished! 5-21

13812 views
48 replies
1 rating 2 rating 3 rating 4 rating 5 rating
  • Member since
    March 2010
  • From: MN
Posted by Nathan T on Saturday, April 11, 2015 1:10 PM

I've been moving right along with the Phantom. I masked the cockpit and primed the model with Mr. Surfacer 1500 black. Then I sprayed Gunze Gloss black on the radome and the areas that will be painted with Alclad later on. The intakes were painted gloss white then masked off while I started painting the neutral gray:

In the meantime I completed and painted the Eduard Brassin exhausts:

The Aires seats were painted with Vallejo Model colors:

I've also been slaving away at the ordinance. 2 travel pods, Aim-9Js, Sparrows, and outer gas bags:

...Off to start the main camo now.


  • Member since
    March 2010
  • From: MN
Posted by Nathan T on Saturday, April 11, 2015 10:34 AM

Hey thanks Aldershot. That's what I assumed and went ahead and filled it. Did you serve around the ND Air Guard? If so, I'd love to hear more.


  • Member since
    January 2015
Posted by Aldershot II on Saturday, April 11, 2015 9:38 AM

USAF F-4C/D's fuselage was flush with no panel lines where the refueling probe would have been on the side of the cockpit. That should have the panel lines filled for this. I was very familiar with the ND ANG aircraft and the "smooth" nose radome  was only used very late in the units use of the F-4D. For most of that unit's use of the aircraft they had the standard F-4D radome.

  • Member since
    March 2010
  • From: MN
Posted by Nathan T on Friday, March 27, 2015 11:44 AM

Update time coming very soon, but first...a question:

Anyone know if the Navy style refueling prob door was on the F-4C/D? I know the prob itself was gone of course but was the door still on the starboard fuselage? Wondering if I need to fill that on my kit?


  • Member since
    March 2010
  • From: MN
Posted by Nathan T on Tuesday, February 10, 2015 12:55 PM

Thanks for checking out my build Mike.


  • Member since
    November 2008
  • From: Far Northern CA
Posted by mrmike on Tuesday, February 10, 2015 12:29 PM

Following along with interest Nathan, As usual, your attention to detail is amazing and your work is first cabin!

Mike

  • Member since
    September 2014
Posted by rooster513 on Tuesday, February 10, 2015 8:49 AM

Thanks Nathan. I'll look it up. With that tool and the tape looks like you have a great amount of control. Looking forward to seeing more.

-Andy

  • Member since
    March 2010
  • From: MN
Posted by Nathan T on Tuesday, February 10, 2015 8:43 AM

Thanks Andy. The scriber is from umm-usa.com. Best scribing tool out there.


  • Member since
    September 2014
Posted by rooster513 on Tuesday, February 10, 2015 8:36 AM

Looking great so far Nathan! Might be a silly question, but what's that tool you're using to scribe the panel lines? I'm building a F6F right now and have lost some panel lines from sanding the seams. Looks like your lines came out perfect!

-Andy

-Andy

  • Member since
    March 2010
  • From: MN
Posted by Nathan T on Monday, February 9, 2015 10:43 PM

Thanks pholks


  • Member since
    March 2005
  • From: Lancaster, South Carolina
Posted by Devil Dawg on Monday, February 9, 2015 10:37 PM

Impressive, Nathan!

Devil Dawg

On The Bench: Tamiya 1/32nd Mitsubishi A6M5 Model 52 Zeke For Japanese Group Build

Build one at a time? Hah! That'll be the day!!

  • Member since
    November 2003
  • From: State of Mississippi. State motto: Virtute et armis (By valor and arms)
Posted by mississippivol on Monday, February 9, 2015 8:09 PM

Phreaky! Lookin' great, Nathan!

  • Member since
    February 2012
  • From: Olmsted Township, Ohio
Posted by lawdog114 on Monday, February 9, 2015 6:42 PM

Excellent work Nathan.

Joe

 "Can you fly this plane and land it?...Surely you can't be serious....I am serious, and don't call me Shirley"


  • Member since
    March 2010
  • From: MN
Posted by Nathan T on Monday, February 9, 2015 6:34 PM

Thanks guys. There's lots more details to add, I just hope I can paint them up good enough to show them off.


  • Member since
    January 2015
Posted by TheMongoose on Monday, February 9, 2015 6:27 PM

I love seeing all this detail.. It give a good perspective of what it takes to create a really exquisite build. Thanks for sharing. Great work!

In the pattern: Scale Shipyard's 1/48 Balao Class Sub! leaning out the list...NOT! Ha, added to it again - Viper MkVii, 1/32 THUD & F-15J plus a weekend madness build!

  • Member since
    August 2012
Posted by AndrewW on Monday, February 9, 2015 5:08 PM

Wow, awesome work so far, Nathan!

Life is hard, it's even harder when you're stupid - John Wayne.


  • Member since
    March 2010
  • From: MN
Posted by Nathan T on Monday, February 9, 2015 4:55 PM

Have a little more progress to show. Cockpit has been painted up and gloss coated. An oil wash will follow. The instrument panels havent' been assembled yet. I tried a few pics with and without flash:

I've turned my attention to the Eduard Resin exhausts. I had to delete some panel lines and make new ones on my -J fuselage appropriate to the -D, as in this pic:

I sanded the edge where the exhaust will be glued to the fuselage at an angle to get the proper tilt, and made a new panel line to mimick the thickness of the stainless band on the fuselage:

Once the burner cans are in place I can close up the fuselage, and things will move much quicker then Cool


  • Member since
    March 2010
  • From: MN
Posted by Nathan T on Tuesday, January 27, 2015 1:00 PM

A few boring dry fitting:

Adding plastic shims to the underside wing/fuselage gap:

The kit intakes fit pretty good if you take your time and dry fit:

White plastic card was glued behind the intake to close the infamous Hasegawa gap:

Checking the sit of the seats:

Phront looks Phine, rear seat sits too Low. Looks better now:

Detail painting of the pit is underway, so more later after my eyeballs recoverIndifferent


  • Member since
    July 2007
Posted by scorpr2 on Friday, January 23, 2015 8:54 PM

She's looking good!  Keep up the good work!!!

  • Member since
    March 2010
  • From: MN
Phantom kitbash- Happy Hooligans ND ANG F-4D-Finished! 5-21
Posted by Nathan T on Friday, January 23, 2015 7:22 PM

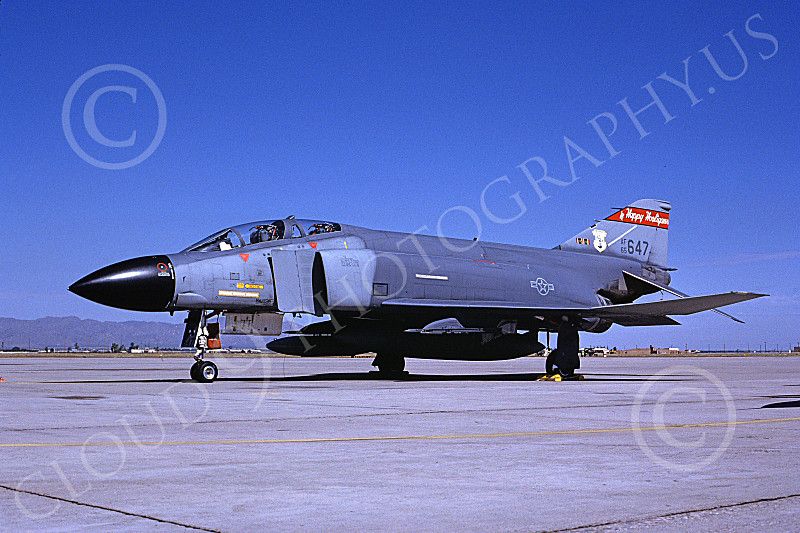
I've been wanting to build a North Dakota Happy Hooligans bird for quite awhile now as ND is my home state, and seeing many of their aircraft at airshows in Fargo growning up has really fueled my interest in the 119th figher wing's history. The phantom just looks perfect to me wearing the Hooligans logo in Hill Gray camo. Like here:

The problem is no decal manufacturer makes markings for a ND F-4 in Hill gray. After lots of scrounging and Help from a great FSM Forum Memeber- Thanks Oritz!, I've got the tail codes and markings I need. 

Now for the kit- I looked at Academy's new F-4C as the parts for a D are in the box, but I couldnt' get the kit shipped to me for less than $70 and having built a few Hase phanotms I just didn't feel like giving the Academy kit and it's multi-colored plastic a try. The old Hase F-4D has raised panel lines, and I don't feel like rescribing a whole kit. So I got the F-4J kit as a base and I'll use a few parts from the raised lined D. 

On to the pics:

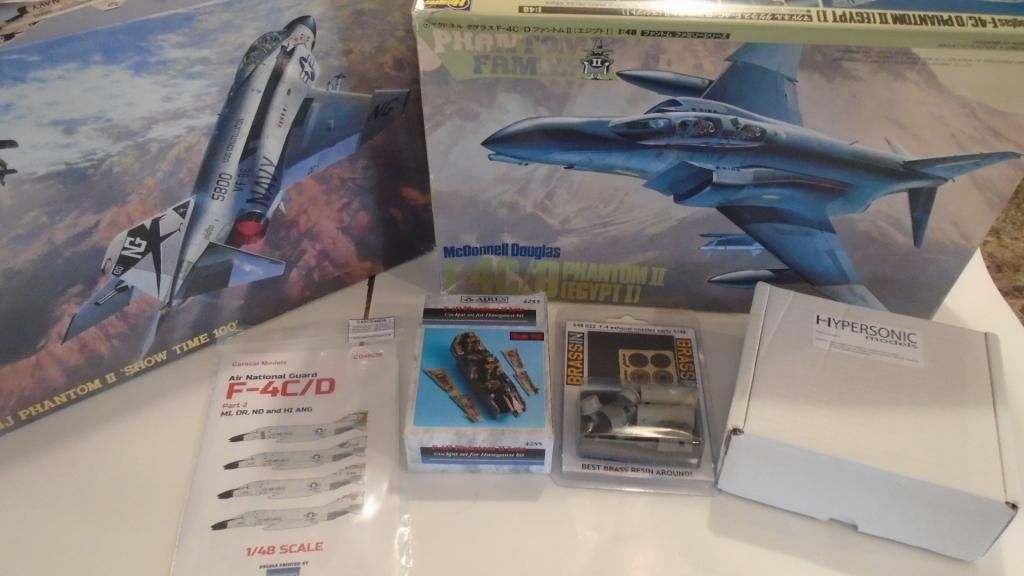
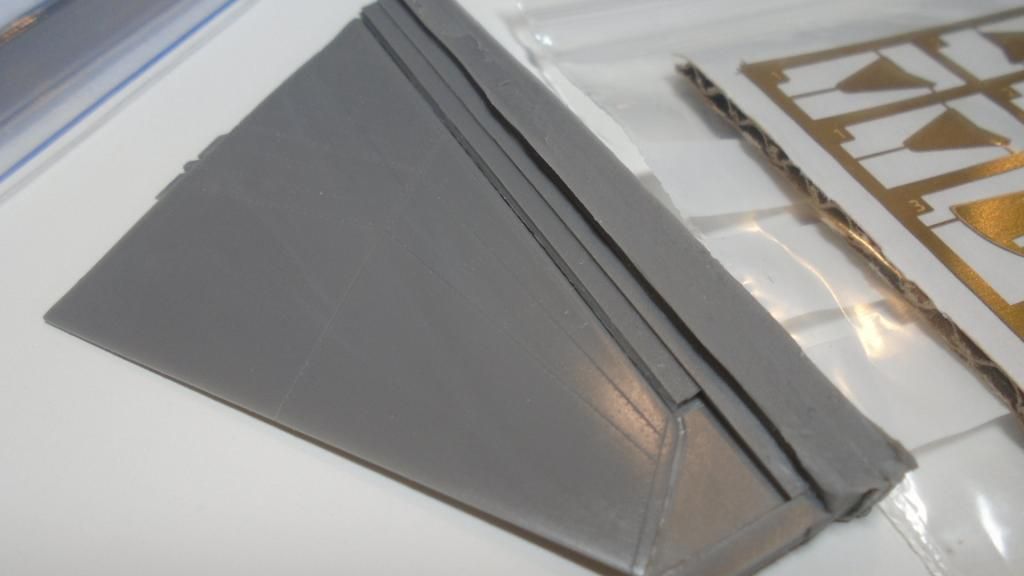
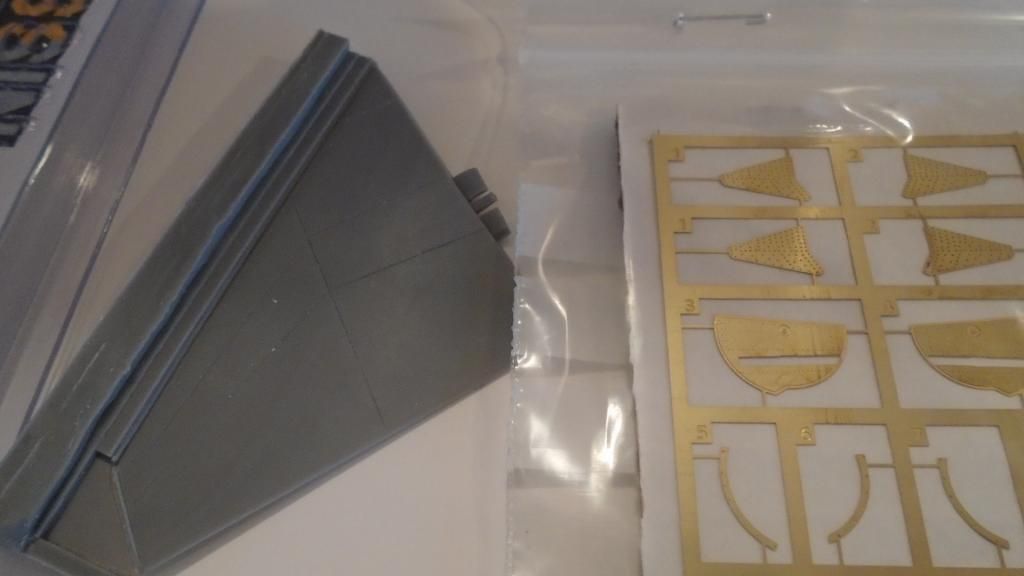
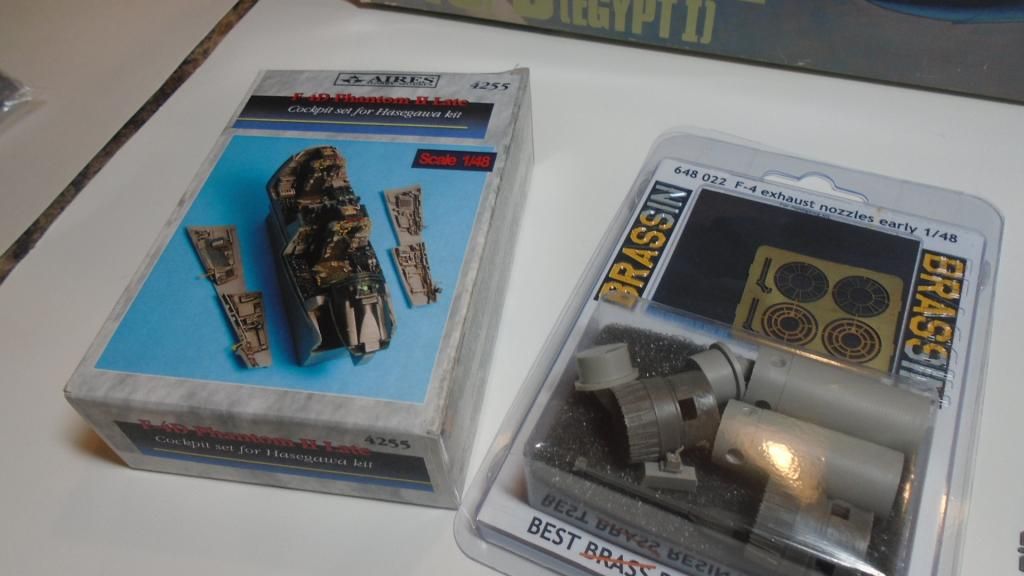
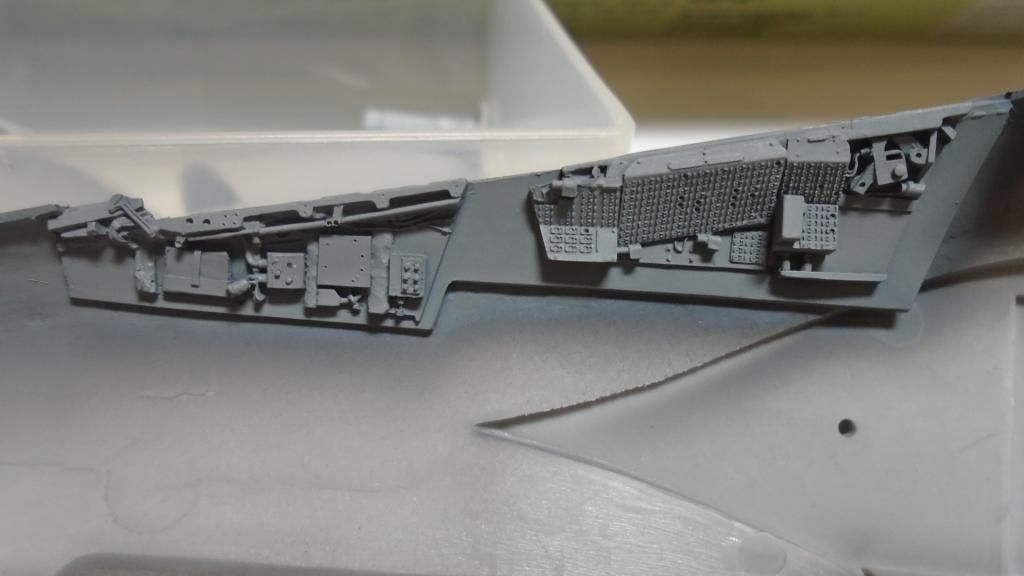
Lots of Aftermarket here, as I need a cockpit specific to the D,as well as the short exhausts, which will come from Eduard's excellent Brassin set. Stabilators of the unslotted type come from Hypersonic models. This is a great, comprehensive resin set that includes some pe as well for the boiler plates and pivot plate. The kit stabs in the old D kit are undersized, otherwise I would rescribe and use those. Here's a closer look at the set:

Here's a look at the decals:

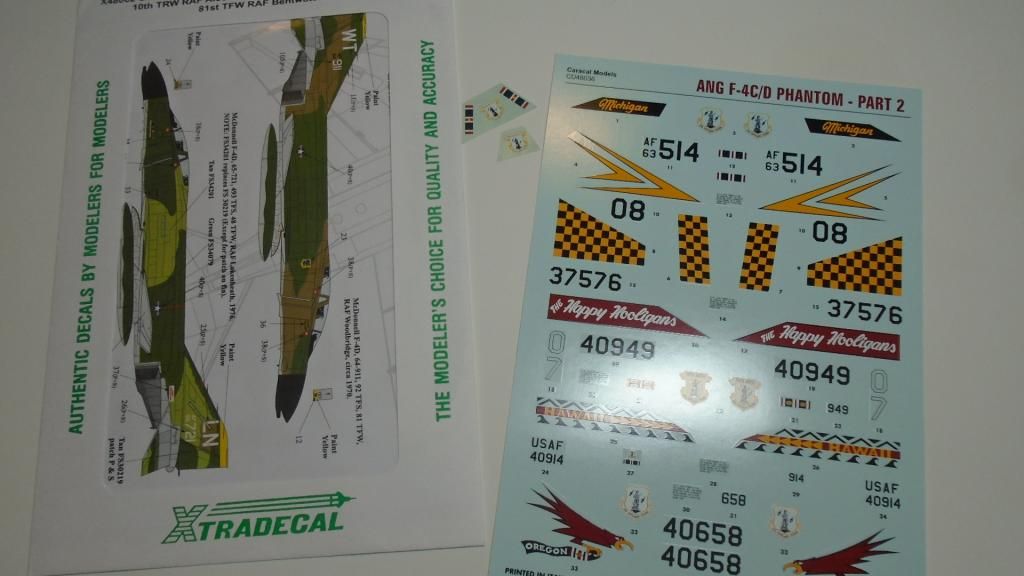
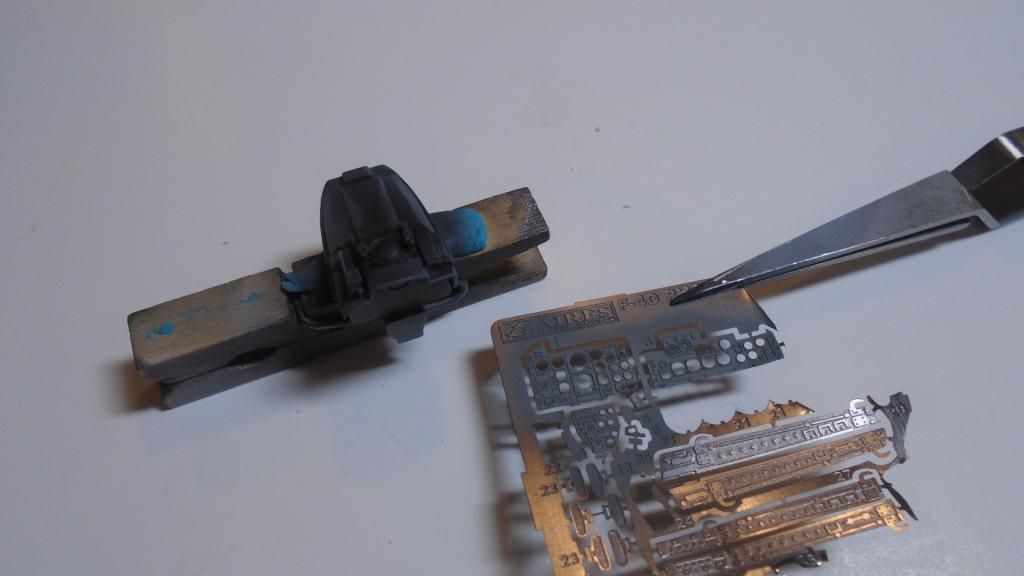
I have another set from Afterburner coming that has all the gray lettering for the tail codes as well as the nose wheel numbers. The Hooligans logo comes from the Caracal set. This set is actually for an earlier F-4D in ADC gray, so the insignias and stenciling/wing walk decals are wrong for a Hill gray A/C. Other stencis from the Xtradecal sheet will be used as necessary. 

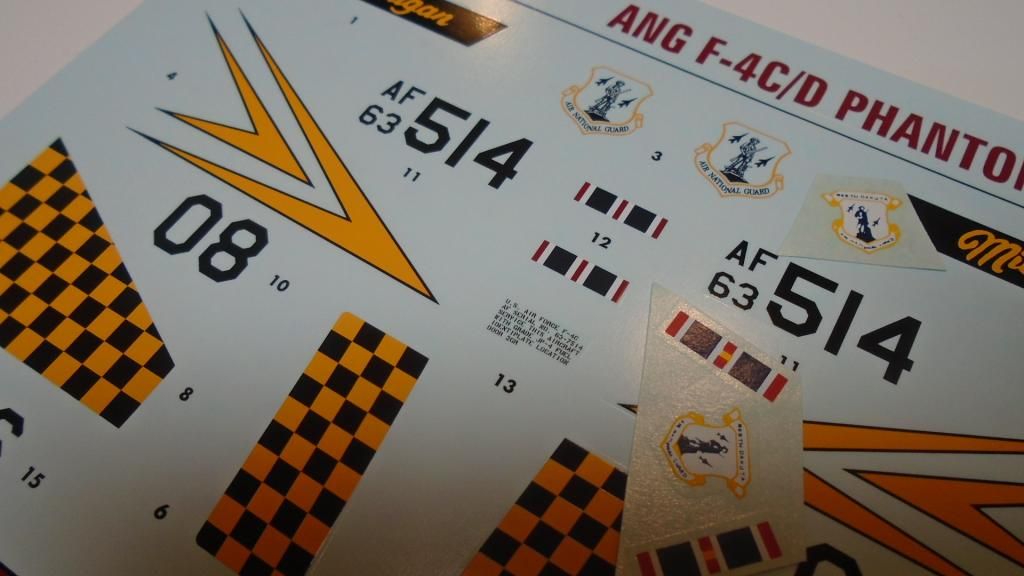
Oritz on the Forum here gave me some spare decals from an older Microscale sheet for a Hooligan phantom in SEA camo. It has the correct ND ANG badge for a hill gray phantom, as well as the correct style ribbon. Thanks O!! Here's the differences:

Here's a shot of the resin goodies:

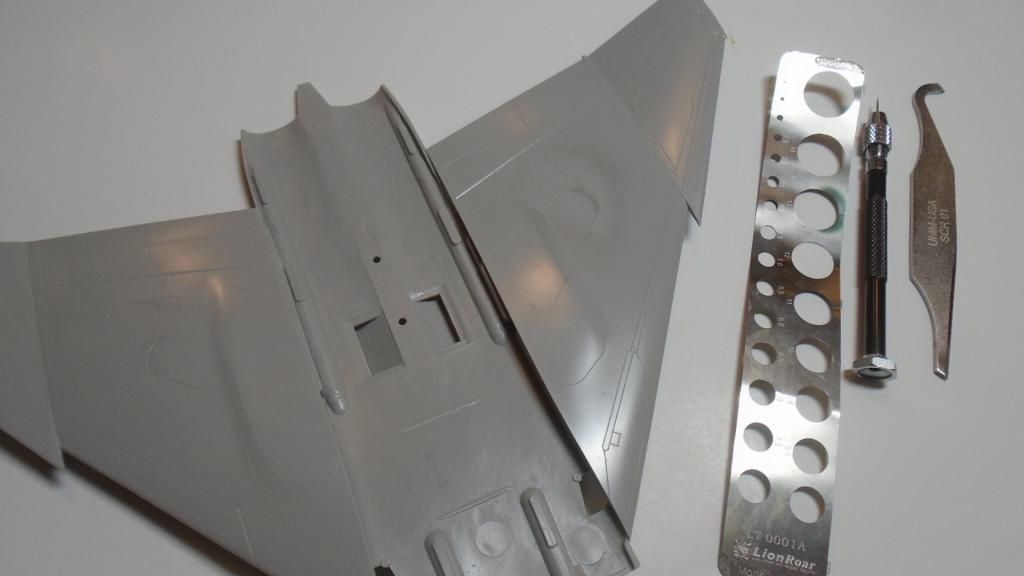
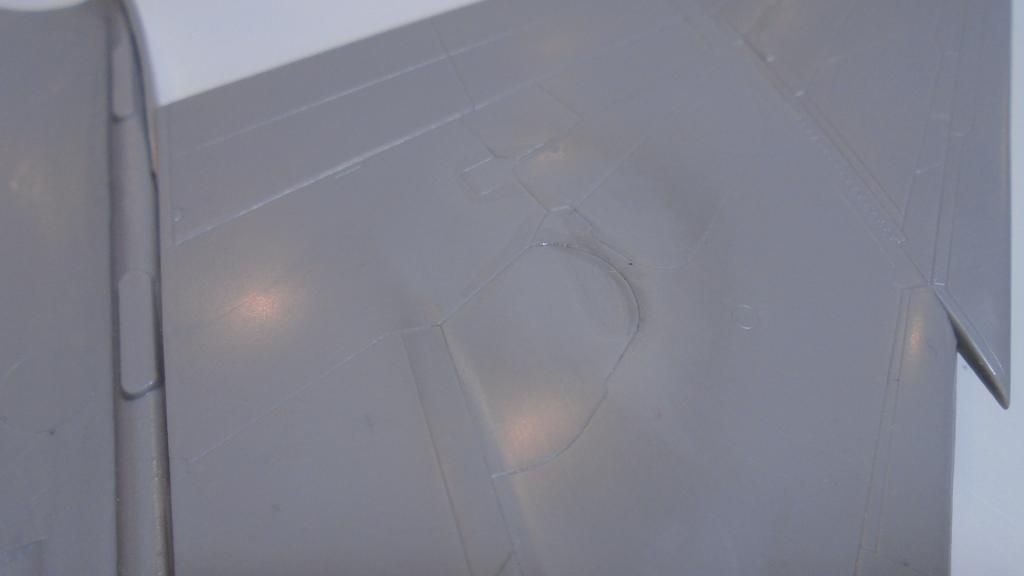
I started with the wings. Assembled the halves together and started grinding off the wheel bumps on the top:

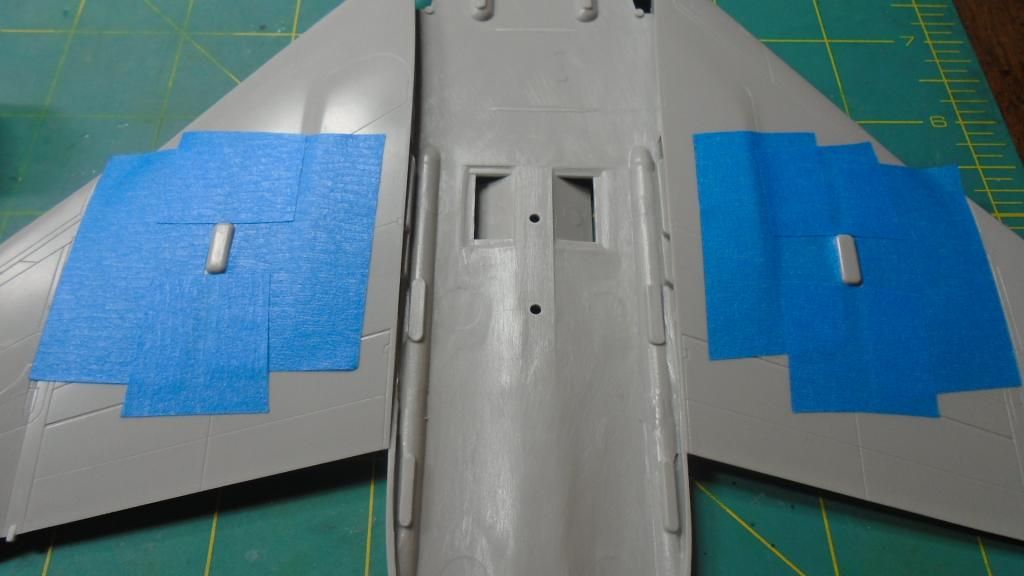
I used a dremel for the major work, then sanded it smooth. The panel lines then got a rescribing like so:

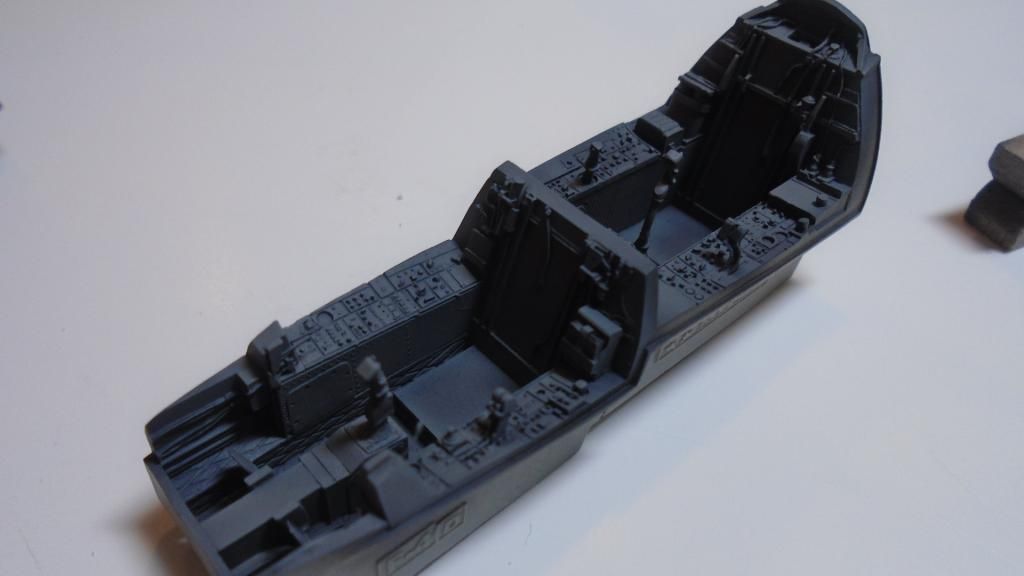
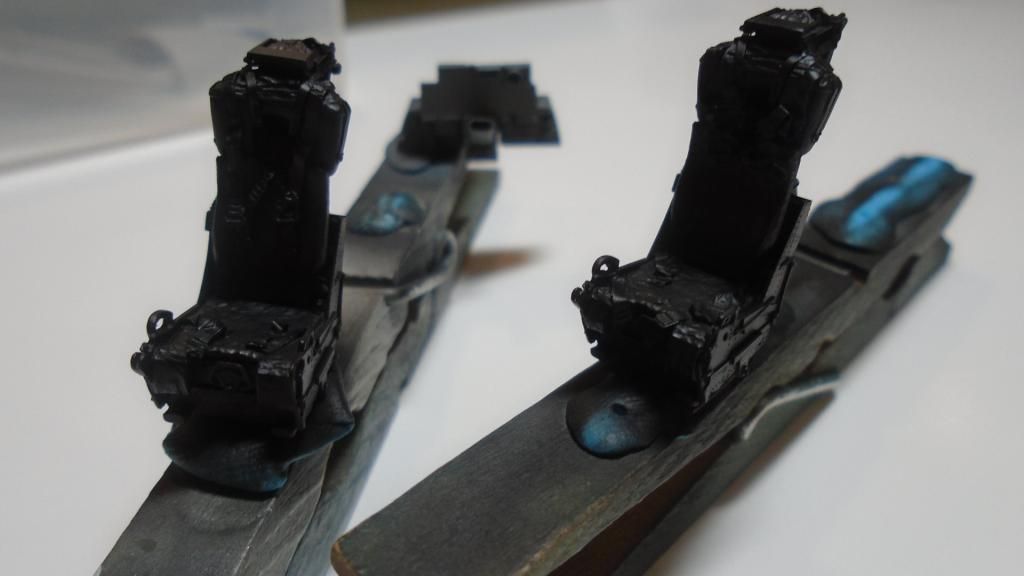
Now on to the cockpit:
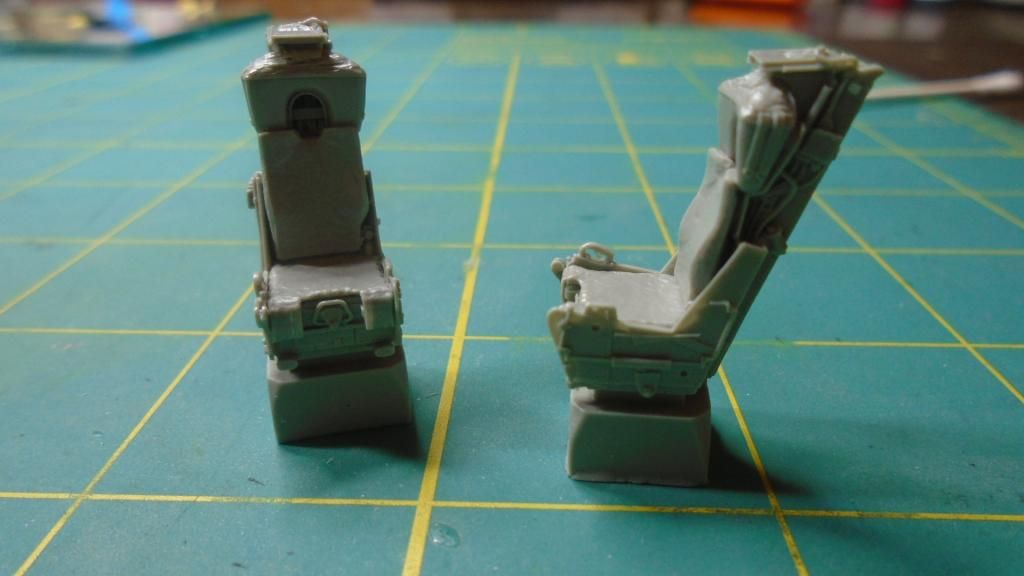
Aires seats:

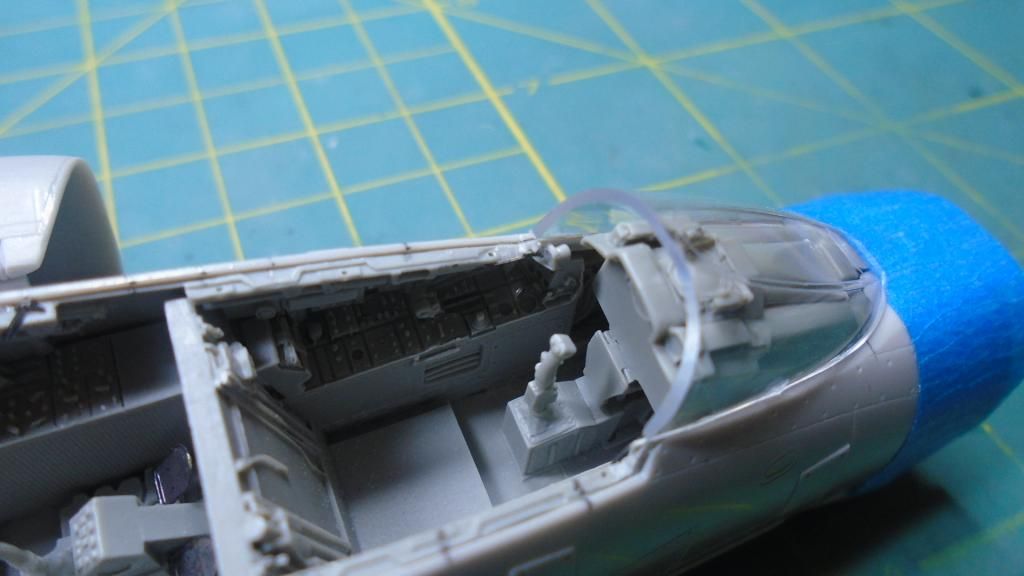
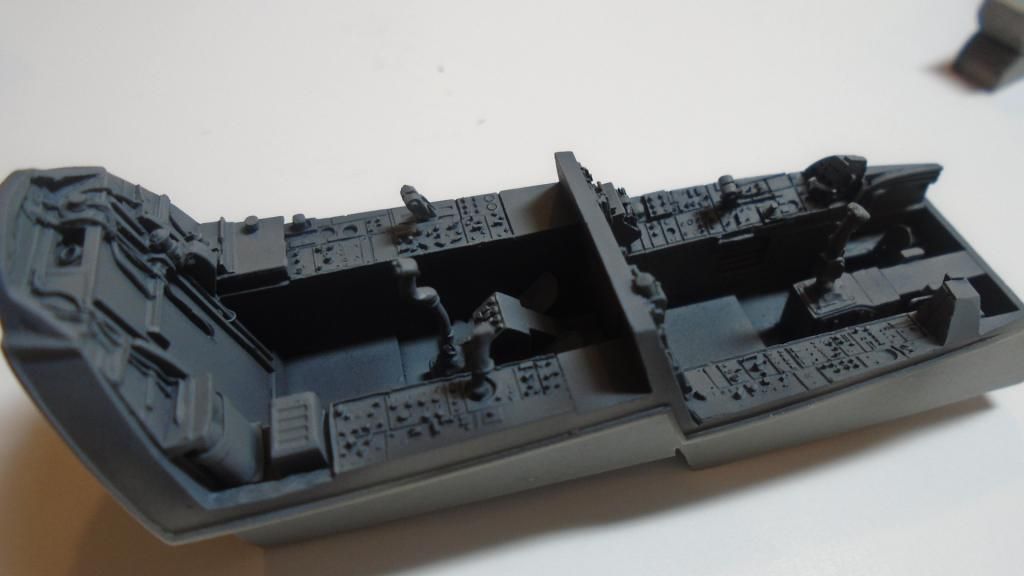
Kit sidewalls have been thinned, and the resin pit being dry fitted:

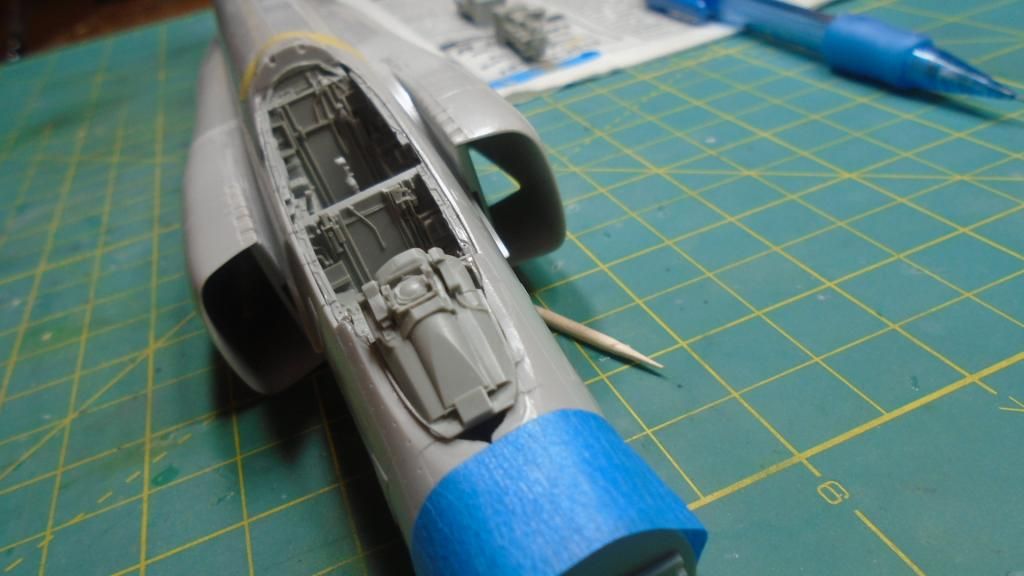
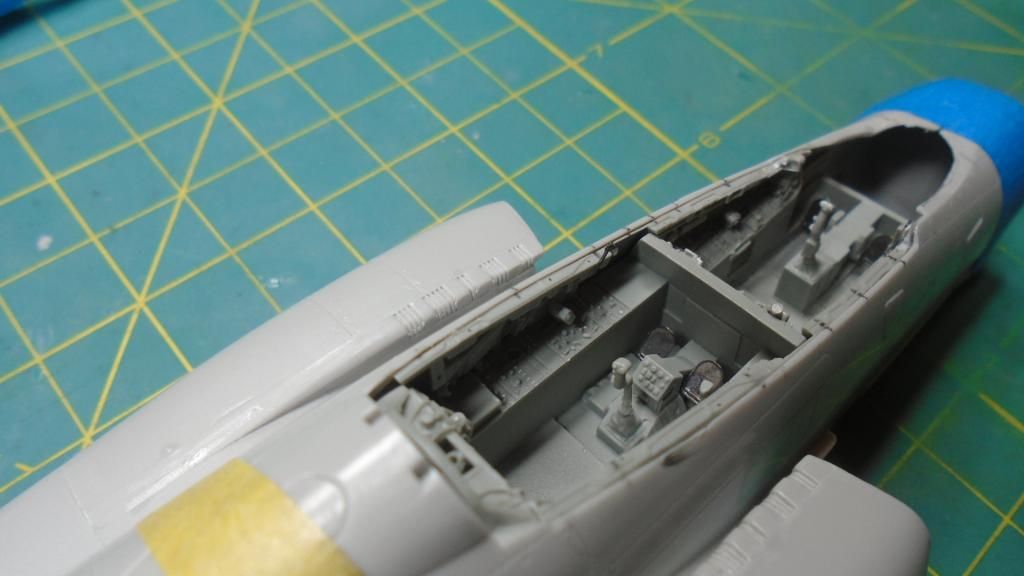
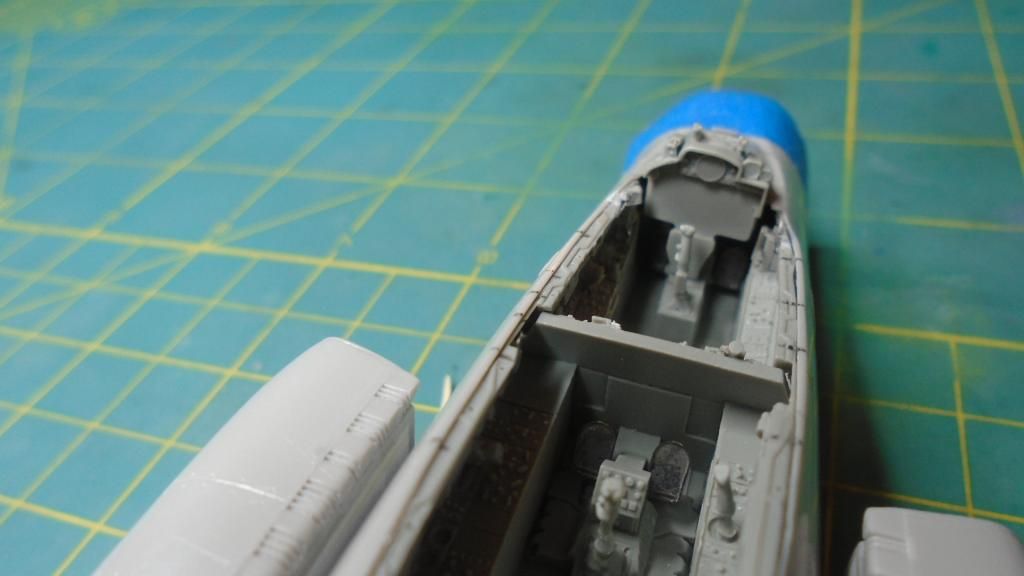
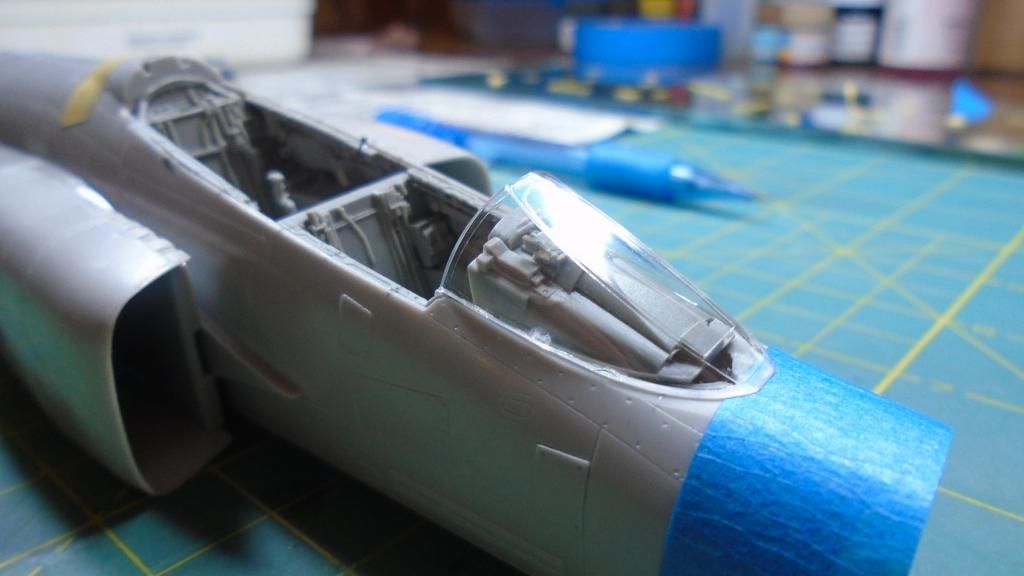
The pencil marks are to line up the sidewalls when I'm ready to glue. Time to make sure the windscreen fits over the resin:

Got some MR. Surfacer black primer on and the cockpit sprayed in DDG:

Painted the back side of the acetate instruments off white:

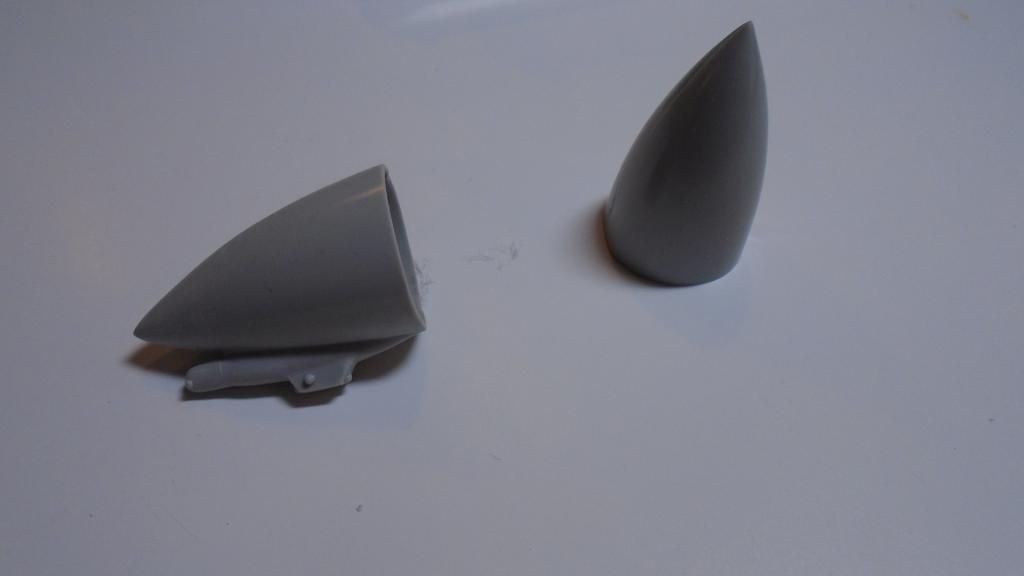
I was gonna use the nose from the D kit, but most of the ND birds had the Ds without the chin pod IR sensor. I figured I would just use the J nose and cut off the small antenna. I'll save the D nose for another build:

More to come!


JOIN OUR COMMUNITY!

Our community is FREE to join. To participate you must either login or register for an account.

SEARCH FORUMS
FREE NEWSLETTER
By signing up you may also receive reader surveys and occasional special offers. We do not sell, rent or trade our email lists. View our Privacy Policy.