SEARCH FINESCALE.COM

Enter keywords or a search phrase below:

1/48 Tamiya P-51D Ridge Runner III WIP Update 5/30/15

3550 views
12 replies
1 rating 2 rating 3 rating 4 rating 5 rating
  • Member since
    December 2003
  • From: Charleston, SC
1/48 Tamiya P-51D Ridge Runner III WIP Update 5/30/15
Posted by sanderson_91 on Sunday, May 24, 2015 6:11 PM

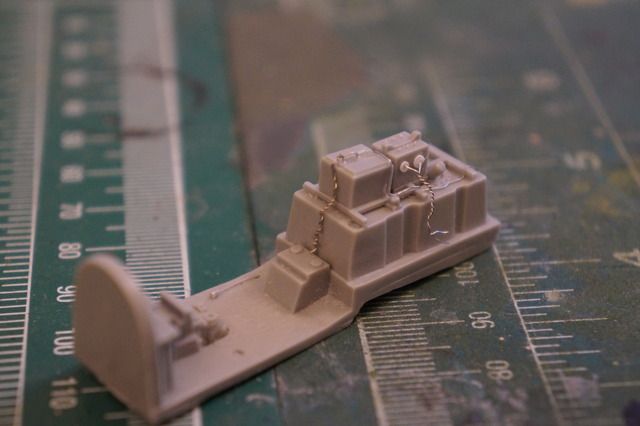
This is the Tamiya P-51D which I'm building as Ridge Runner III for the Mustang GB.  The kit itself is a beauty.  I've added the excellent True Details cockpit set as well as Ultra Cast exhausts and Barracuda wheels. 

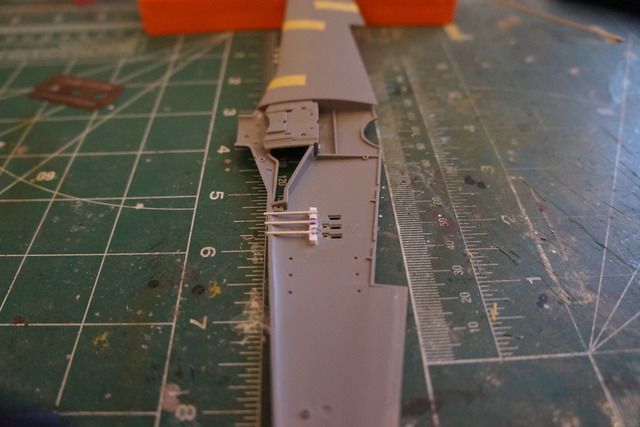
I added a bit of wire to the battery area and used Albion alloys tubing to replace the wing guns.  Here are some photos:

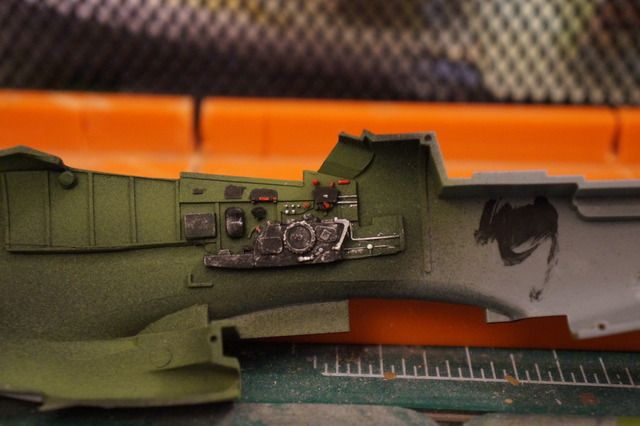
I went a bit heavy with the dry brushing in the next photo, but I toned it down.  I don't have photos of the final result.

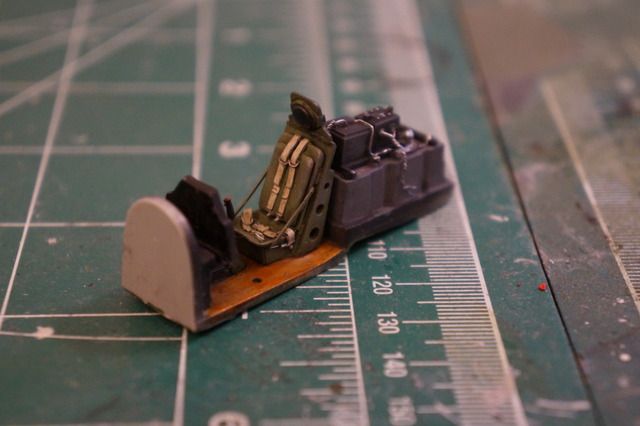
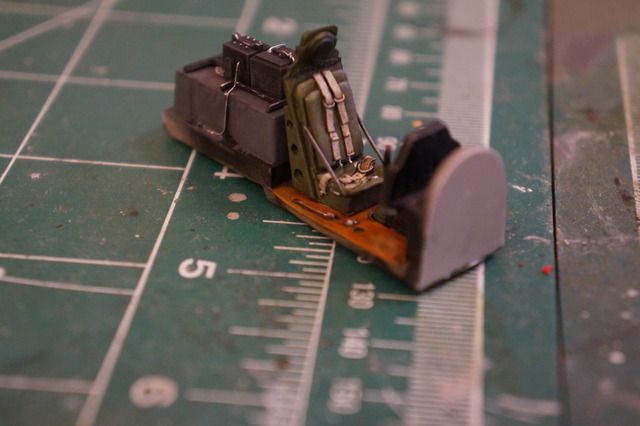
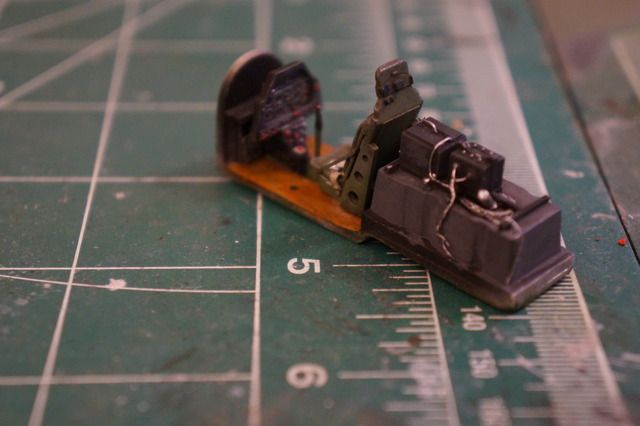
I know that the P-51 had a black floor, but wanted to try my hand a the natural wood finish.  I was going to paint it black and weather it to show some of the wood finish, but I liked the wood finish too much and didn't want to cover it up. 

I've got some paint down but haven't taken any photos yet.  I'll post more soon.  Thanks for looking.

Steve


  • Member since
    February 2012
  • From: Olmsted Township, Ohio
Posted by lawdog114 on Monday, May 25, 2015 12:21 AM

Awesome pit Steve.  Liking the wiring too.  I use the TD pit on all my P-51s. I put one in my Detroit Miss last year. Its in here as a WIP, so feel free to peruse it if your so inclined.  I look forward to your progress...

Joe

 "Can you fly this plane and land it?...Surely you can't be serious....I am serious, and don't call me Shirley"


  • Member since
    January 2015
Posted by BrandonD on Monday, May 25, 2015 2:02 AM

This is looking great, Sanderson. I got the email update on the Mustang group build this afternoon and perused it from there. Excellent work. It's making me want to get mine out.

-BD-

  • Member since
    December 2002
  • From: Bury St Edmunds, Suffolk, England
Posted by Bish on Tuesday, May 26, 2015 11:26 AM

Really nice looking cockpit. I do like the look of the floor.

I am a Norfolk man and i glory in being so


On the bench: Airfix 1/72nd Harrier GR.3/Fujimi 1/72nd Ju 87D-3

  • Member since
    December 2003
  • From: Charleston, SC
Posted by sanderson_91 on Tuesday, May 26, 2015 7:28 PM

Thanks Guys!

Joe - I got the idea for the gun tubes and the wood floor method from you Detroit Miss build!  Thanks for posting some really good tips and ideas!  Gonna try my had a making a base using your tutorial.

Steve


  • Member since
    November 2008
  • From: Central Florida
Posted by plasticjunkie on Wednesday, May 27, 2015 7:40 AM

The pit is looking great. Good job so far!

 GIFMaker.org_jy_Ayj_O


Too many models to build, not enough time in a lifetime!!

  • Member since
    June 2013
Posted by bvallot on Wednesday, May 27, 2015 8:09 AM

Sweet job with the add ons Steve.  That's going to go a long with even with a closed canopy. =]   Joe's cockpits are the best huh.  Even an ordinary pit without any bells or whistles comes out looking superb.

Can't wait to see what you have coming next.

On the bench:  

Tamiya F4U-1  Kenneth Walsh


  • Member since
    July 2014
Posted by modelcrazy on Wednesday, May 27, 2015 8:16 AM

Steve,

Glad to see you started a WIP post, good man. Now others who are't following the Mustang Build can enjoy your work.

Steve

Steve

Building a kit from your stash is like cutting a head off a Hydra, two more take it's place.


http://www.spamodeler.com/forum/

  • Member since
    February 2011
Posted by knox on Wednesday, May 27, 2015 8:26 AM

 Very nice so far!   I will be following.                          knox

  • Member since
    December 2003
  • From: Charleston, SC
Posted by sanderson_91 on Thursday, May 28, 2015 8:00 PM

Thank you for all the kind words!!

I've starting painting and will have an update on either Saturday or Sunday.  Stay tuned!

Steve


  • Member since
    December 2003
  • From: Charleston, SC
Posted by sanderson_91 on Saturday, May 30, 2015 8:32 PM

Here's the latest update.  I primed the model using Tamiya white primer and then pre-shaded the panel lines with Tamiya flat black. Then I painted the airframe Alclad Duraluminum and highlighted several panels with Alclad Magnesium and Alclad Semi-Matt Aluminum.  The red on the nose, tail, and canopy is Mr. Color 79 Shine Red.  The white primer and pre-shade helped give the model a dirty, dull look.

For the landing gear, I used .015 solder run through small sections of Albion Alloys tubing to replicate the brake lines and their attachments.  The wheels are from Barracuda. 

Next up is to paint the prop blades and install them in the nose cone and spray a clear gloss so that I can apply the decals.  I also need to add the twin rear view mirrors and antennas. 

Steve


  • Member since
    June 2013
Posted by RobGroot4 on Sunday, May 31, 2015 4:31 AM

Very nice, sharp paint job.  I particularly like how your Alclad turned out, NMF is such a tough subject but it looks like you nailed it.  The photos make your red look very orange, is it the pictures or is it naturally a rather orange color (not familiar with Mr. Color paints).  I'm enjoying seeing this one come together.

Groot

"Firing flares while dumping fuel may ruin your day" SH-60B NATOPS

  • Member since
    June 2013
Posted by bvallot on Sunday, May 31, 2015 7:31 PM

Coming along! =]

On the bench:  

Tamiya F4U-1  Kenneth Walsh


JOIN OUR COMMUNITY!

Our community is FREE to join. To participate you must either login or register for an account.

SEARCH FORUMS
FREE NEWSLETTER
By signing up you may also receive reader surveys and occasional special offers. We do not sell, rent or trade our email lists. View our Privacy Policy.