SEARCH FINESCALE.COM

Enter keywords or a search phrase below:

Revell 1/32 Supermarine Spitfire Mk.IIa "FINAL REVEAL!" (9.13.15)

9132 views
53 replies
1 rating 2 rating 3 rating 4 rating 5 rating
  • Member since
    April 2015
  • From: New Hampshire, USA
Posted by UKguyInUSA on Saturday, January 23, 2016 7:37 PM

Toshi

Wow, that is amazing!  I love your weathering technique.  I too am building a Spitfire, to the best of my abilities, I'm going to attempt what you just assembled as far as weathering is concerned.   Thank you for sharing, there's a lot of steps I can learn from you. Once again great job!

Toshi


Thanks again, Toshi for your kind comment, much appreciated! Sorry for my late response on this posting...I guess I;m pretty terrible at keeping up with things....life gets in the way, I suppose?!


Cheers! Big Smile

Martin

  • Member since
    March 2015
Posted by qlabs on Tuesday, September 15, 2015 7:59 AM

Absolutely stunning build!

  • Member since
    November 2009
  • From: SW Virginia
Posted by Gamera on Tuesday, September 15, 2015 7:38 AM

Wow, beautiful!!! Top-notch job on the fading and weathering! 

And thanks for the kit review, I've had good luck with RoG, and looks like they have another winner! 

"I dream in fire but work in clay." -Arthur Machen


  • Member since
    March 2013
Posted by patrick206 on Monday, September 14, 2015 2:00 PM

Martin

Just an excellent job, outstanding in all respects. Thanks for all of the info, posts and photos. 

Patrick

  • Member since
    January 2015
  • From: Tumwater, WA.
Posted by M. Brindos on Monday, September 14, 2015 1:27 PM

This build is probably going to stand as a benchmark for this kit from now on. Others will want to build it just like yours and I am one of those people lol.

Splendid! Freakin' superb workmanship and finish! This is why we model.  :D

- Mike Brindos "Lost Boy"

  • Member since
    February 2007
  • From: Brunswick, Ohio
Posted by Buckeye on Monday, September 14, 2015 11:28 AM

Excellent build and thanks for the evaluation.

Mike

  • Member since
    September 2014
Posted by rooster513 on Monday, September 14, 2015 9:32 AM

Looks awesome! It all came together great! Now I've got to get myself one:)

-Andy

  • Member since
    August 2013
Posted by Jay Jay on Monday, September 14, 2015 8:16 AM

A very fine build Sir. 

I do appreciate your honest opinions on the overview of this kit. It surely helps me on my future purchases. I don't think I have any reservations on buying any RoG kit now.


 I'm finally retired. Now time I got, money I don't.

  • Member since
    March 2015
  • From: Streetsboro, Ohio
Posted by Toshi on Monday, September 14, 2015 5:52 AM

What a fantastic finish!  Excellent!

Toshi

On The Bench: Revell 1/48 B-25 Mitchell


Married to the most caring, loving, understanding, and beautiful wife in the world.  Mrs. Toshi


  • Member since
    January 2015
Posted by BrandonD on Monday, September 14, 2015 1:48 AM

Bravo! That is OUTSTANDING!!

Seriously a great recovery from a few mishaps. Now you have me wanting one, haha.

-BD-

  • Member since
    December 2010
  • From: Salem, Oregon
Posted by 1943Mike on Sunday, September 13, 2015 11:57 PM

Martin,

When I was 11 or 12 (1954/1955) I read a biography of Douglas Bader by Paul Bruckhill that impressed me a lot. I'd always been interested in aircraft -especially fighter aircraft. My dad was in Pensicola, Florida in 1917/18 training pilots and working on the Curtiss JN4 which may be why the idea of flight began to fascinate me. At any rate, after having read the above mentioned tomb I was enthralled with Hurricanes and Spitfires for a time.


You've done a wonderful job on this kit and it makes me feel I am looking at a living aircraft.


Kudos,


Mike


Mike

"Le temps est un grand maître, mais malheureusement, il tue tous ses élèves."

Hector Berlioz

  • Member since
    September 2003
  • From: AandF in the Badger State
Posted by checkmateking02 on Sunday, September 13, 2015 11:15 PM
Exceptional! Well done!


  • Member since
    June 2014
Posted by BrandonK on Sunday, September 13, 2015 10:12 PM

You crushed in man!!! Very nice finish.


BK

On the bench:

A lot !! And I mean A LOT!!

2024 Kits on deck / in process / completed   

                         14 / 5 / 2  

                              Tongue Tied

  • Member since
    April 2015
  • From: New Hampshire, USA
Posted by UKguyInUSA on Sunday, September 13, 2015 7:03 PM

Revell 1/32 Supermarine Spitfire Mk.IIa "Final Reveal" (9.11.15)


Hello Chaps,

Well, she's completed and so here are my "Final Reveal" photos. I hope you enjoy them?!


Regarding whether I think this is a VFM kit - "Value For Money" kit, the answer would be a definite "Yes"!

This 1/32 scale Revell Germany kit is only $23.95 to buy in the USA; about 16.00 quid when converted for our UK modelers. Here's a link to where I purchased my kit: 


http://www.hobbylinc.com/revell-germany-spitfire-mk-ii-plastic-model-airplane-kit-1:32-scale-03986


Regarding providing my scores for the overall quality of engineering, quality of molded product, quality of details included, quality of the instruction manual and the decals and packaging, I score as follows:


Quality of Engineering Fits: 9/10 Everything goes together very well and very easily. The only reason that I marked the score down to 9, was because the bullet proof windscreen was about 0.75mm from the surface of the fuselage leaving a gap beneath it. I rectified this by scraping down the two sides of the fuselage profiles where the windshield fitted into, then applied a small amount of filler along the joints of the windshield to fuselage, and then blended it in.

Quality of molded product: 9/10- the product is very nicely molded, parts are crisp and clean with just a few spots of flash. No warp was present on any of the parts and ejector pin witness marks were away from visual area. I didn't have any sink marks to contend with and the canopy parts were nice and clear with minimal distortion when looking through. There are finely recessed panel lines and rivet details, although some of the rivet details are too fine for them to show when the plane is given a dirt wash during the finishing stage. A good rivet forming tool would cure that, should you have one and want to attempt improving them.

Quality of details included: 8/10- I'd pay an extra $5.00 to $8.00, if this kit was further enhanced with the inclusion of a Rolls Royce Merlin Engine to display with the cowlings removed.

Quality of the instruction manual: 9/10- I thought it was very easy to follow, but, it would be nice if the painting instructions were in color and alternative manufacturers paint shades were included for those that cannot get Revell paints easily, or prefer to use other brands.

Quality of Decals: 9/10- There are two options for squadron markings and the decals go down very well with a decal setting solution, conforming nicely to raised and recessed surface details. The kit does lack some of the smaller stencil markings such as "no step".

Quality of packaging: 8/10-  Typical Revell thin card packaging with access to the box by opening the end flaps. The Sprues are packaged in clear polythene bags that are taped closed.

Further notes: I would recommend this kit to anyone that has half a dozen or more builds under their belt, despite its Skill Level 4 marking, it's very easy to put together and goes together well.

Did I enjoy the build?- Yes, very much so; the only issue that affected my enjoyment was the fact that I had a missing upper starboard side wing section and my portside fuselage- tail end- got damaged.

Would I buy this kit again? Yes, I already did! I'll be buying after-market enhancement for the cockpit and some after-market decals to allow more options for finishing.

If you'd like to see my "Final Reveal" video for this update, here is the link to that:


https://youtu.be/IfKX4uaCWy4


Thanks for following along and for your comments, much appreciated! :) :thumb1:

Happy modeling and have fun!

Cheers :) Yes
Martin

  • Member since
    April 2015
  • From: New Hampshire, USA
Posted by UKguyInUSA on Sunday, September 13, 2015 6:39 PM

BrandonD

Wow! I'm gone for a week and it seems like this thing goes from FUBAR to First Place in a future contest! It looks fantastic!

-BD-


Thanks for your very kind compliment, BD, much appreciated mate!

Cheers,

Martin :)

  • Member since
    April 2015
  • From: New Hampshire, USA
Posted by UKguyInUSA on Sunday, September 13, 2015 6:38 PM

BrandonK

Wow, you are really bringing this one home. The weathering is excellent and really makes your detailing pop. Nice work my friend.


BK


Thanks BK, greatly appreciated mate :)


Cheers,

Martin

  • Member since
    April 2015
  • From: New Hampshire, USA
Posted by UKguyInUSA on Sunday, September 13, 2015 6:37 PM

rooster513

Another beauty my friend! Can't wait to see the final pics!


Thanks Andy, greatly appreciated mate!


"Final Reveal" coming tonight before I get into bed!

Cheers,

Martin :)

  • Member since
    April 2015
  • From: New Hampshire, USA
Posted by UKguyInUSA on Sunday, September 13, 2015 6:36 PM

7474

Looks great. Thanks for the build report. 


Thanks, much appreciated, and you're welcome for the report :)

Cheers,

Martin

  • Member since
    April 2015
  • From: New Hampshire, USA
Posted by UKguyInUSA on Sunday, September 13, 2015 6:33 PM

BrandonK

So nicely done. Super work there. 


When I saw that warpped tail I instantly thought of doing a Dio of a downed Spitfire with tail damage. But, you most likely already tossed the bad part. Anyway, it's what came to my mind. Something like this with tail damage also.


BK


Hey Brandon,


Thanks for your compliment, much appreciated, and sorry for my late reply!

That would have been a great idea and thanks for sharing it along with the photo, much appreciated. I couldn,t wait 8 weeks for delivery from Germany so I just bought  new kit, and actually, the parts still haven't arrived, so I might have to contact Revell, GmbH again.

"Final Reveal" photos coming tonight before I get to bed!

Cheers,

Martin :)

  • Member since
    April 2015
  • From: New Hampshire, USA
Posted by UKguyInUSA on Sunday, September 13, 2015 6:28 PM

silentbob33

Great work Martin!  Your preshading shows through in just the right amount.  Bummer about forgetting to chip the paint before you got as far along as you did.  But as you pointed out, there's a fix for that.  I can't wait to see the next update.


Hello Bob,

Sorry for not getting a reply to you sooner, with grandchildren around at weekends it gets difficult to grab a few minutes on the Lap-Top!

Anyway, yes, bummer about the chipping, but my last update shows that I just used files to carefully take off the top paint to reveal the silver beneath.

"Final Reveal" coming tonight before the new week begins and holds me up again!

Cheers,

Martin :)

  • Member since
    February 2012
  • From: Olmsted Township, Ohio
Posted by lawdog114 on Saturday, September 12, 2015 9:57 PM
Excellent work. Your exhaust staing is very convincing as well...

 "Can you fly this plane and land it?...Surely you can't be serious....I am serious, and don't call me Shirley"


  • Member since
    March 2015
  • From: Streetsboro, Ohio
Posted by Toshi on Saturday, September 12, 2015 6:14 AM

Wow, that is amazing!  I love your weathering technique.  I too am building a Spitfire, to the best of my abilities, I'm going to attempt what you just assembled as far as weathering is concerned.   Thank you for sharing, there's a lot of steps I can learn from you. Once again great job!

Toshi

On The Bench: Revell 1/48 B-25 Mitchell


Married to the most caring, loving, understanding, and beautiful wife in the world.  Mrs. Toshi


  • Member since
    January 2015
Posted by BrandonD on Saturday, September 12, 2015 2:34 AM

Wow! I'm gone for a week and it seems like this thing goes from FUBAR to First Place in a future contest! It looks fantastic!

-BD-

  • Member since
    June 2014
Posted by BrandonK on Friday, September 11, 2015 9:07 AM

Wow, you are really bringing this one home. The weathering is excellent and really makes your detailing pop. Nice work my friend.


BK

On the bench:

A lot !! And I mean A LOT!!

2024 Kits on deck / in process / completed   

                         14 / 5 / 2  

                              Tongue Tied

  • Member since
    September 2014
Posted by rooster513 on Friday, September 11, 2015 7:07 AM

Another beauty my friend! Can't wait to see the final pics!

-Andy

  • Member since
    December 2002
Posted by 7474 on Thursday, September 10, 2015 6:58 PM

Looks great. Thanks for the build report. 

  • Member since
    April 2015
  • From: New Hampshire, USA
Posted by UKguyInUSA on Thursday, September 10, 2015 2:31 PM

Revell 1/32 Supermarine Spitfire Mk.IIa "Build Update #4" (9.10.15)


Well, 9 days have passed since my last update, but, it was the Labor Day weekend here in the States and he missus took Thursday and Friday off to take a 5 day break from the office. Her sister from Florida was with us, too. Therefore, nothing done until Tuesday and yesterday (Wednesday) of this week. That said, I completed her, and this update shows what I did since "Build Update #3" to reach completion.


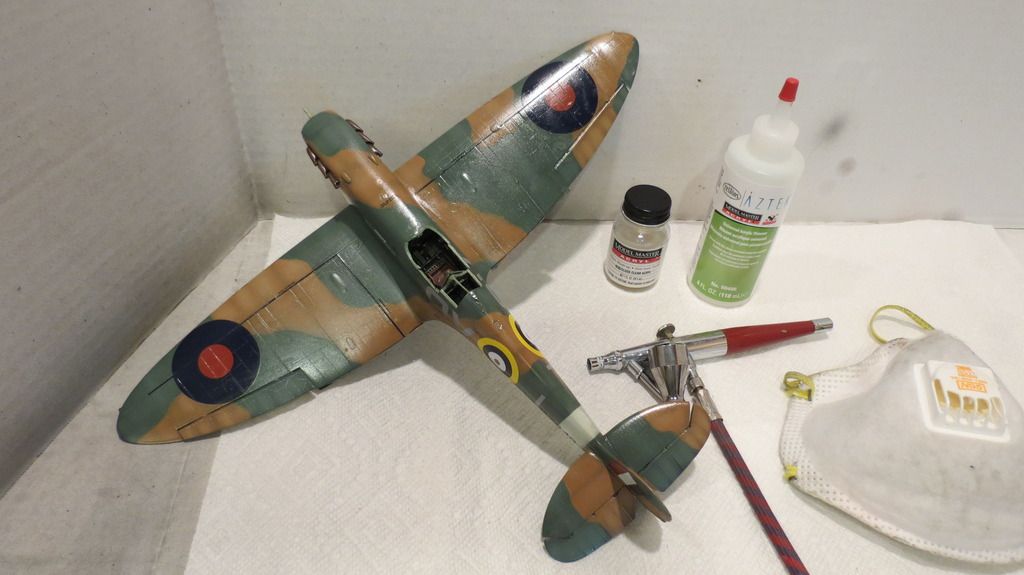
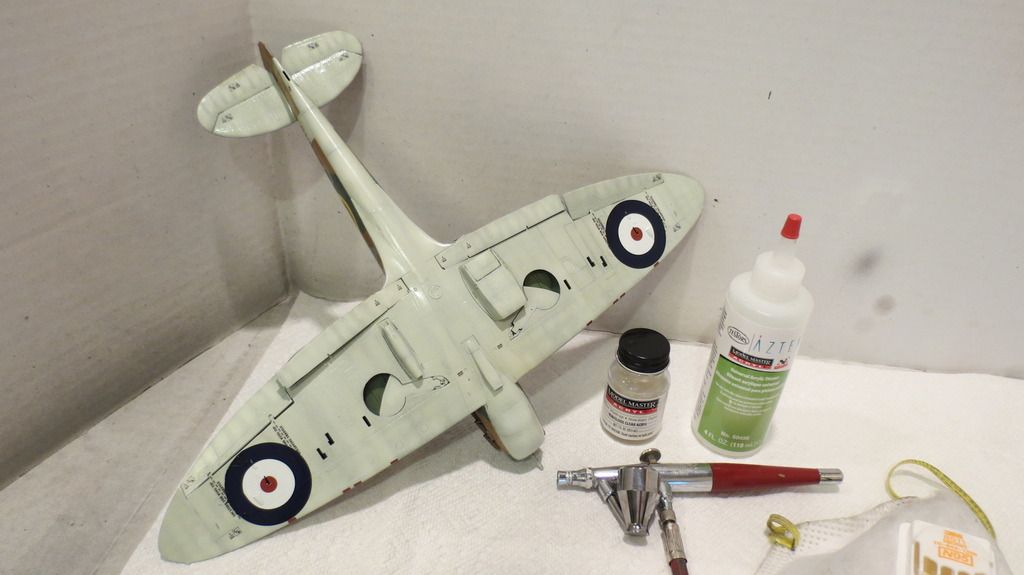
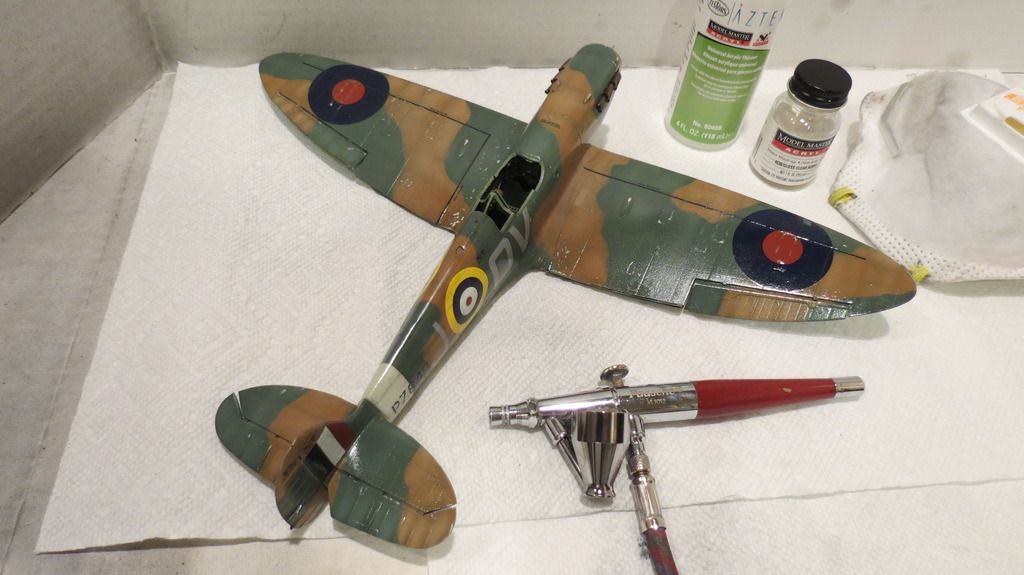
First, I sealed the previously applied decals with a gloss clear coat and in preparation for adding my weathering:


IMG_2761_zpswdeypqnv.jpg


IMG_2762_zpstsgbmkma.jpg


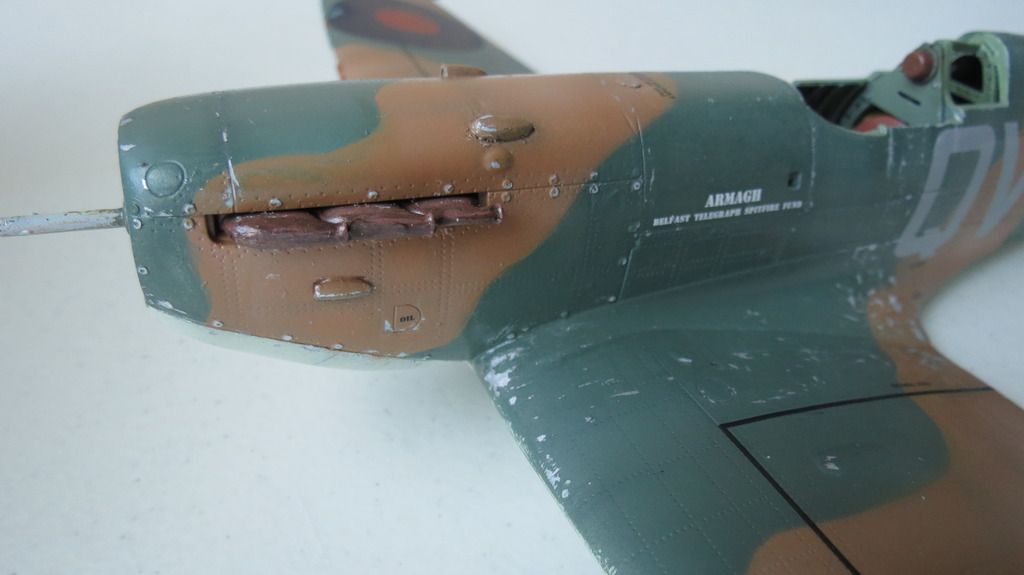
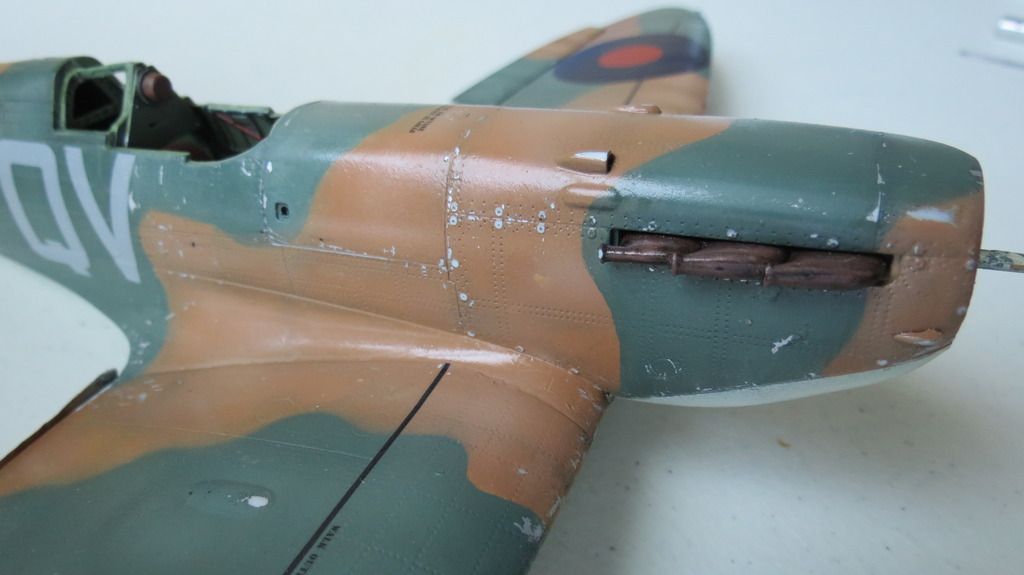
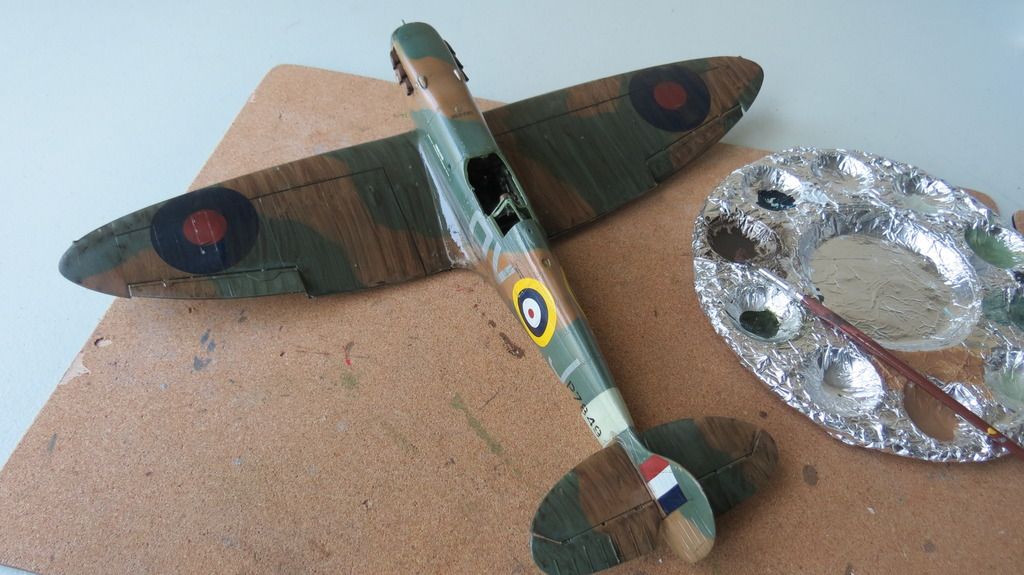
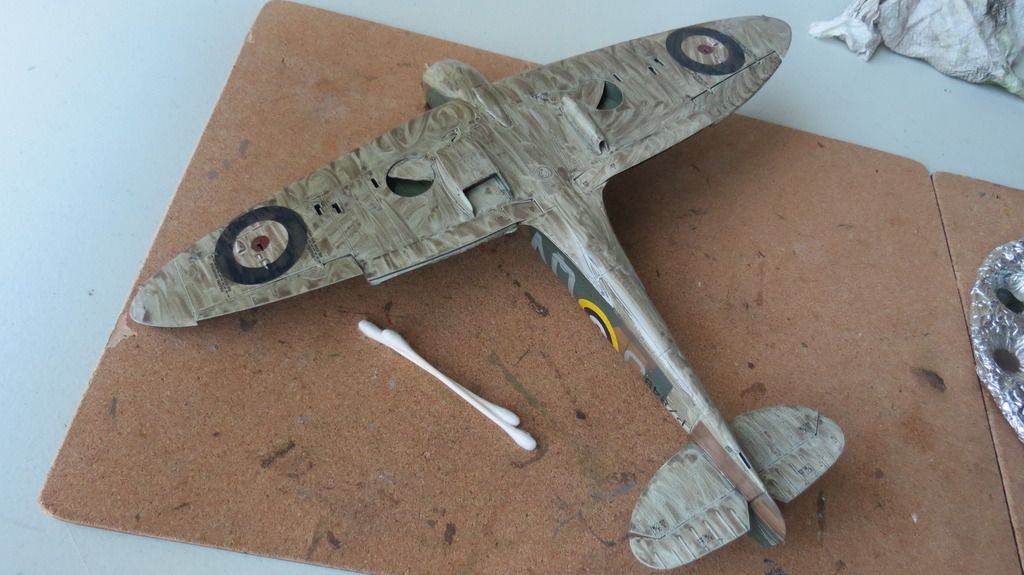
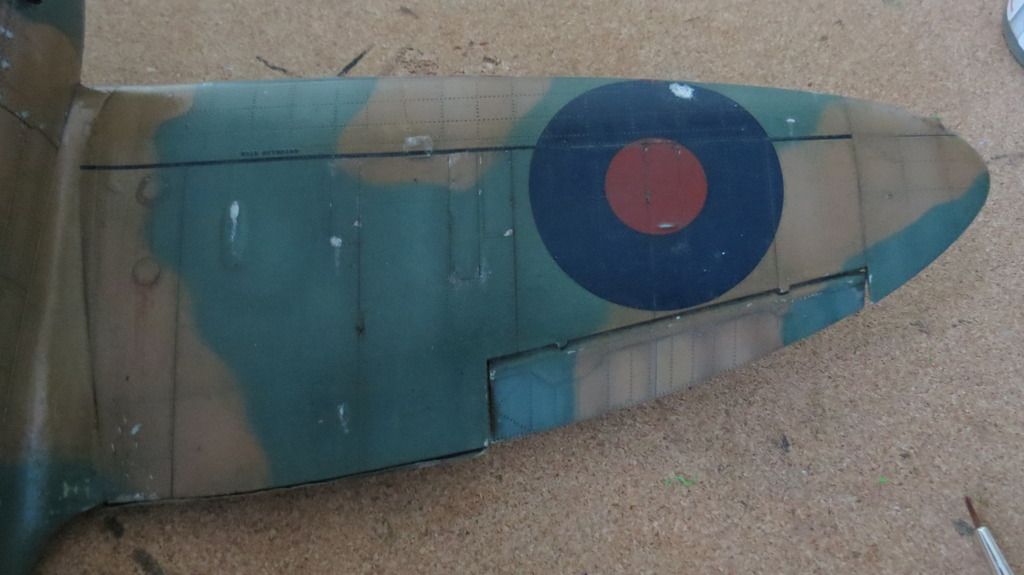
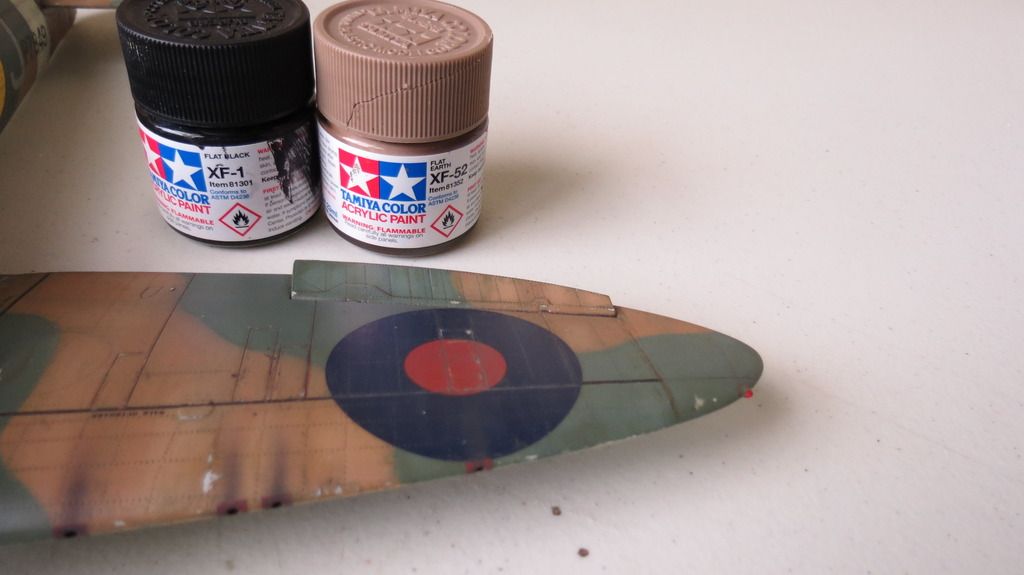
I started my weathering by adding chipping to the model. I had originally intended to use the "Hairspray" technique, but after applying silver paint, sealing it in with a clear coat, then applying hairspray before painting the plane, I sealed the paint with a clear coat ready for decaling, complete brain fart moment! Ha well, there's always more ways to skin a cat, and so, I used files to remove the camo paint to expose the silver beneath:


IMG_2763_zps9eihccal.jpg


IMG_2765_zpsule8tzqc.jpg


IMG_2766_zps7wt6ug60.jpg


IMG_2767_zpsnmtynjvq.jpg


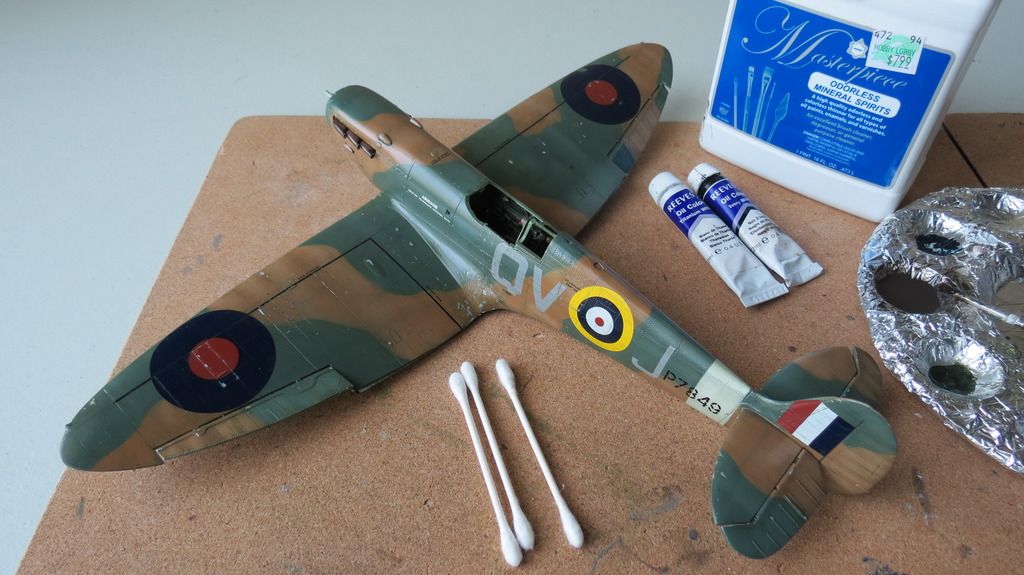
After the chipping was done, I then mixed a green/olive drab color oil filter and applied that all over the upper side camo colors. I allowed it to dry for 30 minutes, then removed the excess with kitchen towel, leaving enough on to provide the tonal variation I was looking for. I allowed it to dry for 3 hrs then sealed it with a gloss clear coat:


IMG_2768_zpslrnr8emi.jpg


IMG_2771_zpsb5siuzrp.jpg


IMG_2773_zpsmecqdtye.jpg


IMG_2775_zpsaraxqyw1.jpg


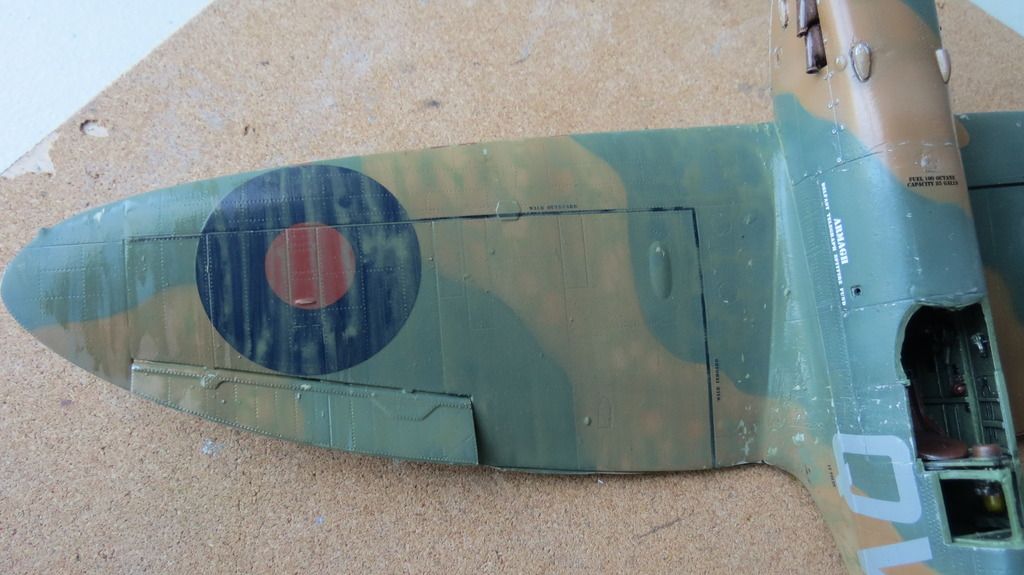
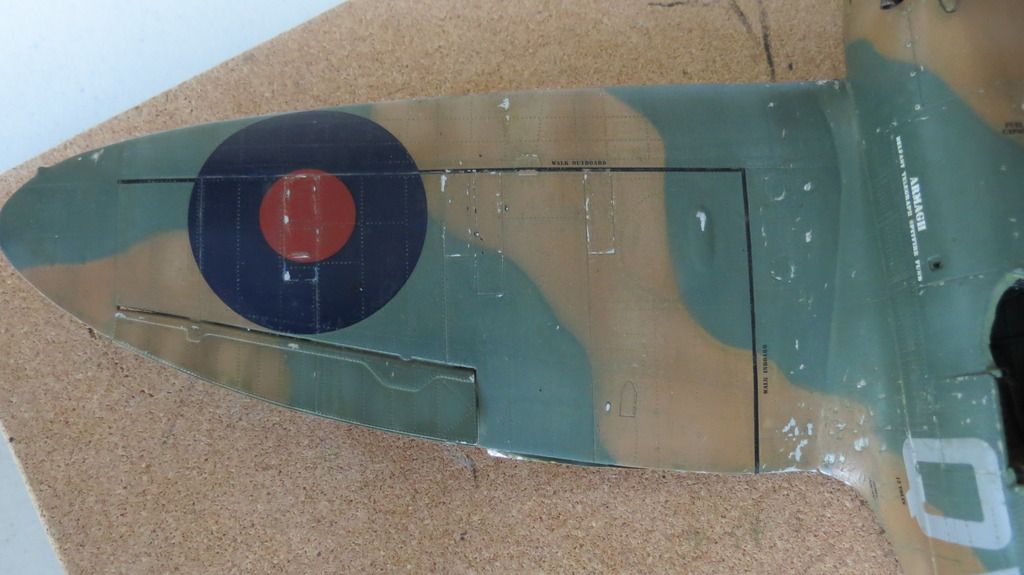
I let the clear coat dry overnight and then I mixed a dark dirt wash with black oil paint and odorless spirit, adding a smidgeon of white to make it look dark brown/black. I applied it liberally all over the plane, allowed it to dry for 30 minutes, then removed the excess with kitchen towel, leaving on an amount that was pleasing to my eyes:


IMG_2778_zpsrsalbcrv.jpg


IMG_2779_zps65drbs0e.jpg


IMG_2780_zpsqcjawkjq.jpg


IMG_2781_zpsiehzrwjc.jpg


IMG_2785_zpstqiqkass.jpg


IMG_2786_zpsotk7ao1b.jpg


IMG_2787_zpsmubxpsgv.jpg


IMG_2788_zpsq4uhiu6z.jpg


IMG_2790_zps1dicprrc.jpg


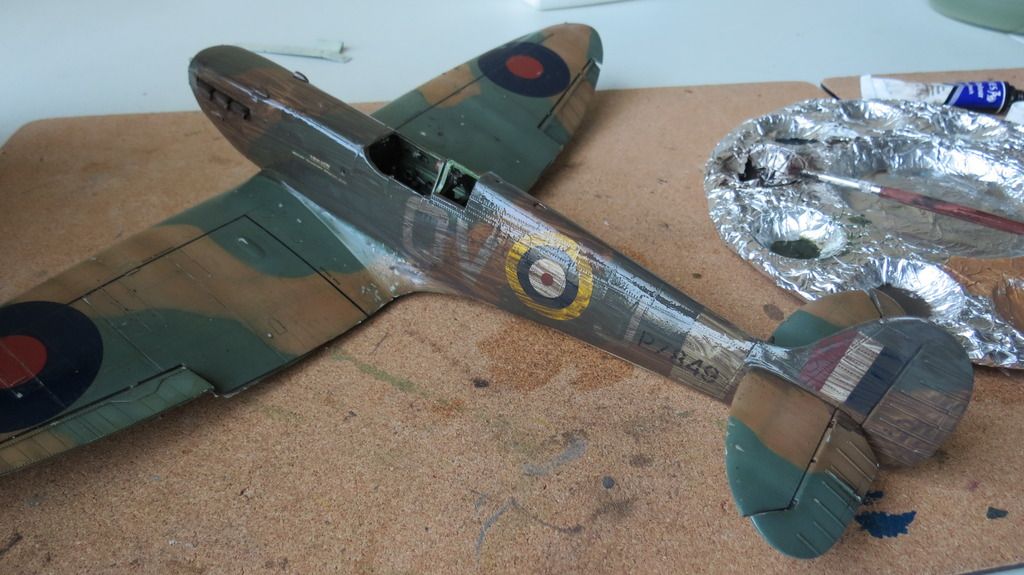
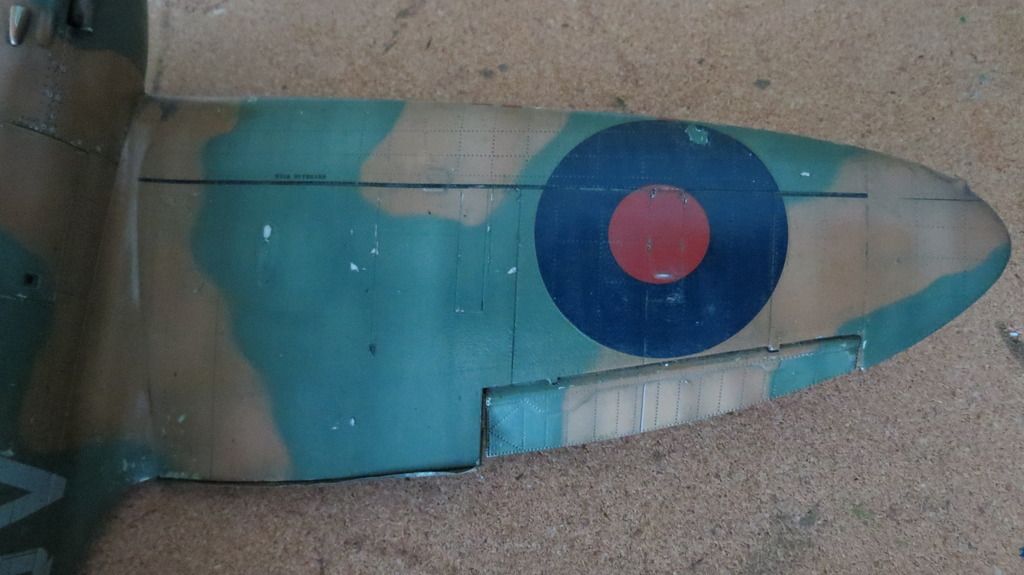
I then mixed a reddish/brown oil wash and applied some streaks and stains here and there, allowed it to dry for a few hours then airbrushed my final matt/flat clear coat onto everything:


IMG_2797_zpslcg16tnt.jpg


IMG_2801_zps4yqisir6.jpg


IMG_2803_zpsvztp8ijd.jpg


IMG_2810_zpsl4warqwb.jpg


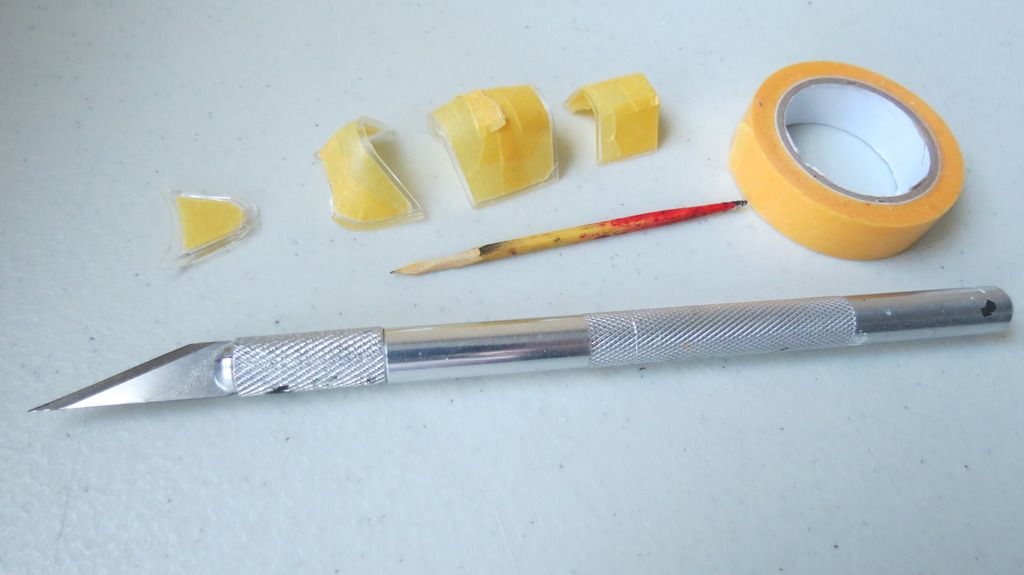
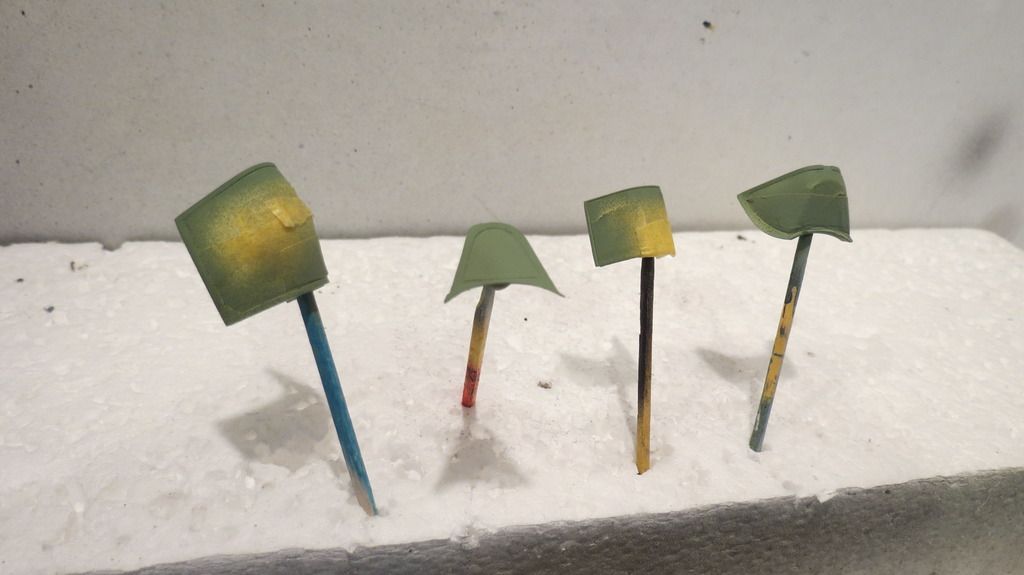
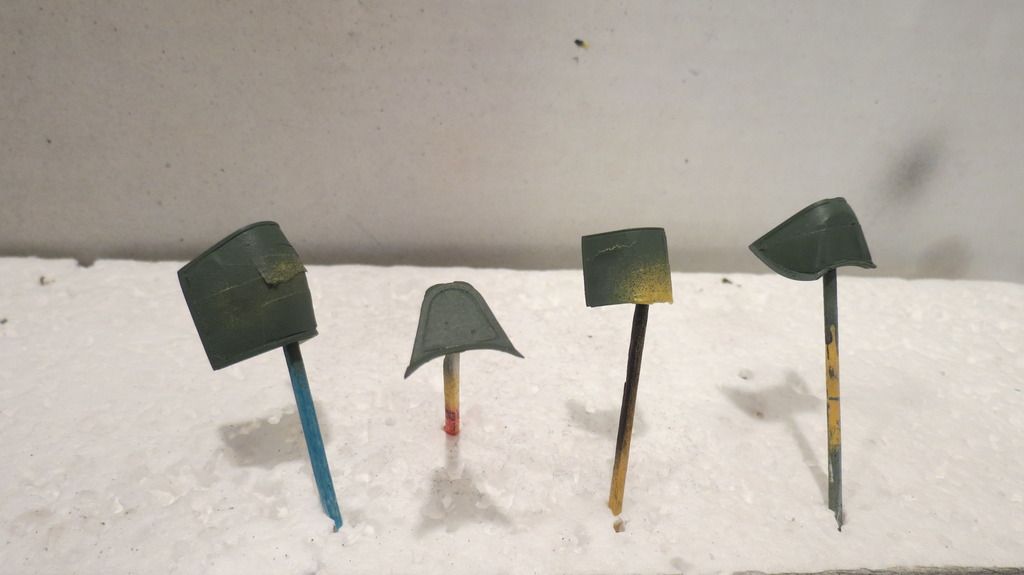
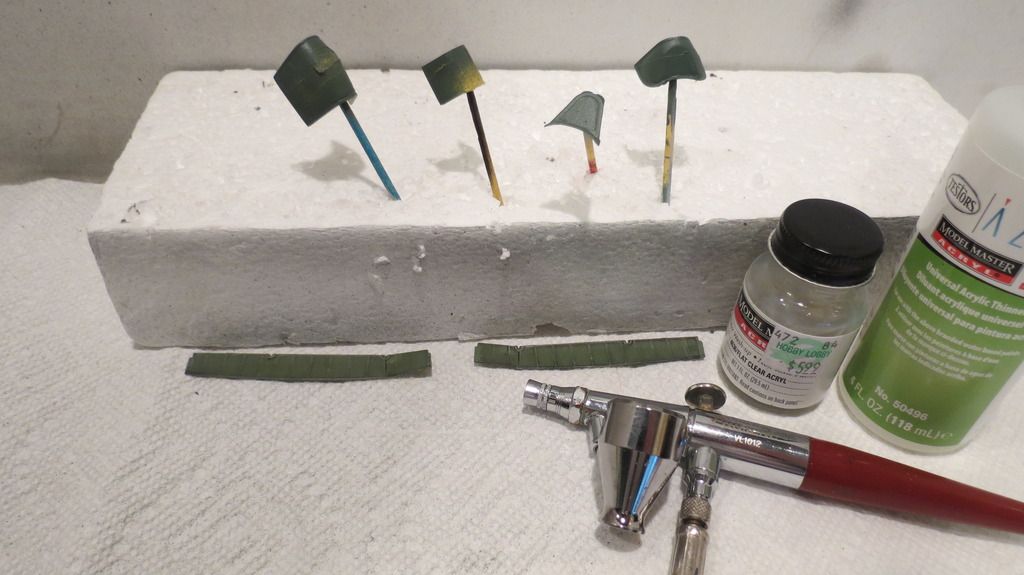
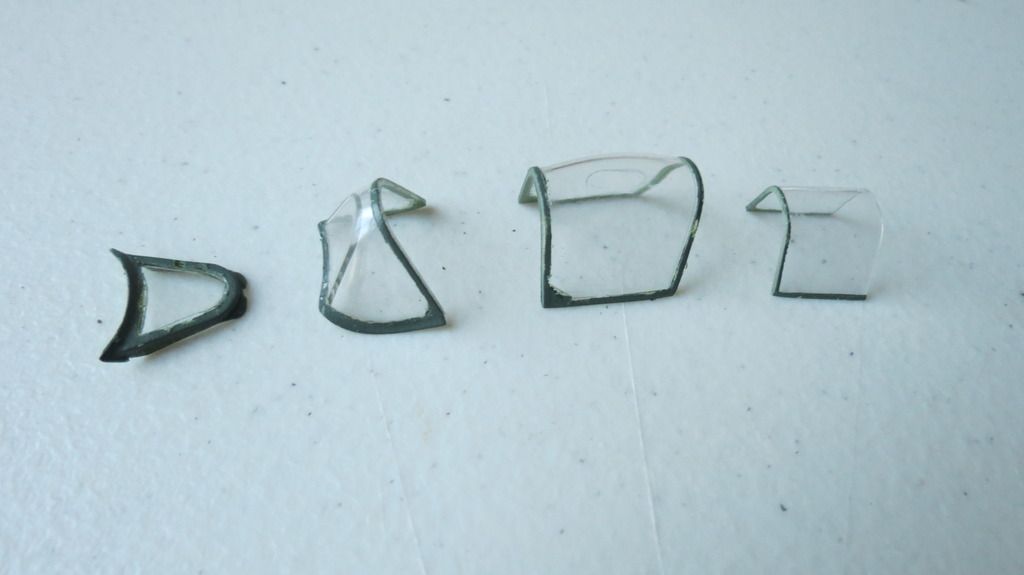
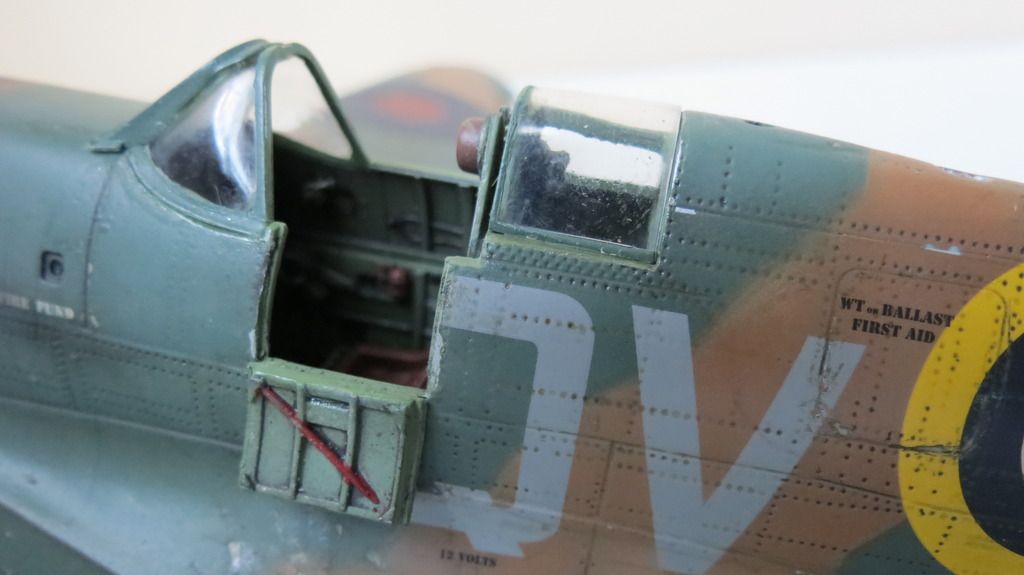
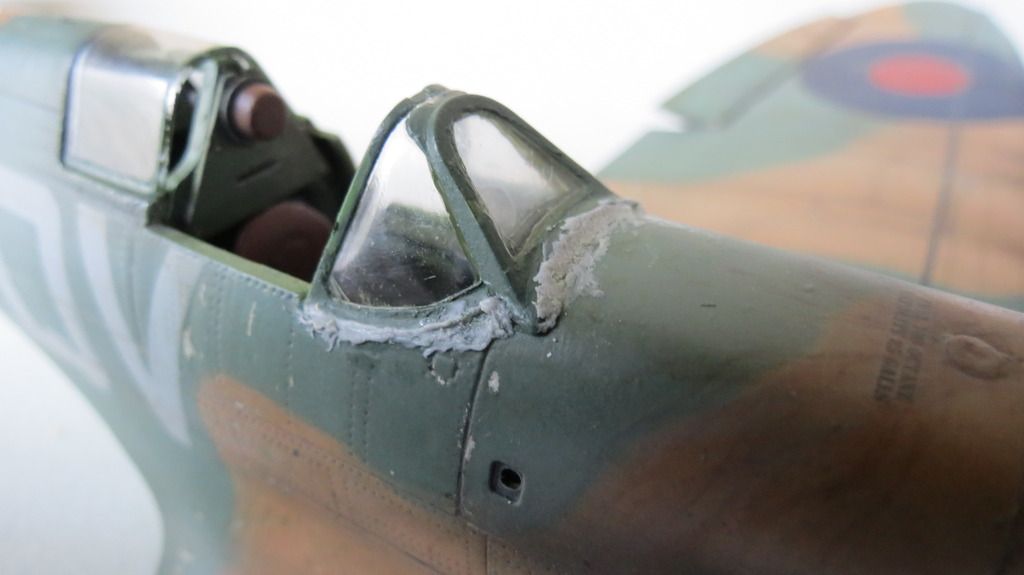
While the flat clear coat was drying on everything, I moved onto the canopy sections. First I masked all the separate parts, then airbrushed interior green onto the exposed frames and let it dry for 1 hr. I then airbrushed the exterior Dark Green camo color on top, allowed that to dry for 1 hr, then sealed it all with a matt/flat clear coat. I then carefully removed the masking tape, but some paint peeled in spots, and so, I touched up those areas. I then glued the front bullet proof shield to the windshield:


IMG_2811_zpstggac7bi.jpg


IMG_2813_zpsp0ruqdge.jpg


IMG_2815_zpsdflee9ci.jpg


IMG_2816_zpsonunbx08.jpg


IMG_2818_zpsk9oeyaqu.jpg


IMG_2819_zpssdjuawhp.jpg


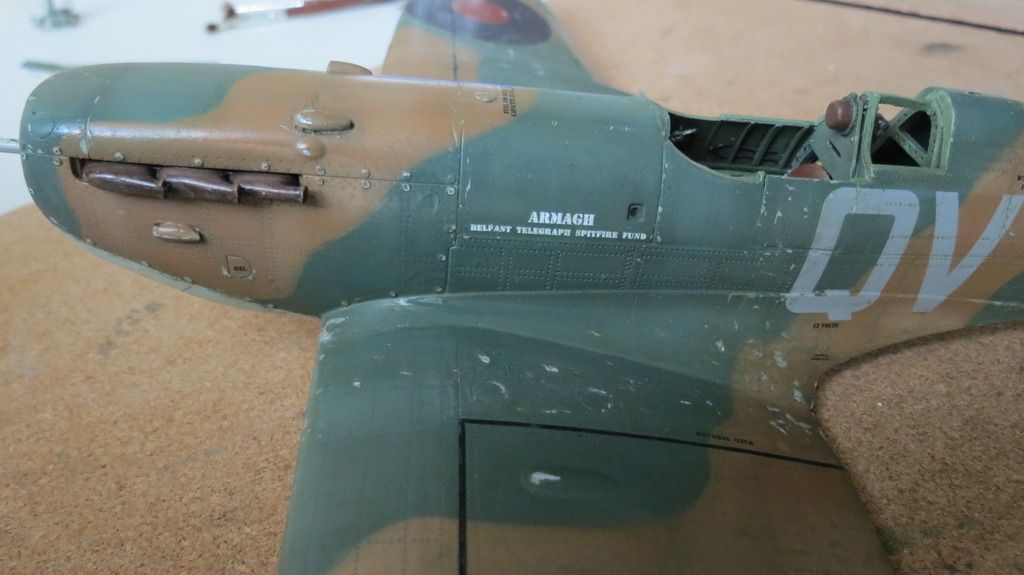
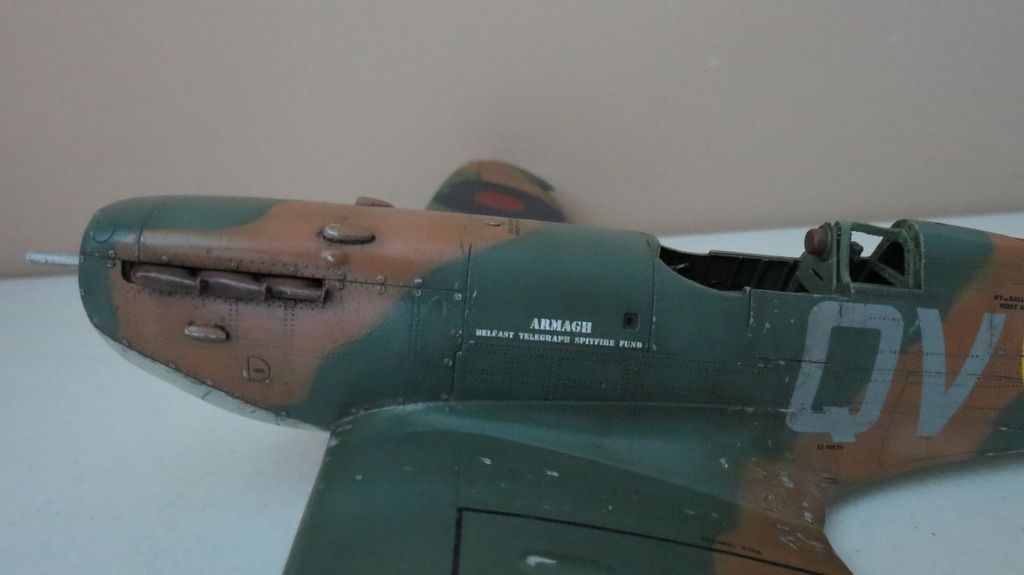
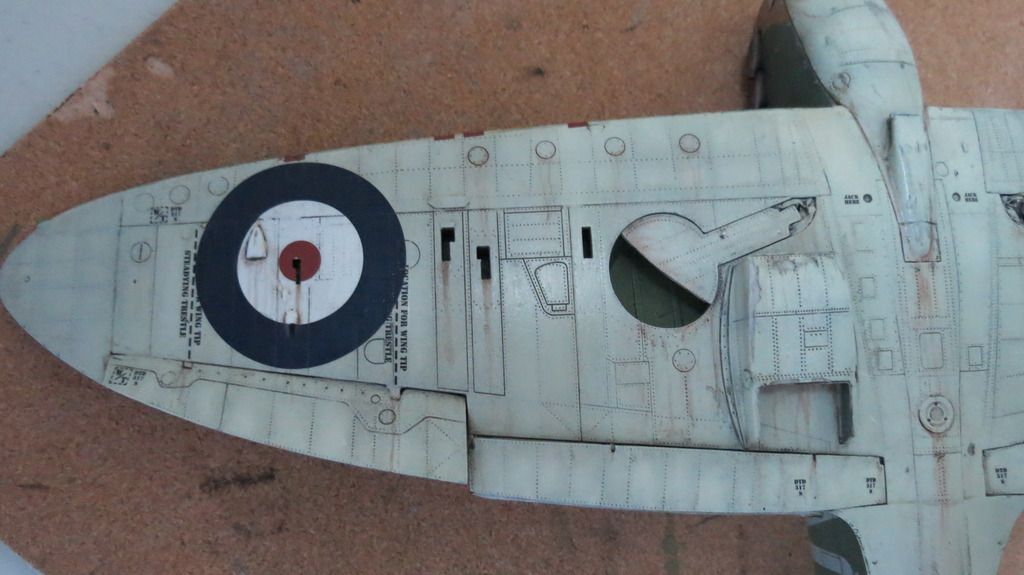
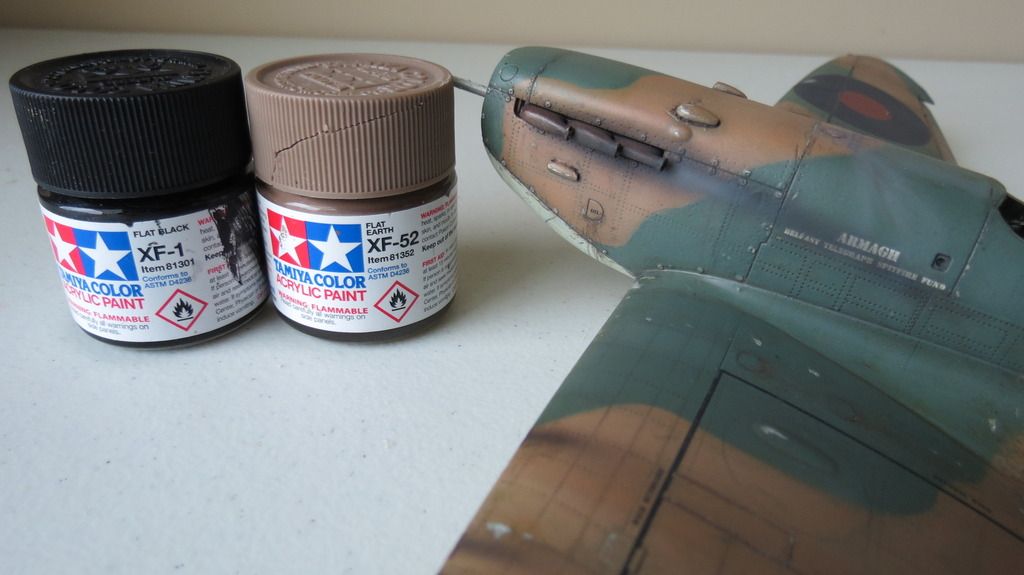
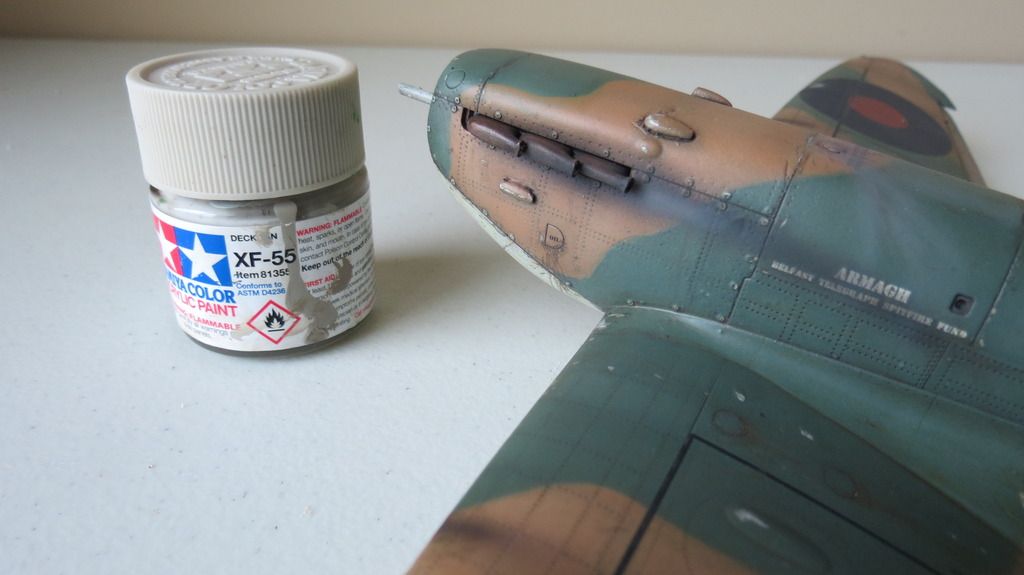
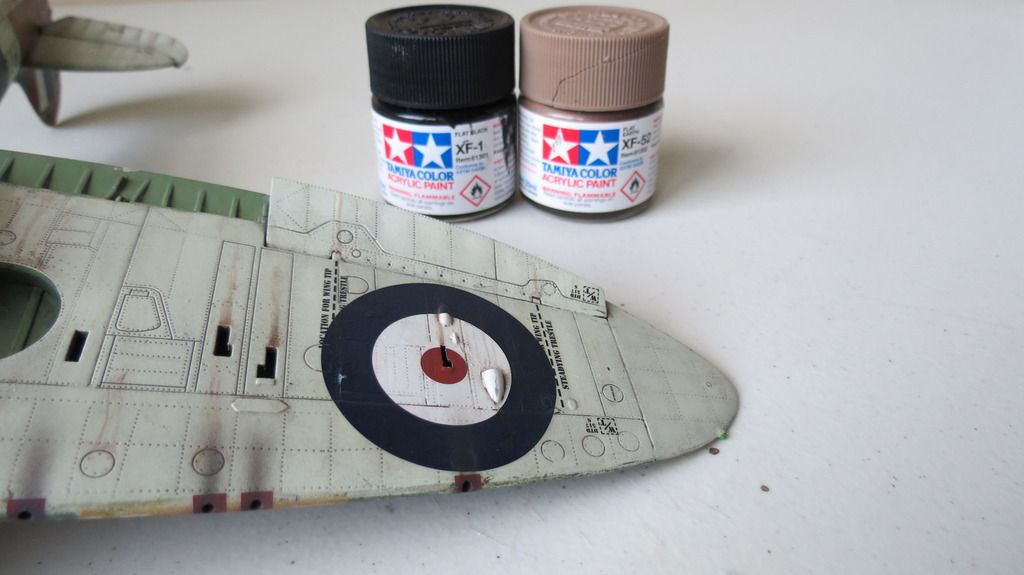
When the matt/flat clear coat had dried on the plane, I then applied the exhaust stains and the stains around the 8 .303" browning machine guns- 4 in each wing leading edge. I used Tamiya XF-1 Black mixed with some Tamiya XF-52 Dark Earth thinned down with X-20A thinners at a 20/80 ratio.  then thinned down some Tamiya XF-55 Deck Tan with X-20A thinners at a 20/80 ratio and airbrushed some on top of the previously airbrushed darker exhaust stains:


IMG_2821_zpsvfievblc.jpg


IMG_2822_zpsptijn7bw.jpg


IMG_2823_zpsrfkfhgag.jpg


IMG_2824_zps3wru6tvj.jpg


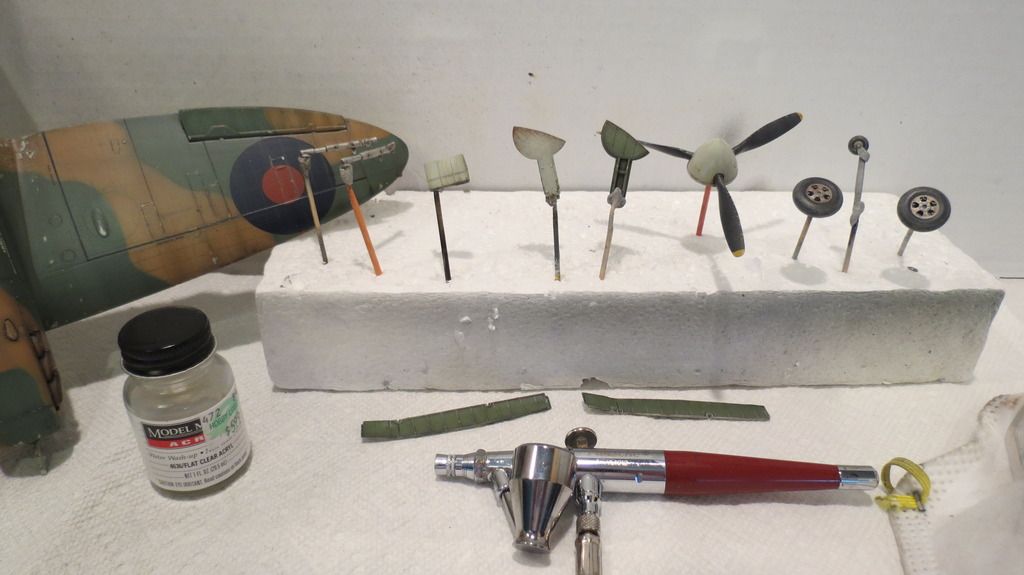
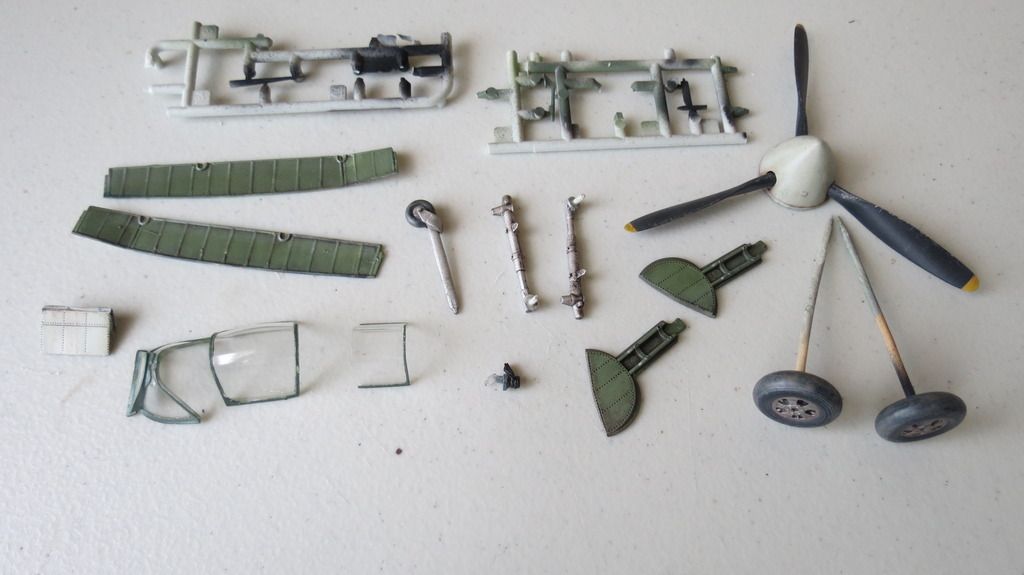
When that was completed, it was now time to gather up all the lose parts in readiness for the final assembly!


IMG_2820_zpsln4phvwk.jpg


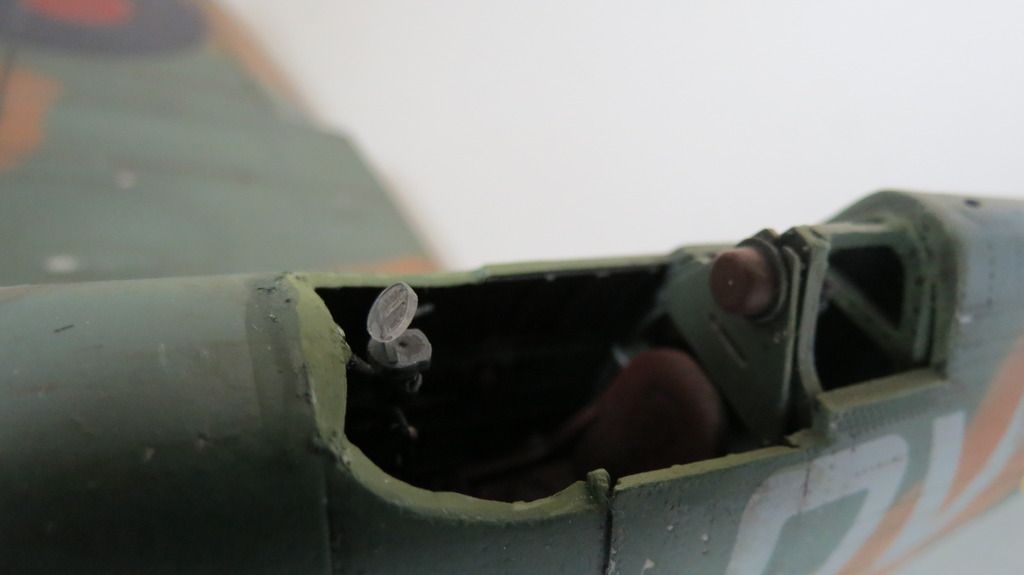
I started the final assembly with the rudder actuator, followed by the gun-sight:


IMG_2825_zpscqqc28gd.jpg


IMG_2826_zps0z5bdoso.jpg


IMG_2827_zpsxyrxqulc.jpg


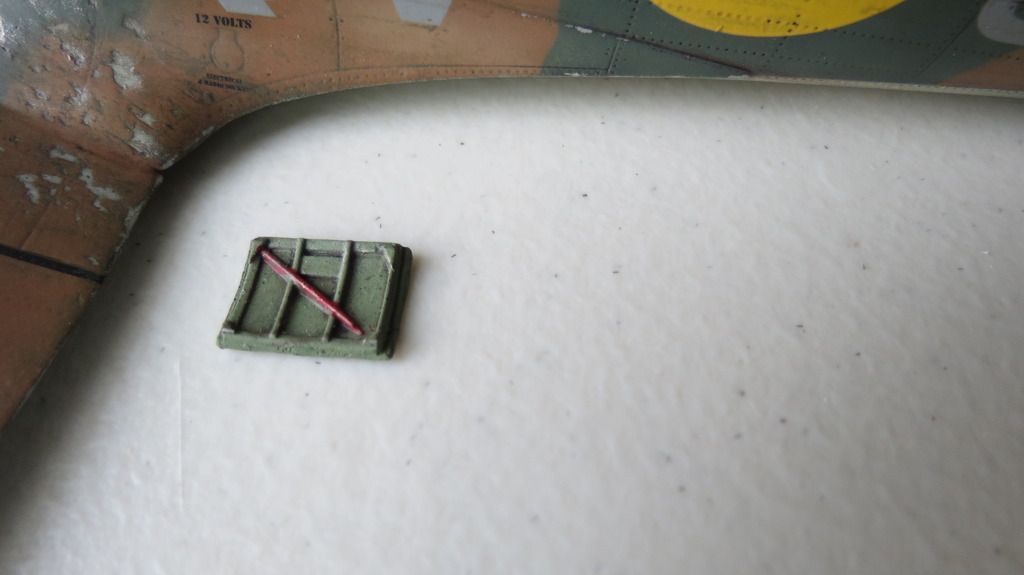
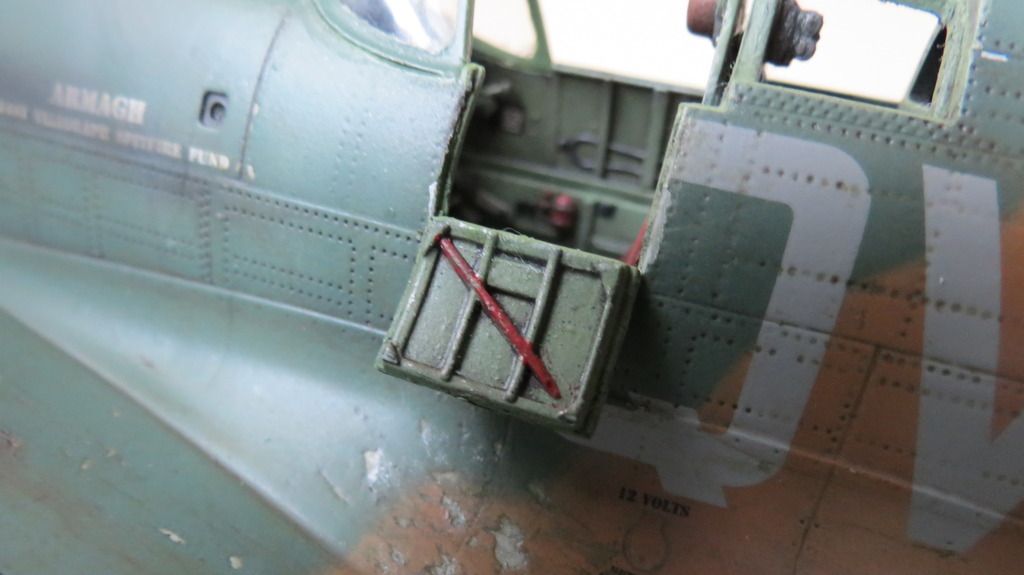
I then fitted the Pilot's door in the open position followed by gluing the windshield and rear canopy section into place. There were some small gaps around the front windshield which I filled in:


IMG_2829_zpsmtn8yrxg.jpg


IMG_2830_zpscfnmvkoh.jpg


IMG_2832_zpsyk7jnmcy.jpg


IMG_2834_zpsmxwcds6s.jpg


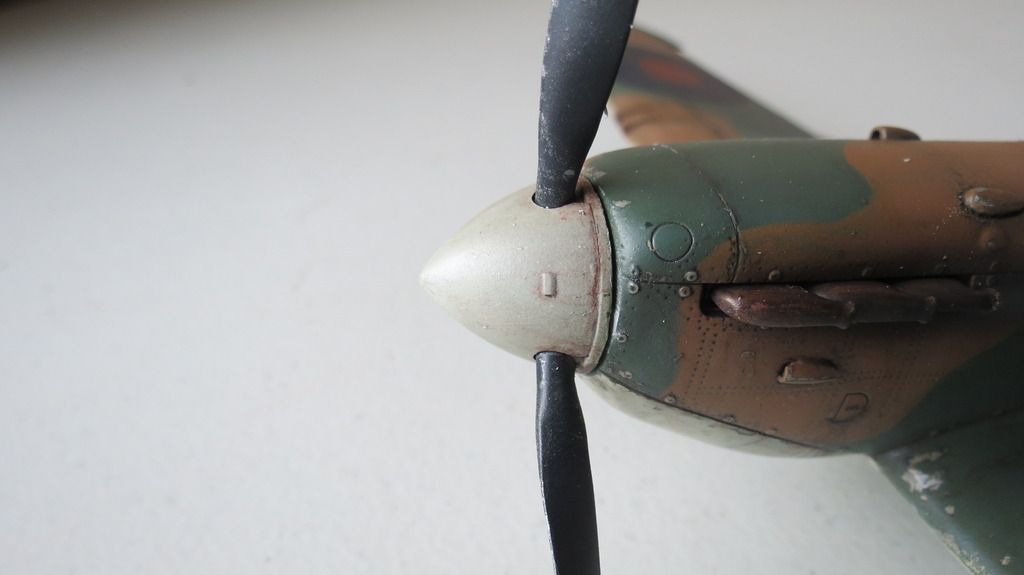
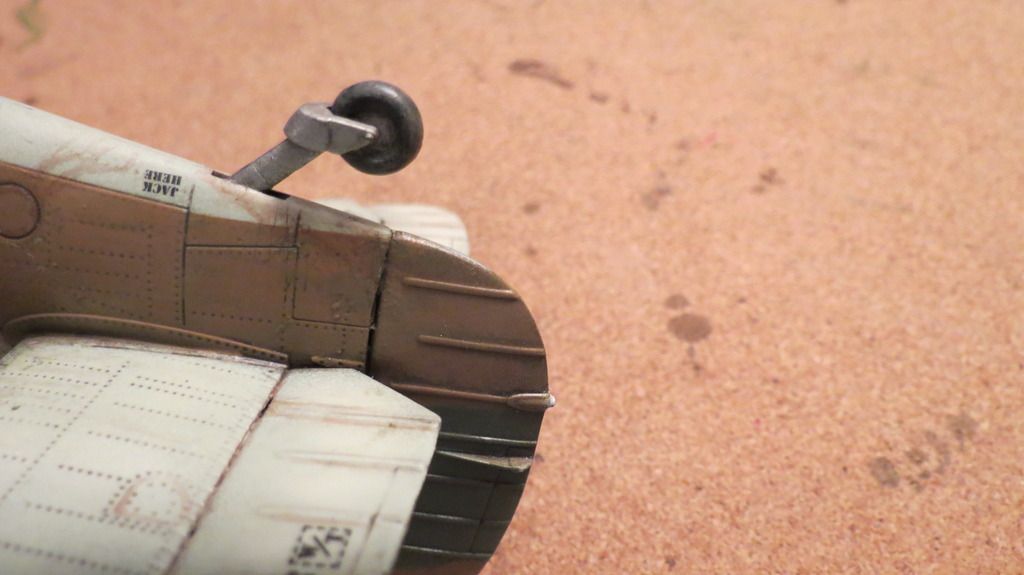
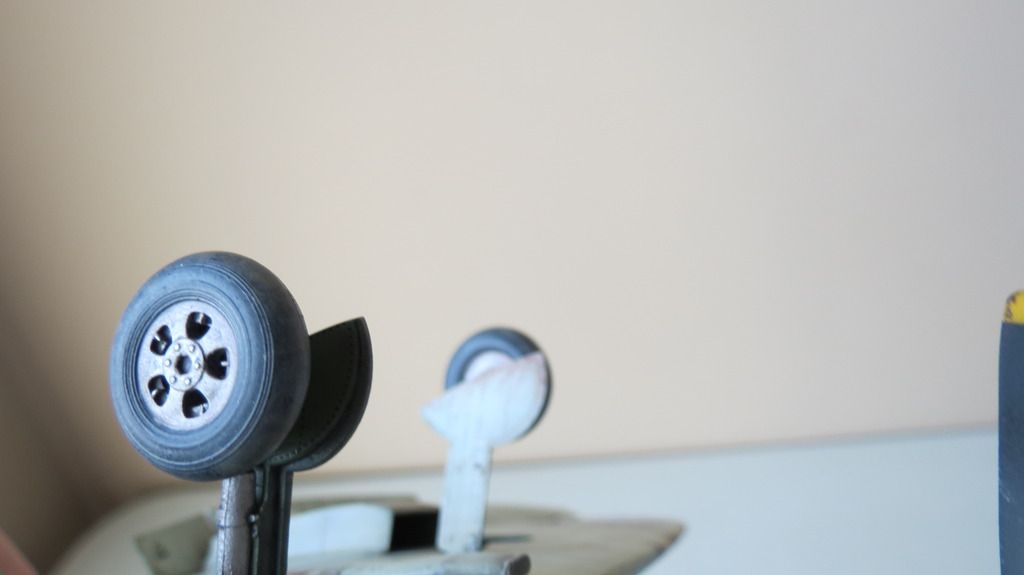
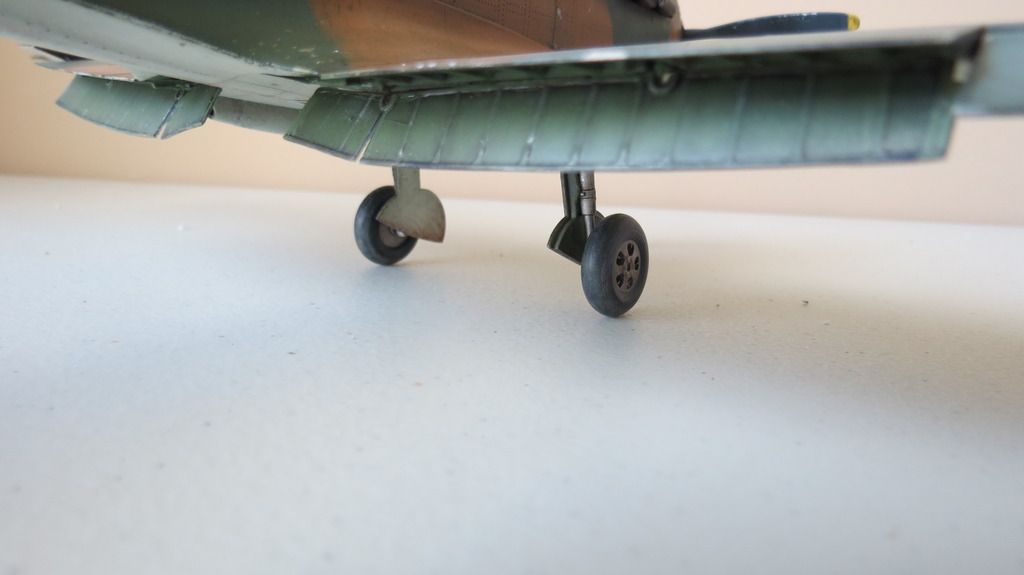
Next, I fitted the propeller which spins, then followed that by fitting the rear wheel:


IMG_2836_zpslcmeuptv.jpg


IMG_2840_zpsifsuszig.jpg


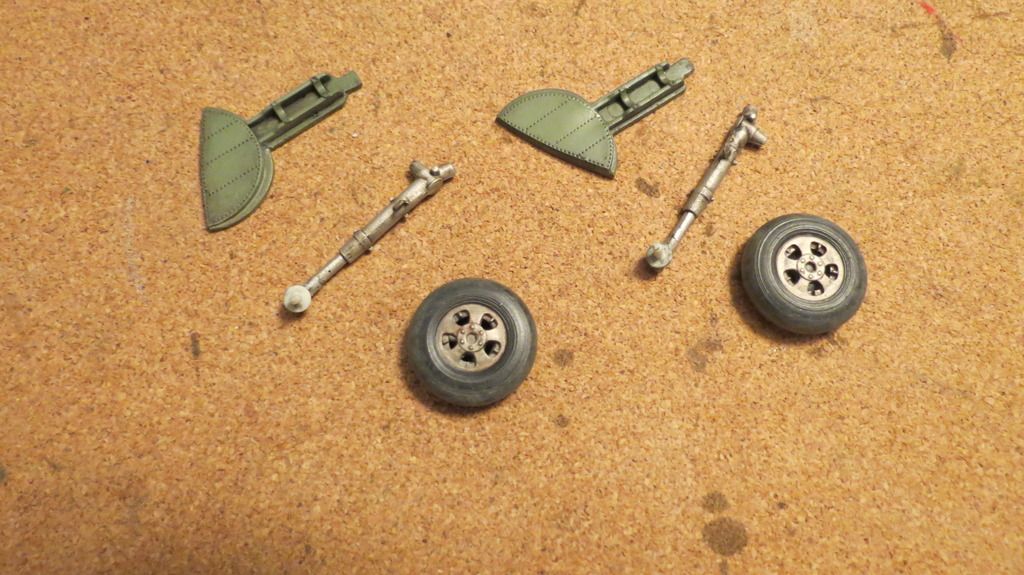
I then assembled the undercarriage parts together and glued them into their corresponding locations beneath the plane:


IMG_2837_zps8vvnnfdj.jpg


IMG_2849_zpsmsrjanji.jpg


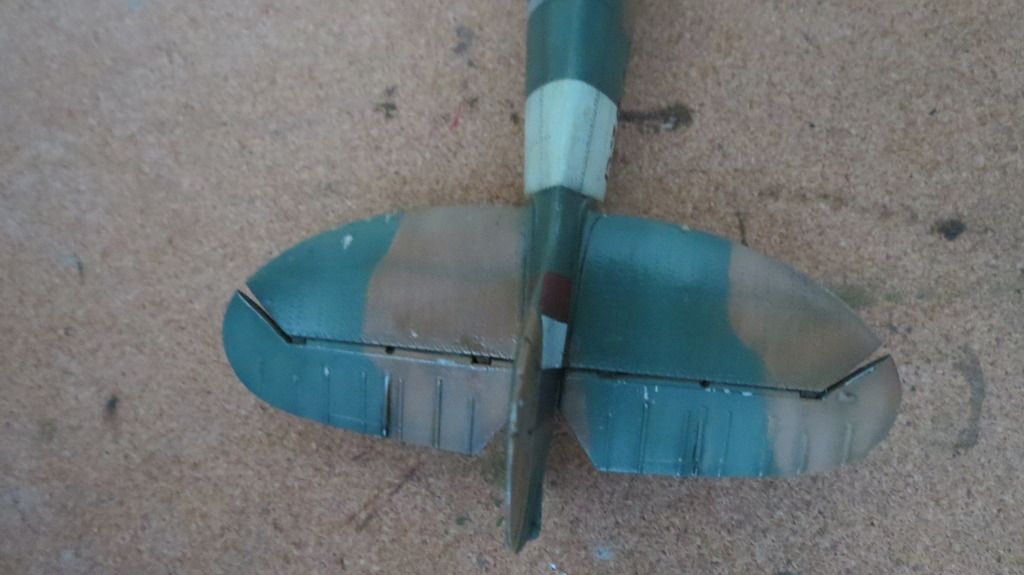
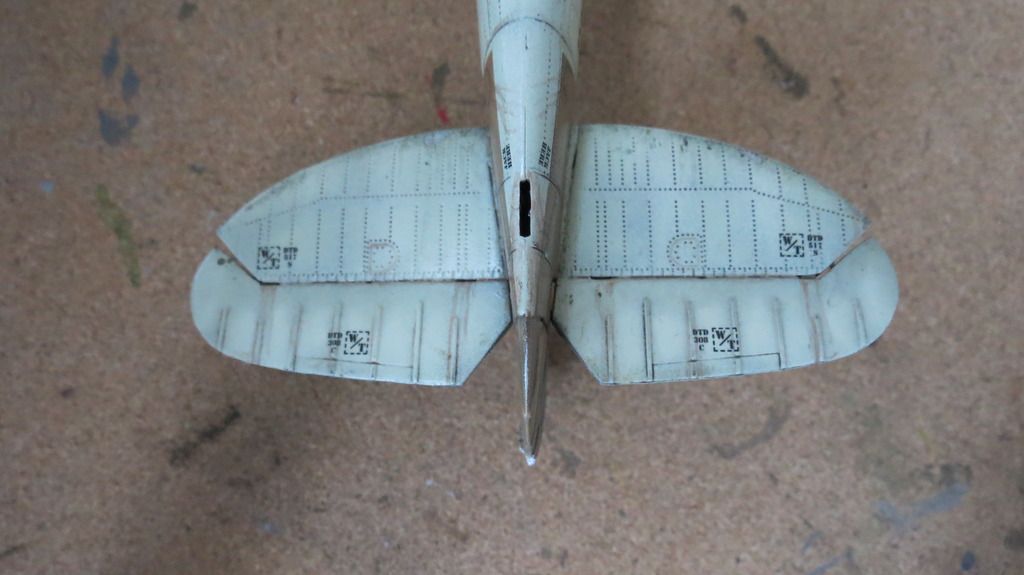
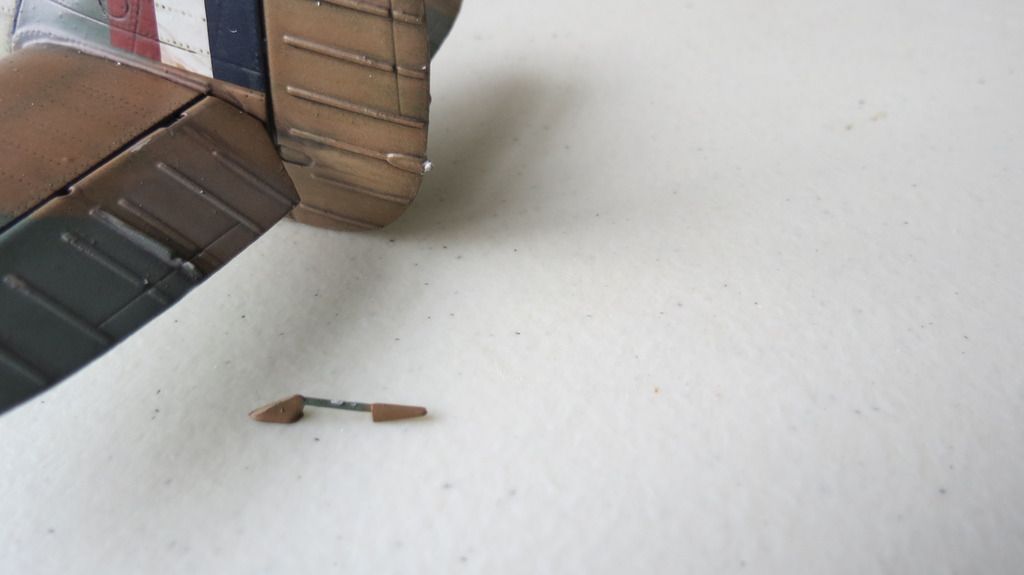
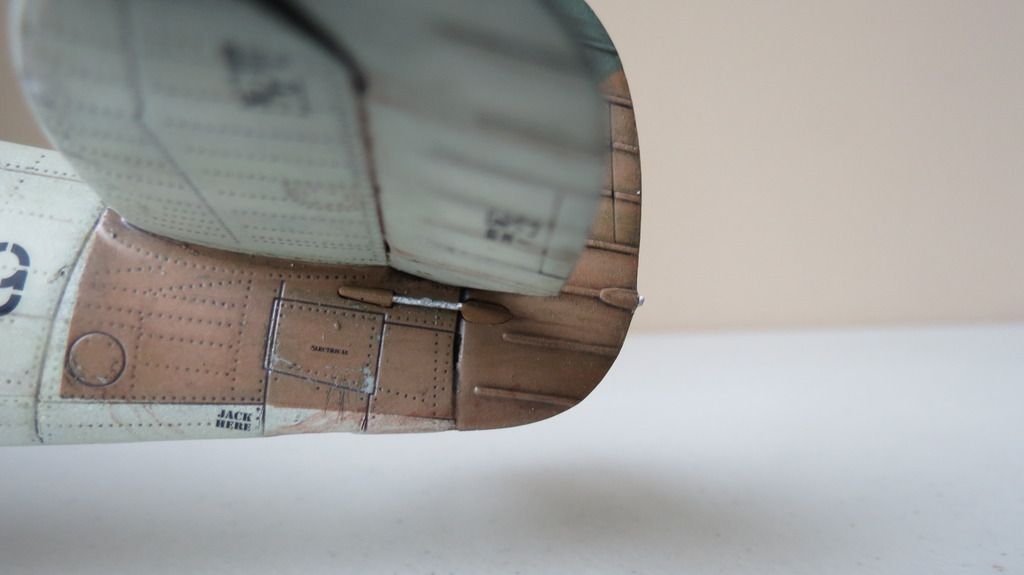
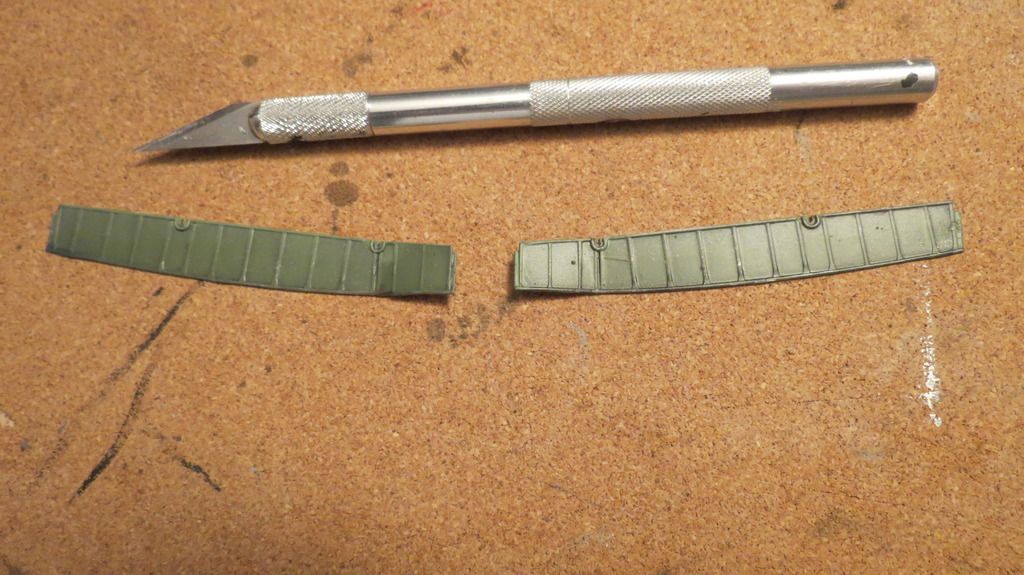
Next, I fitted the flaps, but first, I had to slice the end section on both flaps to help separate it for the change in angle on the underside of the aircraft where they fitted to:


IMG_2841_zpsgvvybmei.jpg


IMG_2848_zpswpn5hdep.jpg


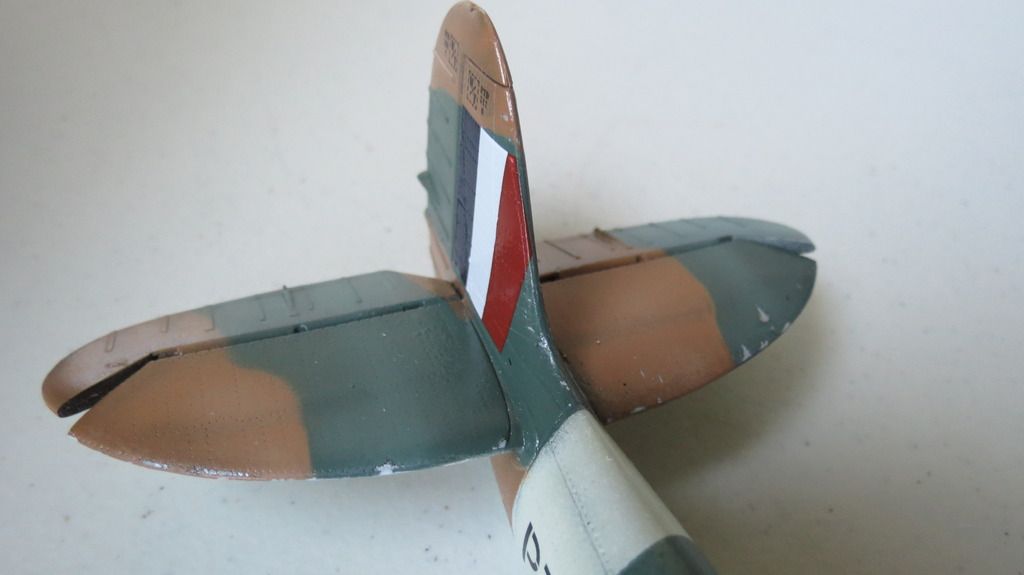
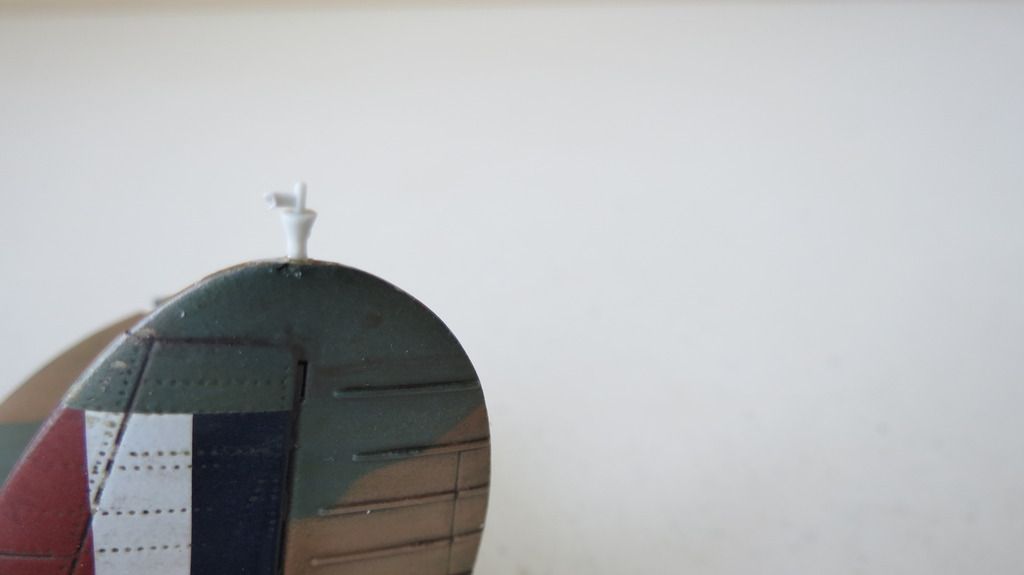
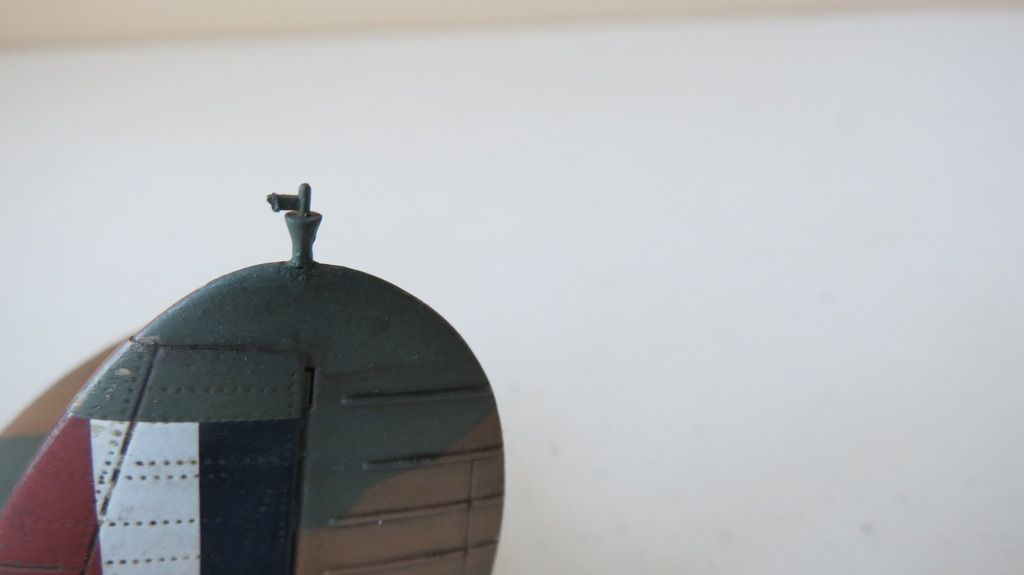
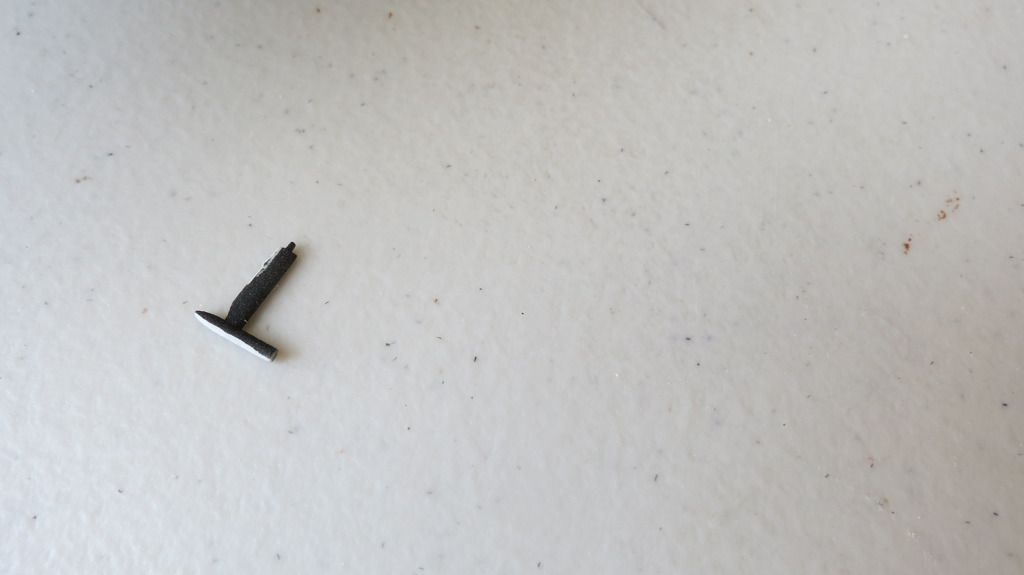
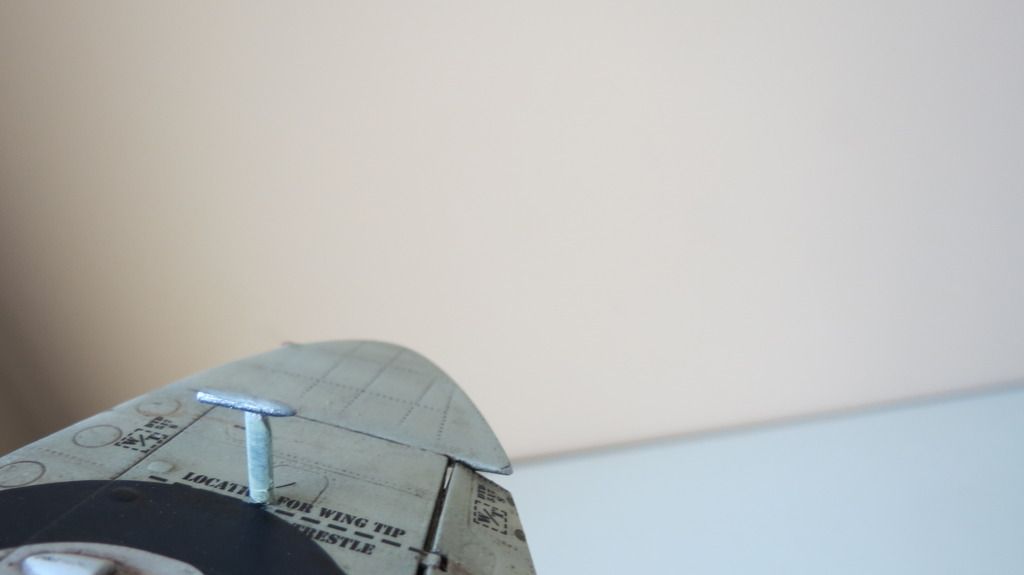
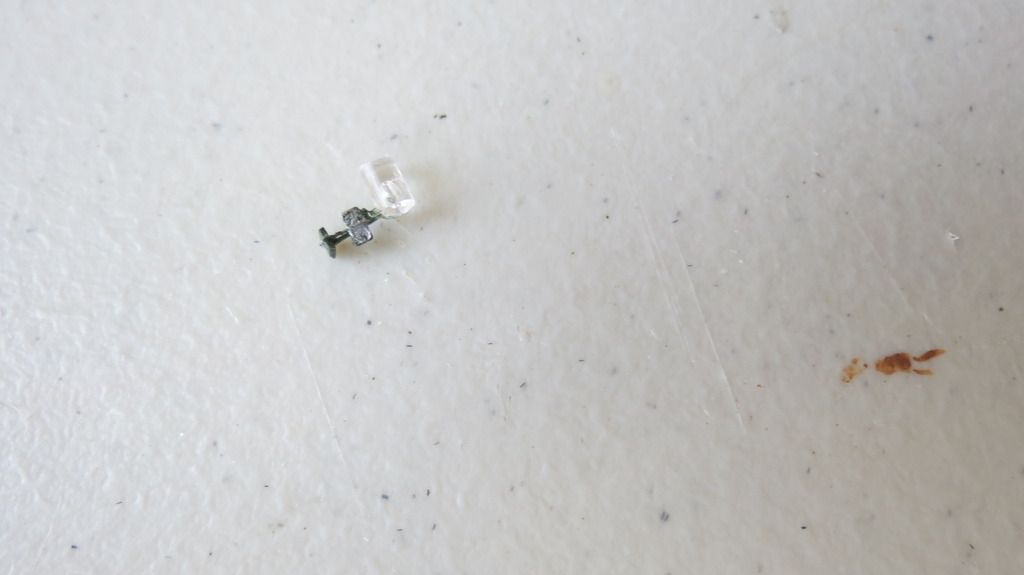
Next, I fitted the aerial, followed by the upper dorsal light lens and then the tail mounted antenna tensioner. This was painted to match the camo colors around it:


IMG_2843_zpsjhjxialg.jpg


IMG_2844_zpslaascfqk.jpg


IMG_2845_zps45jvp4c2.jpg


IMG_2846_zpsqlnyjeor.jpg


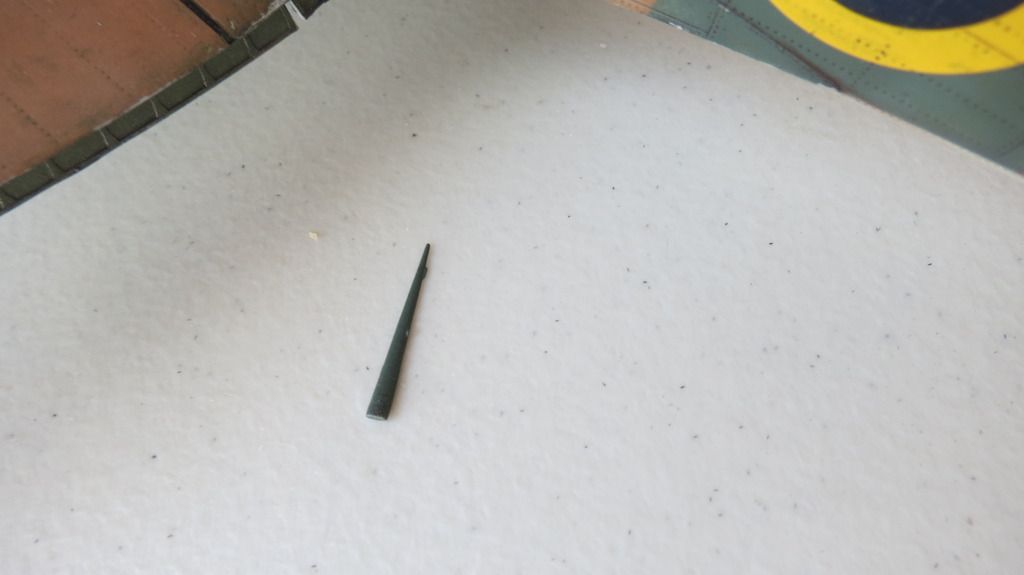
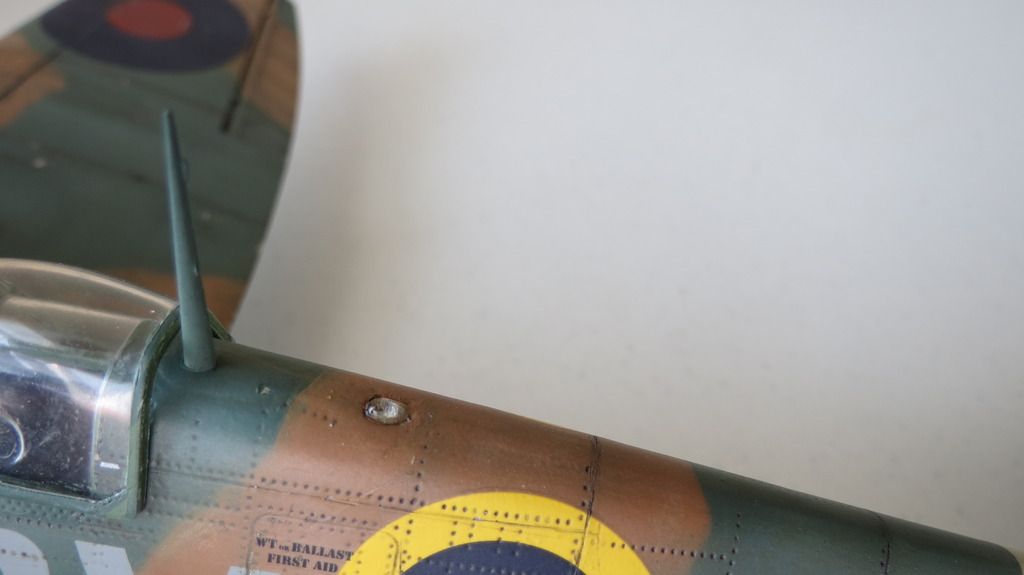
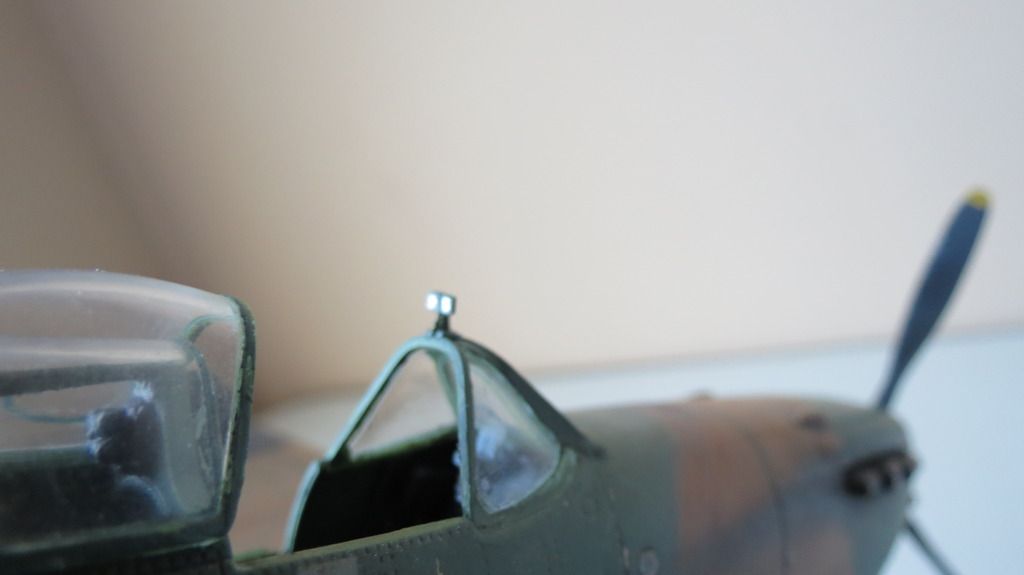
I then fitted the pitot tube, painted it, then fitted the Pilot's rear view mirror:


IMG_2847_zpsm4qydhqg.jpg


IMG_2851_zpslxhehrac.jpg


IMG_2852_zpsfy65tgha.jpg


IMG_2853_zpslpksxpkg.jpg


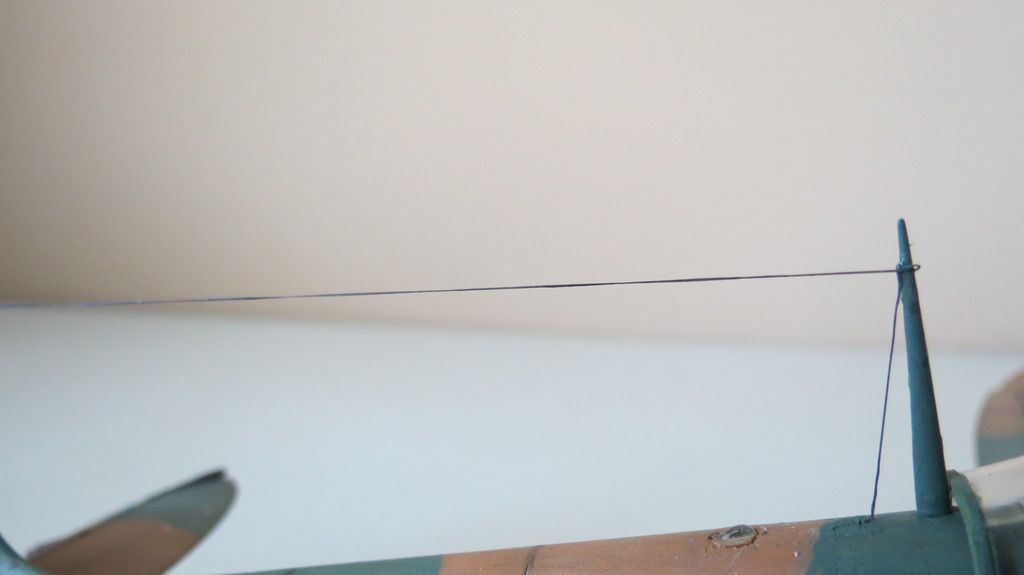
The last part of the assembly was to fit the antenna cables using 1.010" black EZ-Line:


IMG_2979_zpspqfeaqbv.jpg


She was now complete and ready for a "Final Reveal" photo shoot, but, until that time comes, I hope you enjoyed this update, and, if you'd like to watch my YouTube "Build Update #4" video, here is the link to that:


https://youtu.be/9hji8HogpgA


Until my "Final Reveal", thanks for watching and commenting, much appreciated!


Happy modeling and have fun!


Cheers!    
Martin


  • Member since
    April 2015
  • From: New Hampshire, USA
Posted by UKguyInUSA on Thursday, September 10, 2015 2:26 PM

BrandonD

Oh, man! I just saw the rear stabilizer damage. What a tough break. Hopefully the boat gets a favorable current, a tailwind and a captain eager to visit his lady in the U.S. who pushes it here as quickly as possible.

-BD-


Hey Brandon,

Sorry for my late reply, life got in the way a little.


Anyway, I didn't wait for the delivery of parts from Revell GmbH, which still haven't arrived, and I ordered another kit from off-line. It came a couple of weeks ago and I've been busy putting her together and painting her as you can see in my last "Build Update #3" report.

When those parts arrive, I'll just put them into the new kit that I took parts from and have another new Spitfire kit!


Cheers,

Martin :)

  • Member since
    April 2015
  • From: New Hampshire, USA
Posted by UKguyInUSA on Thursday, September 10, 2015 2:23 PM

patrick206

Martin - My only hobby shop in town is 4th generation owners, I was once a bit scolded for not simply returning a kit with defective parts, rather just making it right myself. They said "just bring it back," I said if I can set it right I'd rather not trouble the shop. Their response floored me, the owner said if the suppliers and manufacturers aren't made to deal with their screw ups rather than the customers doing it, they will never be more careful with what they deliver to the folks that ultimately purchase their goods.

So, in order to hold them accountable defective kits should be returned to the shop, they in turn should feel obligated to replace the kit. Telling a loyal customer "sorry, 30 days," is inexcusable and an insult. Did the kit develope the defects after the thirty days expired???? NOPE, the kit not only left their shop with the defects, the kit left the manufacturer with faulty bits. Hobby shops such as that don't deserve any sort of continued customer loyalty.

Still, very nice work that you so far have accomplished, once it's finished you'll have a super Spit.

Patrick  


Hey Patrick,


Firstly, sorry for my very late response, life got in the way a little, and secondly, yes, I totally agree, I've stopped using my only LHS since this show of poor customer service and I now use a couple of on-line distributors that actaully works out cheaper for me.

And, they wonder why they go out of business?!!

Thanks for your compliment regarding my build, I'm back on here now to upload ny "Build Update #4" report!


Cheers,

Martin :)

JOIN OUR COMMUNITY!

Our community is FREE to join. To participate you must either login or register for an account.

SEARCH FORUMS
FREE NEWSLETTER
By signing up you may also receive reader surveys and occasional special offers. We do not sell, rent or trade our email lists. View our Privacy Policy.