SEARCH FINESCALE.COM

Enter keywords or a search phrase below:

1/32 Trumpeter P-40B..Going Dark

9851 views
159 replies
1 rating 2 rating 3 rating 4 rating 5 rating
  • Member since
    September 2011
Posted by fightnjoe on Monday, April 4, 2016 8:53 AM

You are both very very kind.  Many thanks.


Joe

Veterans,

Thank You For Your Sacrifices,

Never To Be Forgotten

Where you can find me:

Workbench on FaceBook  Google Plus  YouTube

  • Member since
    May 2013
  • From: Indiana, USA
Posted by Greg on Monday, April 4, 2016 9:42 AM

I am SO glad I discovered this thread this morning.

This is really something, and to be able to watch it come together in real time is a true treat, Joe.

If I might time travel back to Jan 1, how did you accomplish those wing cutouts so neatly? (and btw, thank you for explaining how you scratched those bulkheads a month or so ago. Who whould thunk...)

  • Member since
    September 2011
Posted by fightnjoe on Monday, April 4, 2016 10:39 AM

Greg to be honest it is all pretty easy.  For the wings I laid out tape on the panels I wanted to keep and then used the backside of an old exacto blade I worked next to the tape.  Scoring until I was nearly through and then sliced with a new blade.


Glad you are liking this so far.


Joe

Veterans,

Thank You For Your Sacrifices,

Never To Be Forgotten

Where you can find me:

Workbench on FaceBook  Google Plus  YouTube

  • Member since
    February 2007
  • From: Brunswick, Ohio
Posted by Buckeye on Monday, April 4, 2016 11:15 AM

That is just awesome work!  I wish I had half your ambition.Bow Down

Mike

  • Member since
    May 2013
  • From: Indiana, USA
Posted by Greg on Monday, April 4, 2016 1:56 PM

Thank you for that explanation! Bow Down

I overcomplicate tasks in my own mind. Now that you explained how you did it, I might even be able to pull such a thing off in some fashion. Geeked

  • Member since
    September 2011
Posted by fightnjoe on Friday, April 8, 2016 7:50 AM

Mike you are very kind.  Many thanks.


Greg to be honest I have no doubt you could do this, most likely you would do it much better than I.  I encourage all to give this type of thing a go.  You never know how it will turn out without giving it a shot.


Joe

Veterans,

Thank You For Your Sacrifices,

Never To Be Forgotten

Where you can find me:

Workbench on FaceBook  Google Plus  YouTube

  • Member since
    September 2011
Posted by fightnjoe on Friday, April 8, 2016 8:18 PM

The final phase of construction is to work on the firewall and the engine area.  The engine will be an entirely separate thing and will be covered while I install it permanently. 


The firewall included a couple of tanks as well as a base for some plumbing and the throttle linkages.


And with it inplace in the fuselage.


Now I have also added just a few stringers for detail on the interior of the fuselage.  Next for me will be to begin to paint.  


All comments, critiques, and criticism are encouraged.


Joe

Veterans,

Thank You For Your Sacrifices,

Never To Be Forgotten

Where you can find me:

Workbench on FaceBook  Google Plus  YouTube

  • Member since
    December 2002
Posted by 7474 on Friday, April 8, 2016 10:24 PM

Woooooooow. I'm so amazed at your work and craftmanship, I've enjoyed seeing this being built. I'm inspired to attempt this, one day.

  • Member since
    June 2014
Posted by BrandonK on Saturday, April 9, 2016 10:26 AM

This is really cool. I love watching you scratch this thing up. I gotta get back on my p-40. Keep it coming.

BK

On the bench:

A lot !! And I mean A LOT!!

2024 Kits on deck / in process / completed   

                         14 / 5 / 2  

                              Tongue Tied

  • Member since
    September 2011
Posted by fightnjoe on Sunday, April 10, 2016 7:34 AM

You are both very kind.  Thank you.


I am glad I could provide some inspiration.  


Joe

Veterans,

Thank You For Your Sacrifices,

Never To Be Forgotten

Where you can find me:

Workbench on FaceBook  Google Plus  YouTube

  • Member since
    September 2011
Posted by fightnjoe on Saturday, April 16, 2016 11:47 AM

Ok folks I have reached a point where it would be advisable to start the paint work.  


All the prep work is done, I think.  Bulkheads are installed, with the exception of the forward most as they need to be removable yet.  The little bits and pieces are prepped for paint.  The tail wheel assembly is in place.


Paint was sprayed starting with a flat black base.  I wanted to try something a bit different and changed midstream to putting a coat of Model Master Aluminium Plate on then I sprayed the interior colors.  I did however forget to take pictures of that.  I wanted to see if the Aluminium changed the Interior Green and the Yellow Zinc Chromate.  It did but not so much as you would really see it.  


I also began to paint and detail paint the interior pieces.


That is where it stands at the moment.  Now the challenge will be to work on the firewall more and on to the engine work.  I am choosing to not install the bits and pieces as of yet as they could break free during the process and I do not want to lose them.


All comments, critiques, and criticism are encouraged.


Joe

Veterans,

Thank You For Your Sacrifices,

Never To Be Forgotten

Where you can find me:

Workbench on FaceBook  Google Plus  YouTube

  • Member since
    August 2013
Posted by Jay Jay on Sunday, April 17, 2016 8:00 AM

OH My Word this is looking soooo cool !

This is my vision of scale model building and your W.I.P is very inspirational to me.  I've done a few "wham bam " kits and found little satisfaction in it.  I'm slowly working on a Accurate miniatures 1/48 TBF Avenger . I'm attempting to open up and detail the engine bay so I'm so lookng forward to your next installments. Many thanks for showing us how to do it. Bow Down


 I'm finally retired. Now time I got, money I don't.

  • Member since
    September 2011
Posted by fightnjoe on Monday, April 18, 2016 8:56 AM

You are very kind.  Thank you.


Joe

Veterans,

Thank You For Your Sacrifices,

Never To Be Forgotten

Where you can find me:

Workbench on FaceBook  Google Plus  YouTube

  • Member since
    September 2011
Posted by fightnjoe on Saturday, April 23, 2016 8:08 PM

Update time:


Engine compartment and Engine work.  


The engine is the kit parts, added are hoses and such. 


The firewall.


With some additions.


And just how much will you actually see when done???


Well not much really.  Again this is not 100% accurate.  Some issues occurred during the process and some things did not get installed.  Maybe the next time.


This took a while so my goal was not reached.  I had hoped to get this weathered but that did not happen.  Also I have not finished the exhausts yet.  That will have to wait till the next update.


All comments, critiques, and criticism are encouraged.


Joe


Veterans,

Thank You For Your Sacrifices,

Never To Be Forgotten

Where you can find me:

Workbench on FaceBook  Google Plus  YouTube

  • Member since
    June 2013
Posted by bvallot on Tuesday, April 26, 2016 4:05 PM

Coming along nicely Joe.  Don't rush a thing. =]

On the bench:  

Tamiya F4U-1  Kenneth Walsh


  • Member since
    February 2014
  • From: Michigan
Posted by silentbob33 on Tuesday, April 26, 2016 8:14 PM
That engine looks really nice, it's a pity you can't see more of it with the fuselage together.

On my bench: Academy 1/35 UH-60L Black Hawk

  • Member since
    September 2011
Posted by fightnjoe on Tuesday, April 26, 2016 8:29 PM

Many many thanks.


It is a shame but I can see something to improve upon for the next one.  And of course more things to research.


Joe

Veterans,

Thank You For Your Sacrifices,

Never To Be Forgotten

Where you can find me:

Workbench on FaceBook  Google Plus  YouTube

  • Member since
    July 2014
Posted by modelcrazy on Tuesday, April 26, 2016 8:39 PM
Sorry Joe, I just saw this post. I see you’re at it again with a cutaway, great work. I wish I had the skill to try something like this and make it plausible.

Steve

Building a kit from your stash is like cutting a head off a Hydra, two more take it's place.


http://www.spamodeler.com/forum/

  • Member since
    September 2011
Posted by fightnjoe on Thursday, April 28, 2016 4:21 PM

My friend I am sure you could do this better than I.  Many thanks for the very kind words.


Joe

Veterans,

Thank You For Your Sacrifices,

Never To Be Forgotten

Where you can find me:

Workbench on FaceBook  Google Plus  YouTube

  • Member since
    September 2011
Posted by fightnjoe on Friday, April 29, 2016 11:00 PM

An update, a rather quick moving one.


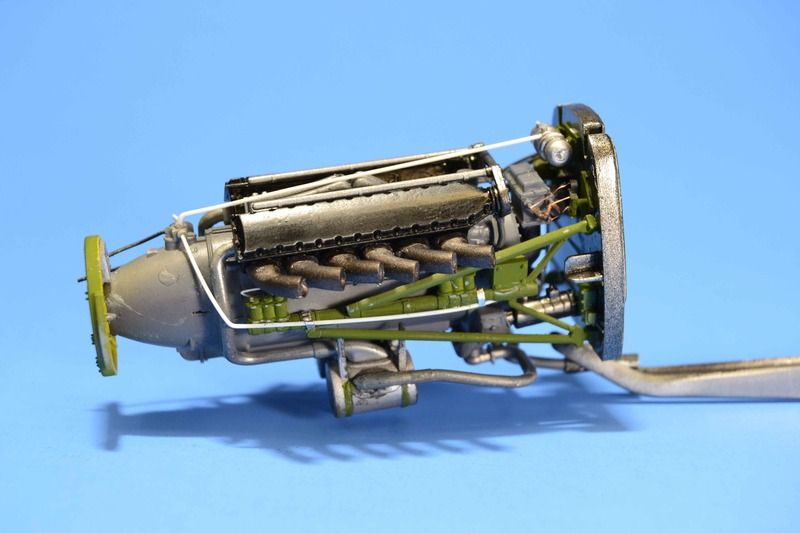
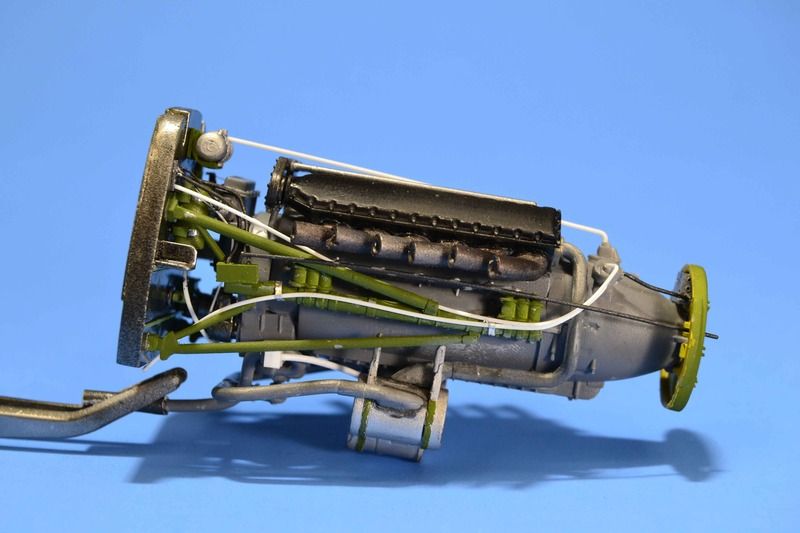
First up is finishing up the engine.  Exhausts are now added.


Next up is to actually begin the painting process.  Some may ask why, why do that prior to gluing all of the bits and pieces?  Well simple really.  I am a bit scared when it comes to painting around that cut away bit.  For that reason I choose to paint it now and then when I get it all together I can go back over the bits and touch up.  


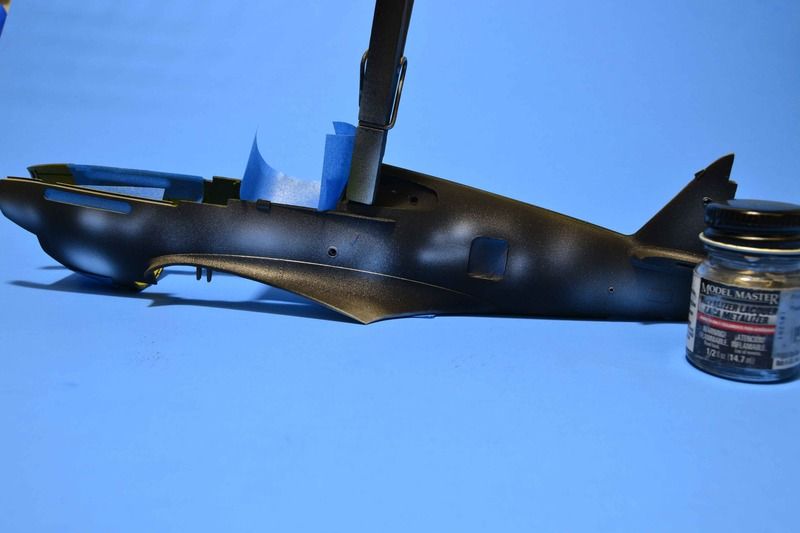
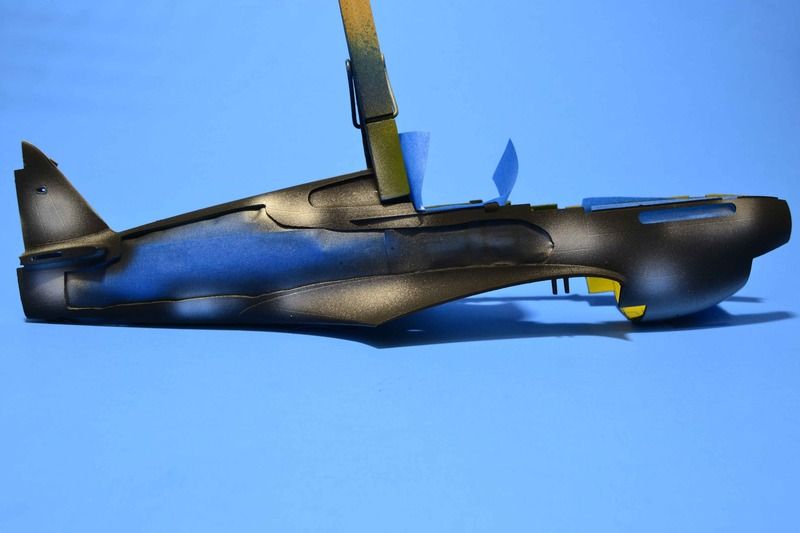
First up is my usual, a coat of Flat Black.


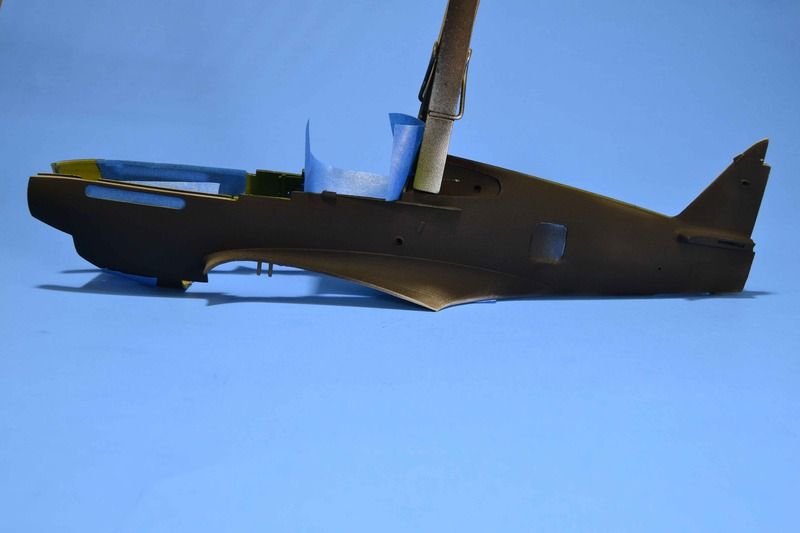
Next up is to break this up just a bit.  I choose to use Model Master Aluminium Plate.  This is sprayed on randomly.  This is to break the monotone of the top colors.


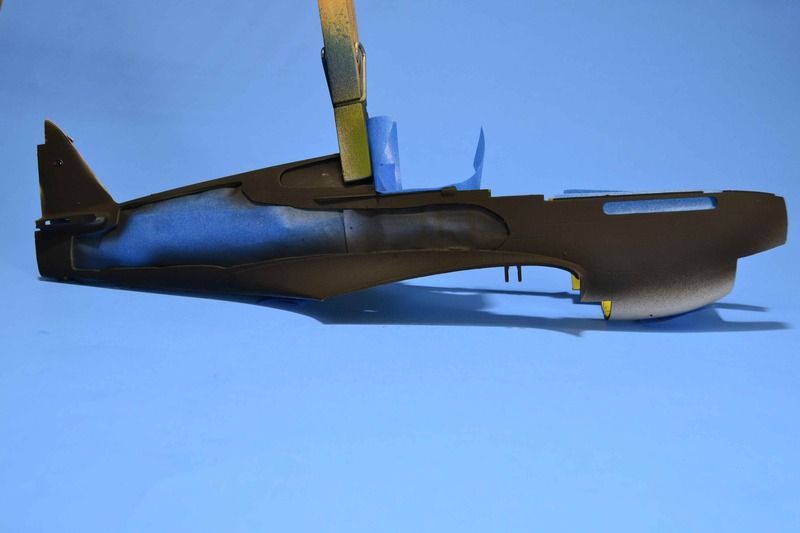
I then sprayed Pollyscale colors, Dark Earth, and Dark Green.   I used homemade paper masks.  To be honest they worked ok but they could have been so much better.  The paints on the other hand again do not impress me.  They are some of the most difficult I have used.  


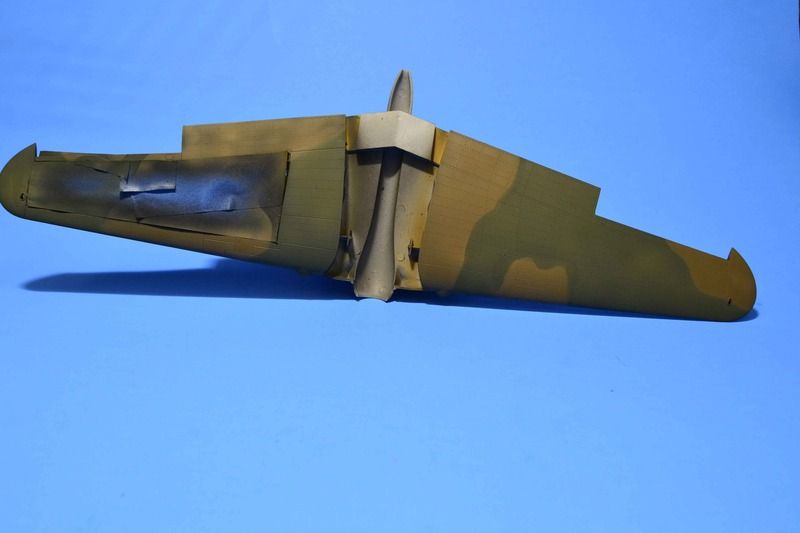
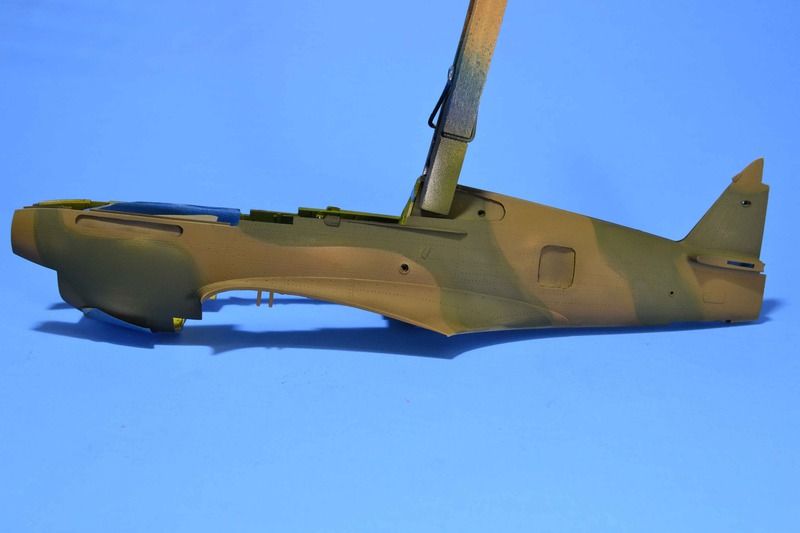
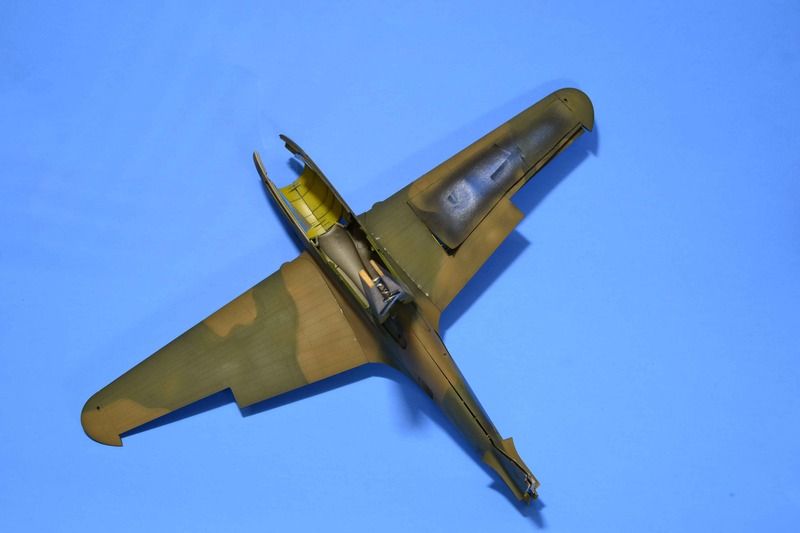
Being up front about it, any tone modulation in the paint are strictly because I either sprayed too heavy, not heavy enough, or otherwise screwed up.  It might just work for what I intend though.


Next up will be to begin the reconstruction of the interior and the permanent installation of the assorted pieces.


All comments, critiques, and criticism are encouraged.


Joe

Veterans,

Thank You For Your Sacrifices,

Never To Be Forgotten

Where you can find me:

Workbench on FaceBook  Google Plus  YouTube

  • Member since
    June 2014
Posted by BrandonK on Friday, April 29, 2016 11:04 PM

Stick out tongue

BK

On the bench:

A lot !! And I mean A LOT!!

2024 Kits on deck / in process / completed   

                         14 / 5 / 2  

                              Tongue Tied

  • Member since
    July 2014
Posted by modelcrazy on Saturday, April 30, 2016 9:48 AM

Joe,

That engine looks better than my 1/8 scale Merlin. You are doing such a great job on this project. 

Steve

Building a kit from your stash is like cutting a head off a Hydra, two more take it's place.


http://www.spamodeler.com/forum/

  • Member since
    May 2013
  • From: Indiana, USA
Posted by Greg on Saturday, April 30, 2016 10:15 AM

Still at the edge of my seat. Coming along nicely to say the least. Beautiful work on the engine and firewall.

It seems you are awfully hard on yourself at times, Joe.

Bang Head     <------- don't do that.  Smile


  • Member since
    September 2011
Posted by fightnjoe on Sunday, May 1, 2016 11:32 PM

You are all very kind.  Many thanks.


Greg you are absolutely right, I am very harsh on my own work.  Always have been.


Joe

Veterans,

Thank You For Your Sacrifices,

Never To Be Forgotten

Where you can find me:

Workbench on FaceBook  Google Plus  YouTube

  • Member since
    June 2003
  • From: Cavite, Philippines
Posted by allan on Monday, May 2, 2016 3:18 AM

Love the way you work, Joe. Clean and crisp! Looking forward to more pics.

No bucks, no Buck Rogers

  • Member since
    February 2012
  • From: Olmsted Township, Ohio
Posted by lawdog114 on Monday, May 2, 2016 9:58 PM
Looking great Joe. Diggin' the camo....

 "Can you fly this plane and land it?...Surely you can't be serious....I am serious, and don't call me Shirley"


  • Member since
    September 2011
Posted by fightnjoe on Tuesday, May 3, 2016 10:32 PM

Many many thanks.


Joe

Veterans,

Thank You For Your Sacrifices,

Never To Be Forgotten

Where you can find me:

Workbench on FaceBook  Google Plus  YouTube

  • Member since
    September 2011
Posted by fightnjoe on Tuesday, May 3, 2016 10:33 PM

Finishing up the interior work.  Everything I will show in this post is now installed.  


The port side 


And the little bit on the starboard side.


What is left on the interior is the seat, the lower section of the tail wheel assembly, and finishing off the plumbing of the starboard side of the cockpit.  Oh so close to closing up the fuselage.  Oh so close.


All comments, critiques, and criticism are encouraged.


Joe

Veterans,

Thank You For Your Sacrifices,

Never To Be Forgotten

Where you can find me:

Workbench on FaceBook  Google Plus  YouTube

  • Member since
    July 2014
Posted by modelcrazy on Tuesday, May 3, 2016 10:41 PM

Joe,

That is looking so good Yes You are doing a fantastic job!!

Steve

Building a kit from your stash is like cutting a head off a Hydra, two more take it's place.


http://www.spamodeler.com/forum/

  • Member since
    February 2007
  • From: Brunswick, Ohio
Posted by Buckeye on Wednesday, May 4, 2016 11:33 AM

Just friggin amazing work there!Bow Down

Mike

JOIN OUR COMMUNITY!

Our community is FREE to join. To participate you must either login or register for an account.

SEARCH FORUMS
FREE NEWSLETTER
By signing up you may also receive reader surveys and occasional special offers. We do not sell, rent or trade our email lists. View our Privacy Policy.