SEARCH FINESCALE.COM

Enter keywords or a search phrase below:

Airfix 1/48 Supermarine Spitfire Mk.Vb "FINAL REVEAL!!"

6865 views
44 replies
1 rating 2 rating 3 rating 4 rating 5 rating
  • Member since
    April 2015
  • From: New Hampshire, USA
Airfix 1/48 Supermarine Spitfire Mk.Vb "FINAL REVEAL!!"
Posted by UKguyInUSA on Thursday, March 31, 2016 11:01 PM

Airfix 1/48 Supermarine Spitfire Mk.Vb "Build Inttroduction" (4.1.16)


Hello Chaps,

In 3 weeks time, my wife and I will be moving to our new home, so, I'm not going to start another large scale plane build until we are settled in. But, that said, I feel I might be able to grab a few hours here and there, in between packing, to build a smaller quicker build kit. Therefore, I've chosen this kit, which was one of five kits that my wife bought me for Christmas from the Airfix "Black Friday" sale.


I have made a start on her this week, but haven't found the time to start a WIP on here until now. So, without further ado, here goes.....


The box is a typical Airfix two-piece construction- Lid and Base, which I much prefer compared to the end opening single units offered by Revell. The box art on the lid shows a Mk.Vb chasing and shooting down an enemy aircraft over the Mediterranean waters and is shown in the first of two color scheme/markings that are offered with this kit. The color scheme and markings are for the aircraft flown by Pilot Officer Robert Wendell "Buck" McNair D.F.C (Royal Canadian Air Force), No.249 (Gold Coast) Squadron, Royal Air Force, Operation "Spotter", Ta'Qali (Ta Kali), Malta, March 1942. This is the version that I will be modeling.


IMG_6334_zpsqsugo3bf.jpg


On the sides of the box there are 5 CAD generated images showing some of the details included with this kit and the two options of color scheme and marking...


IMG_6335_zpswt9fyh2c.jpg


IMG_6336_zps6zvsjkuu.jpg


Inside the box there is a large clear polythene bag containing 5 grey sprues and a smaller clear bag containing a single clear sprue. There is a 16 page Assembly/Instruction booklet and one sheet of decals...


IMG_6337_zpsh95108zo.jpg


The decals are typical AIrfix, which I personally think are some of the best decals on the market, they are nicely printed, with roundels in register, minimal carrier film and the decals are nice and thin and have a matt/satin finish....


IMG_6339_zpsemg2uo0c.jpg


The 16 page booklet is printed in black, white, red and yellow and the last two pages showing the painting and decal instructions offering two options of color schemes and markings, are in full color. There are 46 assembly stages which are very clear with CAD generated images, clearly marked part numbers and color call outs. All colors are for Humbrol paints only  will require converting should you choose other brand paints.


IMG_6340_zpsl3loxja0.jpg


IMG_6341_zpssibfksqg.jpg


IMG_6342_zpsocbruxtp.jpg


IMG_6343_zpsqdmpxdmh.jpg


IMG_6344_zps6u2qgemi.jpg


IMG_6345_zpsgatwtejk.jpg


IMG_6346_zpst7oa9zok.jpg


IMG_6347_zpskzljgw0b.jpg


IMG_6348_zpsynlnwf8w.jpg


IMG_6349_zpsjrscsoqh.jpg


The five grey sprues are very well molded, with nice crisp clean parts that have zero to minimal flash, if any. There is no warp, distortion, stress marks and sink to be seen and ejector pin witness marks are only visible on the inside of some parts. Other parts are ejected via "ejector slugs" that exist outside of the part geometry which eliminates any ejector pin witness marks on the parts.


Sprue "A"


IMG_6350_zpseor1xwl1.jpg


IMG_6351_zpswvqowpt2.jpg


IMG_6352_zpsgr8rk8wr.jpg


Sprue "B"


IMG_6353_zpsjdfudfhh.jpg


IMG_6354_zpszz76fveg.jpg


IMG_6355_zps2lrqdaie.jpg


IMG_6356_zpstufmle0x.jpg


IMG_6357_zpsprqdfyjd.jpg


Sprue "C"


IMG_6358_zpsp5fyrc6g.jpg


IMG_6359_zpsujzgqp7l.jpg


IMG_6360_zpswflsltgy.jpg


IMG_6361_zpsw3xywt58.jpg


Sprue "D"


IMG_6362_zpsjvqdgnfb.jpg


IMG_6363_zpslyillzzk.jpg


IMG_6364_zpsc3lgcv8e.jpg


Sprue "E"


IMG_6365_zpskw2tinrf.jpg


IMG_6366_zpsohhllxpg.jpg


IMG_6367_zpswk4bqzmv.jpg


IMG_6368_zpslwrfrtr6.jpg


IMG_6369_zpsozawd9mr.jpg


Clear Sprue "F"   includes options for open or closed canopies with three styles of hood available. All parts are nicely molded and very clear.


IMG_6370_zpsd8nudyrz.jpg


IMG_6371_zpscdabhad2.jpg


IMG_6372_zps1opbkext.jpg


IMG_6373_zps1ppga5mf.jpg


IMG_6374_zpsbx5rujpi.jpg


Well, that's it for the introduction, so I'll see you guys when I have a "Build Update" ready to report.


In the meantime, if you'd like to watch my YouTube Channel "Build Introduction" video for this kit, then here is the link to that: 


https://youtu.be/paoOiFXy2Kk


Thanks in advance for taking a look at this WIP, watching the video and leaving any comments, should you do so, much appreciated!


Happy modeling and have fun!


Cheers,

Martin


  • Member since
    March 2015
  • From: Streetsboro, Ohio
Posted by Toshi on Friday, April 1, 2016 3:38 AM

UKguyInUSA

Airfix 1/48 Supermarine Spitfire Mk.Vb "Build Inttroduction" (4.1.16)


Hello Chaps,

In 3 weeks time, my wife and I will be moving to our new home, so, I'm not going to start another large scale plane build until we are settled in. But, that said, I feel I might be able to grab a few hours here and there, in between packing, to build a smaller quicker build kit. Therefore, I've chosen this kit, which was one of five kits that my wife bought me for Christmas from the Airfix "Black Friday" sale.


I have made a start on her this week, but haven't found the time to start a WIP on here until now. So, without further ado, here goes.....


The box is a typical Airfix two-piece construction- Lid and Base, which I much prefer compared to the end opening single units offered by Revell. The box art on the lid shows a Mk.Vb chasing and shooting down an enemy aircraft over the Mediterranean waters and is shown in the first of two color scheme/markings that are offered with this kit. The color scheme and markings are for the aircraft flown by Pilot Officer Robert Wendell "Buck" McNair D.F.C (Royal Canadian Air Force), No.249 (Gold Coast) Squadron, Royal Air Force, Operation "Spotter", Ta'Qali (Ta Kali), Malta, March 1942. This is the version that I will be modeling.


IMG_6334_zpsqsugo3bf.jpg


On the sides of the box there are 5 CAD generated images showing some of the details included with this kit and the two options of color scheme and marking...


IMG_6335_zpswt9fyh2c.jpg


IMG_6336_zps6zvsjkuu.jpg


Inside the box there is a large clear polythene bag containing 5 grey sprues and a smaller clear bag containing a single clear sprue. There is a 16 page Assembly/Instruction booklet and one sheet of decals...


IMG_6337_zpsh95108zo.jpg


The decals are typical AIrfix, which I personally think are some of the best decals on the market, they are nicely printed, with roundels in register, minimal carrier film and the decals are nice and thin and have a matt/satin finish....


IMG_6339_zpsemg2uo0c.jpg


The 16 page booklet is printed in black, white, red and yellow and the last two pages showing the painting and decal instructions offering two options of color schemes and markings, are in full color. There are 46 assembly stages which are very clear with CAD generated images, clearly marked part numbers and color call outs. All colors are for Humbrol paints only  will require converting should you choose other brand paints.


IMG_6340_zpsl3loxja0.jpg


IMG_6341_zpssibfksqg.jpg


IMG_6342_zpsocbruxtp.jpg


IMG_6343_zpsqdmpxdmh.jpg


IMG_6344_zps6u2qgemi.jpg


IMG_6345_zpsgatwtejk.jpg


IMG_6346_zpst7oa9zok.jpg


IMG_6347_zpskzljgw0b.jpg


IMG_6348_zpsynlnwf8w.jpg


IMG_6349_zpsjrscsoqh.jpg


The five grey sprues are very well molded, with nice crisp clean parts that have zero to minimal flash, if any. There is no warp, distortion, stress marks and sink to be seen and ejector pin witness marks are only visible on the inside of some parts. Other parts are ejected via "ejector slugs" that exist outside of the part geometry which eliminates any ejector pin witness marks on the parts.


Sprue "A"


IMG_6350_zpseor1xwl1.jpg


IMG_6351_zpswvqowpt2.jpg


IMG_6352_zpsgr8rk8wr.jpg


Sprue "B"


IMG_6353_zpsjdfudfhh.jpg


IMG_6354_zpszz76fveg.jpg


IMG_6355_zps2lrqdaie.jpg


IMG_6356_zpstufmle0x.jpg


IMG_6357_zpsprqdfyjd.jpg


Sprue "C"


IMG_6358_zpsp5fyrc6g.jpg


IMG_6359_zpsujzgqp7l.jpg


IMG_6360_zpswflsltgy.jpg


IMG_6361_zpsw3xywt58.jpg


Sprue "D"


IMG_6362_zpsjvqdgnfb.jpg


IMG_6363_zpslyillzzk.jpg


IMG_6364_zpsc3lgcv8e.jpg


Sprue "E"


IMG_6365_zpskw2tinrf.jpg


IMG_6366_zpsohhllxpg.jpg


IMG_6367_zpswk4bqzmv.jpg


IMG_6368_zpslwrfrtr6.jpg


IMG_6369_zpsozawd9mr.jpg


Clear Sprue "F"   includes options for open or closed canopies with three styles of hood available. All parts are nicely molded and very clear.


IMG_6370_zpsd8nudyrz.jpg


IMG_6371_zpscdabhad2.jpg


IMG_6372_zps1opbkext.jpg


IMG_6373_zps1ppga5mf.jpg


IMG_6374_zpsbx5rujpi.jpg


Well, that's it for the introduction, so I'll see you guys when I have a "Build Update" ready to report.


In the meantime, if you'd like to watch my YouTube Channel "Build Introduction" video for this kit, then here is the link to that: 


https://youtu.be/paoOiFXy2Kk


Thanks in advance for taking a look at this WIP, watching the video and leaving any comments, should you do so, much appreciated!


Happy modeling and have fun!


Cheers,

Martin


Very nice intro.  Can't wait to see the WIP.

On The Bench: Revell 1/48 B-25 Mitchell


Married to the most caring, loving, understanding, and beautiful wife in the world.  Mrs. Toshi


  • Member since
    February 2012
  • From: Olmsted Township, Ohio
Posted by lawdog114 on Friday, April 1, 2016 9:33 PM
Can't wait Martin. I've read good things about this kit. Your introduction is well done and appreciated.

 "Can you fly this plane and land it?...Surely you can't be serious....I am serious, and don't call me Shirley"


  • Member since
    March 2005
  • From: Lancaster, South Carolina
Posted by Devil Dawg on Saturday, April 2, 2016 9:21 PM

I have that kit in the stash, so I will definitely be following this one! Good Luck!

Devil Dawg

On The Bench: Tamiya 1/32nd Mitsubishi A6M5 Model 52 Zeke For Japanese Group Build

Build one at a time? Hah! That'll be the day!!

  • Member since
    April 2015
  • From: New Hampshire, USA
Posted by UKguyInUSA on Tuesday, April 5, 2016 4:48 PM

lawdog114
Can't wait Martin. I've read good things about this kit. Your introduction is well done and appreciated.
 

  Thanks Joe, much appreciated! I'm back to post my first build update, so stick around!   Smile

Cheers!

Martin  

  • Member since
    April 2015
  • From: New Hampshire, USA
Posted by UKguyInUSA on Tuesday, April 5, 2016 4:49 PM

Devil Dawg

I have that kit in the stash, so I will definitely be following this one! Good Luck!


  Thanks Devil, much appreciated! I'm back on here to post my first build update!


Cheers     Smile


Martin

  • Member since
    April 2015
  • From: New Hampshire, USA
Posted by UKguyInUSA on Tuesday, April 5, 2016 5:24 PM

Airfix 1/48 Supermarine Spitfire Mk.Vb "Build Update #1" (4.5.16).


Hello Chaps

I managed to grab a few hours here and there in the last 4 days and made some progression with this build. After building 1/32 scale aircraft, I'd forgotten just how simple, in comparison, these 1/48 scale kits are and how fast they go together!


Anyway, here's what transpired...


First, I performed the ceremonious bathing of sprues to remove any molding residues that might be present....


IMG_6377_zpsbohwryuz.jpg


When the sprues had dried, I then primed all the interior parts and surfaces using black Stynylrez primer. This was followed by applying the interior green color to applicable surfaces. I used Tamiya XF71 Cockpit Green mixed with a drop of XF50 Field Blue, to darken it up a little...I thought the XF71 was too bright. I then masked the demarcations on the interior walls, then airbrushed the aluminum surfaces, and also onto other parts that I wanted to be aluminum. This included the propeller assembly components, so that later when they are chipped, the aluminum shows through...


IMG_6379_zpsexui5sd6.jpg


IMG_6380_zpsrbcy50em.jpg


IMG_6381_zpszupzqf7u.jpg


IMG_6382_zps10l5aup6.jpg


IMG_6383_zpsrxptt4m0.jpg


Next, I put together the separate parts for each of the cockpit sub-assemblies and glued them together...


IMG_6386_zpsrhpe30go.jpg


IMG_6388_zpsze4ysltl.jpg


IMG_6390_zpsrrodxjlb.jpg


IMG_6392_zps1vex1iqf.jpg


I then assembled the Pilot, drilled a hole in his bottom and played "Vlad the Impaler" by staking him with a cocktail stick, in preparation for painting him...


IMG_6395_zpsldfcdkmp.jpg


IMG_6396_zpsixcykjpu.jpg


This was followed by detailing all of the cockpit sub-assemblies, then applying a matt clear coat to seal the paint...


IMG_6408_zpsoh3ivr10.jpg


IMG_6409_zpsdzopddca.jpg


IMG_6412_zpsvxomxuot.jpg


IMG_6406_zpsd8hbcbkf.jpg


IMG_6403_zpsydw54tfz.jpg


When the clear coat was dry, I then assembled the instrument panel, foot pedals and joy-stick assembly into the portside inner wall section. This was followed by assembling the seat, the starboard side inner wall and the two rear bulkheads to complete the cockpit tub...


IMG_6419_zpsoxrzgsxm.jpg


IMG_6420_zpsvca589i3.jpg


IMG_6429_zpsd8qnbiv3.jpg


IMG_6436_zps33jp46nh.jpg


Before assembling the cockpit tub into the fuselage, I cut out the door panel from the portside fuselage half, because I will be building this model with the door open. When this option is chosen, there is a separate door part that is used....


IMG_6401_zps7pvqwoxn.jpg


With that completed, I could now glue the cockpit tub into the starboard side fuselage half. I used mini-pegs to hold the two together until the glue had set...


IMG_6440_zpsgr7ckz9k.jpg


IMG_6445_zps39lbdhsi.jpg


The next step in the assembly instructions is a frustrating one and one that should have been completed before gluing the cockpit tub into the starboard fuselage half. This is stage 17 on page 6 that indicates that part # 56 is to be glued to the wall of the starboard fuselage half. It glues to an area of the wall that is between the two rear bulkheads, which are now an obstruction to performing this task. Therefore, using tweezers and blindly trying to maneuver and locate a peg protruding from part # 56 into a hole in the fuselage wall that is difficult to see, becomes a little frustrating. Airfix need to correct the order of assembly with this part...


IMG_6448_zpsz5xvvchk.jpg


With part #56 finally in place, I could now close up the two fuselage halves to complete the fuselage assembly. I used tape to hold the parts together until the glue had set...


IMG_6449_zpsgxnrtoy6.jpg


Next, I got together all the parts required to build up the wing assembly and assemble it, starting with the internal wing spars, wheel bay walls and undercarriage actuator links, then gluing the upper wing halves onto the lower wing assembly. The last item was to glue the landing light lens into the lower wing and paint it silver on the inside to complete this stage...


IMG_6451_zpsbokczsdn.jpg


IMG_6453_zps7ywfyvru.jpg


IMG_6454_zpsc59ugahv.jpg


IMG_6458_zpsg6iw2ix8.jpg


With the wing assembly completed, I could now glue this to the fuselage assembly. After gluing them together there were gaps present at the wing root to fuselage joints and a small gap at the joint where the rear area of the underside wing meets the fuselage. Also, the fuselage wing root surfaces were higher than the surface of the wings. So, these areas will not only require filling, but filing down so that they blend together. Any panel line details that are lost during the filing will need to be re-scribed...


IMG_6459_zpstdrokjeg.jpg


IMG_6460_zpsvjohqato.jpg


IMG_6461_zps4asyzqet.jpg


I then got together all of the control surfaces and glued them into their locations; the ailerons, the horizontal stabilizers and flaps and the rudder...


IMG_6462_zpssi4ygqtu.jpg


IMG_6463_zpsrdmc5fhm.jpg


Next, I fitted the upper rear engine/fuselage cowling into location. The geometry of this was larger on the profile to where it meets the front engine cowling, and therefore, there was a step down from the rear to the front of about 0.75mm. This will have to be filed down to blend it in with the front cowling and any lost panel line detail will be re-scribed...


IMG_6465_zpsux3wmrxf.jpg


IMG_6466_zpsxs2oxxdw.jpg


I then turned the model upside down and got together the parts for the cooler assembly, the Vokes air filter assembly and the radiator assembly, glued them together, then glued them into their locations on the underside of the model...


IMG_6464_zpskvsrep64.jpg


IMG_6467_zpsaaoetrnb.jpg


Next, I glued the two 20mm cannons into place, followed by filling the gaps that were present around the model...


IMG_6471_zpsxxjgf1bd.jpg


IMG_6472_zpsp3pqotcb.jpg


After sanding down the joints and blending in the miss-matched surfaces, I glued the gun-sight into location. This was followed by masking the three canopy sections, then gluing the front windshield and rear window into place...


IMG_6474_zpsatk2ippz.jpg


IMG_6475_zpshum5ojtk.jpg


IMG_6479_zpssqbj1tki.jpg


Next was the propeller assembly....I got together all the parts required and glued the rear spindle housing assembly, then glued that into the front/nose of the model. The spindle rotates freely to allow for a propeller that spins...


IMG_6476_zpsuisgpv9x.jpg


IMG_6477_zps4lhgeksn.jpg


The model was now ready for a cleaning with some Isopropyl Alcohol prior to priming. The wheel wells and the cockpit were masked with damp kitchen roll, along with masking the underside landing light lens using liquid masking film. The Pilot's door was temporarily located so that it gets painted and weathered at the same time as the model....


IMG_6480_zpsg8tizjjl.jpg


IMG_6481_zpsz8hh2el7.jpg


IMG_6482_zpsocmfovfc.jpg


The plane and the propeller spinner and backing plate were now primed with grey Stynylrez primer. When I began priming the plane, I realized that I hadn't airbrushed the interior green color onto the canopy frames first, so, I was careful not to cover the canopy with the grey primer...


IMG_6484_zpsee3mwhg9.jpg


IMG_6485_zpsdpb5rnm1.jpg


When the primer was touch dry, I then mixed the interior green color and airbrushed it onto the canopy sections...


IMG_6486_zpsmef371fv.jpg


The last task for this build update was to pre-shade the plane prior to painting. I started with the underside and mixed some rust, dark earth and a drop of black to create a dark reddish brown color. I thinned it down about 40/60 paint/thinners and airbrushed it over the panel lines and around raised features. When the underside was complete, I then mixed some of the rust with black to create a reddish black tone and pre-shaded the upper-side panel lines....


IMG_6489_zps5gmx6k0g.jpg


IMG_6491_zpsyhdlsr50.jpg


Well, that's it for this first update until the next one, which will cover painting, decaling, weathering and final assembly.


In the meantime, if you'd like to watch my YouTube "Build Update #1" video for this report, then here is the link to that video: https://youtu.be/wbnxT-rNrhU


Until "Build Update #2" happy modeling, have fun and thanks for any comments you leave, much appreciated!


Cheers

Martin


  • Member since
    August 2009
  • From: Borlando Fla home of the rat
Posted by TREYZX10R on Tuesday, April 5, 2016 8:28 PM

Looking great Martin. That office detail is really sharp. Like the preshade as well. Looking forward to seeing some color go down.

  • Member since
    April 2015
  • From: New Hampshire, USA
Posted by UKguyInUSA on Friday, April 15, 2016 12:05 AM

TREYZX10R

Looking great Martin. That office detail is really sharp. Like the preshade as well. Looking forward to seeing some color go down.


  Thanks Devil, much appreciated!


Cheers Beer

Martin

  • Member since
    April 2015
  • From: New Hampshire, USA
Posted by UKguyInUSA on Friday, April 15, 2016 12:08 AM

Airfix 1/48 Supermarine Spitfire Mk.Vb "Build Update #1" (4.5.16).


Hello Chaps,


It's been 10 days since my last update, but because this is a quick and easy kit to build, I'm pleased to say that I managed to find a few hours here and there and completed the build. This update covers the masking, painting, decaling, weathering and final assembly; the "Ready For Inspection" thread will be released on Sunday.


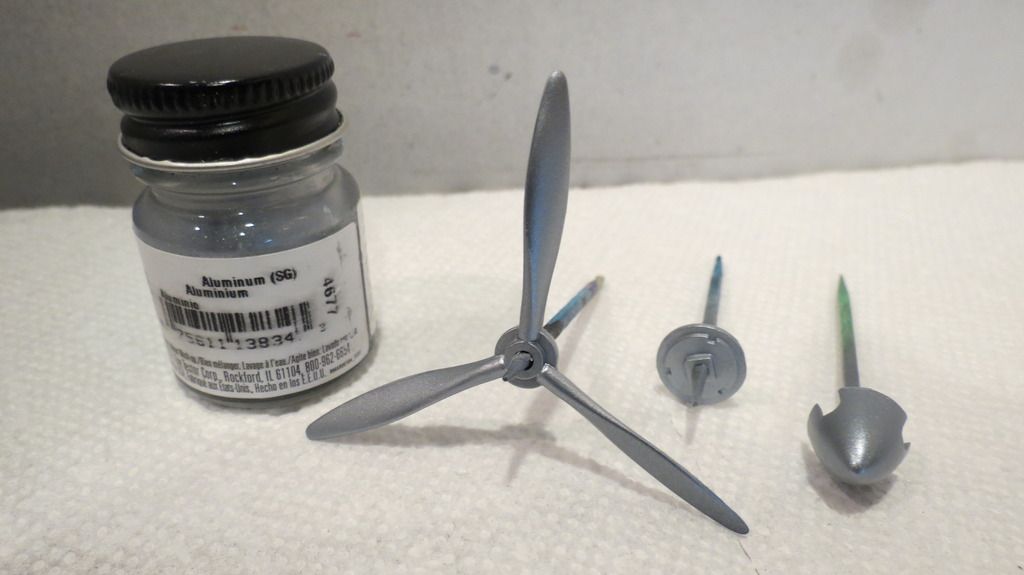
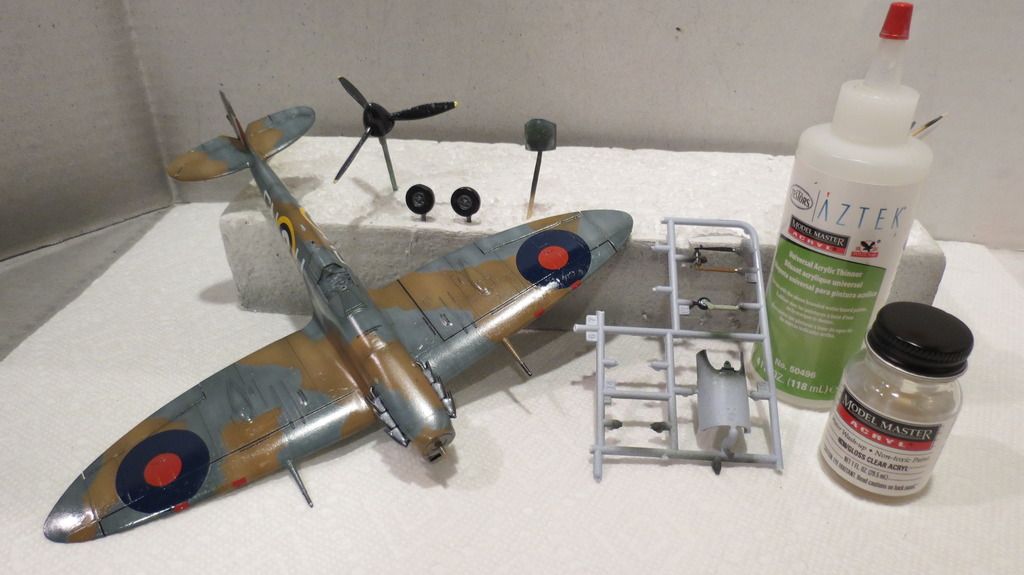
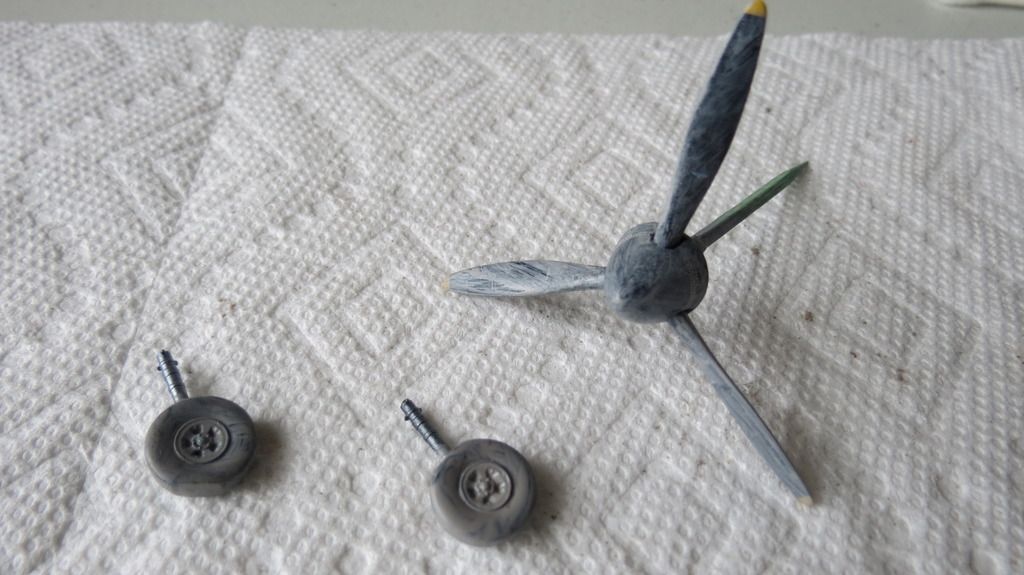
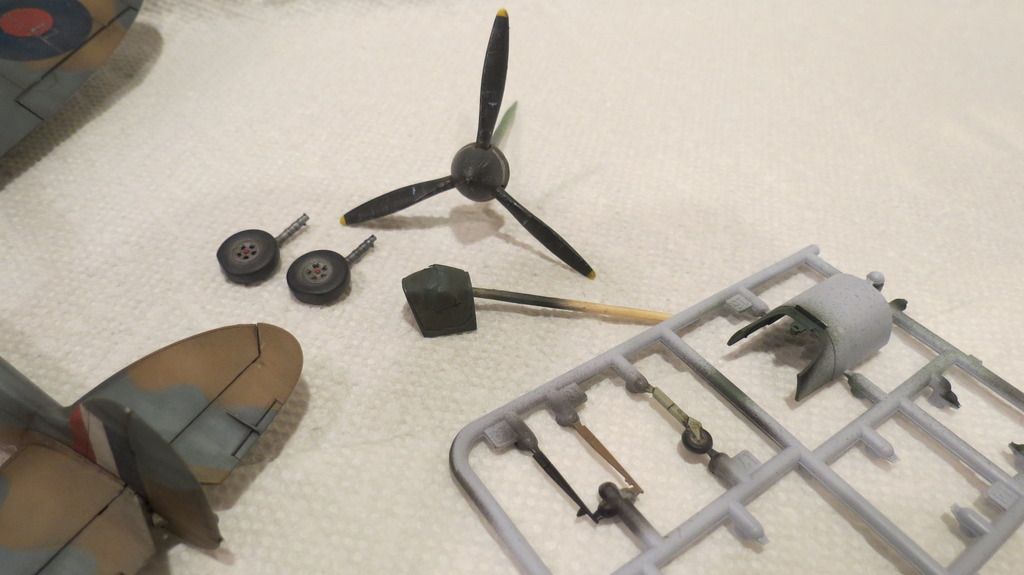
At the end of my last build update I had built the model, primed and pre-shaded her, so following on from where I left off, the next task that I did was to airbrush the propeller and spinner with aluminum paint so that it can be chipped during the weathering stage...


IMG_6487_zpskwg3edhr.jpg


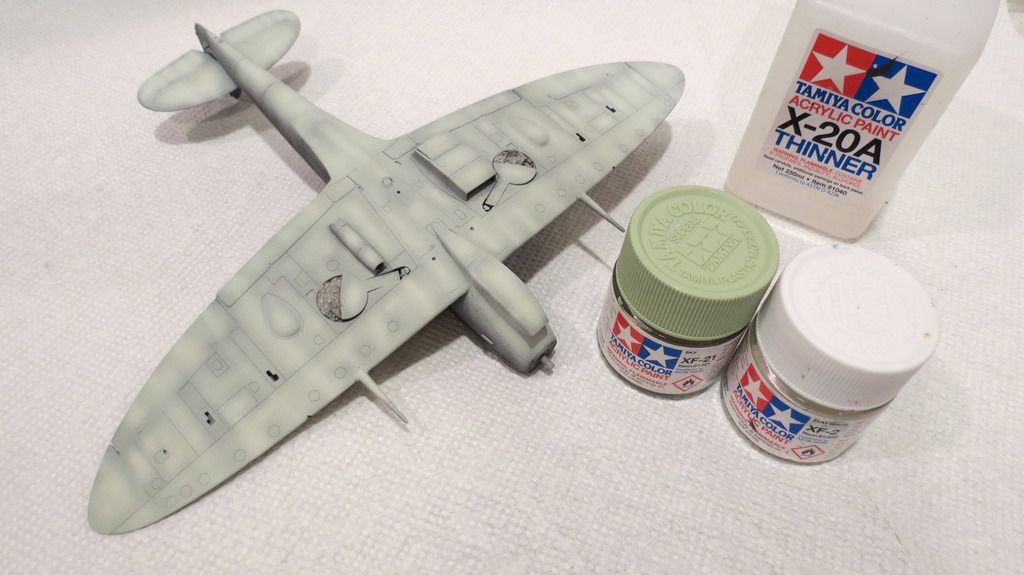
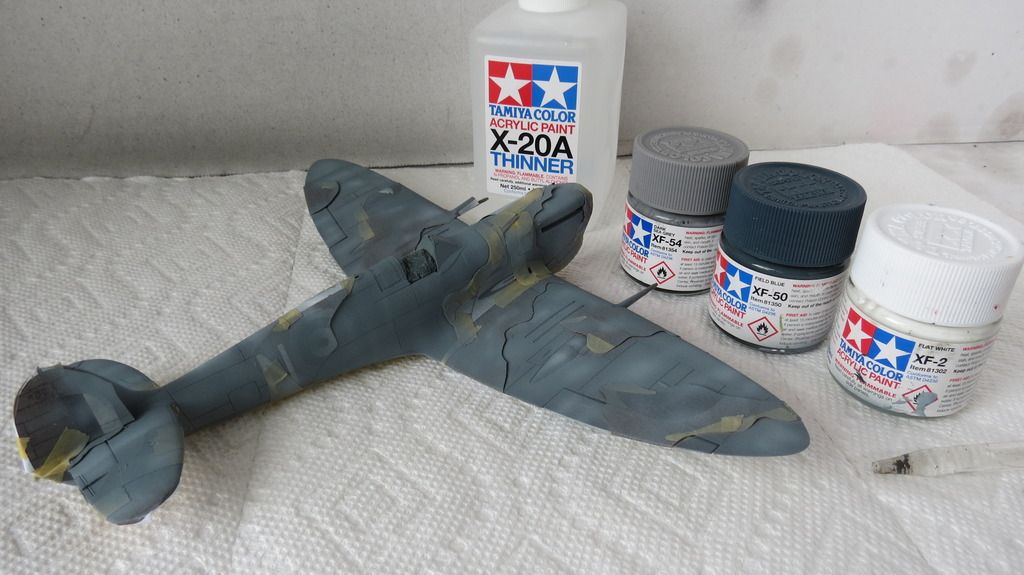
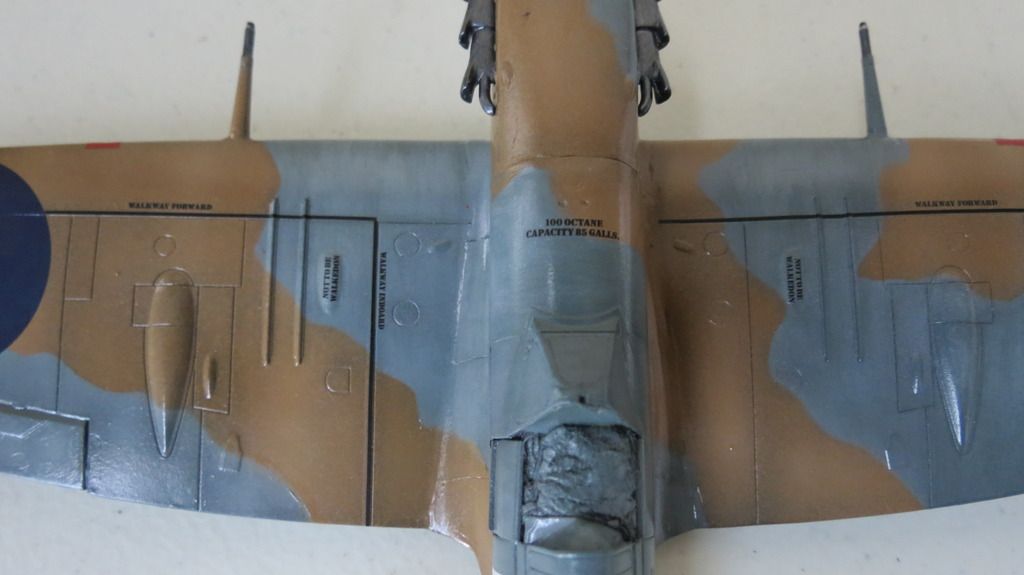
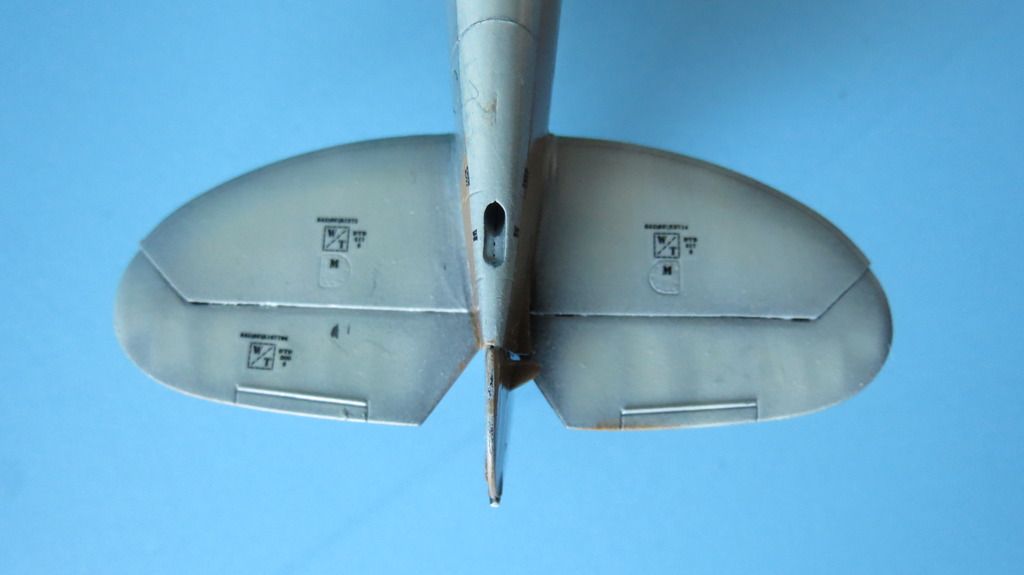
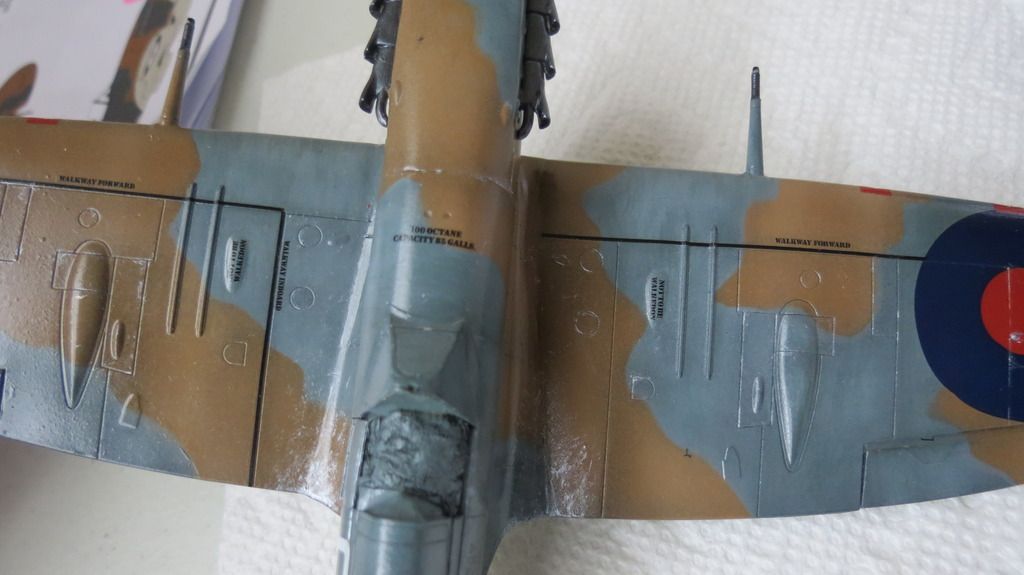
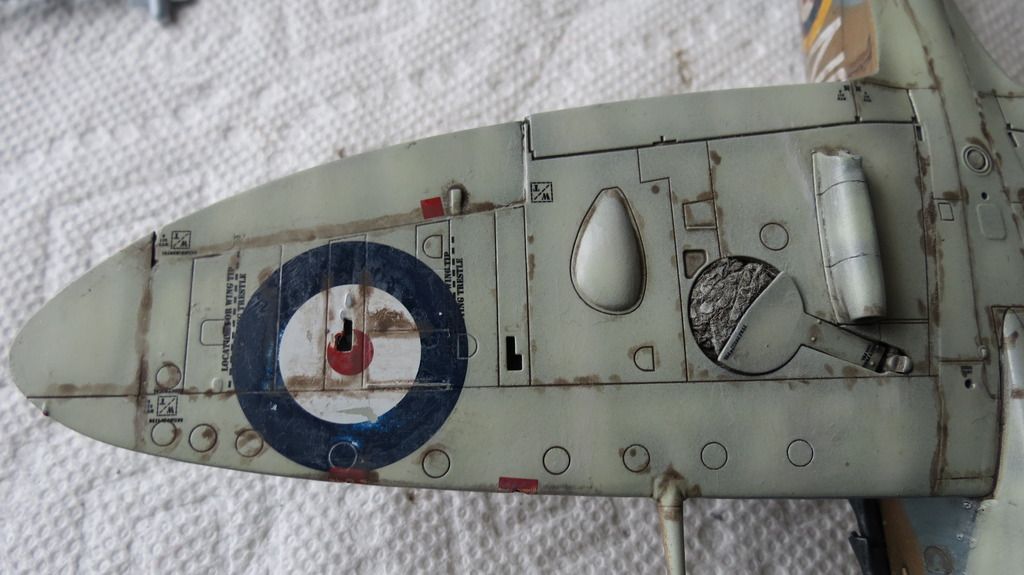
Next, I airbrushed the underside with Tamiya "Sky" toned down with flat white. When that was done, I toned the color down with more white then airbrushed some highlights. When this was dry, I sealed it with a Model Masters gloss clear-coat...


IMG_6493_zps65dguoov.jpg


IMG_6498_zpsne7a4n6a.jpg


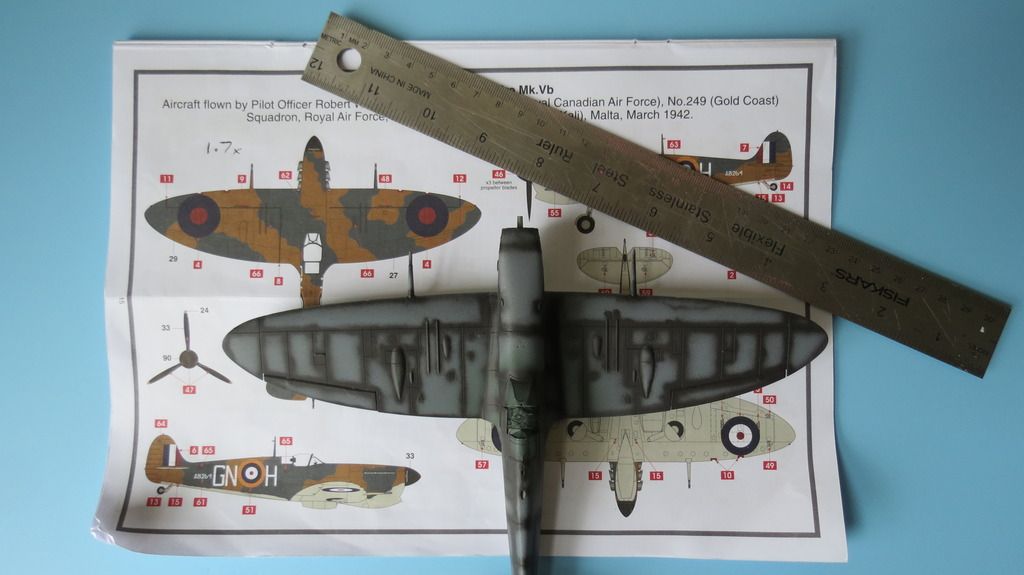
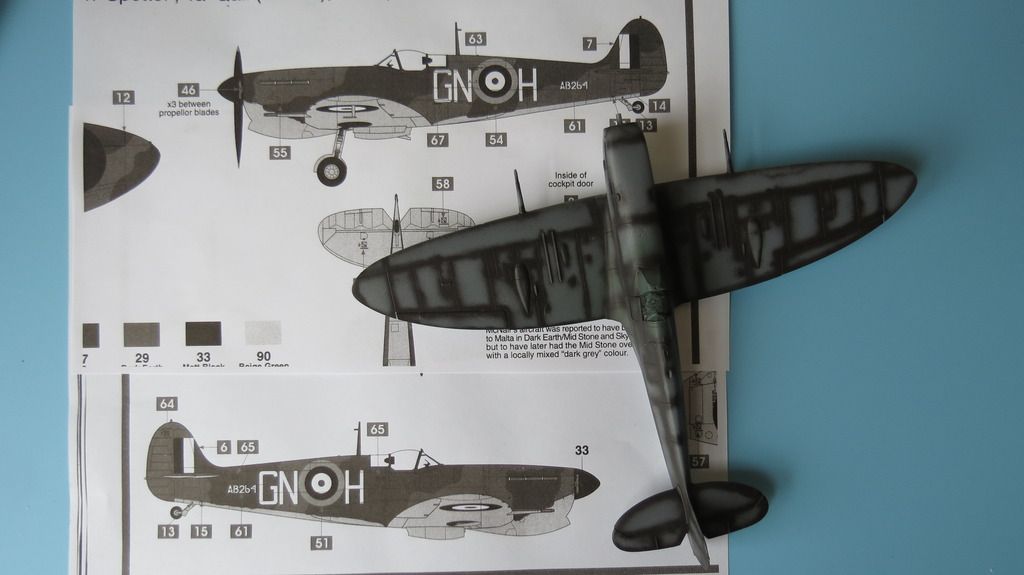
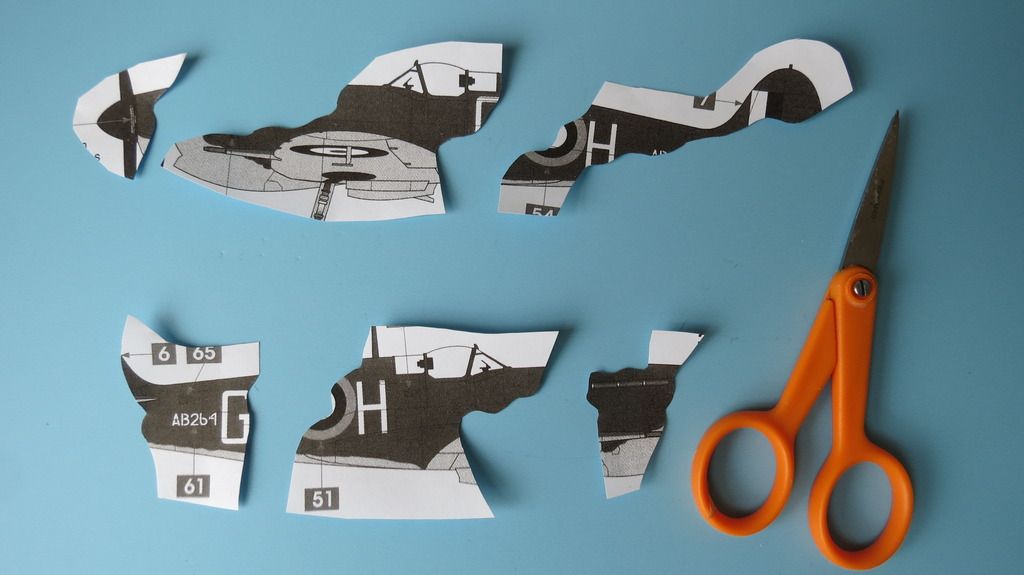
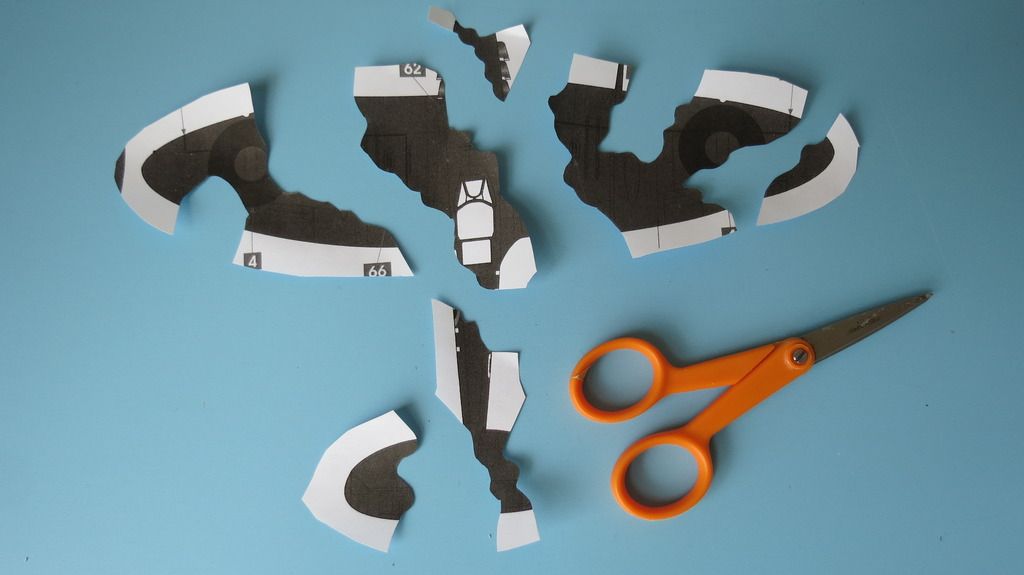
While that was drying, I prepared my home made masks for airbrushing the upper-side camo colors. My method for doing this is to use the views from the painting guide within the assembly booklet, but because they are a smaller scale than the actual model, I need to take photo-copies and enlarge them by a scale factor to get the same size as the model. To determine the scale factor, I measure the distance of the model from wing tip to wing tip, then do the same with the plan view on the painting guide. Dividing the larger number by the smaller number gave a scale factor of 1.7x, which meant that I needed to enlarge the painting instruction views by 1.7. I then produced enlarged photocopies of each of the views with the painting guide. I then cut the views out from the sheets, then cut carefully around the demarcation between the two camo colors. I put the lighter shade aside and gathered together the cut out masks of the darker shade. I then fixed these into place on the model, using the painting guide to help where their correct locations were. I used Tamiya tape folded in two to create "double-sided" tape and taped the separate masks onto the plane.


IMG_6500_zpsspjypjlx.jpg


IMG_6501_zpsqdbubdbn.jpg


IMG_6502_zpsxdccojd9.jpg


IMG_6504_zpsafxrwsty.jpg


IMG_6505_zpsvsxhetmn.jpg


IMG_6507_zpsrtjlxyrp.jpg


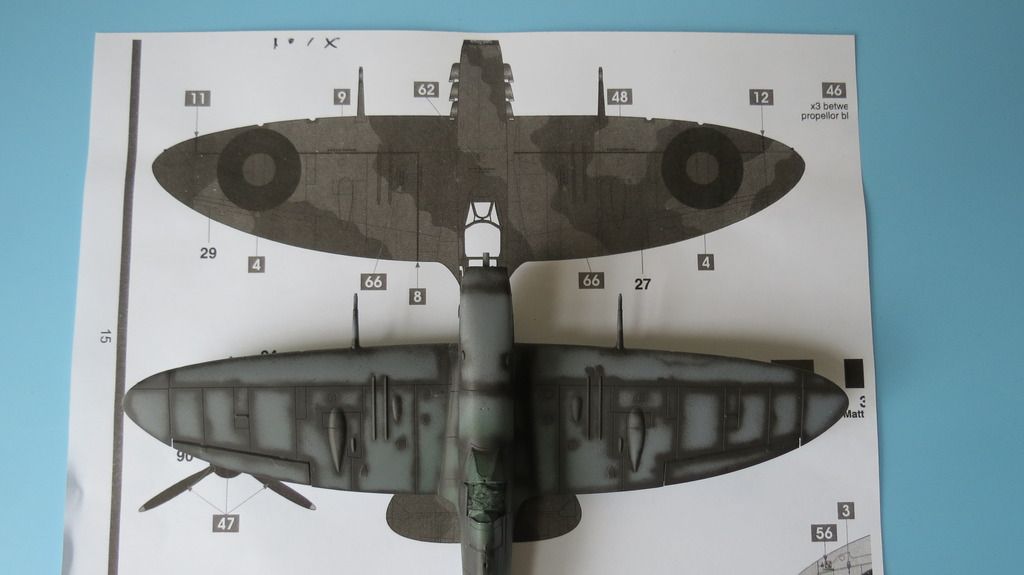
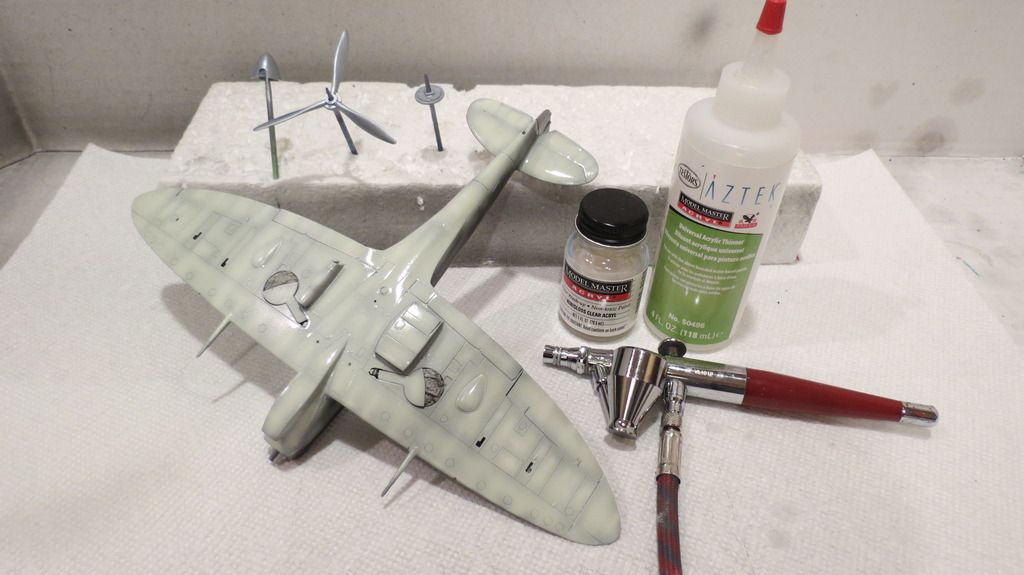
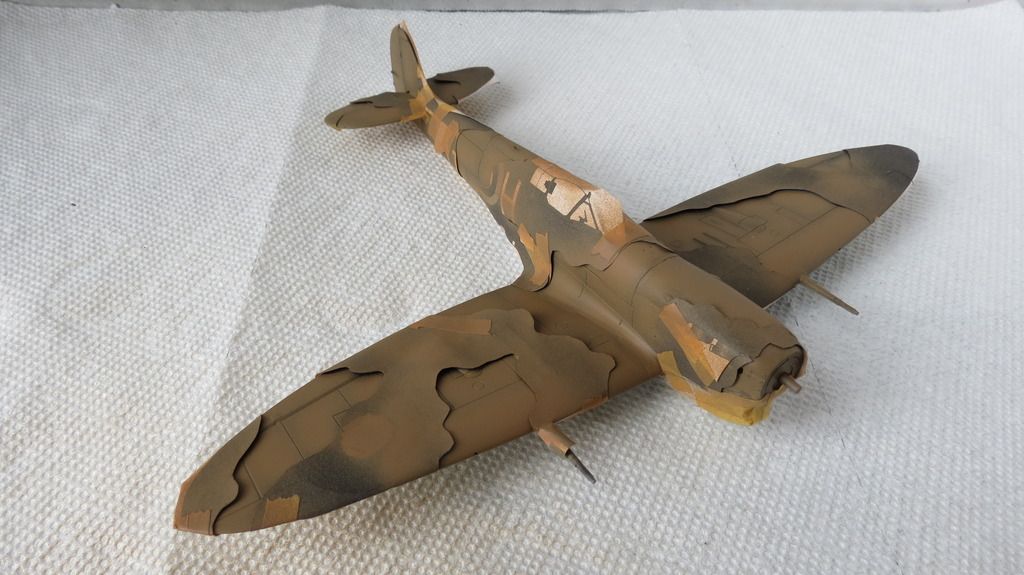
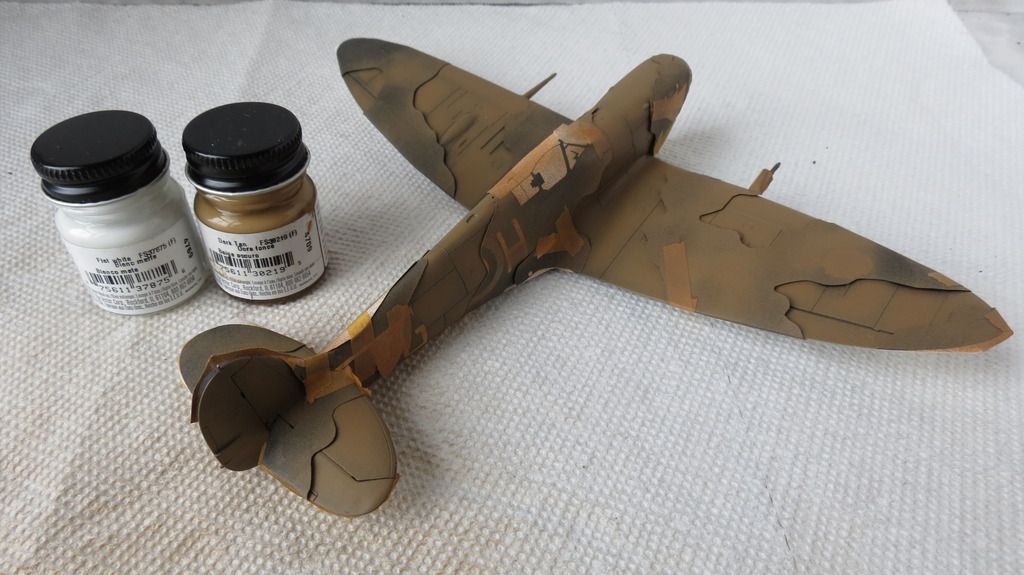
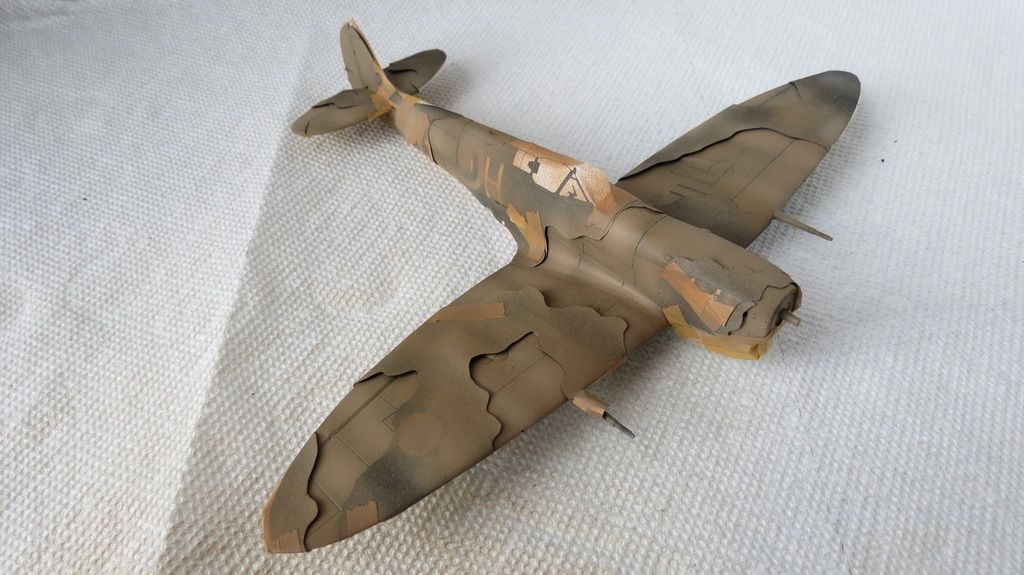
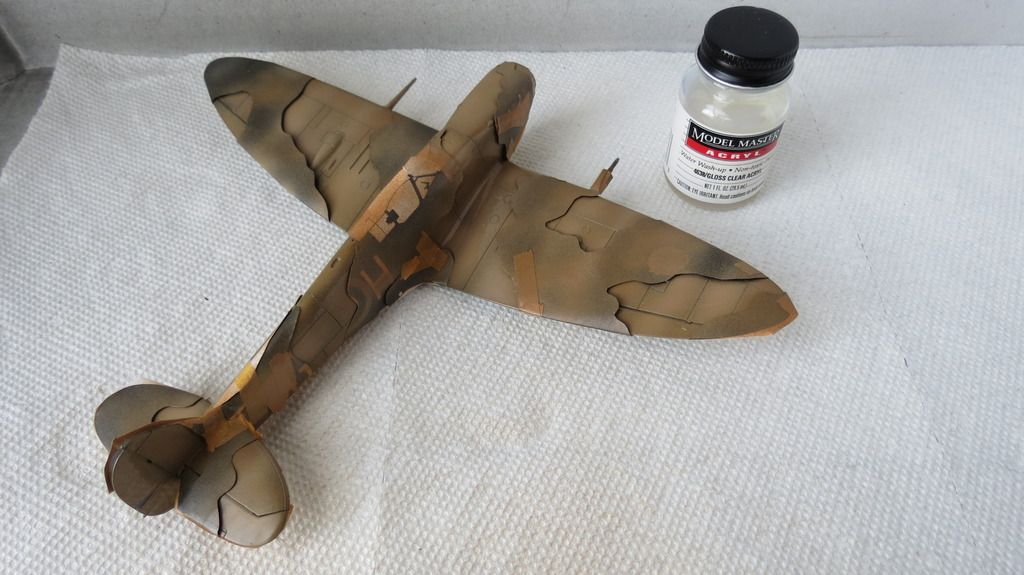
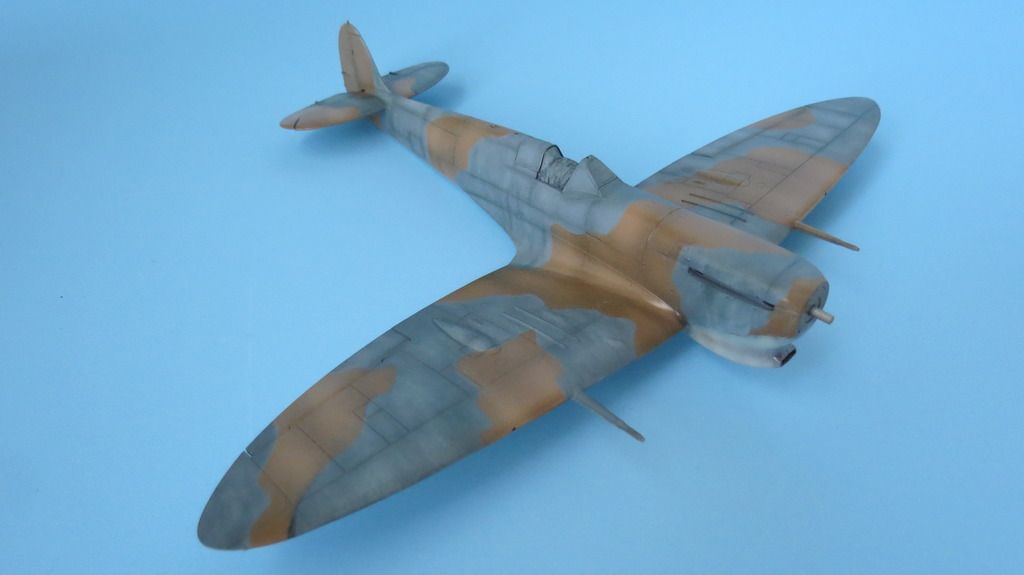
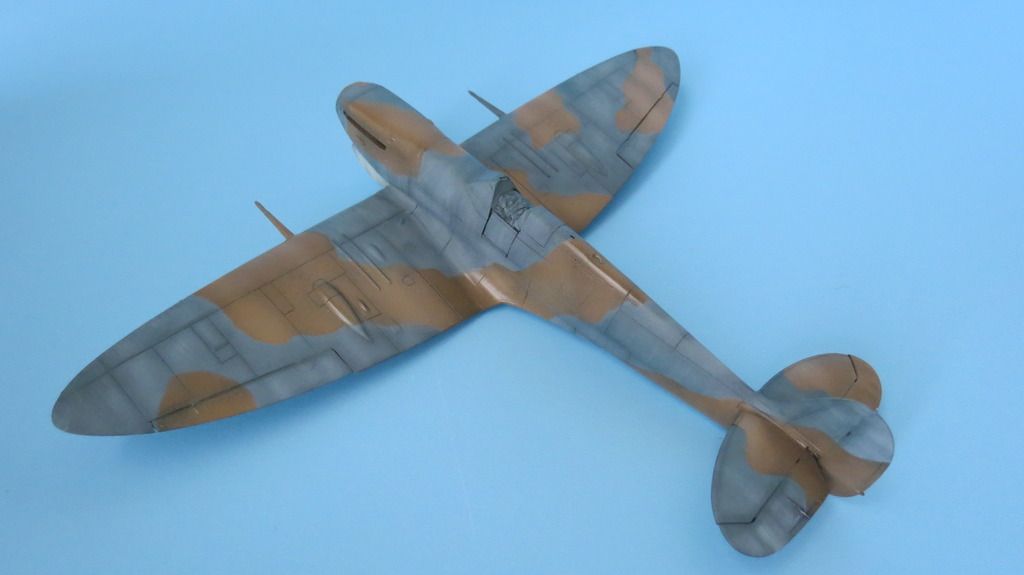
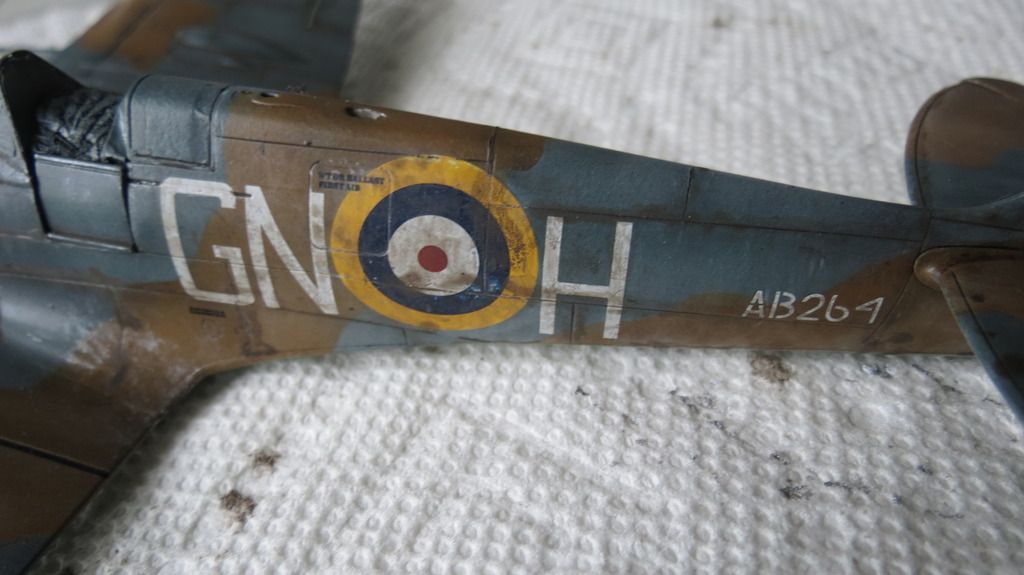
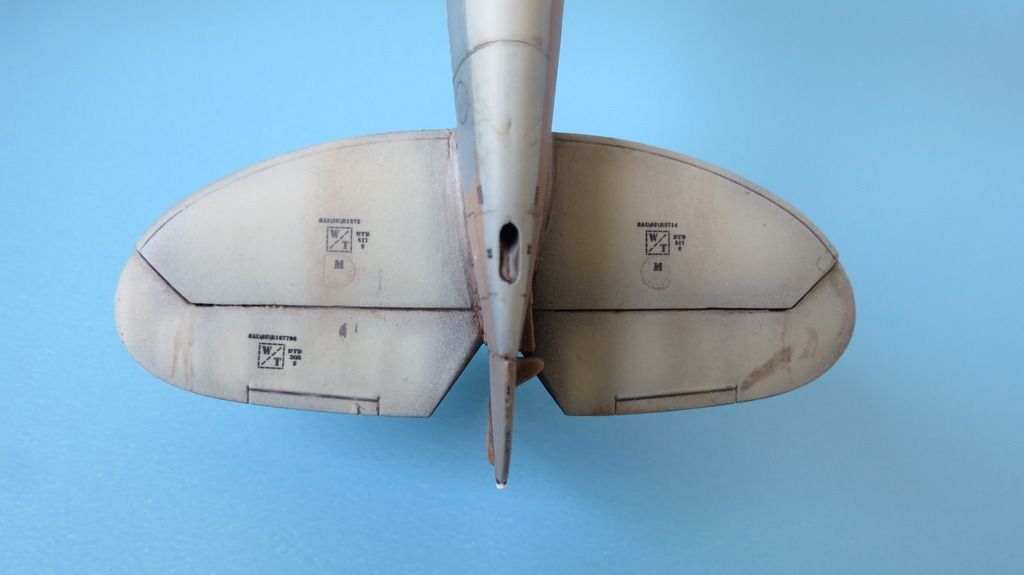
With the masking complete, I then airbrushed Model Masters "Dark Tan" onto the exposed surfaces. I then toned the Tan down with some white and airbrushed highlights. I let the paint dry for a couple of hours then sealed it in with a gloss clear coat. When that was touch dry, I removed the paper masks to see how everything looked, and, I thought it was looking okay, so, I took a couple of photos...


IMG_6509_zpsvviav5ec.jpg


IMG_6510_zpsjchxdazw.jpg


IMG_6512_zpsoirn2shl.jpg


IMG_6513_zpsrb3xa2ev.jpg


IMG_6515_zps9ifyhttu.jpg


IMG_6516_zpsixjwalfz.jpg


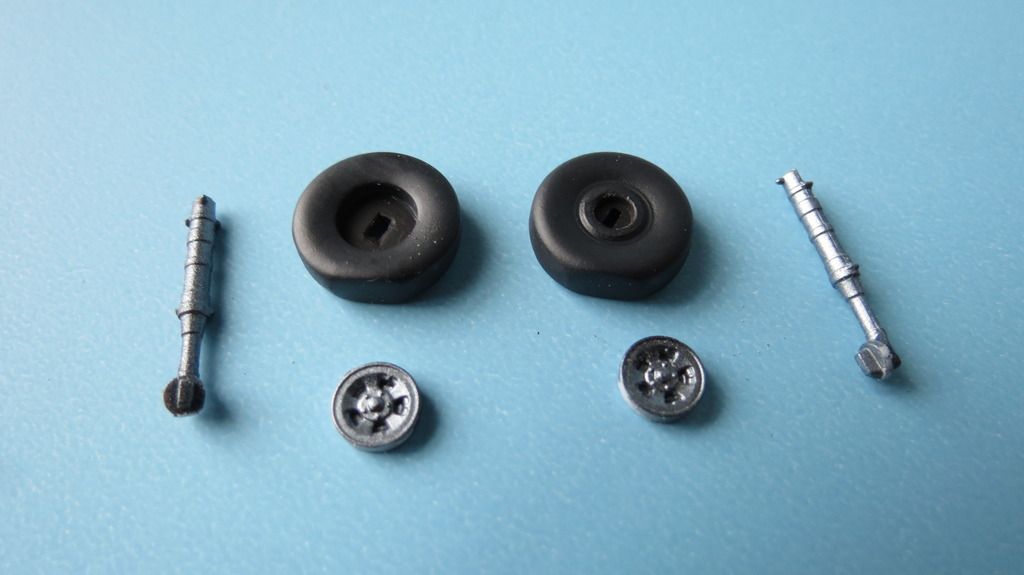
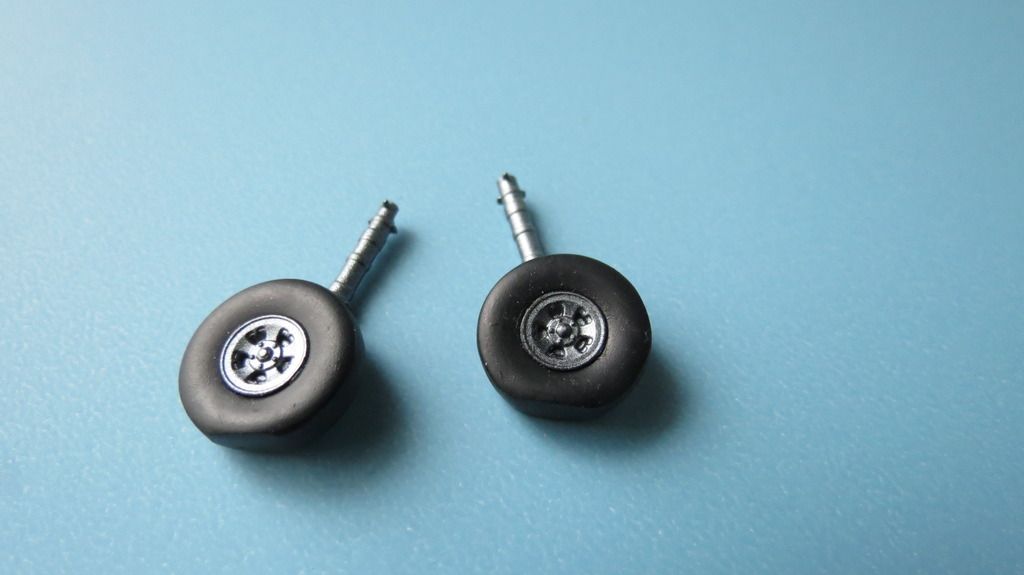
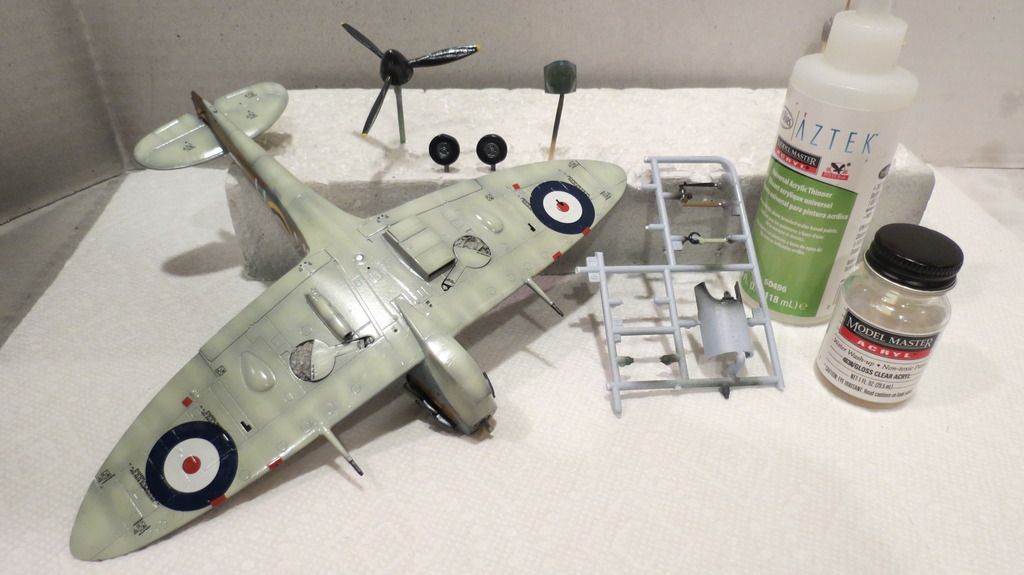
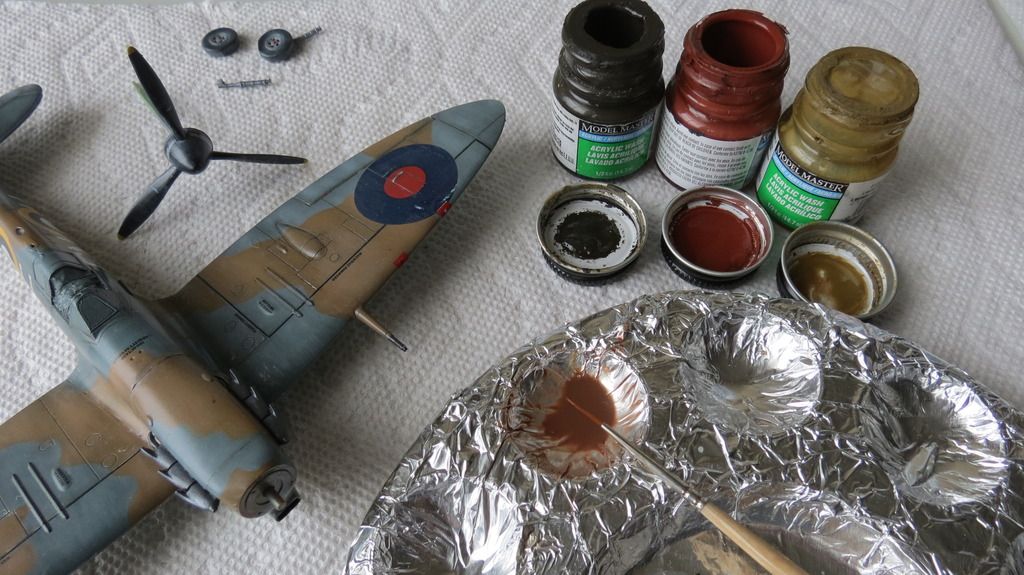
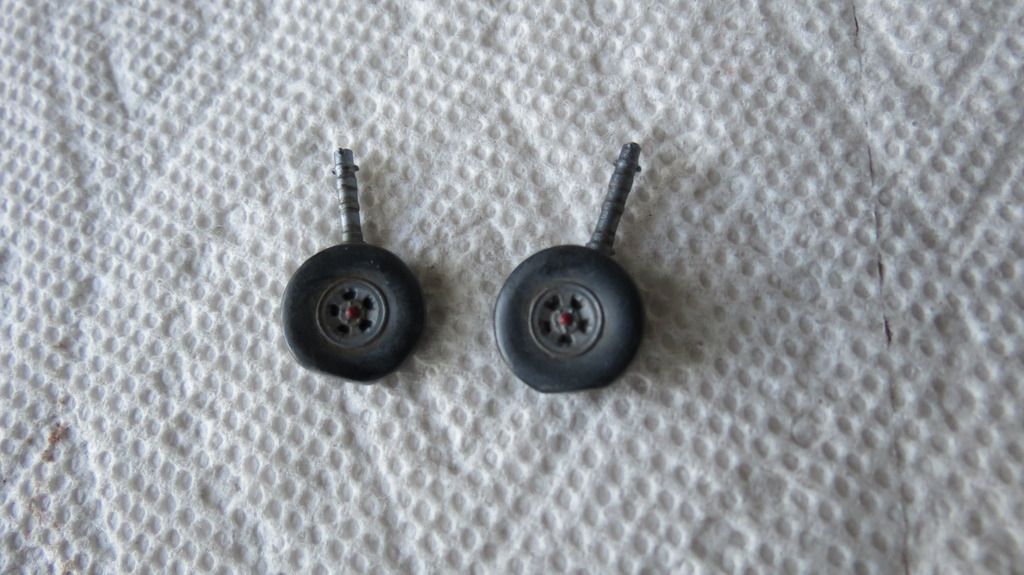
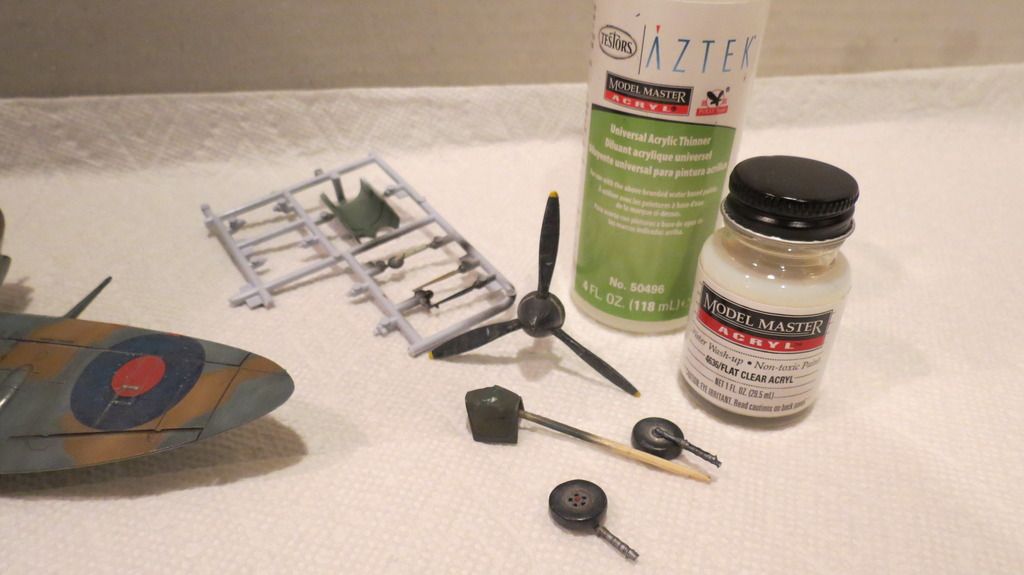
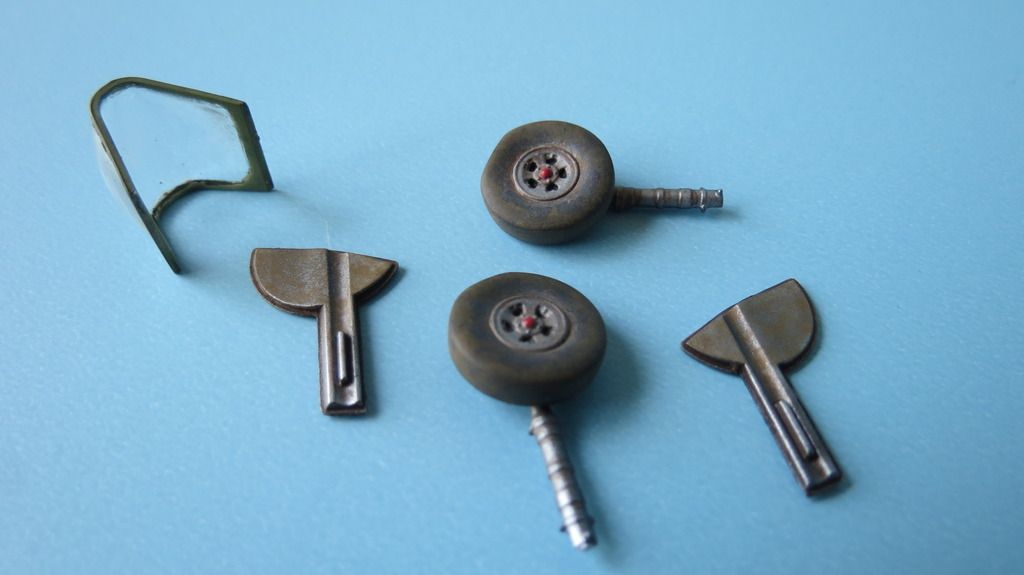
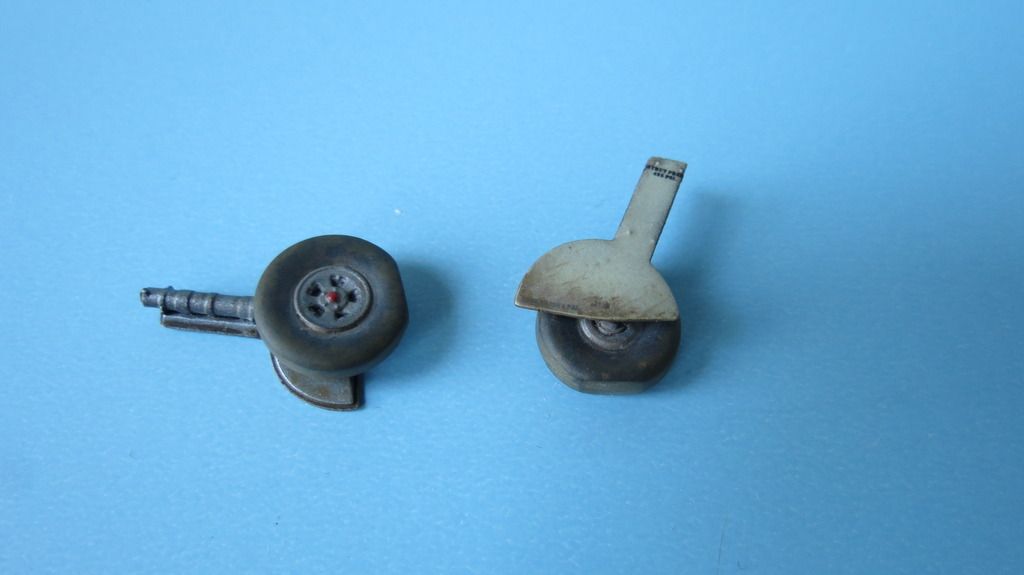
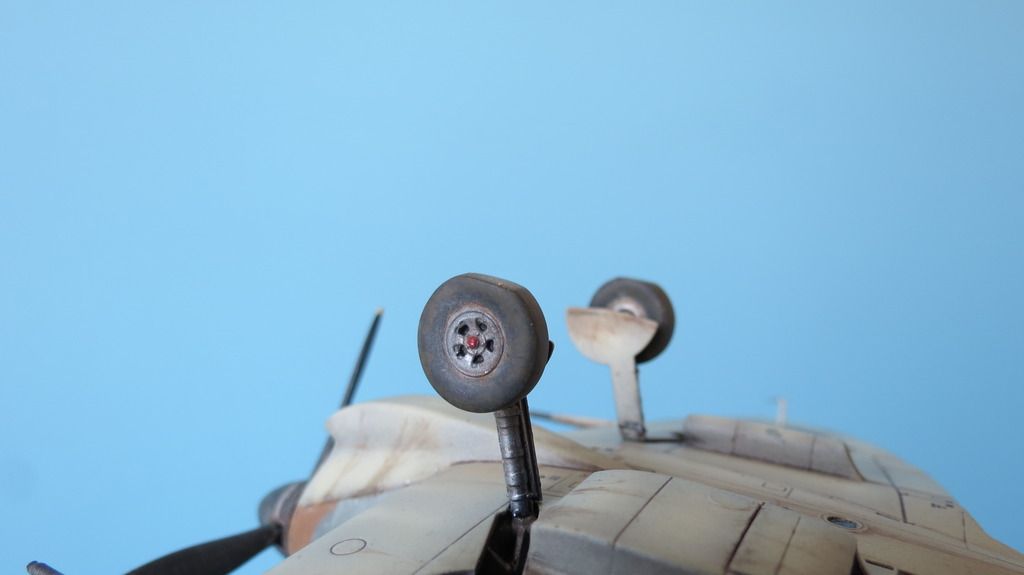
While the clear coat was drying, I moved onto painting the wheels and tires and assembled them...


IMG_6517_zpsqn8xwc8p.jpg


IMG_6518_zpsuithwxhz.jpg


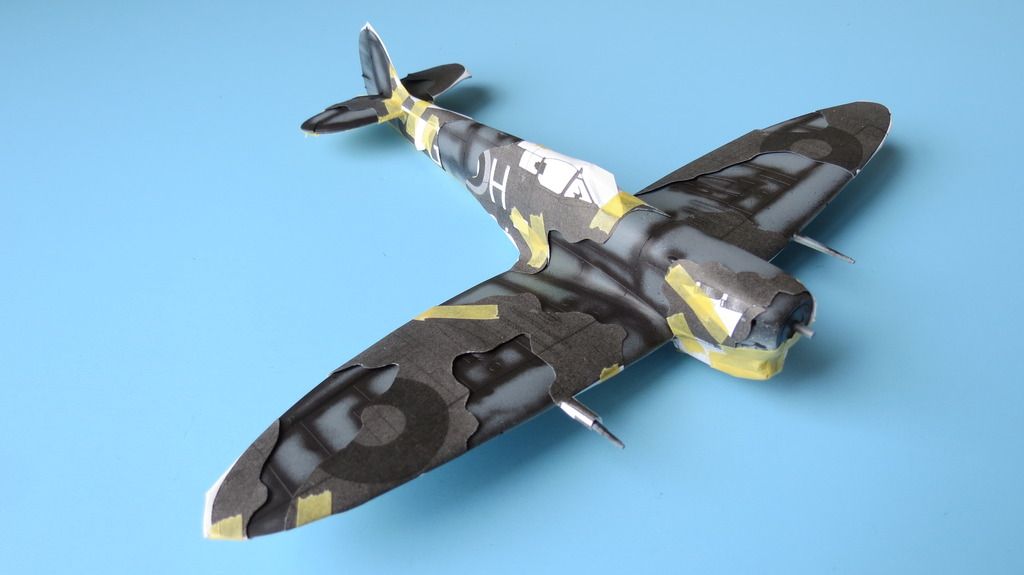
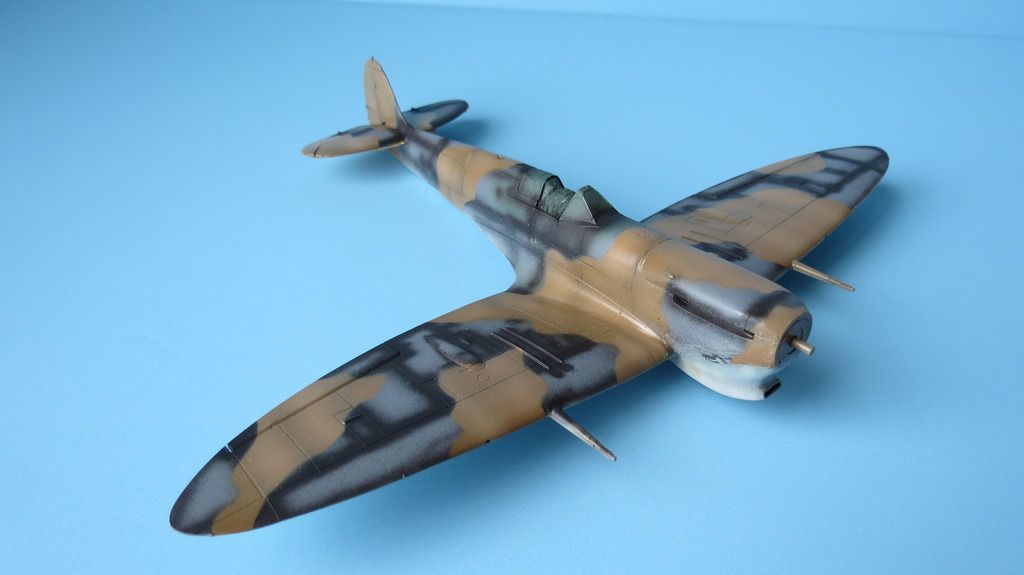
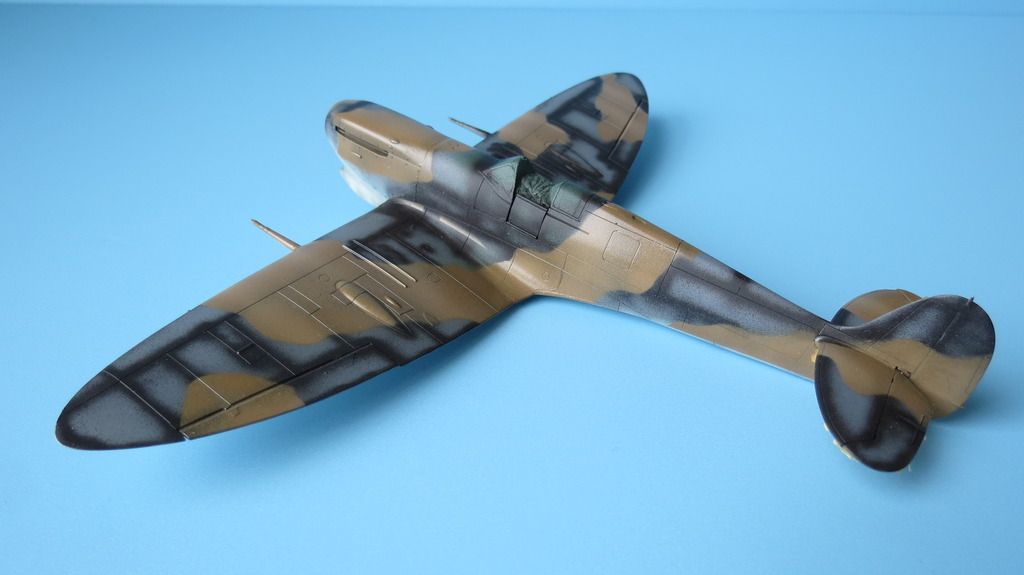
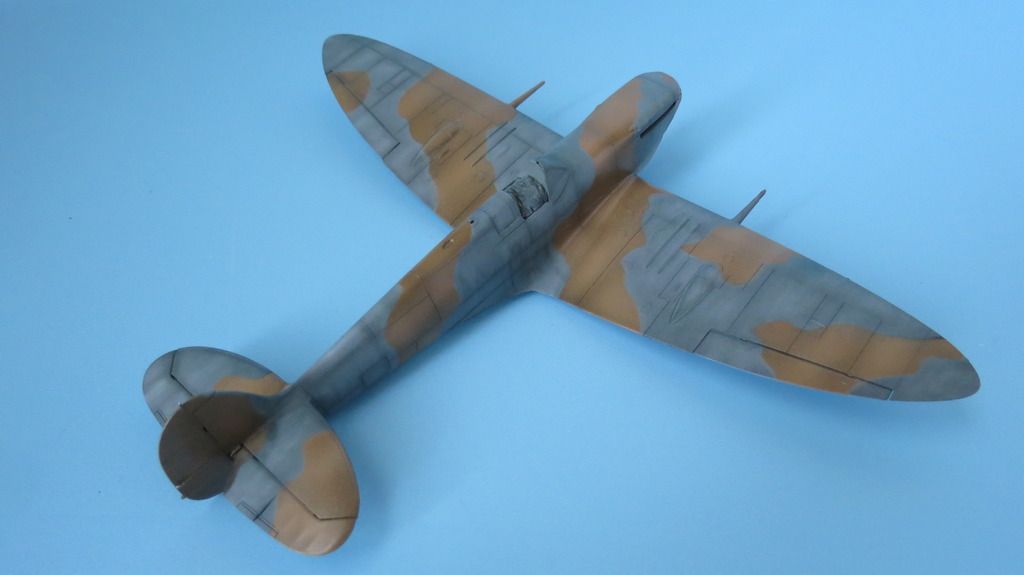
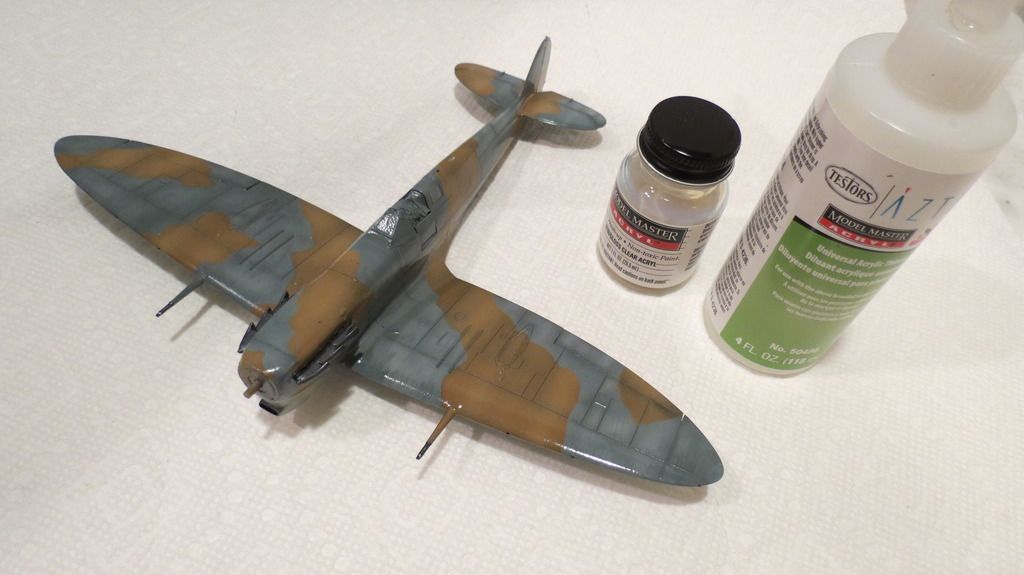
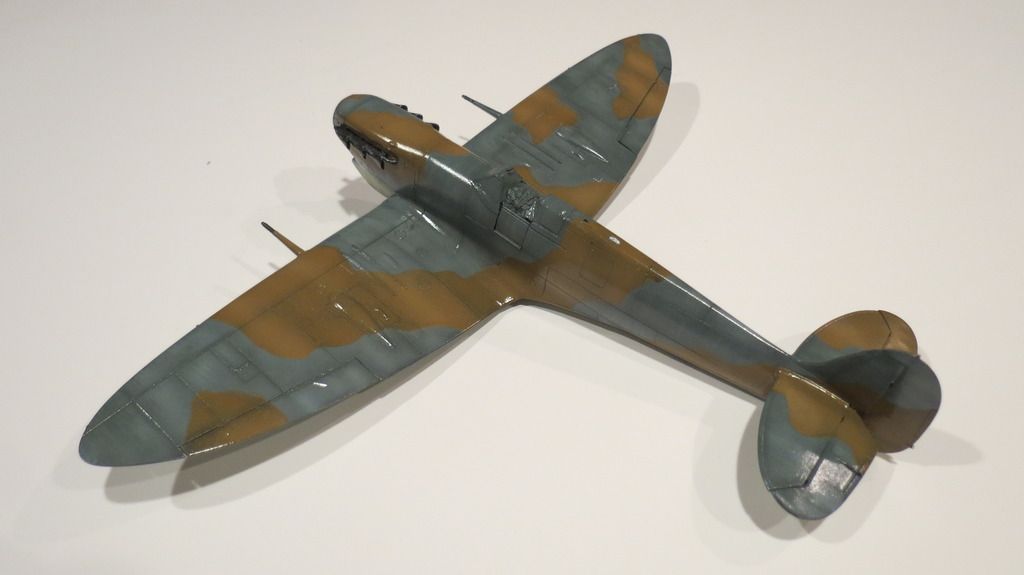
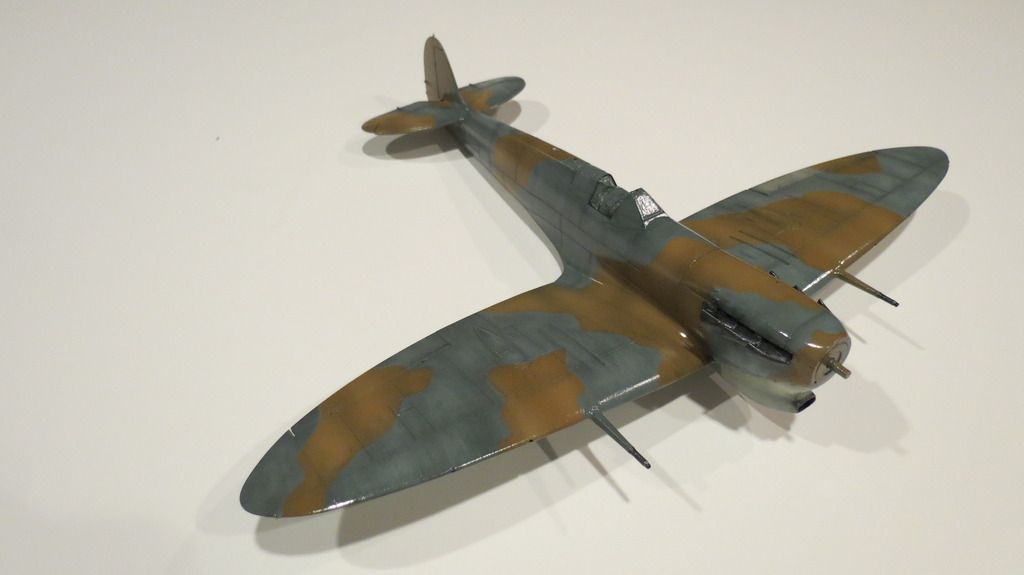
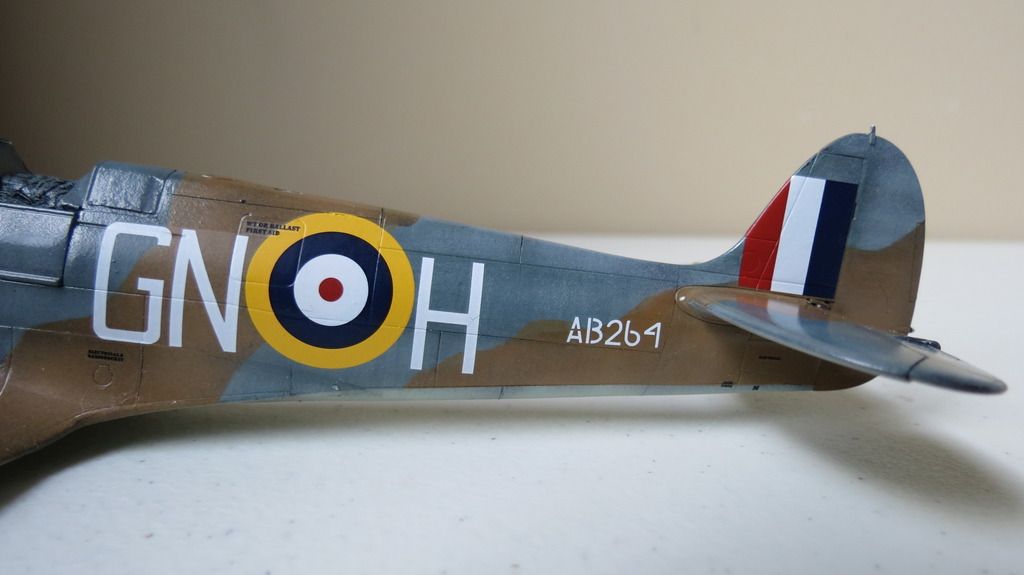
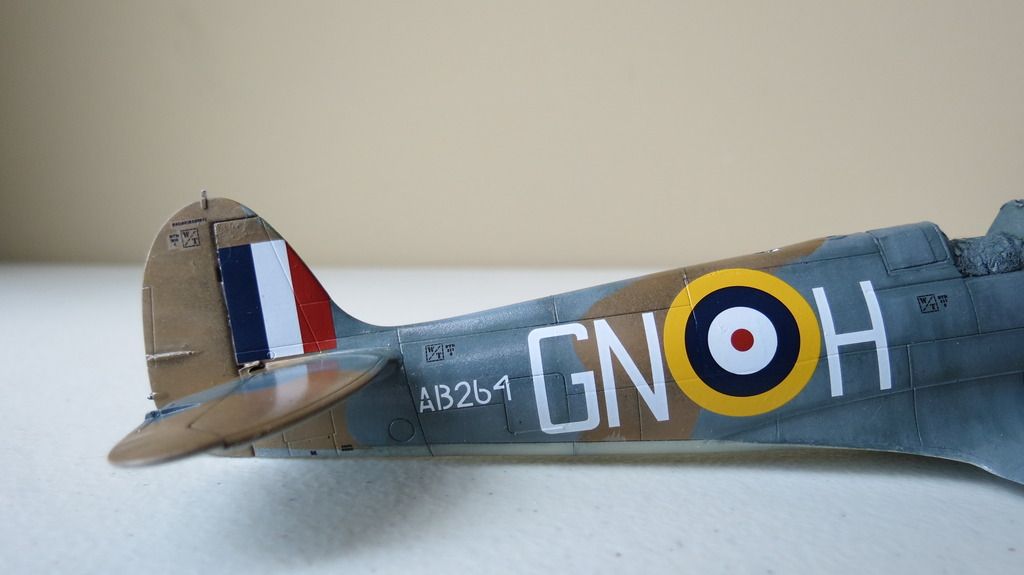
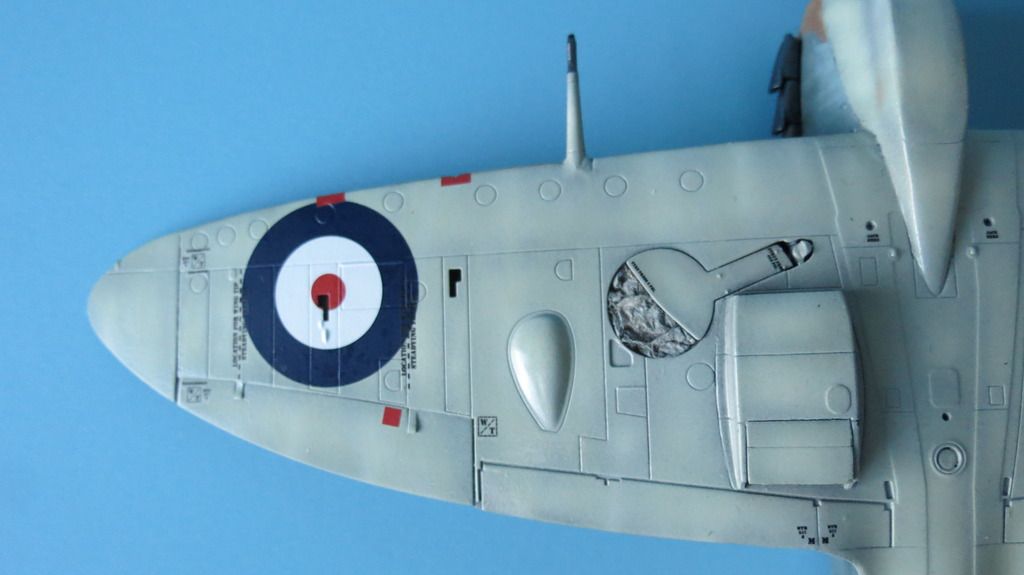
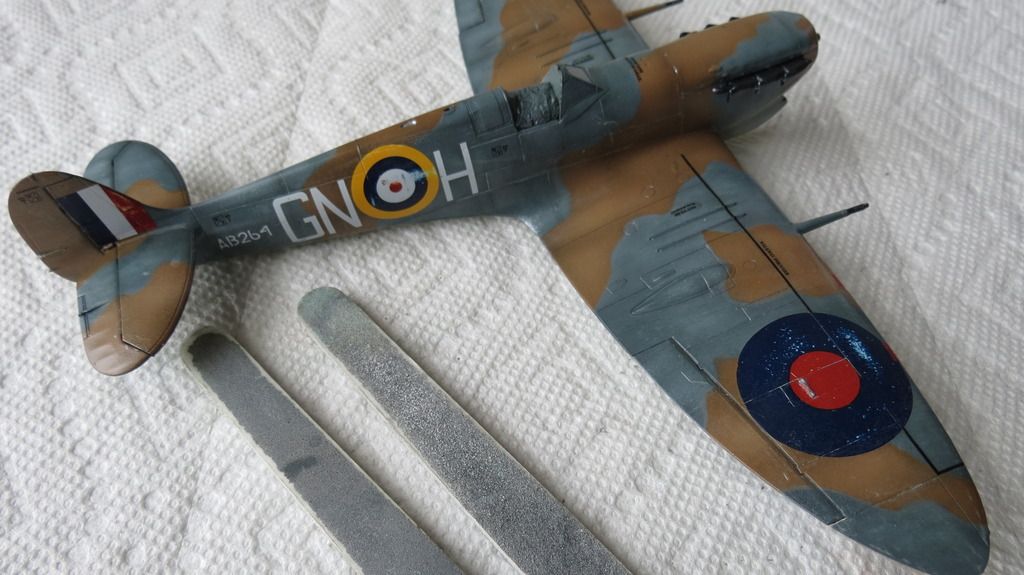
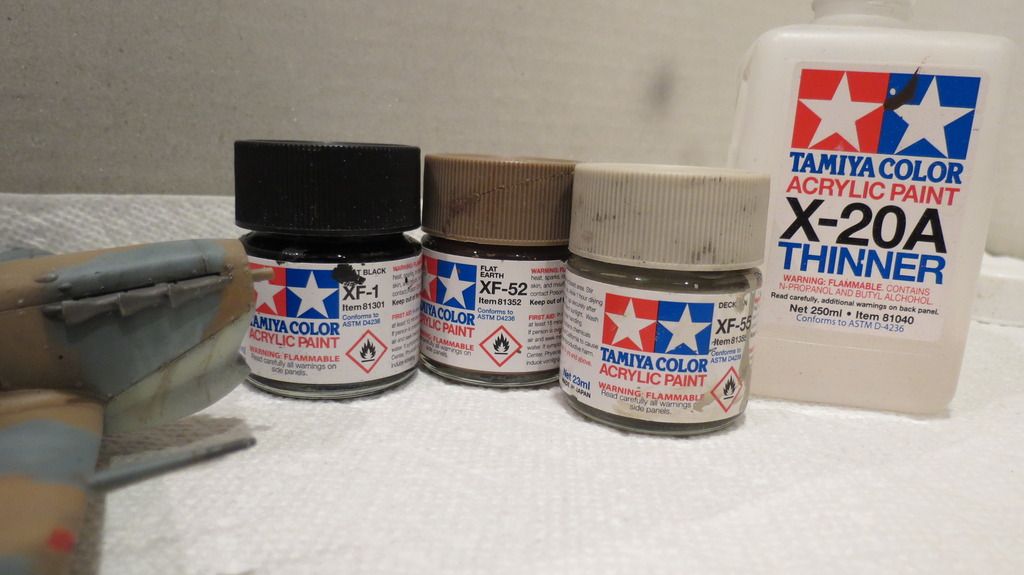
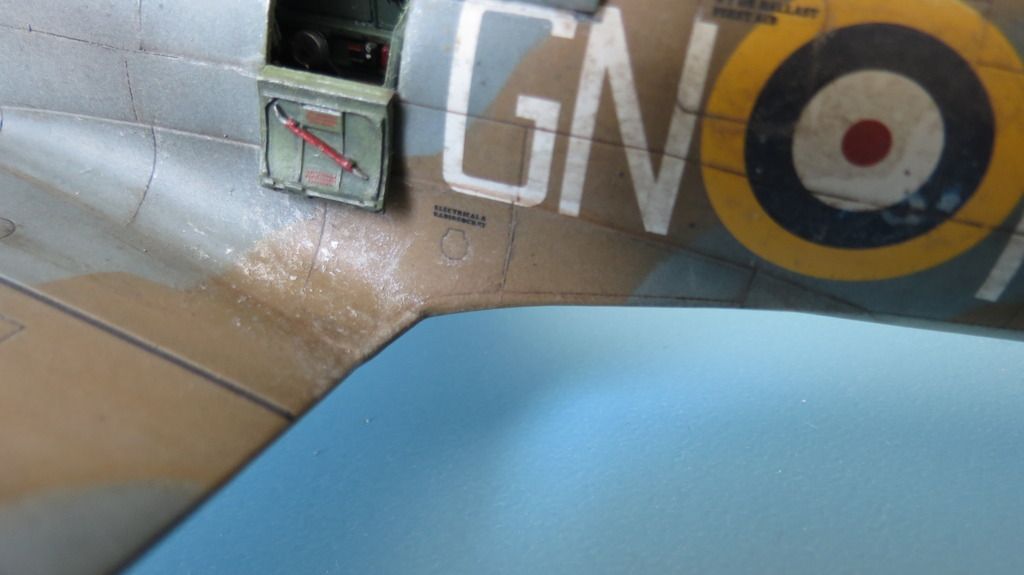
With the clear coat now dry, I applied the lighter colored masks over the top of the previously painted Dark Tan and airbrushed the "Sea Grey" onto the exposed areas. The color call out is for Humbrol 27 which I don't have, because I only use Tamiya and Model Masters paints, and so, I mixed my own shade using Tamiya "Dark Sea Gray" with a drop of "Field Blue". I airbrushed this onto the plane, then when that was done, I mixed white with the color to tone it down and then airbrushed some highlights. I then removed the masks and checked out the paint work. Again, I thought it looked okay, so, I took a few photos...


IMG_6519_zps6glwfj9j.jpg


IMG_6521_zpsxx0fetzq.jpg


IMG_6524_zpsobykdqd1.jpg


IMG_6525_zpsmxsznueo.jpg


IMG_6526_zpsdiywt2ig.jpg


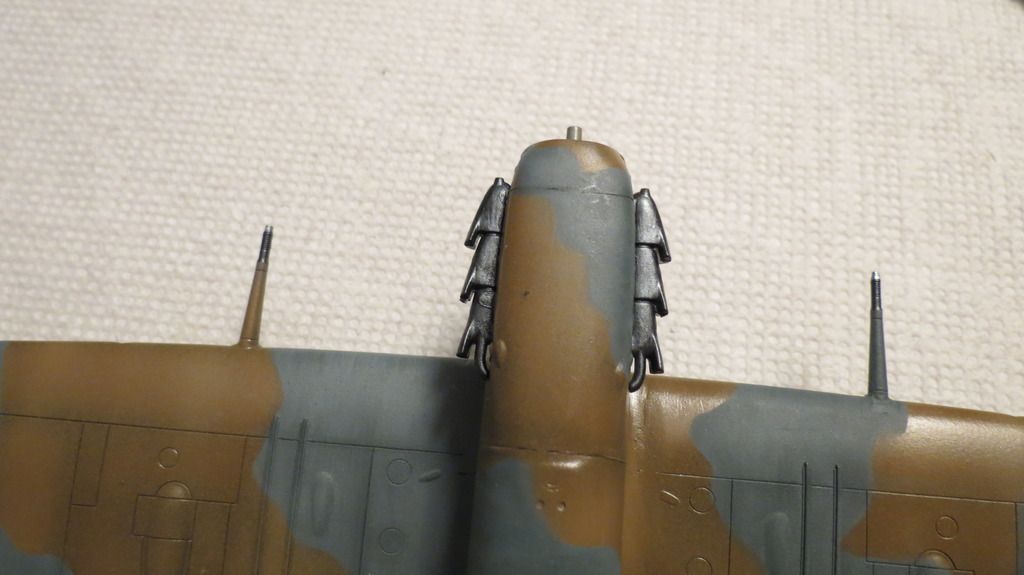
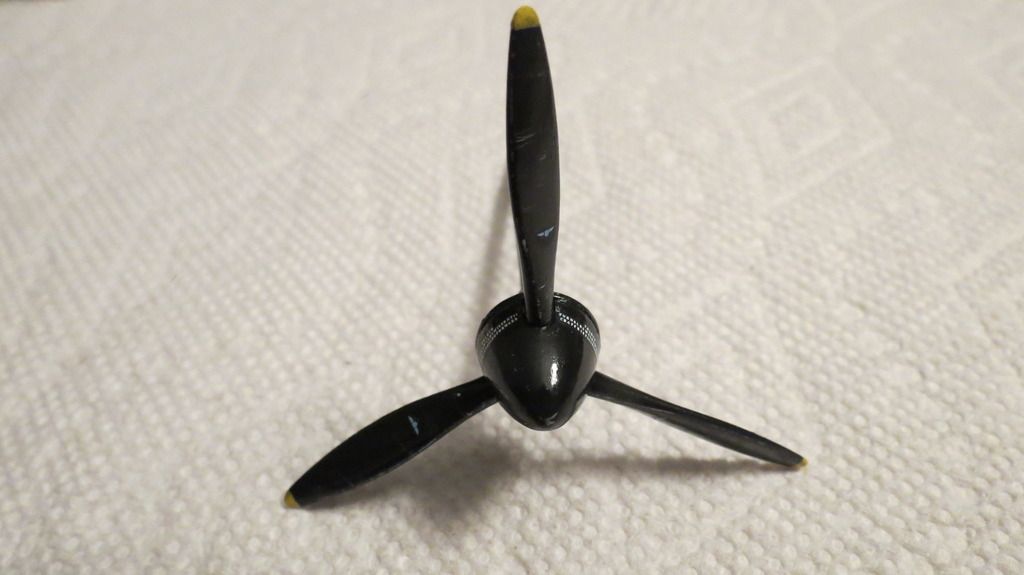
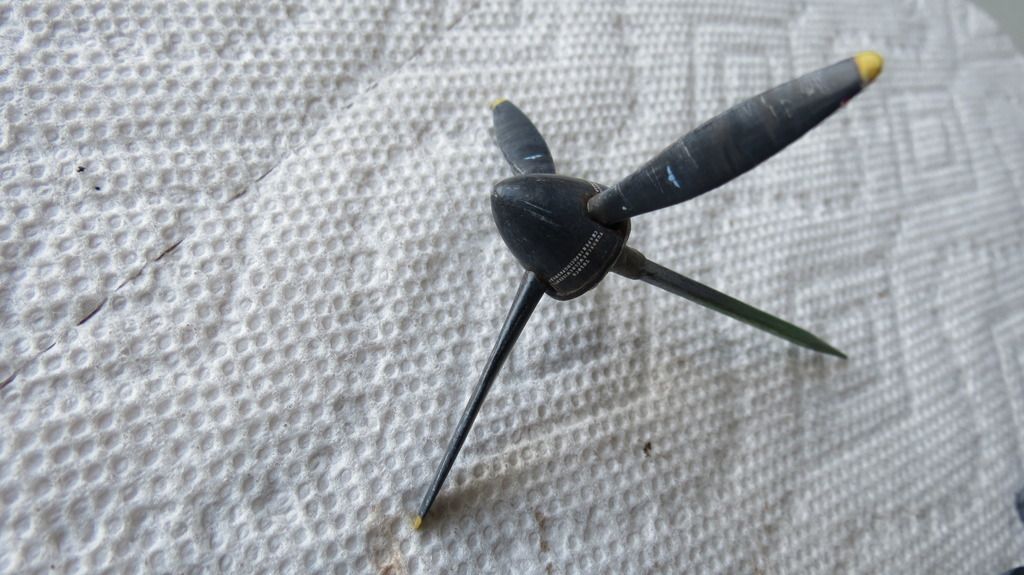
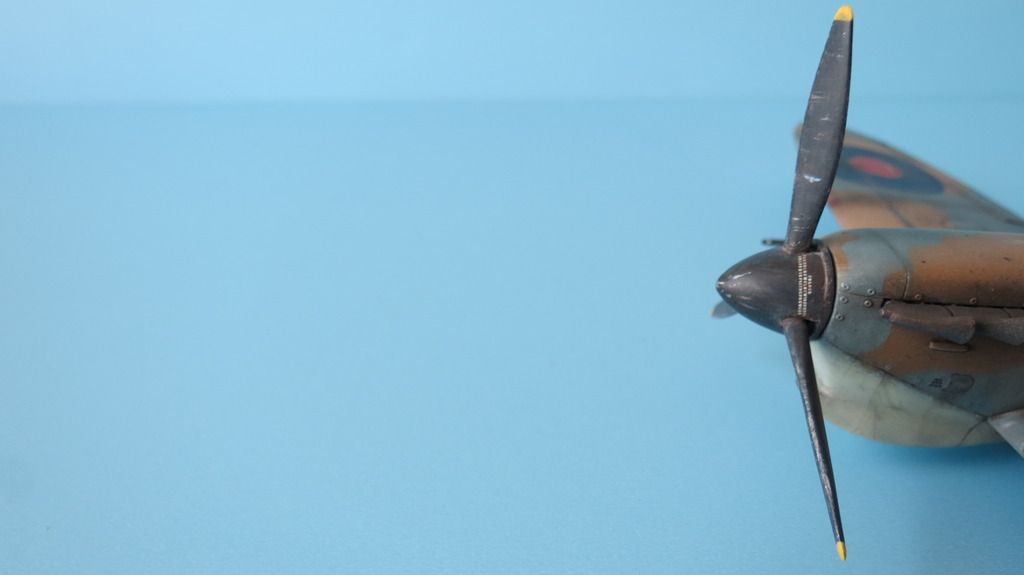
I then glued the exhaust stacks into their locations, followed by painting the propeller assembly black with yellow tips on each blade. I also did some chipping on the propeller. When the propeller was dry, I airbrushed a gloss clear coat onto it and onto the "Sea Grey" color that I had airbrushed onto the plane. This was to make everything ready for decaling...


IMG_6528_zpsayuujmm0.jpg


IMG_6530_zpsk1p1jdtz.jpg


IMG_6532_zpswmpwizwy.jpg


IMG_6541_zpskmjxubve.jpg


IMG_6542_zpsoh1qpmv1.jpg


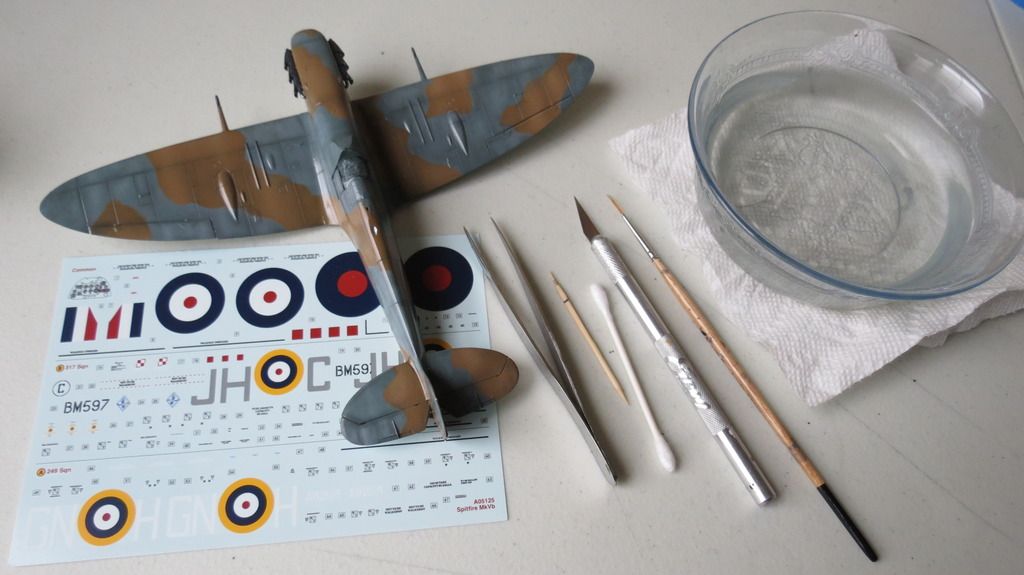
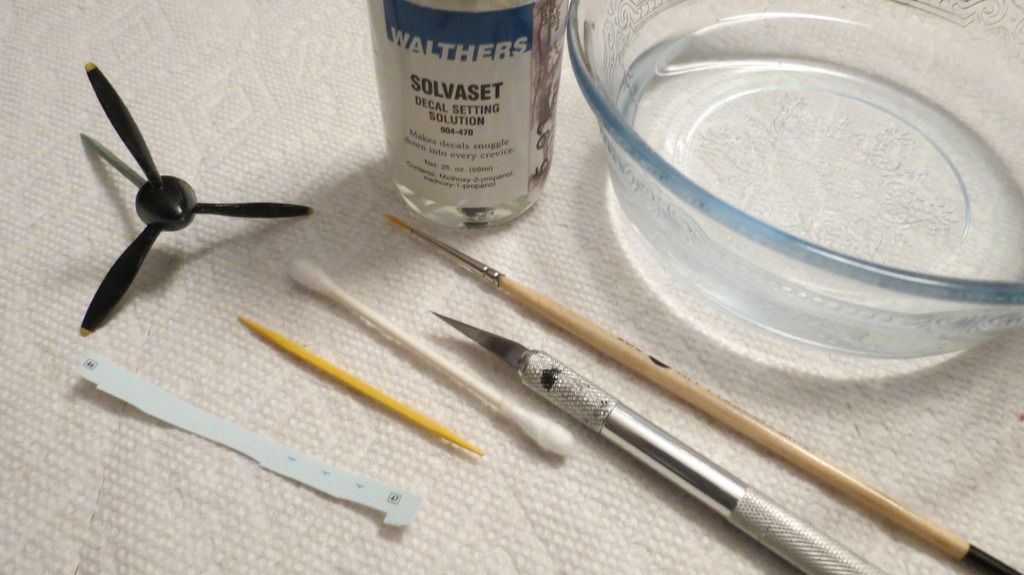
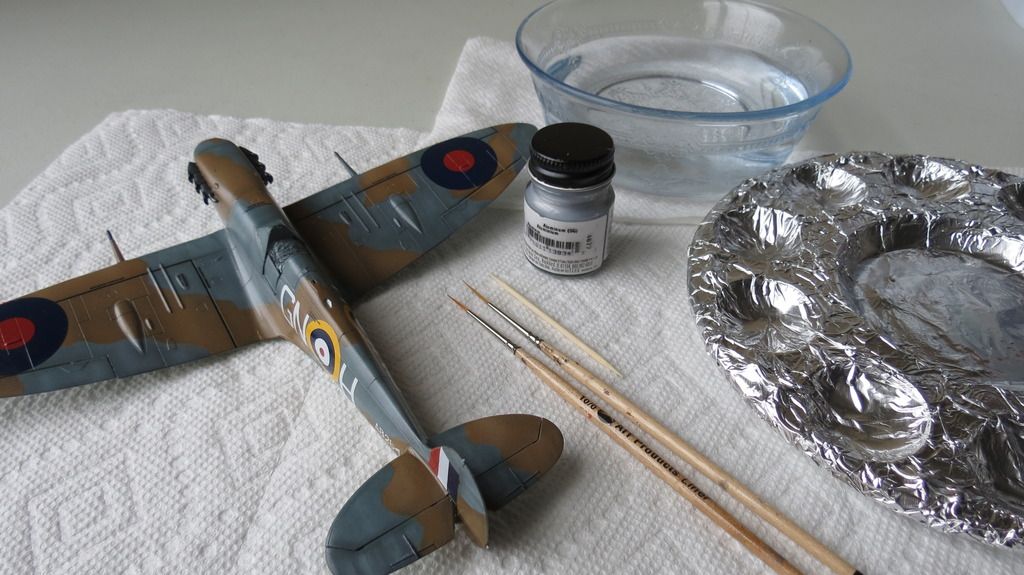
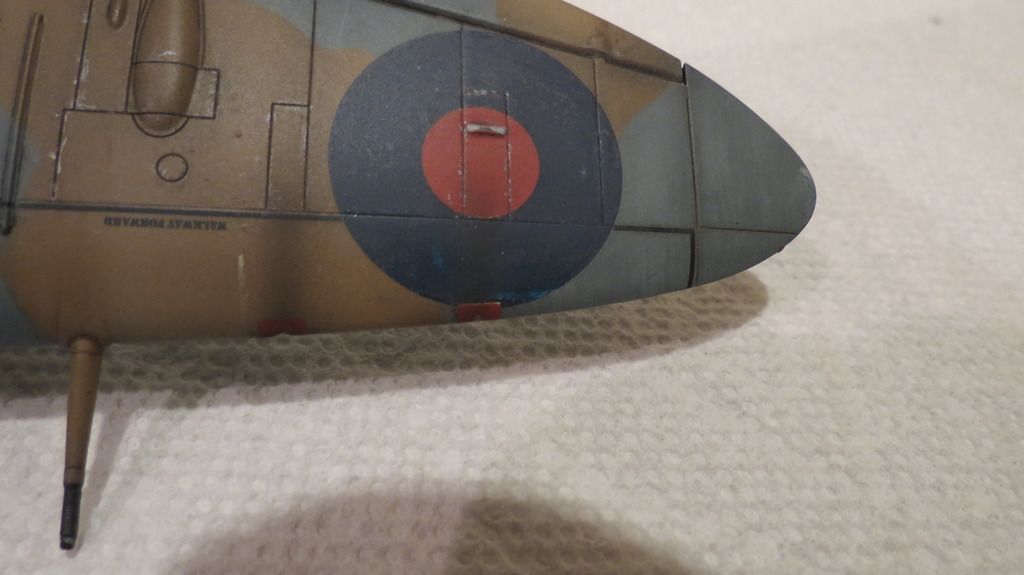
When the clear coat had had time to dry overnight, I then prepared for decaling by getting everything needed together- the decal sheet, tweezers, tooth-pick, cotton bud, scalpel, brush, bowl of water and decal setting solution. I started by applying decals to the upper-side of the wings, then the fuselage sides and top, then when the top-side was completed, I flipped the plane over and applied all the underside decals. The last item to decal was the propeller...


IMG_6544_zps0jccojsi.jpg


IMG_6545_zpski4ikgw1.jpg


IMG_6546_zpsunzymbqx.jpg


IMG_6547_zpsggupgcv9.jpg


IMG_6548_zpslutp3zpk.jpg


IMG_6549_zpsx8ruotqq.jpg


IMG_6561_zpslwtufma9.jpg


IMG_6562_zpsdnwwglmt.jpg


IMG_6563_zpslpwnrwhe.jpg


IMG_6579_zpso50yvjqq.jpg


IMG_6580_zpsa1uis7ew.jpg


When the decals had set, I sealed them and some of the peripheral painted parts with a gloss clear coat...


IMG_6565_zps8h41ygnm.jpg


IMG_6566_zpsw0aqih6m.jpg


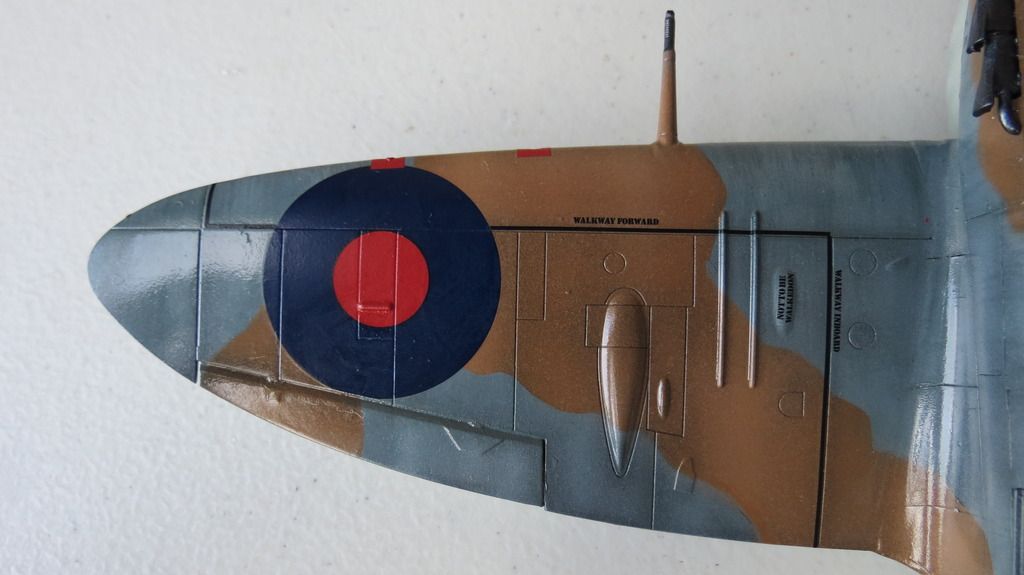
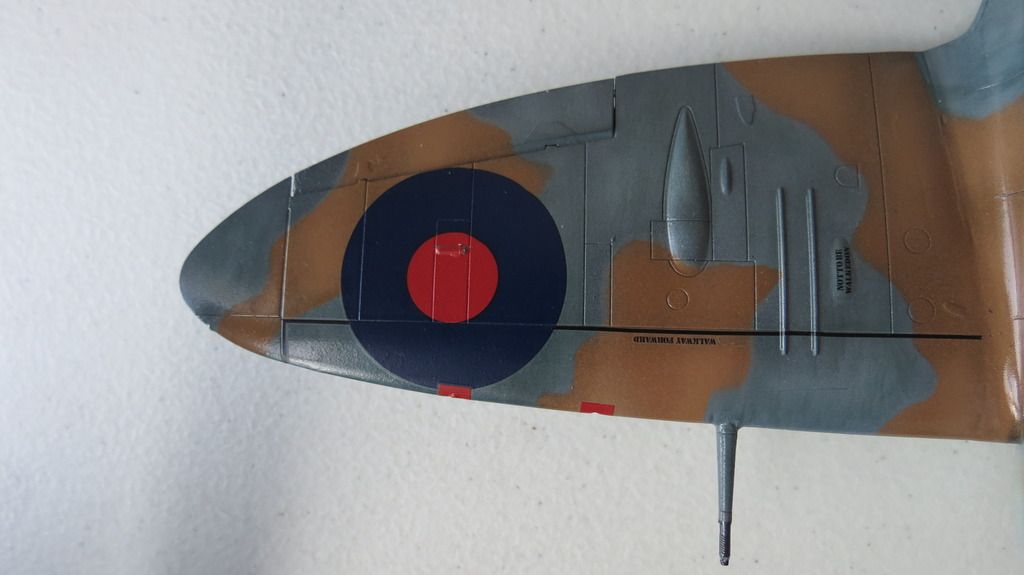
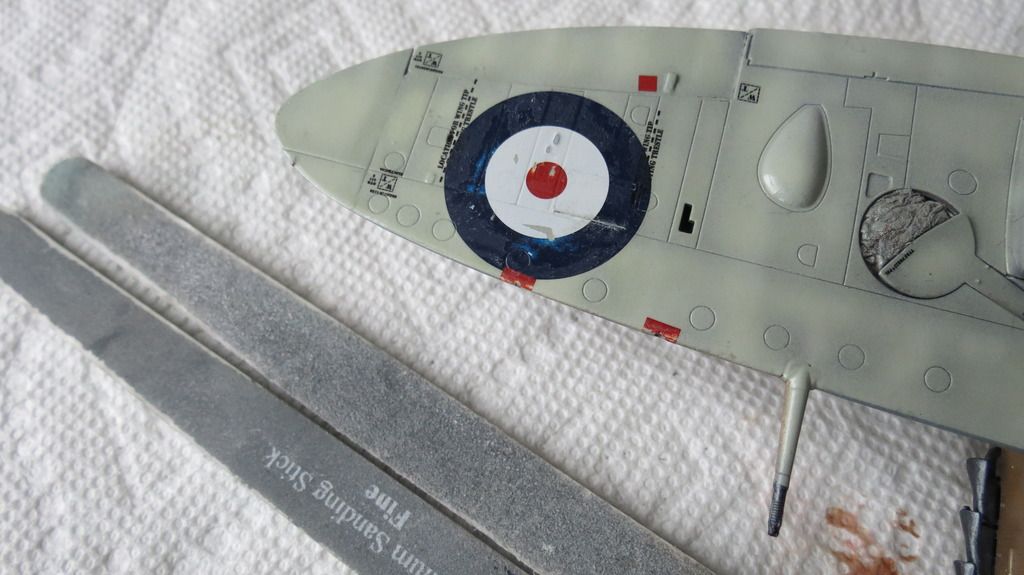
When that clear coat was dry, I moved onto the weathering stage.. I started with applying chipping onto areas that are affected by natural wear and chipping, using Model Masters Aluminum paint. I then scuffed the large decals with sanding sticks to give them a worn appearance...


IMG_6567_zpsuksdib11.jpg


IMG_6570_zpsavvwypca.jpg


IMG_6571_zpsymktb6g3.jpg


IMG_6572_zpsbtvhmb7z.jpg


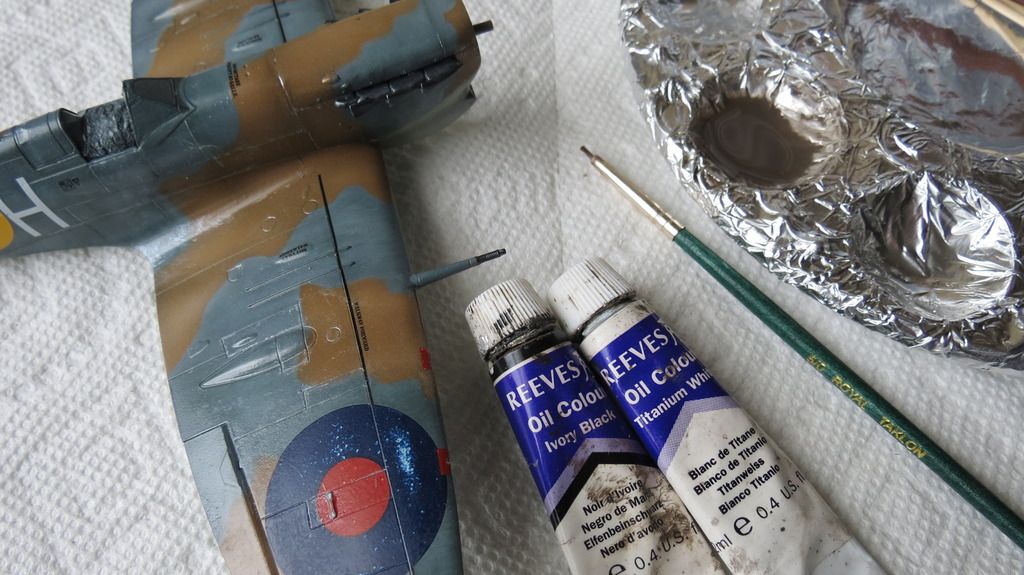
Next to be done was a dark dirt wash that I made by mixing a smidgeon of white oil paint with black and thinning it down with odorless mineral spirits. I liberally brushed this over the whole aircraft, let it dry for 30 minutes, then wiped it off with kitchen roll and cotton buds in the direction of air-flow, leaving on a subtle amount to provide some tonal variations. This also darkened the panel lines somewhat...


IMG_6573_zpsxtqtwecv.jpg


IMG_6574_zpsumtbikje.jpg


IMG_6576_zpse0jjopm1.jpg


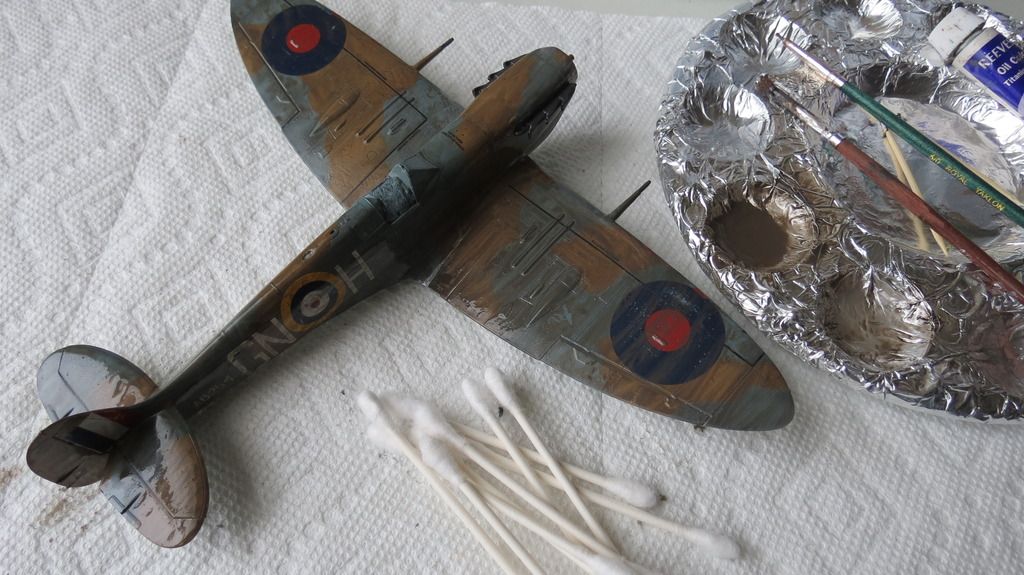
Next, I mixed some white oil paint with odorless mineral spirits and added a smidgeon of the dirt wash to reduce the brightness of the white color. This was then brushed onto the plane, the wheels and the propeller assembly and left to dry for 30 minutes. I then rubbed it off with kitchen roll and cotton buds in the direction of airflow.This application was to produce highlights and "bleaching" of the paint work...


IMG_6577_zps3bj1gdbf.jpg


IMG_6578_zpsvqapyigk.jpg


IMG_6582_zpsviwvtnae.jpg


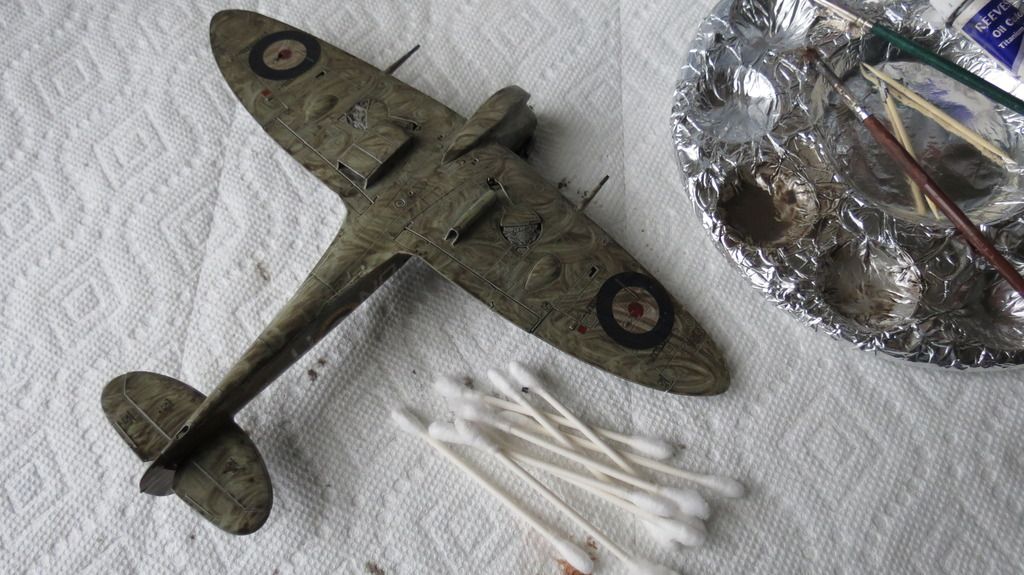
The bleaching lightened some of the previously darkened panel lines, and so, I used a panel line highlight wash to darken them back up...


IMG_6583_zpsntvcoiqr.jpg


IMG_6584_zps3fgpxcnq.jpg


When the panel lines were complete, I then mixed a reddish-brown acrylic wash and applied some streaks and tonal variations to the model, wheels and propeller...


IMG_6585_zpsz4wuvkgq.jpg


IMG_6588_zpsnacbt1xp.jpg


IMG_6590_zps6ocpr4is.jpg


IMG_6587_zpspf8qpnc6.jpg


IMG_6586_zps6t8ed9ob.jpg


With that completed, I then sealed everything with the final matt/flat clear coat...


IMG_6591_zpsnuxun6tb.jpg


IMG_6592_zpskoznu1ku.jpg


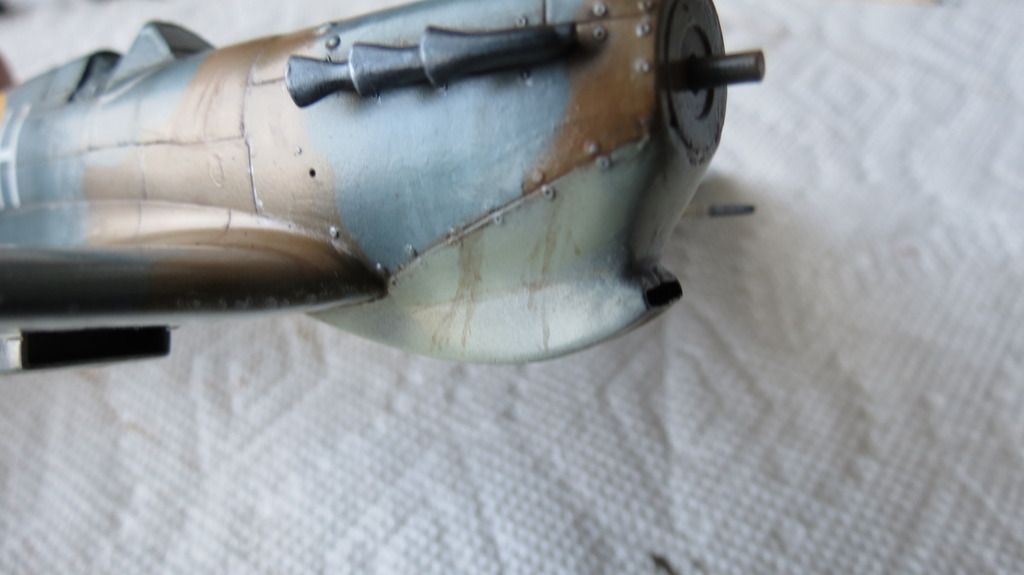
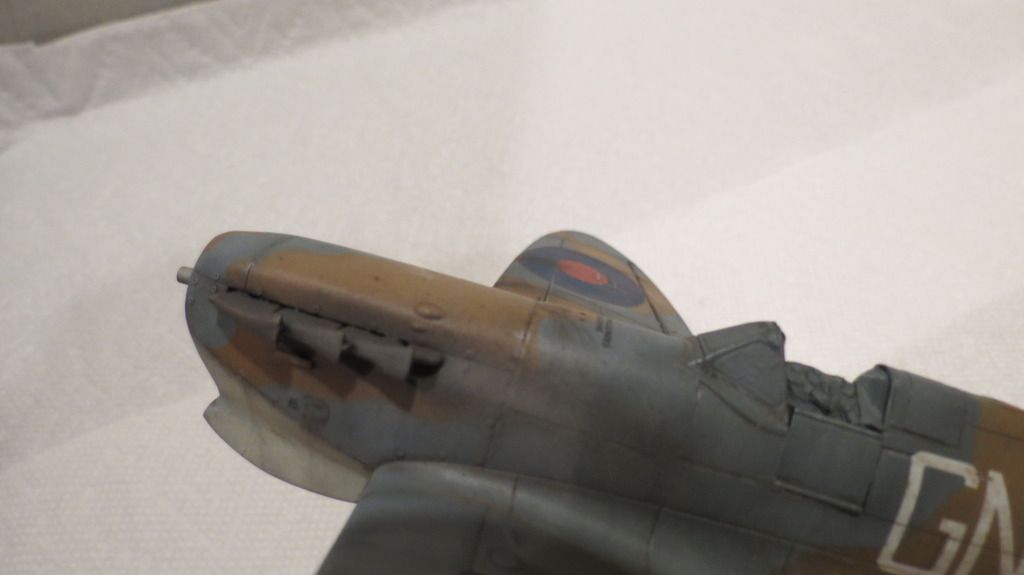
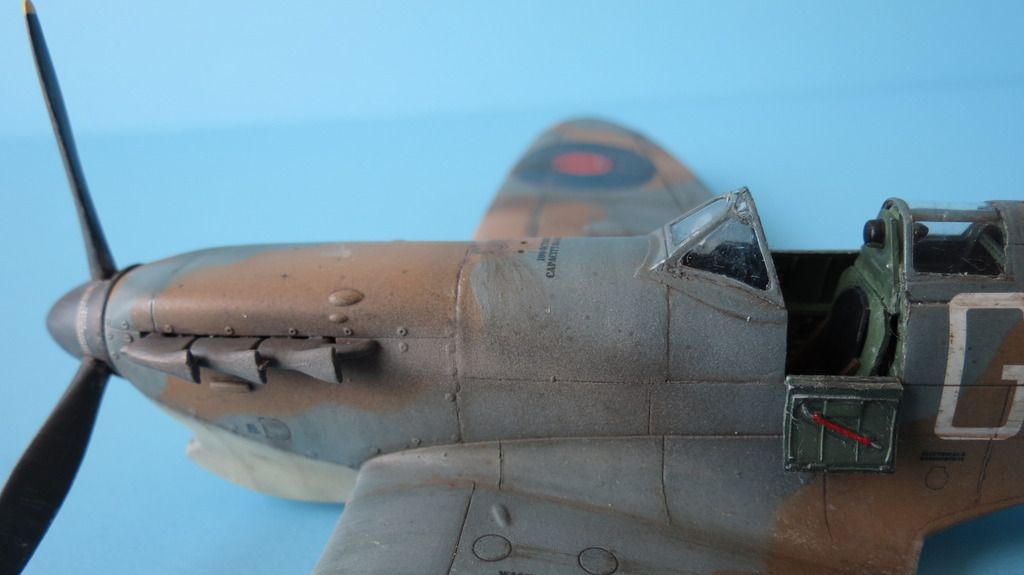
When the matt clear coat was dry, I then moved onto applying the machine gun port stains and the exhaust stains. I mixed some Tamiya Dark Earth with flat black, thinned down 80% then carefully airbrushed the gun port and exhaust stains. I then thinned down some Tamiya "Deck Tan" and airbrushed this on top of the exhaust stains to simulate lead deposits...


IMG_6593_zpsutpfilfw.jpg


IMG_6595_zpsnedpcrov.jpg


IMG_6594_zpssfvzqxag.jpg


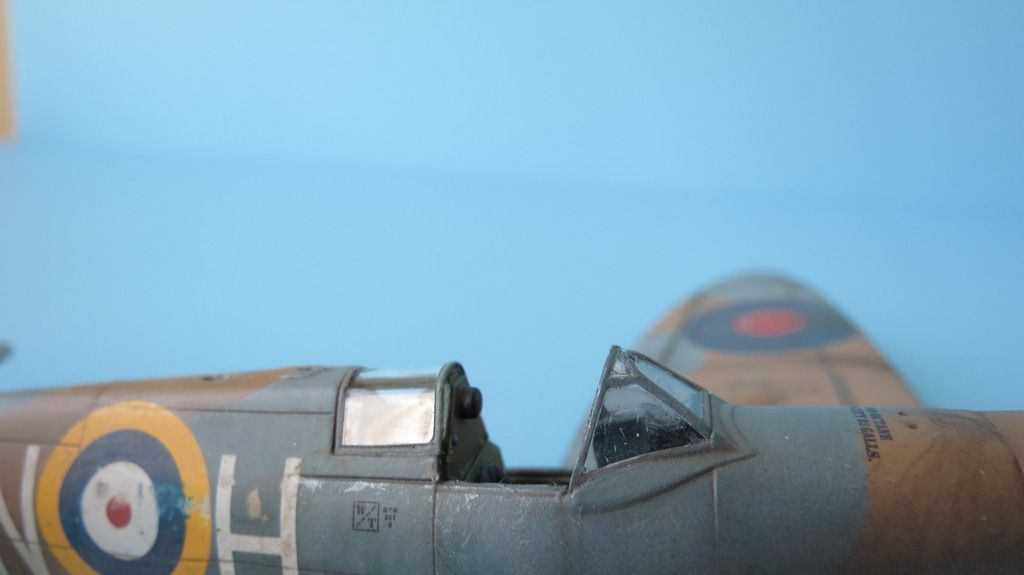
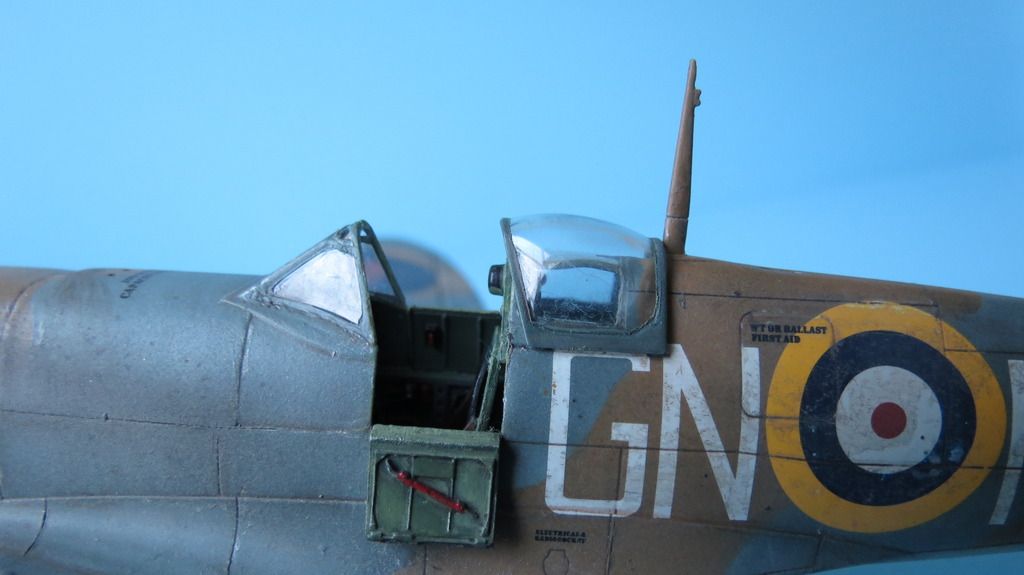
Next, I removed the masks from canopies, along with removing the damp tissue masks from the cockpit. I then glued the propeller in place followed by the Pilot's door in the open position...


IMG_6602_zpsljx9lbpo.jpg


IMG_6603_zpsblmqpi6n.jpg


IMG_6604_zps6urlobf3.jpg


It was now time to assemble the undercarriage, wheel bay doors and rear wheel. But before I did, I removed the doors from the wheel wells, along with the tissue that were masking the insides of the wheel wells. I then applied a dark dirt wash to the insides of the doors and into the wheel wells, let it dry for 30 minutes, then rubbed off the excess, leaving on an amount that provided a dirty appearance...


IMG_6607_zpsybdaemsx.jpg


IMG_6608_zps6qkb3foc.jpg


IMG_6611_zpsnknteqlv.jpg


IMG_6612_zpsvkkisavt.jpg


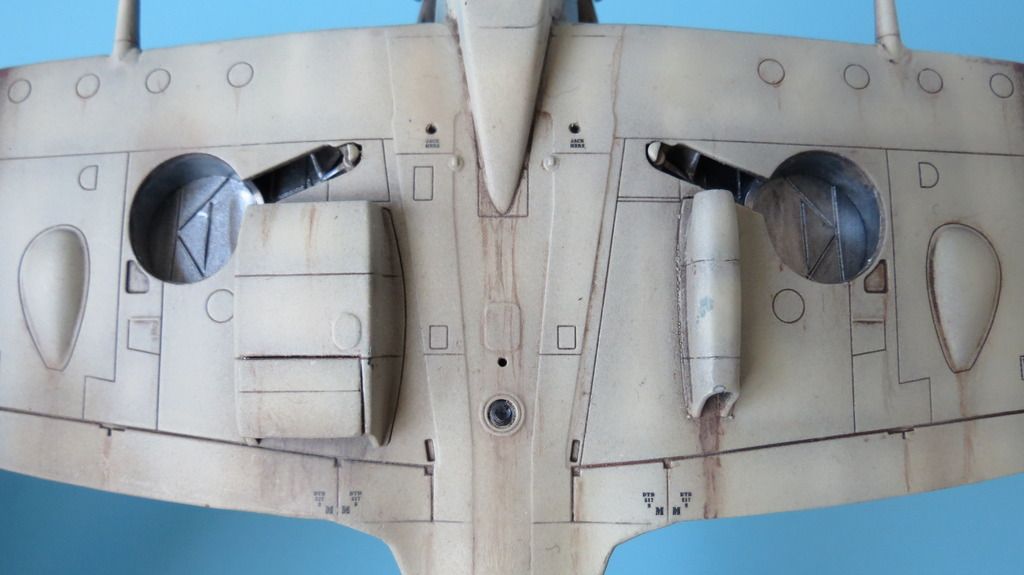
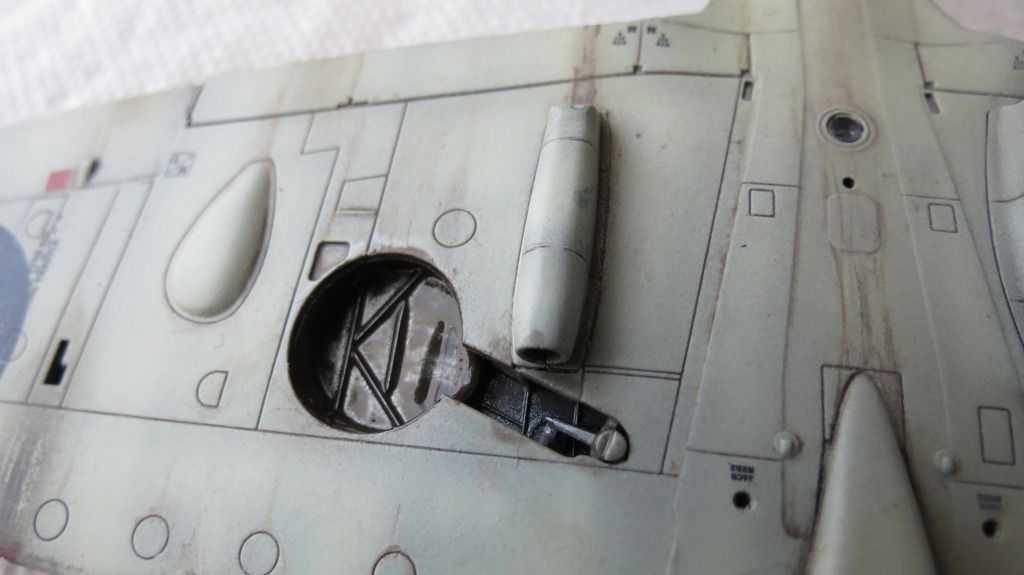
I then assembled the wheel bay doors onto the undercarriage and glued them in place, along with fitting the rear wheel, which was a nice press fit not requiring any glue...


IMG_6613_zpspjpcbkwq.jpg


IMG_6614_zpsgtnlpjdp.jpg


IMG_6633_zps0fw46poa.jpg


IMG_6634_zpsjqzk7mdz.jpg


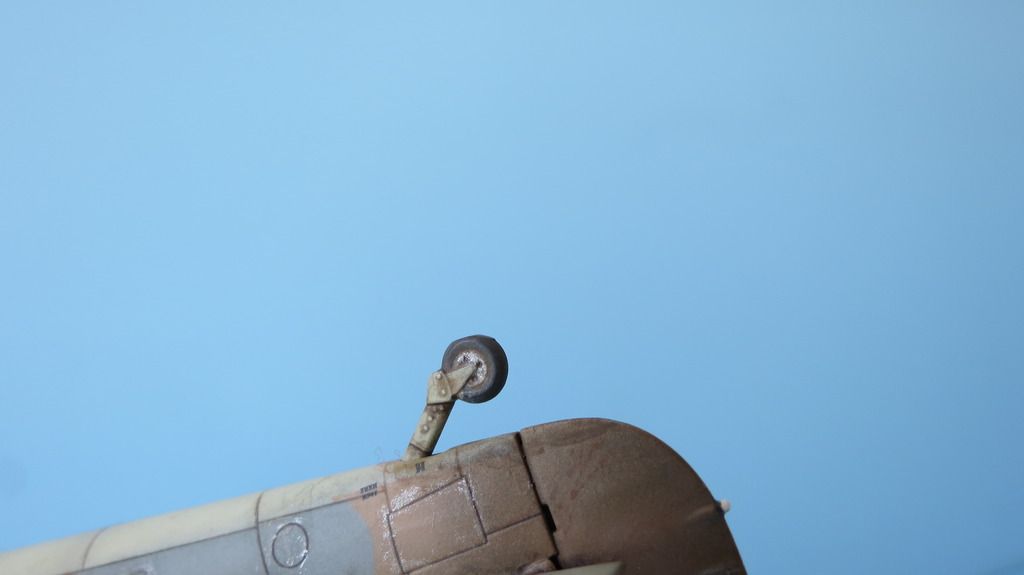
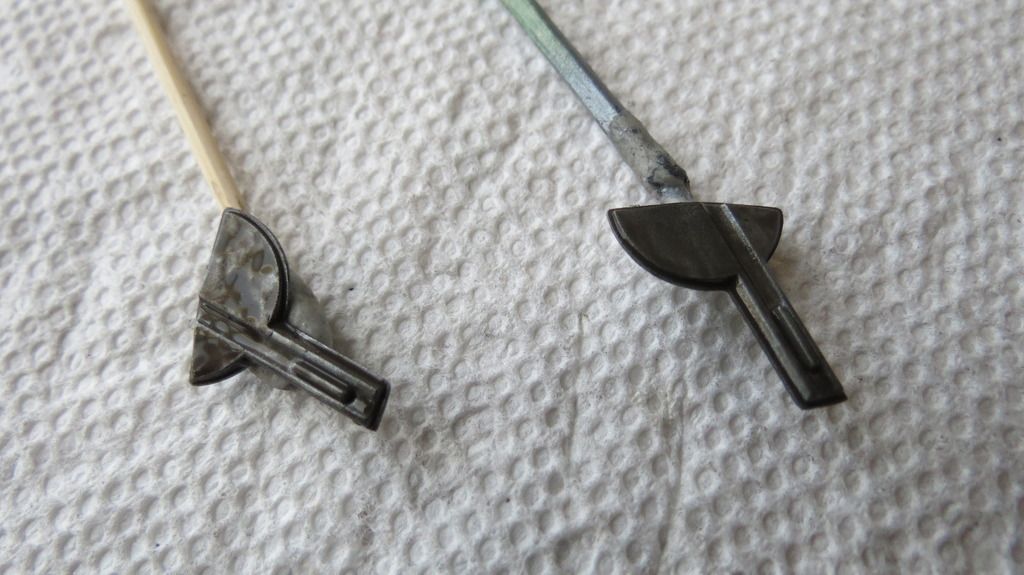
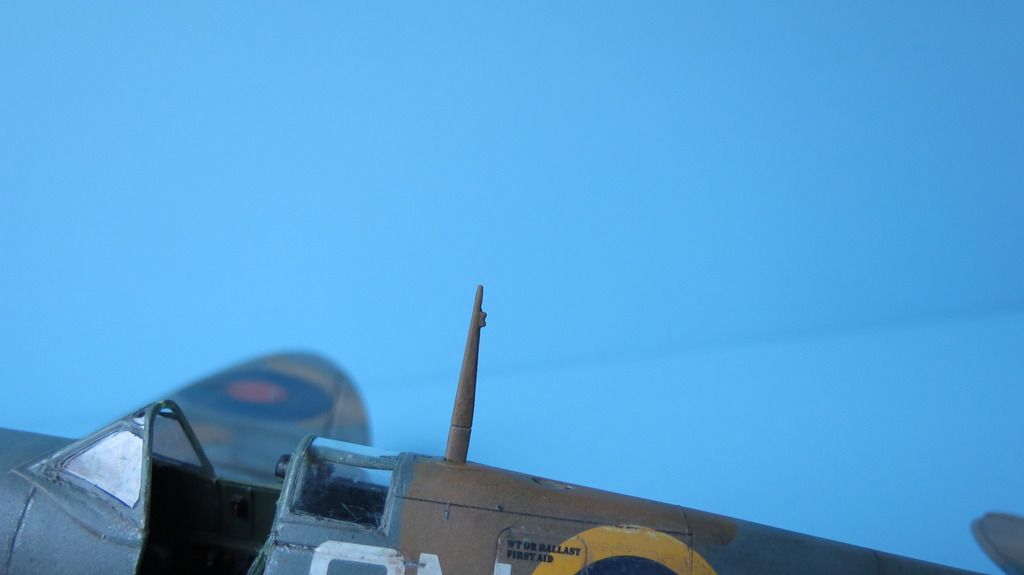
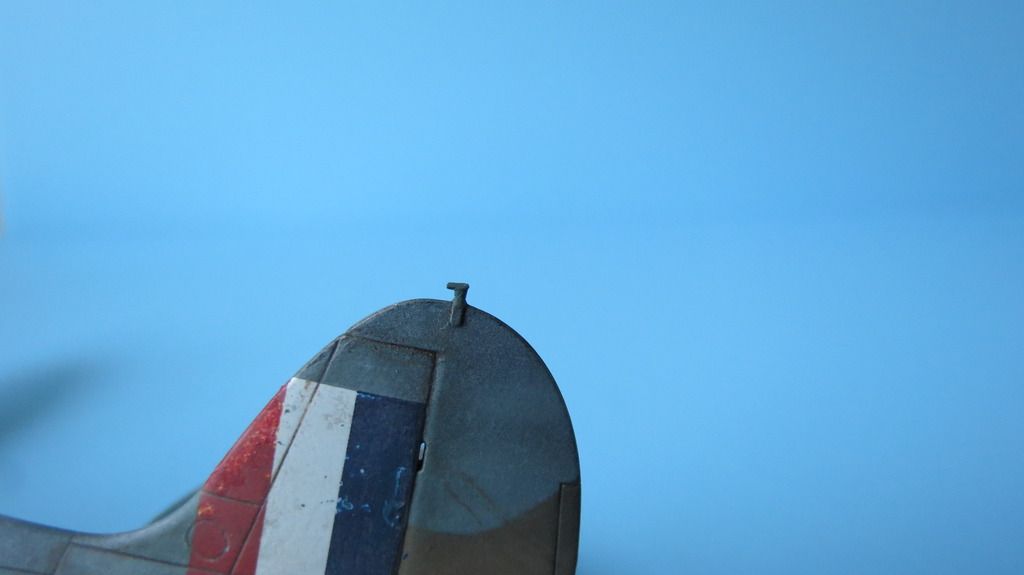
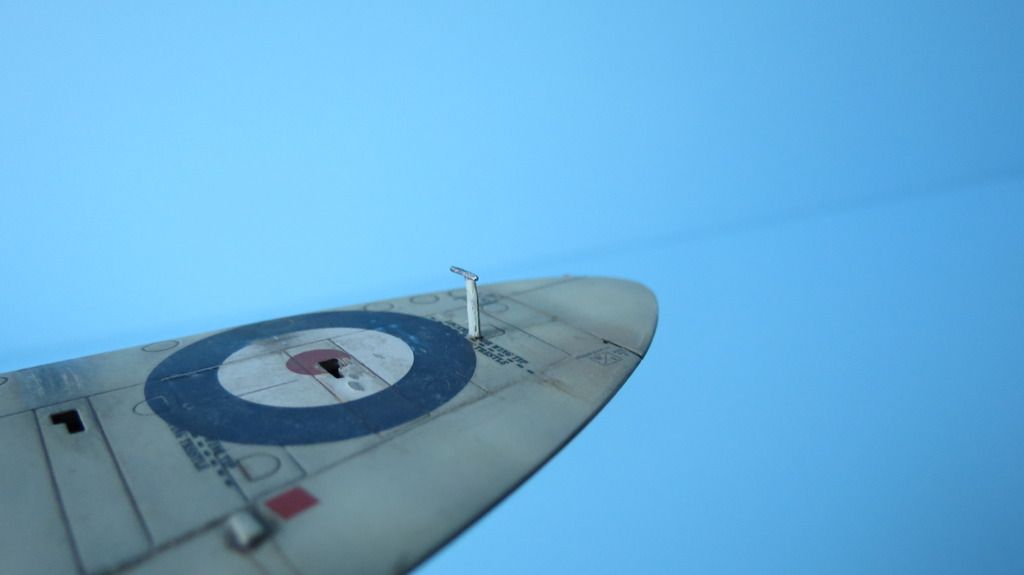
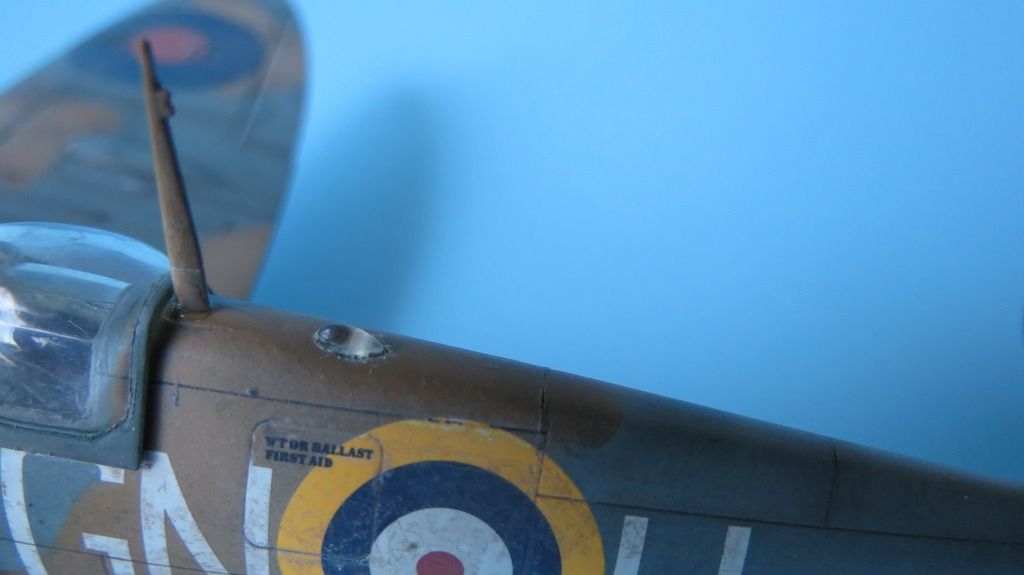
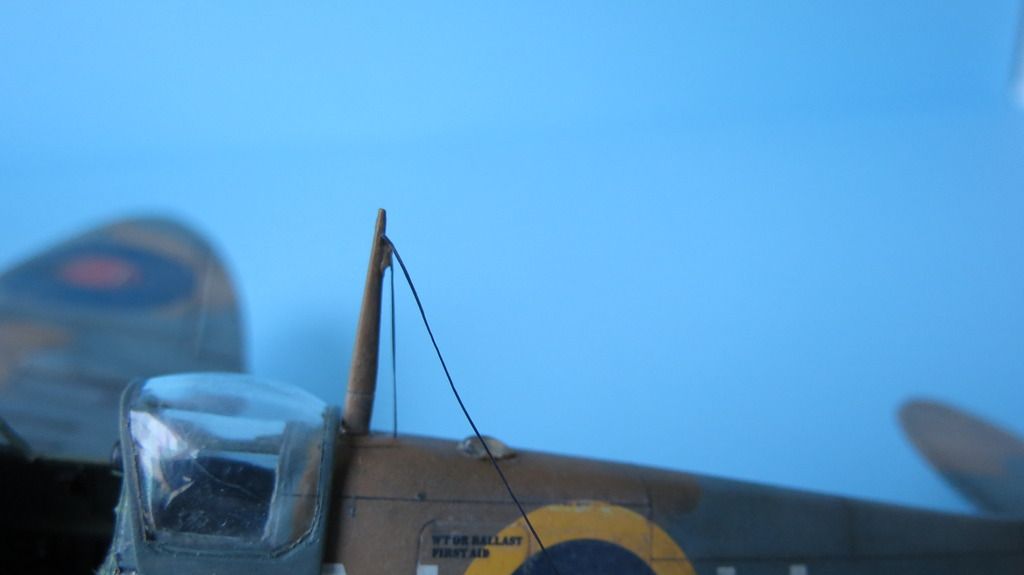
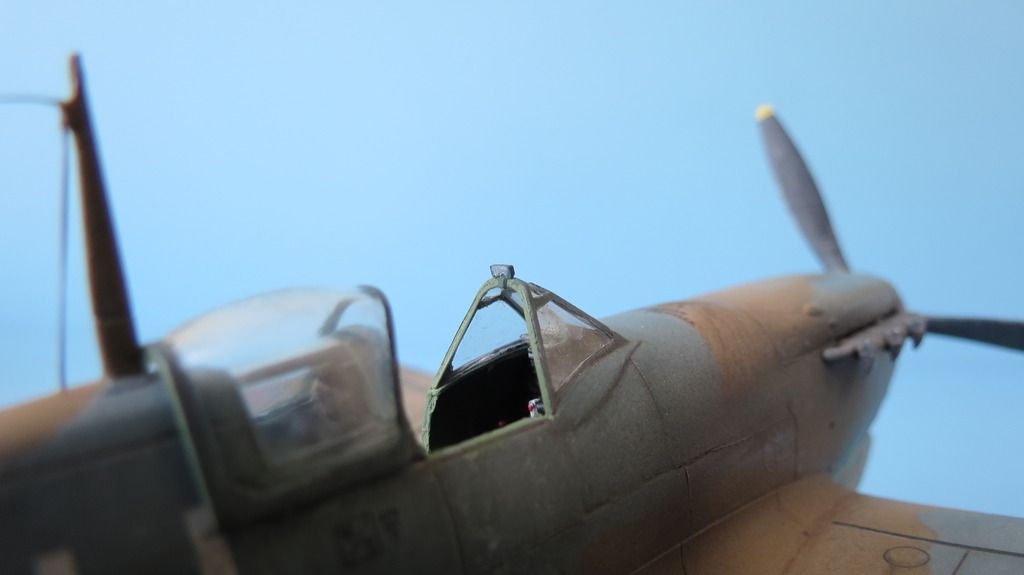
After fitting the wheels, I then glued the antenna mast into place, then carved out of plastic the antenna cable mounting point that locates onto the top of the rudder; the molded in one had broken off during the build process. I then glued the sliding canopy into the open position, followed by the Pitot tube and the upper fuselage light lens...


IMG_6617_zpstpaflpog.jpg


IMG_6619_zps2wytfrd5.jpg


IMG_6620_zpslgf2eu6z.jpg


IMG_6622_zpsybkfe3zd.jpg


IMG_6623_zps4pw4ryom.jpg


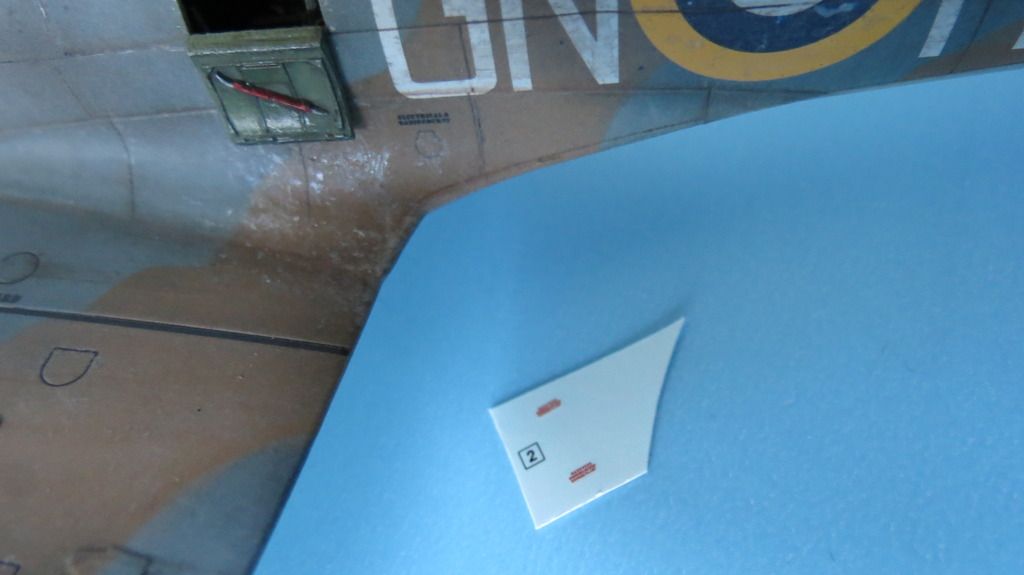
Next, I applied the decals to the inside surface of the Pilot's door and sealed them in with a flat clear coat...


IMG_6624_zpsdpbe88bc.jpg


IMG_6629_zpsqhxch2g6.jpg


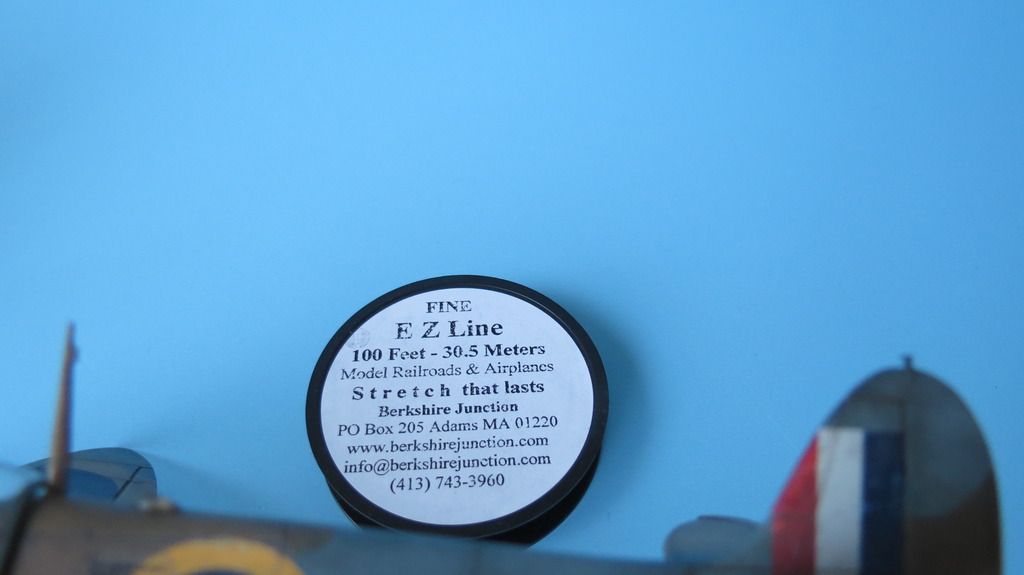
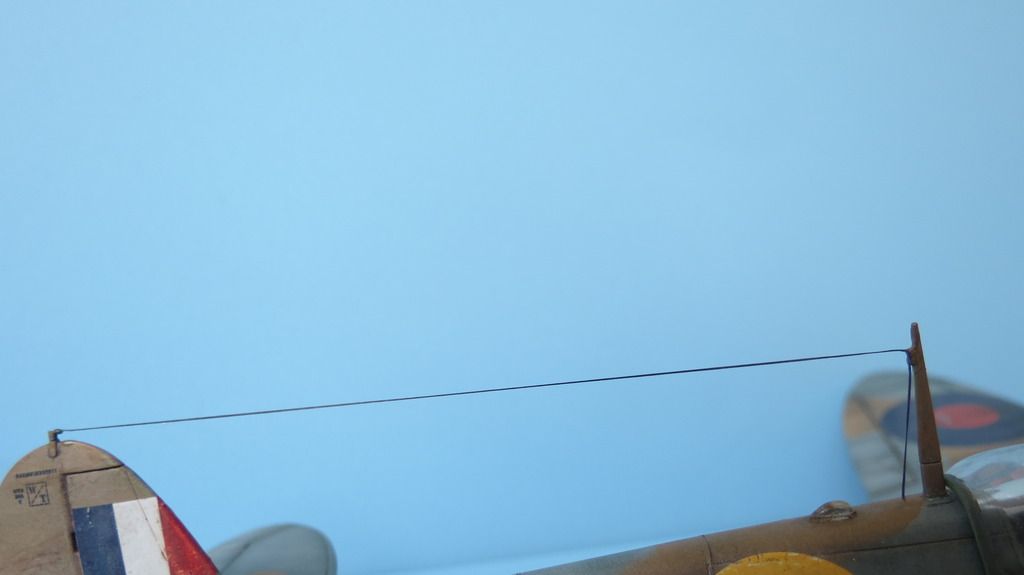
I was nearing the end of the build with just two more things left to do- the first was to glue the antenna cables into place; I used black fine 1.010" diameter EZ-Line. I started out by dipping one end of the EZ-Line into some CA glue, then letting it touch the top of the fuselage, just behind the antenna mast. After about 30 seconds, it had set solid, so, I applied a drop of CA glue to the connection point on the rear of the antenna mast and stretched the EZ-Line up to that point, pressing it against it with the tip of a cocktail stick until it had set in place. I then put a drop of CA glue onto the rudder mounting point, using the tip of a cocktail stick, then stretched the EZ-Line up to the rudder mounting point, and again, holding the EZ-Line against the mounting point with the tip of a cocktail stick until it was set in place. I then snipped off the excess to complete the antenna cabling...


IMG_6625_zpsretnibq6.jpg


IMG_6626_zpscdec4pny.jpg


IMG_6631_zps4b0isnwk.jpg


The last thing to do to complete the build, was to glue the Pilot's rear-view mirror onto the top of the windshield and paint it....


IMG_6630_zpselrcet2f.jpg


Well, that's this build all done now until my "Final Reveal"" post that will be put on here during Sunday.


In the meantime, if you'd like to watch my YouTube "Build Update #2" video for this report, then here is the link to that:  


https://youtu.be/Gtc9BdqfvG8


Thanks in advance for taking a look at this post, the video and for leaving any comments, greatly appreciated!


Until my "Final Reveal", happy modeling and have fun!


Cheers

Martin


  • Member since
    November 2003
  • From: Naples, FL
Posted by tempestjohnny on Friday, April 15, 2016 5:09 AM
Absolutely stunning Martin. I never understood people who said the Spitfire was boring. John (the other UK guy in the USA)


  • Member since
    January 2006
  • From: Pineapple Country, Queensland, Australia
Posted by Wirraway on Friday, April 15, 2016 6:33 AM
Very Nice ! I can see you doing kit reviews in FSM in the not to distant future....

"Growing old is inevitable; growing up is optional"

" A hobby should pass the time - not fill it"  -Norman Bates


GIF animations generator gifup.com

  • Member since
    March 2015
  • From: Streetsboro, Ohio
Posted by Toshi on Friday, April 15, 2016 7:50 AM

Such detail.  You did a fantastic job of n this build.

Toshi

On The Bench: Revell 1/48 B-25 Mitchell


Married to the most caring, loving, understanding, and beautiful wife in the world.  Mrs. Toshi


  • Member since
    August 2013
Posted by Jay Jay on Friday, April 15, 2016 8:05 AM

Ty so much Martin for doing the you tube W.I.P. 's   I enjoy every minute of them and always gain valuable information while watching your skilled presentaions.

Beer cheers Mate.


 I'm finally retired. Now time I got, money I don't.

  • Member since
    November 2009
  • From: SW Virginia
Posted by Gamera on Friday, April 15, 2016 8:51 AM

Wow! I don't know how I missed your earlier posts but that's stunning work! 

"I dream in fire but work in clay." -Arthur Machen


  • Member since
    June 2014
Posted by BrandonK on Friday, April 15, 2016 9:02 AM

Wow Martin, that is a spectacular build. Very nice work indeed. Bow Down

BK

On the bench:

A lot !! And I mean A LOT!!

2024 Kits on deck / in process / completed   

                         14 / 5 / 2  

                              Tongue Tied

  • Member since
    August 2015
  • From: the redlands Fl
Posted by crown r n7 on Friday, April 15, 2016 9:49 AM

Awesome 


 Nick.

  • Member since
    February 2007
  • From: Brunswick, Ohio
Posted by Buckeye on Friday, April 15, 2016 11:28 AM

Well done and thank you for that excellent WIP thread.Yes

Mike

  • Member since
    January 2015
Posted by BrandonD on Tuesday, April 19, 2016 12:43 PM

Excellent job, Martin! I love that scheme on a Spitfire.

-BD-

  • Member since
    April 2015
  • From: New Hampshire, USA
Posted by UKguyInUSA on Wednesday, April 20, 2016 10:46 AM

tempestjohnny
Absolutely stunning Martin. I never understood people who said the Spitfire was boring. John (the other UK guy in the USA)


Thanks John, much appreciated, and now way is the Spitfire boring...it's such a superb design that still looks like it fits in today...so majestic and graceful, yet deadly at the same time!


Just about to post my "Final Reveal"!


Cheers  Smile

Martin

  • Member since
    April 2015
  • From: New Hampshire, USA
Posted by UKguyInUSA on Wednesday, April 20, 2016 10:47 AM

Wirraway
Very Nice ! I can see you doing kit reviews in FSM in the not to distant future....
 

Thank you for your very kind comment, Wirraway, much appreciated! I'd love to do kit reviews/build reports for FSM, if they felt I was worthy enough to do so...I have plenty of time in my retirement!


Cheers  Smile

Martin

  • Member since
    April 2015
  • From: New Hampshire, USA
Posted by UKguyInUSA on Wednesday, April 20, 2016 10:49 AM

Toshi

Such detail.  You did a fantastic job of n this build.

Toshi


  Thanks Toshi, greatly appreciated mate! I'm about to post my "Final Reveal"!


Cheers Smile

Martin

  • Member since
    April 2015
  • From: New Hampshire, USA
Posted by UKguyInUSA on Wednesday, April 20, 2016 10:51 AM

Jay Jay

Ty so much Martin for doing the you tube W.I.P. 's   I enjoy every minute of them and always gain valuable information while watching your skilled presentaions.

Beer cheers Mate.


You're welcome Jay Jay and I'm happy that you like them, it makes doing them worthwhile!


Thanks for the kind compliment, greatly appreciated!


I'm back between packing ready for my move this coming weekend...I managed to get her completed, will be posting soon!


Cheers Smile

Martin

  • Member since
    April 2015
  • From: New Hampshire, USA
Posted by UKguyInUSA on Wednesday, April 20, 2016 10:52 AM

Gamera

Wow! I don't know how I missed your earlier posts but that's stunning work! 


Thanks for your very kind comment, Gamera, greatly appreciated!


Cheers   Smile

Martin

  • Member since
    April 2015
  • From: New Hampshire, USA
Posted by UKguyInUSA on Wednesday, April 20, 2016 10:55 AM

BrandonK

Wow Martin, that is a spectacular build. Very nice work indeed. Bow Down

BK


Thank you kindly Brandon, I'm happy you like her!


I managed to get her completed this week, in between packing for my move to our new home this coming weekend and I'm here to share the final result!


Cheers Smile

Martin

  • Member since
    April 2015
  • From: New Hampshire, USA
Posted by UKguyInUSA on Wednesday, April 20, 2016 10:56 AM

crown r n7

Awesome 


  Thanks Crown, greatly appreciated!


Cheers   Smile

Martin

  • Member since
    April 2015
  • From: New Hampshire, USA
Posted by UKguyInUSA on Wednesday, April 20, 2016 10:57 AM

Buckeye

Well done and thank you for that excellent WIP thread.Yes

Mike


  Thank you Mike, much appreciated, and, you're welcome for the WIP thread, I'm happy you liked it!


Cheers Smile

Martin

  • Member since
    April 2015
  • From: New Hampshire, USA
Posted by UKguyInUSA on Wednesday, April 20, 2016 10:58 AM

BrandonD

Excellent job, Martin! I love that scheme on a Spitfire.

-BD-


  Thanks Brandon, much appreciated!


Yes, this is the first time I have done this color scheme and I have to say, I think I much prefer it to the standard dark earth/dark green camo pattern...it looks pretty cool!


Cheers Smile

Martin

  • Member since
    April 2015
  • From: New Hampshire, USA
Posted by UKguyInUSA on Wednesday, April 20, 2016 11:02 AM

Hello Chaps,


I finally got my Spitfire completed in between packing boxes to move to our new home this coming weekend! My next build won't happen until we're fully settled and my hobby area has been fully set up, so I'm guessing towards the end of May.


Anyway, I built this kit straight from the box (OOB), as I always do, to determine a VFM- "Value For Money" factor in order to perhaps help other modelers thinking about buying this kit decide whether it is worthy of any investment.


During the build, I did encounter two issues:

1) The wing root to fuselage joint areas had gaps that needed some filler and smoothing down with lost panel lines having to be re-scribed after the sanding. A easy fix to remedy. It would be easy for some modelers to push the wing-tips upwards to close the gaps tight during the cementing stage, but the dihedral would be incorrect with a much larger angle created, producing a somewhat flaccid "V" shape when viewed from the front.


2) The rear upper cowling that incorporates the front end of the cockpit, onto which the gun-sight is mounted, has a larger profile geometry than that of the front upper cowling to which it mates. It therefore stands proud by about 0.5 to 0.75mm and requires smoothing down and blending to the front cowling. Again, lost panel lines from this process require re-scribing.


I'm surprised by the two issues with the knowledge that this kit was new tooling in 2014, which means Airfix have had two years to address the molds to correct them. Maybe they have been corrected and the kit I purchased was one from an earlier run in 2014. But, that said, surely a manufacturing company would check the fits of their products prior to releasing them on the market, and if they did check, are we to assume Airfix let the issues go, to satisfy the pressure from their Sales and Marketing division to meet the release date deadline promised to their customers/suppliers of these kits to us, the consumers?


Apart from the above two issues, everything else went together great. The decals are excellent, as I have always found with the more recent Airifx kits, and look painted on when applied to a gloss clear coat surface.


The molded product was clean, crisp and without warp, sink and ejector pin stress marks or witness marks on seen surfaces. Flash was zero if next to nothing, but expected from a new tooling. The panel lines are nicely recessed- not too deep or wide as can be seen on some of the Airfix kits, these are a definite improvement.


The kit comes with two options of colors and markings, which are outlined in my WIP kit review and updates. I chose to go with the first option, that of a Royal Canadian Air Force squadron used in Malta during "Operation Spotter", which has a Sea Grey and Dark Earth camouflage color, the Sea Grey being painted over the Stone color of the typical two-brown Tropical camo pattern. The Sea Grey has a bluish-green tint to it which is called out as Humbrol 27. I mixed a couple of Tamiya paints to get a shade that I liked the look of; XF-54 Dark Sea Grey with a few drops of XF-50 Field Blue, then added white to tone it down in an attempt to give the aircraft a bleached appearance of which I imagine aircraft would have had after weeks of sitting in the hot Mediterranean sun on the Island of Malta and from the salt air and sand erosion.


Because of the two options of markings, there are different options of canopy, air filters, oil coolers and radiators- the Maltese version having a deeper "Vokes" air filter, oil cooler and radiator. It also includes a extra long range fuel (slipper) tank that fits to the underside of the fuselage and wraps around the "Vokes" air filter. I chose to leave this off because my boy is staying local around the Island of Malta and he prefers his bird to be more streamlined and more maneuverable without the hindrance of extra cargo.


The kit also includes bombs, which are not required for either of the two versions on offer, but could be utilized if after-market decals are purchased to represent Mk.Vb's that were used as fighter-bombers and dive-bombers, roles to which they were not well suited.


The cockpit is nicely detailed and would be furthered enhanced with the addition of after-market seat-belts.


There are no separate flap components with this kit, as there are with other Airfix Spitfires, they are molded solid, so no dropping the flaps down to produce some extra interest. The ailerons are also molded solid, bit the elevators and rudder are separate components.


The undercarriage can be modeled up or down, and at first glance, one feels that the design of the location areas for fitting into the wheel wells isn't particularly solid. The end of the oleo struts has a step that locates onto a step inside the wheel well. It doesn't look positive enough and also seems not to provide enough surface area for cementing. But, that said, when it came to gluing them together, I used a spot of CA glue on each of the opposing step joints, held the wheels in place for 30 seconds whilst visually checking that the angles of location looked good, and, hey presto, I was surprised that they were solid once set. Meanwhile, the rear wheel is a nice push fit into the tail of the plane and required no glue.


The assembly, painting and decal instruction booklet is very clear, concise and easily understandable, using nice 3D CAD images for the assembly instructions and color illustrations for the painting and decaling guides.


This kit costs $21.53 in the USA- that's about 15.00 pounds at today's exchange rate, and, it presently costs 18.99 pounds from Hannants in the UK. Therefore, it's around 4.00 pounds cheaper in the USA. Is it VFM- "Value For Money"....I'd say that it was reasonable, not excellent VFM, based on the fact that for exactly $2.00 more, I can buy a Revell of Germany 1/32 Supermarine Spitfire Mk.IIa that offers a lot more volume/weight of molded product and is a nice larger kit that goes together without issues...I know, I built one!


Would I recommend this kit: Yes, apart from the two issues and it's price not offering great value, it is a great representation of a Mk.Vb Spitfire, probably considered one of the best and most loved versions of this iconic aircraft and I had fun building it.


My personal opinion regarding a score out of 10: I would give this kit 8 out of 10, based on the above.


Okay, enough of the rambling and lets get down to sharing my attempt at modeling this aircraft, but first, I apologize for all the photos, I was experimenting with three background colors, white, bIack and blue and I couldn't decide which I preferred. I hope you like!


IMG_6412_zpsw8slpg6t.jpg


IMG_6419_zpshynwaixn.jpg


IMG_6429_zpsc6doag9j.jpg


IMG_6436_zpsuur4oqj8.jpg


IMG_6872_zpsujagb09c.jpg


IMG_6862_zpsgdjiz190.jpg


IMG_6880_zpsag9j10zn.jpg


IMG_6834_zpsi4akd53g.jpg


IMG_6683_zpsqkcgx0bg.jpg


IMG_6724_zps3hzabqiw.jpg


IMG_6887_zpso3osqcqj.jpg


IMG_6894_zpsokliviwr.jpg


IMG_6896_zpsikberncz.jpg


IMG_6826_zpsluh26z5p.jpg


i-phone%202_zpsima9siaj.jpg


i-phone%201_zpsyutzemzt.jpg


i-phone%203_zpsmktd1lo1.jpg


IMG_6952_zpsawjmhq2l.jpg


IMG_6736_zpszflsij8t.jpg


IMG_6740_zpsrm8wstx3.jpg


IMG_6685_zpsnkybqb2x.jpg


IMG_6681_zpshkvcm7tr.jpg


IMG_6852_zpsby36jqex.jpg


IMG_6704_zps9yvb44u4.jpg


IMG_6933_zpsuq4mrbfs.jpg


IMG_6943_zps2dk0iboy.jpg


IMG_6950_zpsbbbhnkg3.jpg


IMG_6874_zpsun0mud59.jpg


IMG_6930_zpssskrp8ip.jpg


IMG_6935_zpsahpoqfok.jpg


IMG_6920_zpscus6gbyk.jpg


IMG_6697_zpsyyjmpcgw.jpg


IMG_6709_zpsjr2xof5d.jpg


IMG_6858_zps1jnicwy4.jpg


IMG_6855_zpsdw9smxhc.jpg


Well, there she is my last build until my next build which will be a huge project- the Airfix 1/24 Hawker Typhoon Mk.1b!


In the meantime, if you'd like to watch my YouTube "Final Reveal" video for this build, here is the link to that: https://youtu.be/AKddHmJ_chs


Thanks in advance for your comments on this posting, for those that have followed this build and for watching the video, it is greatly appreciated!


Have fun and happy modeling!

Cheers

Martin


  • Member since
    February 2012
  • From: Olmsted Township, Ohio
Posted by lawdog114 on Friday, April 22, 2016 10:31 PM
I dig.....very impressive oil work.

 "Can you fly this plane and land it?...Surely you can't be serious....I am serious, and don't call me Shirley"


JOIN OUR COMMUNITY!

Our community is FREE to join. To participate you must either login or register for an account.

SEARCH FORUMS
FREE NEWSLETTER
By signing up you may also receive reader surveys and occasional special offers. We do not sell, rent or trade our email lists. View our Privacy Policy.