SEARCH FINESCALE.COM

Enter keywords or a search phrase below:

Airfix 1/48 Supermarine Spitfire Mk.Vb "FINAL REVEAL!!"

7695 views
44 replies
1 rating 2 rating 3 rating 4 rating 5 rating
  • Member since
    January 2015
Posted by BrandonD on Wednesday, August 10, 2016 12:34 PM

Thanks for the review, Martin. I have been on the fence with this kit, mainly because I really don't need another Spitfire (I've built five and still have two in the stash), but I don't have a Vb Trop, and I don't have one by an English kitmaker, which seems like some sort of blasphemy.

I really do love the scheme you did, and I love that Airfix has a dropped elevators option, as they almost always sat that way on the ground.

-BD-

  • Member since
    April 2015
  • From: New Hampshire, USA
Posted by UKguyInUSA on Wednesday, August 10, 2016 12:29 PM

Aggieman

Beautiful Spitfire. I love the weathering that you have there. I have too many Spits in the stash already or I likely would get this kit.


 Thanks Aggie, greatly appreciated! Is there such thing as too many Spits?! Stick out tongue

  • Member since
    April 2015
  • From: New Hampshire, USA
Posted by UKguyInUSA on Wednesday, August 10, 2016 12:28 PM

allan

Thats a really nice Spit. Nice seeing the WIPs too. Thanks for sharing!


 Thanks Allan, greatly appreciated....you're welcome for the WIPs, I enjoy doing them Smile

  • Member since
    September 2005
  • From: North Pole, Alaska
Posted by richs26 on Wednesday, May 18, 2016 3:42 PM

Excellent build and weathering job.  There is only one very slight error which everyone does, is that the escape crowbar on the door is unpainted on the WW2 versions.  Postwar it was painted red.  WW2 US aircraft have the same kind of error that everybody does.  The fire extinguishers are not red, but are brass or bronze.

WIP:  Monogram 1/72 B-26 (Snaptite) as 73rd BS B-26, 40-1408, torpedo bomber attempt on Ryujo

Monogram 1/72 B-26 (Snaptite) as 22nd BG B-26, 7-Mile Drome, New Guinea

Minicraft 1/72 B-24D as LB-30, AL-613, "Tough Boy", 28th Composite Group

  • Member since
    August 2009
  • From: Borlando Fla home of the rat
Posted by TREYZX10R on Wednesday, May 18, 2016 12:32 PM

Martin the time & effort you put in with the layers of paint and weathering really paid off. Very nicely done Sir!

  • Member since
    February 2007
  • From: Brunswick, Ohio
Posted by Buckeye on Wednesday, May 18, 2016 11:23 AM

What color do you use on your tires?  I really like they way they came out.  Mine are always too black and look fake.

Mike

  • Member since
    April 2015
  • From: New Hampshire, USA
Posted by UKguyInUSA on Wednesday, May 18, 2016 8:53 AM

patrick206

Shazzam!!!! 

You're a right wizard of a builder, Martin. Just an excellent Spit, a total A++++ start to finish. I really enjoy your detailed posts and photos, much to be learned by following your WIP reports. Thank you very much indeed, for your many efforts.

Patrick


Thanks for your very kind comment, Patrick, greatly appreciated and you're very welcome for the detailed posts, I enjoy doing them Smile

  • Member since
    June 2014
Posted by BrandonK on Friday, May 6, 2016 8:46 AM

That turned out really nice. It looks well used. Great job.

BK

On the bench:

A lot !! And I mean A LOT!!

2024 Kits on deck / in process / completed   

                         14 / 5 / 2  

                              Tongue Tied

  • Member since
    November 2009
  • From: SW Virginia
Posted by Gamera on Friday, May 6, 2016 7:56 AM

Wow, she turned out fantastic!!! I'm going to have to pull out an old kit and try your oil techniques myself. Yes

"I dream in fire but work in clay." -Arthur Machen


  • Member since
    December 2010
  • From: Salem, Oregon
Posted by 1943Mike on Thursday, May 5, 2016 7:49 PM

I love this build! The painting/weathering work you do is outrageously good.

So much to learn, so little time.


Mike

"Le temps est un grand maître, mais malheureusement, il tue tous ses élèves."

Hector Berlioz

  • Member since
    April 2015
  • From: New Hampshire, USA
Posted by UKguyInUSA on Thursday, May 5, 2016 2:19 PM

lawdog114
I dig.....very impressive oil work.
 

  Thanks Joe, greatly appreciated!


Cheers Smile

Martin

  • Member since
    April 2016
Posted by Barnaby Bartholomew Drinscott Braithwaite on Tuesday, April 26, 2016 11:13 AM

A splendiferous rendition of a majestic iconic aircraft, very well executed old chap! Smile

  • Member since
    January 2015
  • From: Katy, TX
Posted by Aggieman on Sunday, April 24, 2016 9:54 PM

Beautiful Spitfire. I love the weathering that you have there. I have too many Spits in the stash already or I likely would get this kit.

  • Member since
    June 2003
  • From: Cavite, Philippines
Posted by allan on Sunday, April 24, 2016 9:29 PM

Thats a really nice Spit. Nice seeing the WIPs too. Thanks for sharing!

No bucks, no Buck Rogers

  • Member since
    March 2013
Posted by patrick206 on Sunday, April 24, 2016 2:57 PM

Shazzam!!!! 

You're a right wizard of a builder, Martin. Just an excellent Spit, a total A++++ start to finish. I really enjoy your detailed posts and photos, much to be learned by following your WIP reports. Thank you very much indeed, for your many efforts.

Patrick

  • Member since
    February 2012
  • From: Olmsted Township, Ohio
Posted by lawdog114 on Friday, April 22, 2016 10:31 PM
I dig.....very impressive oil work.

 "Can you fly this plane and land it?...Surely you can't be serious....I am serious, and don't call me Shirley"


  • Member since
    April 2015
  • From: New Hampshire, USA
Posted by UKguyInUSA on Wednesday, April 20, 2016 11:02 AM

Hello Chaps,


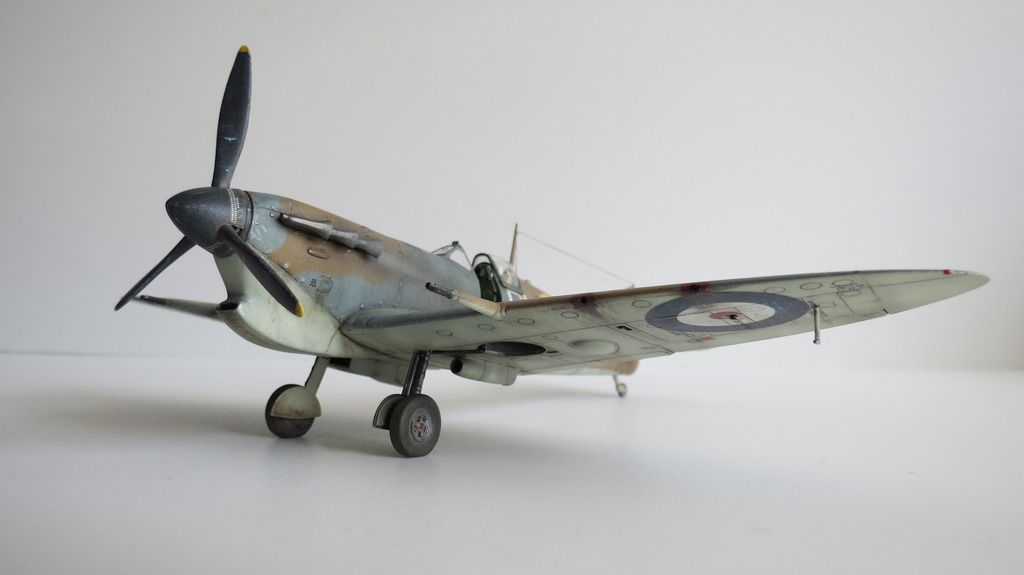
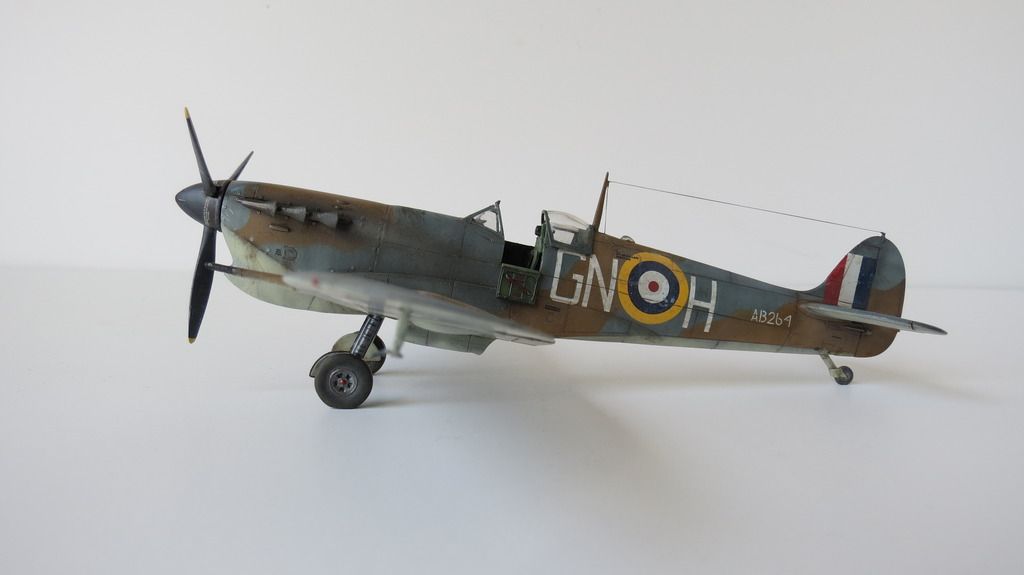
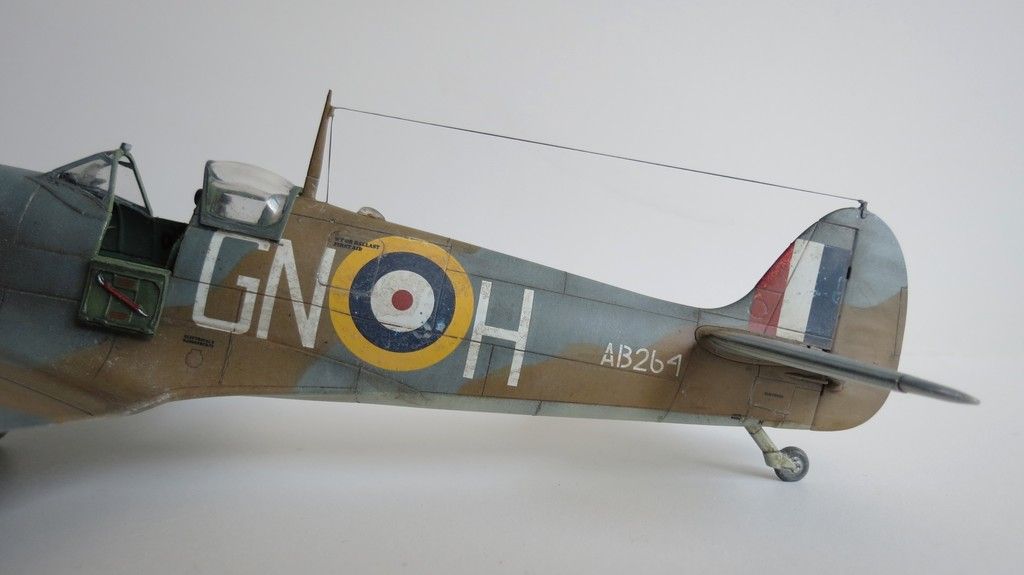
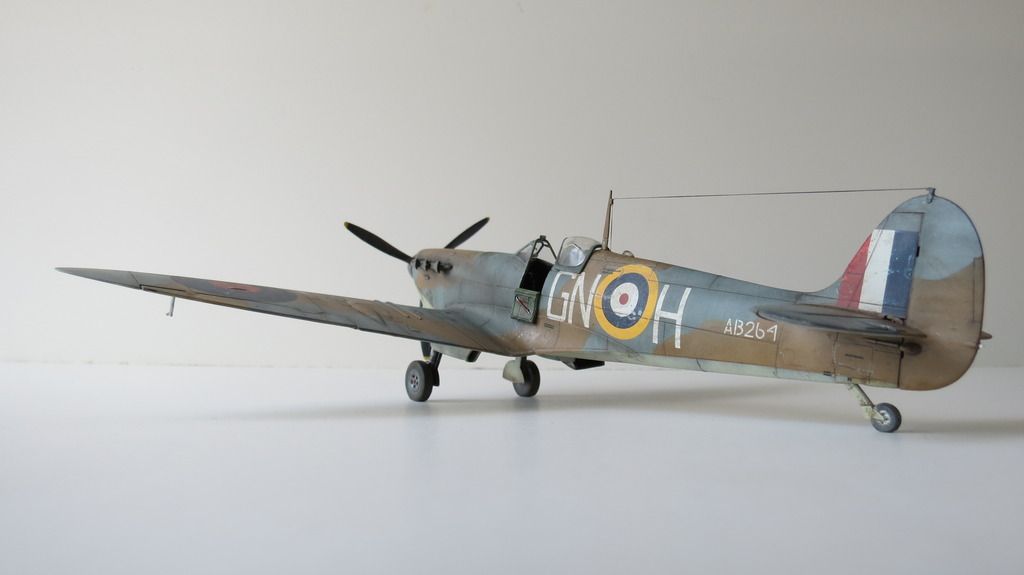
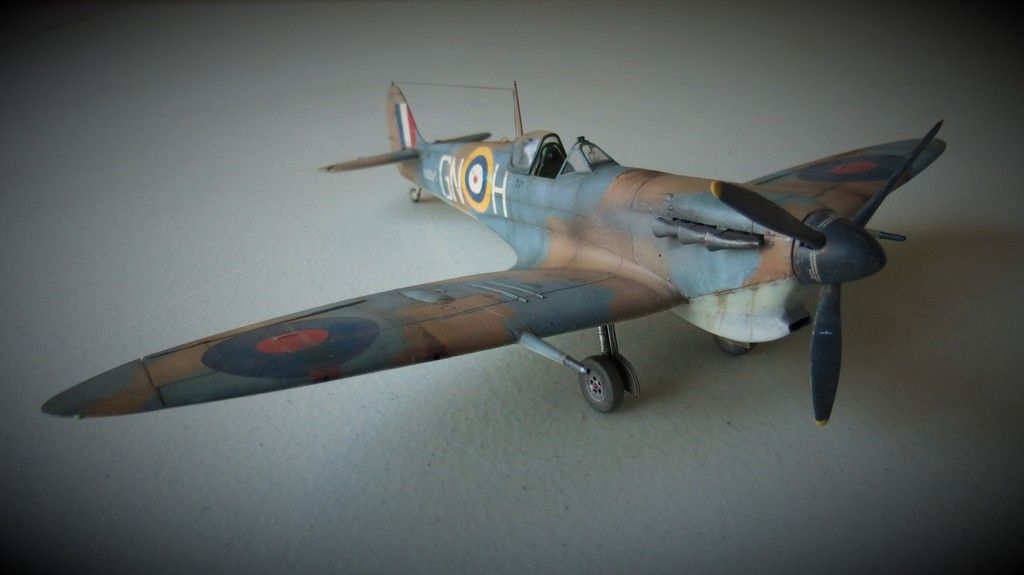
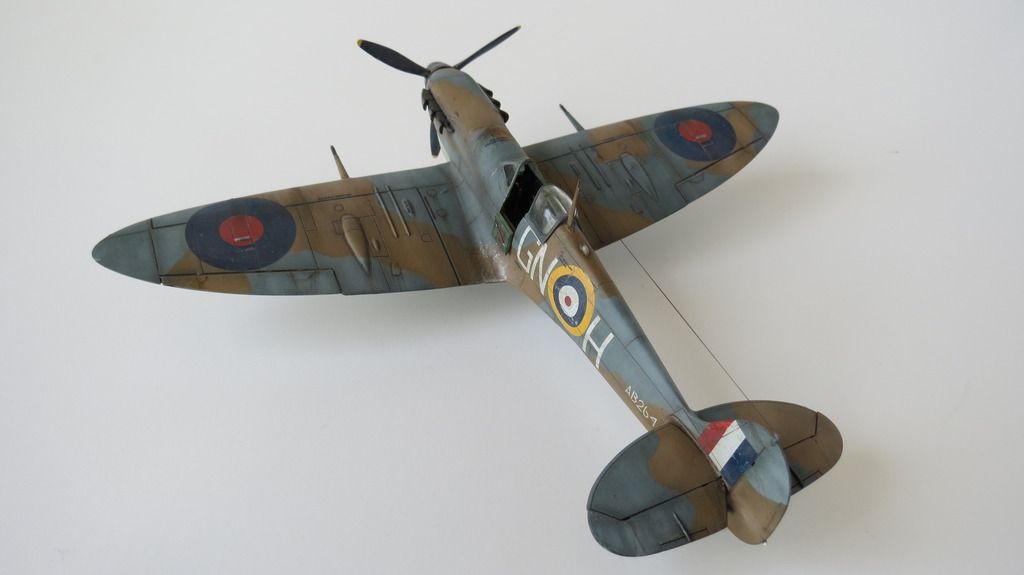
I finally got my Spitfire completed in between packing boxes to move to our new home this coming weekend! My next build won't happen until we're fully settled and my hobby area has been fully set up, so I'm guessing towards the end of May.


Anyway, I built this kit straight from the box (OOB), as I always do, to determine a VFM- "Value For Money" factor in order to perhaps help other modelers thinking about buying this kit decide whether it is worthy of any investment.


During the build, I did encounter two issues:

1) The wing root to fuselage joint areas had gaps that needed some filler and smoothing down with lost panel lines having to be re-scribed after the sanding. A easy fix to remedy. It would be easy for some modelers to push the wing-tips upwards to close the gaps tight during the cementing stage, but the dihedral would be incorrect with a much larger angle created, producing a somewhat flaccid "V" shape when viewed from the front.


2) The rear upper cowling that incorporates the front end of the cockpit, onto which the gun-sight is mounted, has a larger profile geometry than that of the front upper cowling to which it mates. It therefore stands proud by about 0.5 to 0.75mm and requires smoothing down and blending to the front cowling. Again, lost panel lines from this process require re-scribing.


I'm surprised by the two issues with the knowledge that this kit was new tooling in 2014, which means Airfix have had two years to address the molds to correct them. Maybe they have been corrected and the kit I purchased was one from an earlier run in 2014. But, that said, surely a manufacturing company would check the fits of their products prior to releasing them on the market, and if they did check, are we to assume Airfix let the issues go, to satisfy the pressure from their Sales and Marketing division to meet the release date deadline promised to their customers/suppliers of these kits to us, the consumers?


Apart from the above two issues, everything else went together great. The decals are excellent, as I have always found with the more recent Airifx kits, and look painted on when applied to a gloss clear coat surface.


The molded product was clean, crisp and without warp, sink and ejector pin stress marks or witness marks on seen surfaces. Flash was zero if next to nothing, but expected from a new tooling. The panel lines are nicely recessed- not too deep or wide as can be seen on some of the Airfix kits, these are a definite improvement.


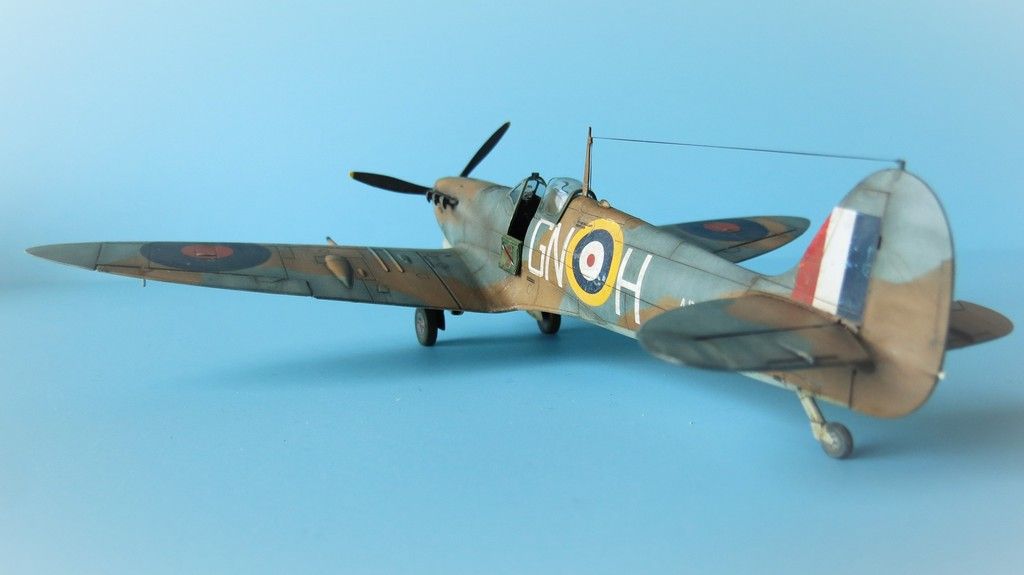
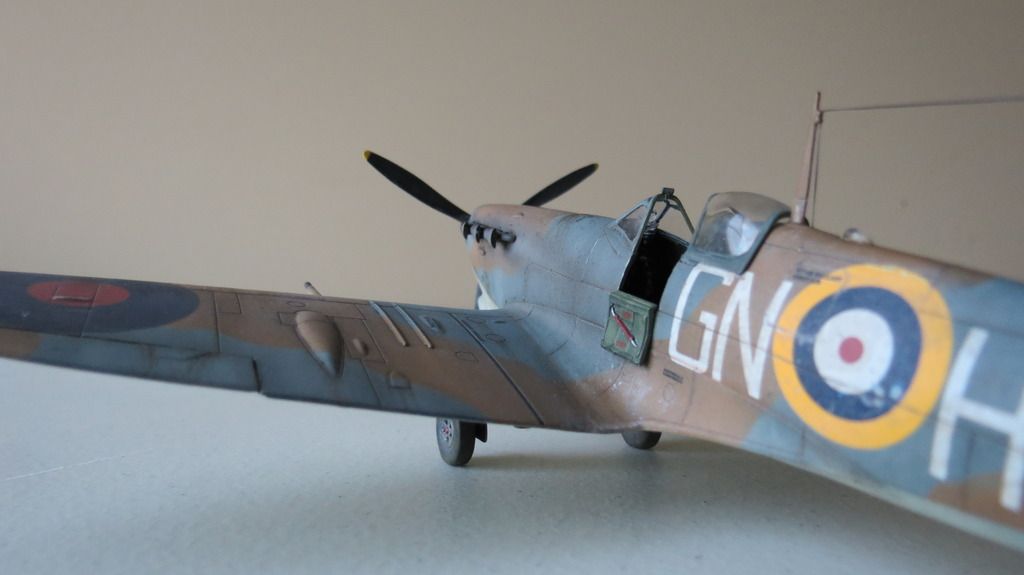
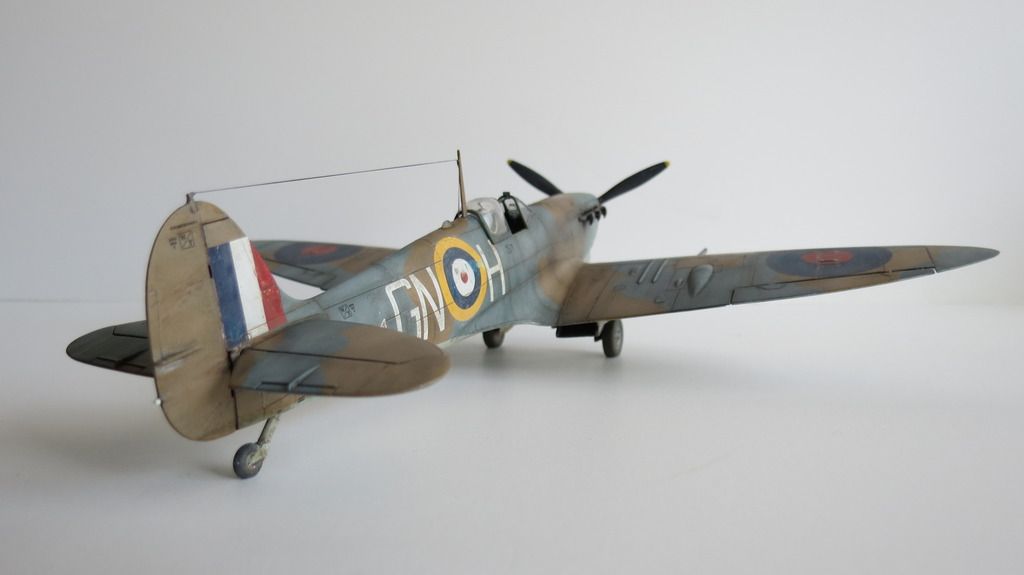
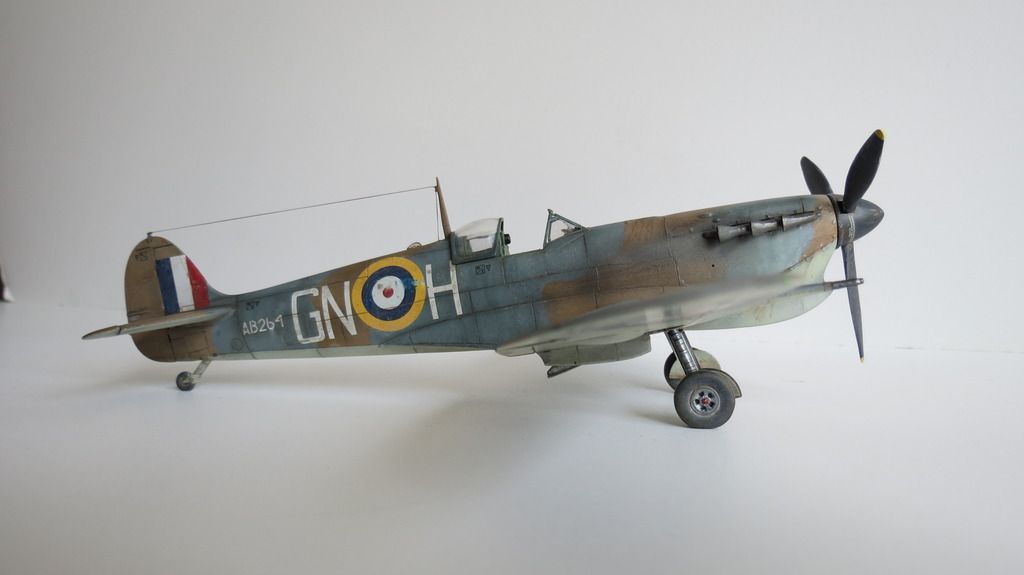
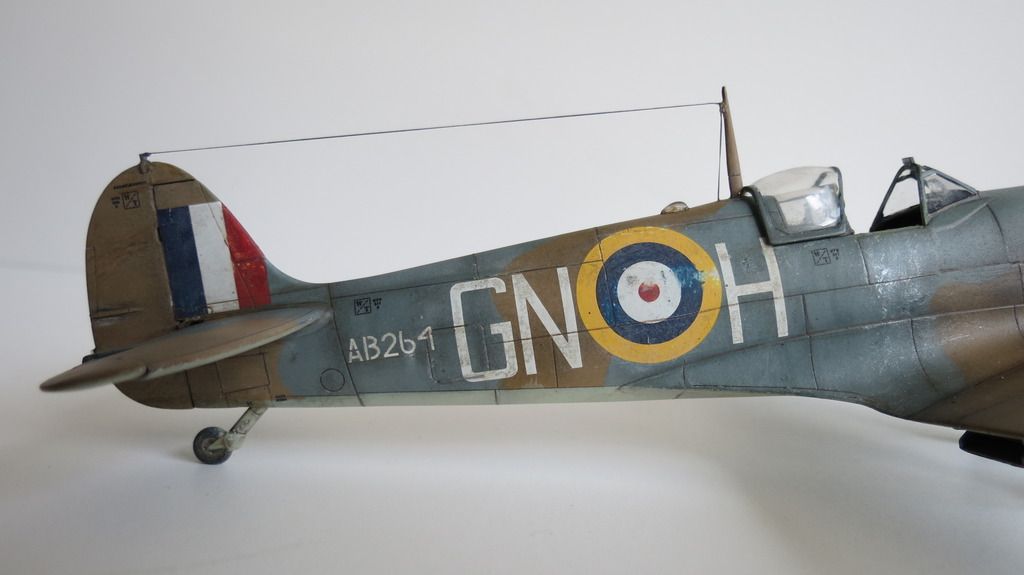
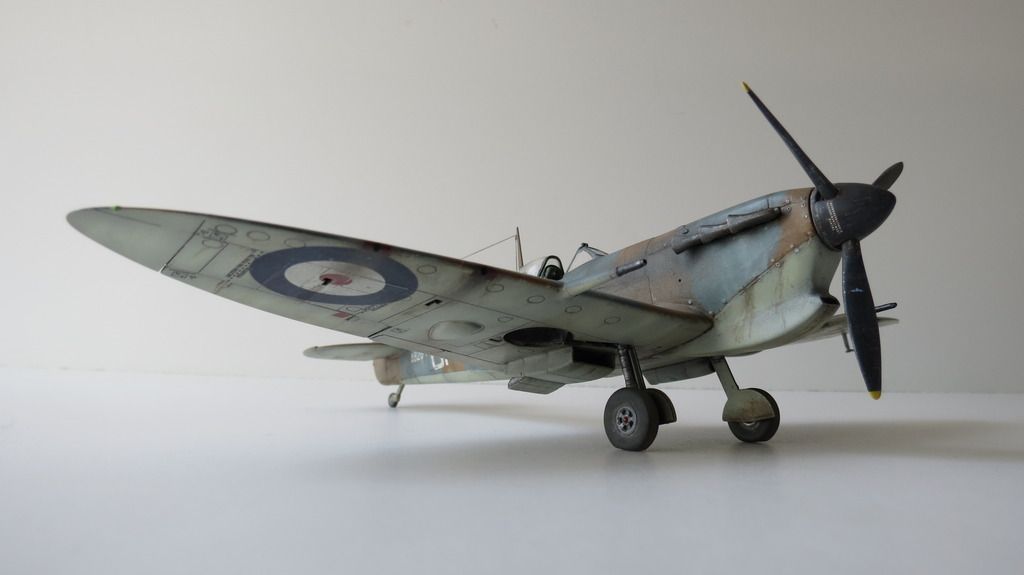
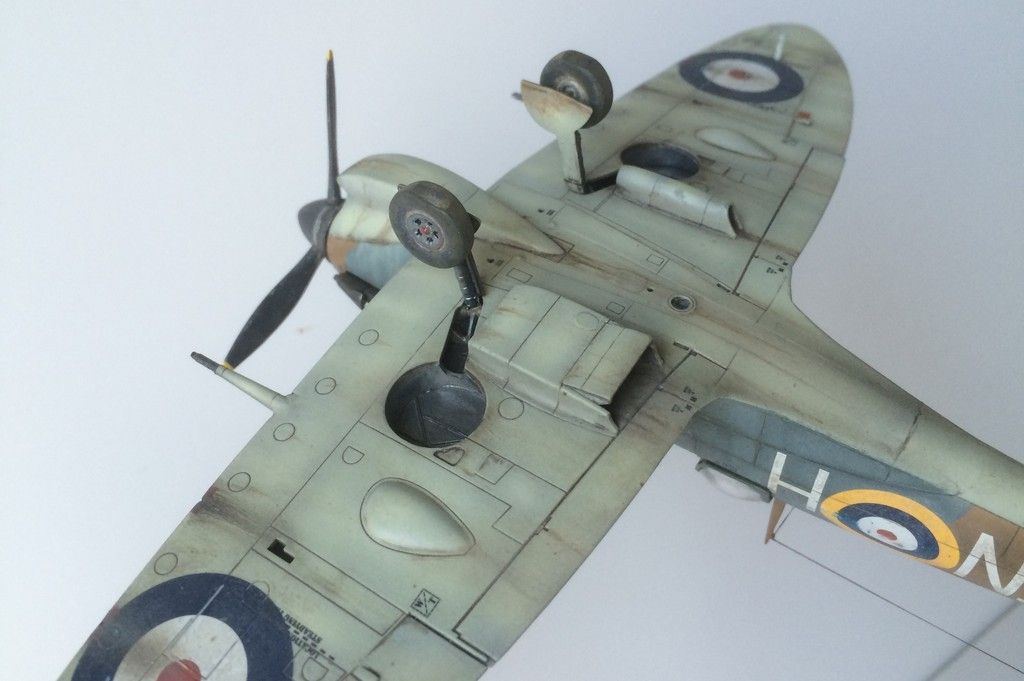
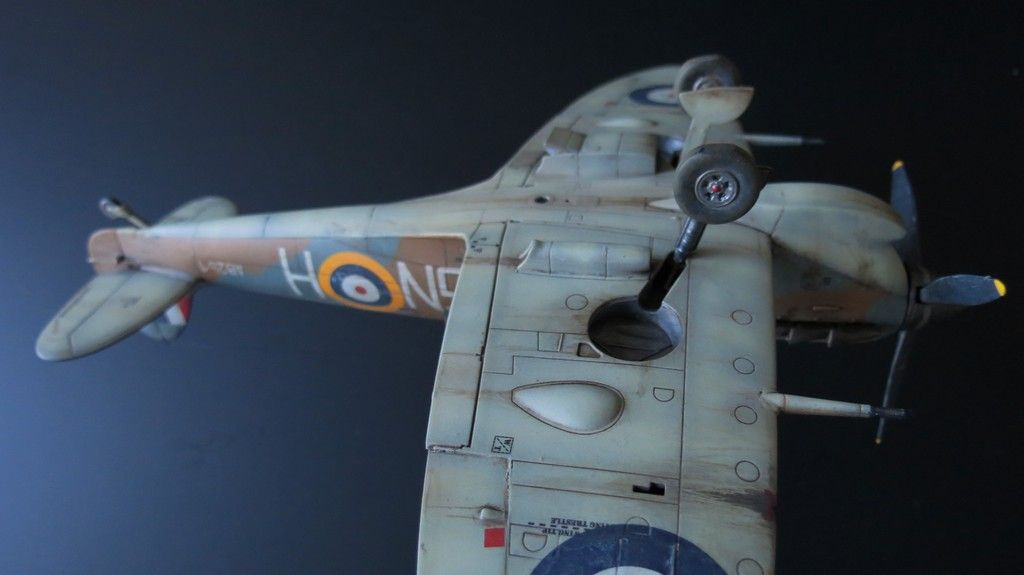
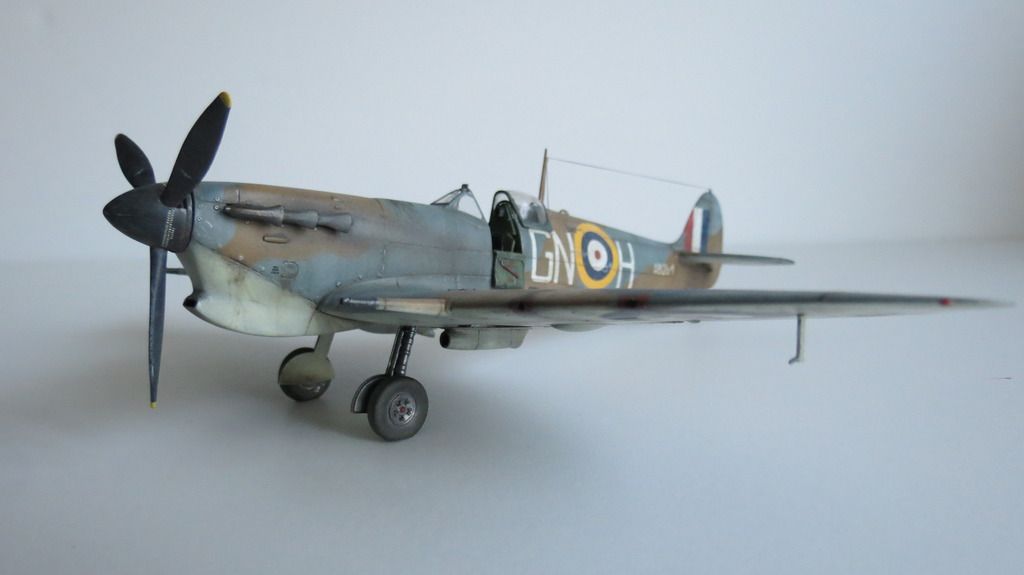
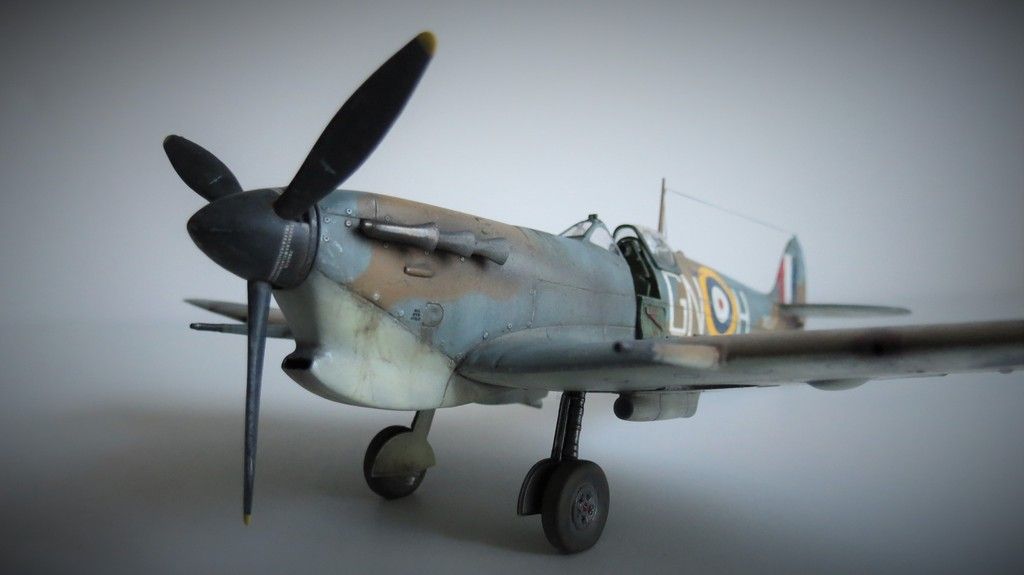
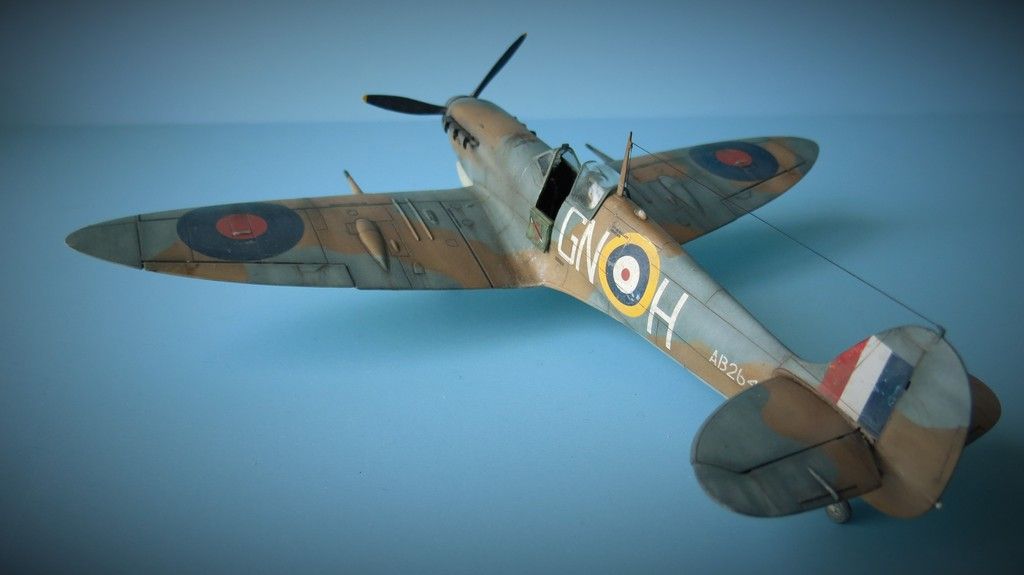
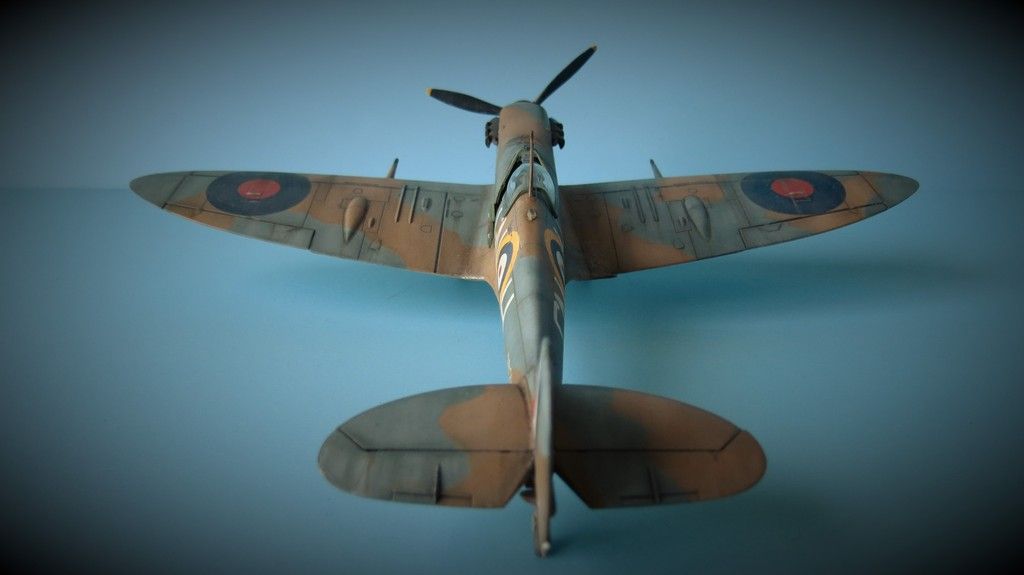
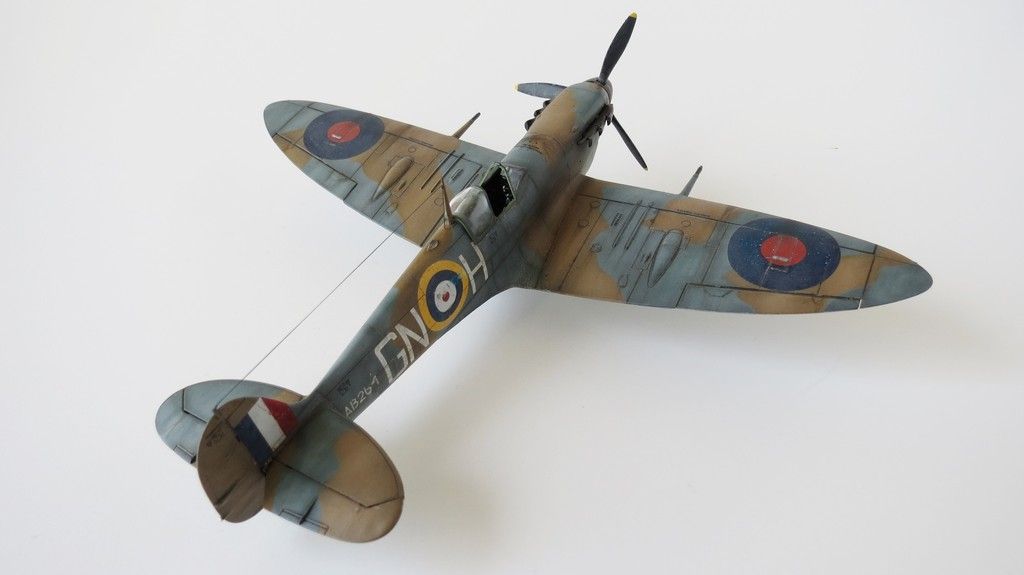
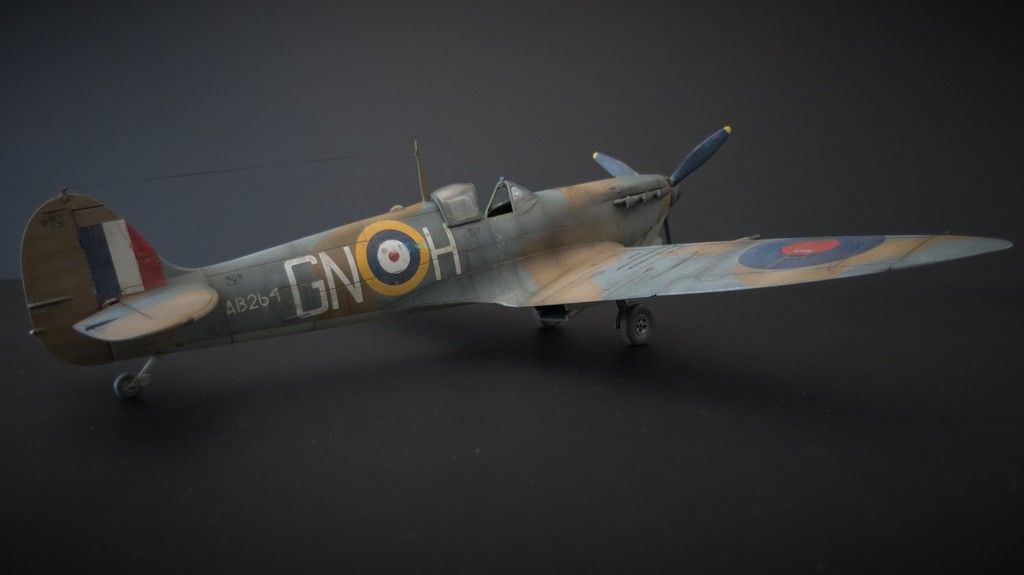
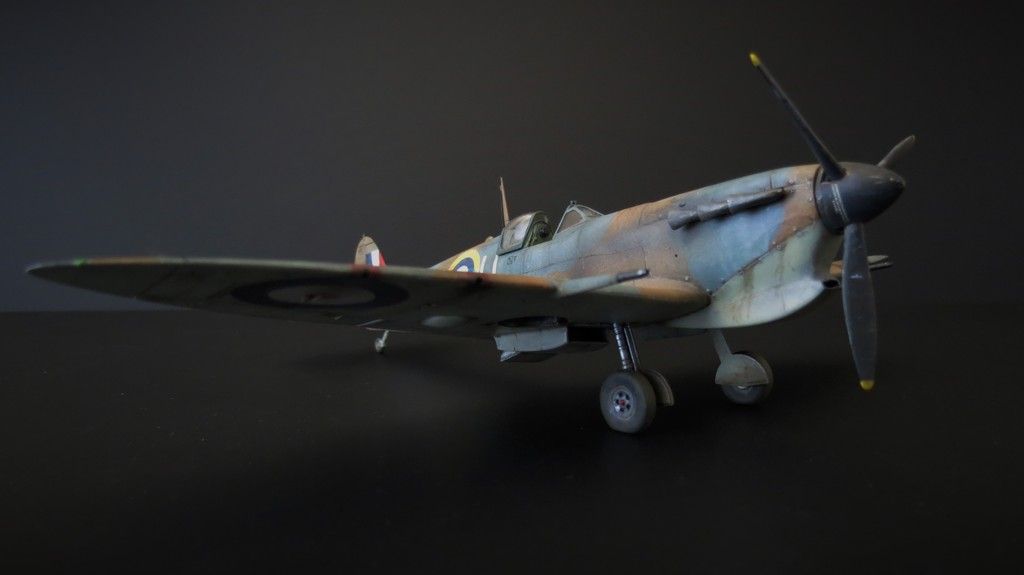
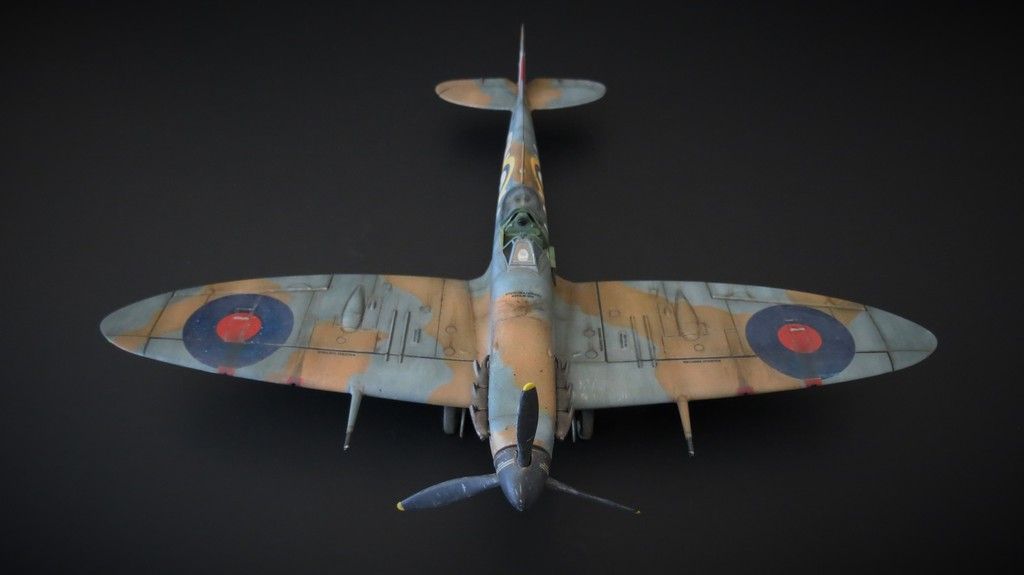
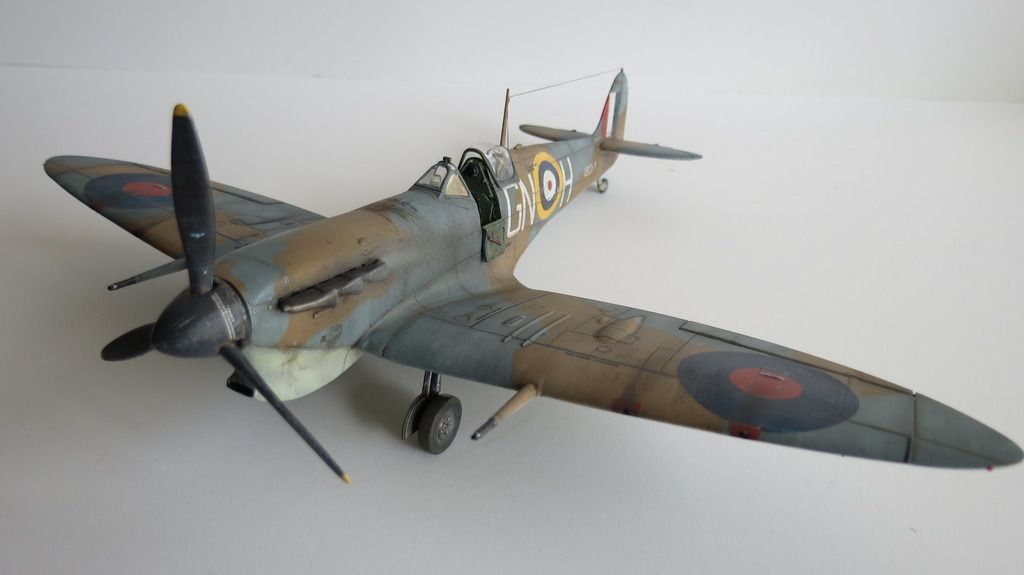
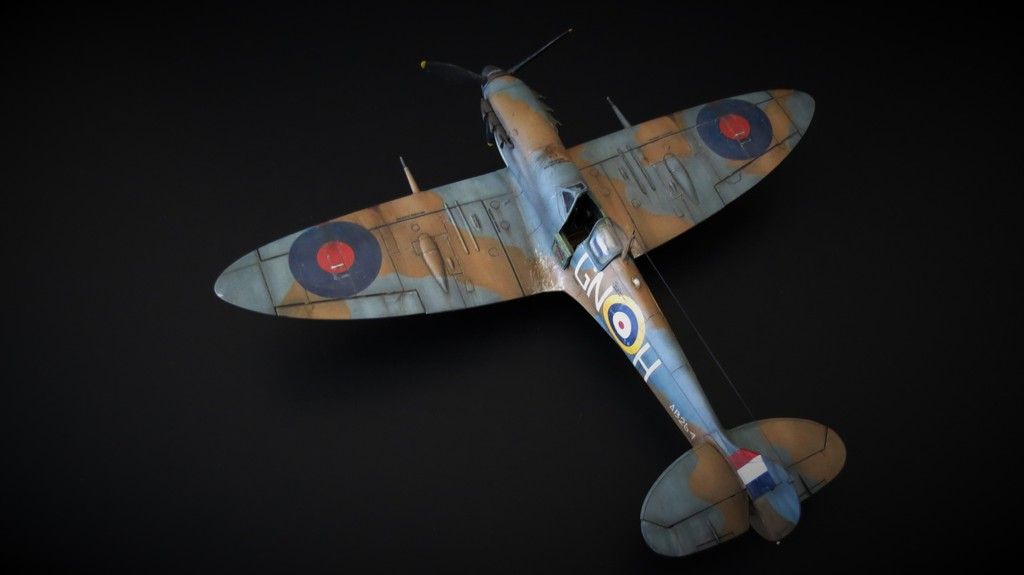
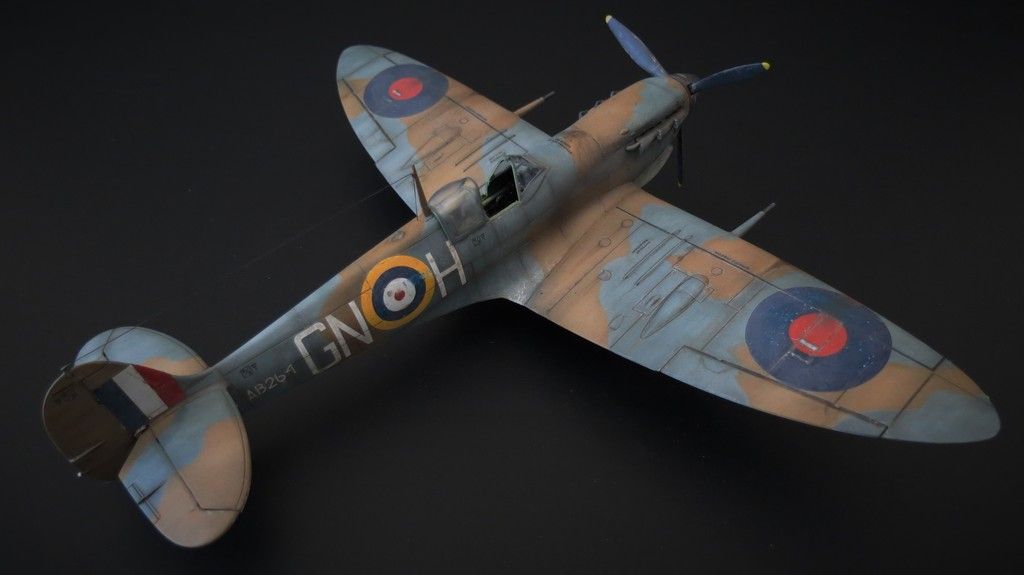
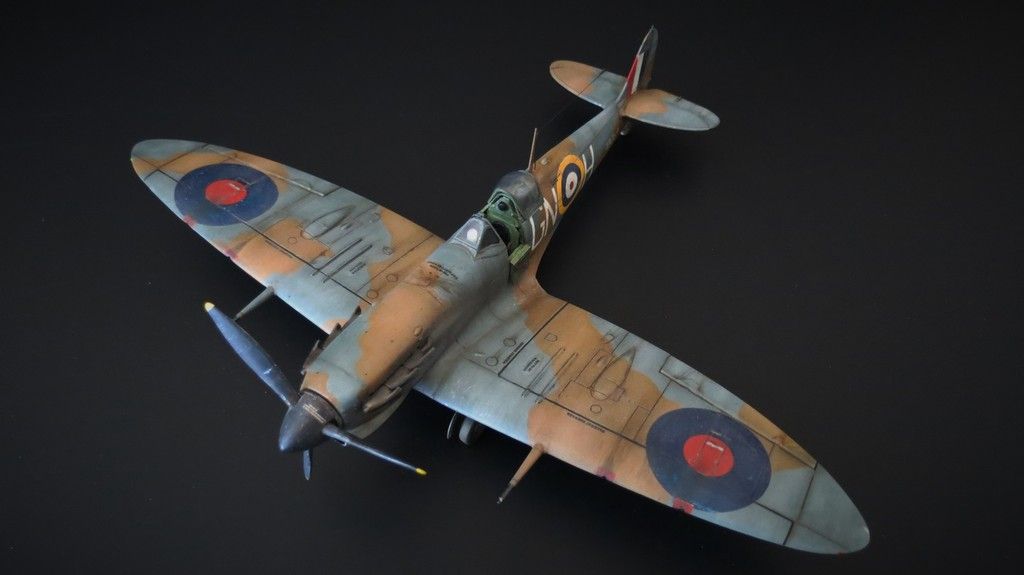
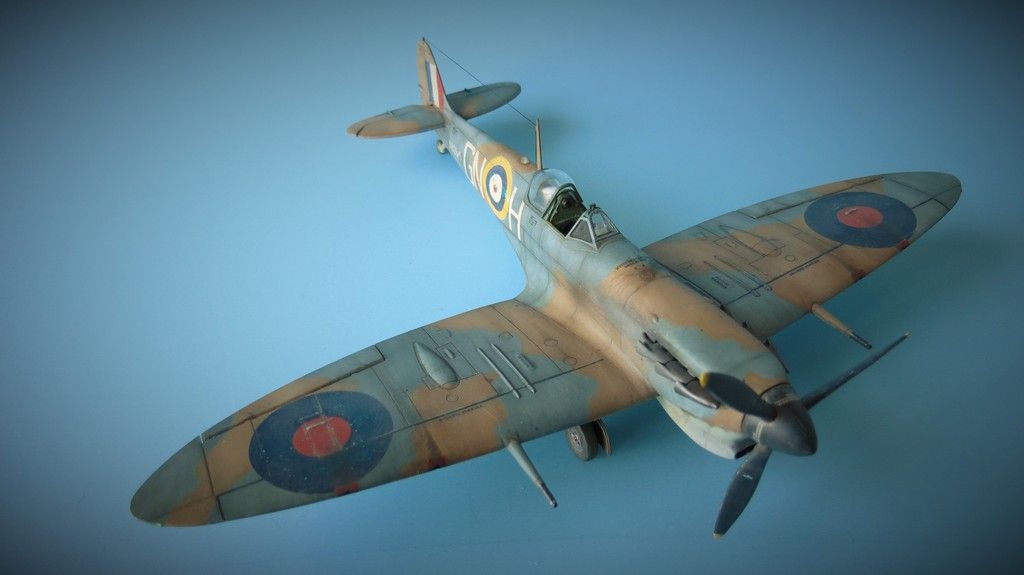
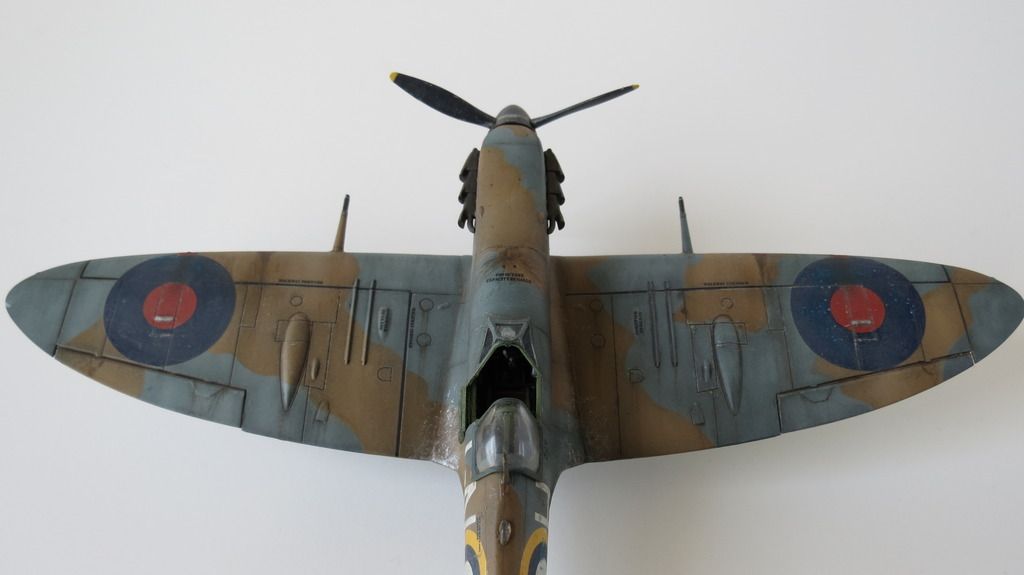
The kit comes with two options of colors and markings, which are outlined in my WIP kit review and updates. I chose to go with the first option, that of a Royal Canadian Air Force squadron used in Malta during "Operation Spotter", which has a Sea Grey and Dark Earth camouflage color, the Sea Grey being painted over the Stone color of the typical two-brown Tropical camo pattern. The Sea Grey has a bluish-green tint to it which is called out as Humbrol 27. I mixed a couple of Tamiya paints to get a shade that I liked the look of; XF-54 Dark Sea Grey with a few drops of XF-50 Field Blue, then added white to tone it down in an attempt to give the aircraft a bleached appearance of which I imagine aircraft would have had after weeks of sitting in the hot Mediterranean sun on the Island of Malta and from the salt air and sand erosion.


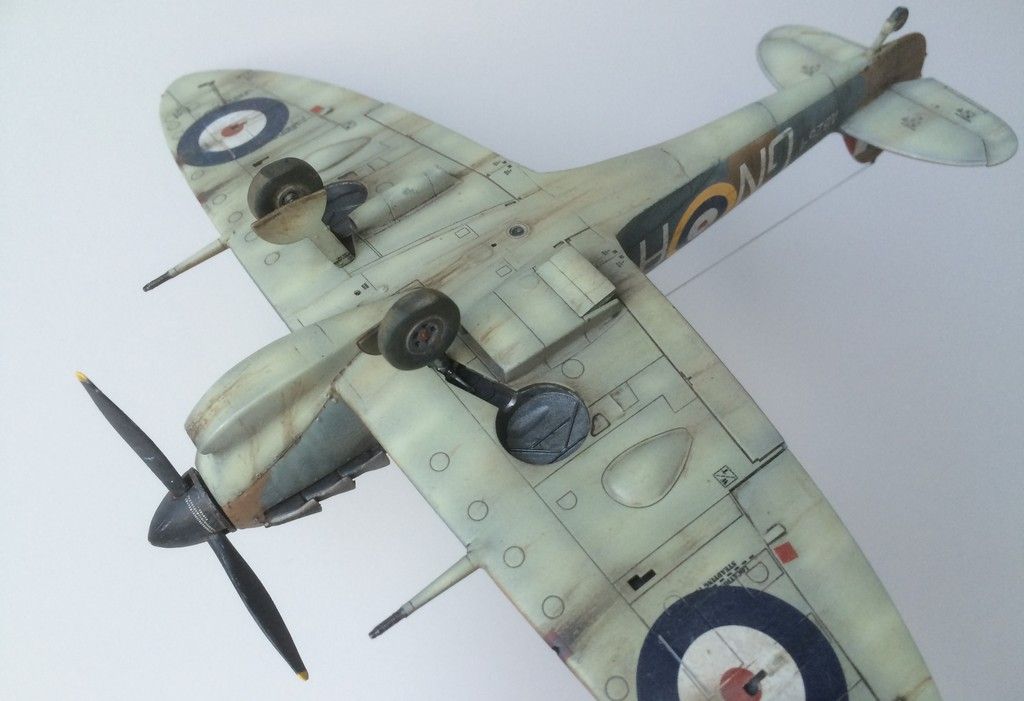
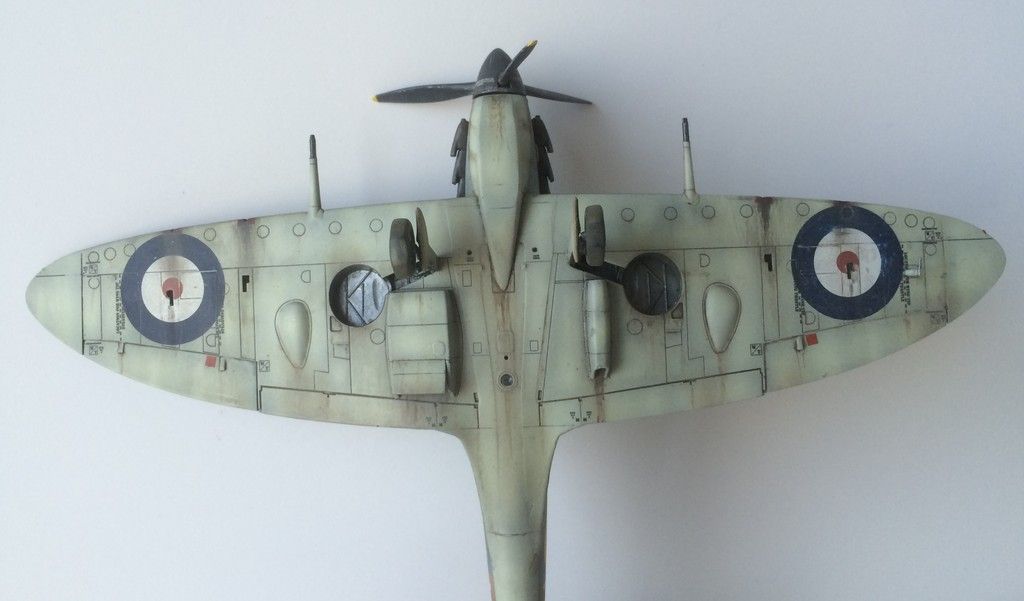
Because of the two options of markings, there are different options of canopy, air filters, oil coolers and radiators- the Maltese version having a deeper "Vokes" air filter, oil cooler and radiator. It also includes a extra long range fuel (slipper) tank that fits to the underside of the fuselage and wraps around the "Vokes" air filter. I chose to leave this off because my boy is staying local around the Island of Malta and he prefers his bird to be more streamlined and more maneuverable without the hindrance of extra cargo.


The kit also includes bombs, which are not required for either of the two versions on offer, but could be utilized if after-market decals are purchased to represent Mk.Vb's that were used as fighter-bombers and dive-bombers, roles to which they were not well suited.


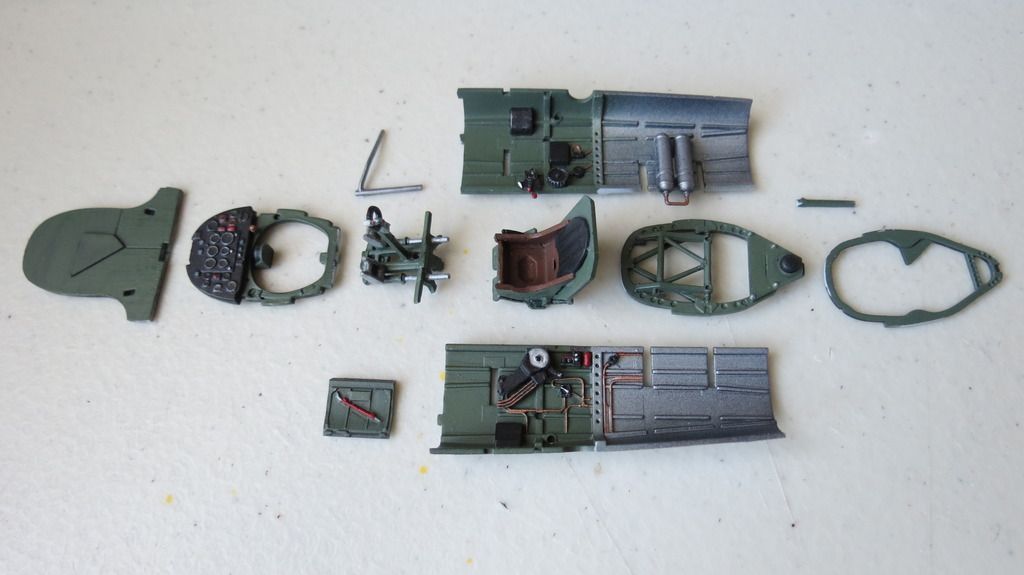
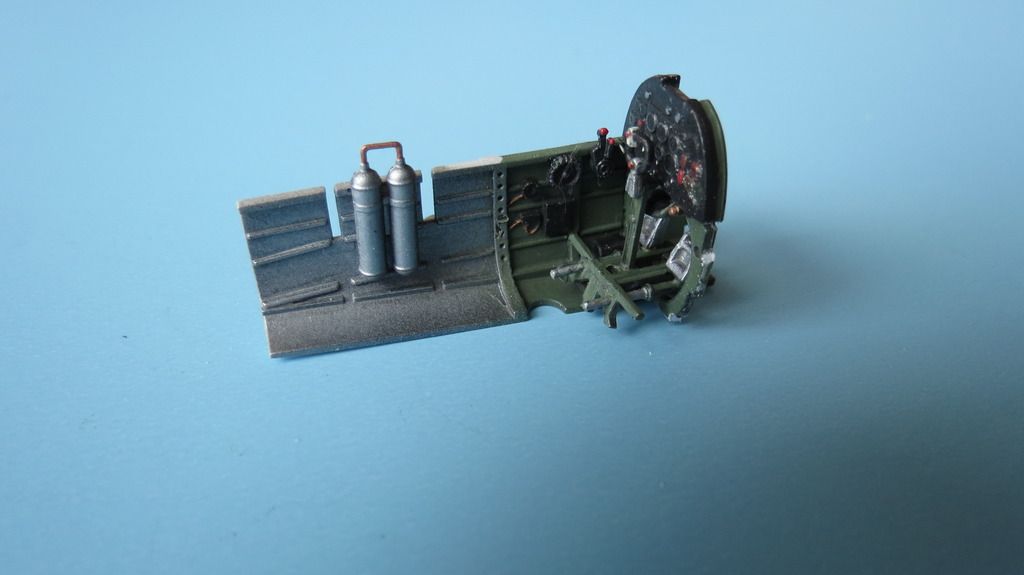
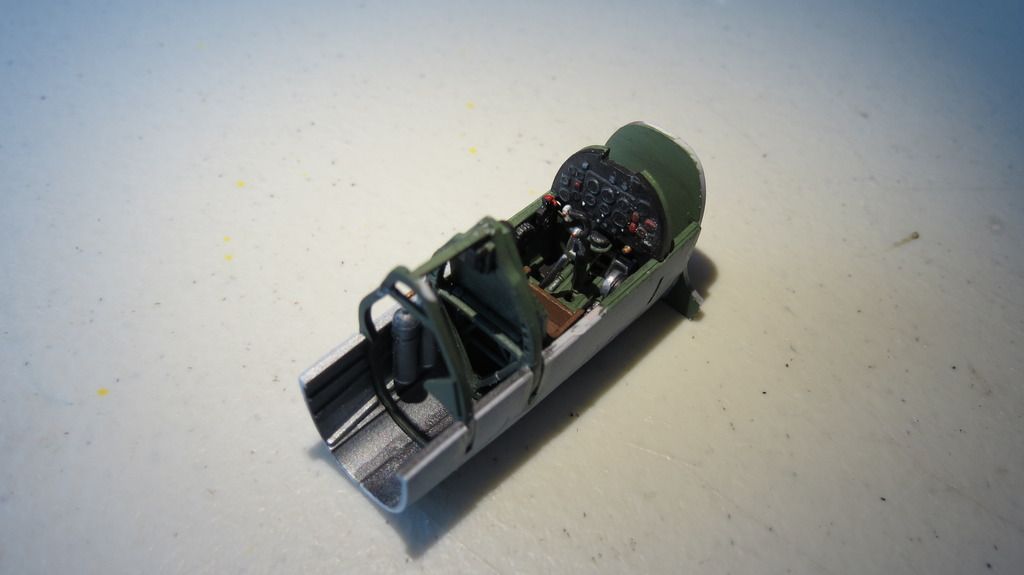
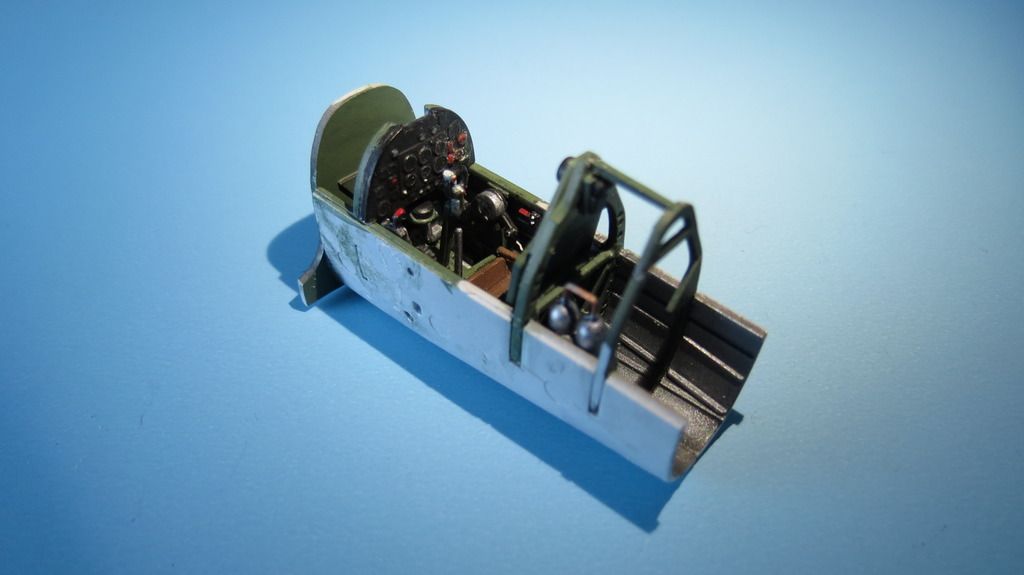
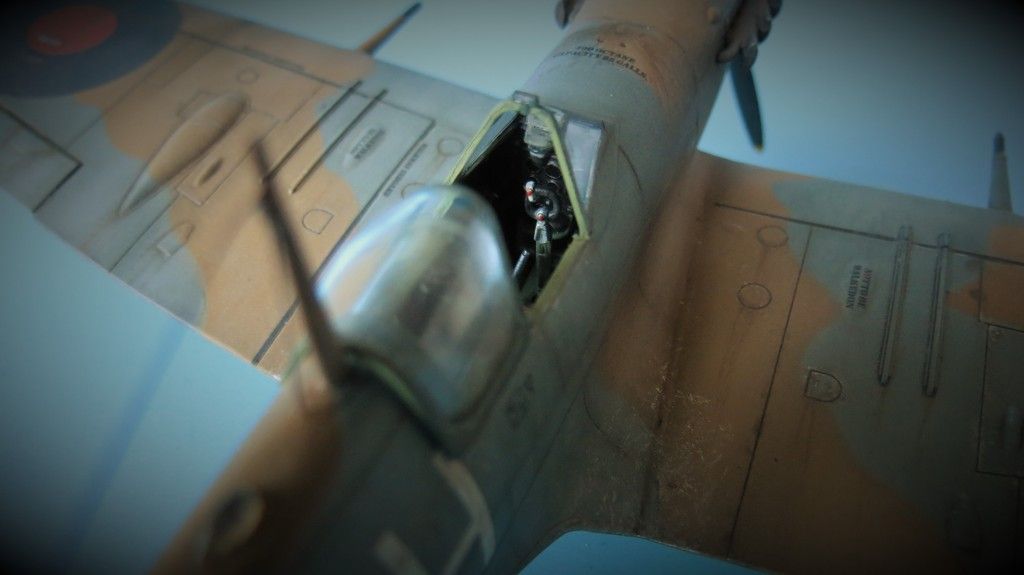
The cockpit is nicely detailed and would be furthered enhanced with the addition of after-market seat-belts.


There are no separate flap components with this kit, as there are with other Airfix Spitfires, they are molded solid, so no dropping the flaps down to produce some extra interest. The ailerons are also molded solid, bit the elevators and rudder are separate components.


The undercarriage can be modeled up or down, and at first glance, one feels that the design of the location areas for fitting into the wheel wells isn't particularly solid. The end of the oleo struts has a step that locates onto a step inside the wheel well. It doesn't look positive enough and also seems not to provide enough surface area for cementing. But, that said, when it came to gluing them together, I used a spot of CA glue on each of the opposing step joints, held the wheels in place for 30 seconds whilst visually checking that the angles of location looked good, and, hey presto, I was surprised that they were solid once set. Meanwhile, the rear wheel is a nice push fit into the tail of the plane and required no glue.


The assembly, painting and decal instruction booklet is very clear, concise and easily understandable, using nice 3D CAD images for the assembly instructions and color illustrations for the painting and decaling guides.


This kit costs $21.53 in the USA- that's about 15.00 pounds at today's exchange rate, and, it presently costs 18.99 pounds from Hannants in the UK. Therefore, it's around 4.00 pounds cheaper in the USA. Is it VFM- "Value For Money"....I'd say that it was reasonable, not excellent VFM, based on the fact that for exactly $2.00 more, I can buy a Revell of Germany 1/32 Supermarine Spitfire Mk.IIa that offers a lot more volume/weight of molded product and is a nice larger kit that goes together without issues...I know, I built one!


Would I recommend this kit: Yes, apart from the two issues and it's price not offering great value, it is a great representation of a Mk.Vb Spitfire, probably considered one of the best and most loved versions of this iconic aircraft and I had fun building it.


My personal opinion regarding a score out of 10: I would give this kit 8 out of 10, based on the above.


Okay, enough of the rambling and lets get down to sharing my attempt at modeling this aircraft, but first, I apologize for all the photos, I was experimenting with three background colors, white, bIack and blue and I couldn't decide which I preferred. I hope you like!


IMG_6412_zpsw8slpg6t.jpg


IMG_6419_zpshynwaixn.jpg


IMG_6429_zpsc6doag9j.jpg


IMG_6436_zpsuur4oqj8.jpg


IMG_6872_zpsujagb09c.jpg


IMG_6862_zpsgdjiz190.jpg


IMG_6880_zpsag9j10zn.jpg


IMG_6834_zpsi4akd53g.jpg


IMG_6683_zpsqkcgx0bg.jpg


IMG_6724_zps3hzabqiw.jpg


IMG_6887_zpso3osqcqj.jpg


IMG_6894_zpsokliviwr.jpg


IMG_6896_zpsikberncz.jpg


IMG_6826_zpsluh26z5p.jpg


i-phone%202_zpsima9siaj.jpg


i-phone%201_zpsyutzemzt.jpg


i-phone%203_zpsmktd1lo1.jpg


IMG_6952_zpsawjmhq2l.jpg


IMG_6736_zpszflsij8t.jpg


IMG_6740_zpsrm8wstx3.jpg


IMG_6685_zpsnkybqb2x.jpg


IMG_6681_zpshkvcm7tr.jpg


IMG_6852_zpsby36jqex.jpg


IMG_6704_zps9yvb44u4.jpg


IMG_6933_zpsuq4mrbfs.jpg


IMG_6943_zps2dk0iboy.jpg


IMG_6950_zpsbbbhnkg3.jpg


IMG_6874_zpsun0mud59.jpg


IMG_6930_zpssskrp8ip.jpg


IMG_6935_zpsahpoqfok.jpg


IMG_6920_zpscus6gbyk.jpg


IMG_6697_zpsyyjmpcgw.jpg


IMG_6709_zpsjr2xof5d.jpg


IMG_6858_zps1jnicwy4.jpg


IMG_6855_zpsdw9smxhc.jpg


Well, there she is my last build until my next build which will be a huge project- the Airfix 1/24 Hawker Typhoon Mk.1b!


In the meantime, if you'd like to watch my YouTube "Final Reveal" video for this build, here is the link to that: https://youtu.be/AKddHmJ_chs


Thanks in advance for your comments on this posting, for those that have followed this build and for watching the video, it is greatly appreciated!


Have fun and happy modeling!

Cheers

Martin


  • Member since
    April 2015
  • From: New Hampshire, USA
Posted by UKguyInUSA on Wednesday, April 20, 2016 10:58 AM

BrandonD

Excellent job, Martin! I love that scheme on a Spitfire.

-BD-


  Thanks Brandon, much appreciated!


Yes, this is the first time I have done this color scheme and I have to say, I think I much prefer it to the standard dark earth/dark green camo pattern...it looks pretty cool!


Cheers Smile

Martin

  • Member since
    April 2015
  • From: New Hampshire, USA
Posted by UKguyInUSA on Wednesday, April 20, 2016 10:57 AM

Buckeye

Well done and thank you for that excellent WIP thread.Yes

Mike


  Thank you Mike, much appreciated, and, you're welcome for the WIP thread, I'm happy you liked it!


Cheers Smile

Martin

  • Member since
    April 2015
  • From: New Hampshire, USA
Posted by UKguyInUSA on Wednesday, April 20, 2016 10:56 AM

crown r n7

Awesome 


  Thanks Crown, greatly appreciated!


Cheers   Smile

Martin

  • Member since
    April 2015
  • From: New Hampshire, USA
Posted by UKguyInUSA on Wednesday, April 20, 2016 10:55 AM

BrandonK

Wow Martin, that is a spectacular build. Very nice work indeed. Bow Down

BK


Thank you kindly Brandon, I'm happy you like her!


I managed to get her completed this week, in between packing for my move to our new home this coming weekend and I'm here to share the final result!


Cheers Smile

Martin

  • Member since
    April 2015
  • From: New Hampshire, USA
Posted by UKguyInUSA on Wednesday, April 20, 2016 10:52 AM

Gamera

Wow! I don't know how I missed your earlier posts but that's stunning work! 


Thanks for your very kind comment, Gamera, greatly appreciated!


Cheers   Smile

Martin

  • Member since
    April 2015
  • From: New Hampshire, USA
Posted by UKguyInUSA on Wednesday, April 20, 2016 10:51 AM

Jay Jay

Ty so much Martin for doing the you tube W.I.P. 's   I enjoy every minute of them and always gain valuable information while watching your skilled presentaions.

Beer cheers Mate.


You're welcome Jay Jay and I'm happy that you like them, it makes doing them worthwhile!


Thanks for the kind compliment, greatly appreciated!


I'm back between packing ready for my move this coming weekend...I managed to get her completed, will be posting soon!


Cheers Smile

Martin

  • Member since
    April 2015
  • From: New Hampshire, USA
Posted by UKguyInUSA on Wednesday, April 20, 2016 10:49 AM

Toshi

Such detail.  You did a fantastic job of n this build.

Toshi


  Thanks Toshi, greatly appreciated mate! I'm about to post my "Final Reveal"!


Cheers Smile

Martin

  • Member since
    April 2015
  • From: New Hampshire, USA
Posted by UKguyInUSA on Wednesday, April 20, 2016 10:47 AM

Wirraway
Very Nice ! I can see you doing kit reviews in FSM in the not to distant future....
 

Thank you for your very kind comment, Wirraway, much appreciated! I'd love to do kit reviews/build reports for FSM, if they felt I was worthy enough to do so...I have plenty of time in my retirement!


Cheers  Smile

Martin

  • Member since
    April 2015
  • From: New Hampshire, USA
Posted by UKguyInUSA on Wednesday, April 20, 2016 10:46 AM

tempestjohnny
Absolutely stunning Martin. I never understood people who said the Spitfire was boring. John (the other UK guy in the USA)


Thanks John, much appreciated, and now way is the Spitfire boring...it's such a superb design that still looks like it fits in today...so majestic and graceful, yet deadly at the same time!


Just about to post my "Final Reveal"!


Cheers  Smile

Martin

  • Member since
    January 2015
Posted by BrandonD on Tuesday, April 19, 2016 12:43 PM

Excellent job, Martin! I love that scheme on a Spitfire.

-BD-

  • Member since
    February 2007
  • From: Brunswick, Ohio
Posted by Buckeye on Friday, April 15, 2016 11:28 AM

Well done and thank you for that excellent WIP thread.Yes

Mike

  • Member since
    August 2015
  • From: the redlands Fl
Posted by crown r n7 on Friday, April 15, 2016 9:49 AM

Awesome 


 Nick.

JOIN OUR COMMUNITY!

Our community is FREE to join. To participate you must either login or register for an account.

SEARCH FORUMS
FREE NEWSLETTER
By signing up you may also receive reader surveys and occasional special offers. We do not sell, rent or trade our email lists. View our Privacy Policy.