SEARCH FINESCALE.COM

Enter keywords or a search phrase below:

Arado ar234 1/48 Build

3081 views
15 replies
1 rating 2 rating 3 rating 4 rating 5 rating
  • Member since
    March 2015
Arado ar234 1/48 Build
Posted by qlabs on Monday, May 30, 2016 8:59 PM

Hi all, I've begun my Arado ar234 build for the 1946 what if group build.

I'm building the Revell-Monogram 1/48 ProModeller version which I'm going to modify as a form of mistel carrier of a t.v. guided tactical nuclear unit as part of the what if portion of the build.
A simillar idea to the ar234/381 mistel configuration slung below but with a larger, but not as large as the, aircraft loaded on top as further below. 
So it looks like I'm in for a bit of scratch building.


Starting off we have the box and its contents.


Next up I gave all the parts a wash with some warm water and dish detergent and a cool rinse.


Always be sure to feel around in the wash basin for any loose parts and pull the drain plug but leave it in to catch anything from going down the drain.
Like these two little fellas below. It's not like they were going to go down the drain but even large parts can have delicate sprue attachments and fall off.


Then I let them dry overnight next to the open window.


Once they were dry I gave the cockpit parts a base coat of Tamiya XF-1 flat black thinned with X-20A thinner.
I built the spray booth out of some scrap and a brushless bathroom fan feeding into a coffee can filled with filters. I only spray acrylic these days and it has some really good airflow, you can't even smell the paint at all.
It still needs a decent light installed.


Next up I'll prime and assemble some other portions while the cockpit primr dries so I can get to work on that detail.
Such a massive 'wall of glass' means there are lots of fiddly bits that will need some accurate attention and will have to be one highest detailed cockpits I've ever built. I guess I'm a sucker for punishment.

-Colin.

  • Member since
    March 2015
Posted by qlabs on Thursday, June 2, 2016 9:45 PM

So once the base coat of flat black was dry I gave them a spray of Vallejo RLM66 schwarzgrau. This is my first time using Vallejo paints and I must say they were worth the money. Very good quality paint and I love the dropper style bottle, much easier than Tamiya or Testors paint jars.

This is also my first time using flat black as a base coat and using it as a form of shading, something I've seen done but have never tried. I'm pretty pleased with the result on this bulkhead.

While those were drying I gave some other parts a coat of RLM02 that I mixed up from Tamiya XF-22, XF-49 & XF-24. Going off some research that the actual colour of RLM02 changed over the years and from factory to factory I think this should just about match it.


This is a shot without the flash.

And by comparison this is one with the flash to get an idea of the colour. My photography skills could probably use some work.


While all of that was drying I glued one side of the wing together. Might as well get some major assemblies done while paint dries.


And now I wait.


  • Member since
    March 2015
  • From: Streetsboro, Ohio
Posted by Toshi on Friday, June 3, 2016 3:49 AM

That's a very nice start.  I'm looking forward to this build.

Toshi

On The Bench: Revell 1/48 B-25 Mitchell


Married to the most caring, loving, understanding, and beautiful wife in the world.  Mrs. Toshi


  • Member since
    February 2012
  • From: Olmsted Township, Ohio
Posted by lawdog114 on Saturday, June 4, 2016 2:42 AM
I have the same kit in the stash. Great start and I'm watching with interest.

 "Can you fly this plane and land it?...Surely you can't be serious....I am serious, and don't call me Shirley"


  • Member since
    March 2015
Posted by qlabs on Monday, July 18, 2016 4:20 PM

So I'm bad for updating as I go. Here are some shots of what I've got completed as time comes here and there :)

Wheel wells updated and weathered.
I realized after looking at some reference photo's that the kit's recomendation on the colour was incorrect.

My reference from the NASM example.
As I'm going for a 1946 what if build colours can be interpreted I suppose.

And I temporarially installed the gear to glue together so they can be painted and rigged up with lines as one unit.

Lines installed on the pedals. A few left to go once these are set in place.

More lines and a view of the cockpit coming together.

Control column together awaiting final paint.

Finally wheels clamped and drying.


  • Member since
    January 2015
  • From: Tumwater, WA.
Posted by M. Brindos on Monday, July 18, 2016 11:17 PM

This is enjoyable to read through. I love what you're doing with this.

- Mike Brindos "Lost Boy"

  • Member since
    November 2003
  • From: Naples, FL
Posted by tempestjohnny on Tuesday, July 19, 2016 5:21 AM
Great start and walkthrough. Like the spray booth too.


  • Member since
    March 2015
Posted by qlabs on Tuesday, July 19, 2016 11:05 AM

Thanks guys :)
The spray booth is some scrap I had left laying around and a brushless bathroom fan, feeding into a coffee can filled with filters capped off with a charcoal filter. I only use acrylics so a very low change of things going ka-boom!

Here are some more updates.

Lines joined together and drying, waiting for final bends and paint.
I accidentally broke off the left hand gauge pannel while handling Super Angry

Gear painted.

Plus some tires on dowels! HaHa!

And lots of enginey bits before weathering. Base coats of zinc chromate, steel and jet exhaust. Not that any of this will be overly seen unless you are right up to it close with a flashlight ;)

  • Member since
    March 2012
  • From: Corpus Christi, Tx
Posted by mustang1989 on Tuesday, July 19, 2016 11:11 AM

Nice project! I just started a thread on mine here and didn't realize there was another one of these bad boys being built right now. Good work so far Colin.


 Forum | Modelers Social Club Forum (proboards.com) 

  • Member since
    March 2015
Posted by qlabs on Wednesday, July 27, 2016 9:26 AM

I've managed to get some more sub assemblies done and well as some fiddly bits.

Engine bits done and ready to be installed.

Intakes in the nacelles.

Everything sandwiched together.

The camera's have been painted after sanding.

Camera mount/frames sanded and waiting for paint.


And with a good coat of RLM66.

Next up the wheels get a coat of semi-gloss.

And now to really dig into the most finicky bit of the whole project, the cockpit.
The "office" glued into the right half so I can get the lines installed and judge the angles of the bends before the glass goes in.

And some hoses cut from some very fine solder for the pedals. Trying to match my reference photo's from the NASM example. I think I might need to redo the main lines as they don't look quite right.

While I've got the solder out I drilled some holes in the gear for the brake lines.

Then measured, cut and glued them in place. Having the holes drilled makes it much easier on placement, you don't need to worry about them drifting all over the place.
Once the glue is good and dry I'll give them some paint and then carefully bend them into place.


And after this I got tired of all my brushes sitting in the old mugs I was using so I made a brush and tool holder from some scrap I had kicking around.
It was a quick and dirty build, not winning any beauty contests but it's functional and does its job :)  ...and it didn't cost anything.


In place and everything a bit more organized.

That's about it for now, hoping to get a little more time this week to tackle some more.


  • Member since
    March 2012
  • From: Corpus Christi, Tx
Posted by mustang1989 on Wednesday, July 27, 2016 2:52 PM

Progress looks good Colin and I like that paint brush rack you've got.Yes


 Forum | Modelers Social Club Forum (proboards.com) 

  • Member since
    March 2015
Posted by qlabs on Thursday, July 28, 2016 6:01 PM

A few more updates today.
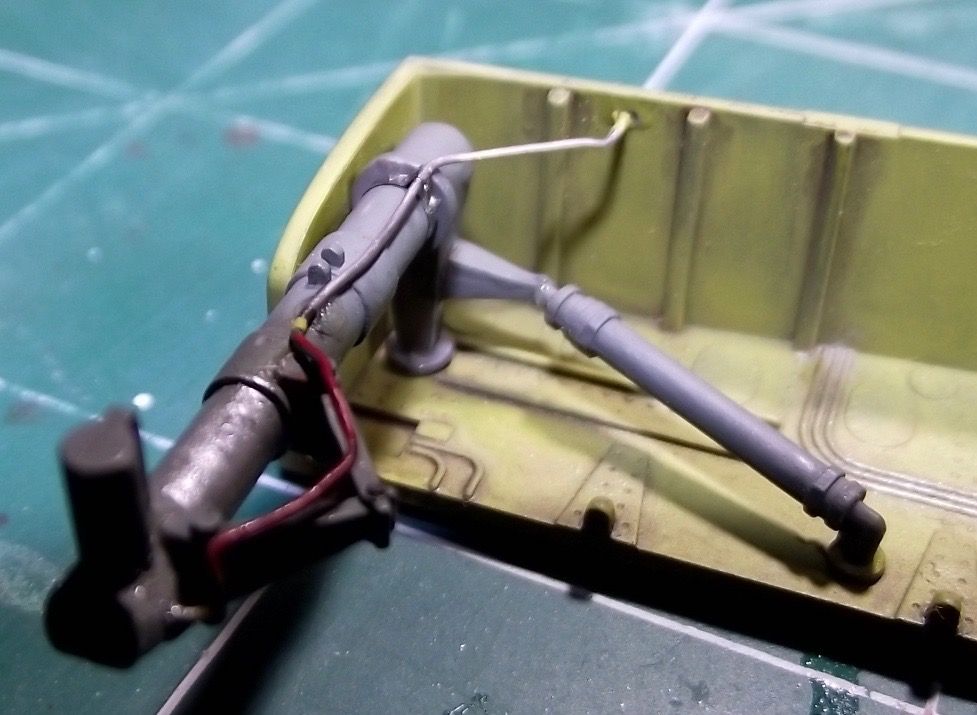
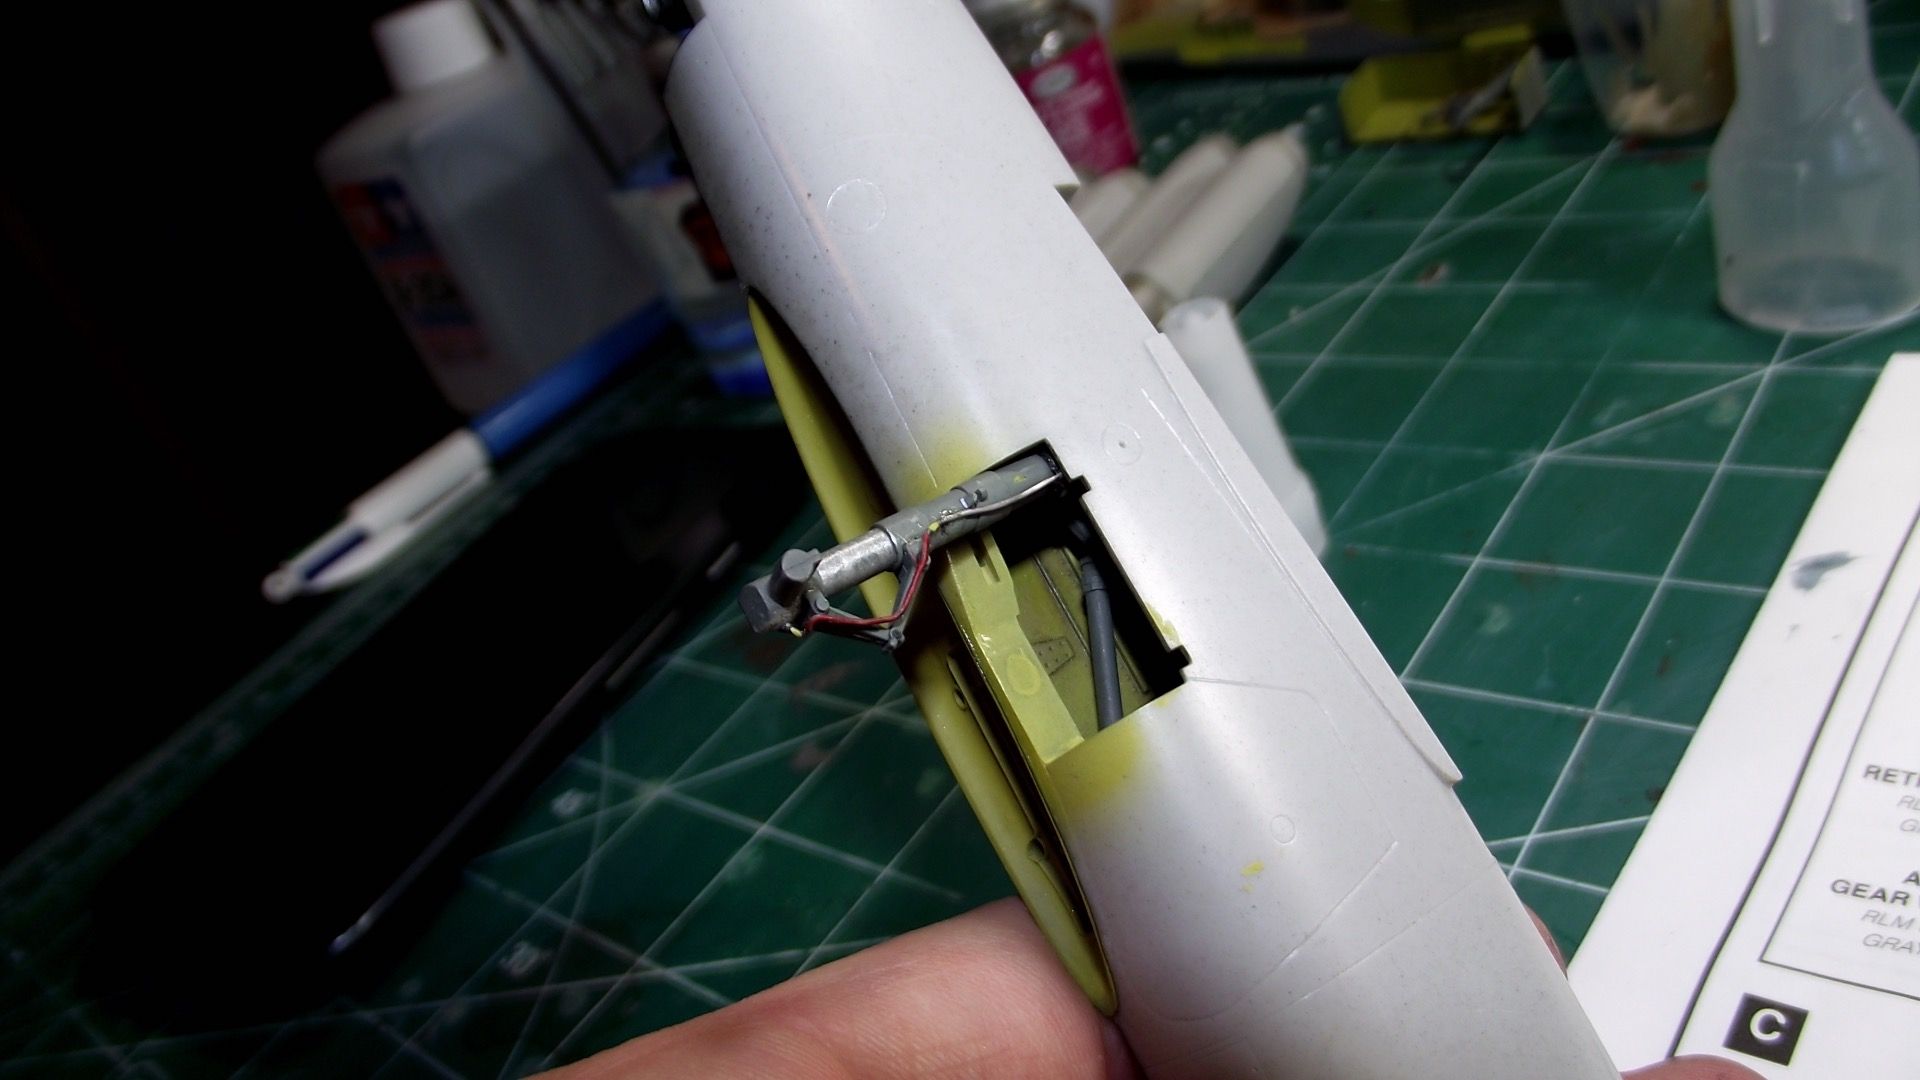
The brake lines are being installed. Holes drilled to accept the solder and then some careful bending and fitting with a dab of glue to secure it.

I used some bare metal adhesive foil to make the hose clamps around the lines and gear.

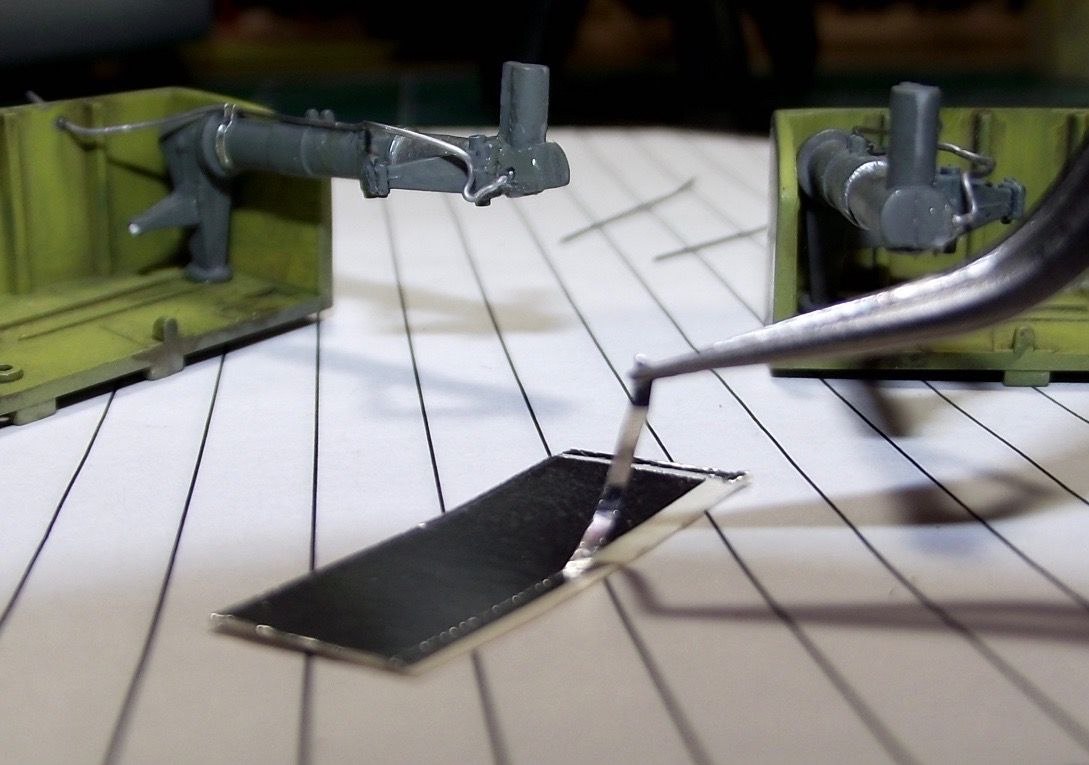
Here you can see the clamps installed and the lines painted.

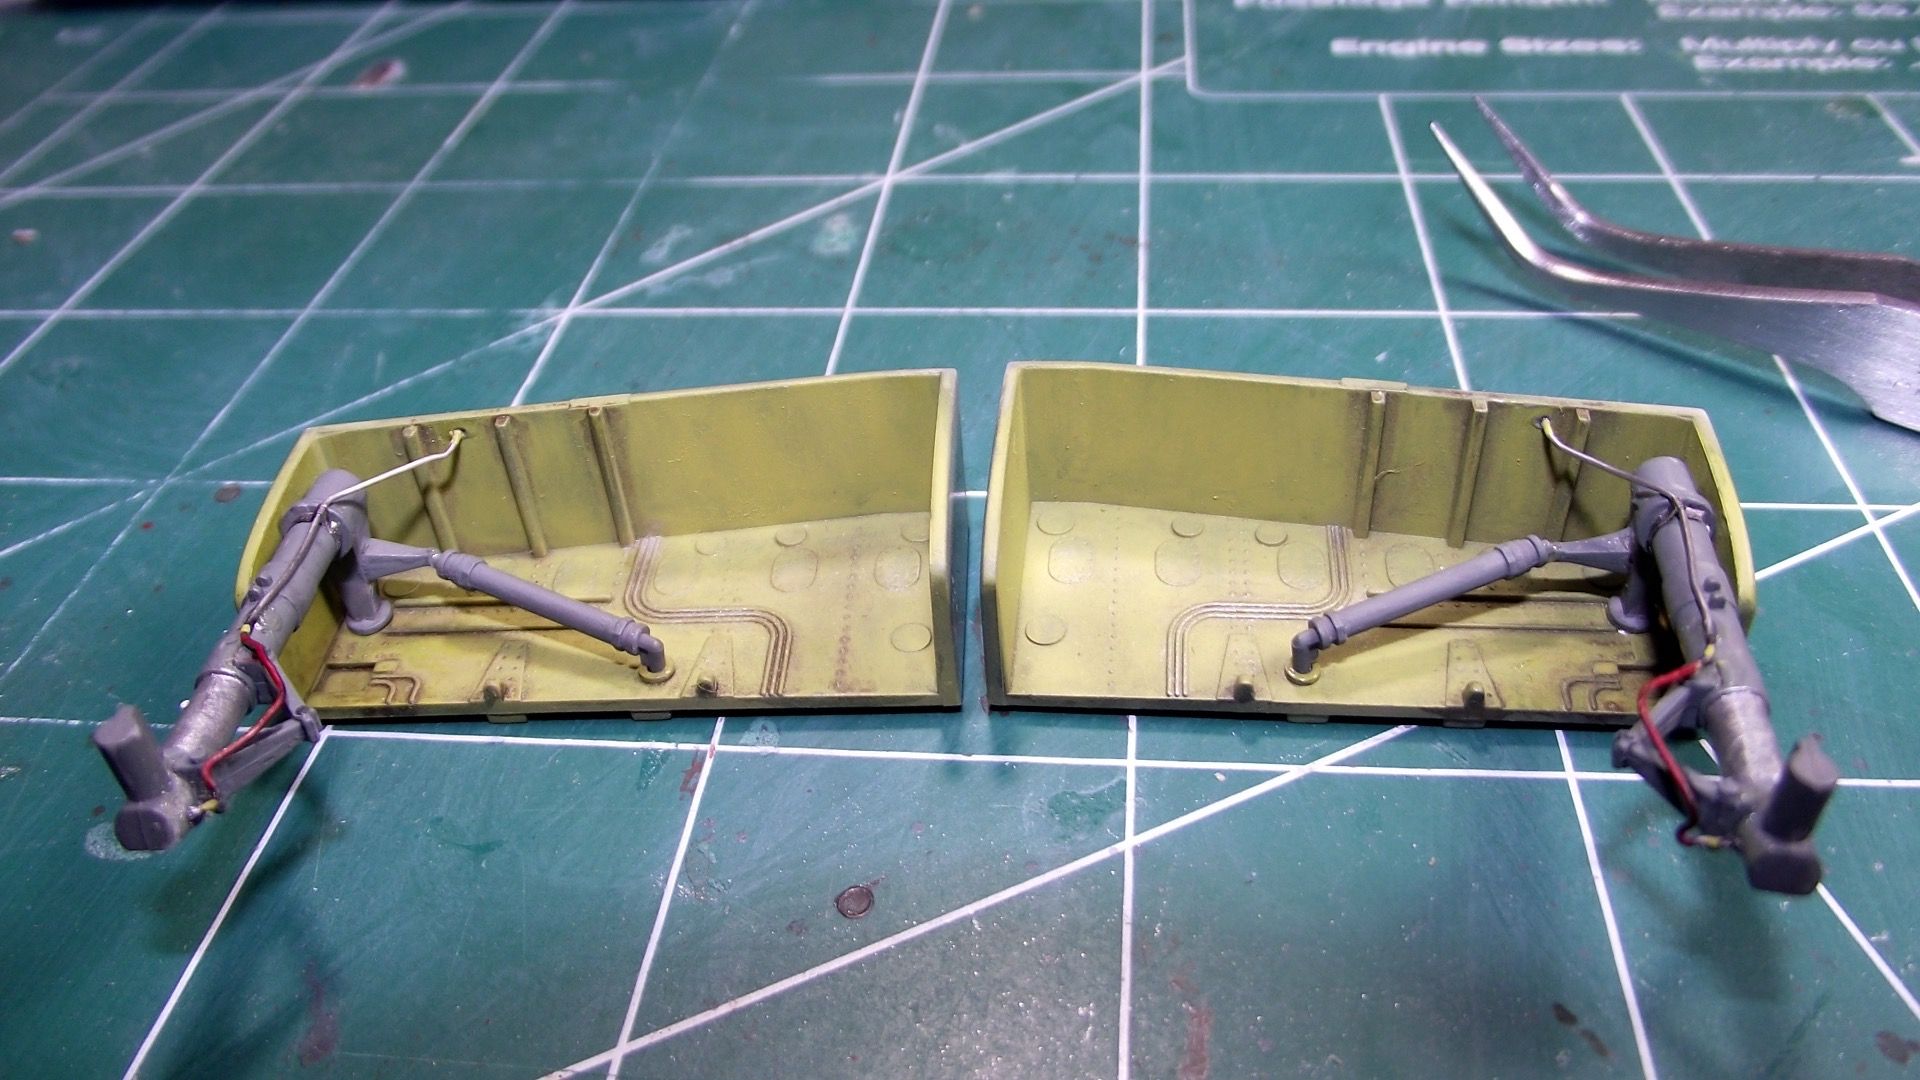
After this all of the shiny spots on the gear from the glue got a very light coat of some yellowed dirty thinner as a wash to remove the glaze and give a little extra wear in the crevaces.

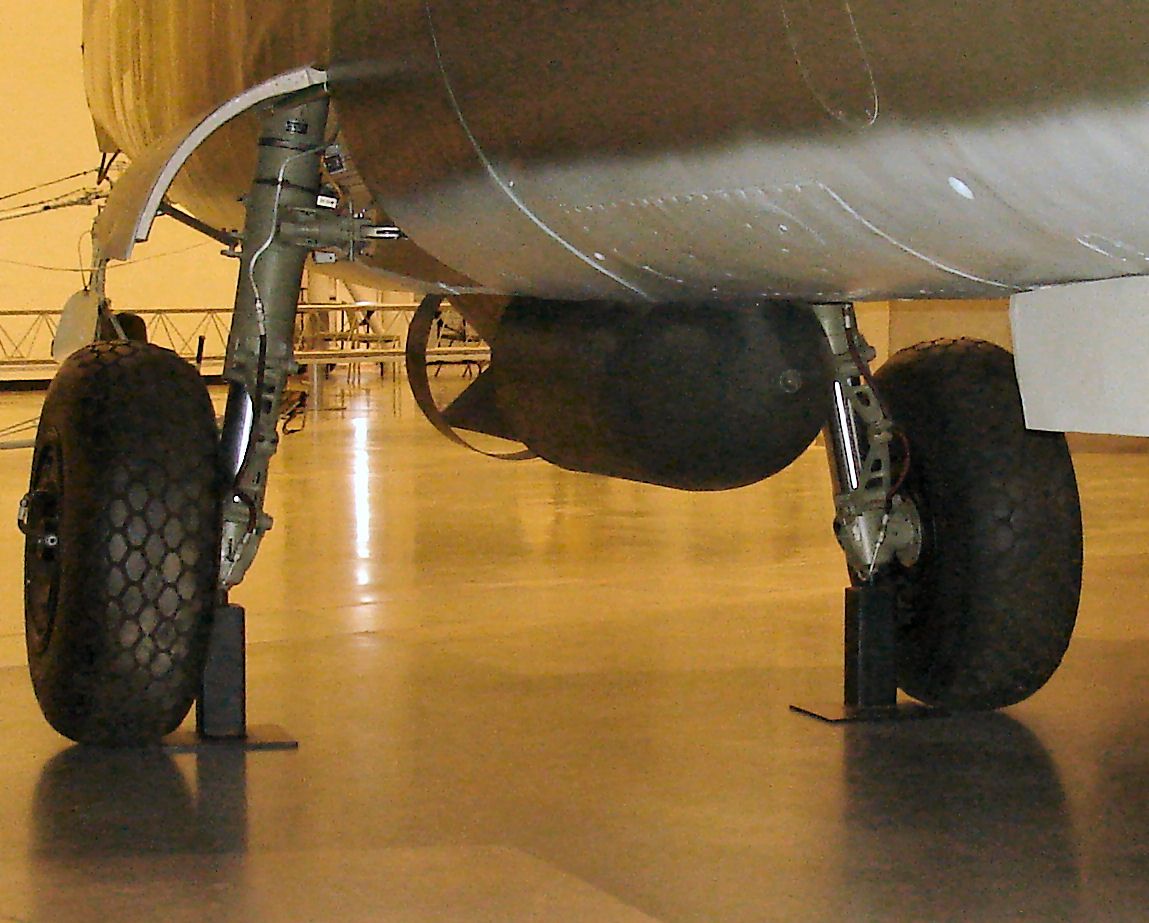
I painted half the line red and the other half black to emulate the dual lines on the original. I didn't have any finer solder to do dual lines.


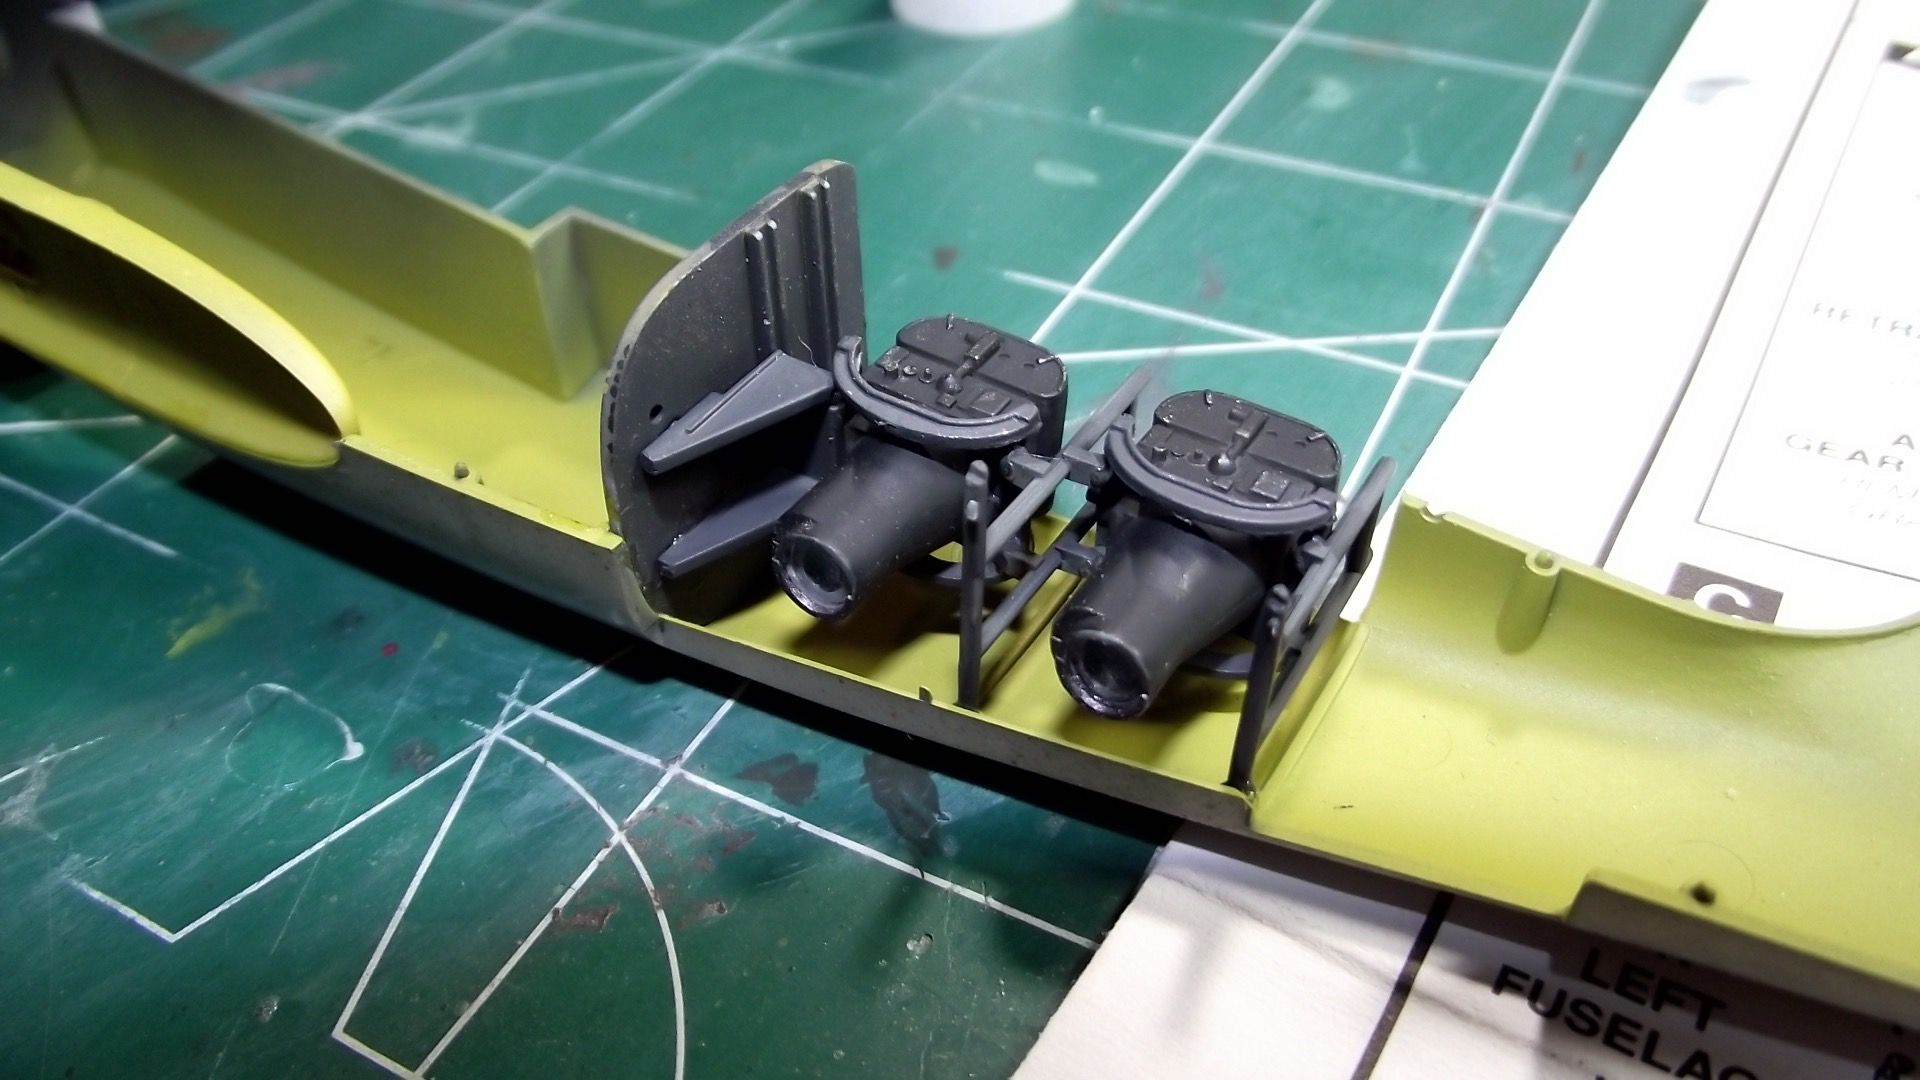
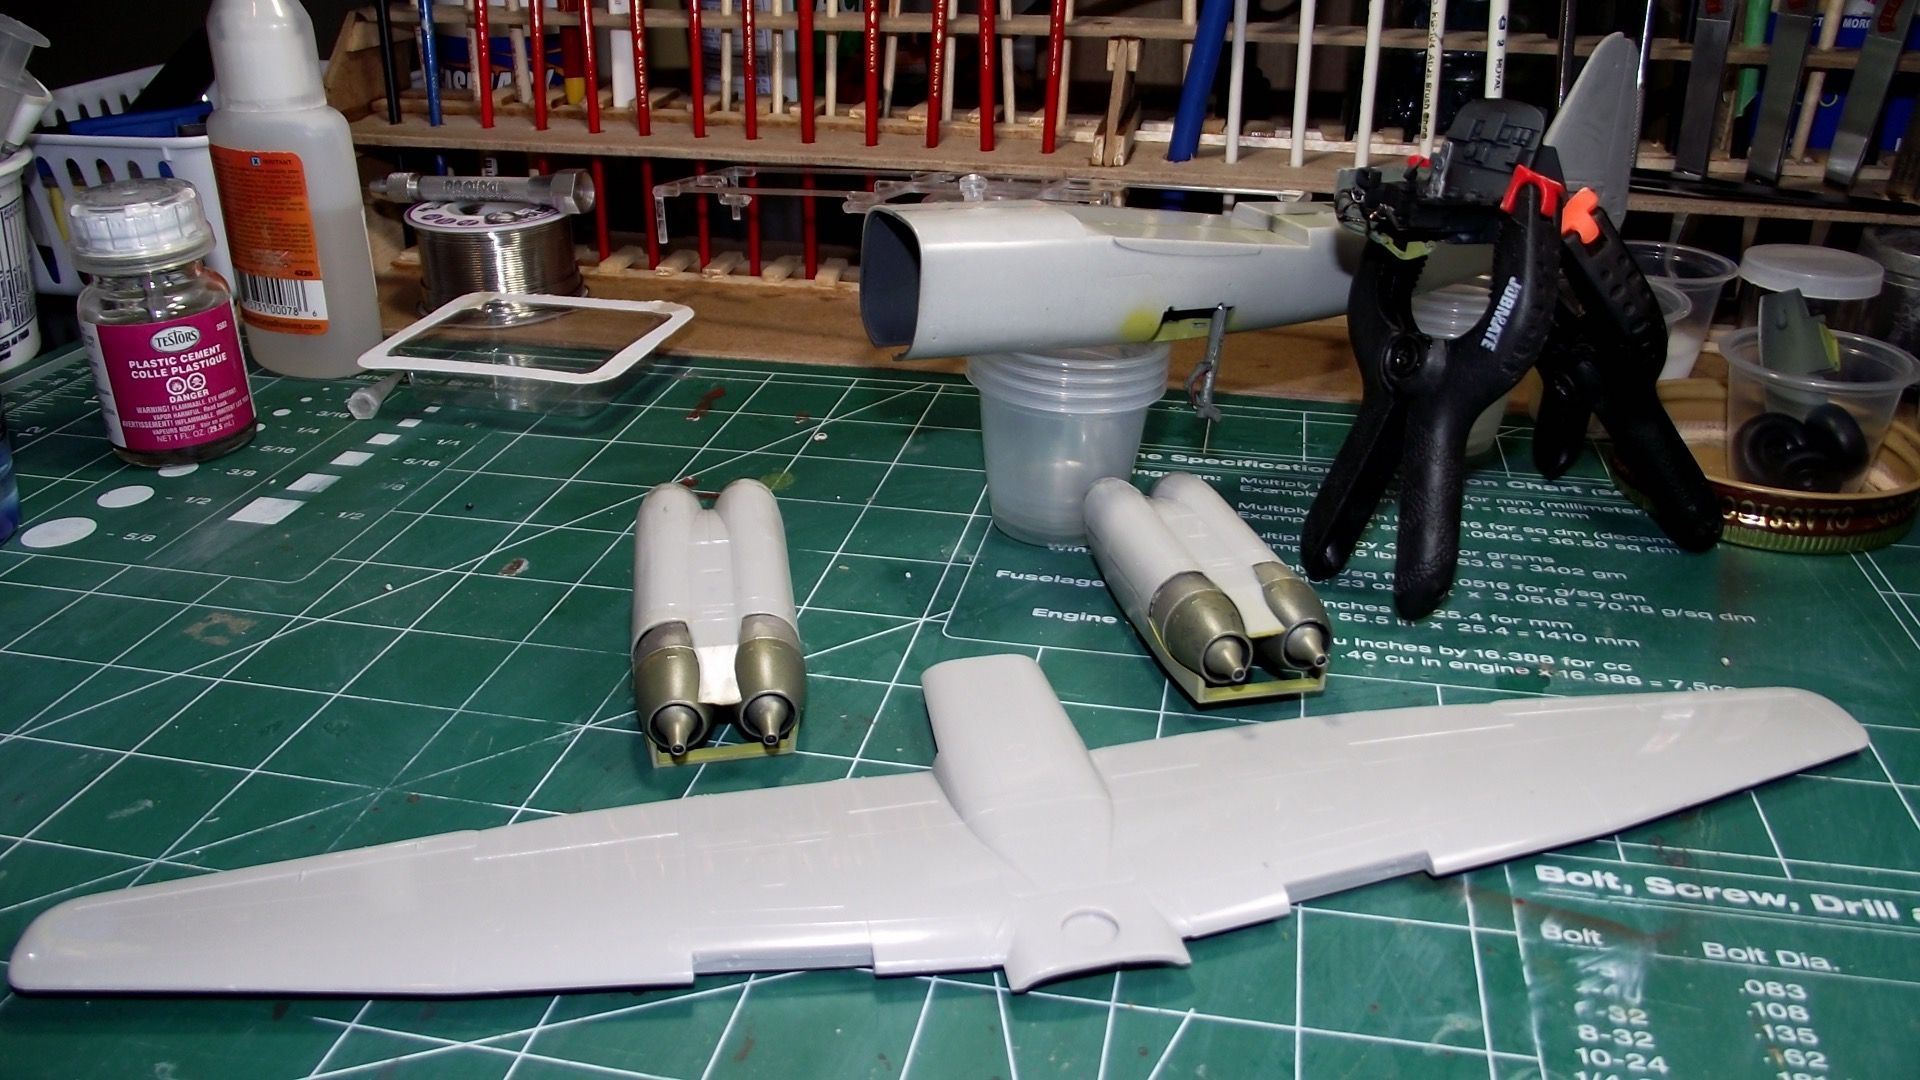
Next I finished off the camera equipment. They were assembled and given a final touch up coat of paint on any sanded areas and to dull out the shiny bit of glue.

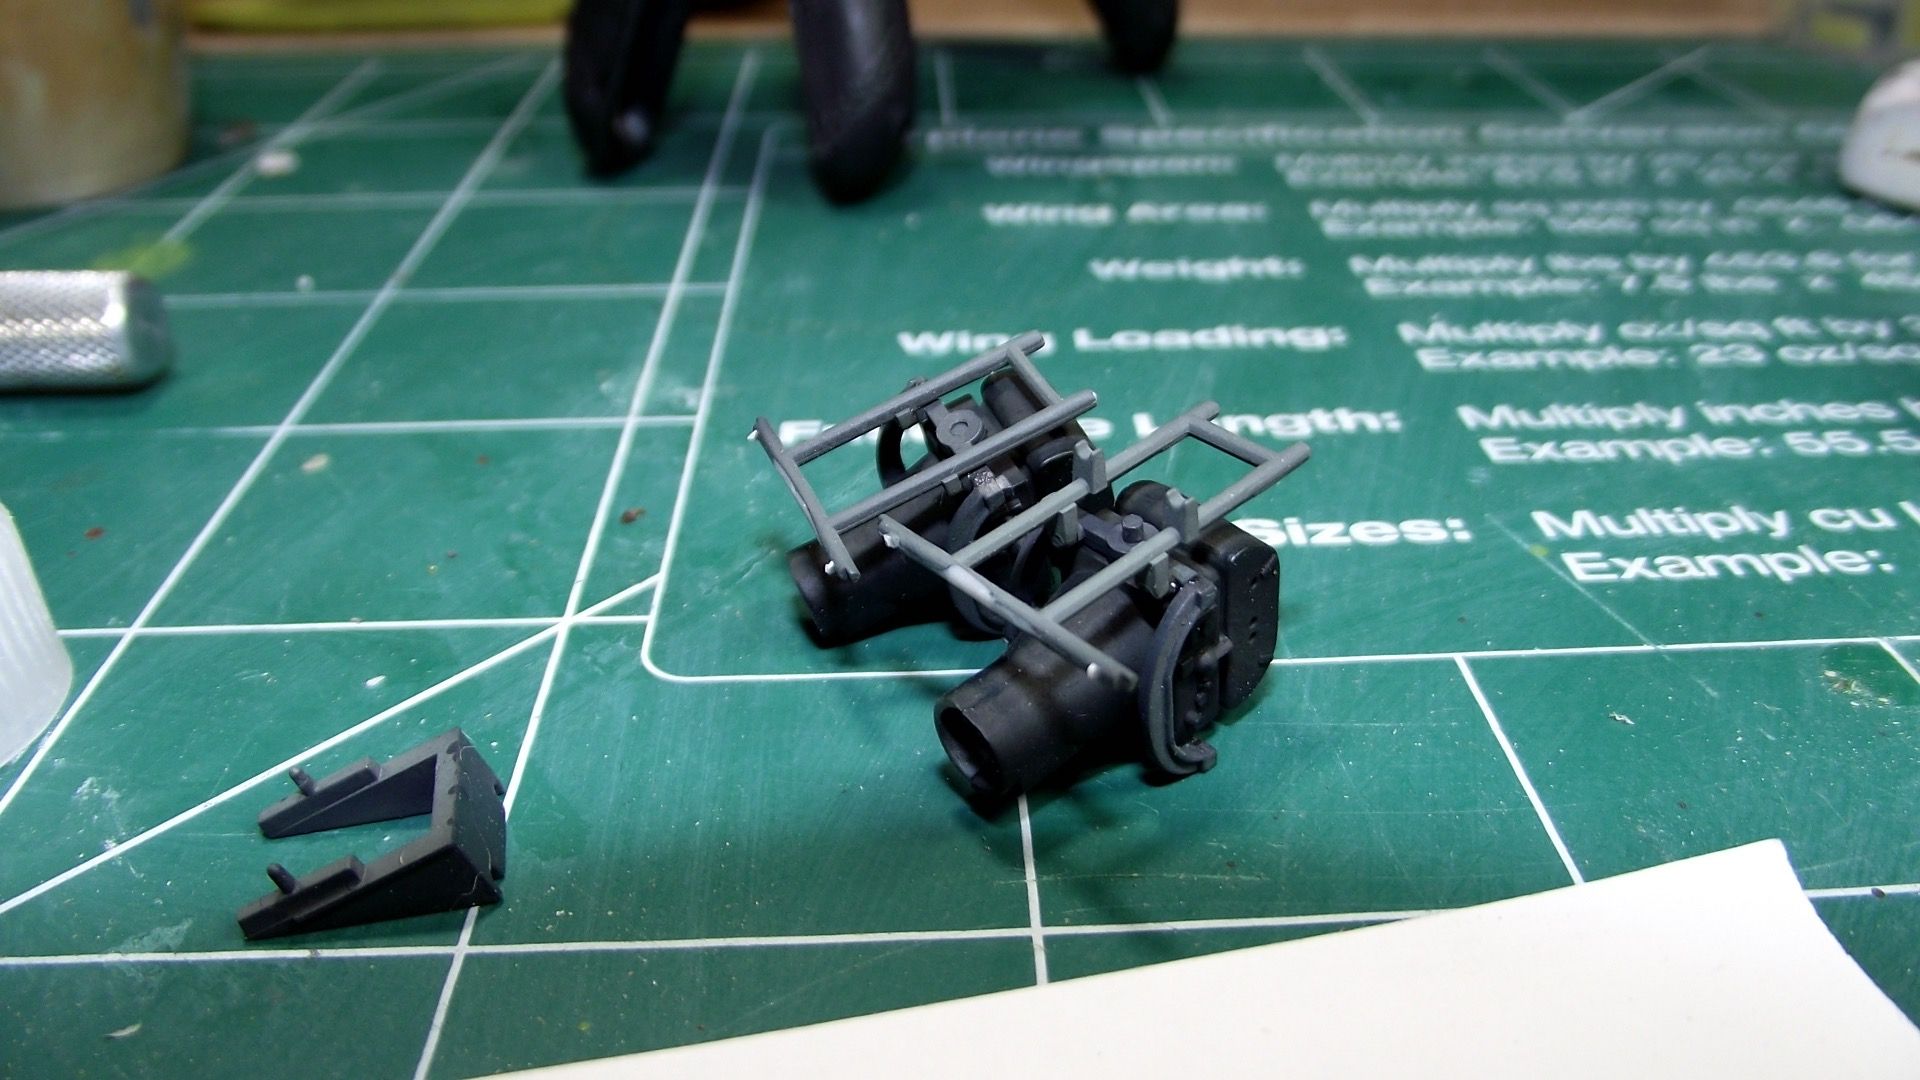
Both wheel wells were then installed along with the recessed bomb rack and camera equipment and bulkhead.

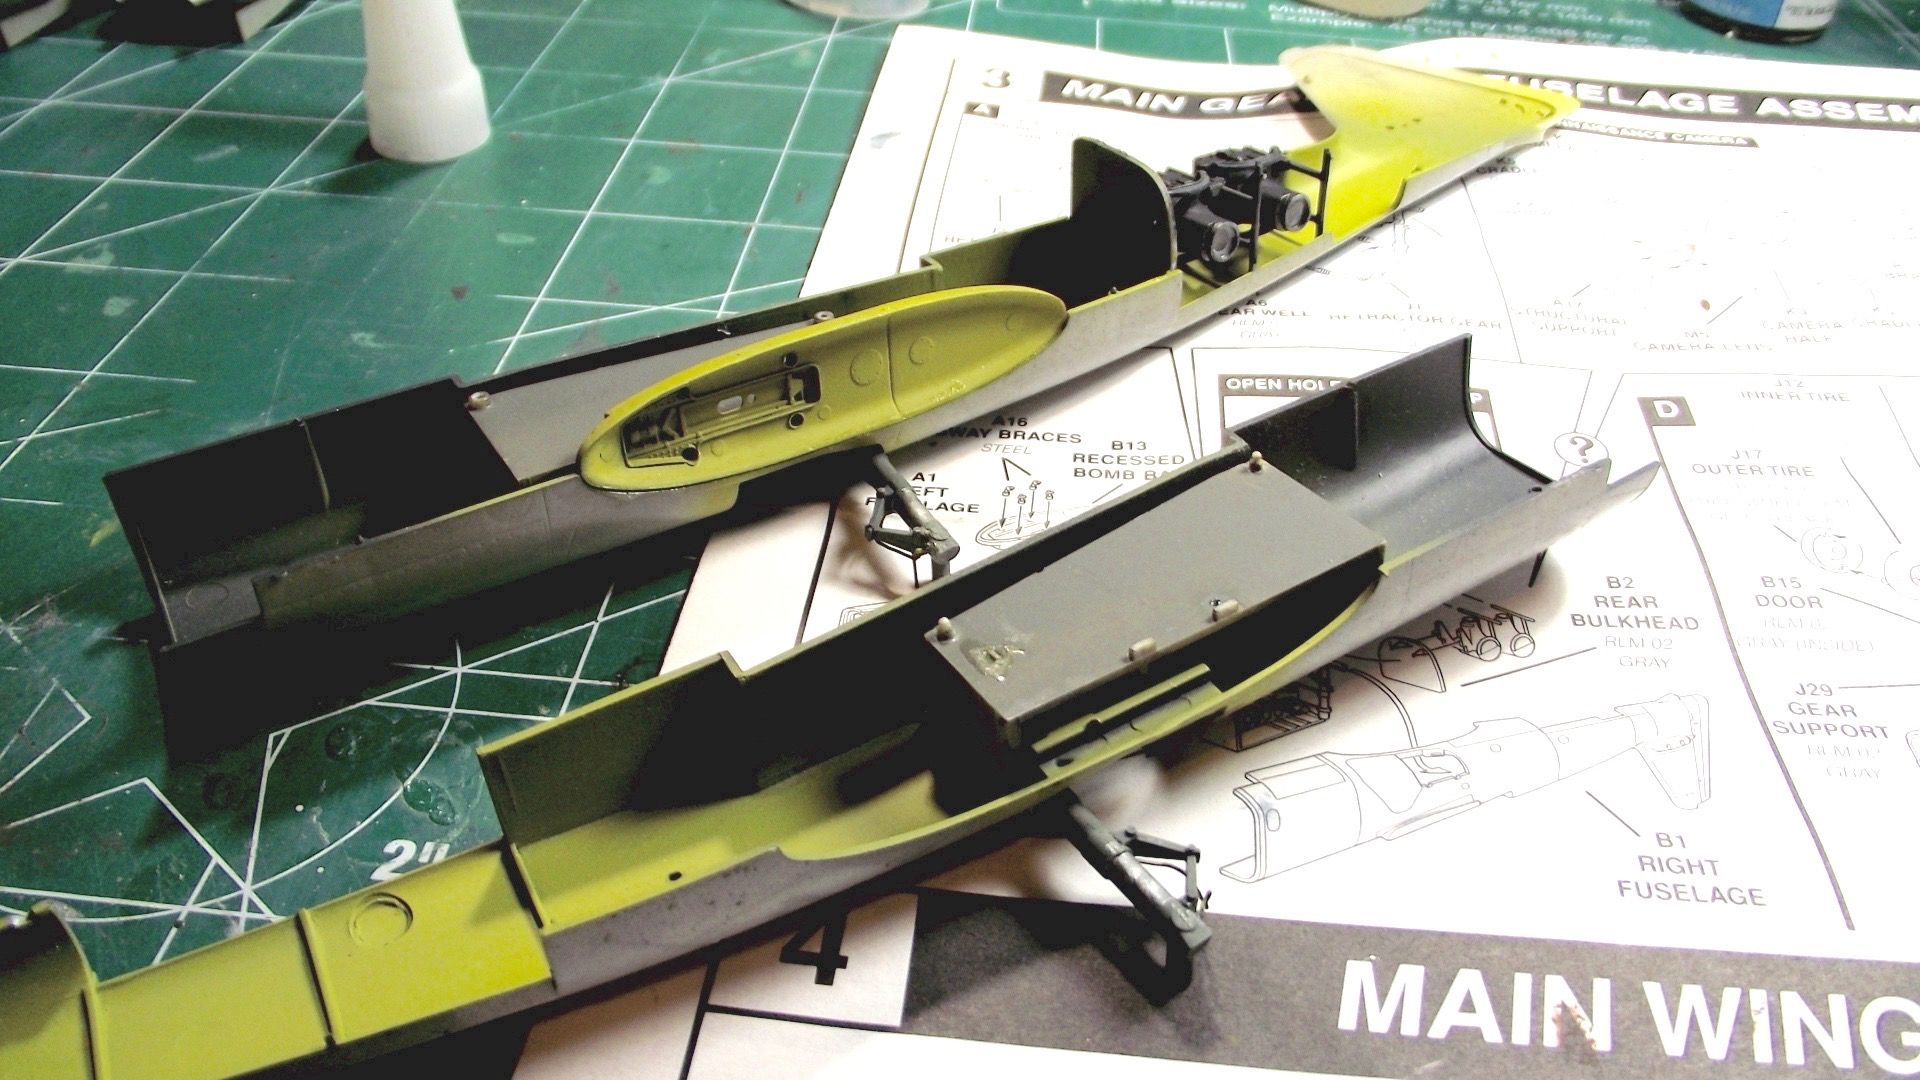
Now I was ready to button everything up.

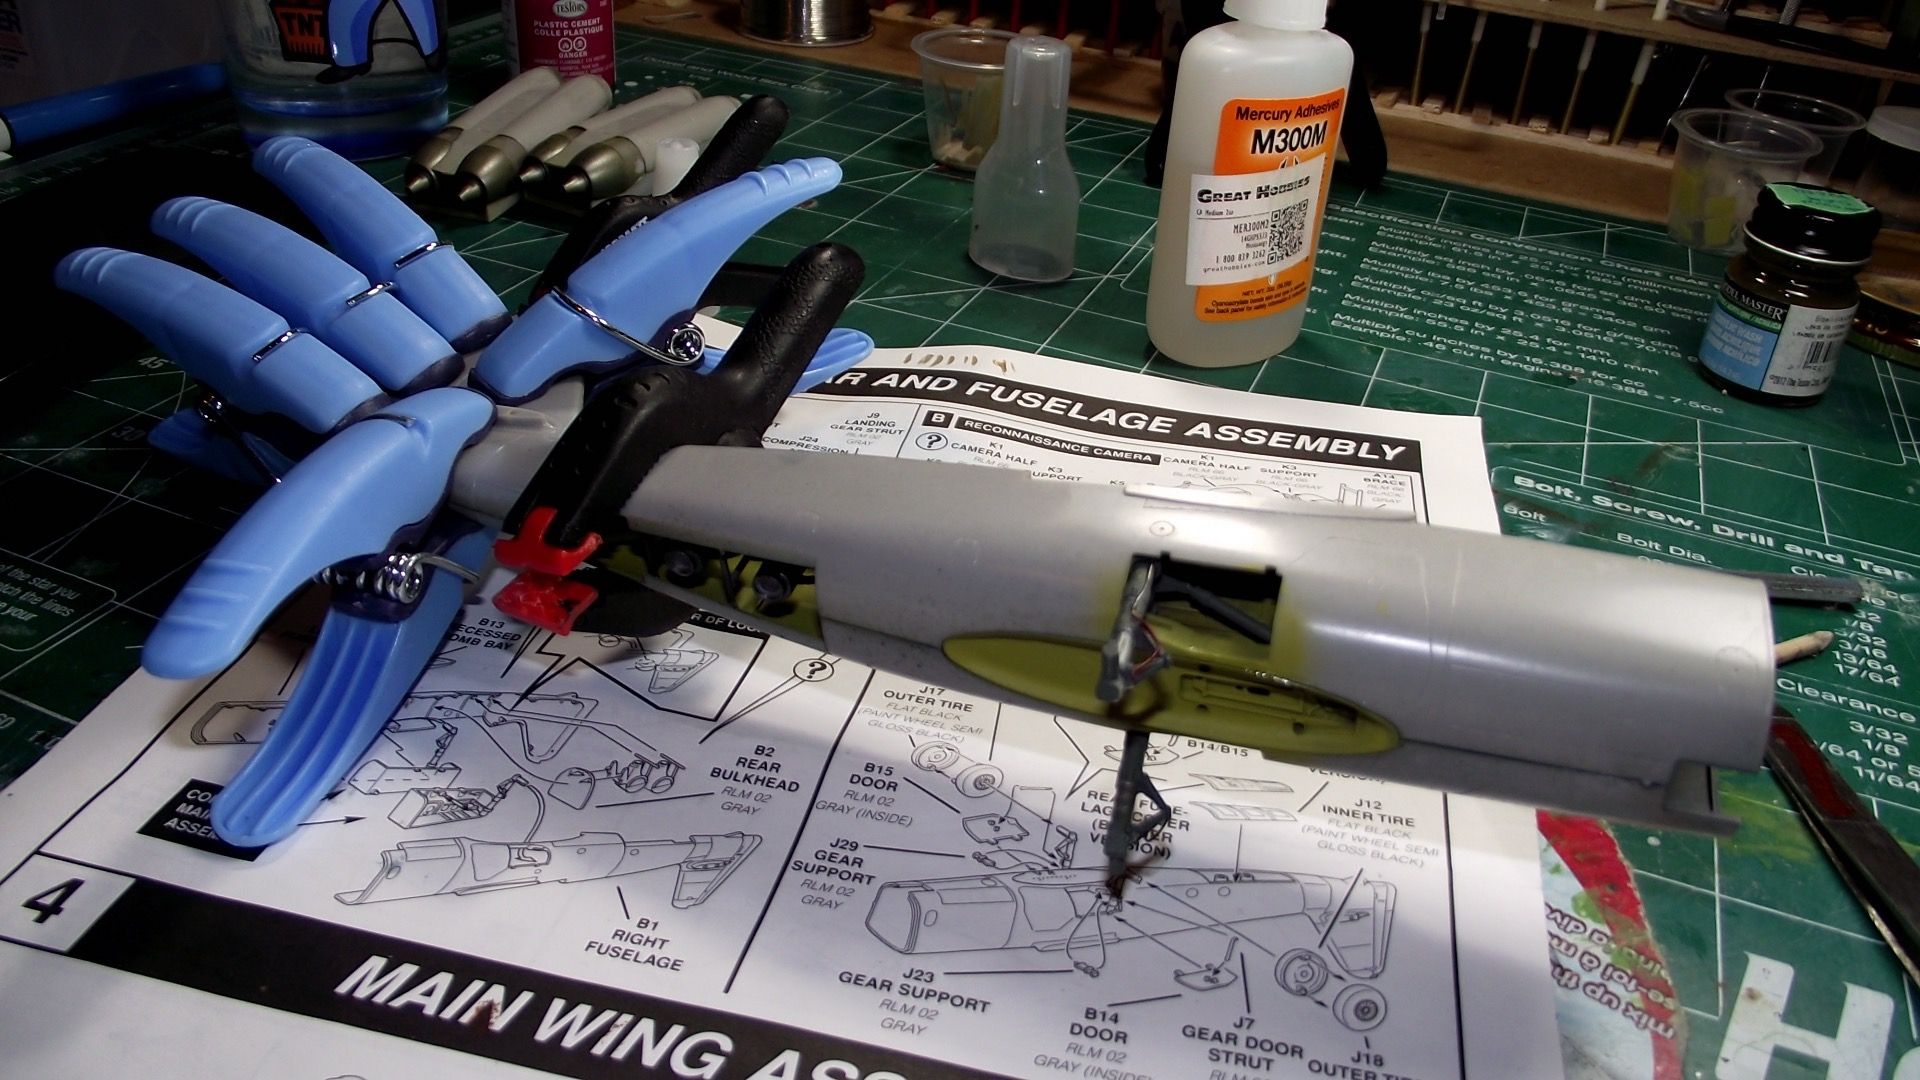
Now I have a fair number of sub assemblies done, it's starting to look like an airplane!

Next I decided to mask the cockpit glass. Talk about nerve racking!
I put some Tamiya tape over the areas to be done and held it up to one of my bench lights to see the lines and carefully trace/cut them out with a blade.

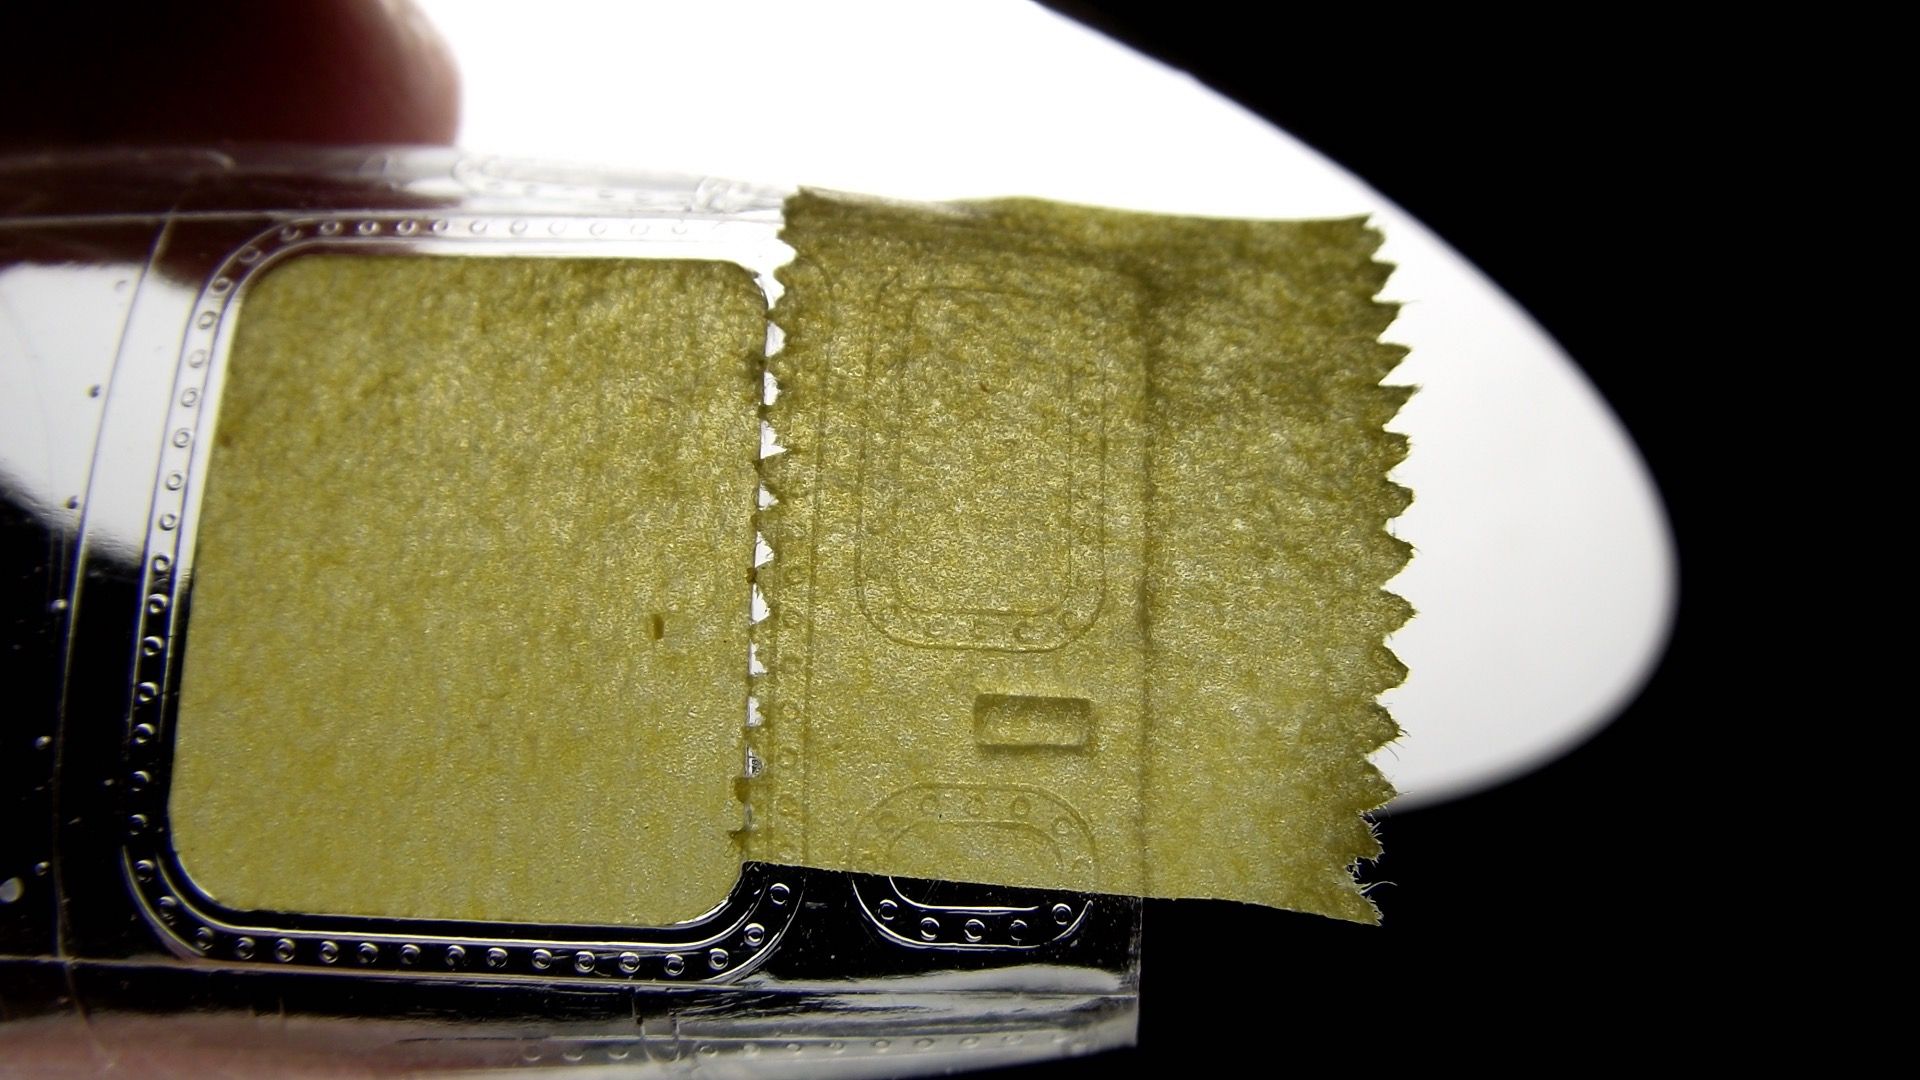
I am pretty pleased with the results.

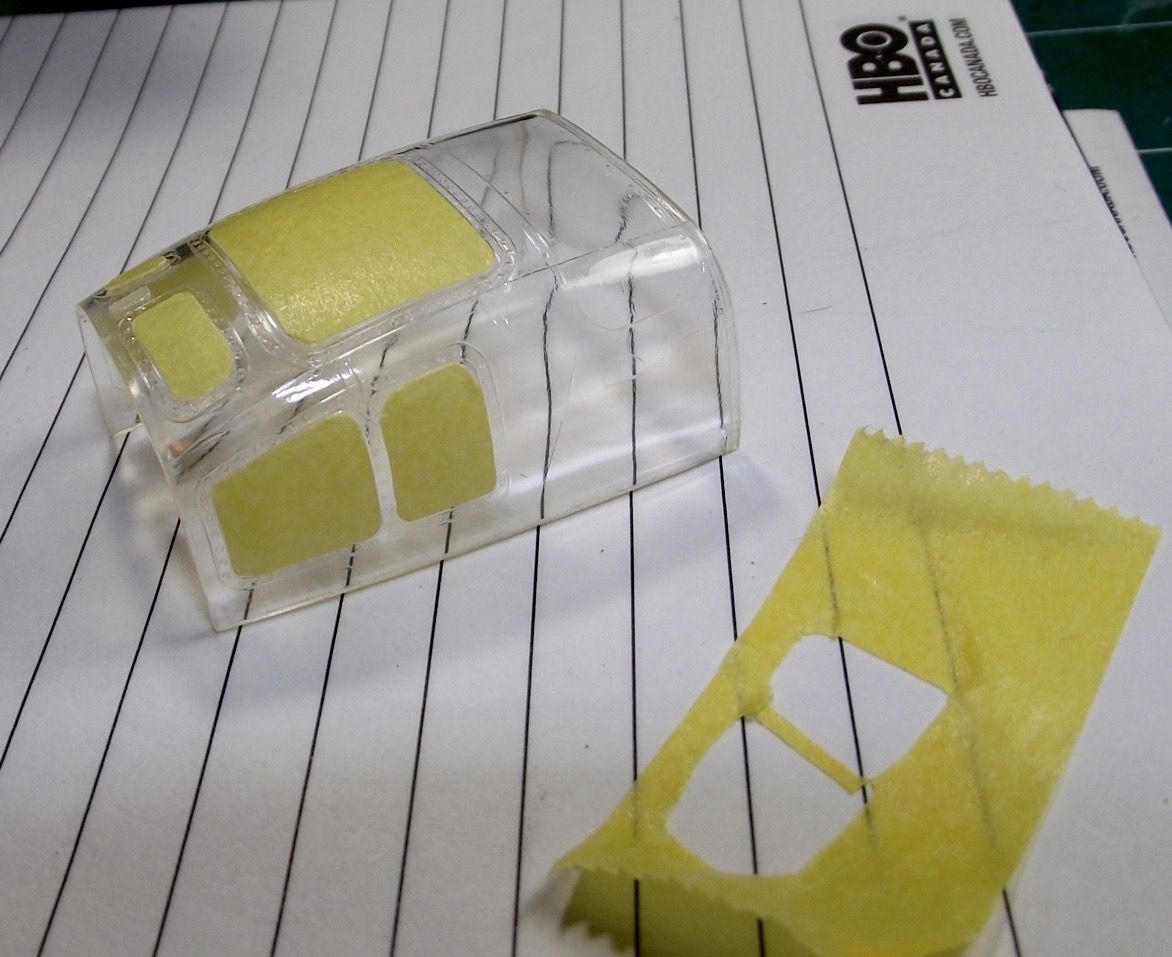
My only complaint is that the glass is very thick and the nose glass has a mold seam line right down the centre, no realistic way of removing that.
I was talking with a friend who does tabletop gaming scenery about this and it led to us deciding to build a small vacuum forming machine. So I think I'll take a crack at making my own cockpit glass, see how it actually works out.

Once this was done I started on the lines for the instruments, that much to see, it'd be a shame if i didn't add the plumbing for the works.
I took some thin fishing line, clamped it on a shelf and put a clamp on the bottom for weight and gave it a coat of matte white for primer. 
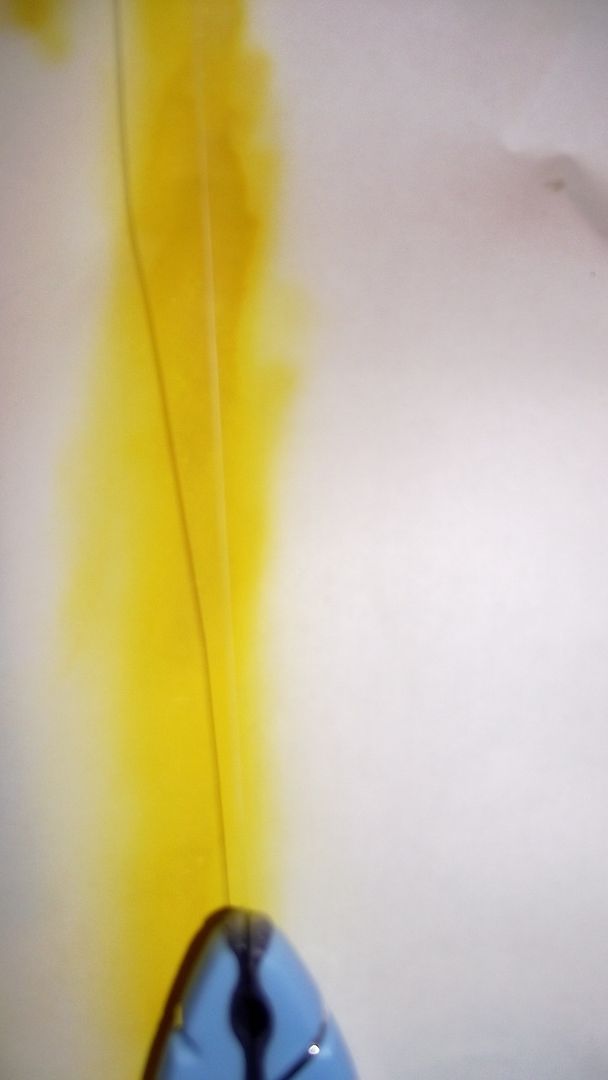
Then I gave it a coat of yellow to match my reference.
I held a sheet of paper behind it to both prevent painting my walls and to see where I was going and actually "hit" the line.


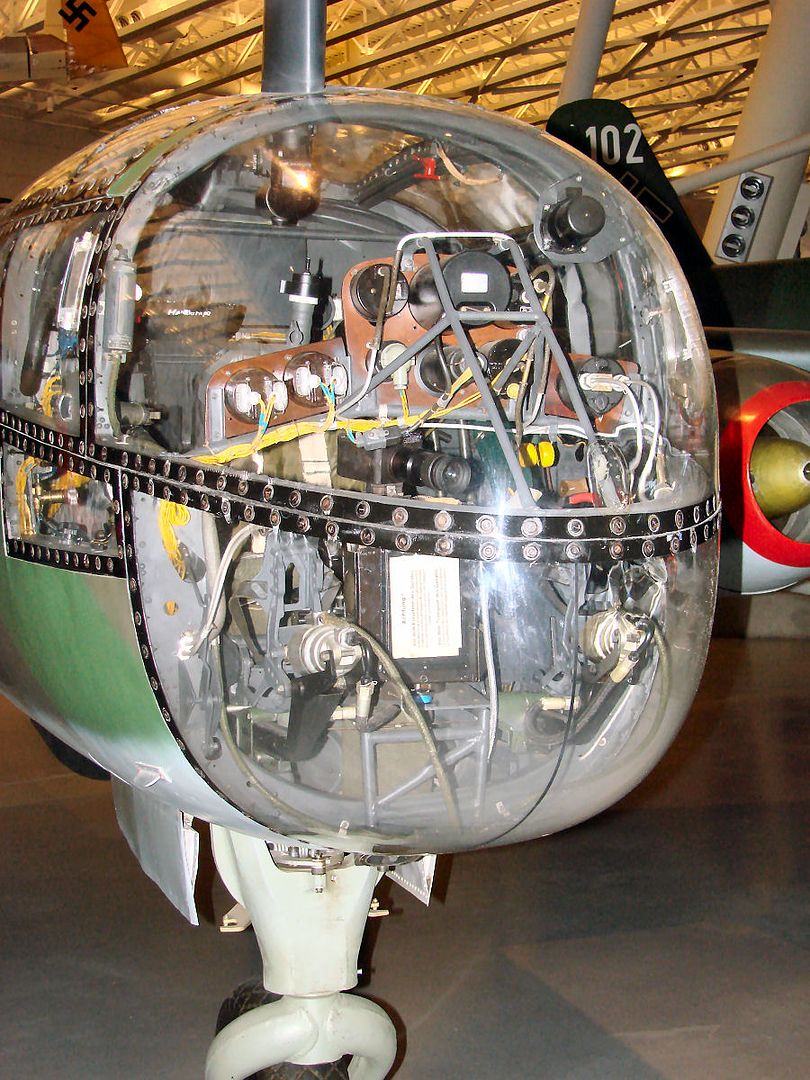
Looking at the reference, it's going to be some wicked eye strain but well worth it :)


  • Member since
    March 2012
  • From: Corpus Christi, Tx
Posted by mustang1989 on Thursday, July 28, 2016 7:54 PM

Heya Colin, 

 The gear and brake lines as well as the overall progress is coming along great!! For gauge circuitry I tend to use braided wire found in things like wire used for ear buds or the like. There's alot of little bitty wires in there and they are really pliable. Here's some that I spooled up on a roller:

Alot of this stuff is already kind of braided like alot of electrical circuits are in real life. Now let's zoom in a little closer to take a look .....

You may have the question raised of how to paint this stuff. It's simple. Dip your built "harnesses" in Future, let dry and paint it whatever color you want with acrylic paint, apply a light wash to bring out the wire definition a little and your done.


 Forum | Modelers Social Club Forum (proboards.com) 

  • Member since
    March 2015
Posted by qlabs on Thursday, July 28, 2016 8:53 PM

Excellent!
I used some stripped ethernet wire for the lines coming off the pedals in the cockpit but I think it's a bit thick and hard to work. Not like solder that's for sure.
I'll definately try some wire from earbuds. Do you find it easy to work?
Do you do anything to it to make it a bit stiffer or shouldn't be a concern?

  • Member since
    March 2012
  • From: Corpus Christi, Tx
Posted by mustang1989 on Thursday, July 28, 2016 9:02 PM

It really shouldn't be much of a concern as its all going to be behind a windscreen and it works really easy.


 Forum | Modelers Social Club Forum (proboards.com) 

  • Member since
    March 2012
  • From: Corpus Christi, Tx
Posted by mustang1989 on Friday, July 29, 2016 9:59 AM

Quick update. I stripped a set of ear bud wires down this morning and the wire is actually smaller than what I had pictured so it'll work great scale wise for the circuitry behind the gauges.


 Forum | Modelers Social Club Forum (proboards.com) 

JOIN OUR COMMUNITY!

Our community is FREE to join. To participate you must either login or register for an account.

SEARCH FORUMS
FREE NEWSLETTER
By signing up you may also receive reader surveys and occasional special offers. We do not sell, rent or trade our email lists. View our Privacy Policy.