I've hesitated to post this yet because I am building it as Big Beautiful Doll and wanted to make sure it wasn't going to be a mess before sharing it.
I bought Meng's P-51 because I was itching to try out the kit that is engineered to eliminate annoying seams. And it largely does this well. The build/paint sequence for the cockpit was awesome, and worked to allow easy painting and then construction with minimal masking and headaches.
The things I don't like are tha the "cement-free" assembly (yes, I cemented every part because otherwise it will come loose) makes dry-fitting hard. Those fuselage halves REALLY want to stay together. Also, the need to install radio mast and all gear legs before full assembly was rather annoying, and I broke one of the gear legs while sanding something, which caused me to drop the plane, and that caused the tail wheel to break off. So those will be fun fixes...
The worst-fitting parts of the kit are the upper cowling, which is too long, but only requires a bit of sanding, and the gun inserts, which just don't fit well and needed some putty and sanding (that's then I broke the gear leg).
Mostly, however, it goes together well and locks up tight.
I have an Eagle Editions decal set that I used for Petie 2nd on my Tamiya Mustang, and I opted to use Big Beautiful Doll on this build, despite my worries about fitting the 22 pieces that compose the chessboard and stripes portion of the scheme.
First up was the wingtips. Eagle Editions did not include the white on those, which was super annoying because it meant I had to either measure perfetly (not my strong suit) or take another approach.
I opted to primer the wings in Tamiya gray primer through the airbrush, and paint the wingtips white. I then gave the wings and wingtips a gloss clear coat, then applied the black chessboard decals and another hefty clear coat to protect them in the masking process.
Fortunately, that worked well. I had to cut the decals around the aileron, as Meng molded it as a second piece and I didn't want the decals to rip when it flexed. That was good, as I later broke off the right aileron (easy fix).
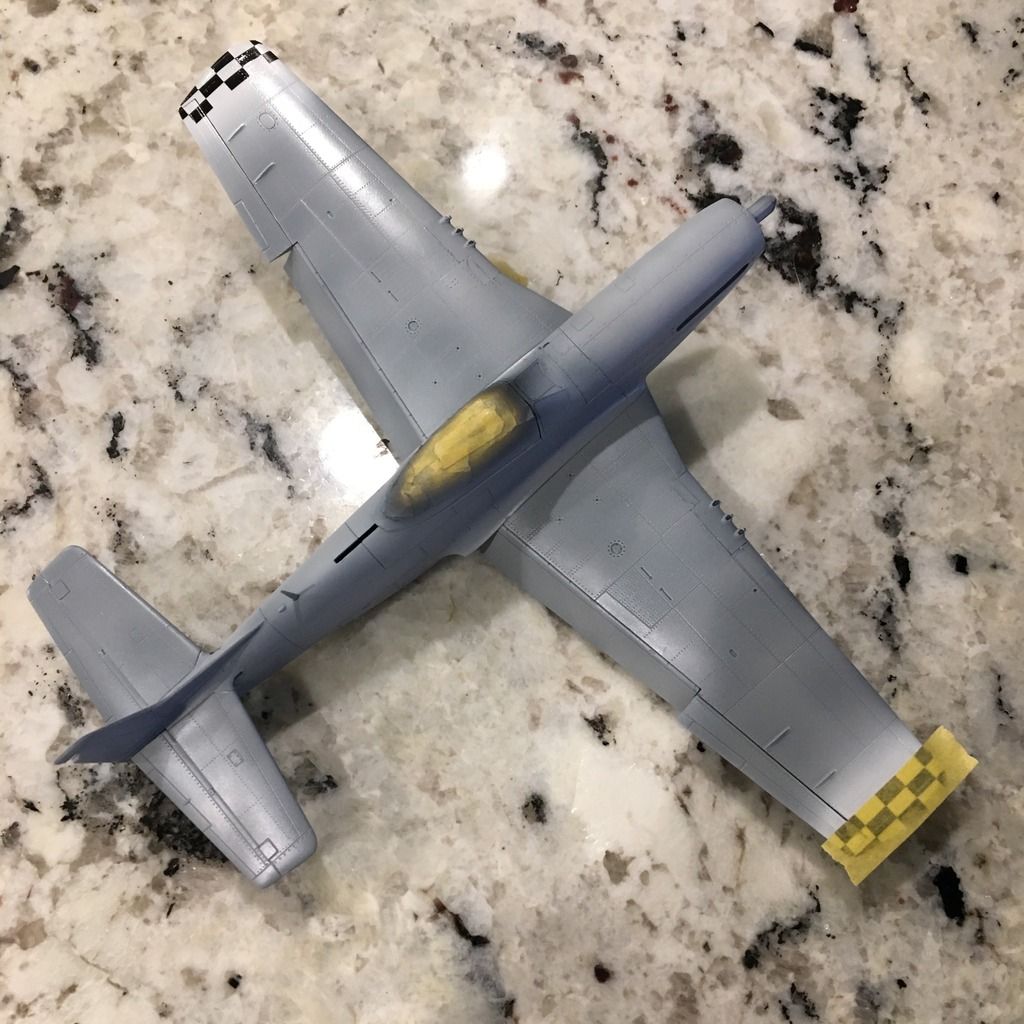
After masking the wingtips, I painted the wings what I thought was Alclad RAF Hi-Speed Aluminum, but what was actually Hi-Shine Aluminum. Oops. With Mustang wings being painted, it was way too shiny. So I masked off the ammo bays and then sprayed over the wings with Mr. Paint Duraluminum.
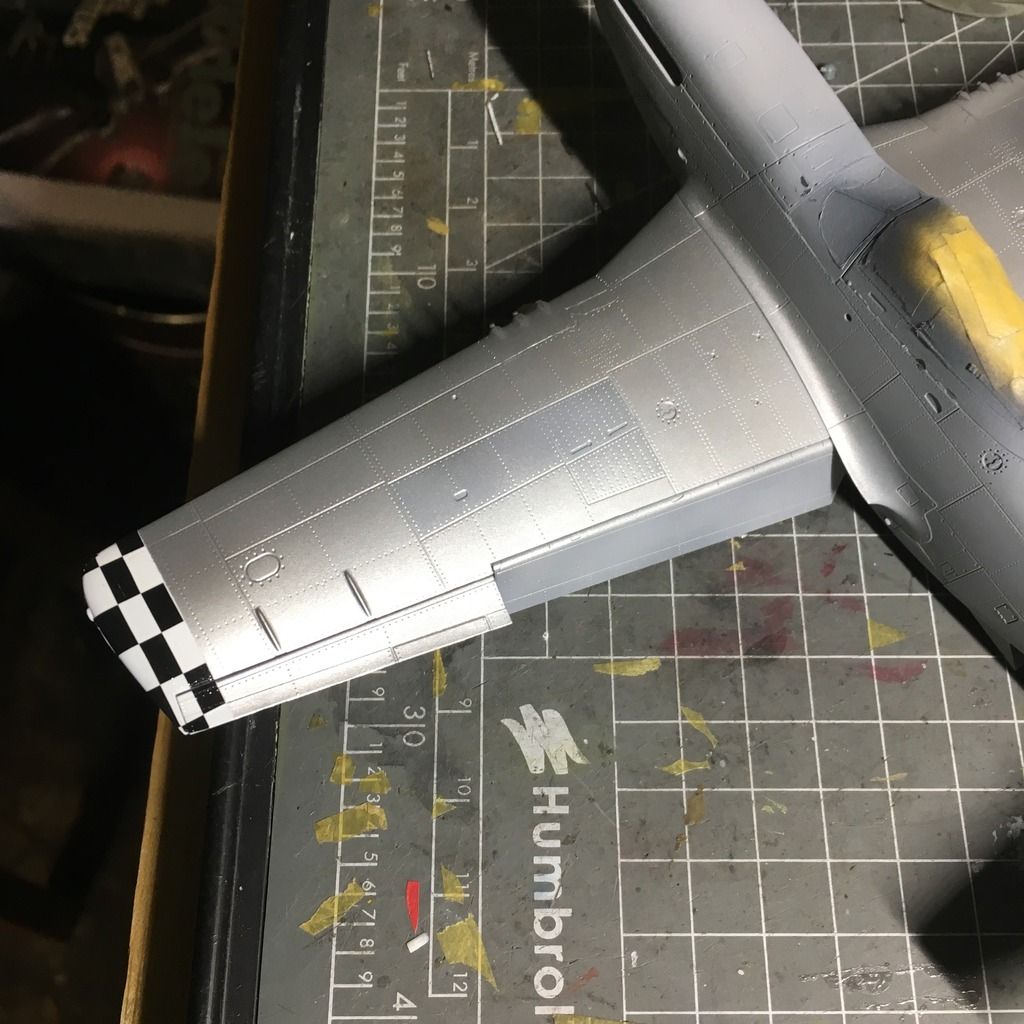
Once that was dry, I masked off the wings and horizontal stabilizers, leaving their tips exposed, and sprayed the nose with Tamiya Olive Drab before masking it and spraying the whole fuselage Tamiya Gloss Black.
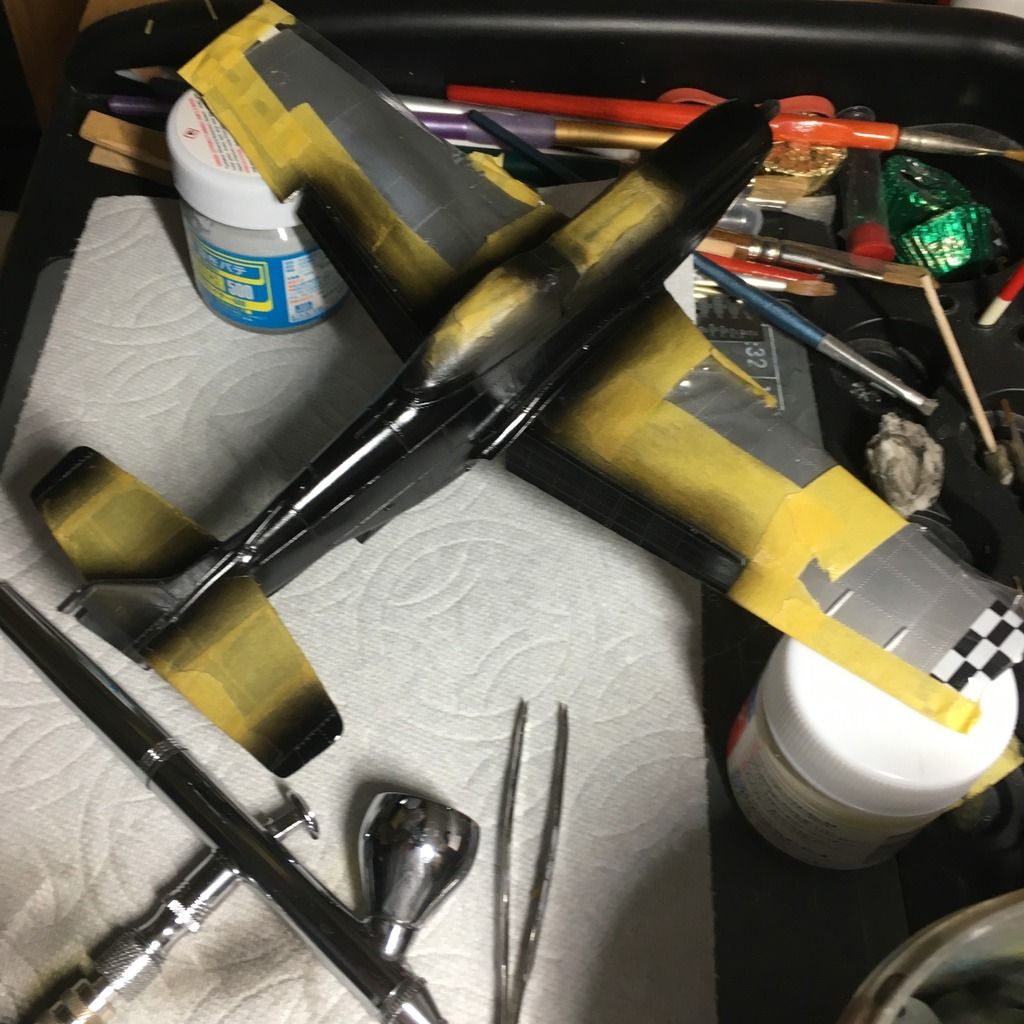
Next up was Alclad Airframe Aluminum, and I do love this paint so much.
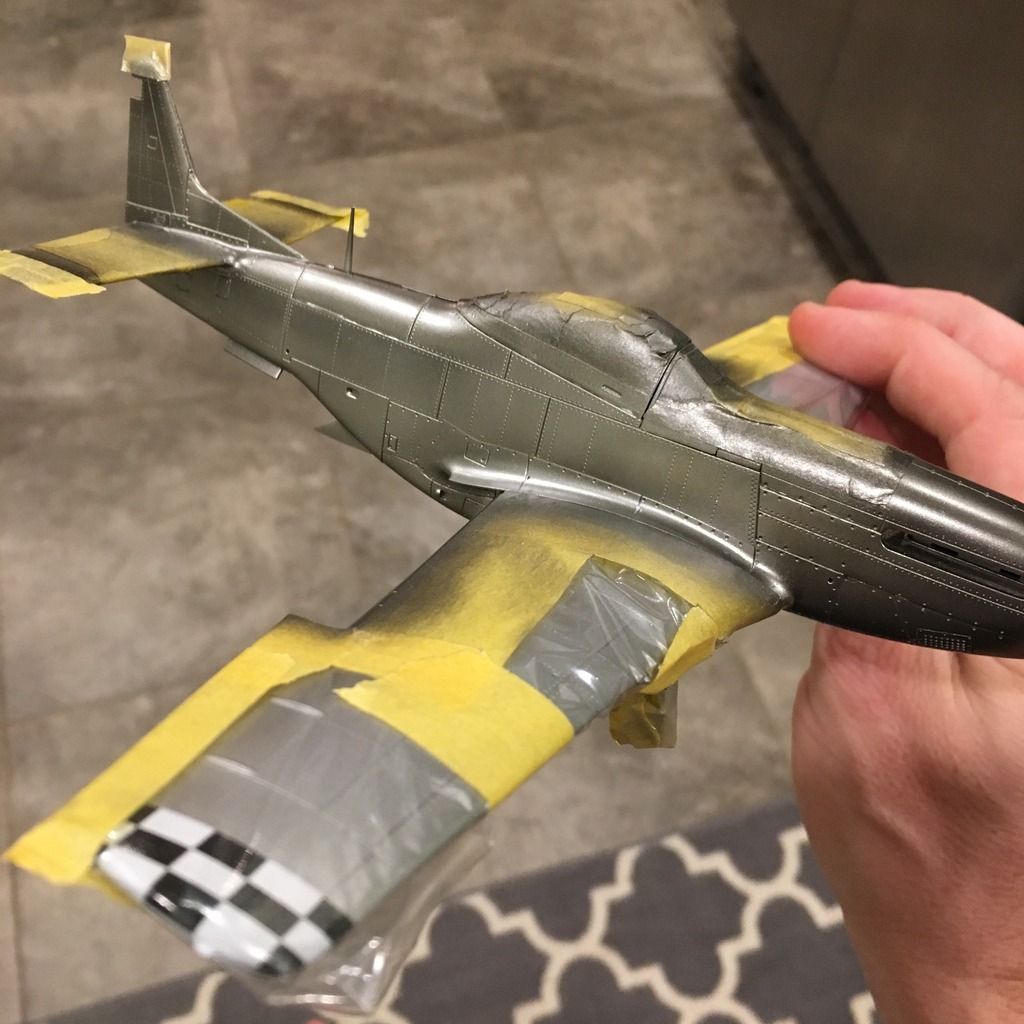
I waited an hour for that to dry, then masked off the rear fuelage saddle piece, a spot on the tail and the pieces behind the exhaust and sprayed hi-shine aluminum on the forst two, and magnesium on the exhaust parts.
After that, I got to pull off the masks and see how she looked. Then it was the moment of truth.
I started with the top two decals for the chessboard. I had estimated pretty well where the lines would be and masked off the olive drab around it so that I wouldn't be putting white decals down over high-contrast colors (shiny aluminum and matt olive drab).
And they fit! So next up were the bottom portions, which run from below the exhaust ports to the chin and front of the gear bays. They were slightly off, but a small amount of paint touching up will fix their overlap on the chin.
After that, I added the red outline decals, which also all fit very well, with the exception of the thin red lines around the exhaust opening, but that can be fixed with paint (it's hard to gauge exactly where they go when the chessboard wraps around the opening slightly).
After that, it was pretty easy. The Cartograf-printed scheme decals went down like a dream and sank into all the fine surface detail with only Micro Set being used.
For the national insignia, I had to use the Meng decals, which are also Cartograf-printed. Oddly, the fuselage stars and bars were printed with the letters, which meant they have a ton of carrier film that needed tobe cut away. But that was pretty easy, and they layed down nicely as well.
I also applied the red lines around the wingtip chessboard at this time, which I had left off as a way to cover imperfect masking.
So, after two hours of decals, this is where I was:
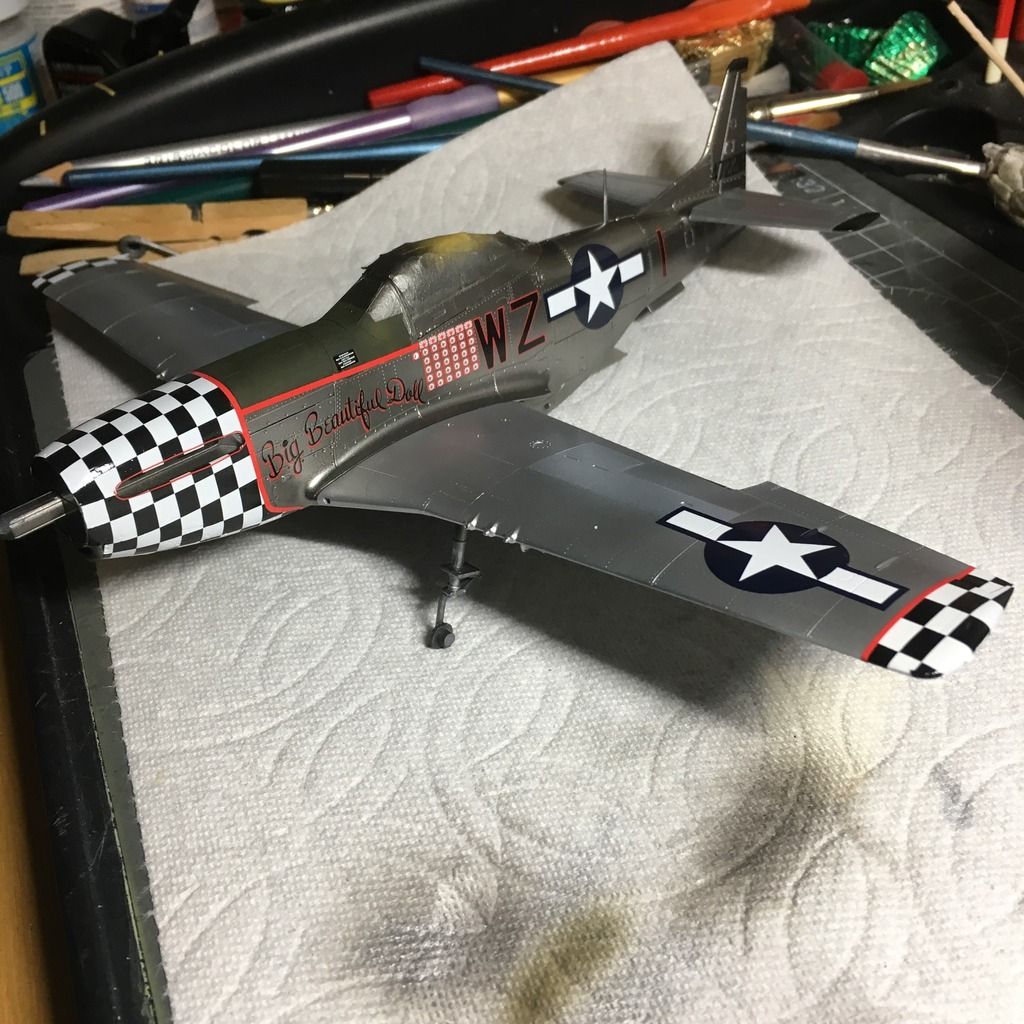
It's definitely not perfect. The chessboard isn't 100 percent, and there are a few small imperfections that I didn't fully iron out before paint, but they're hard to see, and given this is my first time using chessboard decals, I am pretty happy withhow they came out. I am hoping to get the rest of the decals and stencils on in thenext few days and then get those landing gear legs fixed.
Thanks for looking!
-BD-