SEARCH FINESCALE.COM

Enter keywords or a search phrase below:

Tammy's 1/48 - Whole lotta Zero going on here.

6497 views
93 replies
1 rating 2 rating 3 rating 4 rating 5 rating
  • Member since
    July 2003
  • From: Cincinnati, Ohio
Tammy's 1/48 - Whole lotta Zero going on here.
Posted by ridleusmc on Sunday, August 20, 2017 10:26 PM

Hello Everybody,

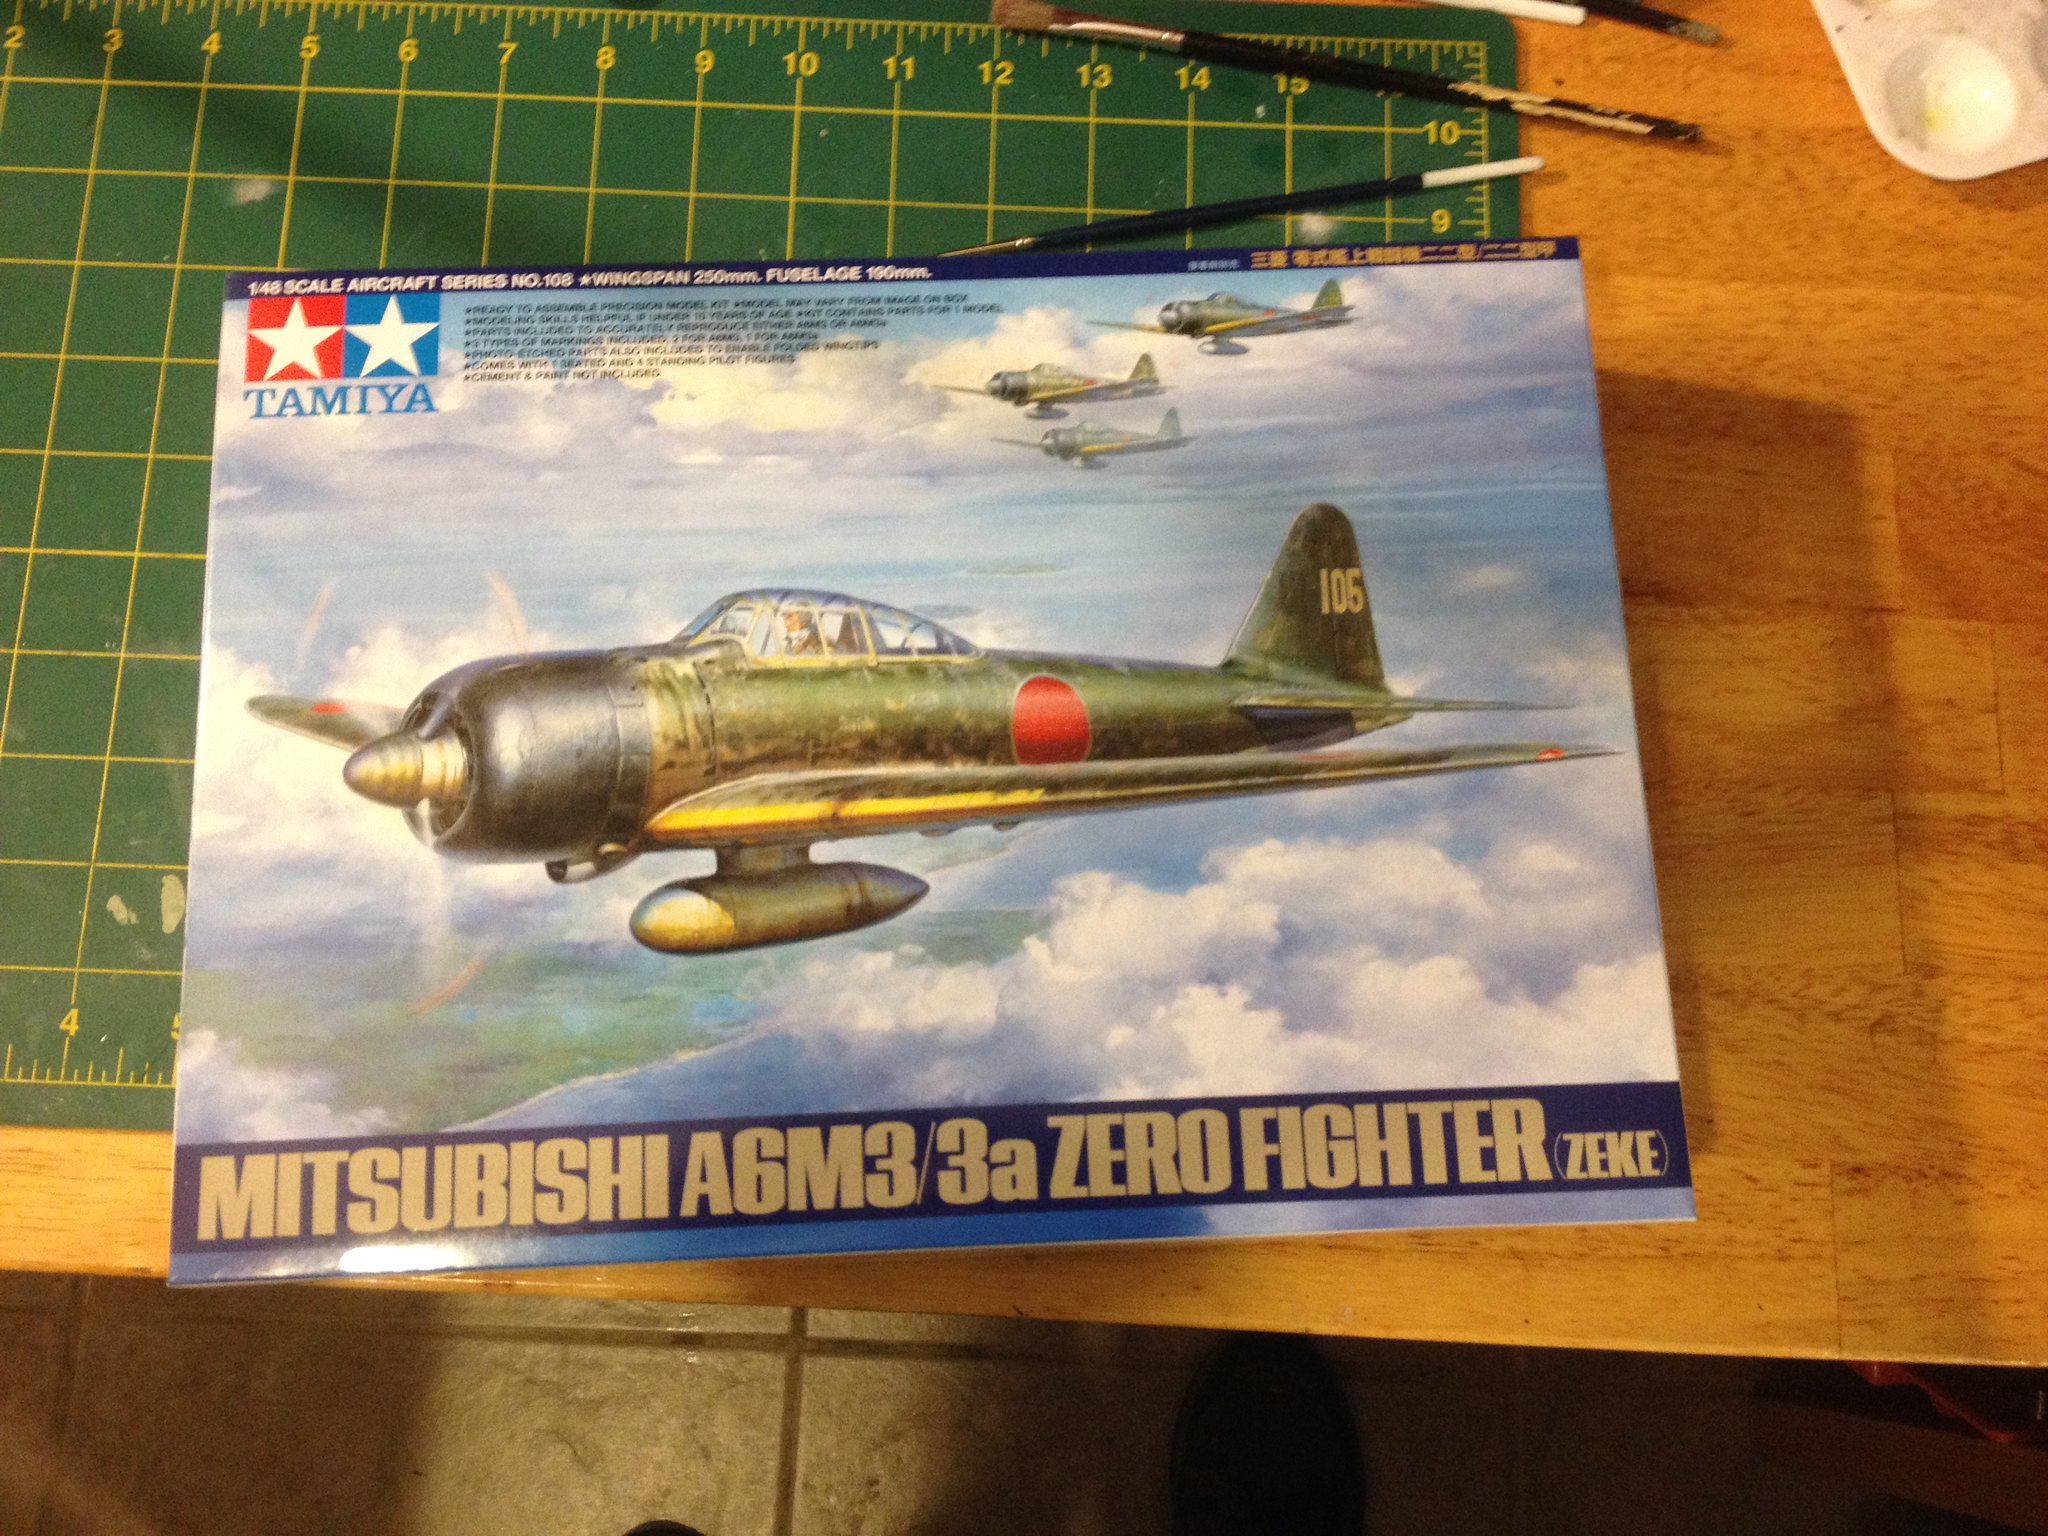
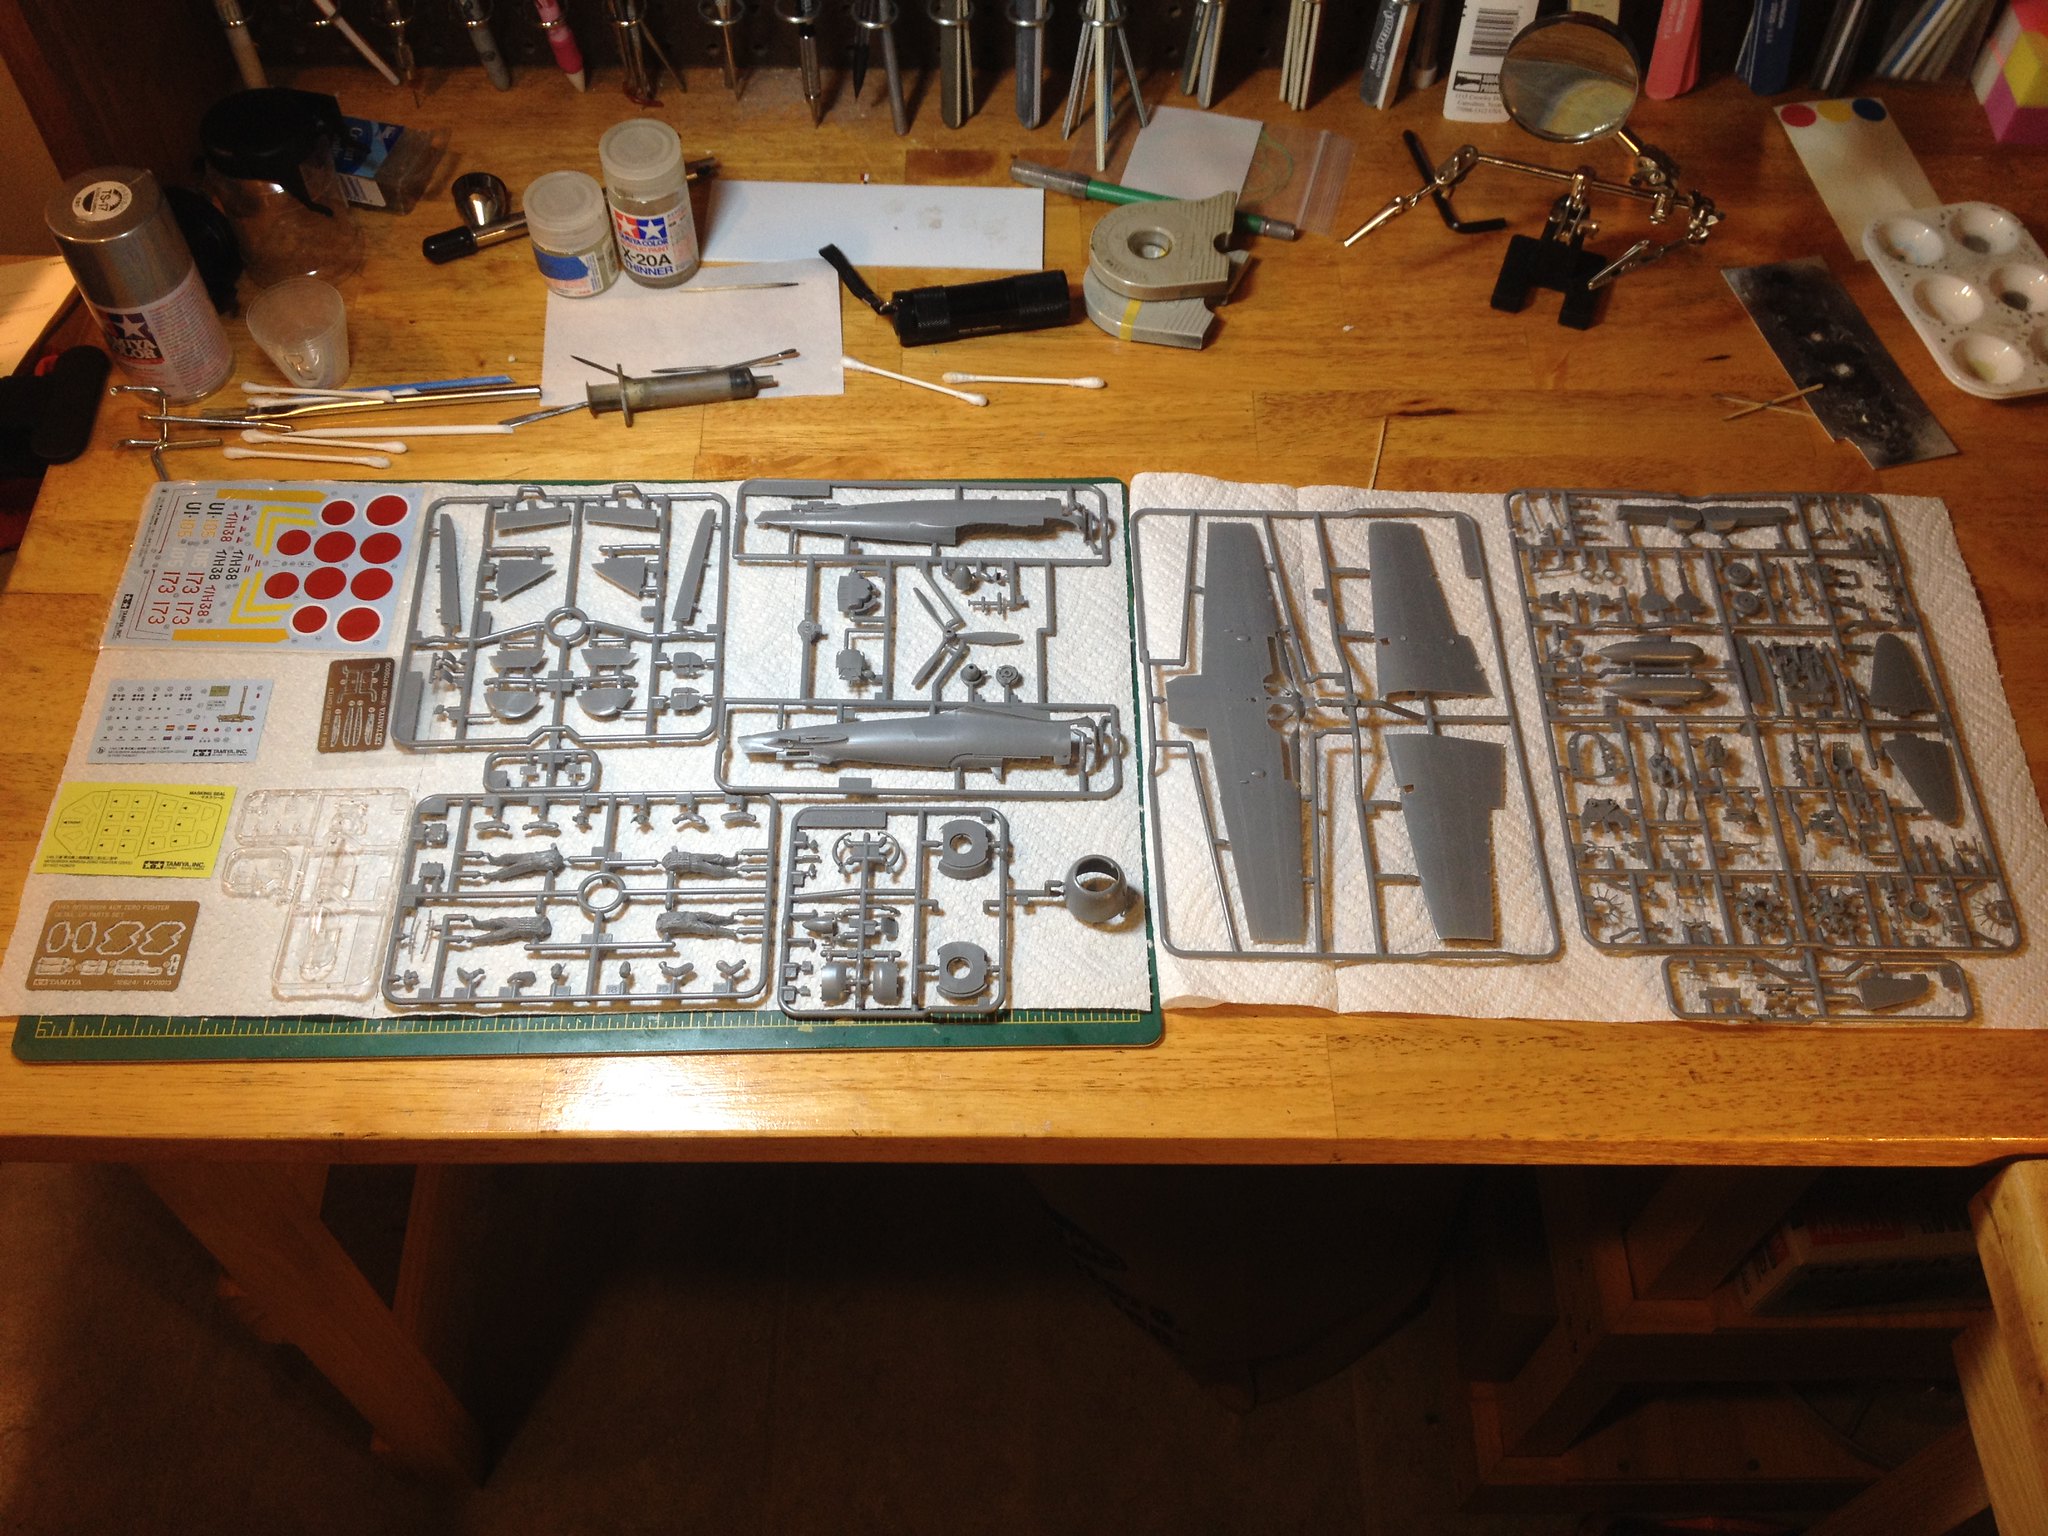
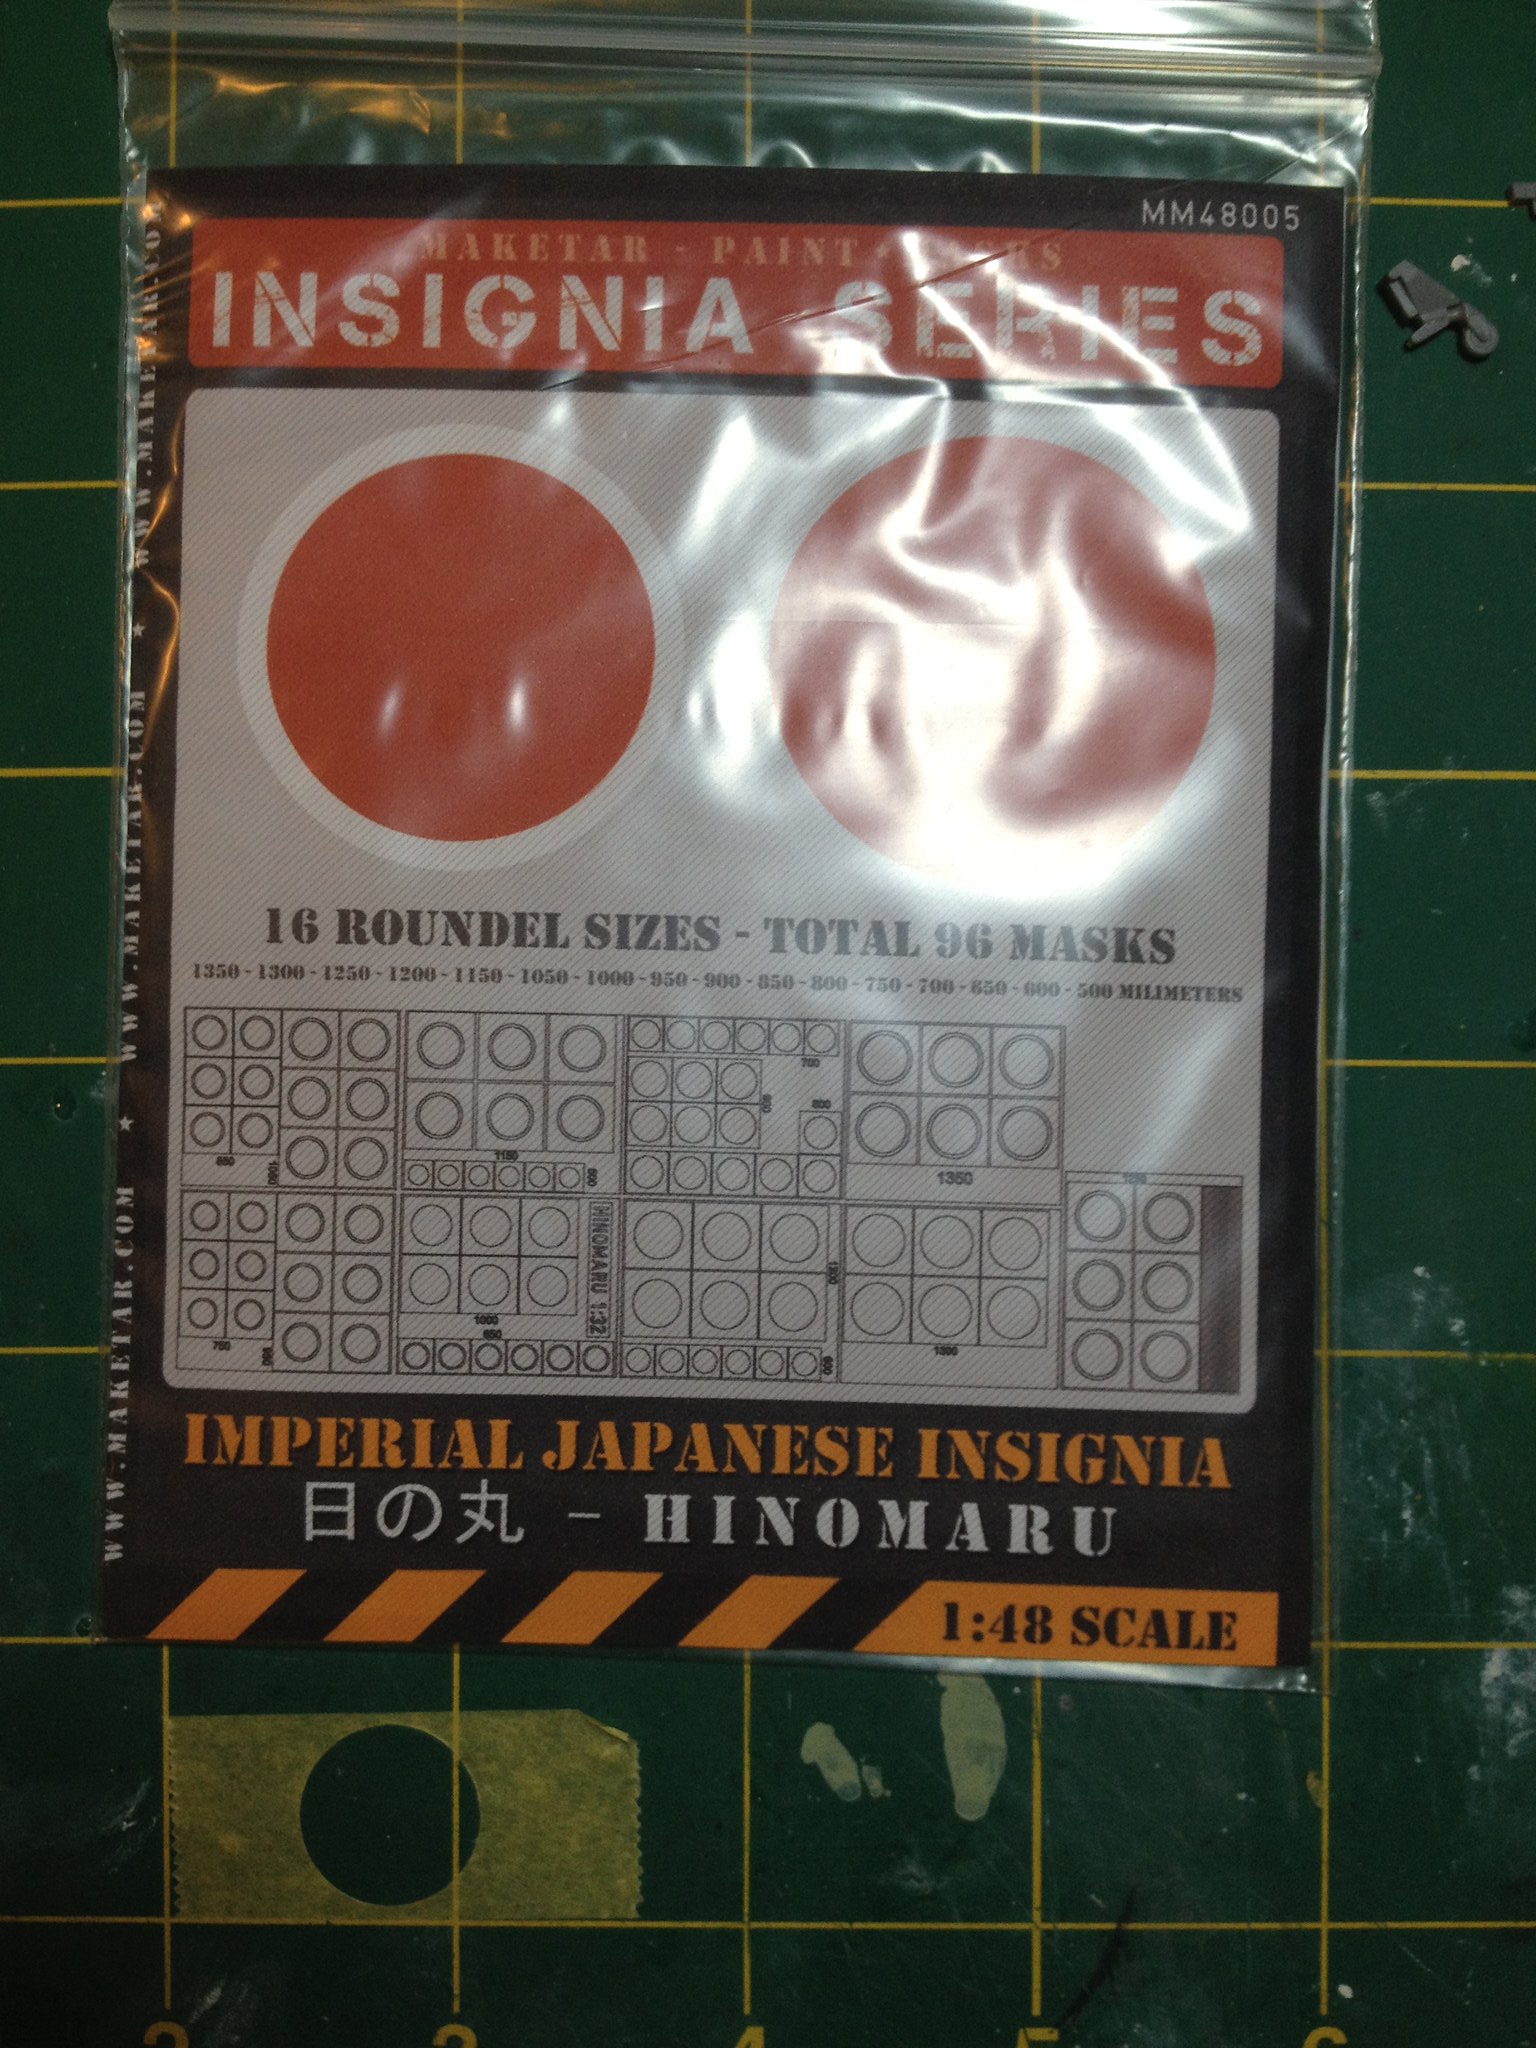
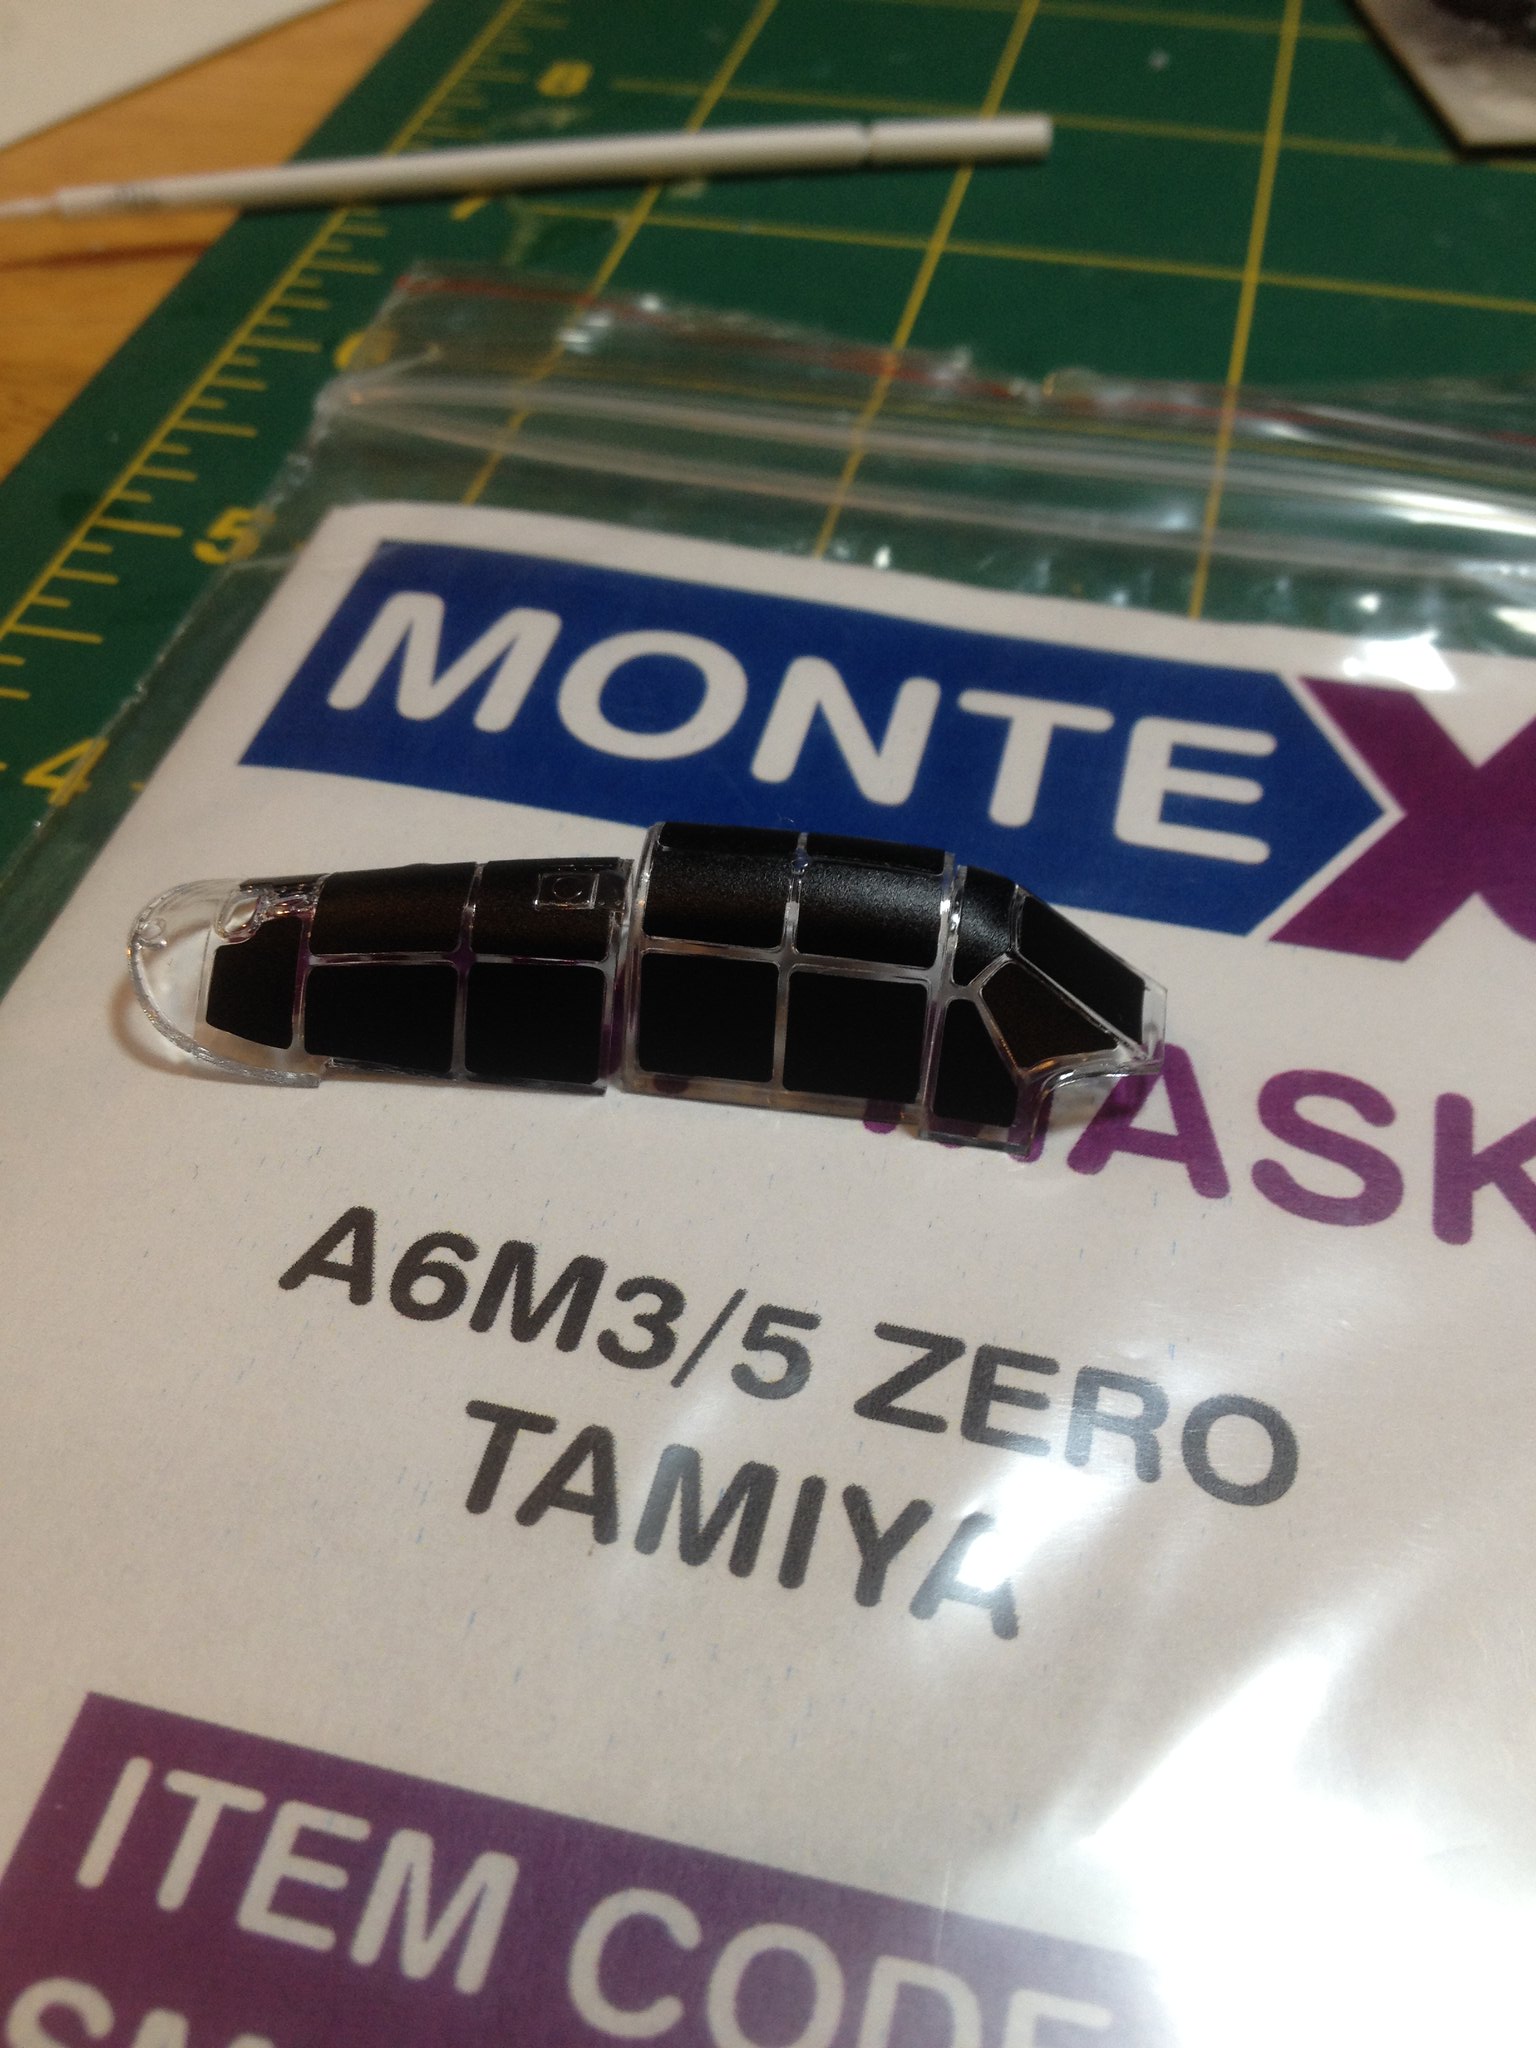
I've decided to add to my recent Pacific Theater builds with an adversary.  It's Tamiya's 1/48 A6M3/3a Zero.  I usually don't keep banging away at a single topic stream, but this will be my 4th Pacific War subject in a row.  However, this one is different, because I usually build US subjects.  It's a great kit.  I've really only run across one horrific dud from Tamiya, and it had tracks.  I bought Tamiya's Detail Up Parts Set (Item 12624).  I wanted the seatbelts, but they are steel photo-etch.  Steel PE is stiffer than I like.  I also purchased Montex masks for the canopy (SM 48332) and Maketar masks for the Hinomarus (MM 48005).  I also bought a circle cutter from amazon to help with the Hinomarus if needed.  

 IMG_2118 by Christopher Ridle, on Flickr

 IMG_2120 by Christopher Ridle, on Flickr

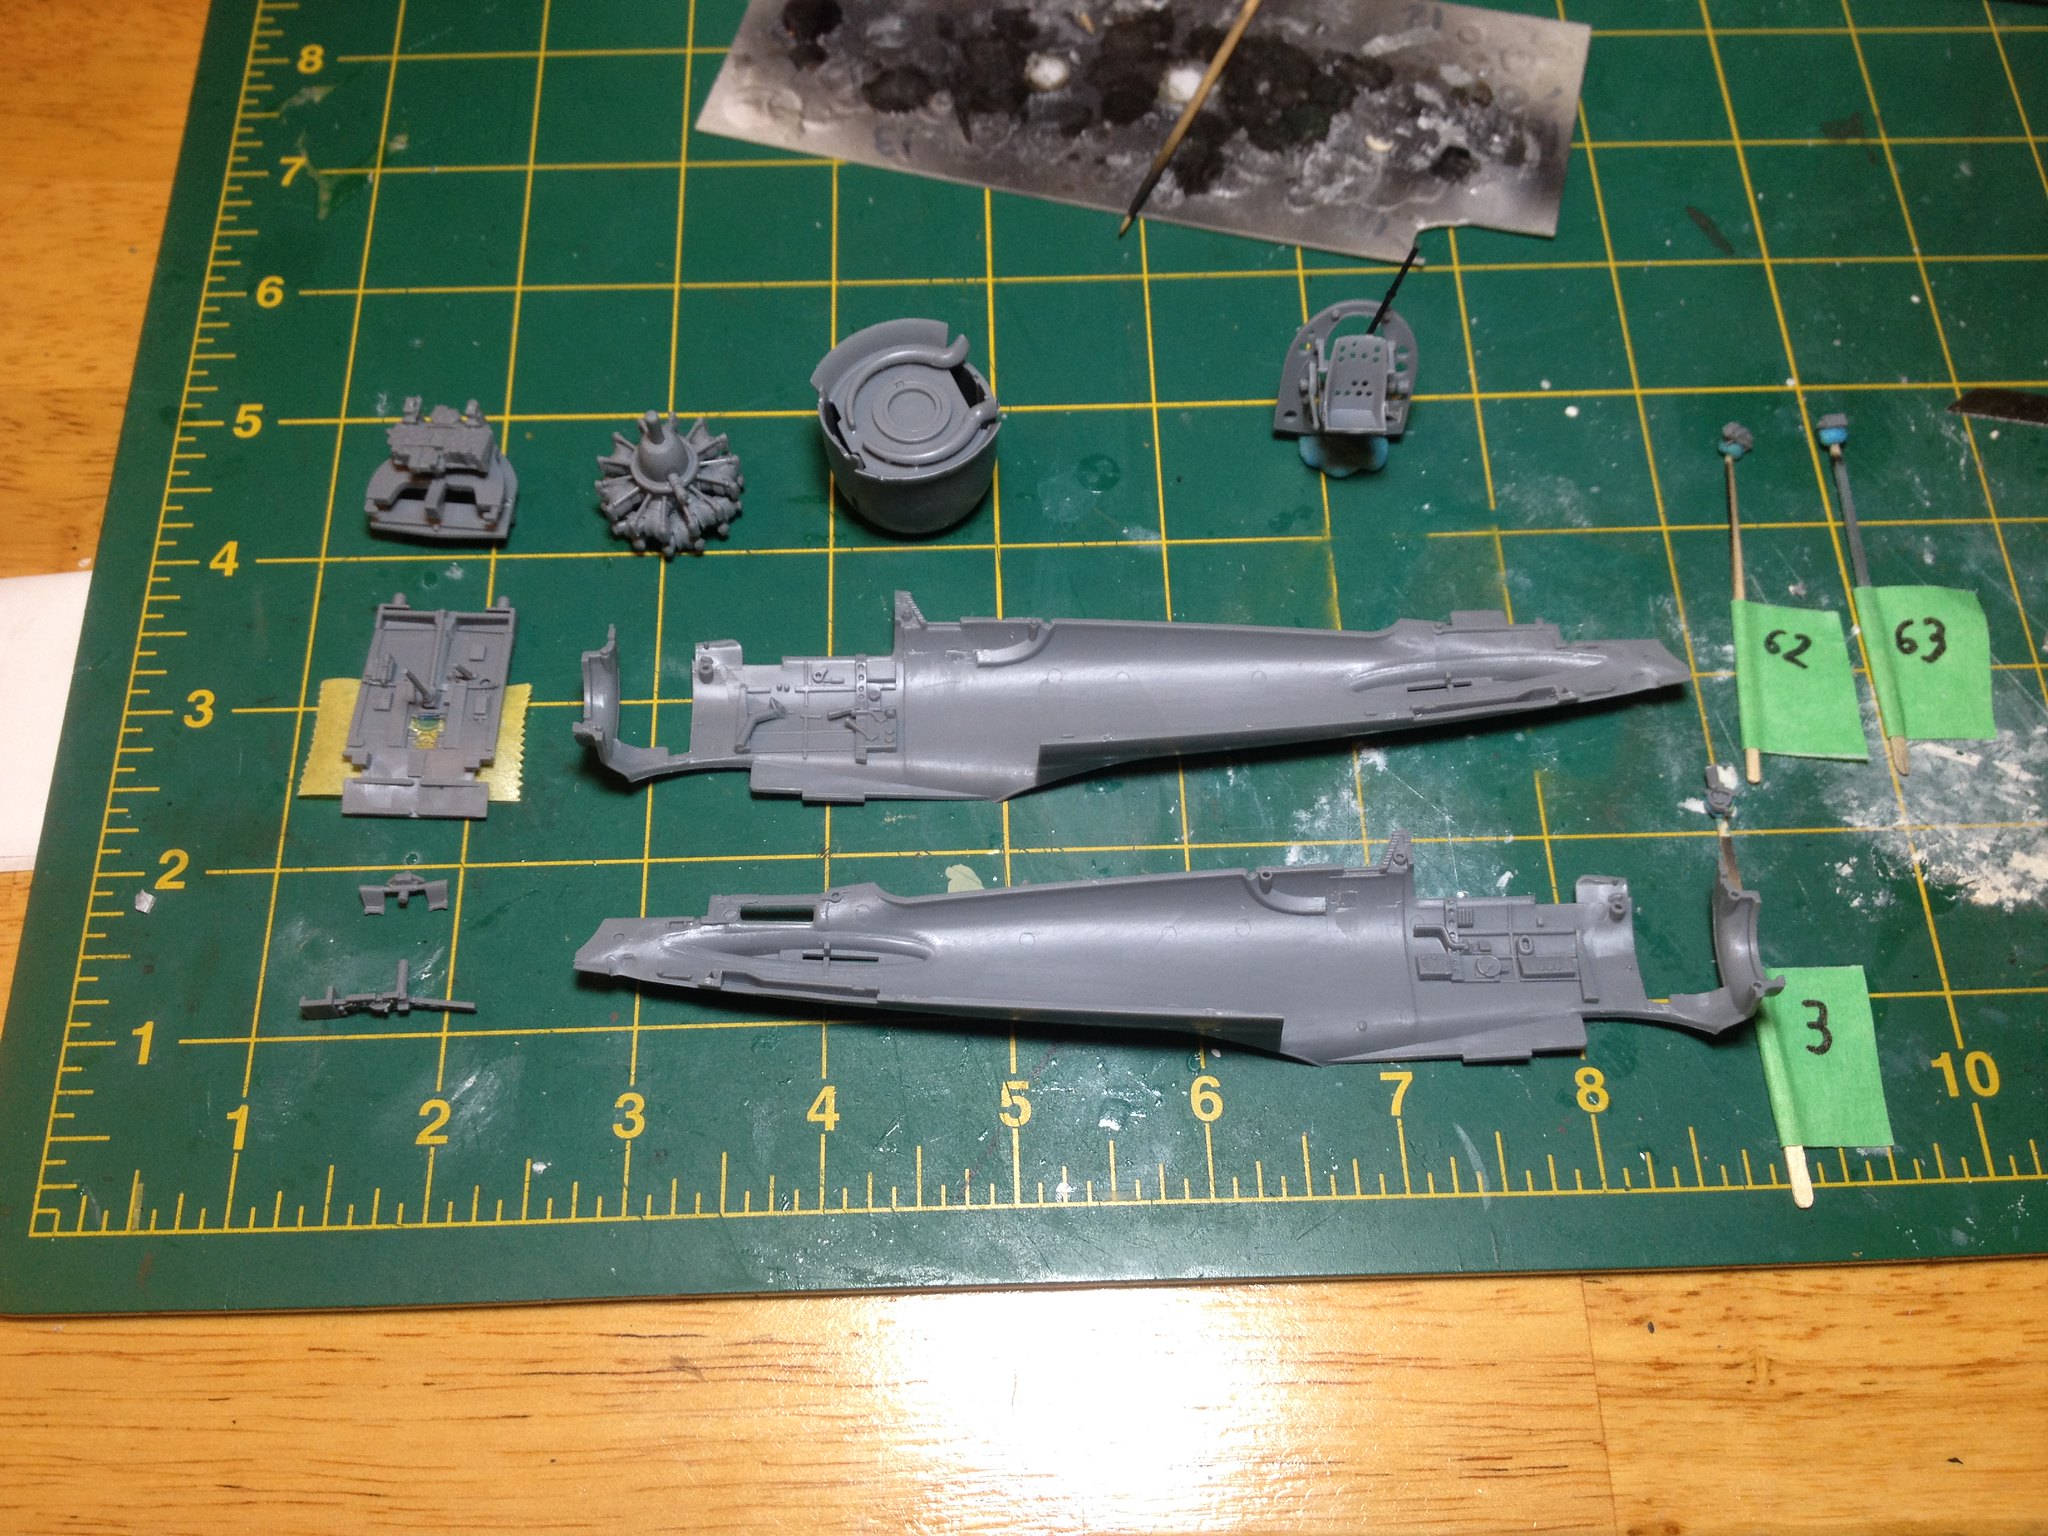
The sub assemblies slide together.

 IMG_2124 by Christopher Ridle, on Flickr

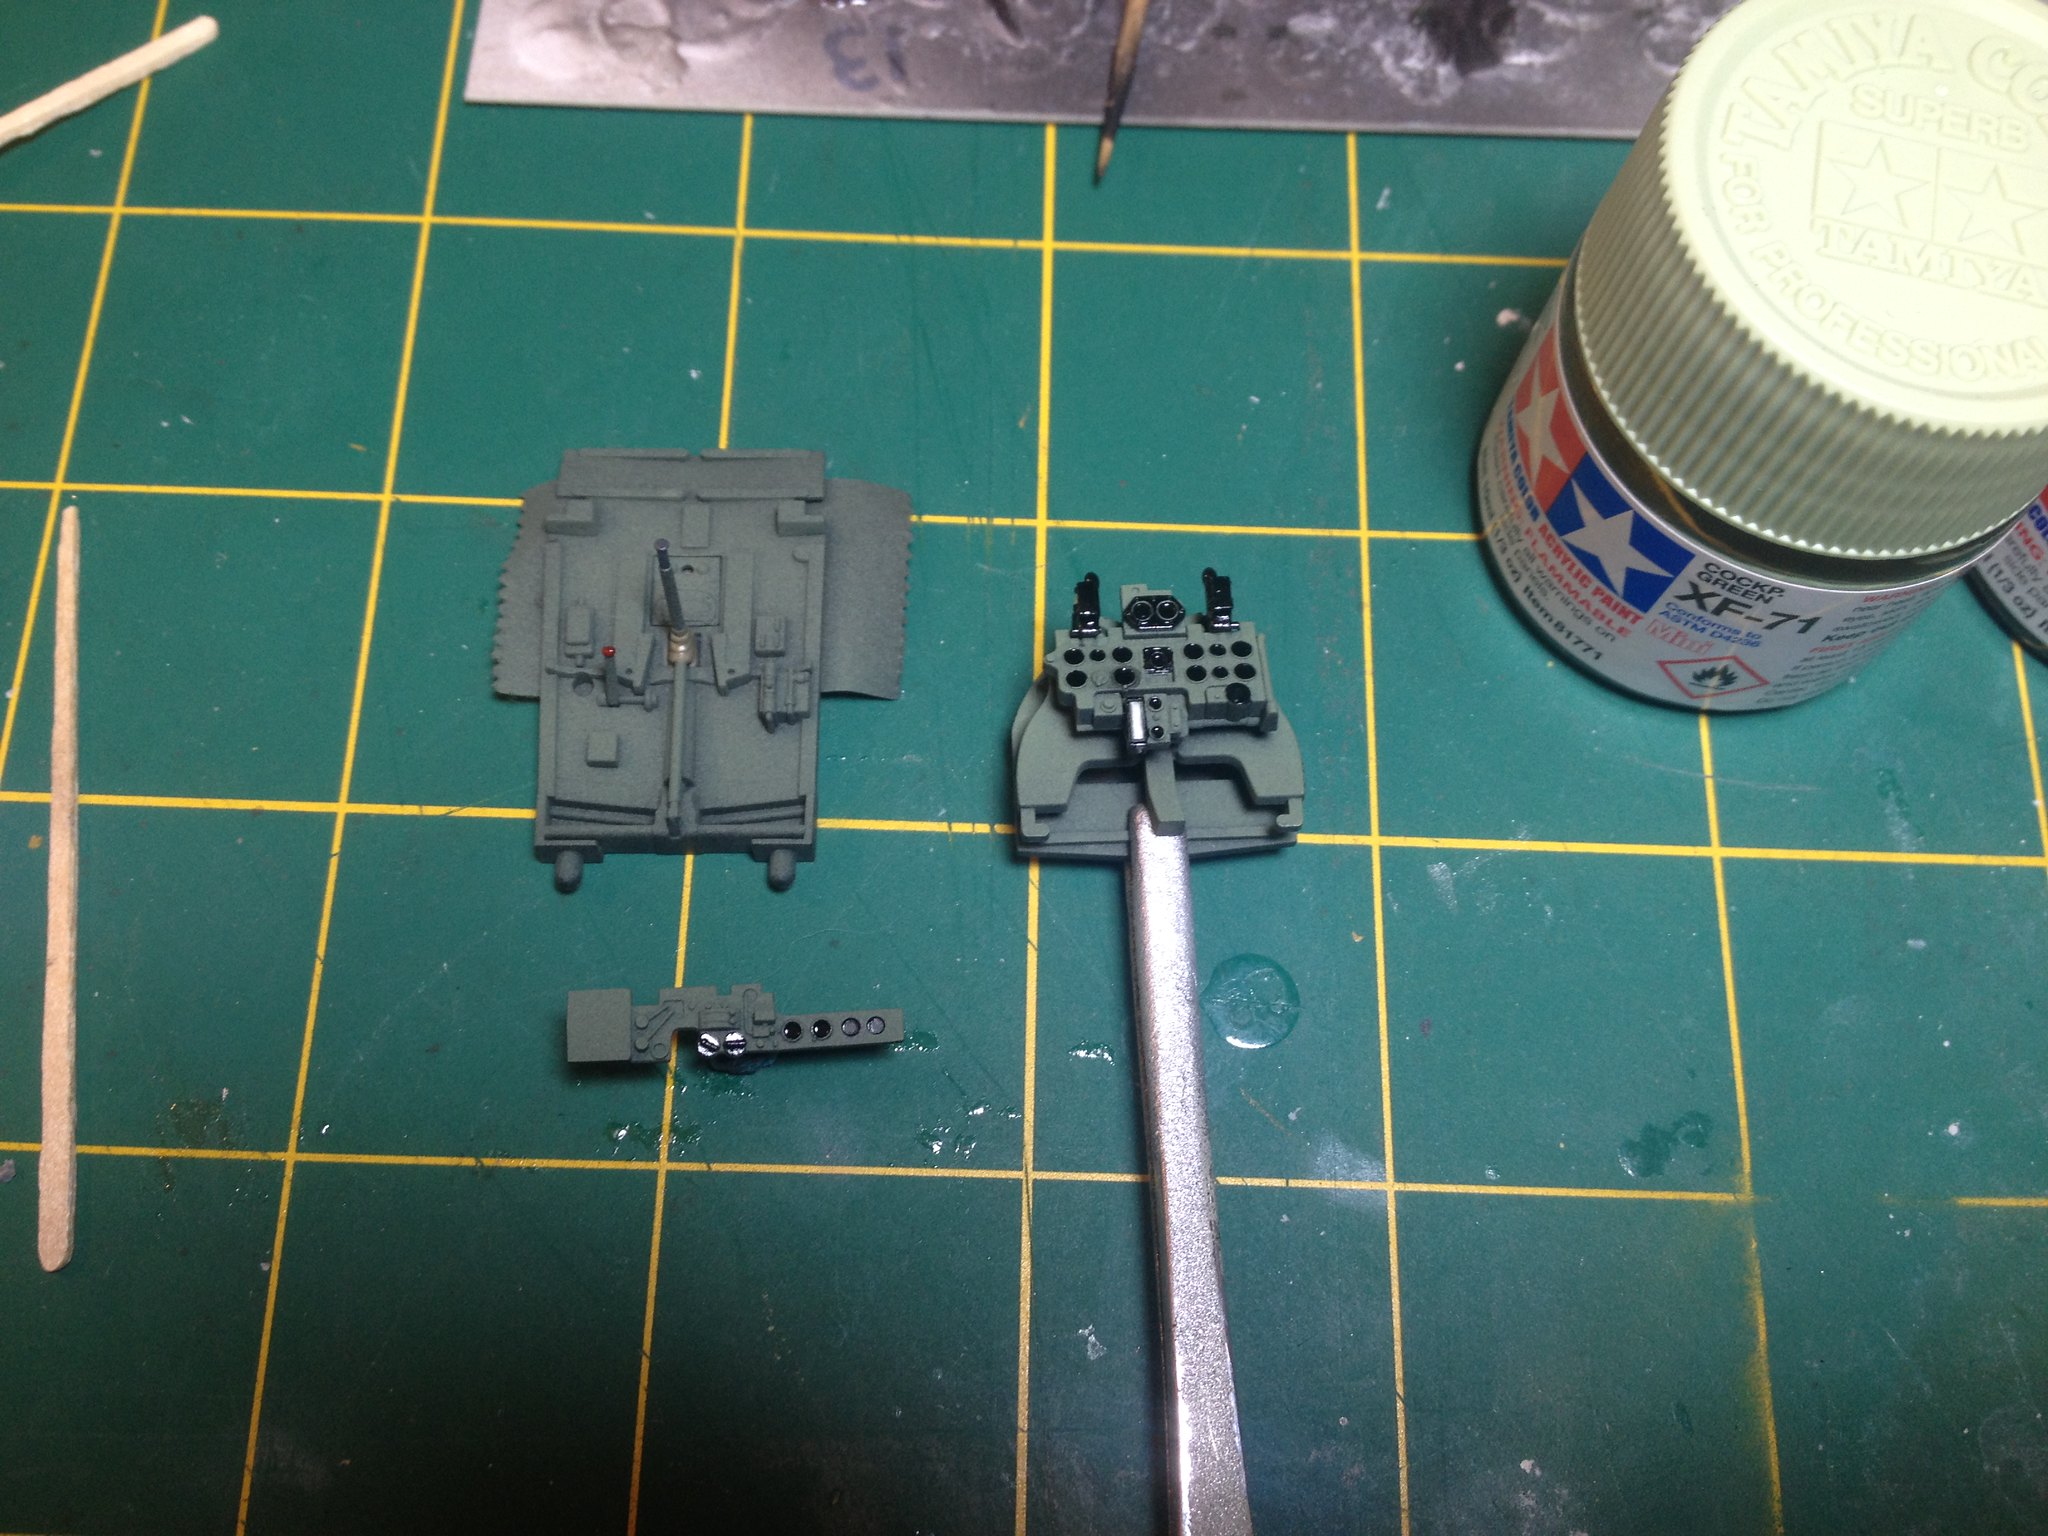
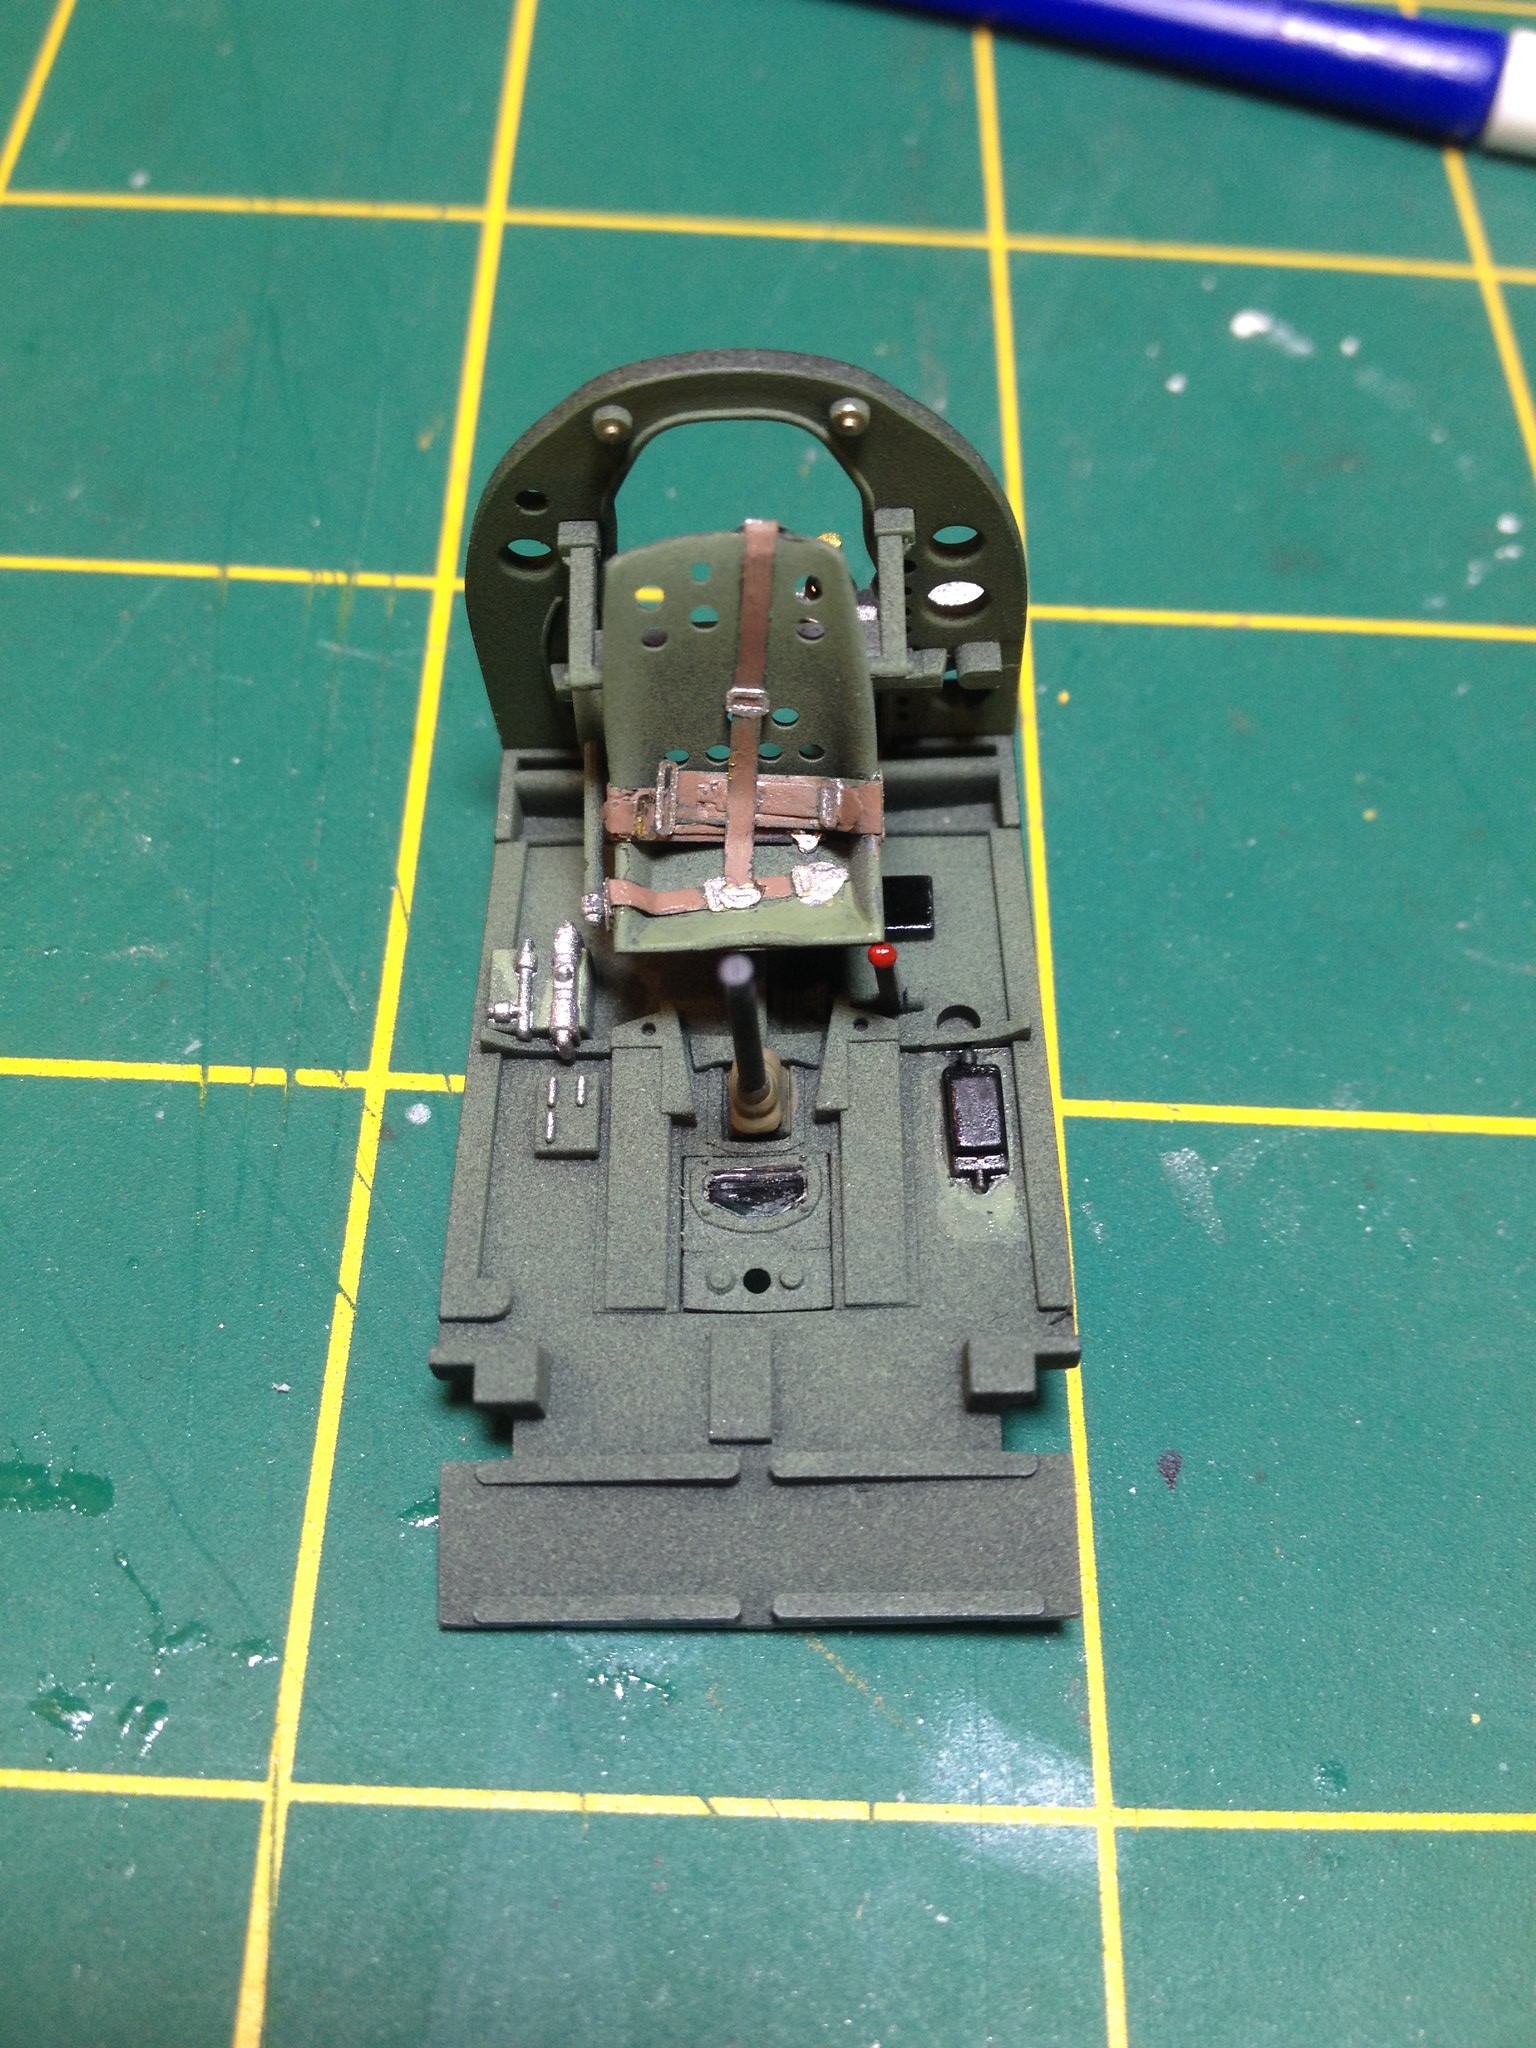
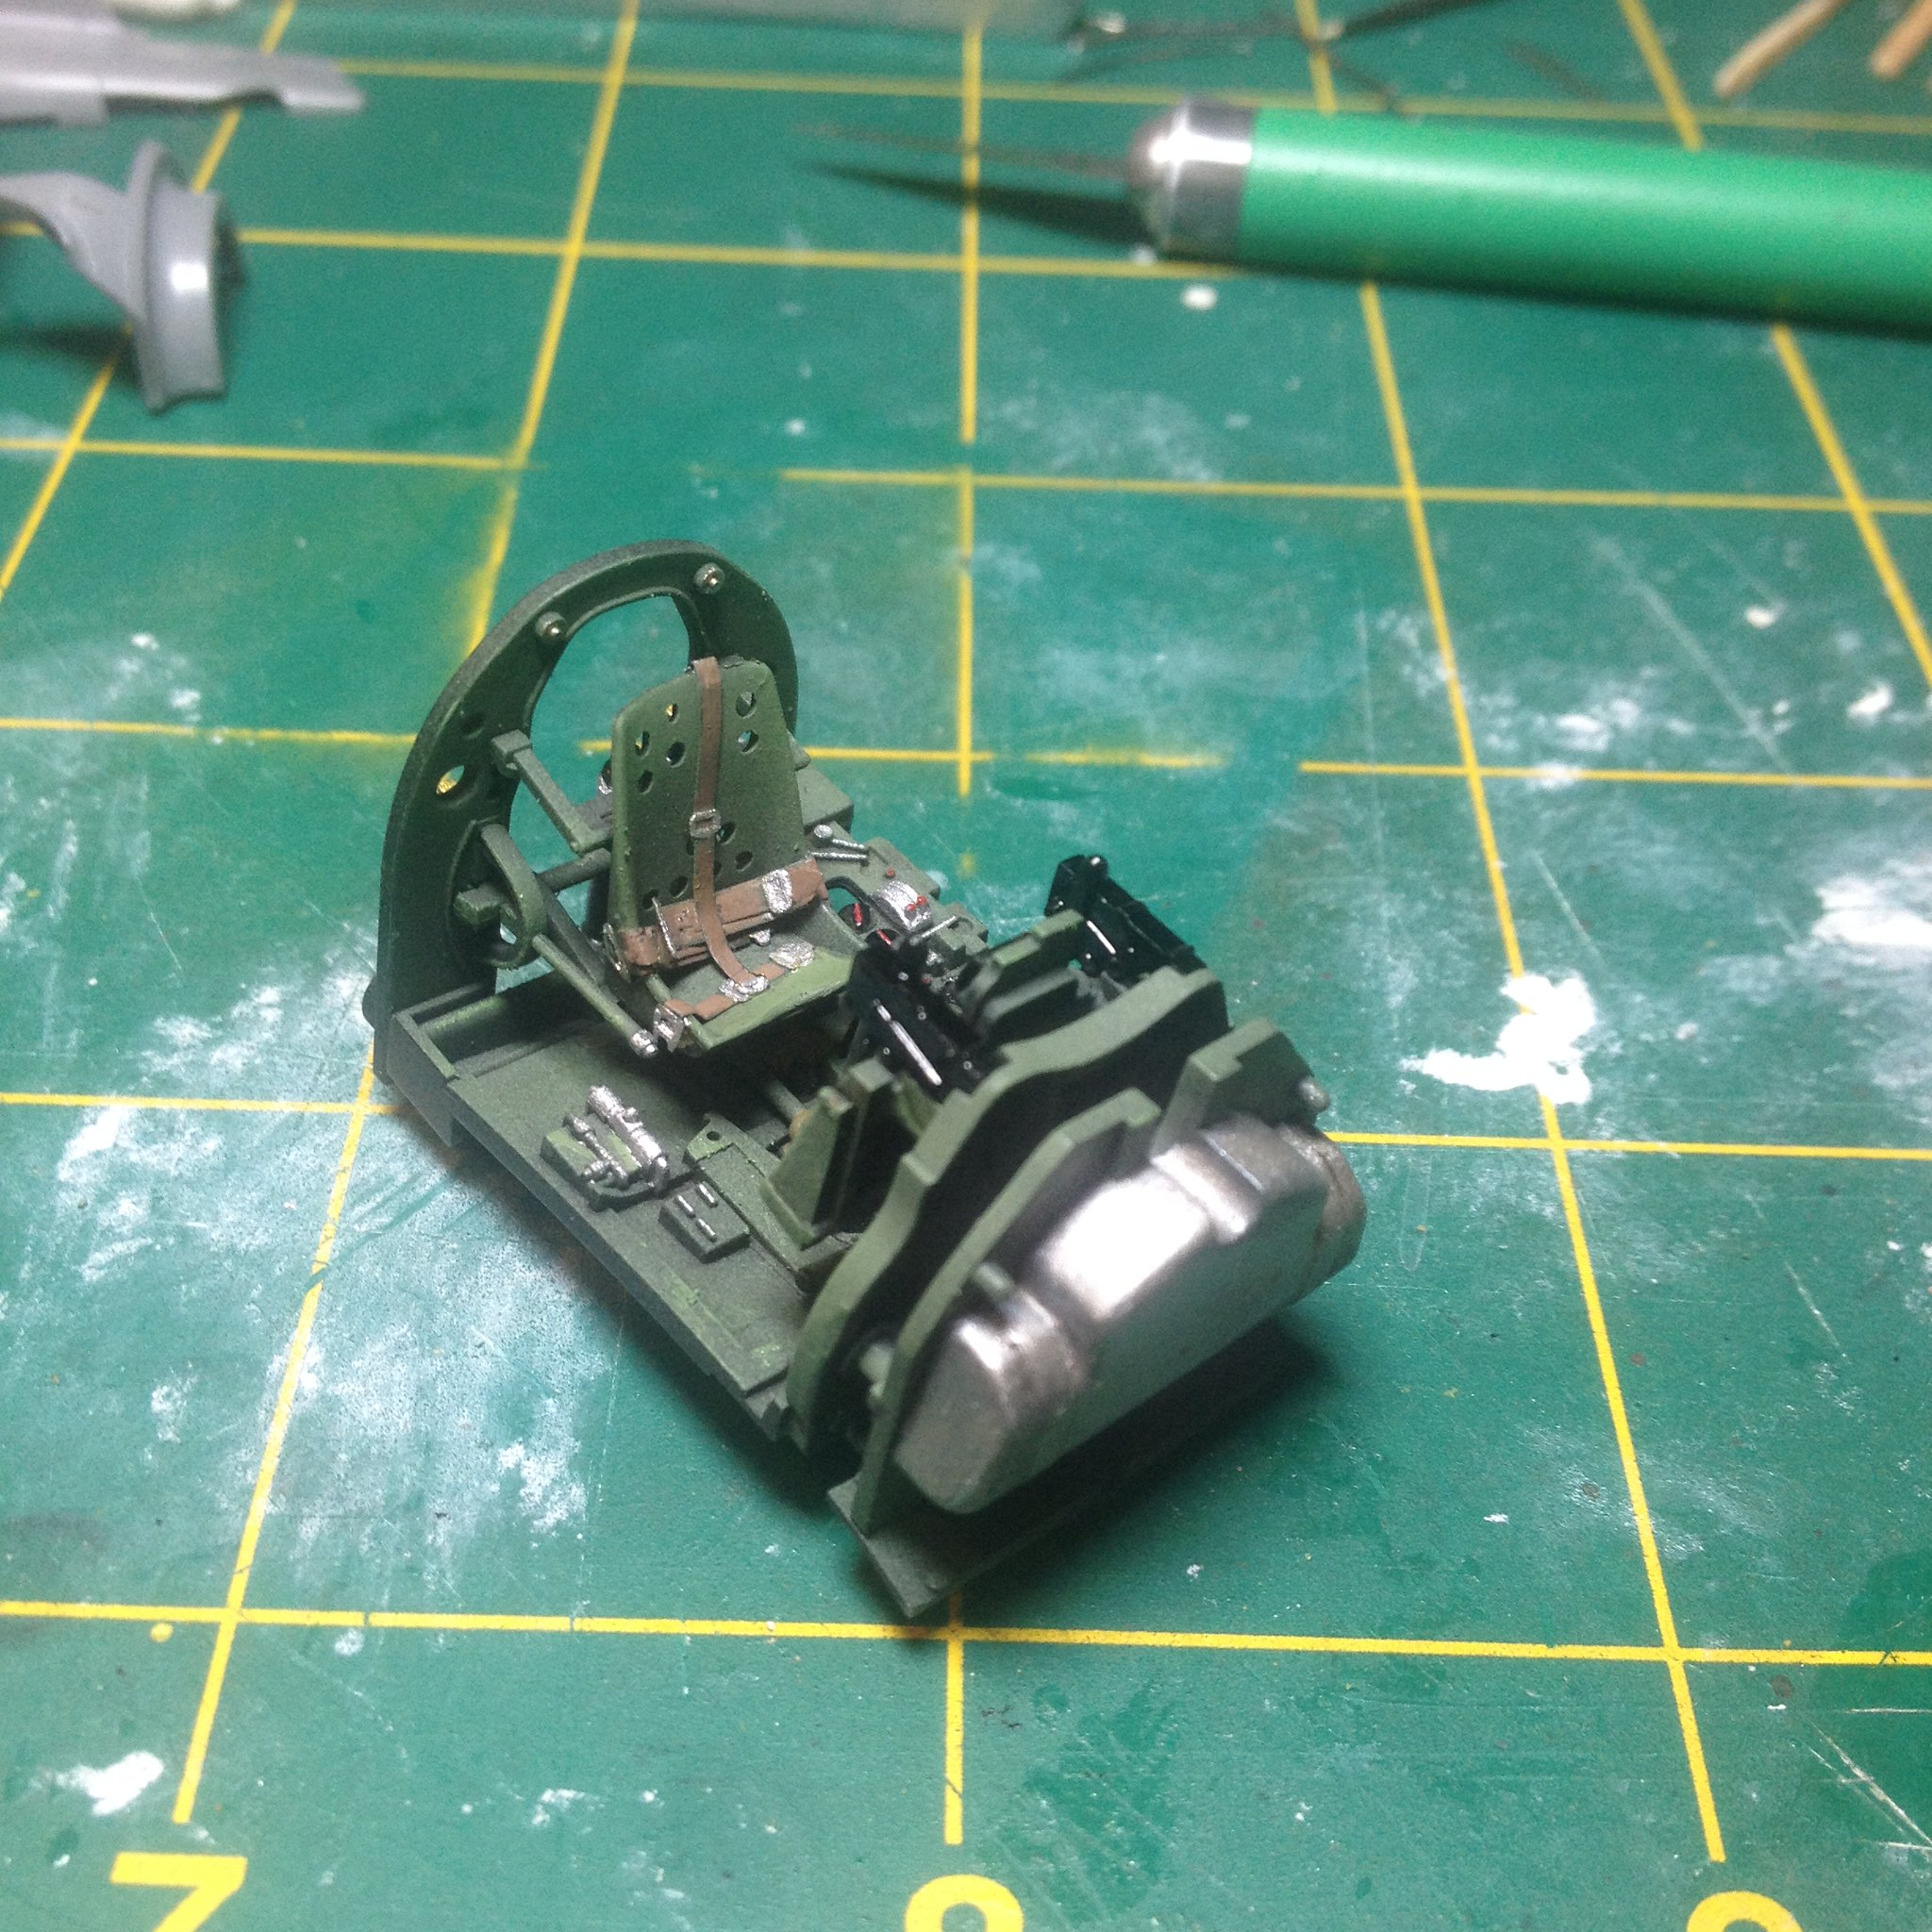
I black-based the interior, and used Tamiya Cockpit Green (XF-71) to add color to the interior parts.  The dials got gloss black (X-1).

 IMG_2129 by Christopher Ridle, on Flickr

The seatbelts were from the Tamiya Detail Up set, and they were a real pain.  I'm used to brass PE.  Why steel?  Steel PE stinks.  It's too stiff and too hard to form. I'm going to try to avoid steel PE from now on.

 IMG_2135 by Christopher Ridle, on Flickr 

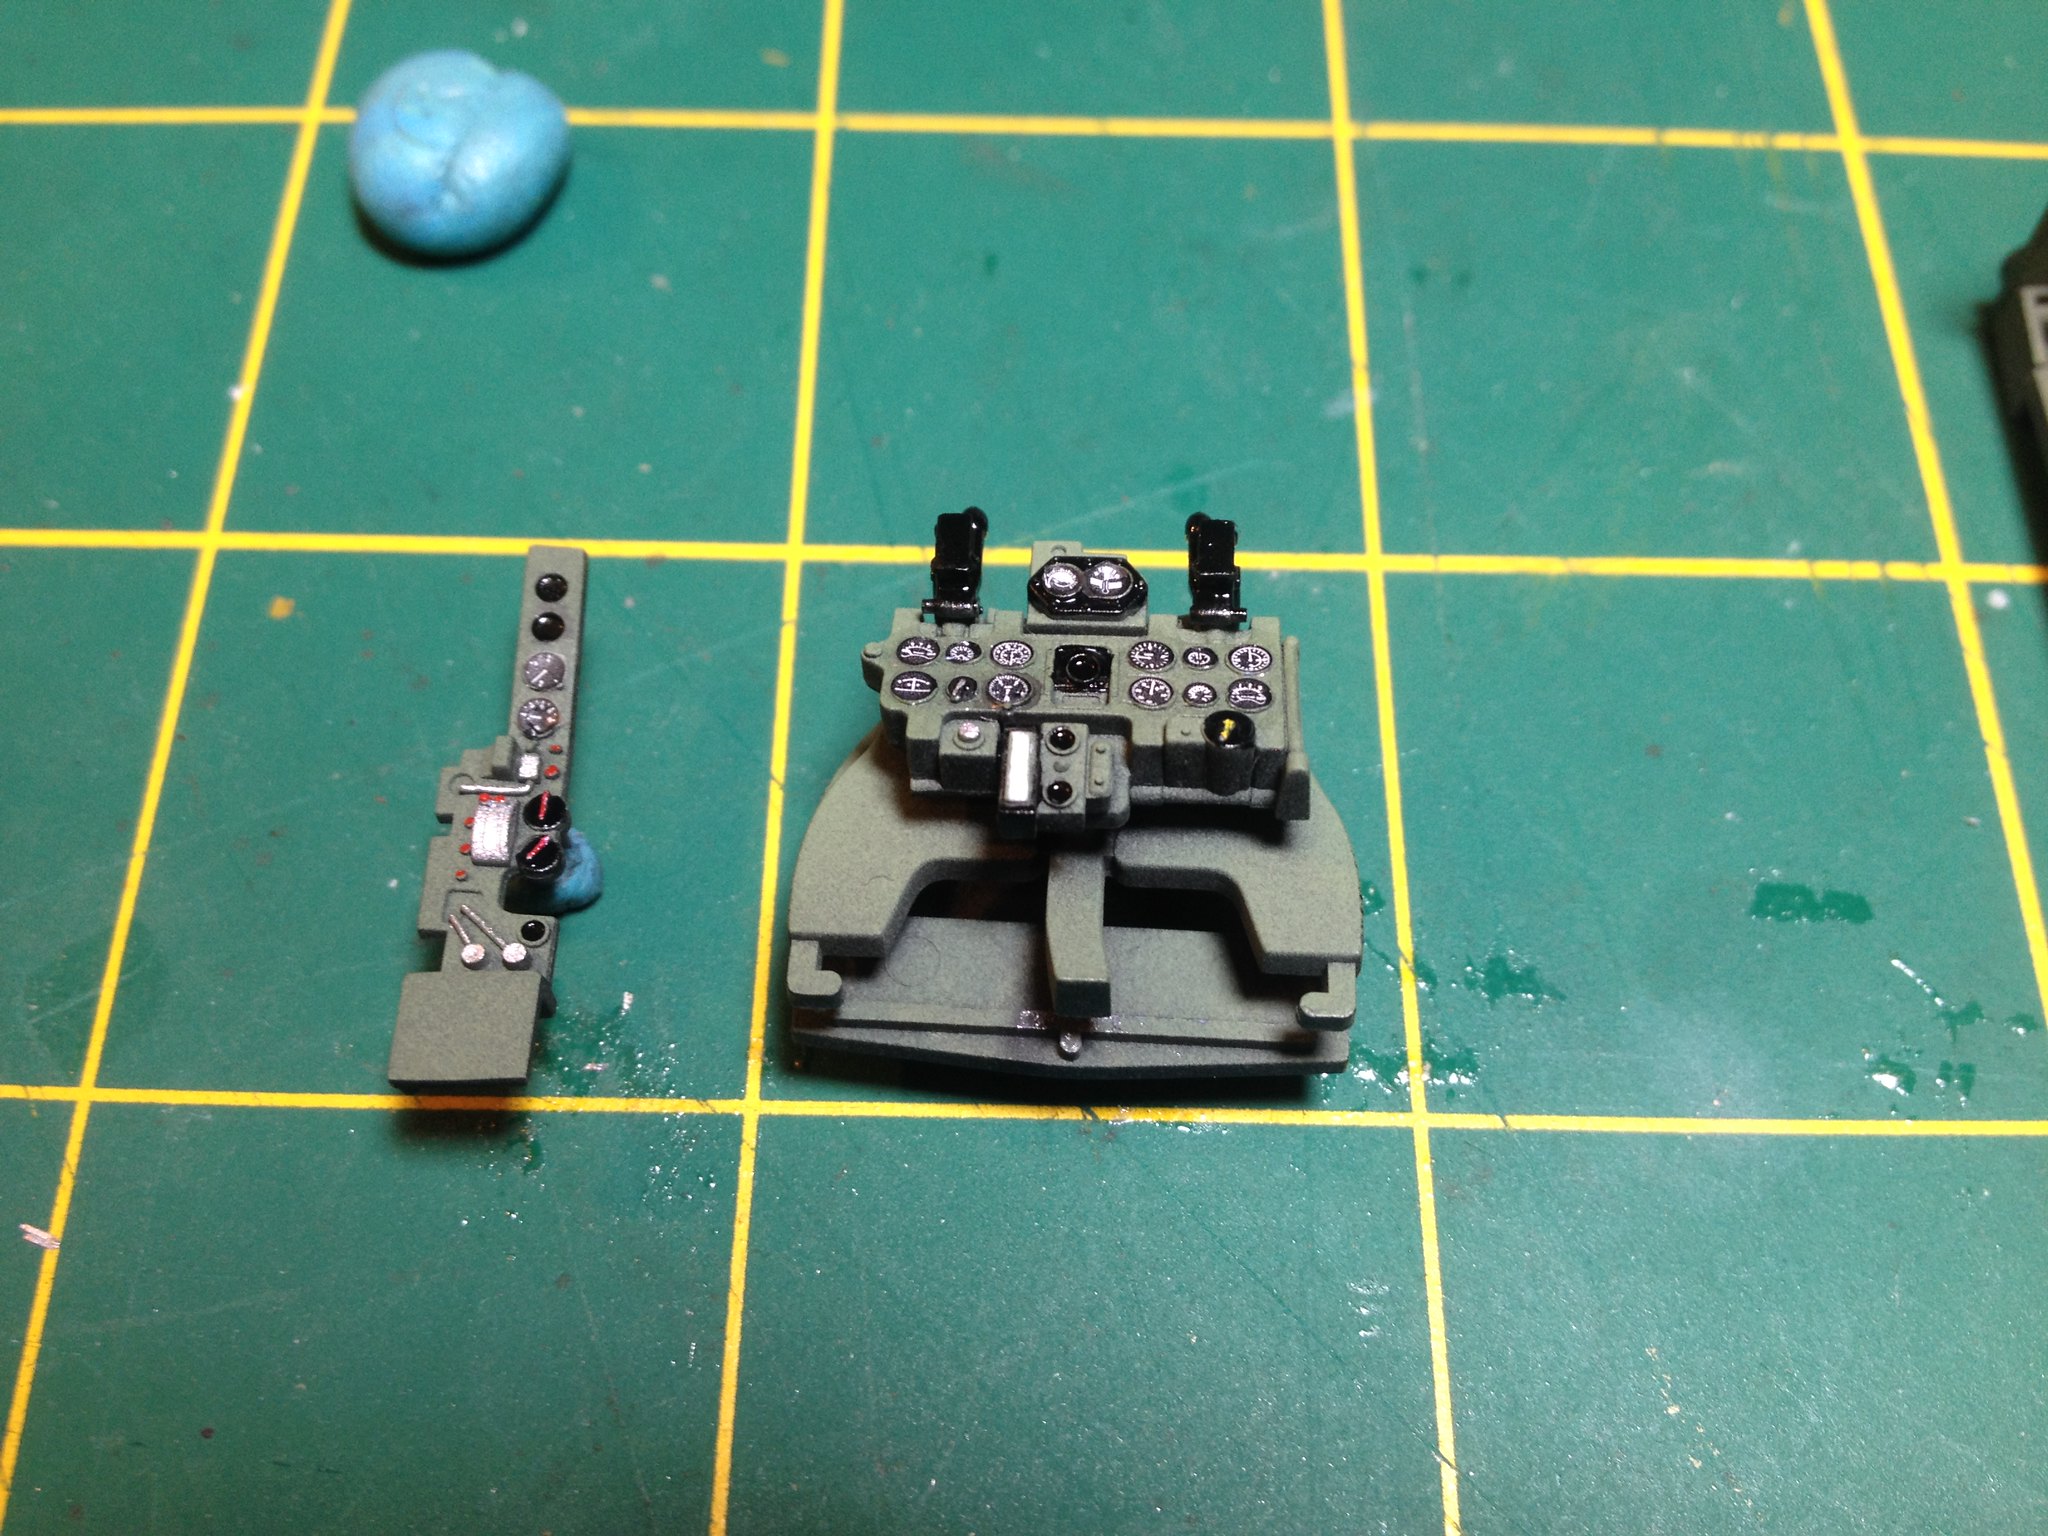
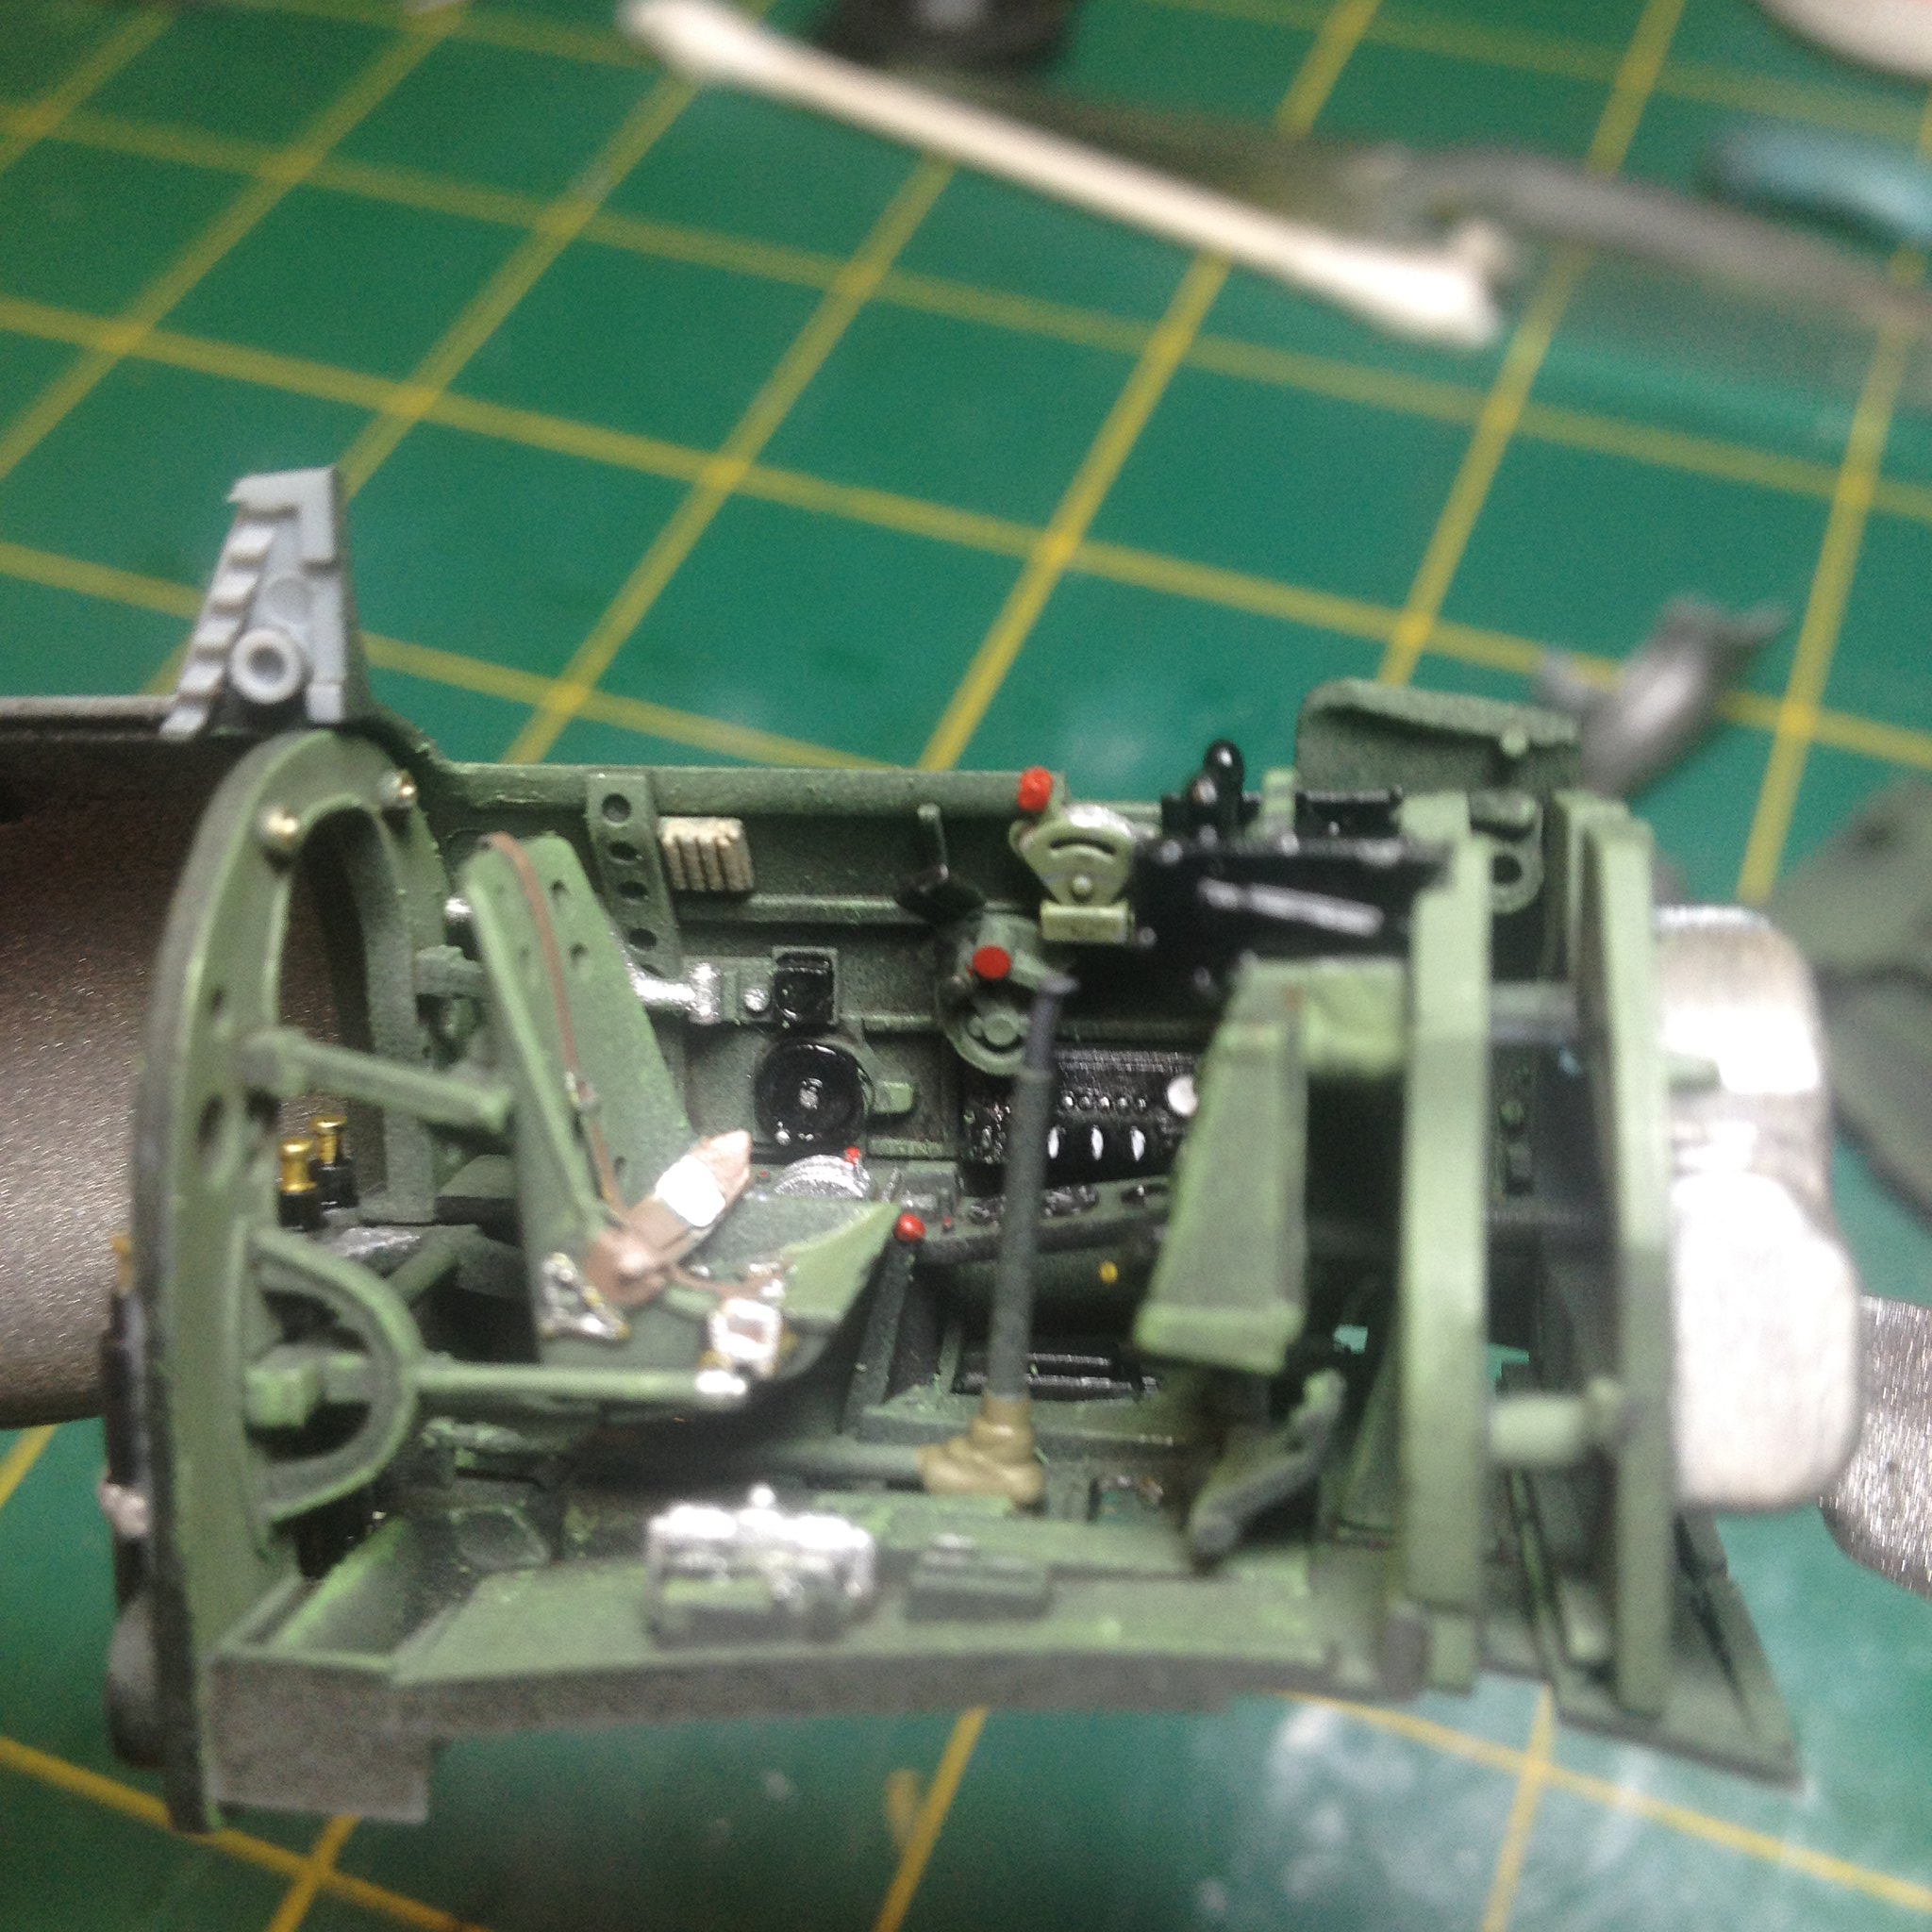
I decided to turn 4 small decals into 15 tiny decals, and I applied each gage decal individually.  Some got a little mangled, but I'm happy with the final result.  

 IMG_2136 by Christopher Ridle, on Flickr

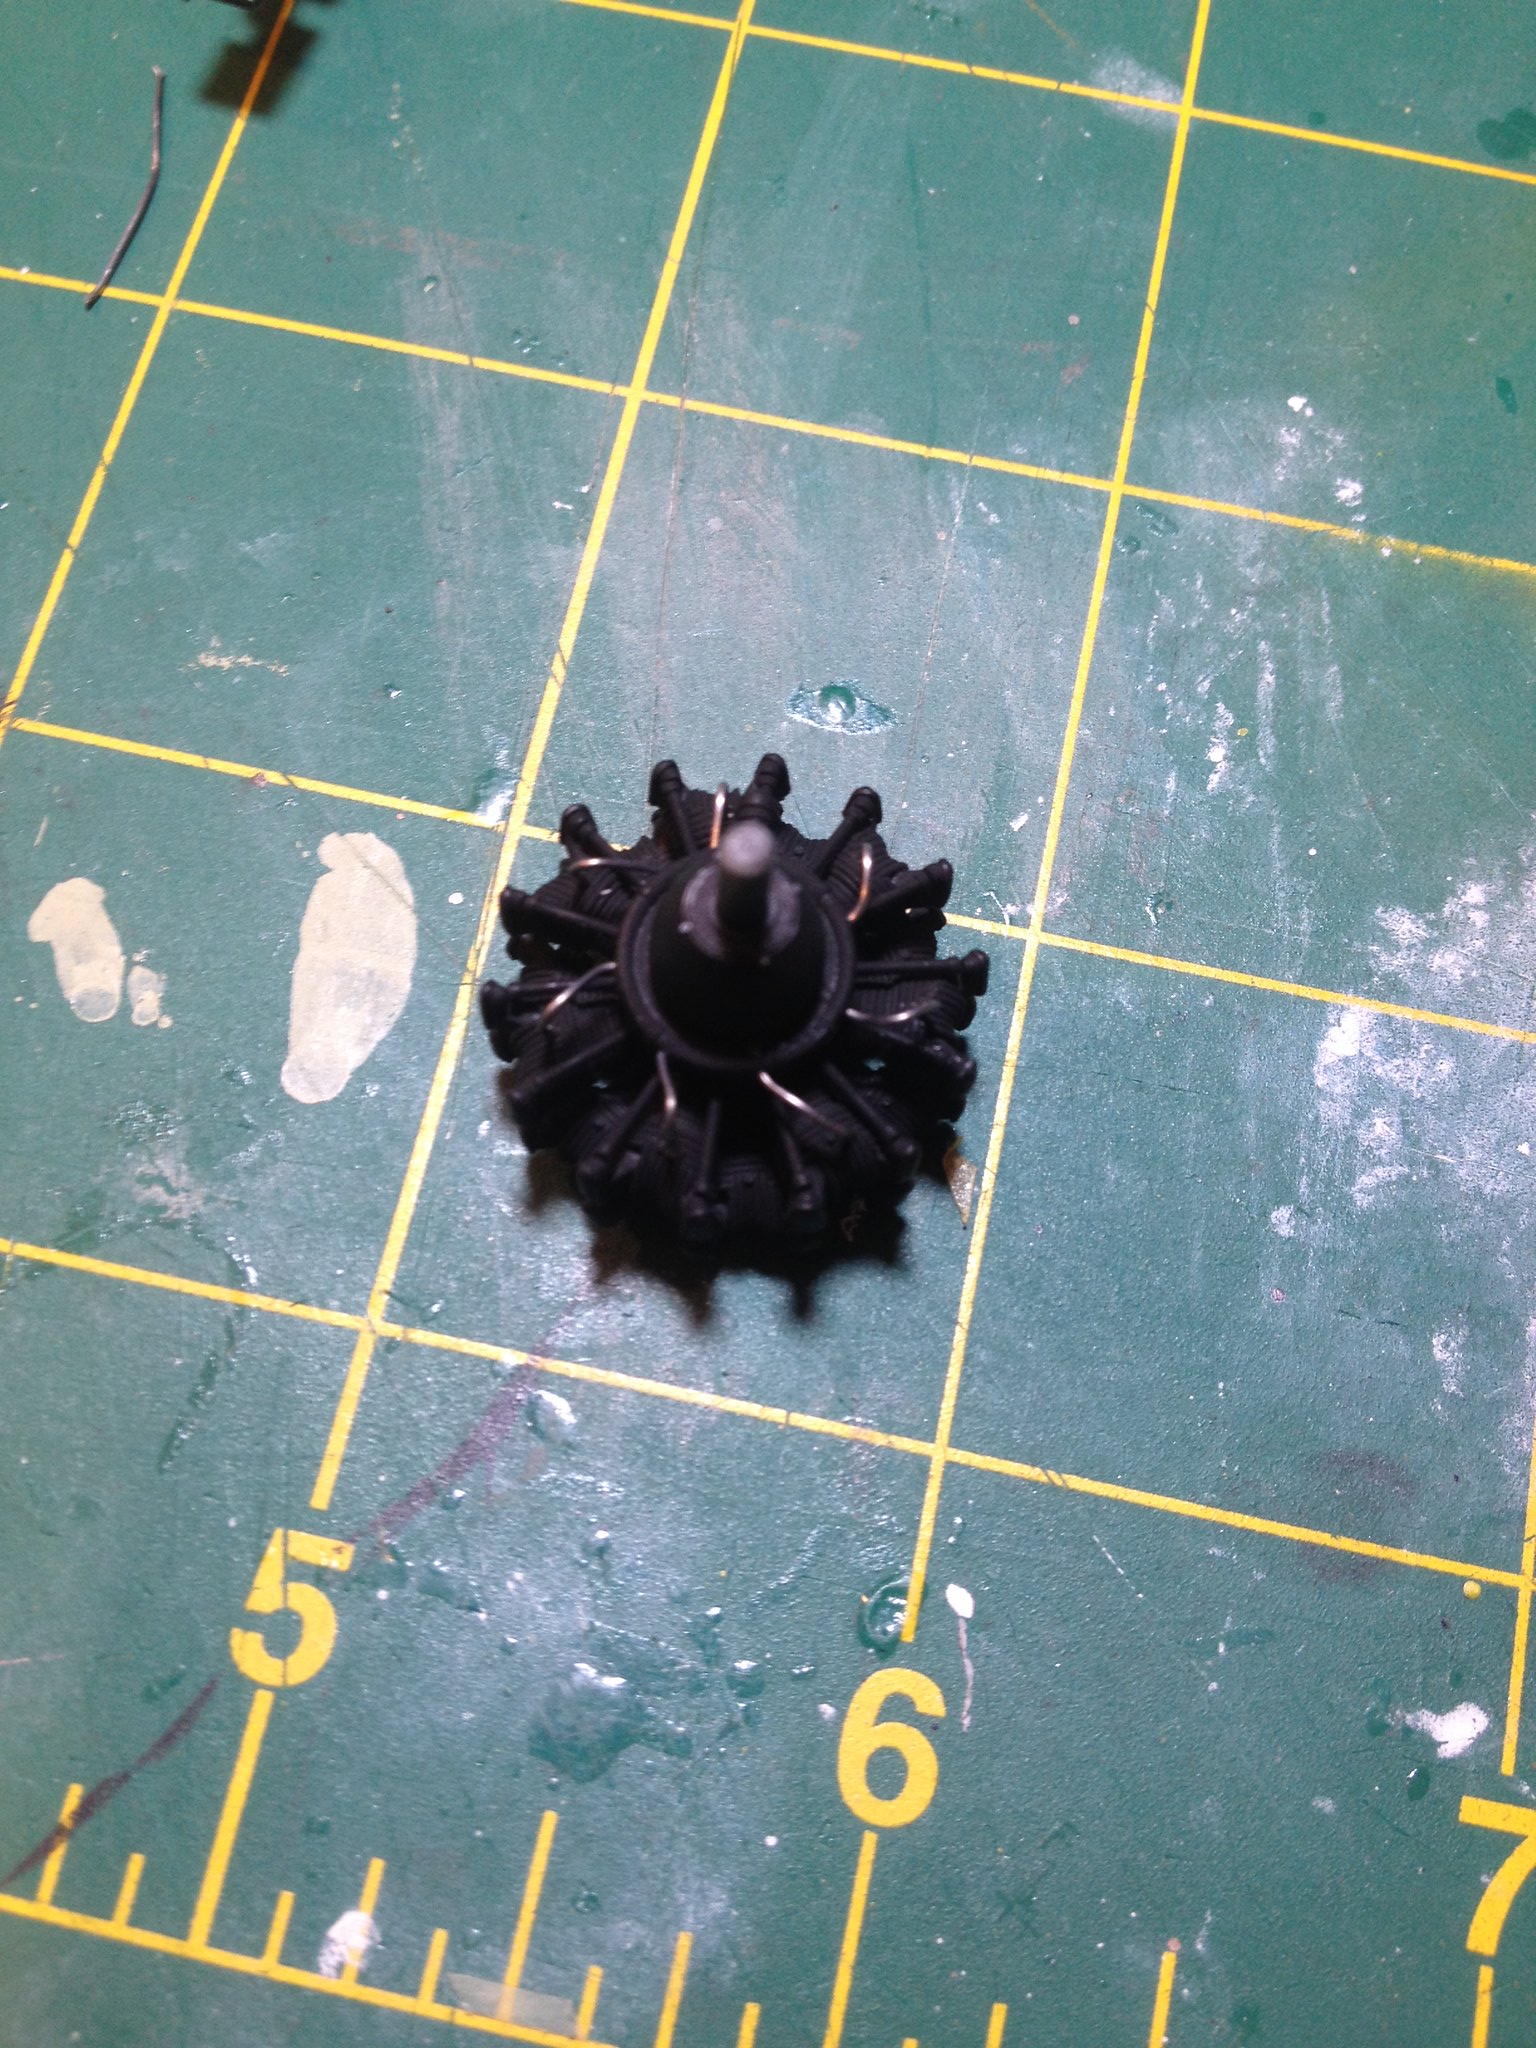
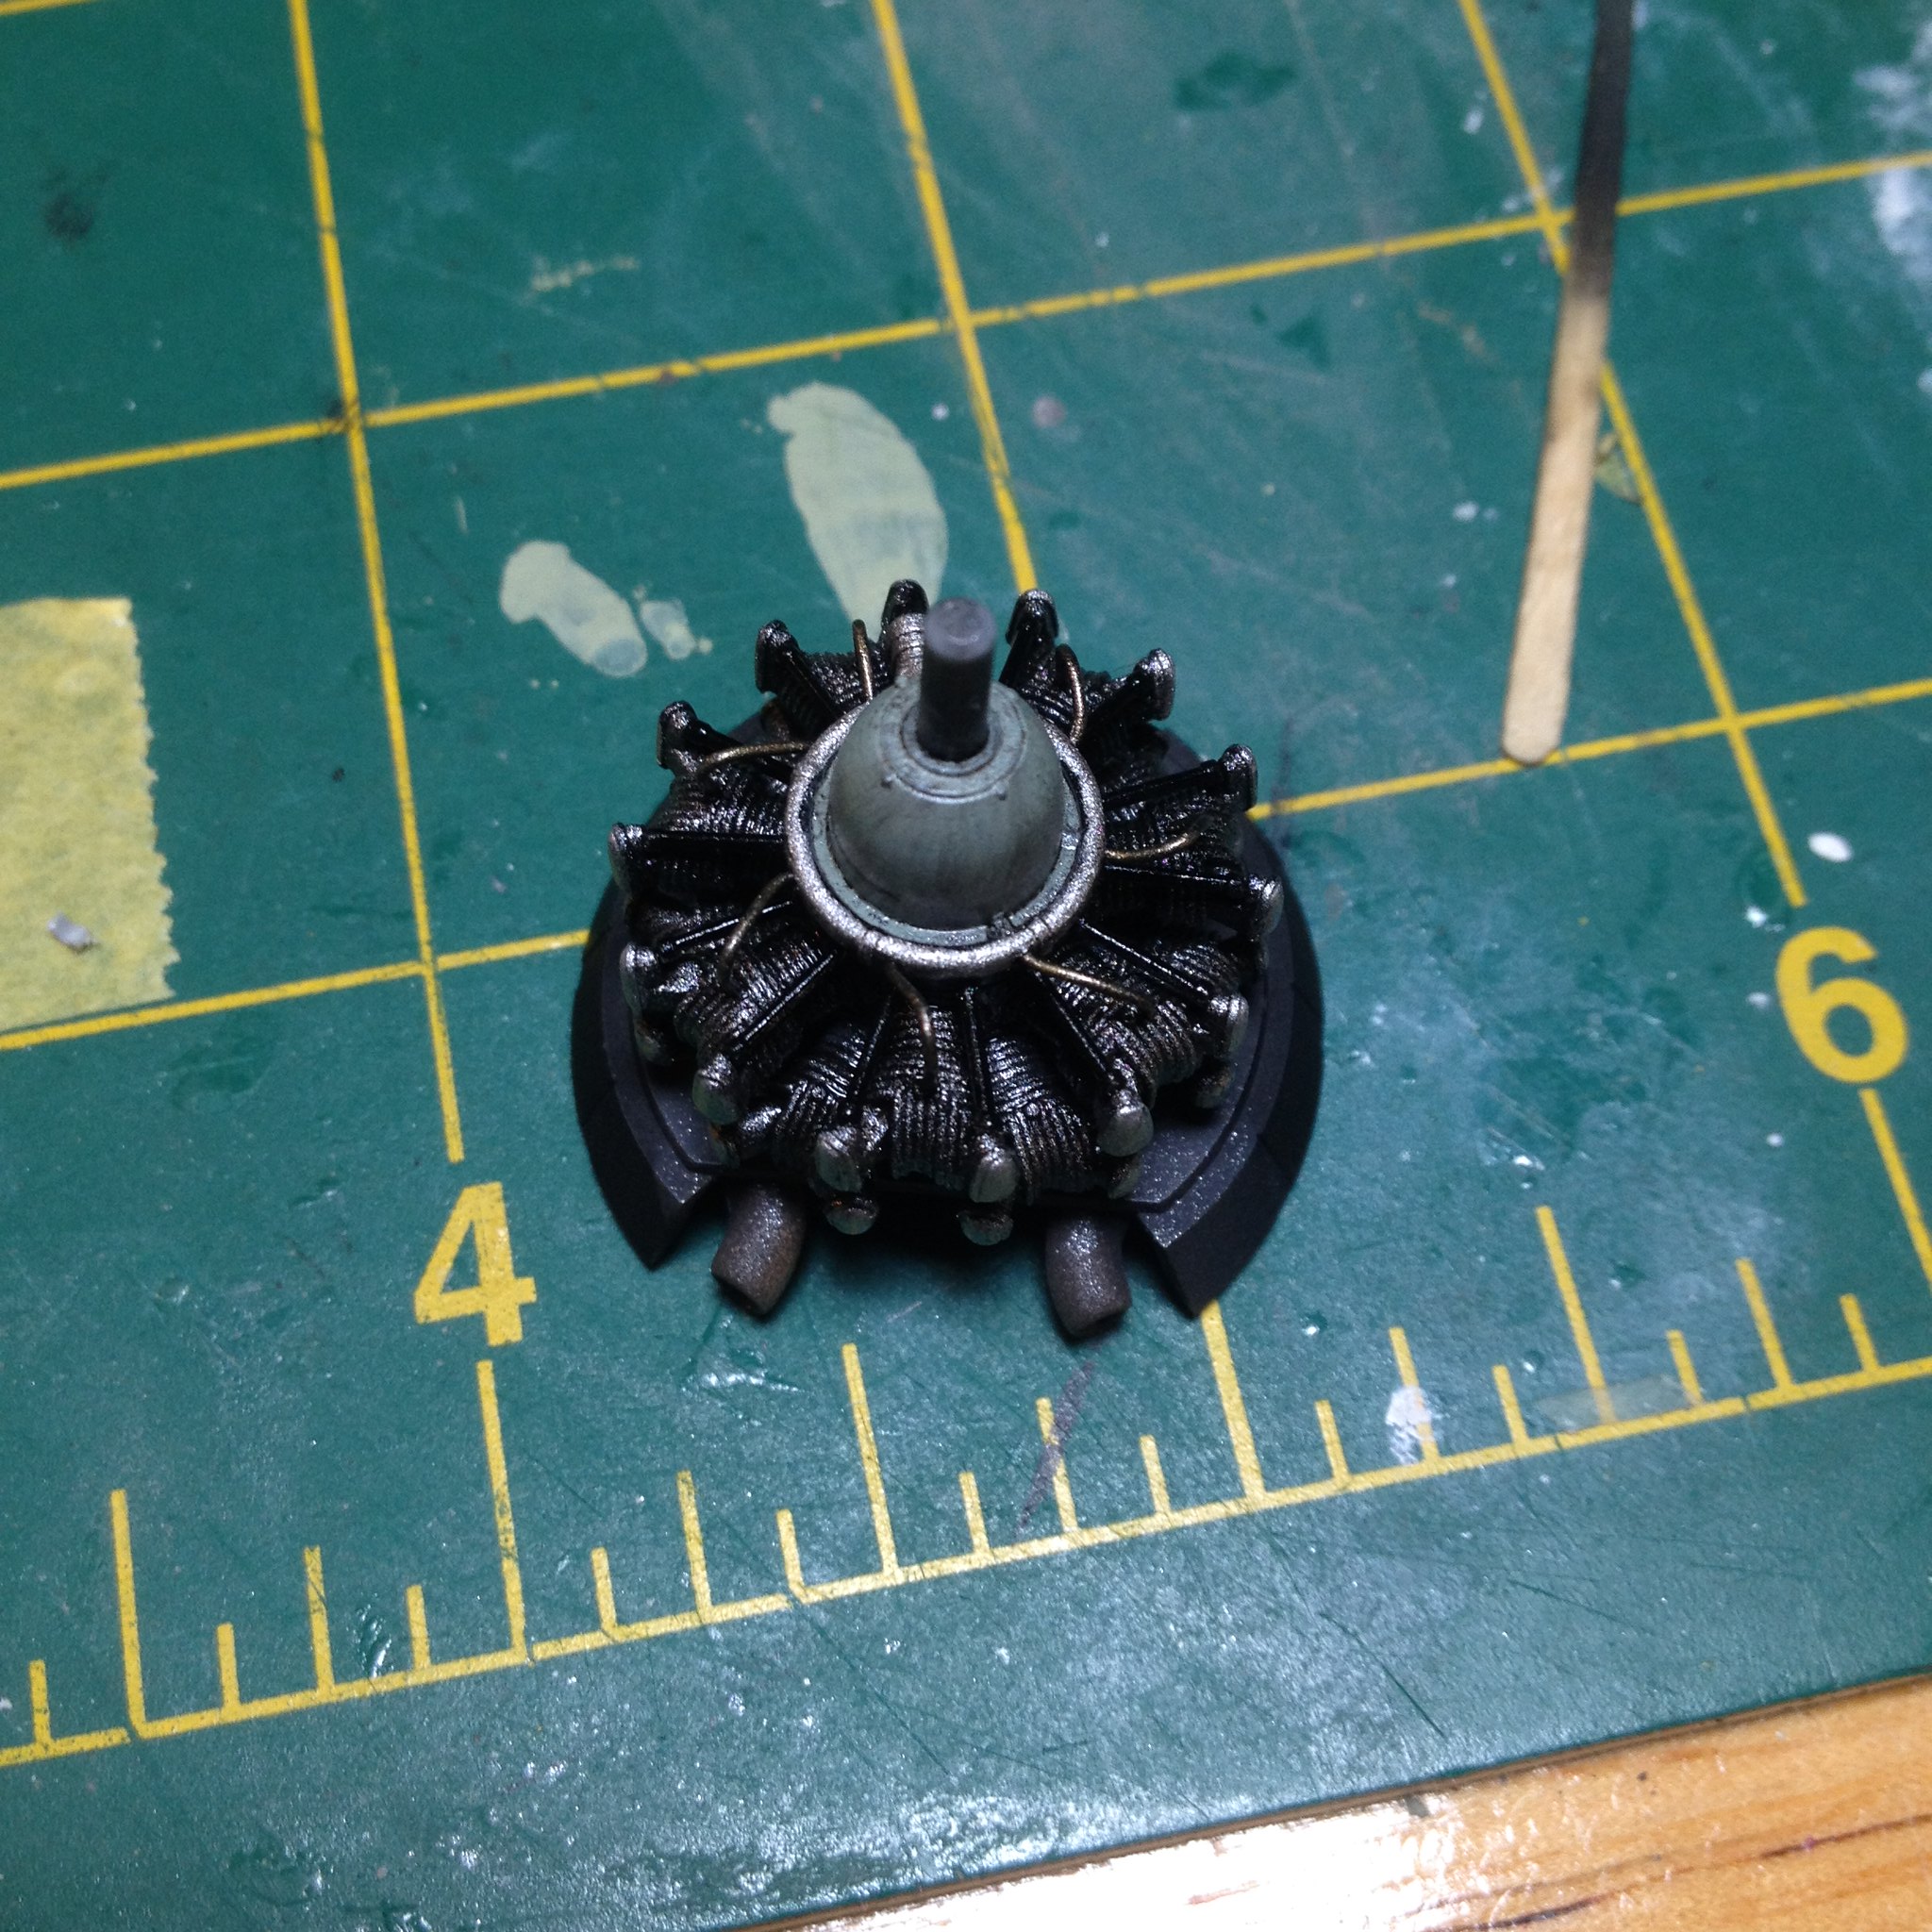
The engine got some 0.015-inch solder ignition wires.  I only did the front row ignition wires, because the rear row wires follow the front row wires.  I don't think that adding rear row wires would add much to the model.  Just my opinion.  

 IMG_2137 by Christopher Ridle, on Flickr

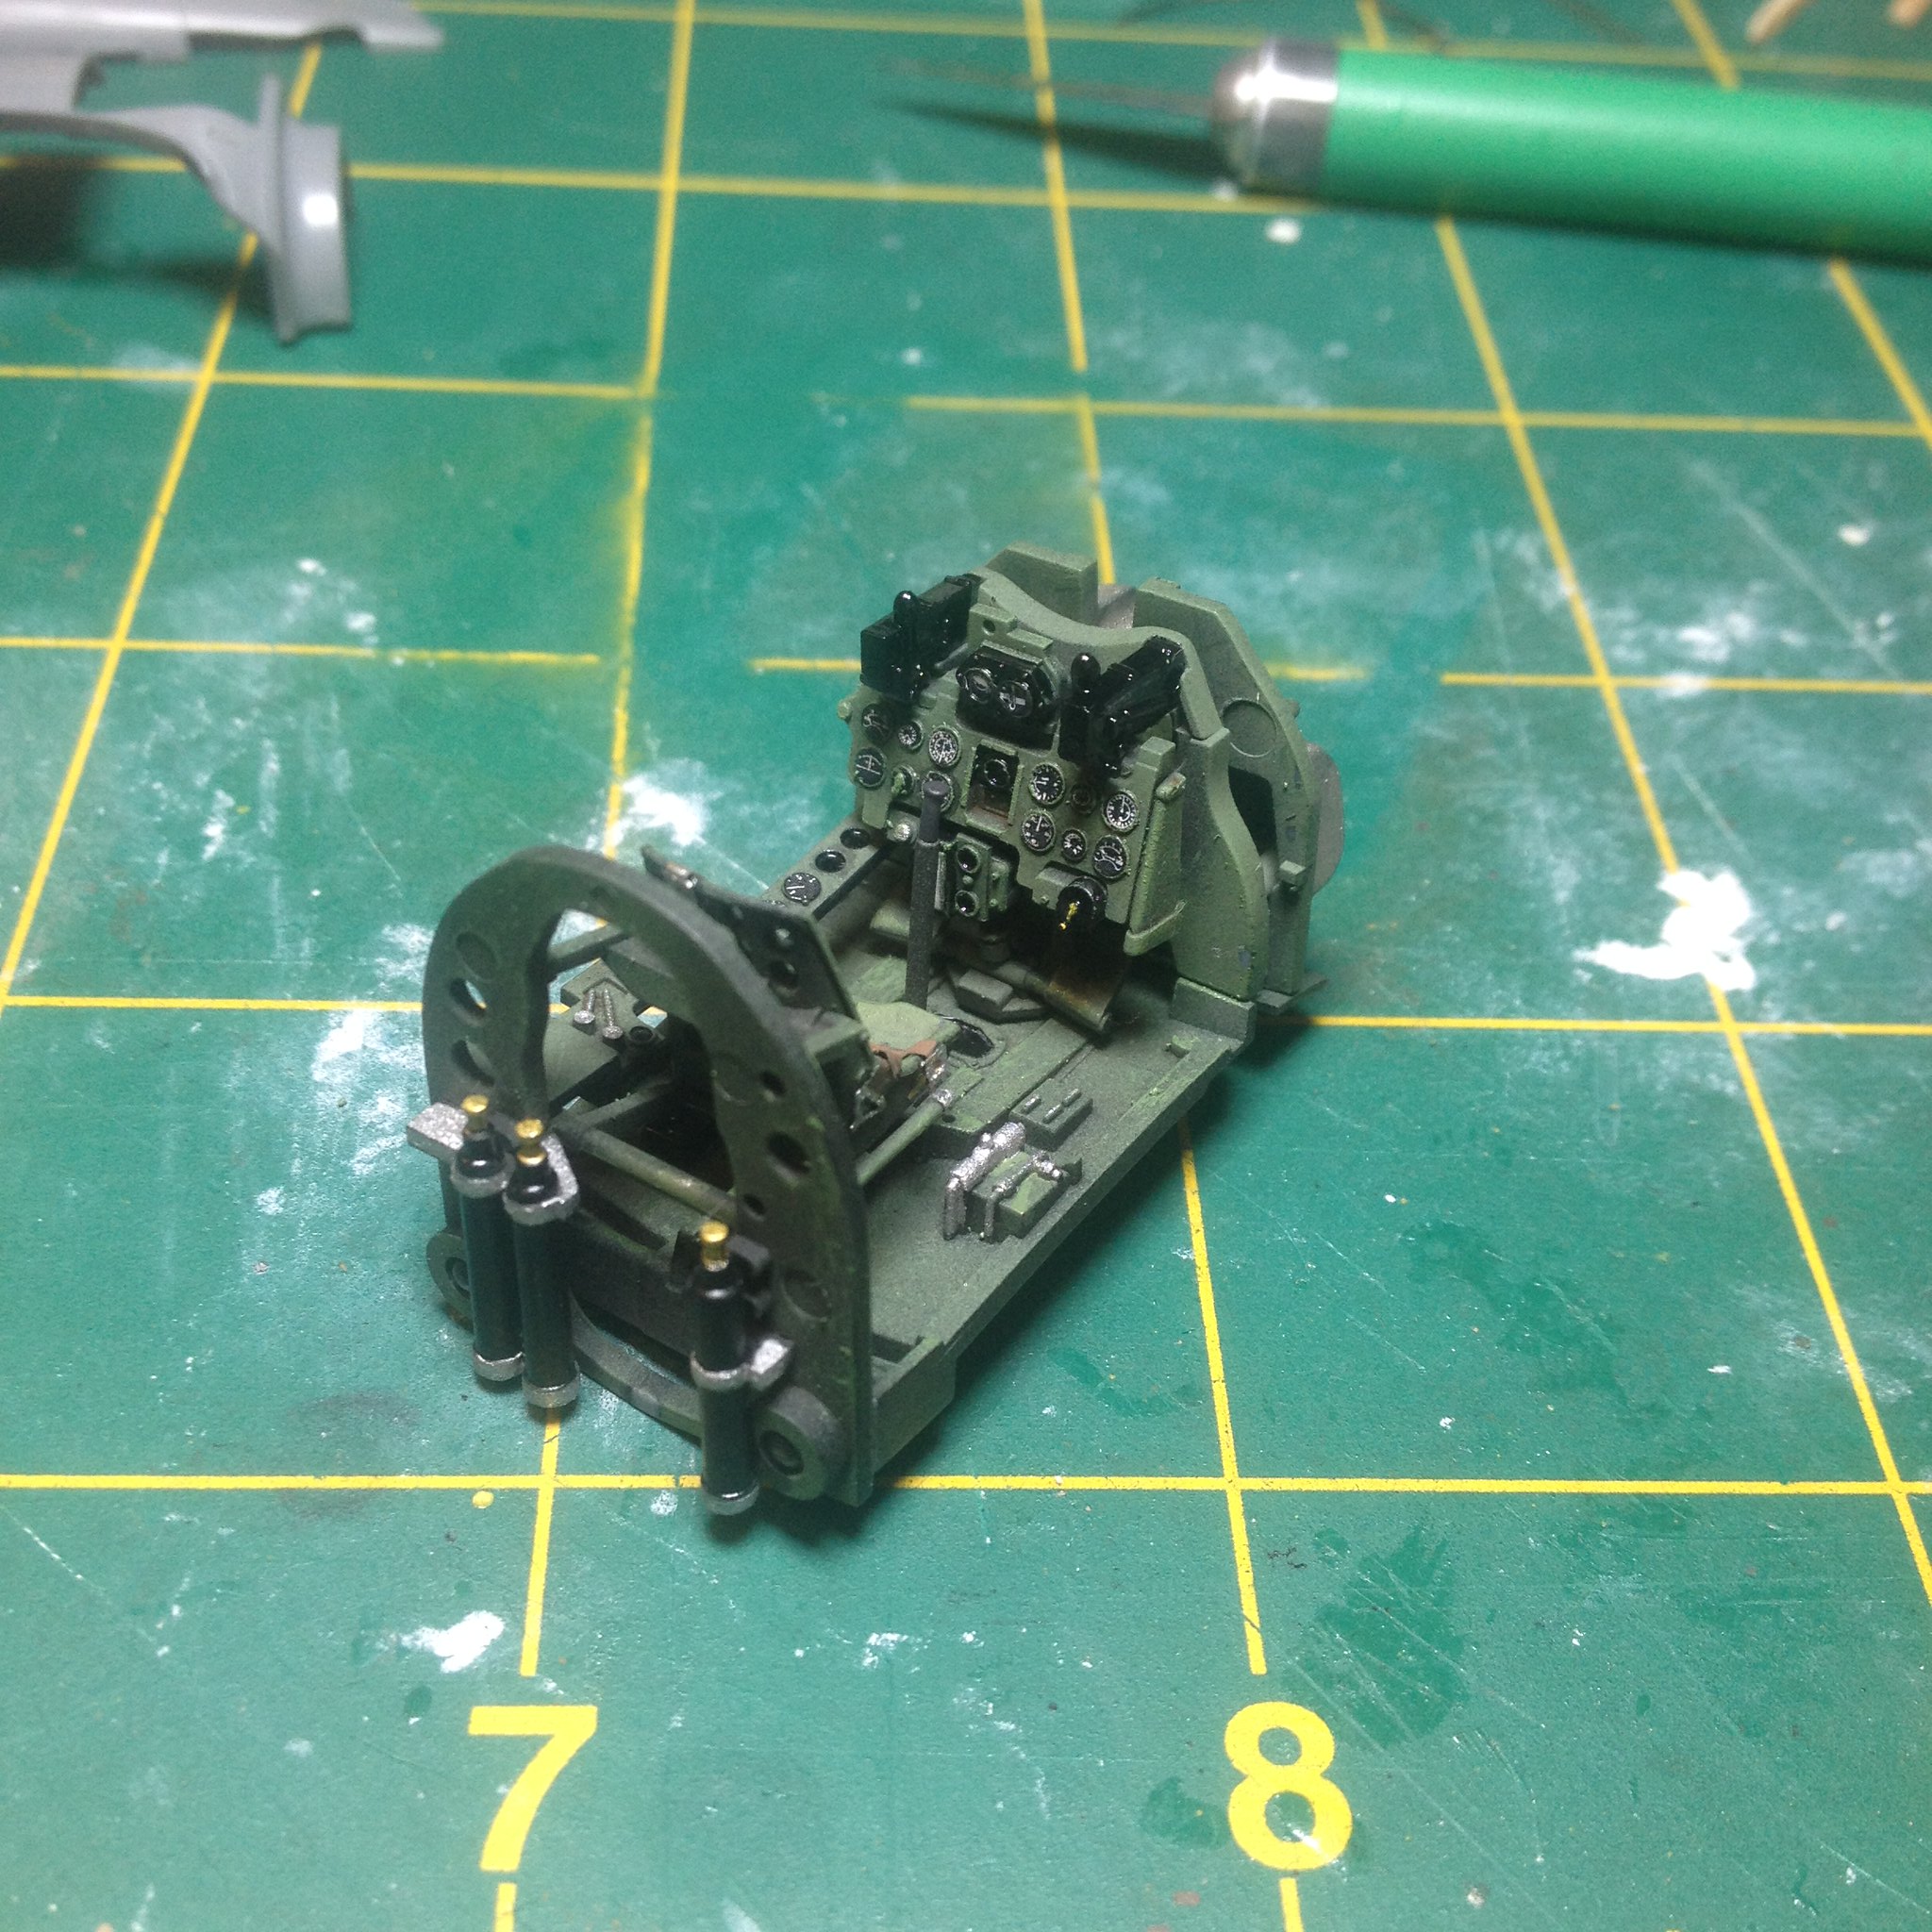
Generally, I'm very happy with how the interior turned out. 

 IMG_2153 by Christopher Ridle, on Flickr

 IMG_2154 by Christopher Ridle, on Flickr

 IMG_2157 by Christopher Ridle, on Flickr

The interior was weathered with a thin wash of Windsor and Newton Artist Oil Black and Burnt Umber.  Then, it got a drybrush of Cockpit Green.  

The Sakae 21 engine was first painted flat black.  Then it got a light coat of flat aluminum (XF-16).  Then it got its details painted according to instructions.  The black/burnt umber wash was then used to finish the engine.  

 IMG_2164 by Christopher Ridle, on Flickr

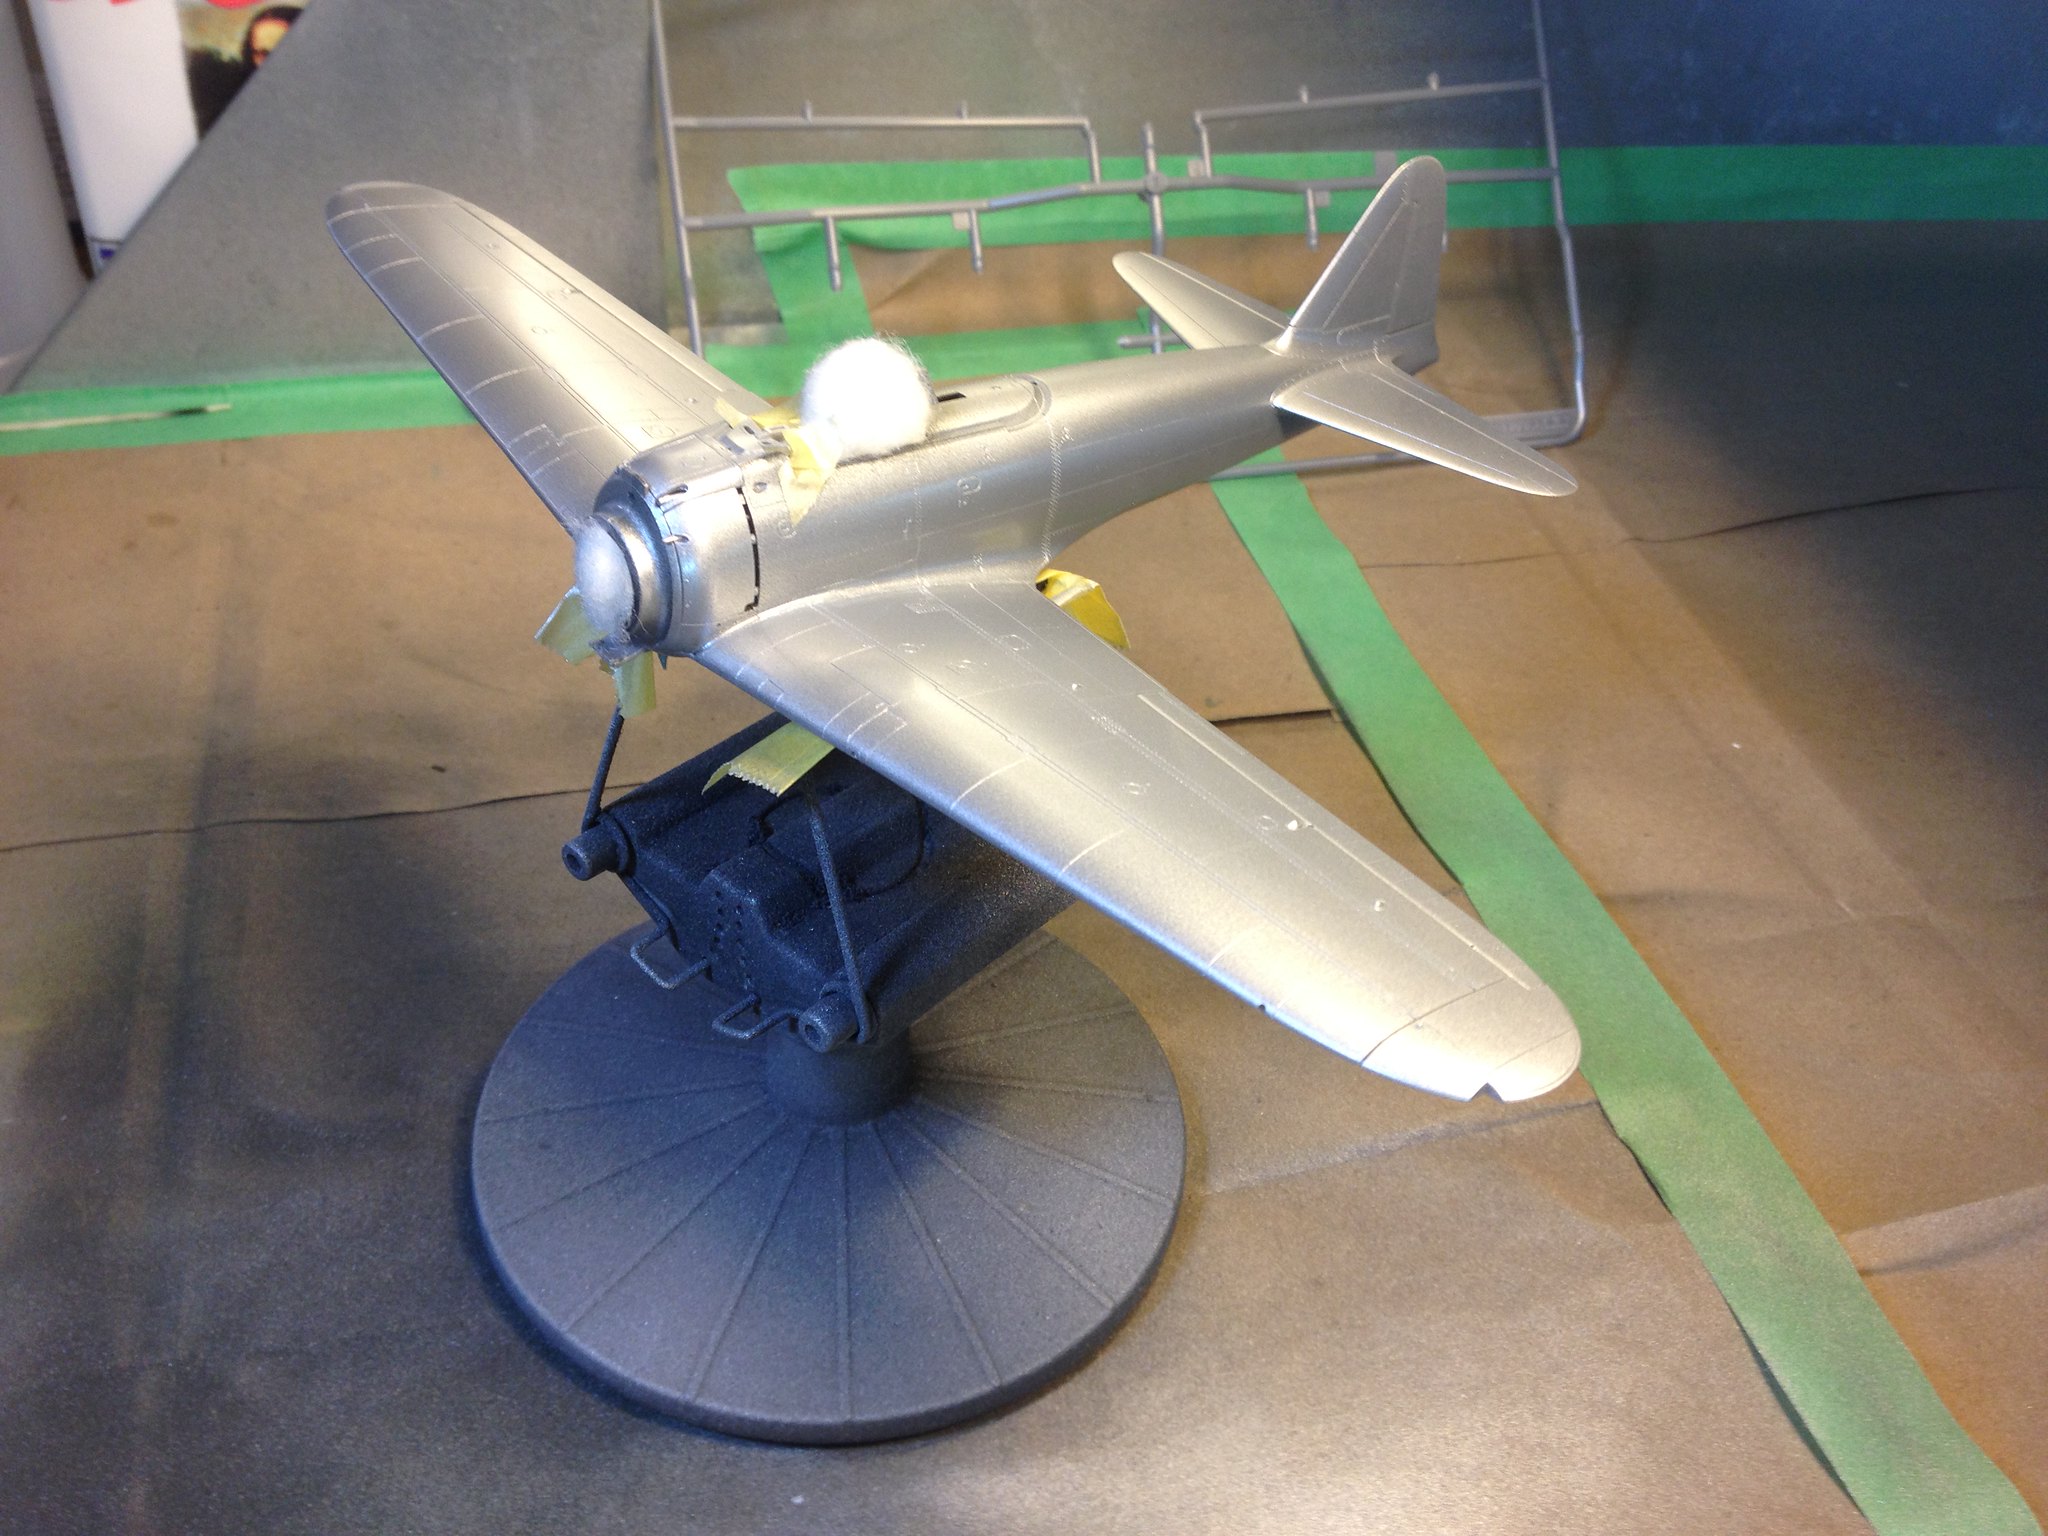
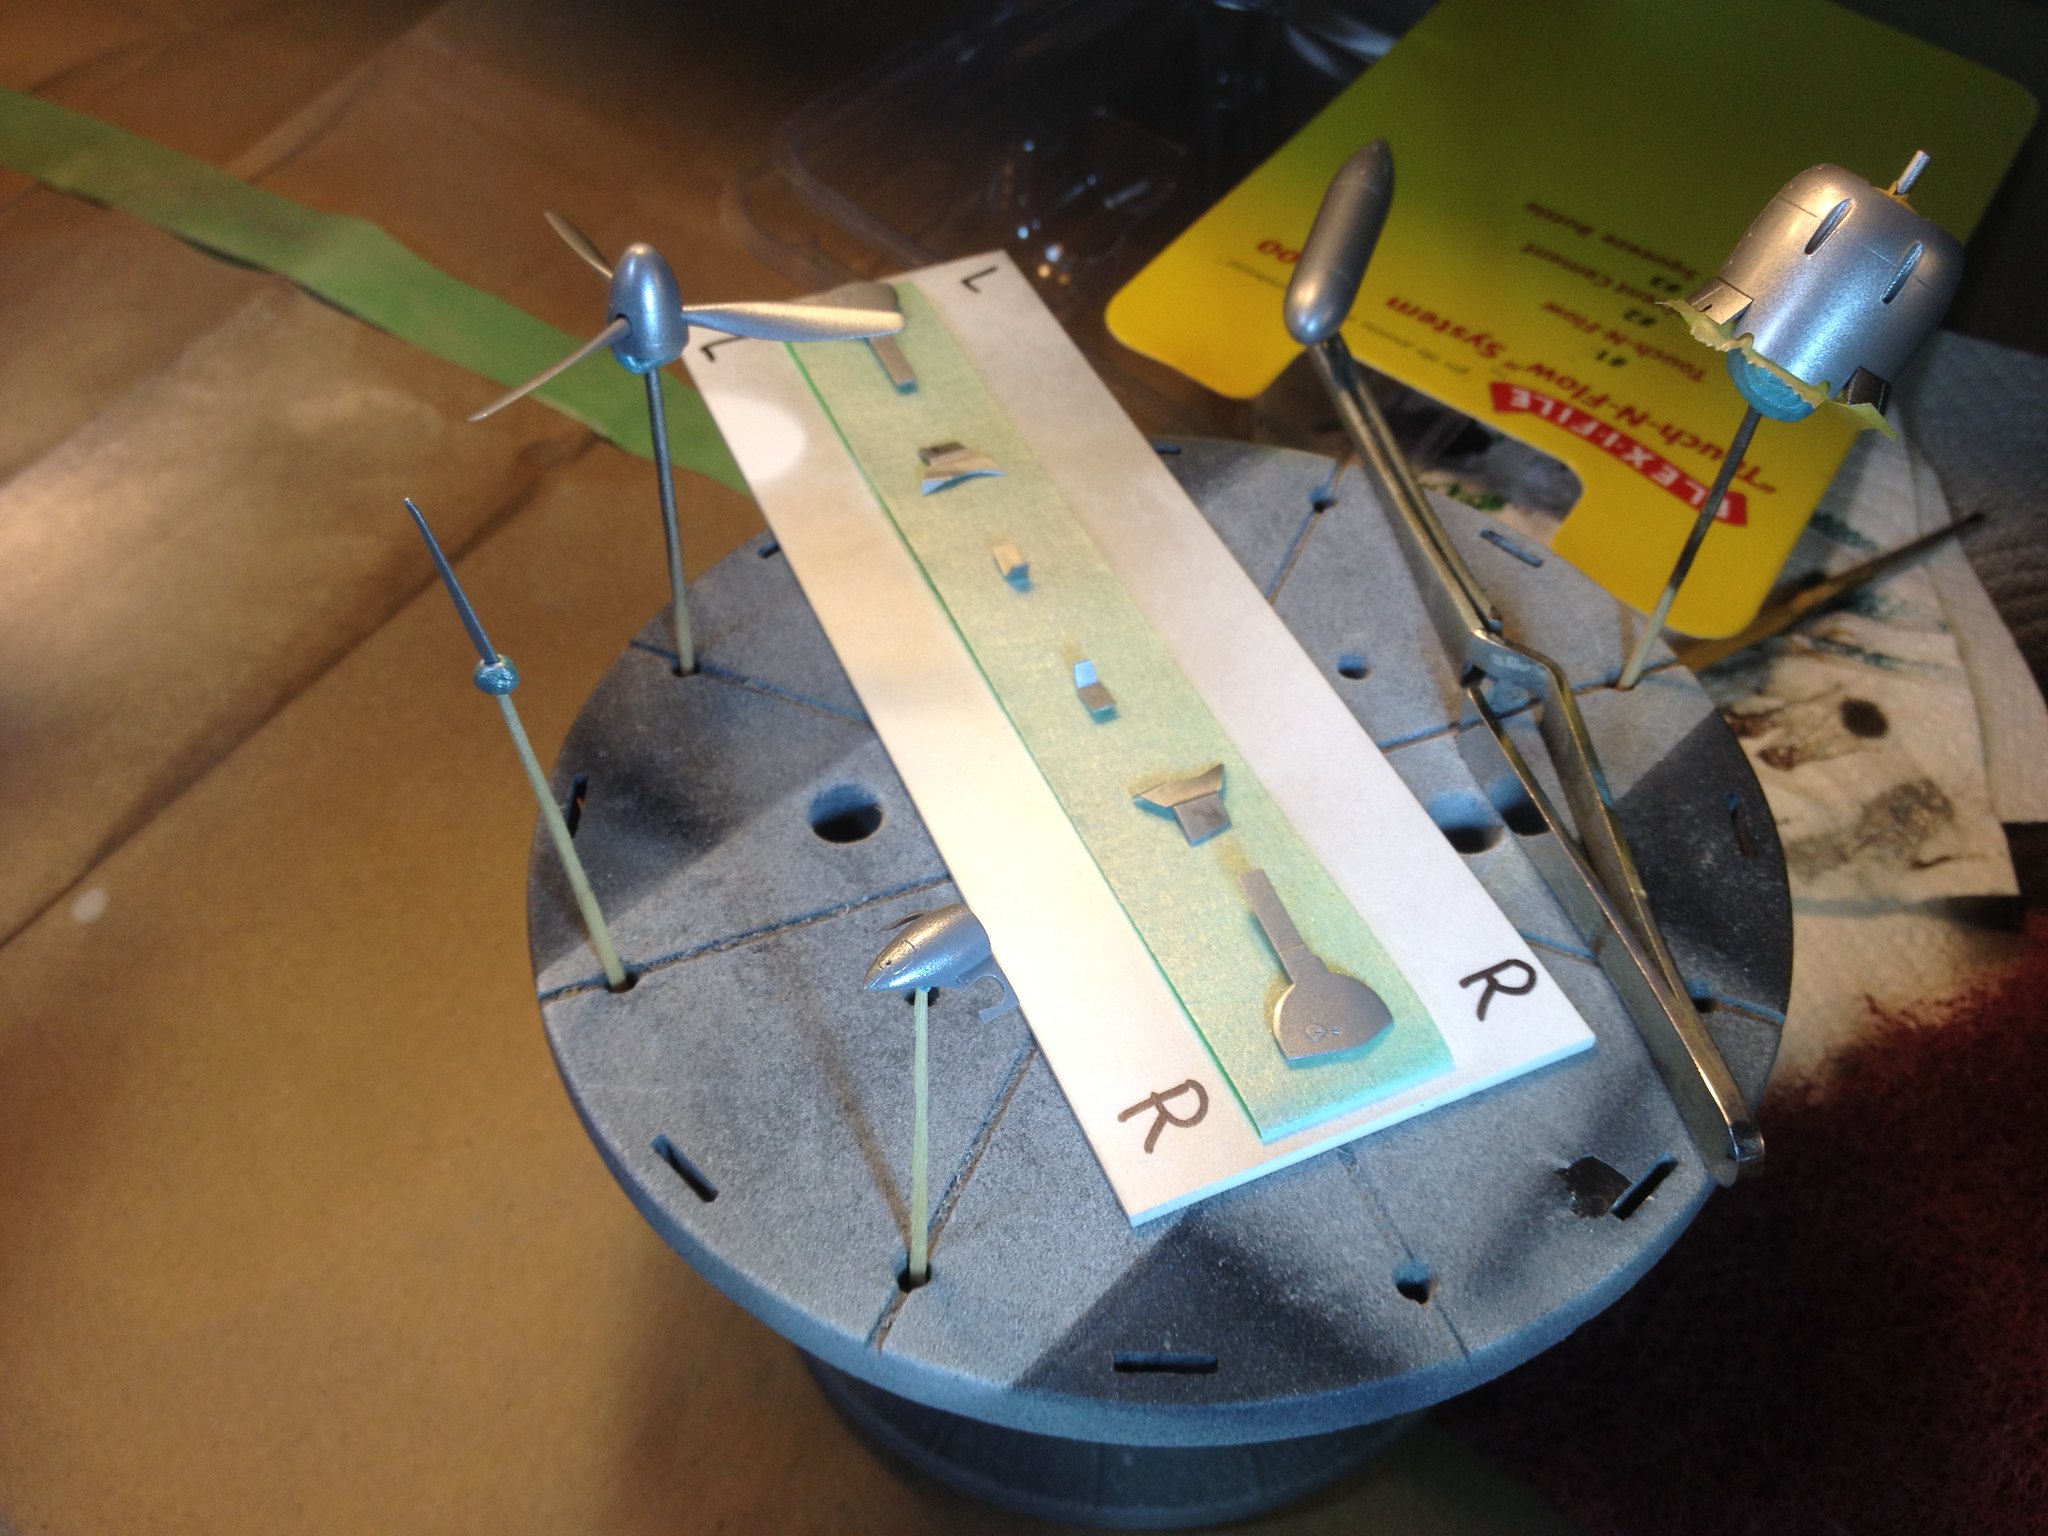
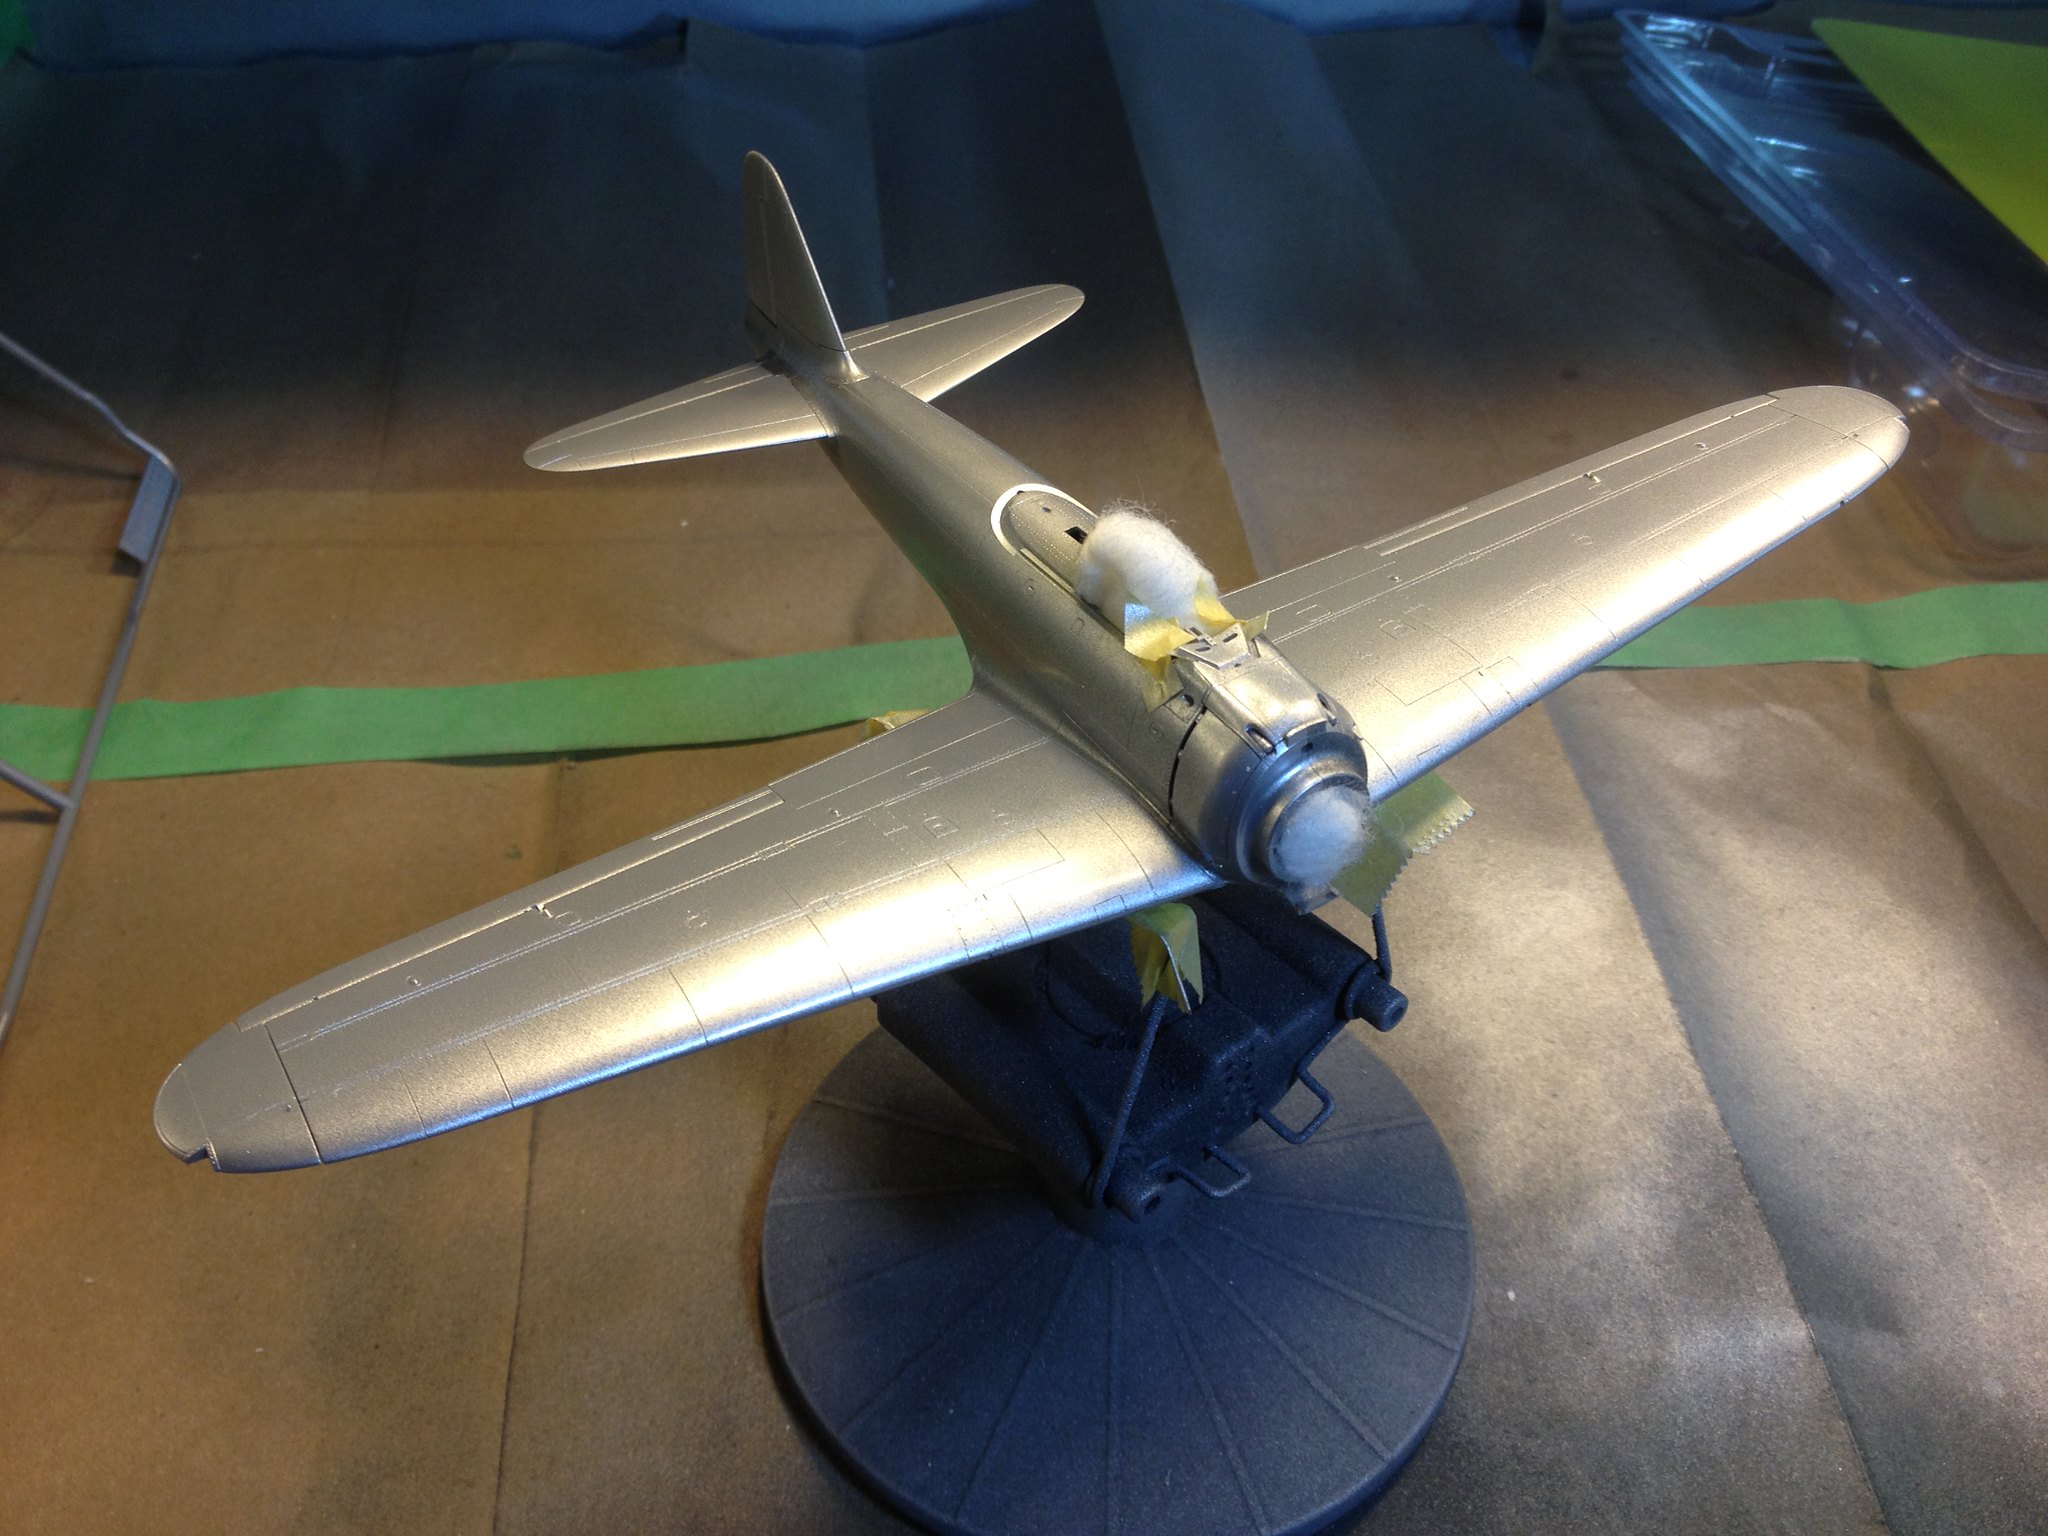
Small parts have been prepped for paint, and my "primer" has gone down.  I'm using Tamiya TS-17 Gloss Aluminum spray to start the finish.  I plan on applying several layers, and I'll be chipping/wearing away some of them.  I'm excited to try the chipping and wear techniques that I've read about.  Here's how she sits tonight.

 IMG_2177 by Christopher Ridle, on Flickr

 IMG_2176 by Christopher Ridle, on Flickr

 IMG_2175 by Christopher Ridle, on Flickr

And, these are my masks.  I plan to use decals for the tail numbers and everything smaller. 

 IMG_2178 by Christopher Ridle, on Flickr

The Montex masks are great!

 IMG_2179 by Christopher Ridle, on Flickr

Cheers all, Beer

Chris


  • Member since
    March 2015
  • From: Streetsboro, Ohio
Posted by Toshi on Monday, August 21, 2017 2:15 AM

Awesome start as always.  I'm looking forward to more progress.

Toshi

On The Bench: Revell 1/48 B-25 Mitchell


Married to the most caring, loving, understanding, and beautiful wife in the world.  Mrs. Toshi


  • Member since
    December 2002
  • From: Bury St Edmunds, Suffolk, England
Posted by Bish on Monday, August 21, 2017 6:30 AM

Looking good Chris, off to a nicestart.

Its nice seeing all these japanese subects we have had lately.

I am a Norfolk man and i glory in being so


On the bench: Airfix 1/72nd Harrier GR.3/Fujimi 1/72nd Ju 87D-3

  • Member since
    July 2003
  • From: Cincinnati, Ohio
Posted by ridleusmc on Monday, August 21, 2017 8:35 AM

Thank you gentlemen,

So far, it has been a very fun build.  I made an error with glue at a wing root, but it came out with some sanding.  Other than that, it's been a joy to build.  

  • Member since
    January 2015
  • From: Tumwater, WA.
Posted by M. Brindos on Monday, August 21, 2017 8:45 AM

Sounds as fantastic to work on as the Ki-61, Chris.

Fantastic work so far. That pit is beautiful!

- Mike Brindos "Lost Boy"

  • Member since
    July 2003
  • From: Cincinnati, Ohio
Posted by ridleusmc on Monday, August 21, 2017 10:01 AM

Thank you Mr. Brindos, 

Tamiya's and Hasegawa's Ki-61 kits look nice.  I may have to do one someday.  I am happy with the pit.  It turned out well, and it's OOTB except for the belts.  

  • Member since
    February 2014
  • From: Michigan
Posted by silentbob33 on Monday, August 21, 2017 10:09 AM
That cockpit looks really good Chris! Much better than Tamiya's older Zero kits. Looking forward to more

On my bench: Academy 1/35 UH-60L Black Hawk

  • Member since
    July 2003
  • From: Cincinnati, Ohio
Posted by ridleusmc on Monday, August 21, 2017 8:34 PM

Thank you Silentbob, 

Tell Jay to stay away from my mother.  

Yeah, I decided to go straight to one of the $50 kits instead of one of the $15 kits.  It'll keep me busy long enough to justify the cost.     

  • Member since
    September 2016
  • From: Albany, New York
Posted by ManCityFan on Tuesday, August 22, 2017 10:36 AM

Looking really good so far.  The pit is especially nice.  Excellent detail without adding AM parts.

Watching with interest,

D

Dwayne or Dman or just D.  All comments are welcome on my builds. 

  • Member since
    November 2016
  • From: Maryland
Posted by iampiper13 on Tuesday, August 22, 2017 11:59 AM

Very nice work on the pit, I keep eyeing up Zero's on ebay but have had enough trouble getting time to work on my B17 lol

  • Member since
    January 2015
Posted by GreenStyrene48 on Tuesday, August 22, 2017 5:41 PM

Your cockpit work looks nice!  I'll get around to building that kit some day.  Are you going to fold the wings?  I'm tempted to swap the wing onto an A6M2 instead, but don't know how well it would fit the Hasegawa fuselage.  If you're going to chip a lot, I'd just chip the field painted green.  The factory gray paint was pretty durable. If you're doing the box art plane, that is.

  • Member since
    July 2003
  • From: Cincinnati, Ohio
Posted by ridleusmc on Tuesday, August 22, 2017 6:37 PM

For markings, I'm going with a kit option.  However, it's not the option on the box-cover.  It'll be an aircraft from the 582nd Naval Air Group on Buin, Bougainville in June 1943.  

I will be chipping a little all over the bird.  Buin was a primative base with coral runways, and it endured daily air attacks.  I'm sure the environment was rough on the aircraft.  I don't want to overdo it, so I'll give it a first month treatment. 

The Zero got some more paint today, but there will be much more paint to travel through my airbrush.  Today was mostly about black.  I applied the Semi-gloss to the area around the cockpit, the cowl and the landing gear struts.  The canopy frames and the aft sides of the propellers got flat black.  The landing gear doors got some of a metalic blue mixture.  

 IMG_2182 by Christopher Ridle, on Flickr  

 IMG_2185 by Christopher Ridle, on Flickr

 IMG_2188 by Christopher Ridle, on Flickr

 IMG_2190 by Christopher Ridle, on Flickr

 IMG_2191 by Christopher Ridle, on Flickr

 IMG_2183 by Christopher Ridle, on Flickr


  • Member since
    June 2013
Posted by bvallot on Tuesday, August 22, 2017 10:36 PM

Very nice so far Chris. I've been swooning over this box art for the longest. I normally don't go with the box or offerings in it except in a few cases. But after that famous photograph I knew I had to paint it. It's good to see the cockpit is a little more ample than the A6M2 version Tamiya has. It builds well, but it sure is sparse on the inside. Can't wait to see more. =]

Are you going to chip the paint at all??

On the bench:  

Tamiya F4U-1  Kenneth Walsh


  • Member since
    July 2003
  • From: Cincinnati, Ohio
Posted by ridleusmc on Wednesday, August 23, 2017 7:05 AM

bvallot


Are you going to chip the paint at all??


Oh yeah!  But, I don't want to overdo it.  Maybe I'd be a little harsher to a 1945 A6M5 than a 1943 A6M3.  

  • Member since
    February 2012
  • From: Olmsted Township, Ohio
Posted by lawdog114 on Thursday, August 24, 2017 4:44 AM
Looking great!......sure picked a honey of a kit. I like the Sakae and the wiring....well done. FYI...The instrument panel decal actually fits great on this kit, but your way looks great too.

 "Can you fly this plane and land it?...Surely you can't be serious....I am serious, and don't call me Shirley"


  • Member since
    November 2009
  • From: SW Virginia
Posted by Gamera on Thursday, August 24, 2017 11:23 AM

You're doing a great job on her. 

Fantastic kit, one of the best I've ever built. Mine fell together- and then I used aftermarket decals that badly silvered and I couldn't figure out a good way to save them so it ended up back in the box.

"I dream in fire but work in clay." -Arthur Machen


  • Member since
    July 2003
  • From: Cincinnati, Ohio
Posted by ridleusmc on Thursday, August 24, 2017 9:11 PM

^^ That does stink, but you should fix it!  I'm sure it'd be easier to fix than build a whole new zero.  

Thank you LawDog.  I took some knowledge and inspiration from your radial engine wiring tuturial.  

Today saw little progress.  I experimented with chipping on the cowl.  I started at the bottom of the cowl.  I was pleased with it, so I went ahead and did the whole cowl.  I don't think I overdid it.  What do you folks think?  Did I over do it?  

 IMG_2196 by Christopher Ridle, on Flickr

 IMG_2195 by Christopher Ridle, on Flickr

 IMG_2194 by Christopher Ridle, on Flickr

  • Member since
    January 2015
  • From: Tumwater, WA.
Posted by M. Brindos on Friday, August 25, 2017 8:22 AM

That is definitely not overdone. That's perfect. I've seen them with almost half the black missing and I don't care for it.

that is just enough for your goals. :)

- Mike Brindos "Lost Boy"

  • Member since
    February 2014
  • From: Michigan
Posted by silentbob33 on Friday, August 25, 2017 10:23 AM
I'll agree and say the chipping is not overdone at all, looks just about right to me

On my bench: Academy 1/35 UH-60L Black Hawk

  • Member since
    November 2008
  • From: Hatboro, PA
Posted by Justinryan215 on Friday, August 25, 2017 4:21 PM

This is looking good!   I've got the A6m5 offering in the on deck circle...just need to finish my lancaster.

I have started painting the pilot figure, and did construct a carrier deck base for it to sit on when it's finished....


I'll be following along on this build!

"...failure to do anything because someone else can do better makes us rather dull and lazy..."

Mortal as I am,I know that I am born for a day.  But when I follow at my pleasure the serried multitude of the stars in their circular course, my feet no longer touch the Earth...


  • Member since
    July 2003
  • From: Cincinnati, Ohio
Posted by ridleusmc on Friday, August 25, 2017 8:49 PM

Thank you Gentilemen, 

Justin, we look forward to seeing your A6M5.  It was a tough decision between the M3 and M5.  I chose the M3 because I find the Solomon Islands campaign interesting.  The M5 looks pretty cool with its multiple exhausts.


  • Member since
    August 2009
  • From: Borlando Fla home of the rat
Posted by TREYZX10R on Saturday, August 26, 2017 8:18 AM

That office came out sweet,nicely detailed. The chipping on the cowl is not over done it looks spot on! This is building out nicely great job

  • Member since
    June 2017
Posted by Chemteacher on Saturday, August 26, 2017 8:48 PM
Everything looks great. I especially like the pit and the chipping on the cowl. I can't wait to see the final reveal.

On the bench: Revell-USS Arizona; Airfix P-51D in 1/72

  • Member since
    March 2005
  • From: Lancaster, South Carolina
Posted by Devil Dawg on Saturday, August 26, 2017 10:40 PM

ridleusmc

^^ That does stink, but you should fix it!  I'm sure it'd be easier to fix than build a whole new zero.  

Thank you LawDog.  I took some knowledge and inspiration from your radial engine wiring tuturial.  

Today saw little progress.  I experimented with chipping on the cowl.  I started at the bottom of the cowl.  I was pleased with it, so I went ahead and did the whole cowl.  I don't think I overdid it.  What do you folks think?  Did I over do it?  

 IMG_2196 by Christopher Ridle, on Flickr

 IMG_2195 by Christopher Ridle, on Flickr

 IMG_2194 by Christopher Ridle, on Flickr 

Well Done, fellow Devil Dog!! That is awesome weathering! Not over-done at all. I've got that very kit in the stash, and didn't realize how good it is until I saw this thread. Not sure when I'll get to it, though, as I have too many in the queue already. Might hafta make your build my "vicarious" build! Semper Fi, Marine!

Gary Mason


Devil Dawg

On The Bench: Tamiya 1/32nd Mitsubishi A6M5 Model 52 Zeke For Japanese Group Build

Build one at a time? Hah! That'll be the day!!

  • Member since
    July 2003
  • From: Cincinnati, Ohio
Posted by ridleusmc on Sunday, August 27, 2017 12:16 AM

Thank you Gentlemen and Semper Fi, 

It is a great kit.  It looks like much of the sprues are common with the A6M5.  So, it's likely wonderful as well.   

I didn't get much done today.  I layed some Future on the model, and I constructed a pilot figure.  It's been a busy Saturday.  

Painting is going to be a long process on this one.   

 IMG_2199 by Christopher Ridle, on Flickr

  • Member since
    January 2015
  • From: Tumwater, WA.
Posted by M. Brindos on Sunday, August 27, 2017 10:41 AM

That's a dang nice looking pilot figure, Chris. He looks like he'll look great with paint on him!

Progress is progress no matter how small. At least you're more productive than I've been lately lol!

- Mike Brindos "Lost Boy"

  • Member since
    July 2003
  • From: Cincinnati, Ohio
Posted by ridleusmc on Sunday, August 27, 2017 3:45 PM

The kit came with 4 or 5 options for pilot figures.  One was seated in the pit, but I didn't want to cover the cockpit work.  It'll make a great airstrip display.  I just have to start working the base.  I'm not sure I'll go that route, but it's getting strong consideration.

OK, this may look weird.  I'm using a technique that I read about in Osprey Modelling's Modelling the Mitsubishi A6M Zero by Brian Criner (pp 10-13).  I added a slight variation.  He doesn't use chipping medium, but I've decided to add it between color layers.  So far, the model has been painted with Tamiya's TS-17 Gloss Aluminum spray, then Pledge Floor Care Finish (Future), then Vallejo Chipping Medium, then a thin mix of Tamiya XF-7 Red and XF-9 Hull Red.  The Red/Hull Red mix is intended to replicate the primer common to zeros.  I expect to have some primer showing through the paint chips.  Here's a red zero:

 IMG_2203 by Christopher Ridle, on Flickr

 IMG_2207 by Christopher Ridle, on Flickr

 IMG_2206 by Christopher Ridle, on Flickr

 IMG_2205 by Christopher Ridle, on Flickr

 IMG_2204 by Christopher Ridle, on Flickr

  • Member since
    July 2003
  • From: Cincinnati, Ohio
Posted by ridleusmc on Monday, August 28, 2017 7:38 PM

And, I started the Hinomarus tonight.  I'll do the red tomorrow.  

 IMG_2208 by Christopher Ridle, on Flickr

 IMG_2210 by Christopher Ridle, on Flickr

 IMG_2211 by Christopher Ridle, on Flickr

  • Member since
    January 2015
  • From: Tumwater, WA.
Posted by M. Brindos on Monday, August 28, 2017 7:43 PM

Looking spectacular, Chris! :D

- Mike Brindos "Lost Boy"

  • Member since
    June 2013
Posted by bvallot on Monday, August 28, 2017 11:27 PM

How about that. I can't say I've researched the Zero nearly as much as American planes in the PTO but I've never come across hearing about what color primer they used. Thanks for the tip. Thinking back...just about every weathered Zero I've seen never seemed to show anything but metal underneath. Now you've got me itching to find one that does. =]

Your cowling is without a doubt appropriately weathered Chris. These planes did not fair well in the harsh environment of the Pacific. So if you're looking for something light, I'd say you nailed it. 

On the bench:  

Tamiya F4U-1  Kenneth Walsh


JOIN OUR COMMUNITY!

Our community is FREE to join. To participate you must either login or register for an account.

SEARCH FORUMS
FREE NEWSLETTER
By signing up you may also receive reader surveys and occasional special offers. We do not sell, rent or trade our email lists. View our Privacy Policy.