SEARCH FINESCALE.COM

Enter keywords or a search phrase below:

1/48 Eduard Mig-21 PFM "Weekend Edition" (Finished)

8197 views
38 replies
1 rating 2 rating 3 rating 4 rating 5 rating
  • Member since
    July 2003
  • From: Cincinnati, Ohio
1/48 Eduard Mig-21 PFM "Weekend Edition" (Finished)
Posted by ridleusmc on Friday, September 14, 2018 6:24 PM

Hello Everybody,

Hopefully, I'll finish up this Mig soon, but it's paused right now.  It's paint drying time.  I was in the local hobby shop, and I was in a Cold War/early jet/natural metal kind of mood.  Then I found this kit.  I thought, "Too bad it doesn't have Soviet markings."  Then I thought, what's wrong with Polish markings?  I bought the kit thinking it was a bird from the 60's.  It turns out, the markings are from 1994.  That's OK, it's still a cool scheme.  I've done Eduard "Profipack" kits before, and they made me tired.  I figured a "Weekend Edition" would be a little less tiresome.   

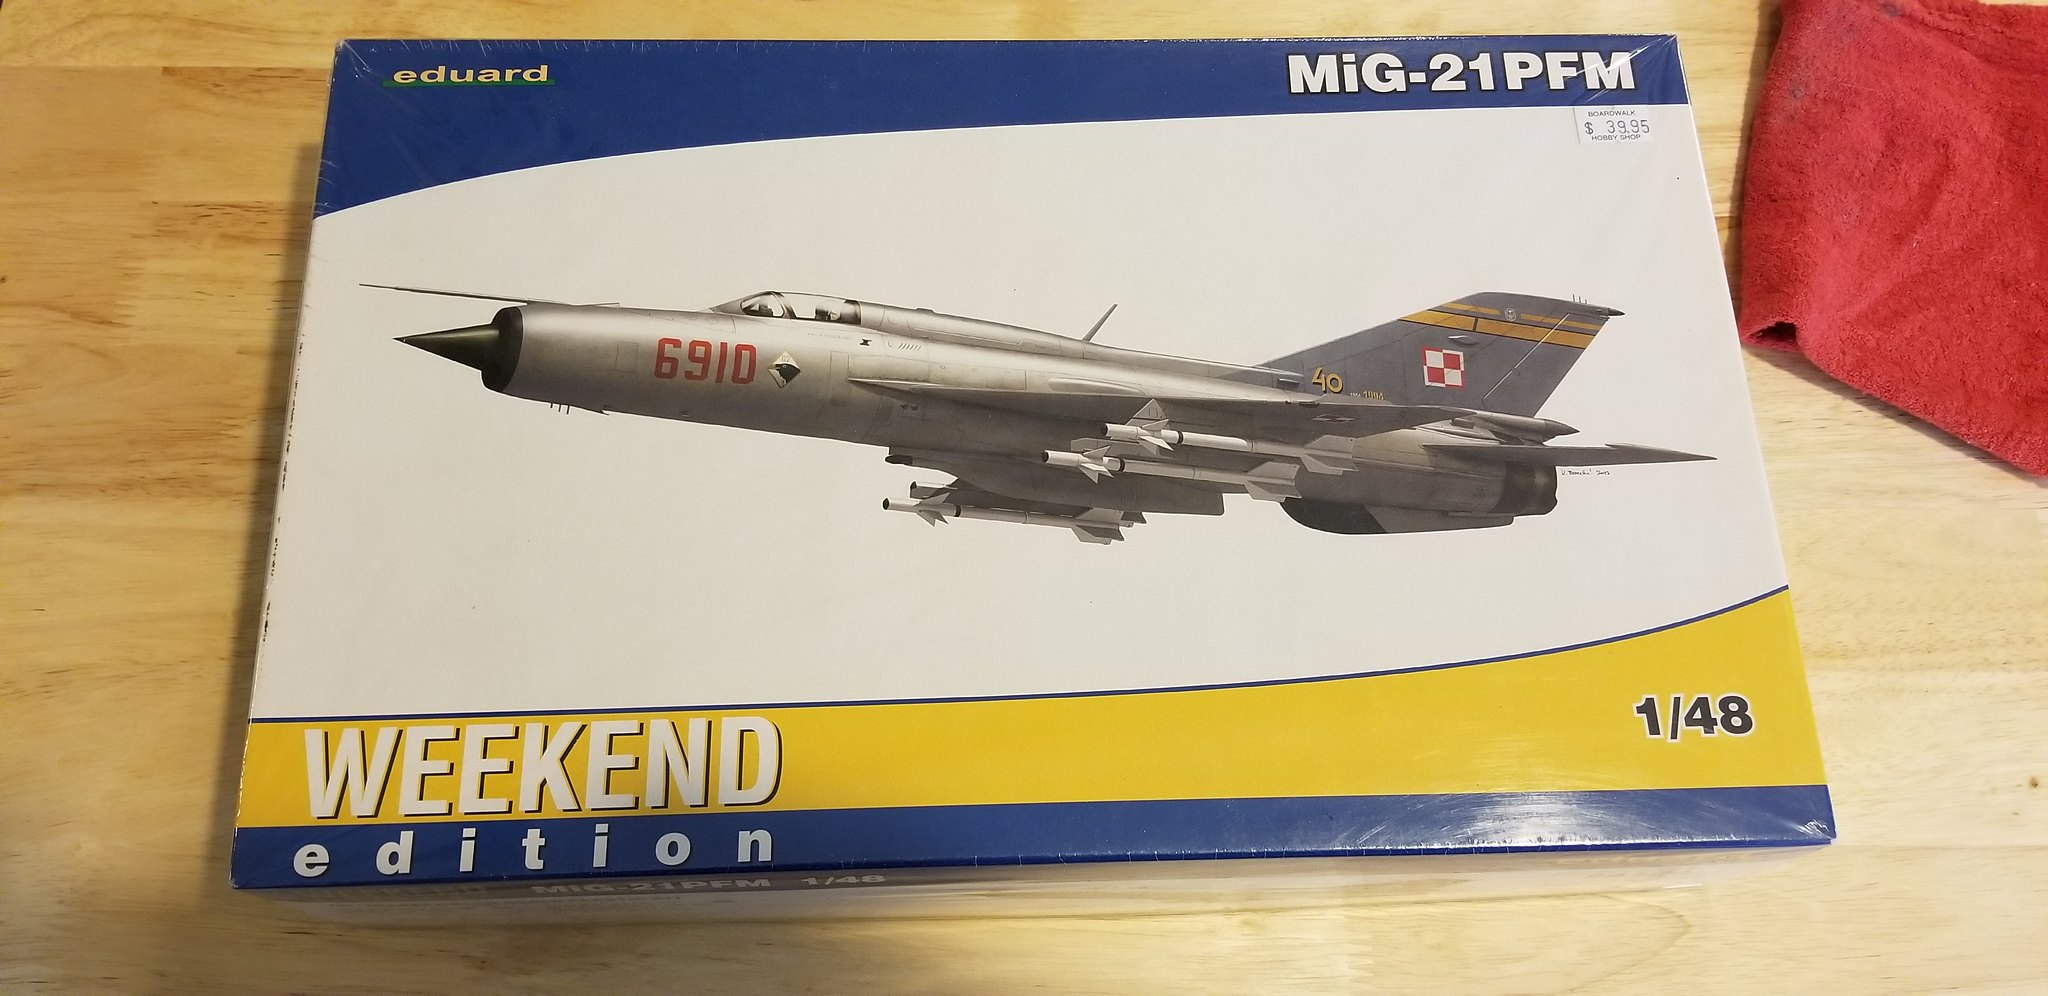
 20180812_160804 by Christopher Ridle, on Flickr

I was able to find three pictures of the plane online.  

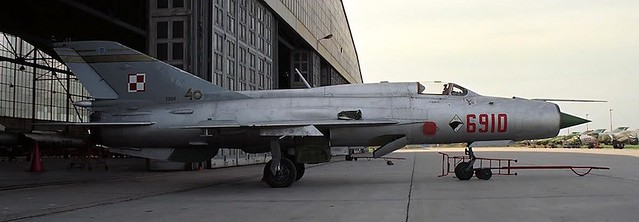
 scheme2 by Christopher Ridle, on Flickr

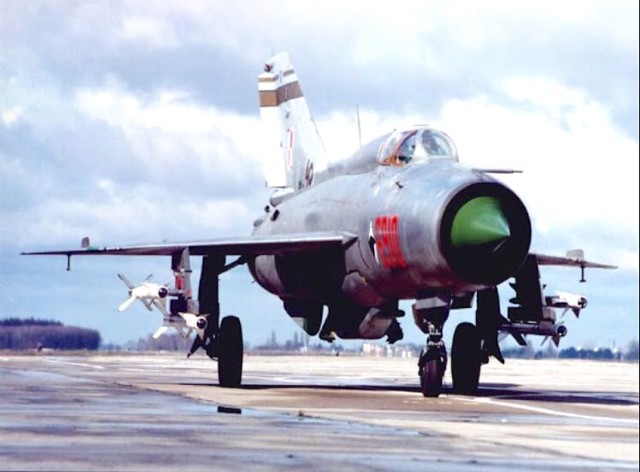
 035ff1d882757cd54a61bf0bfb586f13 by Christopher Ridle, on Flickr

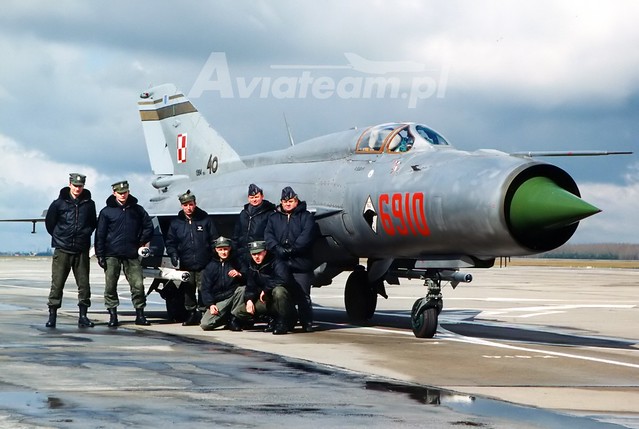
 17696_wtr by Christopher Ridle, on Flickr

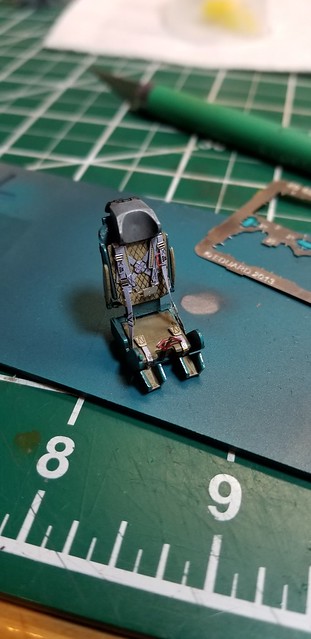
The build was pretty straight-forward.  There weren't any major fit-issues, and the kit displays some fine molded detail.  Honestly, I didn't like the kit plastic/clear plastic/decal combination for the cockpit.  So, I decided to buy the Eduard color PE set.  (I know, it would have come in the Profipack version.)  Unfortunately, I neglected to take pictures of the pit, but the seat gives an idea of the photo etch involved.  Oddly enough, the seat can go in at the end of the build.   

 20180828_201106 by Christopher Ridle, on Flickr

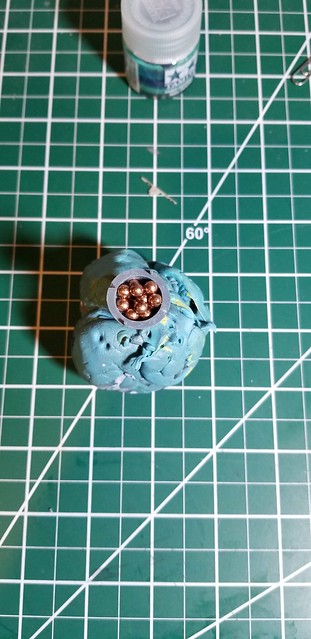
The shock cone got some weight.  

 20180812_201654 by Christopher Ridle, on Flickr

The build progressed.  I did my best to match the interior color with the Eduard color PE set.  It's a 4 to 1 mix of Tamiya X-14 Sky Blue with X-28 Park Green.  It seems to fit well.  

 20180820_184946 by Christopher Ridle, on Flickr

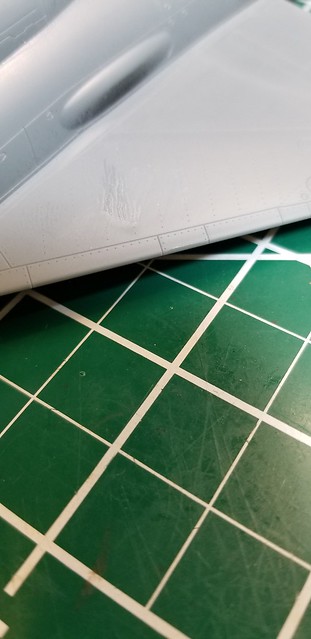
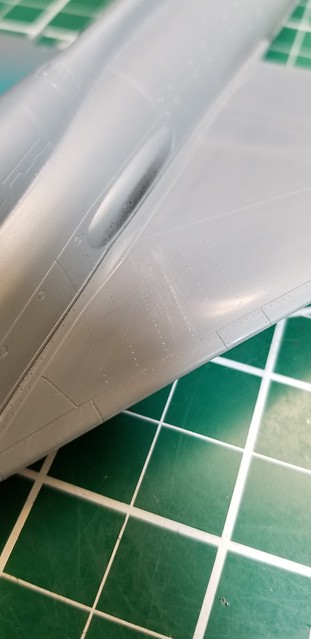
My fat thumb put a nice cement mark in the wing.

 20180820_192035 by Christopher Ridle, on Flickr

I was able to smooth it out, but it was a project.  

 20180820_192932 by Christopher Ridle, on Flickr

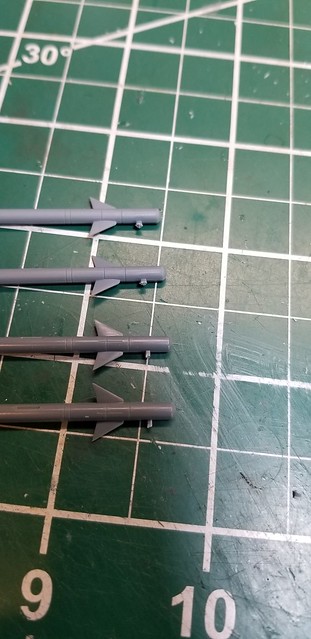
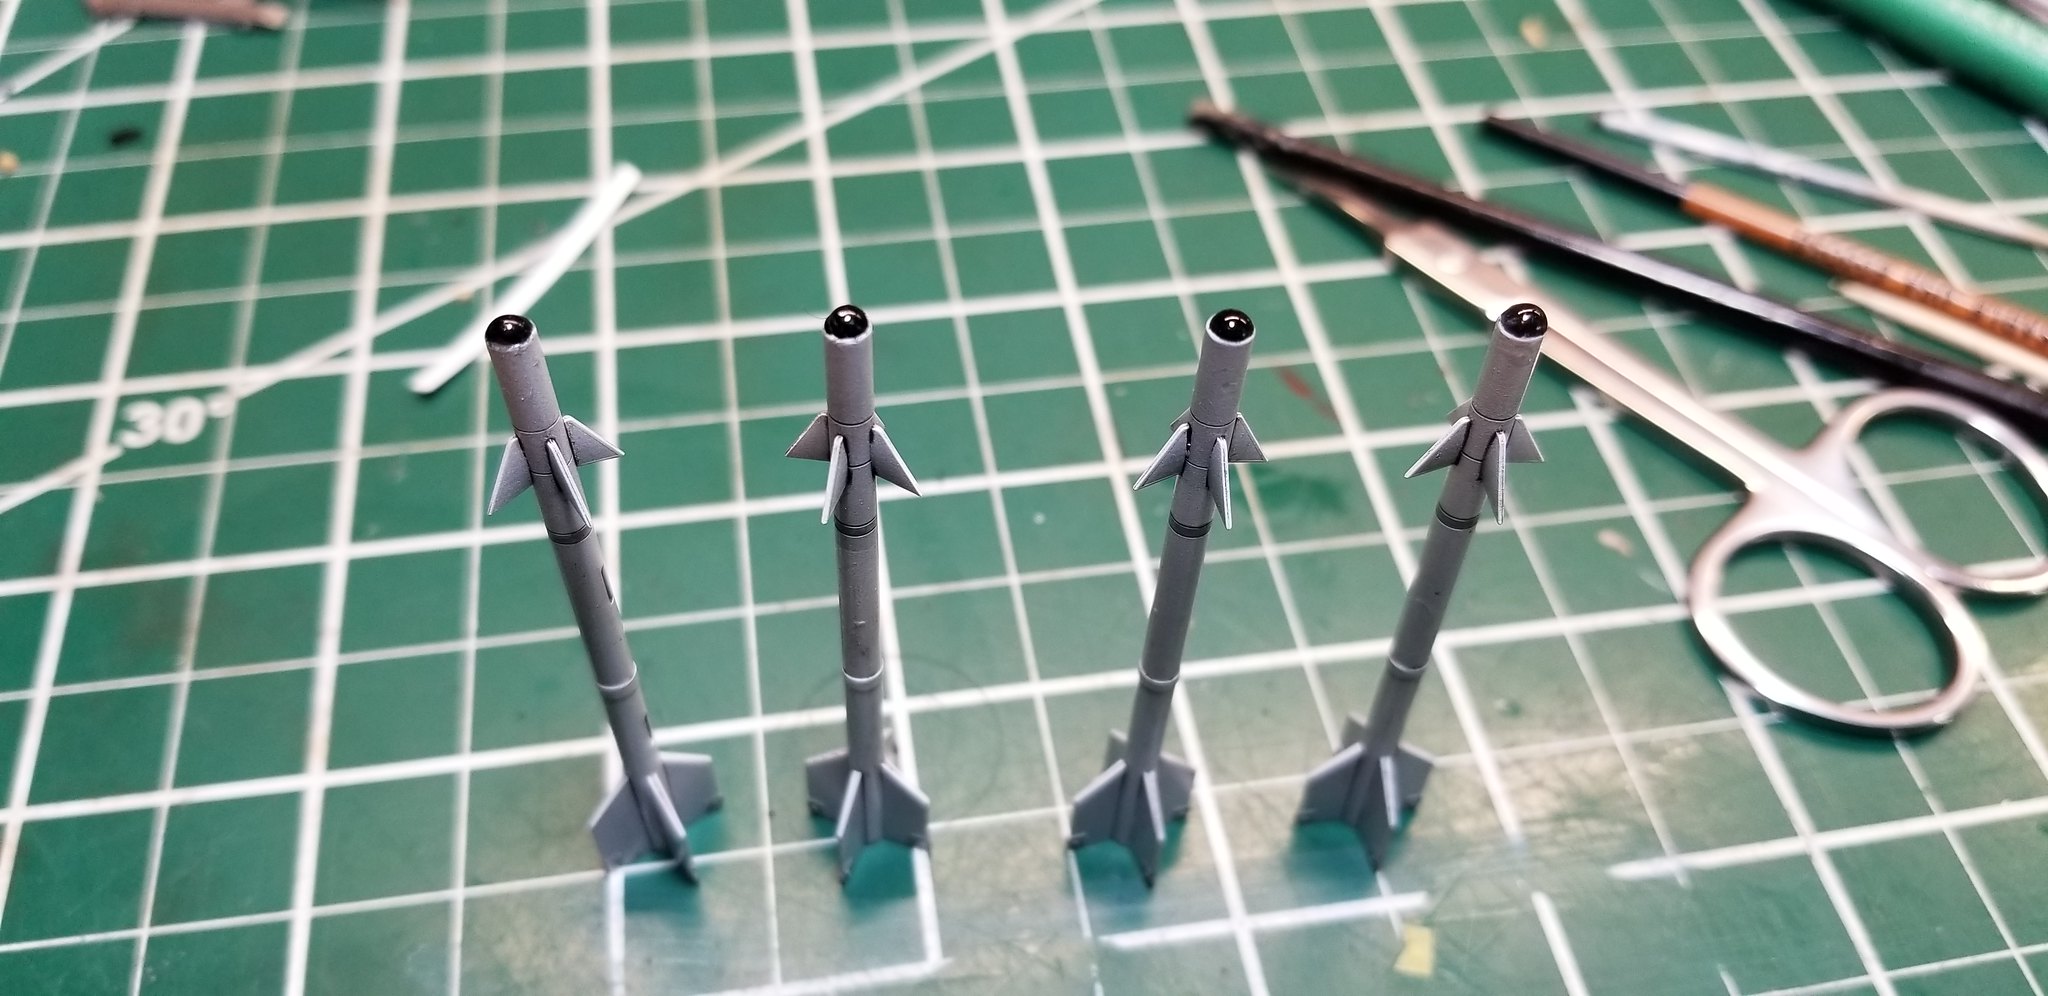
I wasn't happy with the seaker heads on these Atoll missiles.  I had gotten some advice to cut the tips off.  Then, use a clear drying UV glue to form the glass heads at the tip of the missile.  The glue is called Bondic.  You apply it, then you shine a small UV light at it.  The light cures adhesive.  It works well.    

 20180829_081235 by Christopher Ridle, on Flickr

 20180914_164602 by Christopher Ridle, on Flickr

I had some terrible trouble with Vallejo's black acrylic-polyurethane surface primer on a previous build, so I tried Badger's Stynylrez primer on the Mig's interior.  I don't like the Badger stuff either.  So Tamiya X-1 was used for primer with great results. 

 20180901_044909 by Christopher Ridle, on Flickr

 20180901_044856 by Christopher Ridle, on Flickr

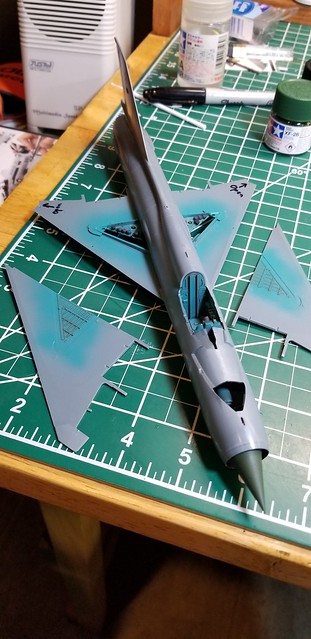
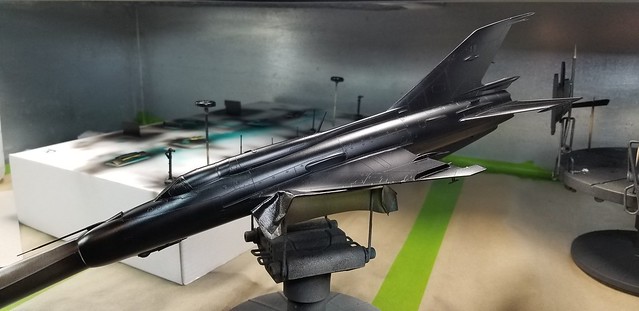
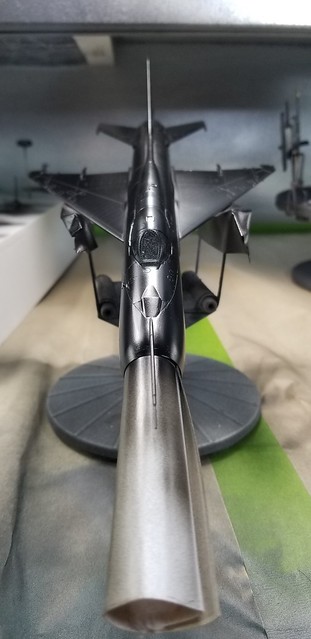
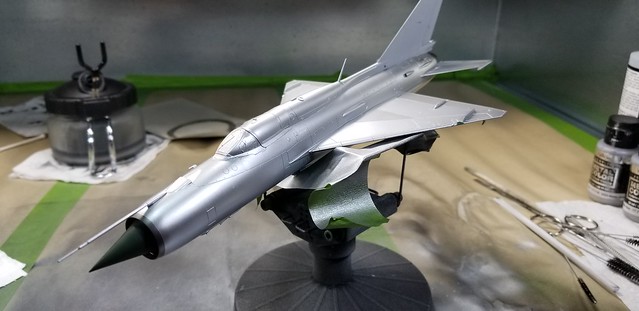
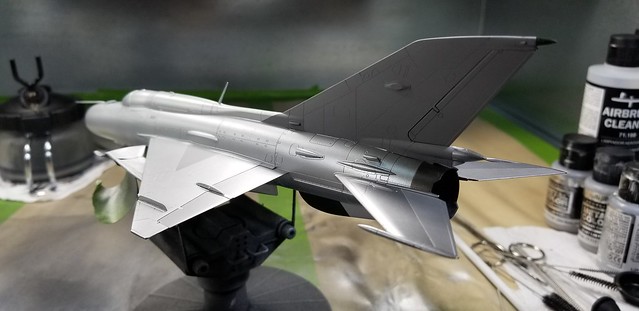
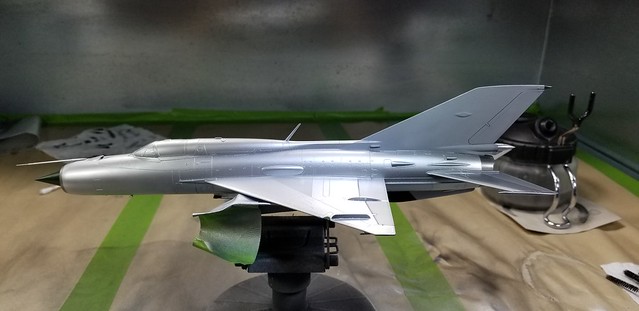
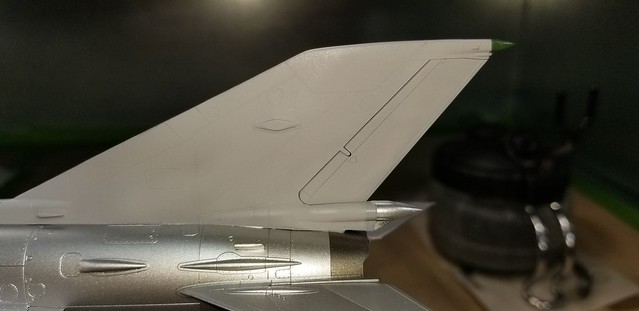
The shock cone and other green areas are Tamiya's XF-26 Deep Green.  The tail is sky grey XF-19.  The body of the aircraft is Vallejo Metal Color Aluminum 77.701.  The flight controls are Semi-Matte Aluminum 77.716.  The dark ring around the intake is Dark Aluminum 77.703.  The dark ring around the exhaust and up into the jet-pipe is Exhaust Manifold 77.723.  The pipe also has some Burnt Iron 77.721 and Jet Exhaust 77.713.  The area just forward of the exhaust got Pale Burnt Metal 77.704. 

 20180912_070510 by Christopher Ridle, on Flickr

 20180912_070520 by Christopher Ridle, on Flickr  

 20180914_164437 by Christopher Ridle, on Flickr

I had given it a shot of Future on Wednesday night, and I was hoping to start decals tonight.  However, I found metal color splatter all over the grey tail.  I believe it happened when I closed one of the Metal Color bottles after touch-ups.  The paint had dried as little droplets on the tail.  I gingerly smoothed them down with a Q-tip and alcohol.  It worked, but it left the grey paint splotchy.  So I repainted the grey.  I'm waiting for it to dry, then it'll get a some more Future.   

 20180914_164426 by Christopher Ridle, on Flickr

Have a great weekend!

  • Member since
    March 2007
  • From: Northeast WA State
Posted by armornut on Friday, September 14, 2018 8:51 PM

   So cool, I have said it before the Mig-21 has to be one of my all time favorite birds.

     I have heard that Eduard kits can be " challenging", I have 2 21s in my stash niether are " Weekend Editions" so what made you tired about your previous kits?

we're modelers it's what we do

  • Member since
    July 2003
  • From: Cincinnati, Ohio
Posted by ridleusmc on Friday, September 14, 2018 9:18 PM

My aversion to Profipack kits comes from this:

This FW-190 kit is highly detailed, and it's a pain in the butt.  The engine consisted of a great deal of tiny parts with loose fits and unclear instructions.  I struggled with the pit, the engine and the wings. The wings have all of these great panels which can be posed open to show gun details.  It's beautiful, but I can't handle it.  I got most of the construction done.  Then I went to test fit the windshield, and I found that the fuselage halves were a mile away from the windshield mounts.  I gave up at that point.  The box taunts me whenever I step down to my shop.  When it comes to the FW-190, I may get the Tamiya kit.  

However, the fit of this Eduard Mig-21 kit is pretty good.  The instructions are pretty clear.  I had to fill some seams on the belly, but I could skip many of the seams due to covering fins and farings.  It's like Eduard wanted to keep the seams to a minimum.  It's a much better kit than the 190.  

  • Member since
    November 2008
  • From: Far Northern CA
Posted by mrmike on Friday, September 14, 2018 9:49 PM

Thanks for the well documented WIP, especially the color mixes. I've got the Profipack version, and am bookmarking your build for the day it gets to the bench. Looking forward to your next installment!

Mike

  • Member since
    July 2003
  • From: Cincinnati, Ohio
Posted by ridleusmc on Friday, September 14, 2018 11:32 PM

I'm glad it may help you Mr. Mike.  Truth be told, I was dreading mixing up the interior color.  However, I had a decent match in about 5 minutes.  

  • Member since
    March 2007
  • From: Northeast WA State
Posted by armornut on Saturday, September 15, 2018 10:01 AM

  Thank you also Ridleusmc, I'm looking forward to someday putting glue to my Migs. Beautiful build btw.

we're modelers it's what we do

  • Member since
    July 2003
  • From: Cincinnati, Ohio
Posted by ridleusmc on Saturday, September 15, 2018 11:50 AM

Thank you sir.  Really, these Eduard Migs are quite nice.  


  • Member since
    May 2013
  • From: Indiana, USA
Posted by Greg on Saturday, September 15, 2018 1:59 PM

You hooked me at the picture of the seat. Big Smile It looks great.

The rest of the MIg is coming along good too. I'm looking forward watching the rest, a Mig is on of my very few stalled builds.

  • Member since
    May 2009
  • From: Poland
Posted by Pawel on Saturday, September 15, 2018 2:16 PM

Hello!

Cool! A MiG-21 in Polish markings! Do i see right, that this baby is from the 62. PLM? If so, than this is the unit stationed in my home town. I watched those planes take off far on the horizon, when I was standing at the playing field of my primary school. And now I live only a couple of clicks from their home airfield. They are flying F-16s now.

I have looked it up on the 'net and here's what I found for you:

Good luck with your build and have a nice day

Paweł

All comments and critique welcomed. Thanks for your honest opinions!

www.vietnam.net.pl

  • Member since
    March 2005
  • From: Lancaster, South Carolina
Posted by Devil Dawg on Saturday, September 15, 2018 10:04 PM

Looking good, Devil Dog. I've never built built a MiG kit before. Your's is looking great!

Devil Dawg

On The Bench: Tamiya 1/32nd Mitsubishi A6M5 Model 52 Zeke For Japanese Group Build

Build one at a time? Hah! That'll be the day!!

  • Member since
    July 2003
  • From: Cincinnati, Ohio
Posted by ridleusmc on Sunday, September 16, 2018 2:00 AM

Thank you Gentlemen,

Pawel, thank you very much for the reference photos.  I've finally seen the left side of the aircraft.  The photos verified the markings and thier placement.  I wasn't sure about a couple things.  Maybe one or two of my decals could have been a little this way, or a little that way, but the photos verify their general placement and my choice for the crow (the kit has an option).  The decals for this kit were great.  I don't know who printed them, but they went down easily and they were a pleasure to apply.  I haven't dealt with decals this good in a long time. 

 20180915_203434 by Christopher Ridle, on Flickr

I also built a ladder out of an Eduard set.  From those pictures Pawel loaded, it looks like it gets red. 

 20180916_024944 by Christopher Ridle, on Flickr

  • Member since
    February 2012
  • From: Olmsted Township, Ohio
Posted by lawdog114 on Monday, September 17, 2018 12:17 AM
Looking sweet Chris. I agreed with you on the original Eduard 190. I think I'd rather get a root canal than build another one. The new tooled A is supposed to be fairly nice though.

 "Can you fly this plane and land it?...Surely you can't be serious....I am serious, and don't call me Shirley"


  • Member since
    July 2003
  • From: Cincinnati, Ohio
Posted by ridleusmc on Monday, September 17, 2018 1:46 AM

Maybe the challenge of the 190 is the reason why it was so inexpensive at the model show.  

As for the Mig, the decals look good.  I put a little more Micro Sol on one of the large tail decals.  It just needs to snug down one stubborn spot, but it's not bad at all.  Maybe it'll get a sealing clear coat tomorrow.  Then, it's a light weathering.  It should be done soon.  

  • Member since
    July 2003
  • From: Cincinnati, Ohio
Posted by ridleusmc on Friday, September 21, 2018 3:42 PM

It's finished!  I didn't weather it much.  I just gave it a Flory Models Dark Dirt treatment.  It pulls out the panel lines.  

 20180919_074418 by Christopher Ridle, on Flickr

 20180919_080936 by Christopher Ridle, on Flickr

After wiping that off, I applied the landing gear, missiles and canopy.  I'm very happy with the results.  

 20180920_205225 by Christopher Ridle, on Flickr

 20180920_205251 by Christopher Ridle, on Flickr

 20180920_205311 by Christopher Ridle, on Flickr

 20180920_205325 by Christopher Ridle, on Flickr

 20180920_205344 by Christopher Ridle, on Flickr

 20180920_205351 by Christopher Ridle, on Flickr

 20180920_205401 by Christopher Ridle, on Flickr

 20180920_205442 by Christopher Ridle, on Flickr

 20180920_205455 by Christopher Ridle, on Flickr

 20180920_205522 by Christopher Ridle, on Flickr

 20180920_205547 by Christopher Ridle, on Flickr

 20180920_205603 by Christopher Ridle, on Flickr

 20180920_205646 by Christopher Ridle, on Flickr

 20180920_205808 by Christopher Ridle, on Flickr

Thank you for looking,

Chris

  • Member since
    December 2002
  • From: Northern California
Posted by jeaton01 on Friday, September 21, 2018 7:07 PM

Well done, Christopher.

John

To see build logs for my models:  http://goldeneramodel.com/mymodels/mymodels.html


  • Member since
    November 2003
  • From: Naples, FL
Posted by tempestjohnny on Friday, September 21, 2018 7:08 PM
Looks great


  • Member since
    November 2008
  • From: Far Northern CA
Posted by mrmike on Friday, September 21, 2018 10:49 PM

Outstanding - thanks again for the WIP!

  • Member since
    July 2003
  • From: Cincinnati, Ohio
Posted by ridleusmc on Saturday, September 22, 2018 12:27 AM

Thank you gentlemen, 

This was a fun kit.  I'd recommend these Eduard Migs.  

  • Member since
    December 2010
  • From: Salem, Oregon
Posted by 1943Mike on Saturday, September 22, 2018 11:00 AM

Chris,

I second the other comments .. very well done!

Mike

"Le temps est un grand maître, mais malheureusement, il tue tous ses élèves."

Hector Berlioz

  • Member since
    July 2003
  • From: Cincinnati, Ohio
Posted by ridleusmc on Saturday, September 22, 2018 3:38 PM

Thank you Mike!  

I'm toying with the idea of closing up the cockpit.  

What does everyone think?

  • Member since
    March 2015
  • From: Streetsboro, Ohio
Posted by Toshi on Sunday, September 23, 2018 3:32 AM

Leave it, it adds character to the build.  Excellent craftsmanship!

Your friend, Toshi

On The Bench: Revell 1/48 B-25 Mitchell


Married to the most caring, loving, understanding, and beautiful wife in the world.  Mrs. Toshi


  • Member since
    April 2003
  • From: USA
Posted by keavdog on Sunday, September 23, 2018 3:40 AM

That turned out really, really nice!

Thanks,

John

  • Member since
    July 2003
  • From: Cincinnati, Ohio
Posted by ridleusmc on Monday, September 24, 2018 1:46 AM

Thank you Gentlemen!


  • Member since
    May 2018
  • From: Commonwealth of Virginia
Posted by VA Spartan on Monday, September 24, 2018 4:52 PM

Very awesome!!!!  I would leave the cockpit open to show your work in there and give people an idea of how cramped the MiG-21’s office is.  Well done!

On the workbench: 1/35 Takom T-54B; 1/35 Tamiya Char B1bis w/French Infantry; 1/48 Tamiya Fairey Swordfish Mk. 1

  • Member since
    June 2017
Posted by UnwaryPaladin on Wednesday, September 26, 2018 7:19 AM

Very nice! The cockpit looks great and the ladder really adds to the model. I vote for leaving the canopy open. 

  • Member since
    May 2013
  • From: From the Mit, but live in Mason, O high ho
Posted by hogfanfs on Wednesday, September 26, 2018 8:36 AM

Chris,

That MiG turn out perfect! DO NOT close the cockpit! It looks perfect the way it is. The NMF turned out perfect! I have a Profipack 21MF I'll be building hopefully soon for one of Bish's GB. Lots of details from this build I'll incorporate in to mine, so thanks for posting this WIP.

Did I mention it turned out perfect?

 Bruce


 On the bench:  1/48 Eduard MiG-21MF

                        1/35 Takom Merkava Mk.I


  • Member since
    July 2003
  • From: Cincinnati, Ohio
Posted by ridleusmc on Thursday, September 27, 2018 2:04 AM

Thank you Gentlemen, 

Canopies usually slide back or open upward.  This one is a little different.  It opens to the side.  I was thinking it could look a little sleeker/sportier with it closed up.  But, Ok, I'll leave it alone.   You guys are right. 


  • Member since
    November 2016
Posted by StephenL on Wednesday, October 17, 2018 12:36 AM
Nice job! She really looks great.

200 kits was my limit...

  • Member since
    September 2011
  • From: Milaca, Minnesota
Posted by falconmod on Wednesday, October 17, 2018 7:08 AM

Fantastic job!

On the Bench: 1/72 Ki-67, 1/48 T-38

1/144 AC-130, 1/72 AV-8A Harrier

  • Member since
    March 2007
  • From: Northeast WA State
Posted by armornut on Wednesday, October 17, 2018 7:43 AM

    The side tilting canopy is one of the many odd and unique things attributed to the 21, even with the canopy open the bird still looks sleek and fast. Beautiful build sir.

we're modelers it's what we do

JOIN OUR COMMUNITY!

Our community is FREE to join. To participate you must either login or register for an account.

SEARCH FORUMS
FREE NEWSLETTER
By signing up you may also receive reader surveys and occasional special offers. We do not sell, rent or trade our email lists. View our Privacy Policy.