SEARCH FINESCALE.COM

Enter keywords or a search phrase below:

Weathering GB - 2/1/2011 - 1/31/2012

24487129 views
861 replies
1 rating 2 rating 3 rating 4 rating 5 rating
  • Member since
    May 2005
  • From: Dublin Rep Of Ireland
Posted by terry35 on Saturday, January 22, 2011 6:57 PM

Just thought that I'd get this one attached before I post.

http://www.network54.com/Forum/110741/message/1295198866/Rust+on+the+exhaust+in+the+scale+1-15

I think that is the bees knees.

Terry.

  • Member since
    May 2005
  • From: Dublin Rep Of Ireland
Posted by terry35 on Saturday, January 22, 2011 7:29 PM

Well I've been browsing the Gb and I must say I am impressed with the progress being made so far.

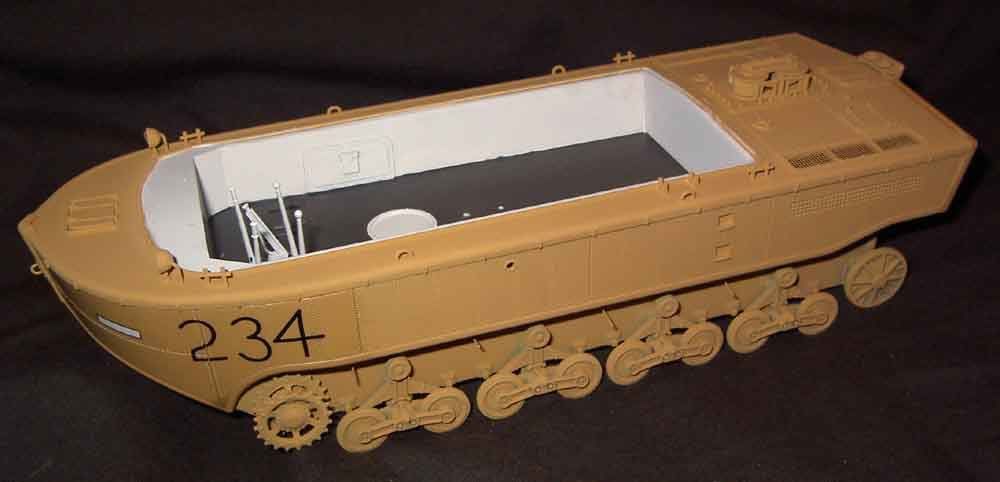
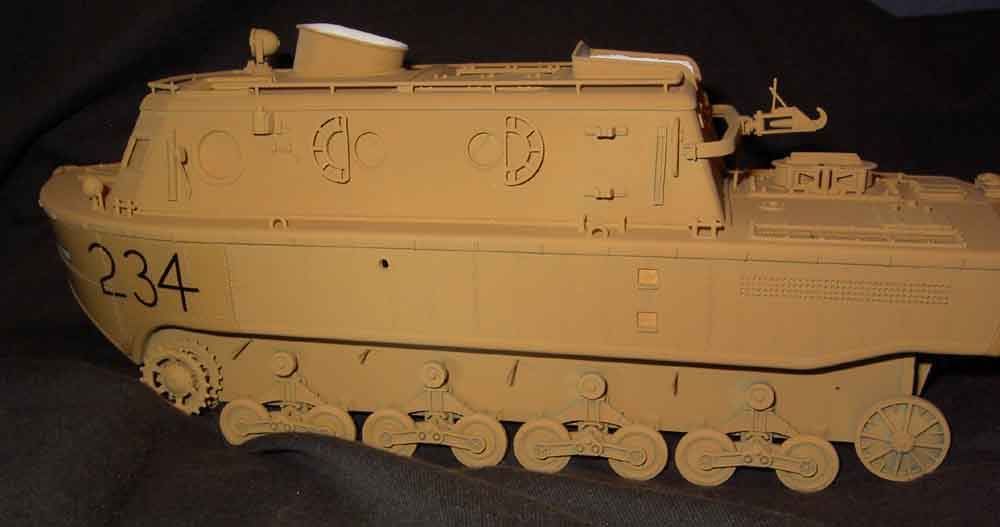
Well my subject is the German LWS, Landes Wasser Schlepper, an amphibious vehicle designed in the 30's and unarmoured.

I remember this subject first being released in the 1990's as a resin kit. It's a subject I have always wanted to build ever since I first seen it in the encylopedia of german armour.

When Hobby Boss brought out their offering as  a plastic kit I still did not jump as it was very expensive for a plastic kit about €50 over here, I ended up getting one for about €20 or €30 can't remember exactly how much.

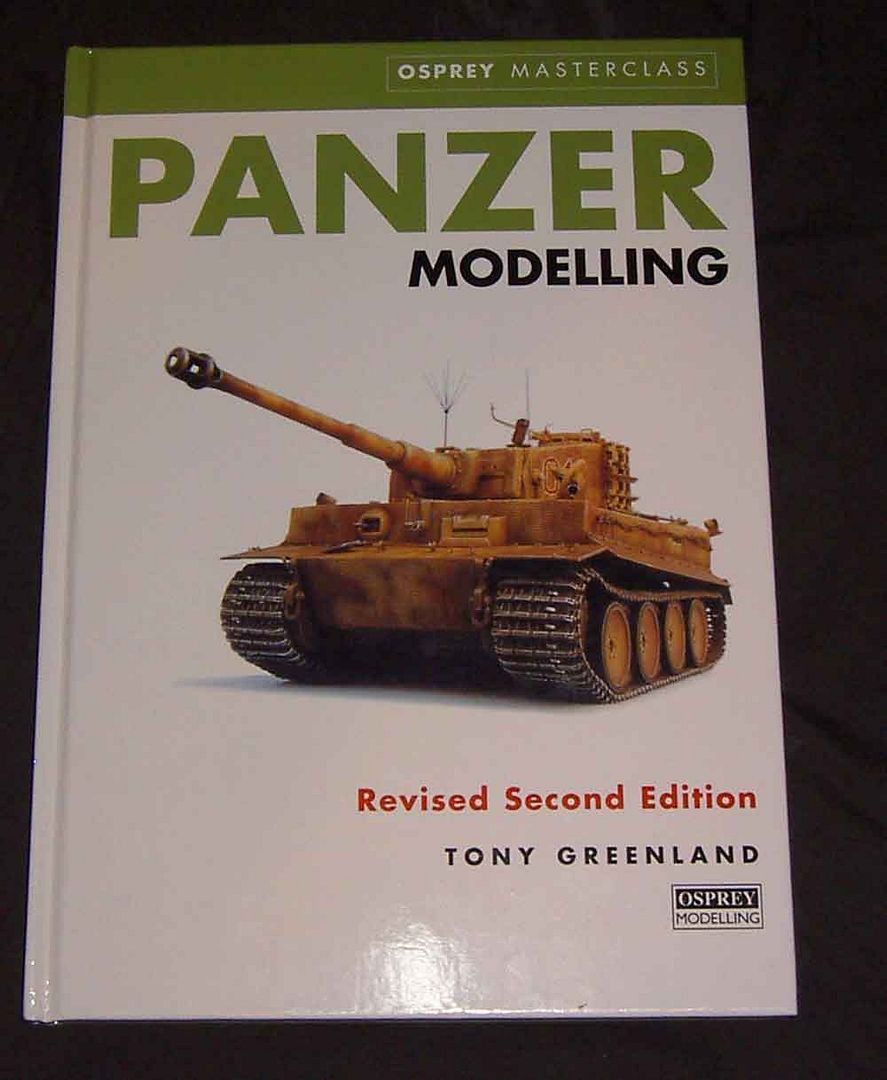
I have always been a fan of Tony Greenland's work, since the early to mid eighties I always considered his German models the best and always tried to copy his style. THe eighties also gave us Verlinden with the very stylistic drybrushing and heavy washes.

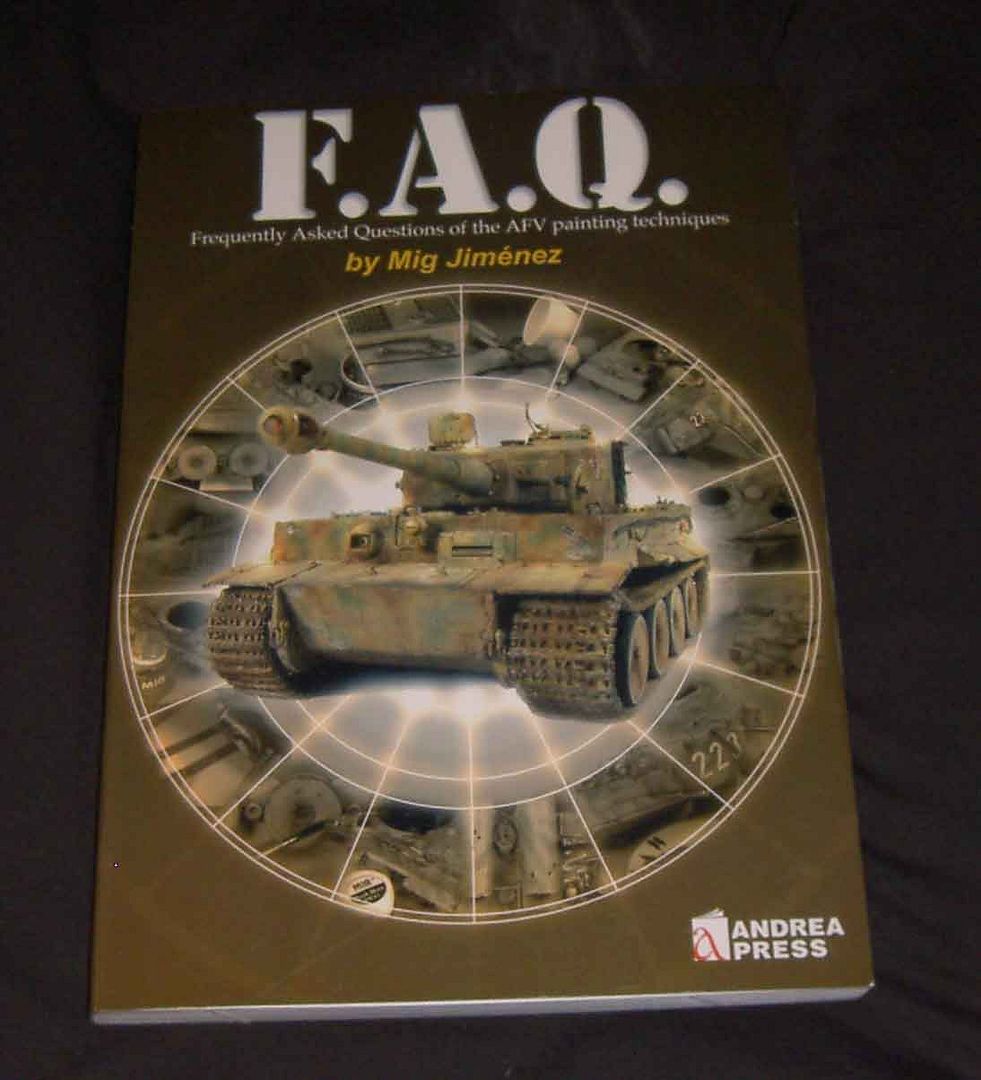
The 1990's and 00's gave us MIG, Phil Stuncinkas as just two names who shine in my opinion but thats just my opinion.

For this build I will try using my own take on various painting techniques, drybrushing washes pigments pastels. Chipping basically I want to try and marry old and new to my own personal taste.

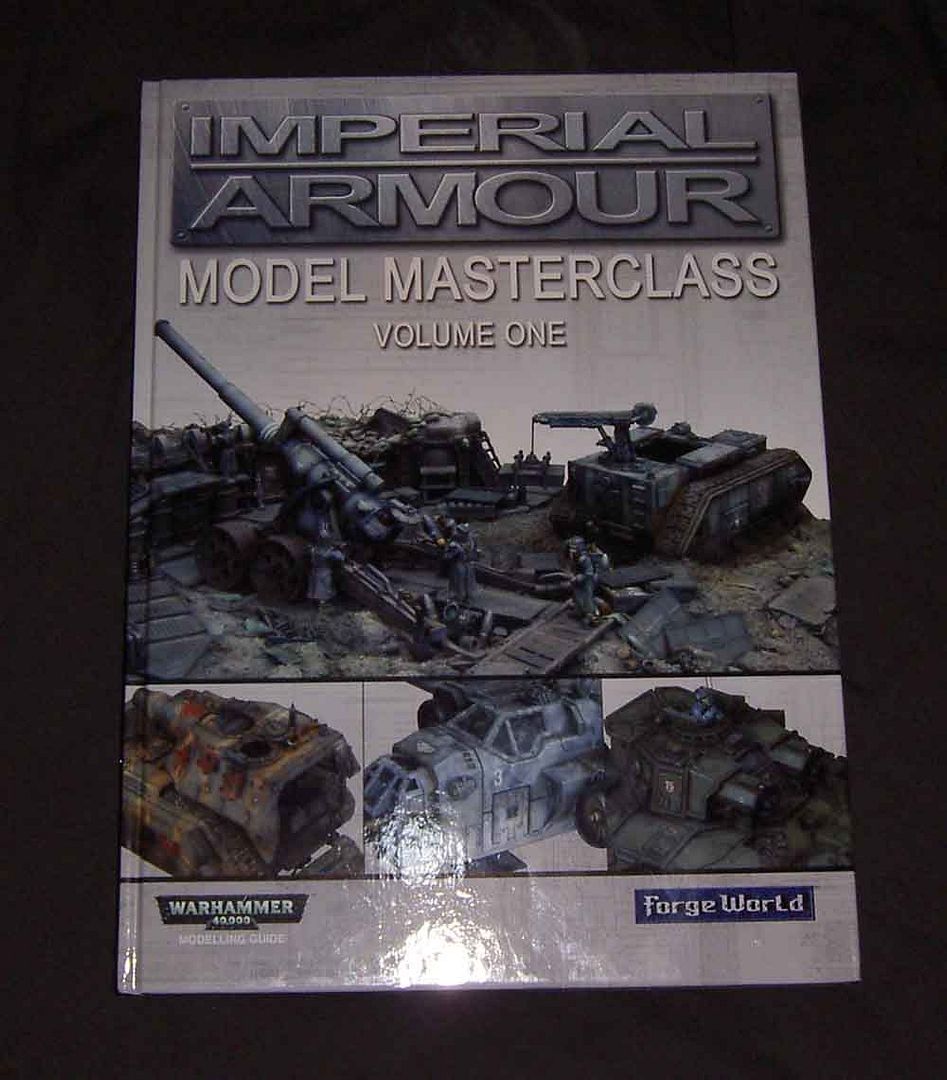
The books I'm working from are as follows.

Tony Greenlands masterclass

Migs own FAQ

And this one by Games workshop written by Phil Stutcinkas, this is by far the best Modelling manual I have ever seen.


Now for my LWS progress.

THe kit built into sub-assemblies.

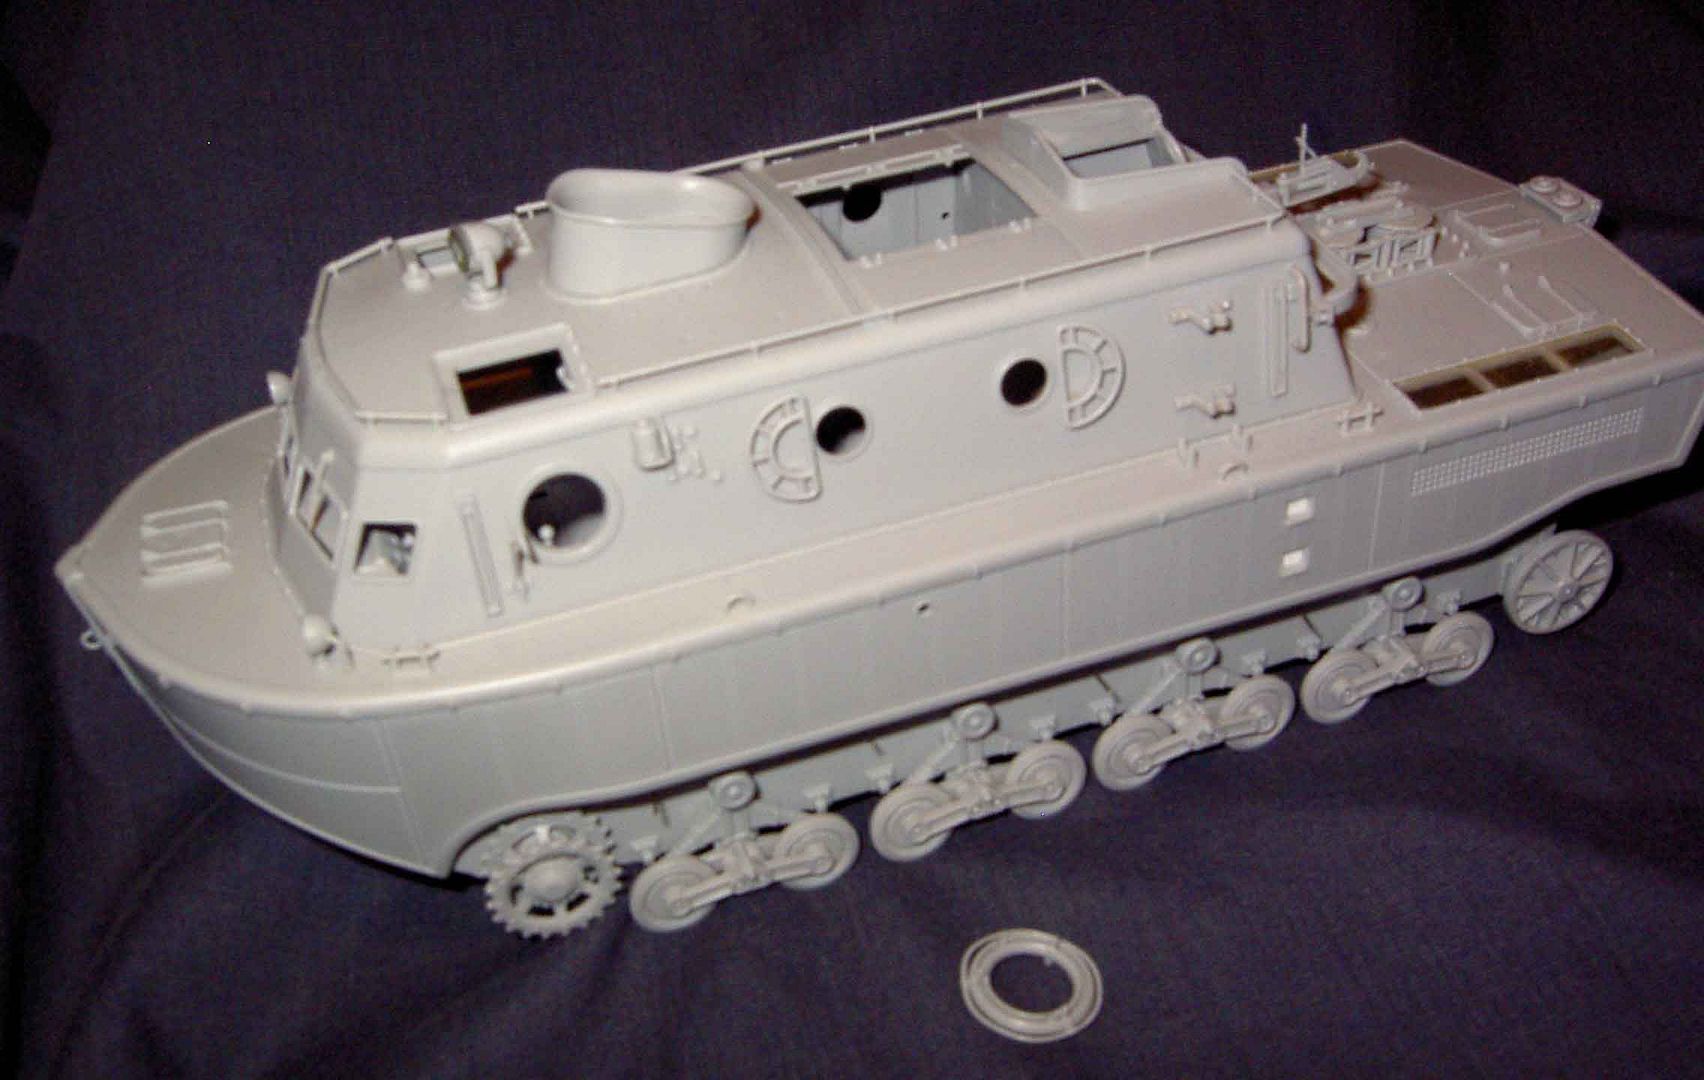
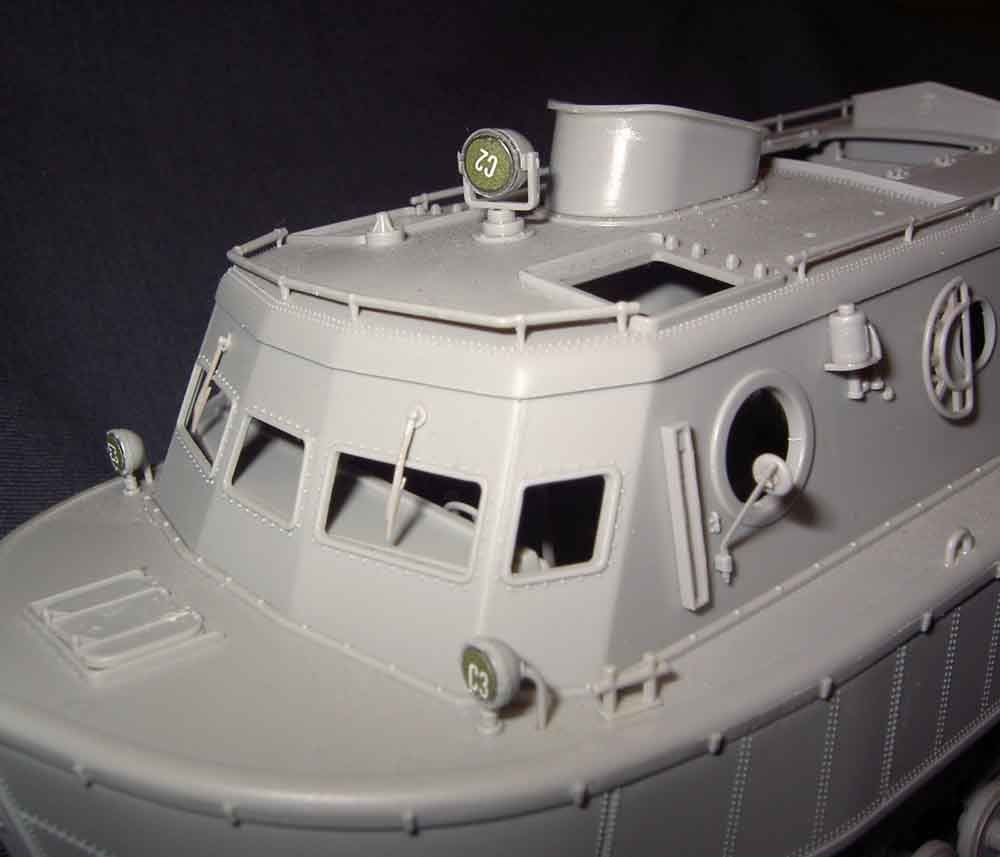
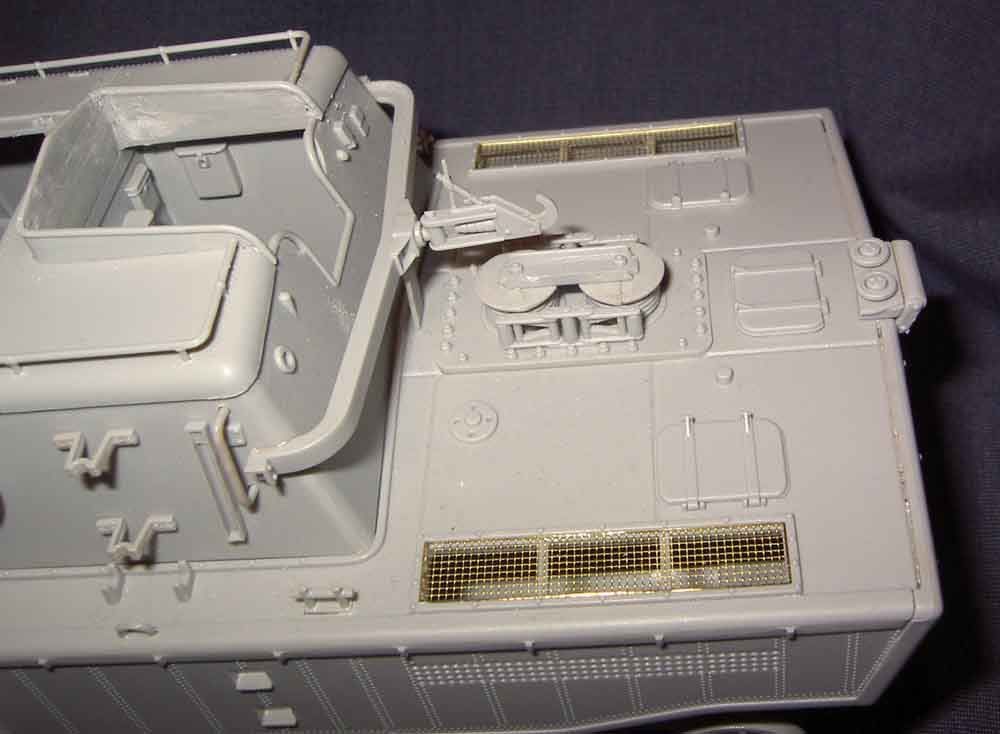
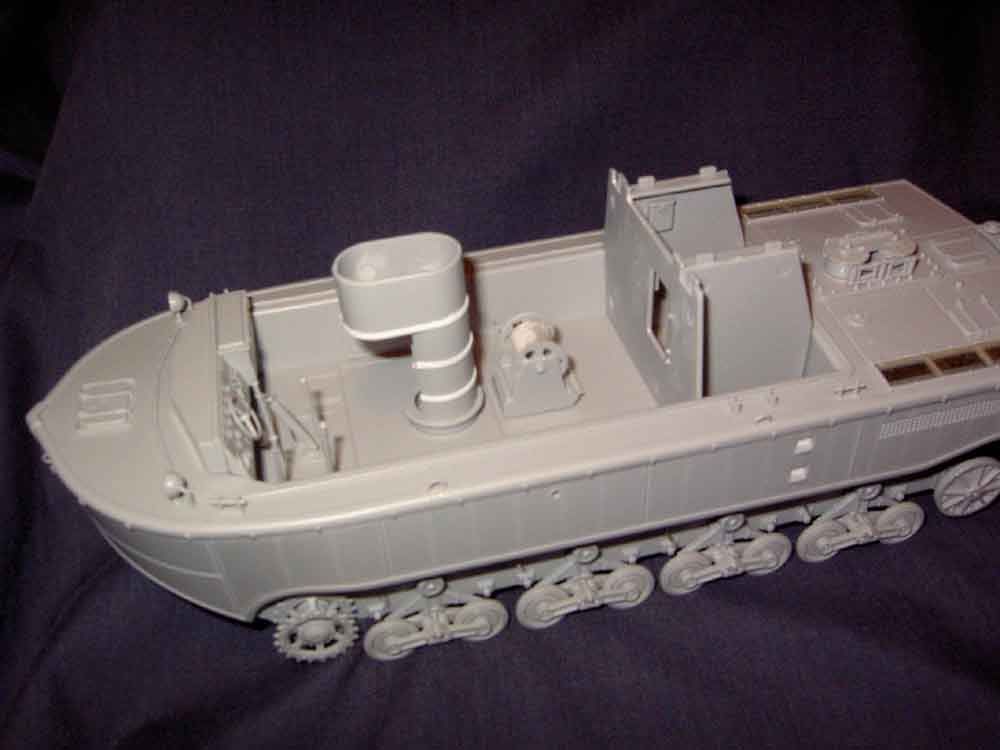
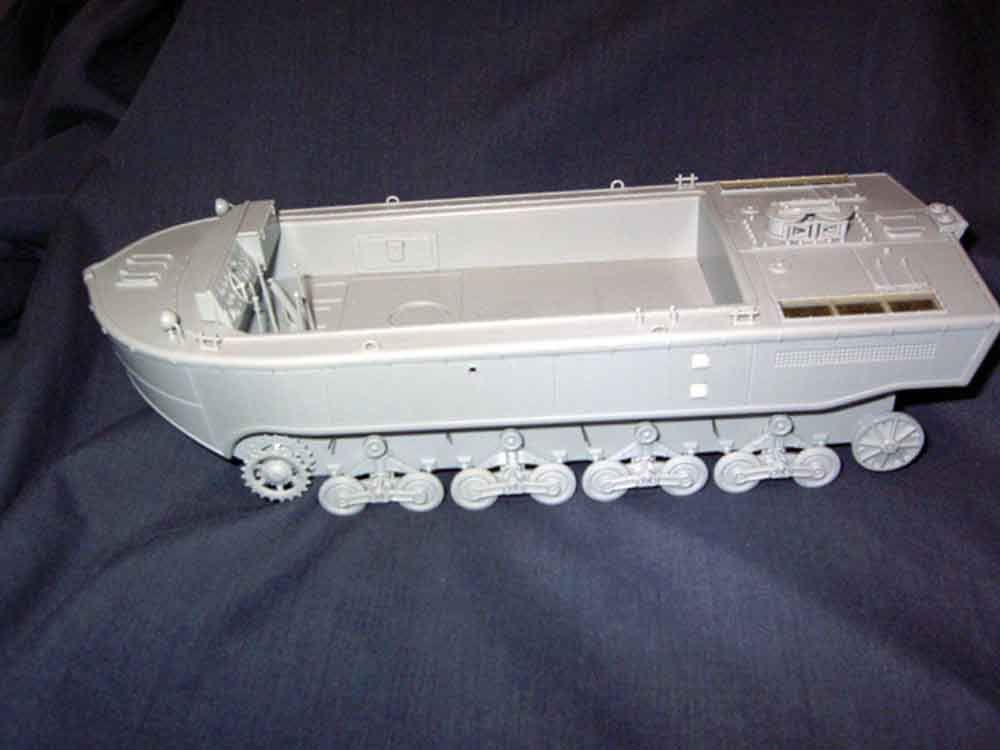
Sprayed from a rattle can for convenience.

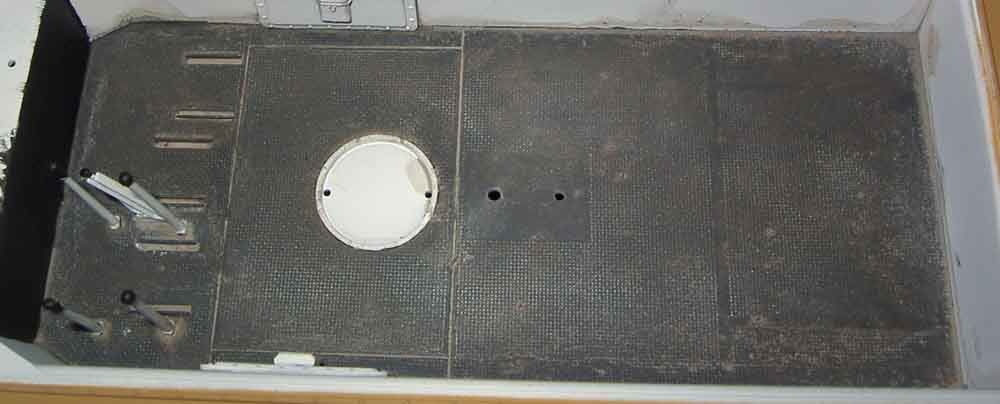
I was going to paint the floor black or something lighter when I found a great Gamesworkshop colour graniite in their base colour set, its dark enough to imitate black but light enough to be easy to work with. This is it with a Tamiya flat earth wash.

As the vehicle I am modelling ended up in north africa and is probably the one that was captured by the British and brought to england then I believe I have a lot of leeway to "GO NUTS" weathering.

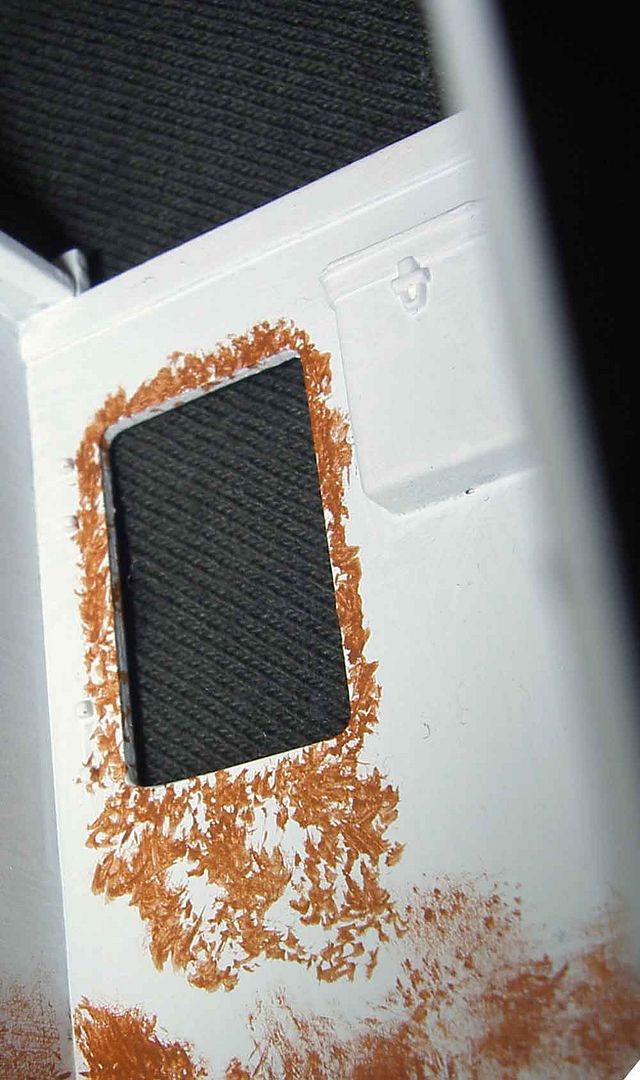
Well I started with a Vallejo light rust from the Panzer aces range.
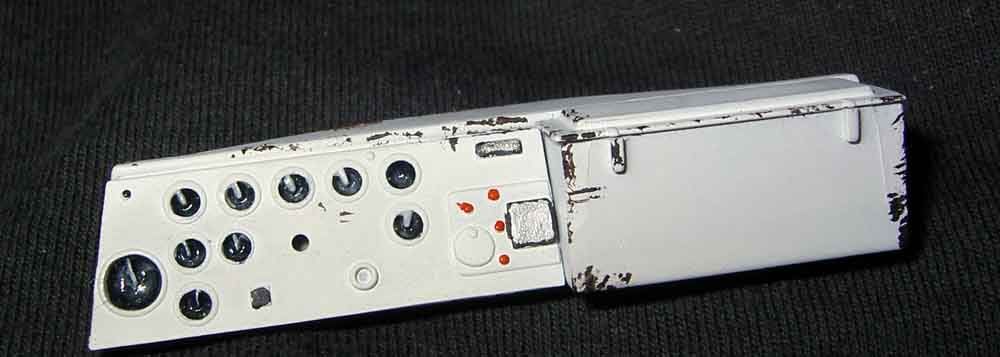
THe Dash

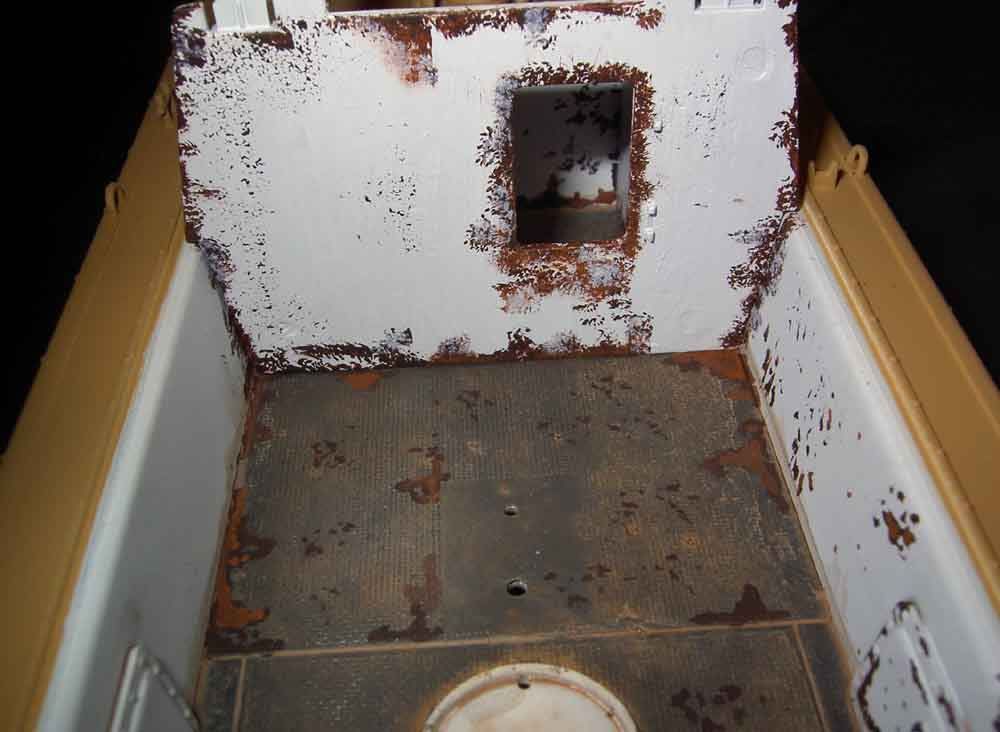
In this image it can be seen where I have started to rust up the floor, light rust and dark brown, by not using Black as a base colour has made this easier, since this shot I have added a flesh wash and got a lot more into the weathering.

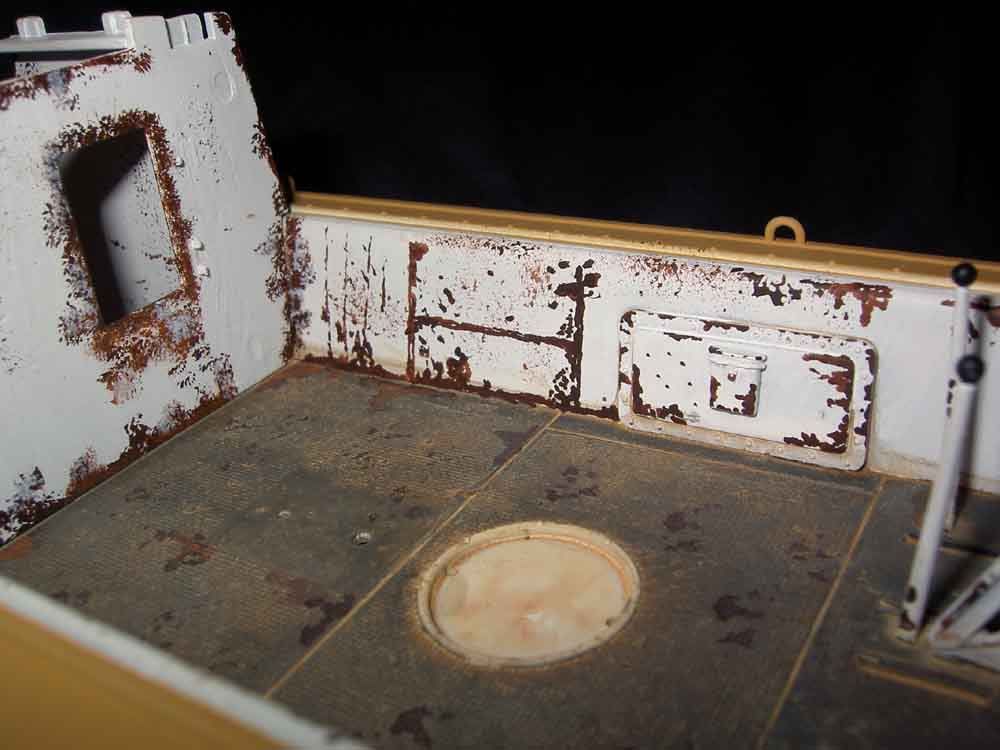
In this shot I wanted to break up the openess of the side so I painted scratches to look like a table or bench had been removed and the walls paint got damaged.

THanks for dropping by and all comments are welcome.

Terry.


  • Member since
    January 2011
  • From: Springfield, MA
Posted by TigerEP1 on Sunday, January 23, 2011 3:45 AM

Looking great terry!

I have been wanting to do one of those, so it will be nice to see it finished! BTW that rust you posted is freaking insane! I tried to follow the links to the tutorial but it only brought me to the main forum page and i don't speak Polish =(

Anyho i got a basecoat down on the StuG and did painted the tools some:


Enjoy =D

On the bench:

1/35th Tamiya Willi's MB


  • Member since
    May 2010
Posted by personman906 on Sunday, January 23, 2011 5:27 PM

I'll put in a Revell of Germany 1/35 Panzerhaubitze Pzh-2000, a Tamiya 1/35 Chieftain Mk5, and a Tamiya 1/35 SU-122.

In Soviet Russia, MODEL BUILD YOU!

Still Building: Dragon 1/144 HH-60H

Ready for First Coat: Academy 1/35 MH-60G, Tamiya 1/35 Chieftain Mk5, Trumpeter 1/35 KSK Commandos

Finishing Touches: Revell 1/35 PzH-2000, Dragon 1/144 SH-60F, Revell 1/48 F-15E


  • Member since
    June 2010
  • From: Austin, TX
Posted by DoogsATX on Monday, January 24, 2011 3:43 PM

Okay, back from Vegas and playing catchup!

All builds have been updated in the roster - this is one kick*** group we've got going here!

Terry - the LWS is looking pretty sick! Love the rust against the white. Can't wait to see the outside get the same amount of attention!

Tiger - the hand tools, MG, etc are coming along really well! I'm the "painting tools and stowage" stage myself with the Sherman.

I managed to get in a bit of bench time last night. Primed some select areas of the 109 - exhausts, bodywork immediately around exhausts, plus the spinner, resin wheels, etc. 

I typically prefer to paint exhausts off the plane and install them after closer to the end of the build, but this kit requires the exhausts be installed from the inside, so I have to paint them and the surrounding areas prior to gluing them in. Hence the priming.

I'm planning to paint them tonight. Been having a bit of a mental debate about what to go with. I typically reach for Alclad Exhaust Manifold:

But it seems a bit too browned for the 109E exhaust images I've got (not to mention the dry desert climate the E-7 Trop operated in). I'm thinking I might use Alclad Steel instead - which came out way darker than I expected the last time I used it (on the exhaust plating of an La-5), but looks like a good match for the 109 exhausts...


On the Bench: 1/32 Trumpeter P-47 | 1/32 Hasegawa Bf 109G | 1/144 Eduard MiG-21MF x2

On Deck:  1/350 HMS Dreadnought

Blog/Completed Builds: doogsmodels.com


  • Member since
    January 2011
  • From: Springfield, MA
Posted by TigerEP1 on Monday, January 24, 2011 4:38 PM

Doogs,

Progress looks great, i agree the exhaust looks a bit too browned, just didn't fit the theater it was in.

Ill have more prgress tonight on both the Jeep and the StuG and possibly the Panzer as I am stuck home with no car due to some jerk slashing all 4 of my tires...


Anywho more to come!

On the bench:

1/35th Tamiya Willi's MB


  • Member since
    July 2010
Posted by jbrady on Monday, January 24, 2011 7:10 PM

Doogs: Welcome back. I'm going to try the dark grey suggestion for the preshading. Had a bit of a set back though. I can't keep the youngest cat out of my work area. I find her in there all the time. Tonight I went to answer the door and left an open bottle of gap filling glue next to the model. When I came back she was sitting next to the model and the glue was laying on its side on the left wing of the model... going to cost me some rivet detail... I think, at this point, I prefer the mice.


  • Member since
    October 2010
  • From: Hobart, Australia
Posted by Casper the Chihuahua on Tuesday, January 25, 2011 3:41 AM

DoogsATX


Also been trying my hand at creating dents. First several attempts (on a broken P-38) were horrid. But I started to get the hang of it...actually relatively happy with the dent on the left side of the spare E-4 spinner:

http://i780.photobucket.com/albums/yy86/doogsatx/Eduard%20Bf-109E-7%20Trop/a61614d7.jpg

Hey Doogs, how do you dent plastic?

Cheers

On the bench: A-4F 1/32 Hasegawa

Just deployed: F6F-5N Hellcat Nightfighter 1/48 Eduard

Up next: A6-E Intruder 1/48 Revell

  • Member since
    October 2008
  • From: New Jersey
Posted by oddmanrush on Tuesday, January 25, 2011 10:41 AM

Lot of good progress on this thread, its good to see GB's moving at a good pace. I've done a little more work on the Butchered Bird.

I scratch built the control surfaces using plastic card. Not like styrene but actual playing cards from a deck that I don't use. Its an almost unlimited supply of thin plastic that is great for doing work just like this. I left the aileron off the port side wing and I also left off the elevator on the port side stabilizer just to break up the look of it and also because it was tedious work. I also eliminated the glass canopy and scratched the frame using the same material. Difficult to see but will be visible in the final pics. 

Comments and criticism is welcome!

Jon

My Blog: The Combat Workshop 

  • Member since
    June 2010
  • From: Austin, TX
Posted by DoogsATX on Tuesday, January 25, 2011 11:24 AM

Casper the Chihuahua


 DoogsATX:


Also been trying my hand at creating dents. First several attempts (on a broken P-38) were horrid. But I started to get the hang of it...actually relatively happy with the dent on the left side of the spare E-4 spinner:

http://i780.photobucket.com/albums/yy86/doogsatx/Eduard%20Bf-109E-7%20Trop/a61614d7.jpg


Hey Doogs, how do you dent plastic?

Cheers

Dremel with a high-speed ball cutter thing. Used the lowest speed and just kind of "skipped" it off the surface. Then went back and sanded. It's too big for scale, but I've had trouble recreating the effect with smaller ball heads. Think I may save the attempt for something that's not a $50+ 1/32 kit. Maybe the ICM Spitfire VIII I scored off eBay for $5...I'm going to be doing it as a heavily weathered RAAF bird, so some dings wouldn't be out of the question...

On the Bench: 1/32 Trumpeter P-47 | 1/32 Hasegawa Bf 109G | 1/144 Eduard MiG-21MF x2

On Deck:  1/350 HMS Dreadnought

Blog/Completed Builds: doogsmodels.com


  • Member since
    June 2010
  • From: Austin, TX
Posted by DoogsATX on Tuesday, January 25, 2011 11:35 AM

oddmanrush - the Butchered Bird is looking awesome! What are these plastic cards? I'm accustomed to playing cards being cardboard. Are you going to be adding anything to represent the shredded cloth of the control surfaces?

Wish I had anything to report on the 109, but sick kiddos kept me out of the garage last night, and possibly tonight as well. Boo.

On the Bench: 1/32 Trumpeter P-47 | 1/32 Hasegawa Bf 109G | 1/144 Eduard MiG-21MF x2

On Deck:  1/350 HMS Dreadnought

Blog/Completed Builds: doogsmodels.com


  • Member since
    June 2003
  • From: Garland, TX
Posted by pepper kay on Tuesday, January 25, 2011 11:42 AM

DoogsATX
 

Hey Doogs, how do you dent plastic?

On model railroad cars, I use a flat blade screwdriver, with the end heated up with a Bic lighter ... when hot (warm) enough, I press the blade onto the car body where I want the dent ...

Another way is to thin the surface (where you want the dent) with a roundy-type thingie from Dremel - it looks like a ball with grit on it ... at low speed with my Dremel, I  push down against the car body until I thin out the area ... then, I can push the dent in with the back end (bottom) of my X-acto knife handle ...

Food for thought,

pepper

  • Member since
    October 2008
  • From: New Jersey
Posted by oddmanrush on Tuesday, January 25, 2011 12:05 PM

DoogsATX

oddmanrush - the Butchered Bird is looking awesome! What are these plastic cards? I'm accustomed to playing cards being cardboard. Are you going to be adding anything to represent the shredded cloth of the control surfaces?

Wish I had anything to report on the 109, but sick kiddos kept me out of the garage last night, and possibly tonight as well. Boo.

Thanks Doogs! I shouldn't say they are 100% plastic because they do absorb liquid to a certain degree but they are more or less a composite and are more durable than the older style paper or cardboard cards mainly because I think they have a decent laminate over the top. They bend nicely, cut cleanly, and glue perfectly, even with just liquid glue. Also, a good substitute for styrene are old gift cards which I've used here to simulate some ribbing that you can see through the hole in the wing. I'm almost as cheap as Hans von Hammer.....

Any how, I plan on putting some tissue paper on the control surfaces, not a lot, but it'll be there for sure.

Jon

My Blog: The Combat Workshop 

  • Member since
    June 2003
  • From: Garland, TX
Posted by pepper kay on Tuesday, January 25, 2011 5:47 PM

Hi Guys:

In addition to airplanes and trains, I also build the occassional dragster ... I've attached two photos of one I finished this morning ...

I'll be 'weathering' the engine and front wheels to start with, then go through my photo collection for pictures of the Real McCoy, so that I can weather the model to look like the real deal after a hard day at the drag strip ... of course, no weathering photos until 2/1/11, official start of the GB Big Smile ...

Any questions or comments, please feel free ...

pepper


  • Member since
    July 2010
Posted by jbrady on Tuesday, January 25, 2011 8:05 PM

Paint on the Wildcat

Binginning the weathering... The top side color is intermediate blue with a bit of neutral grey damn flash washes everything out


  • Member since
    July 2010
Posted by jbrady on Wednesday, January 26, 2011 2:33 PM

Okay... so I don't have complete control of my airbrush Now I got to figure out how to fix it.


  • Member since
    July 2010
  • From: Tornado Alley
Posted by Echo139er on Wednesday, January 26, 2011 3:59 PM

I need to pull out of this GB. I no longer have the ship that was slated for this build.  The badge will be removed as soon as I can get to it.  

  • Member since
    June 2003
  • From: Garland, TX
Posted by pepper kay on Wednesday, January 26, 2011 4:02 PM

Are we weathering now or s'posed to wait until 2/1/11 ?? ...

Thanks,

pepper

  • Member since
    July 2010
Posted by jbrady on Wednesday, January 26, 2011 5:33 PM

I think Doogs said to go ahead when we want. I know I've seen quite a few WIP post here.


  • Member since
    October 2010
  • From: Hobart, Australia
Posted by Casper the Chihuahua on Wednesday, January 26, 2011 6:13 PM

Yeah, I even finished one already! Big Smile

On the bench: A-4F 1/32 Hasegawa

Just deployed: F6F-5N Hellcat Nightfighter 1/48 Eduard

Up next: A6-E Intruder 1/48 Revell

  • Member since
    June 2003
  • From: Garland, TX
Posted by pepper kay on Wednesday, January 26, 2011 7:58 PM

jbrady

I think Doogs said to go ahead when we want. I know I've seen quite a few WIP post here.

OK-dokey, artichokey ... I'll post some photos tomorrow ...

pepper

  • Member since
    February 2006
  • From: Smithers, BC, Canada
Posted by ruddratt on Wednesday, January 26, 2011 9:16 PM

Man you fellas have been a busy bunch!

Terry, that rust effect is mind blowing! Never seen anything like it. Yes

Tiger, it just keeps getting better & better! Excellent progress on your Stug. Can't wait to see it weathered!

Pepper, that rail really brought back a lot of memories from my many past trips to Englishtown NJ and the old National Speedway on Long Island NY. Great stuff! Who's car is that?

Jbrady, neat lookin' Wildcat! Definitely looking forward to seeing more progress pics of 'er! Yes

Oddmanrush, that is one of the most unique builds and interesting concepts & approaches I've seen in a long time. That's about as weathered as they get. Great work!

Doogs, exhausts mounted from the inside always give me fits. I think that color looks fine, but would consider adding some black, sooty effects to it here & there.


The fuselage has been buttoned up on the Pfalz and the lower wing & horizontal tailplane have been attached. Got a few seams to clean up, then it's time to add the gear struts, vertical tailplane, and wing & interplane struts before she gets some paint.

I've decided on a different scheme for her (I've seen two threads related to this kit and both are of the scheme I origionally chose), so I figure I'll take 'er in a slightly different direction - not to worry, it's still an awesome paint scheme - very colorful. I'll post some pics of it soon.

Mike

 "We have our own ammunition. It's filled with paint. When we fire it, it makes pretty pictures....scares the hell outta people."


  • Member since
    June 2003
  • From: Garland, TX
Posted by pepper kay on Thursday, January 27, 2011 9:23 AM

ruddratt

Pepper, that rail really brought back a lot of memories from my many past trips to Englishtown NJ and the old National Speedway on Long Island NY. Great stuff! Who's car is that? 

From back 'in the days', that car is the famous Greer, Black and Prudhomme (The Snake) rail ... it had a win-loss record of 234 - 7, and  though they never won a national title with it, they terrorized the match race circuit around the country ... it ran, as you see it, for just 18 months and was retired ....

Interesting note - it was stored and some folks, a few years back, acquired and refurbished it and run it at the Nostalgia Drags at Bakersfield every year, where it is still a monster !! ...

I saw it run all over So. California in its heyday ... witnessed the very first sub 8 second e.t. and over 200 mph run made by anyone, ever, at the old San Gabriel drag srip one summer night ... this, in  the days before the cars became waaaay long and computerized as they are now ... the guys would tow it to the strip behind a '59 Ford Ranchero - none of those huge Kenworth transporter trucks you see now ...ah, such memories !! ...

Weathering is going to be moderate as they kept the car squeaky clean... just gonna show it as it would have looked at the end of a hard nights work ...

I'm also going to post up here in a day or so, a weathered reefer ... I believe I showed a clean one not too long ago ... I've got one finished and am working on another for which I'll do WIP photos to show how I get my results ...

pepper


  • Member since
    June 2003
  • From: Garland, TX
Posted by pepper kay on Thursday, January 27, 2011 10:38 AM

OK All:

Here are two photos of the 'before' and 'after' weathering on an Athearn blue box kit of a reefer (refrigerator car) ...

I'm doing a Project Reefer, building 30 cars and have 29 finished ...  I'll show WIP photos of #30, so you can see what I'm doing ...

This one is and old-timer (early 40's era), with the rest being more modern (the mid-50's era) ...

pepper


  • Member since
    June 2010
  • From: Austin, TX
Posted by DoogsATX on Thursday, January 27, 2011 11:44 AM

I really need to be less busy! It's hard to keep up with you all!

pepper - the dragster looks pretty sweet! I've always wanted to build cars...just can never find the ones I want to build. I know I'd fail at a fresh-off-the-showroom finish, but I'd love to do a modded and battered Jeep/early Bronco/Toyota FJ40/Land Rover I/II/III. Maybe someday...

Also, would you mind providing a brief rundown of the steps you took weathering the reefer car? Looks great - definitely has a sense that it's seen a lot of miles.

jbrady - I take it those are the gun stains? They do look a bit broad. Dig the pre-shading effect, though! 

joeviz - I'll pull you down. Sorry to see you go - feel free to join back up with another kit if you want!

ruddratt - eager to see the replacement scheme!

Been making progress on the 109. Got the exhausts installed last night, and I'm planning to finally lock the cowl down this evening.Once that's done I won't be too far from filling and sanding. 

I ended up painting the exhausts with Alclad Steel. The ends aren't open, but they do have indentions molded in, so I painted these with MM flat black, then drybrushed the exhausts with MM Jet Exhaust. This has a very faint goldish tinge to it, which IMO does a nice job of achieving that burnished effect of metal in harsh desert conditions.

I've also got a start on the prop (Gunze RLM 70 on the blades), wheels (RLM 66) and tires (Vallejo Black Grey with a few drops of Leather Brown). 

Hopefully I'll have some pics to share after tonight!


On the Bench: 1/32 Trumpeter P-47 | 1/32 Hasegawa Bf 109G | 1/144 Eduard MiG-21MF x2

On Deck:  1/350 HMS Dreadnought

Blog/Completed Builds: doogsmodels.com


  • Member since
    June 2003
  • From: Garland, TX
Posted by pepper kay on Thursday, January 27, 2011 12:41 PM

DoogsATX

pepper - the dragster looks pretty sweet! I've always wanted to build cars...just can never find the ones I want to build. I know I'd fail at a fresh-off-the-showroom finish, but I'd love to do a modded and battered Jeep/early Bronco/Toyota FJ40/Land Rover I/II/III. Maybe someday...

Also, would you mind providing a brief rundown of the steps you took weathering the reefer car? Looks great - definitely has a sense that it's seen a lot of miles. 

Hey Doogs:

I'm doing another reefer right now and will post pics later showing  the steps I use to get the finished product ...

I do cars just every once in awhile ... I own a real '57 Chevy BelAir Sport Coupe with a monster engine straight from the factory (1 of 500 built by Chevy to comply with NASCAR rules for the '57 season) and a '66 Chevelle 396 SS ... of course, '57 Chevy kits are a dime a dozen, but I've only found one '66 Chevelle, which is now in the process of being built to look like my real deal ... I'll post a couplea photos of both if anyone is interested ...

As an aside, I still use Testors (in the tiny square bottle) RUBBER to do my tires ... works  really well, though when you first see it you think it's going to make your tires chocolate brown ...Oops

pepper

  • Member since
    June 2010
  • From: Austin, TX
Posted by DoogsATX on Thursday, January 27, 2011 2:07 PM

pepper kay

As an aside, I still use Testors (in the tiny square bottle) RUBBER to do my tires ... works  really well, though when you first see it you think it's going to make your tires chocolate brown ...Oops

pepper

Yeah, I'm a big fan of Vallejo's Black Grey in most cases. One of the best brushing paints I've ever used. It's a standout even among Vallejo's paints. But the 109 reference pics I've got show a slight brownish tinge in the tires. I think adding the leather brown should go a long way, and I might cap it off with a heavy raw umber filter. Of course, it probably won't matter too much in the end, since I'm going to weather the tar out of them!

In other news...I know there's been some discussion about the Cyber-Hobby/Dragon 109E-4. Well, I picked one up at my LHS today. They were so eager to see it that we cracked the box right there in the store. What can I say? It's absolutely gorgeous. I thought the Eduard kit looked nice, but this one breaks it over its knee. Who's to say how it'll fit, but the detail is achingly good. At a glance, it looks like it ships with everything you'd need to build an E-7 variant, though it lacks the filter for the Trop models. 

I'm under the impression that the E-7 evolved from the E-4 with the addition of a centerline bomb/drop tank rack, and if that's the case and the E-4's didn't generally use drop tanks, I'll be stealing the one from this kit to use on the Eduard, since it's easily the best drop tank I've ever seen.

On the Bench: 1/32 Trumpeter P-47 | 1/32 Hasegawa Bf 109G | 1/144 Eduard MiG-21MF x2

On Deck:  1/350 HMS Dreadnought

Blog/Completed Builds: doogsmodels.com


  • Member since
    February 2006
  • From: Smithers, BC, Canada
Posted by ruddratt on Thursday, January 27, 2011 3:49 PM

Pepper, the weathering effects on those railway cars is nothing short of amazing! Yes  ....and thanks for the info on the dragster. Those were the good old days for sure. Somewhere I have an old 8mm film reel shot at National Speedway (Long Island NY) back around 1970. Some neat footage of 'Big Daddy' in his last front-engined mount and one of the first rear-engined mounts I ever saw, Duane Ong and his 'Pawnbroker' ride. Don Schumacher makes an appearance in one of his earlier rides too.

Doogs, here's the new scheme I chose (I couldn't believe that this kit has just been released and the first scheme I picked has already been done to death). Anyway, I think my second choice is pretty neat too.....

Mike

 "We have our own ammunition. It's filled with paint. When we fire it, it makes pretty pictures....scares the hell outta people."


  • Member since
    January 2011
  • From: Springfield, MA
Posted by TigerEP1 on Thursday, January 27, 2011 4:42 PM

Ruddratt,

Thanks, although tbh the weathering of this thing has me a bit nervous as i don't have the materials or the experience to pull off the basic stuff like oils etc.  I just hope i can do it justice!

Love the new scheme, it's eye popping and i cannot wait to see it.

jbrady,

I agree they look broad but overall the plane is coming along awesome. looking forward to more.

Pepper,

yay dragsters! anything with more engine than it needs gets my vote! I miss my classic cars and one day hope to acquire another. Oh and i still use that same testors paint when i can find it...lol

Doogs,

Pics man pics!

On the bench:

1/35th Tamiya Willi's MB


  • Member since
    June 2010
  • From: Austin, TX
Posted by DoogsATX on Thursday, January 27, 2011 6:44 PM

TigerEP1

Doogs,

Pics man pics!

Ask and ye shall receive!

Here's the 109 in present state. The cowl goes on tonight for real!

Close-up of the exhaust

And the wheels/tires. Not quite as much brown tint as I'd hoped. I'll add it in with washes and some drybrushing.

On the Bench: 1/32 Trumpeter P-47 | 1/32 Hasegawa Bf 109G | 1/144 Eduard MiG-21MF x2

On Deck:  1/350 HMS Dreadnought

Blog/Completed Builds: doogsmodels.com


JOIN OUR COMMUNITY!

Our community is FREE to join. To participate you must either login or register for an account.

SEARCH FORUMS
FREE NEWSLETTER
By signing up you may also receive reader surveys and occasional special offers. We do not sell, rent or trade our email lists. View our Privacy Policy.