SEARCH FINESCALE.COM

Enter keywords or a search phrase below:

Ju 87 Stuka GB

173400 views
2599 replies
1 rating 2 rating 3 rating 4 rating 5 rating
  • Member since
    May 2013
  • From: Indiana, USA
Posted by Greg on Tuesday, March 3, 2015 8:53 AM

Ernie, fading would make sense down in that sun. Really looks good!

CMK, holy cow, what a great job. And in 1/72 no less. Thanks for taking the time to shoot and post the step by step. I'm really impressed. Bow Down

Being as I assume your new circle template is plastic, did you have any trouble keeping the blade from cutting into same during the cuts?

  • Member since
    December 2002
  • From: Bury St Edmunds, Suffolk, England
Posted by Bish on Tuesday, March 3, 2015 12:37 AM

Now that's nice check, defiantly going to have to file that one away for future use.

I am a Norfolk man and i glory in being so


On the bench: Airfix 1/72nd Harrier GR.3/Fujimi 1/72nd Ju 87D-3

  • Member since
    September 2003
  • From: AandF in the Badger State
Posted by checkmateking02 on Monday, March 2, 2015 9:45 PM

That fading looks exactly right, PJ.  Your skills are showing!!  Really prime work!

And here's some progress I've made in 1/72.

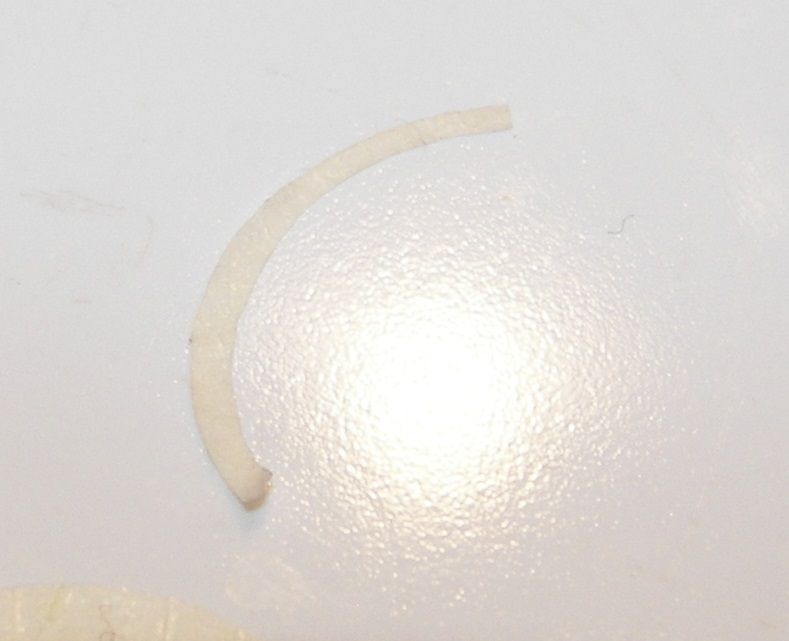
Cut an arc using my bright, shiny-new circle template.  It took a couple of attempts to get thing even close to workable.

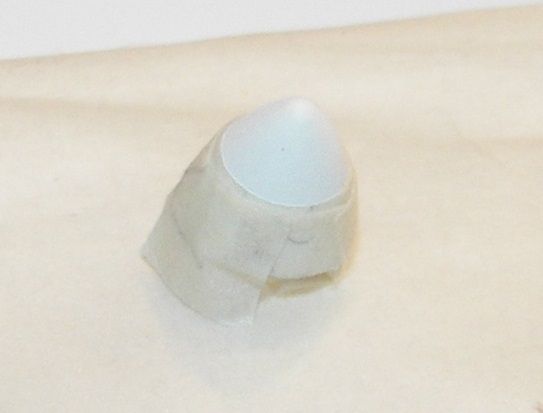
Applied it to the spinner which I'd previously painted white, masked the lower portion of the spinner.
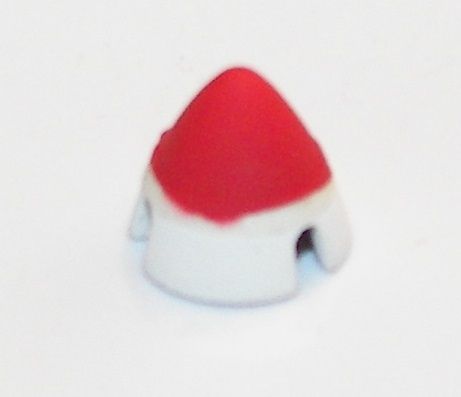
Added the red.

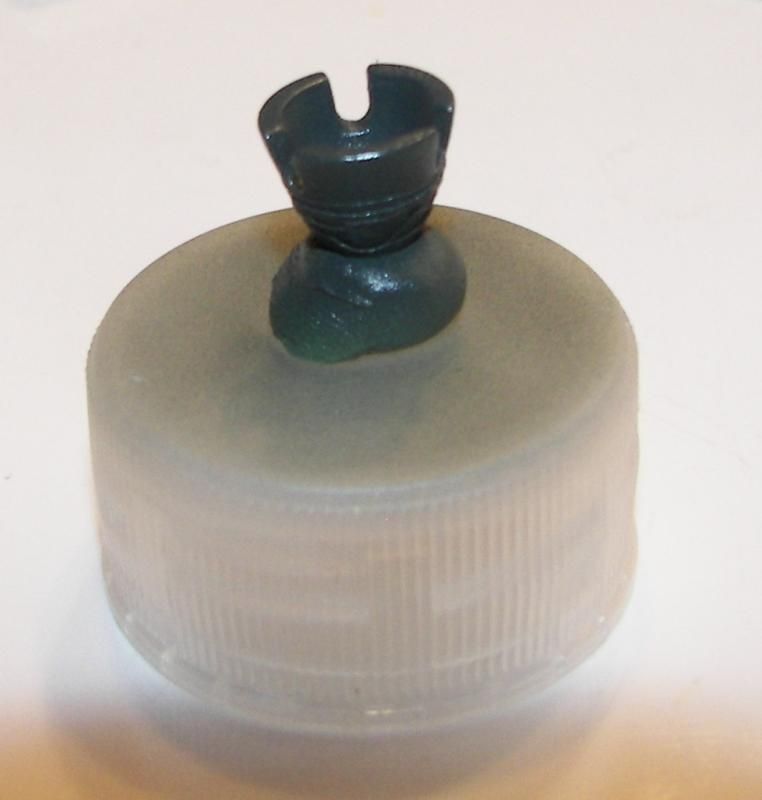
Masked that and stuck the thing upside in a mess of ticky-tack on a bottle cap for handing.  Painted that.

And the final result after some re-masking the red, and spraying some white touch up to even things out; followed by some very minor brush touch up.

Enlarged this much, the demarcation lines look a little rough, but from normal viewing distance, in this scale it is not evident.

Should mention that before I sprayed the red and schwarzgruen, I sprayed around the mask with white paint to seal things as much as possible and prevent paint bleeding under the mask.

Very much appreciated learning this technique.  It was new to me, and I'll be practicing with it to refine my skill with it.  


  • Member since
    December 2002
  • From: Bury St Edmunds, Suffolk, England
Posted by Bish on Monday, March 2, 2015 9:03 AM

Looks good PJ, good idea about the wash.

Shooter, I will certainly look into that on the 24th kit.

I am a Norfolk man and i glory in being so


On the bench: Airfix 1/72nd Harrier GR.3/Fujimi 1/72nd Ju 87D-3

  • Member since
    November 2008
  • From: Central Florida
Posted by plasticjunkie on Monday, March 2, 2015 7:08 AM

Thanks CM.

I shot the entire plane with clear flat acrylic and then gave it a light colored wash as a fading filter. That North African sun was harsh on the paint so fading and bleaching would be present.

Some staining, chipping  and more weathering is next.

 GIFMaker.org_jy_Ayj_O


Too many models to build, not enough time in a lifetime!!

  • Member since
    October 2006
  • From: Tucson, AZ
Posted by Archangel Shooter on Sunday, March 1, 2015 6:13 PM

The window is easy to see in 1/24, tried to take a pic of it through the cockpit but just can't get the exposure right, comes out too dark even with the flash.

 Your image is loading...

 On the bench: So many hanger queens.


  • Member since
    September 2003
  • From: AandF in the Badger State
Posted by checkmateking02 on Sunday, March 1, 2015 2:49 PM

Outstanding, PJ.  The 1/72 Airfix effort is much less detailed.  No bomb-aiming window. Sad


  • Member since
    November 2008
  • From: Central Florida
Posted by plasticjunkie on Sunday, March 1, 2015 1:58 PM

Bish

You really can't see anything either inside the pit or on the underside cause of the steep angle on part J26. Part K-3 is buried inside the fuselage away from sight. At 1/24 may be a bit easier to see.

 GIFMaker.org_jy_Ayj_O


Too many models to build, not enough time in a lifetime!!

  • Member since
    December 2002
  • From: Bury St Edmunds, Suffolk, England
Posted by Bish on Sunday, March 1, 2015 1:14 PM

Now that's a useful image. the only 72nd kit I have seen with the window open is the SH kit I built for this GB. And the Fujimi and academy you have to cut it out. In 72nd scale having something like that j26 part would be a waist of time, but in your scale you can see the shape of it from the outside. Might have to consider installing something like that in 32nd and 24th. Thanks for that.

I am a Norfolk man and i glory in being so


On the bench: Airfix 1/72nd Harrier GR.3/Fujimi 1/72nd Ju 87D-3

  • Member since
    November 2008
  • From: Central Florida
Posted by plasticjunkie on Sunday, March 1, 2015 12:14 PM

Bish

Here is a picture of the instruction sheet showing the installation of the window.

 GIFMaker.org_jy_Ayj_O


Too many models to build, not enough time in a lifetime!!

  • Member since
    November 2008
  • From: Central Florida
Posted by plasticjunkie on Sunday, March 1, 2015 12:04 PM

Thanks Bish. Yes the window is opened and the clear part  sort of a triangle is included and masked (with the Eduard mask set) and secured inside the fuselage forward under the pilot seat but can't be seen cause of the angle. I'm very happy with the overall fit of all the parts requiring no filler. The included decals are a whole different story.

 GIFMaker.org_jy_Ayj_O


Too many models to build, not enough time in a lifetime!!

  • Member since
    December 2002
  • From: Bury St Edmunds, Suffolk, England
Posted by Bish on Sunday, March 1, 2015 10:50 AM

Greta work there PJ. Theres some nice detail in the kit with the clamps for the bomb. Was the target viewing window already open on that kit.

I am a Norfolk man and i glory in being so


On the bench: Airfix 1/72nd Harrier GR.3/Fujimi 1/72nd Ju 87D-3

  • Member since
    November 2008
  • From: Central Florida
Posted by plasticjunkie on Sunday, March 1, 2015 10:25 AM

The finish line is getting closer with each little progress I make. The bombs were attached to their hardpoints.


The SC1000 package was given a wash of burnt umber and paynes gray oil paint to dirty it up a bit. The trapeze was painted dark steel. It looks weird painted sky blue as most would have gone with a black or a dark grey but the Luftwaffe directives called out for the blue color as evidenced in that link I found.


For the landing light I used a gemstone from a set I have from Hobby Lobby. They are self stick and come in assorted sizes and colors.


Picked out the one that looks right and secured it with a dab of Aleene's.


With the clear cover on and secured the light looks pretty close to the prototype. The wing gun muzzles were drilled with a miniature drill bit. 

 GIFMaker.org_jy_Ayj_O


Too many models to build, not enough time in a lifetime!!

  • Member since
    December 2002
  • From: Bury St Edmunds, Suffolk, England
Posted by Bish on Sunday, March 1, 2015 1:04 AM

WOW Scott, that thing is huge. I think I might need to move house before starting mine. can't wait to get yours added to the front page, she look sweet indeed.

I am a Norfolk man and i glory in being so


On the bench: Airfix 1/72nd Harrier GR.3/Fujimi 1/72nd Ju 87D-3

  • Member since
    December 2002
  • From: Bury St Edmunds, Suffolk, England
Posted by Bish on Sunday, March 1, 2015 1:02 AM

A 24th G would certainly be on my to buy list. But I think our best chance of that will be Trumpeter as it would not take much to convert there D kit, when it finally comes out, into a G-1.

I am a Norfolk man and i glory in being so


On the bench: Airfix 1/72nd Harrier GR.3/Fujimi 1/72nd Ju 87D-3

  • Member since
    October 2006
  • From: Tucson, AZ
Posted by Archangel Shooter on Saturday, February 28, 2015 6:51 PM

I think I can fit her into one of my glass case bookcases below the 1/24th FW-190. Would be great if Airfix were to redo the bird as a Ju-87G, I would certainly jump on that.

 Your image is loading...

 On the bench: So many hanger queens.


GAF
  • Member since
    June 2012
  • From: Anniston, AL
Posted by GAF on Saturday, February 28, 2015 6:15 PM

Wow!  That things big enough for an RC model!

  • Member since
    May 2013
  • From: Indiana, USA
Posted by Greg on Saturday, February 28, 2015 5:34 PM

So glad you posted a size comparison pic. Wow, that IS big!

Nice job on the spinner, mate.

  • Member since
    November 2008
  • From: Central Florida
Posted by plasticjunkie on Saturday, February 28, 2015 5:08 PM

Geez shooter, large is an understatement. That thing is HUGE! I can just imagine the size of my Bandai 1/24 George.

 GIFMaker.org_jy_Ayj_O


Too many models to build, not enough time in a lifetime!!

  • Member since
    September 2003
  • From: AandF in the Badger State
Posted by checkmateking02 on Friday, February 27, 2015 7:52 PM

Impressive!  Nice work!


  • Member since
    October 2006
  • From: Tucson, AZ
Posted by Archangel Shooter on Friday, February 27, 2015 7:50 PM

"Scott: That's a nice looking plane so far bud. Can you stick something in the pic like a coffee cup or even your hand so we can see just how big this thing is? I can only imagine at this point."

HI Mustang! Here's a couple of comparison pics using my still un-finished  Monogram 1/48 Stuka.

At 1/24th scale, she's a BIG BIRD! and it's been fun to work with even for being an Airfix kit.

Has for my spinner painting efforts. I first painted it flat white. There was a slight circular indentation around the spinner where the white stripe would start so I used that as a guide for masking. I hit it with the flat red then I masked off the white stripe and painted the forward spinner black. Just needed to do a little touch up here and there with it. I was looking at using the spinner stripes from the FW-190 sheet but it looks like I don't need to.

Still need to hit the bottom with Pledge and wrap up with the decals, then add the lower sub-assemblies. I'm nearly there, starting to see that light at the end of the build.


 Your image is loading...

 On the bench: So many hanger queens.


  • Member since
    November 2008
  • From: Central Florida
Posted by plasticjunkie on Friday, February 27, 2015 4:19 PM

You are welcome and good luck.

 GIFMaker.org_jy_Ayj_O


Too many models to build, not enough time in a lifetime!!

  • Member since
    September 2003
  • From: AandF in the Badger State
Posted by checkmateking02 on Friday, February 27, 2015 4:02 PM

Good!  Thanks again, PJ.  I think I'm going to try out your method before I go messing with the template again.  I appreciate it!


  • Member since
    November 2008
  • From: Central Florida
Posted by plasticjunkie on Friday, February 27, 2015 4:00 PM

CM

Cheap Dollar store tape. Nice and tacky for a super strong grip.

 GIFMaker.org_jy_Ayj_O


Too many models to build, not enough time in a lifetime!!

  • Member since
    September 2003
  • From: AandF in the Badger State
Posted by checkmateking02 on Friday, February 27, 2015 3:58 PM

Great!  Thanks PJ.

Is that Tamiya tape you're using?  Or regular ol' masking tape?


  • Member since
    November 2008
  • From: Central Florida
Posted by plasticjunkie on Friday, February 27, 2015 3:36 PM

The circle template I find a bit fiddly as it needs to be affixed at the correct angle on the spinner and I spray away from the mask to avoid build up, something that can't be done using the template.

Tape laid and curve cut out. It may take you a couple of tries to get the right radius.

Tape applied around the spinner line. The tape broke when I lifted it from the cutting mat but it can be applied as one piece. It only took me a couple of minutes to demonstrate this. I find this a very easy and effective masking technique.

 GIFMaker.org_jy_Ayj_O


Too many models to build, not enough time in a lifetime!!

  • Member since
    September 2003
  • From: AandF in the Badger State
Posted by checkmateking02 on Friday, February 27, 2015 3:35 PM

Thanks, Greg.  Blu-tack--yup, that's what I think I'll do.  I'll also try and remember (my memory is about like yours!) to post photos, so whether it's a success or not, I can get some feedback and suggestions.

I just now finished painting the whole spinner white.  My next plan is to use the template and paint the lower part black green; then do the red on the tip, leaving a narrow white ring in the middle.

Of course, there's a time issue of letting each color dry for a day.  One thing I discovered yesterday with the circle template is that it will chip paint if you're not real careful.


  • Member since
    May 2013
  • From: Indiana, USA
Posted by Greg on Friday, February 27, 2015 2:57 PM

Thanks for all the neat idea, gents.

CMK, I'm telling you, my memory.......... (if something isn't on the most recent page or two I get so lost).

Maybe secure the spinner with a few spots of blu-tack on the unpainted side? Just a random thought since I've never done it and have also pondered how to hold the template on square.

GAF
  • Member since
    June 2012
  • From: Anniston, AL
Posted by GAF on Friday, February 27, 2015 2:53 PM

I think another suggestion was using tubing or soda straws for creating circles or painting props.  I've got a selection of brass tubing I cut short lengths off of to use as hole punches (not for metal, tho).  Yes, it works.  Just put what you want to punch on a soft piece of wood (such as pine) or a piece of matte board.

Painting the prop one color, then placing the tube over the tip to protect it while painting the other color should work.  If you have tubing of close sizes you can even do rings.  Big Smile  Sealing the edge or using some clear glue or Future to secure the prop in place would probably be advisable.  If you've already installed the prop in the model, this method will probably not work.

Your mileage may vary.  Wink

PS> How did I do the spiral on my Stuka model?  By hand, of course!  I did lay it out with a felt tip pen first, tho.

  • Member since
    September 2003
  • From: AandF in the Badger State
Posted by checkmateking02 on Friday, February 27, 2015 1:25 PM

'Twas me who--maybe among others--was obtaining a circle template for the Stuka nose cone.

My first attempt last night was a failure.  I'll try it again today.

One thought-provoking issue I'm having is how to ensure that the spinner goes through the template hole at a 90 degree angle so the rings run true, and not all whopper-jawed.

If I can't make that work, I'll probably try PJ's method and cut a curved piece of tape, or maybe try cutting a curved decal for the white center stripe.


JOIN OUR COMMUNITY!

Our community is FREE to join. To participate you must either login or register for an account.

SEARCH FORUMS
FREE NEWSLETTER
By signing up you may also receive reader surveys and occasional special offers. We do not sell, rent or trade our email lists. View our Privacy Policy.