SEARCH FINESCALE.COM

Enter keywords or a search phrase below:

Ju 87 Stuka GB

173400 views
2599 replies
1 rating 2 rating 3 rating 4 rating 5 rating
  • Member since
    December 2002
  • From: Bury St Edmunds, Suffolk, England
Posted by Bish on Friday, March 20, 2015 5:59 PM

I've had that happen before check. I just looked at one of my Osprey books and it has a colour plate showing the same as that image you posted. But I don't always trust these plates. If it was me at this stage, I think I would leave it. the red looks much better and does make sense with the red around the K

I am a Norfolk man and i glory in being so


On the bench: Airfix 1/72nd Harrier GR.3/Fujimi 1/72nd Ju 87D-3

  • Member since
    September 2003
  • From: AandF in the Badger State
Posted by checkmateking02 on Friday, March 20, 2015 5:24 PM

Thanks, Bish.

For the sake of accuracy, what I ended up building was the Airfix 1/72 offering.  I scrapped the Revell.

And then, for more accuracy, regarding the spinner, after I painted it, I ran across this:

Not at all the same spinner!  I followed Airfix's kit instructions and painting guide, so I really don't know which one is more accurate.  But it's still a Stuka!


  • Member since
    December 2002
  • From: Bury St Edmunds, Suffolk, England
Posted by Bish on Friday, March 20, 2015 5:07 PM

Always a pleasure to have you on board check. Lovely looking finish and I really do like the work on the spinner. have added one to the front page.

Thanks again.

I am a Norfolk man and i glory in being so


On the bench: Airfix 1/72nd Harrier GR.3/Fujimi 1/72nd Ju 87D-3

  • Member since
    September 2003
  • From: AandF in the Badger State
Posted by checkmateking02 on Friday, March 20, 2015 4:38 PM

Here is my finished Stuka.  The only after-market addition was a hakenkreuz from an old MicroScale sheet.

Thanks for hosting the GB, Bish.  It was a chance to build something different than my usual.  It was a pleasure to see the results that everyone has achieved with their aircraft.


  • Member since
    September 2003
  • From: AandF in the Badger State
Posted by checkmateking02 on Tuesday, March 17, 2015 10:46 PM

Incredible level of work, Shooter.  Exquisite!


  • Member since
    December 2002
  • From: Bury St Edmunds, Suffolk, England
Posted by Bish on Tuesday, March 17, 2015 6:50 PM

Greg

Shooter, amazing level of detail. Your added touches really add a lot!

Watching you build this, it's hard not to think about trying one of these 'big birds' someday! (But I need your skill level first :) )

And the space to display it Big Smile

I think I may need to move home before I can start on mine.

I am a Norfolk man and i glory in being so


On the bench: Airfix 1/72nd Harrier GR.3/Fujimi 1/72nd Ju 87D-3

  • Member since
    May 2013
  • From: Indiana, USA
Posted by Greg on Tuesday, March 17, 2015 6:45 PM

Shooter, amazing level of detail. Your added touches really add a lot!

Watching you build this, it's hard not to think about trying one of these 'big birds' someday! (But I need your skill level first :) )

  • Member since
    December 2002
  • From: Bury St Edmunds, Suffolk, England
Posted by Bish on Tuesday, March 17, 2015 6:21 PM

Shooter, that is some seriously nice work, love the detail in the engine. I would say that's a pretty good guess for the seat harness mount, I couldn't find any decent pics either. Is the fire extinguisher scratch built.

I am a Norfolk man and i glory in being so


On the bench: Airfix 1/72nd Harrier GR.3/Fujimi 1/72nd Ju 87D-3

  • Member since
    October 2006
  • From: Tucson, AZ
Posted by Archangel Shooter on Tuesday, March 17, 2015 2:54 PM

Here's a few update pics. I'm tying to bring everything all together for the big finish.

I drilled out a hole at the bottom of the antenna mast, made a support loop and ran the wire down towards the radios.

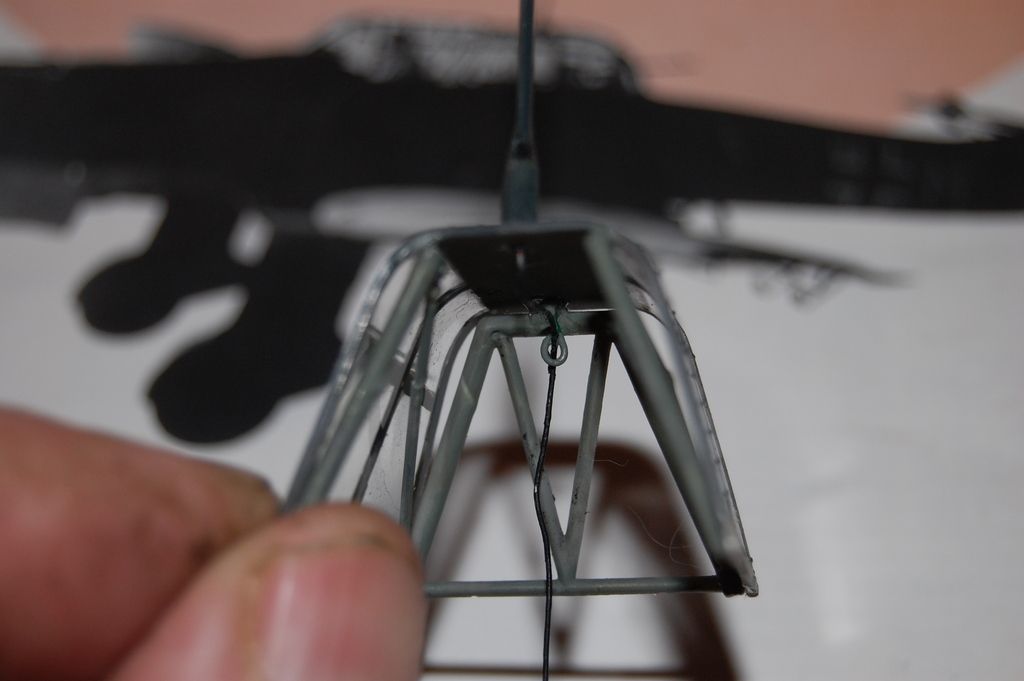
I glued a small piece of aluminum foil to the back of the landing light. Will have to do a little paint touch up on some of the CAM decals, they were some 10 years old and a couple were cracking on me.

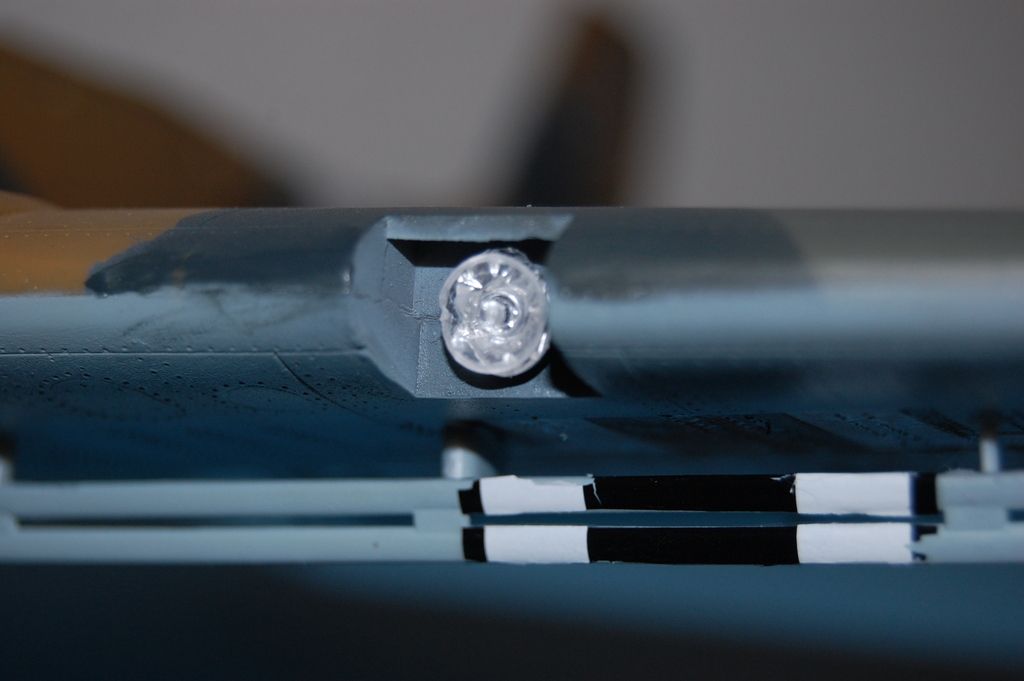
Using small strips of foil to make hose clamps. Easy to do in this scale.

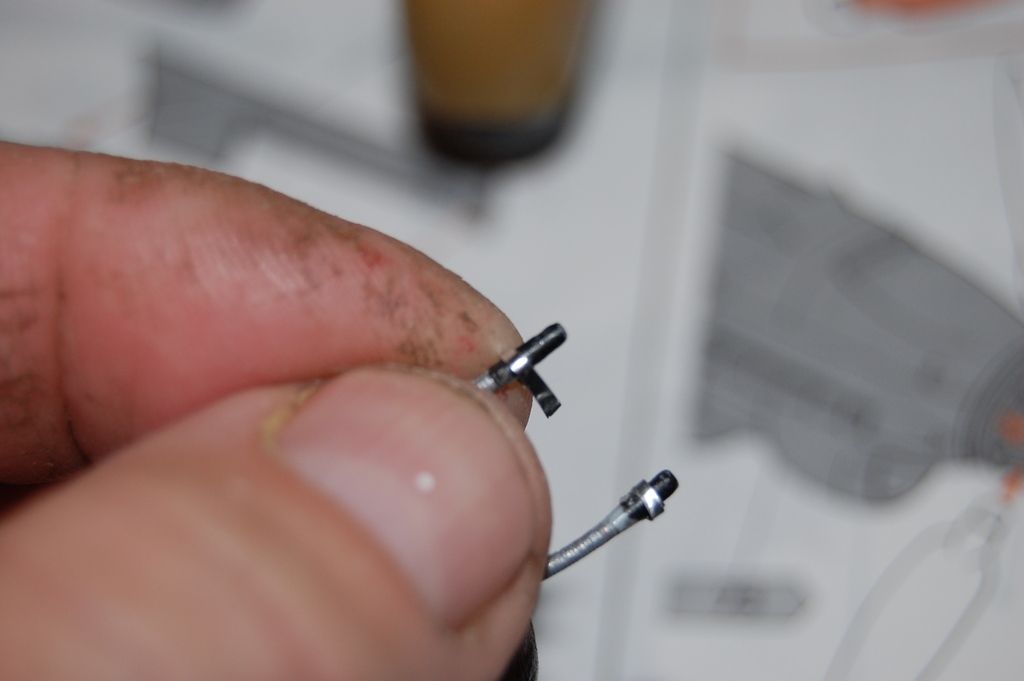
Adding placard decals to the engine areas.

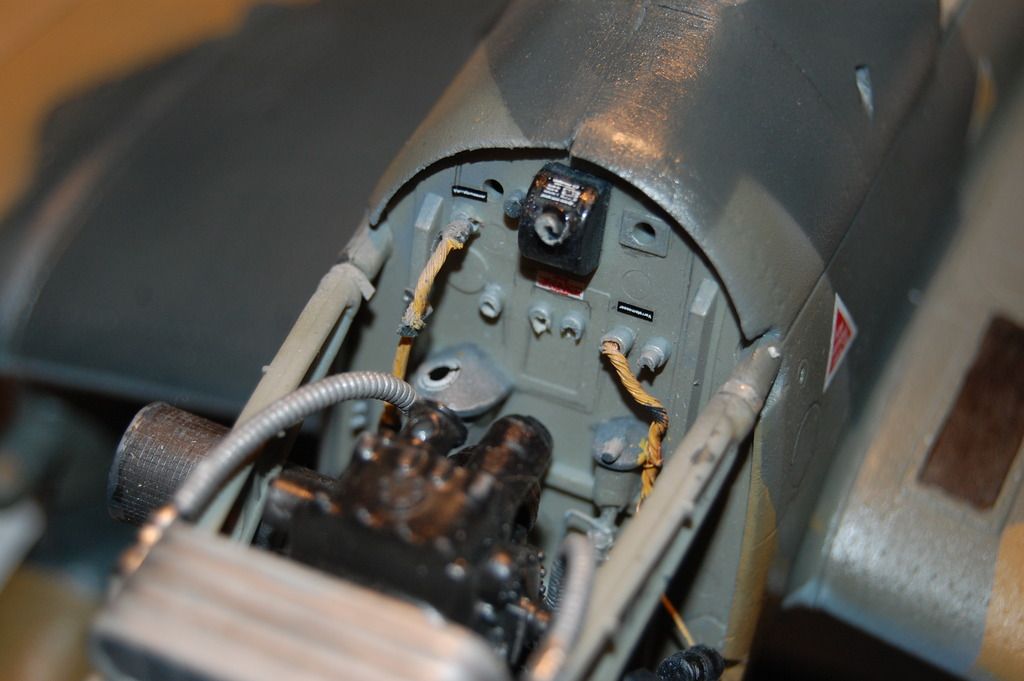
The aft machine gun assy.

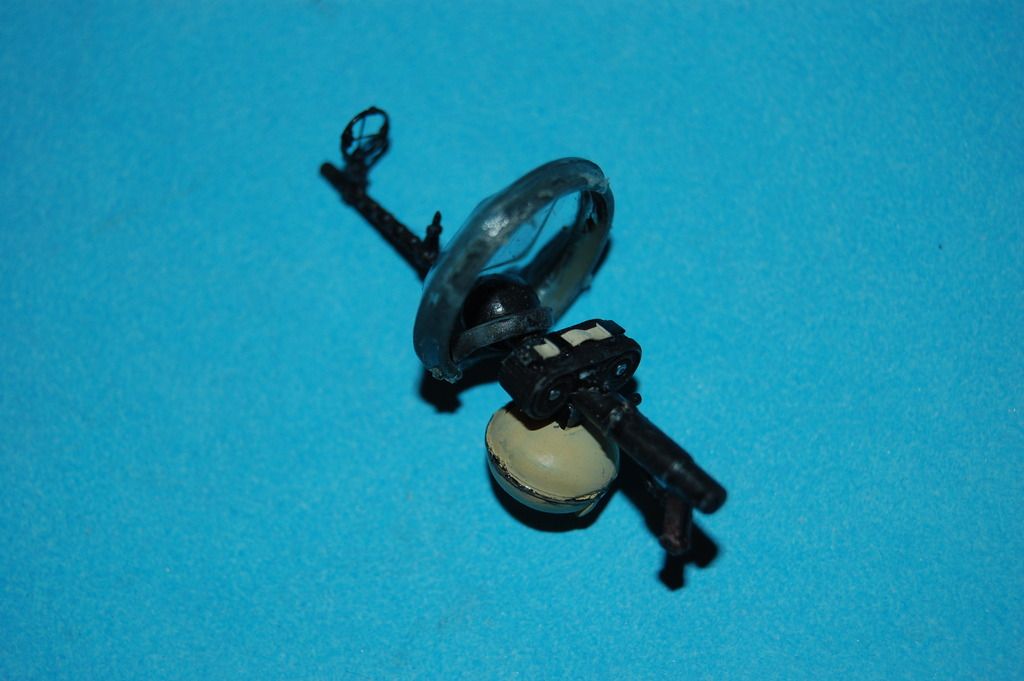
Looking at Ju-87 pics I will  need to add a handle grip to the rotating gun canopy. Did that using a larger gauge wire, paint drying on it right now.

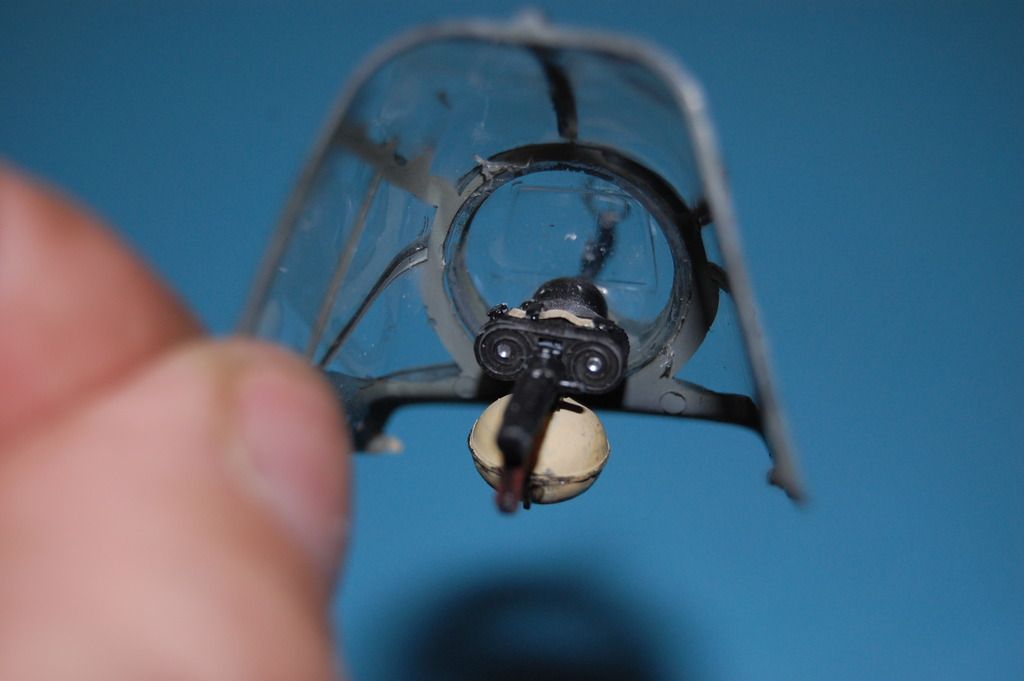
Starting to add more hoses and wiring to the engine.

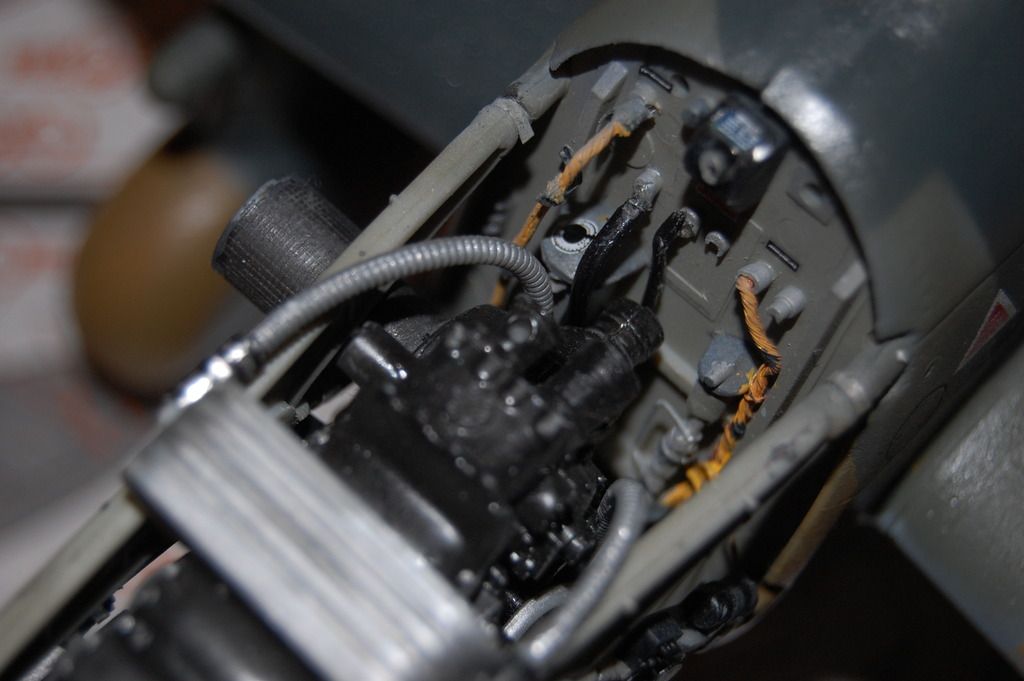
Added a fire extinguisher to the cockpit.

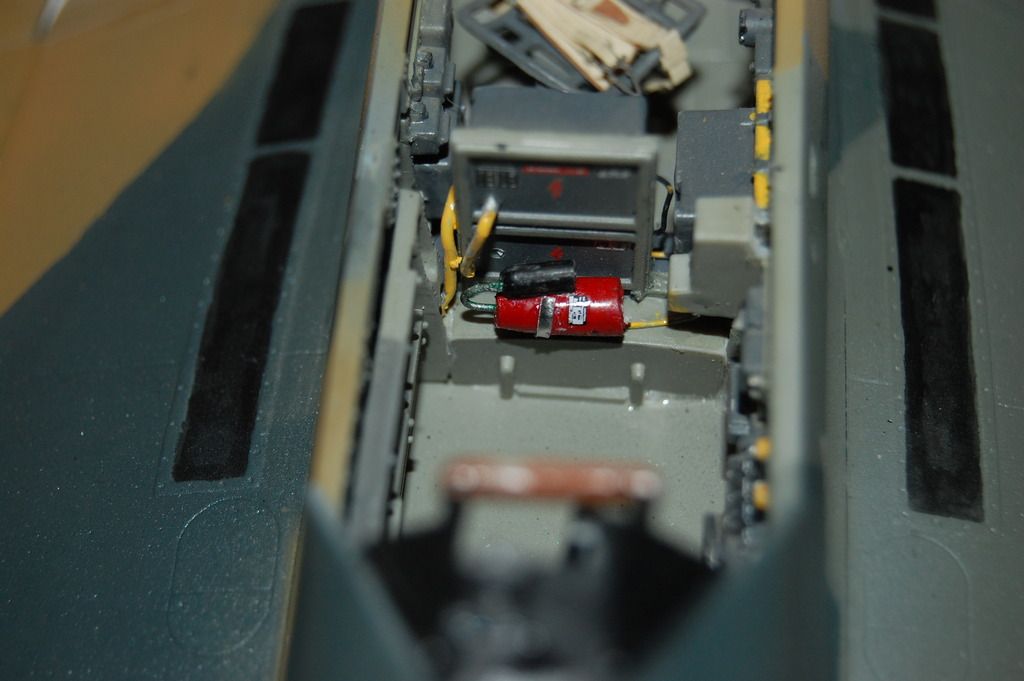
As for the backside of the pilot seat, I took some artistic liberties here. I just could not find a pic showing the backside of the Ju-87B seat. I could have simply pinned them to the back but what I did was to make a rough version of a harness retracting system.

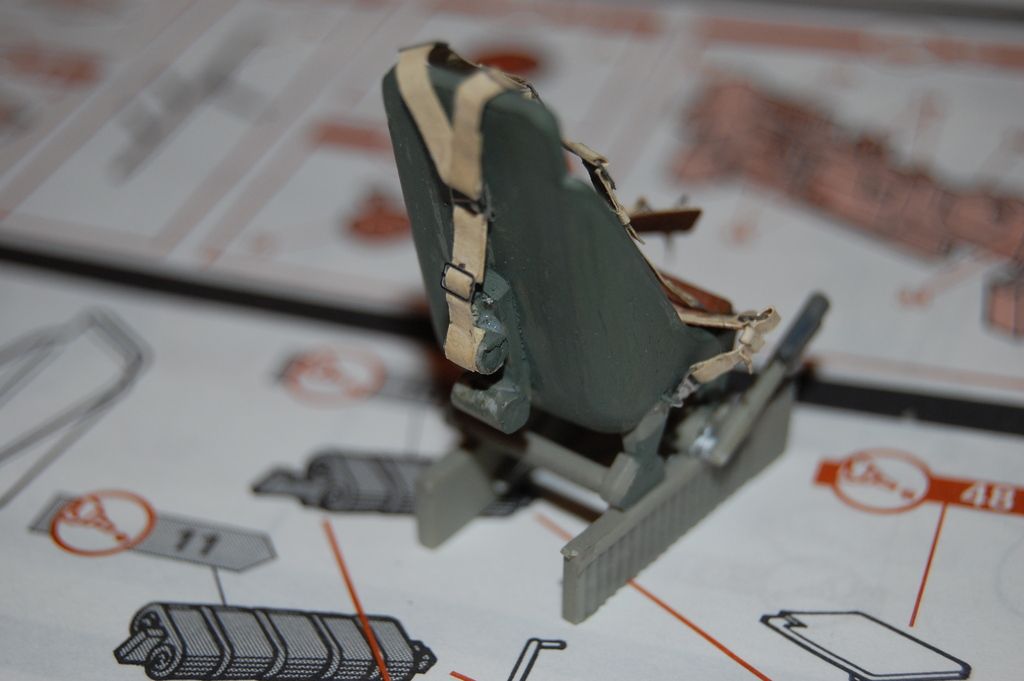
I used the clear part meant for the rear gun sight as the base glass for the gun sight. Glad I held off on the sight installation till now, it would not have fit through it's opening as following the instructions, I still had to cut the sight in half which worked out fine.

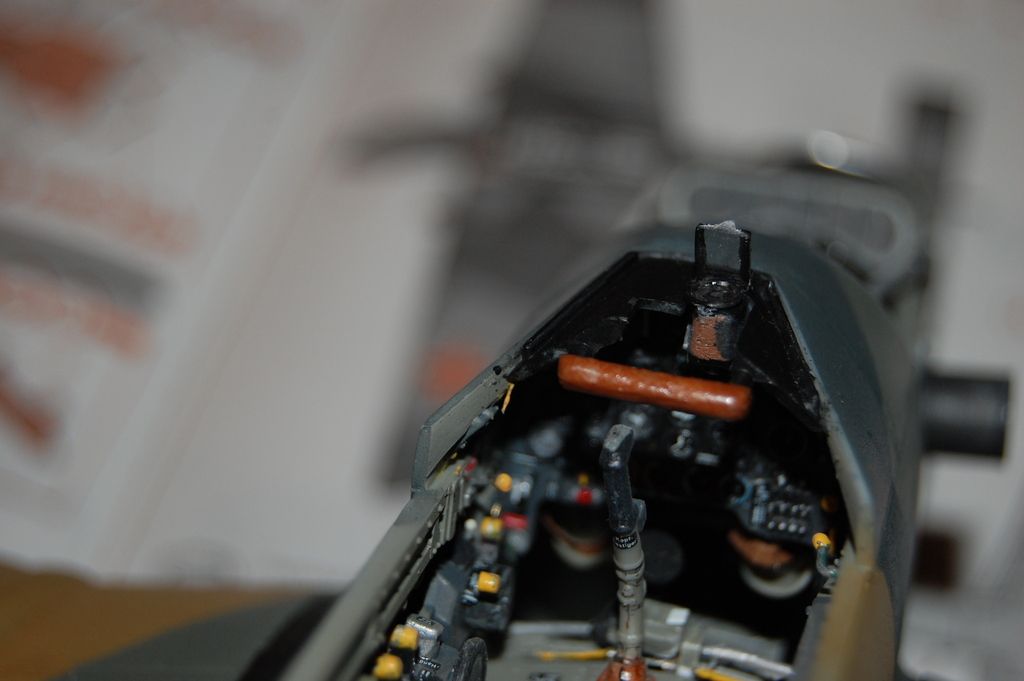
I slapped a couple of placards on the oil filter, will be running more wiring through this side too.

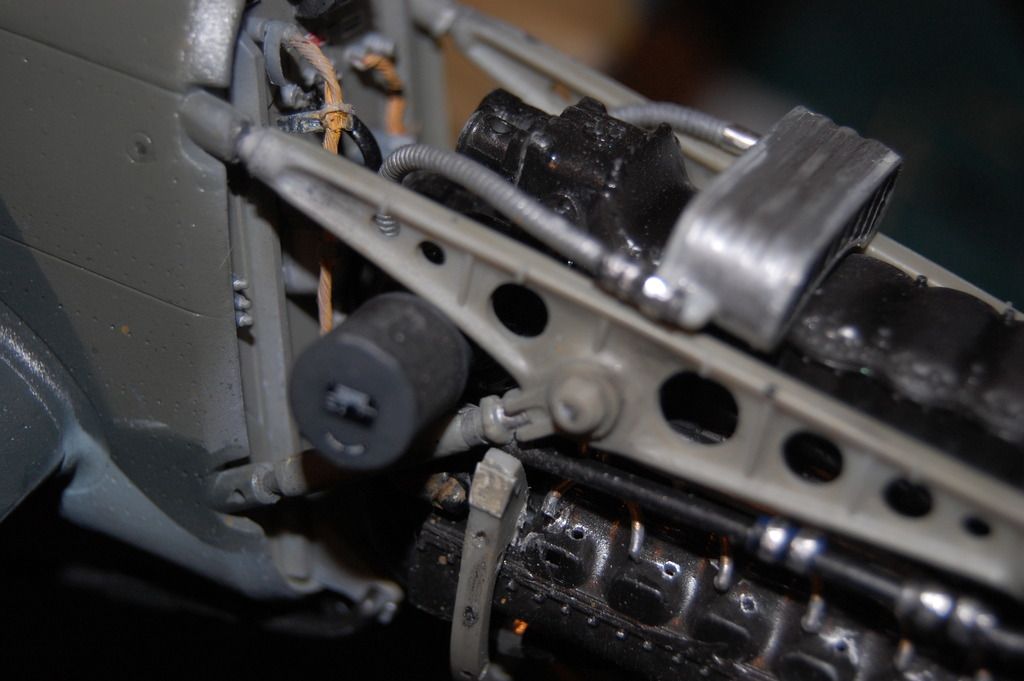
Not too much left to do before I can call it finish. 

 Your image is loading...

 On the bench: So many hanger queens.


  • Member since
    November 2008
  • From: Central Florida
Posted by plasticjunkie on Saturday, March 7, 2015 9:43 PM

Clemens, Bish and Greg

Thanks so much for your comments. It was fun participating in this GB.

 GIFMaker.org_jy_Ayj_O


Too many models to build, not enough time in a lifetime!!

  • Member since
    May 2013
  • From: Indiana, USA
Posted by Greg on Saturday, March 7, 2015 5:26 PM

PJ, that is some truly impressive work. Truly.

So much to like it's hard to pick out anything in particular, but I can't help commenting yet again how much I like that multi-color camo, and your weathering is so spot on and really brings out everything.

This has been so much fun to watch, thanks for participating.

Bow Down

  • Member since
    December 2002
  • From: Bury St Edmunds, Suffolk, England
Posted by Bish on Saturday, March 7, 2015 3:36 PM

Praise more than well deserved PJ.

I am a Norfolk man and i glory in being so


On the bench: Airfix 1/72nd Harrier GR.3/Fujimi 1/72nd Ju 87D-3

  • Member since
    April 2013
Posted by SchattenSpartan on Saturday, March 7, 2015 3:12 PM

Holy smokes, the weathering on your Stuka looks amazing! Great work on the paint job and especially the decals as well!

  • Member since
    November 2008
  • From: Central Florida
Posted by plasticjunkie on Saturday, March 7, 2015 7:34 AM

Thanks Jonny and Mustang. Glad you like how the snake came out.

 GIFMaker.org_jy_Ayj_O


Too many models to build, not enough time in a lifetime!!

  • Member since
    March 2012
  • From: Corpus Christi, Tx
Posted by mustang1989 on Saturday, March 7, 2015 5:59 AM

PJ: Dammmitt boy!! That thing turned out great!!!! And that weathering is awesome. No prob on the decals brutha! Just payin' it forward! Wink


 Forum | Modelers Social Club Forum (proboards.com) 

  • Member since
    November 2003
  • From: Naples, FL
Posted by tempestjohnny on Saturday, March 7, 2015 5:10 AM

PJ  awesome.   The close up of the panel line weathering is unbelievable.   Really looks like sand in the panel lines. Great job.  John


  • Member since
    November 2008
  • From: Central Florida
Posted by plasticjunkie on Friday, March 6, 2015 8:12 PM

Thanks for the nice words gents!

 GIFMaker.org_jy_Ayj_O


Too many models to build, not enough time in a lifetime!!

  • Member since
    September 2003
  • From: AandF in the Badger State
Posted by checkmateking02 on Friday, March 6, 2015 6:25 PM

Outstanding, PJ!


GAF
  • Member since
    June 2012
  • From: Anniston, AL
Posted by GAF on Friday, March 6, 2015 2:57 PM

Plasticjunkie,

Looks great.  Nice "sun and sand" weathering.   WTG!

Gary

  • Member since
    December 2002
  • From: Bury St Edmunds, Suffolk, England
Posted by Bish on Friday, March 6, 2015 2:50 PM

Love it PJ. The extra weathering has really paid off, really looks like it has been under a hot desert sun. Really nice build all round and was worth the extension for this alone. have added it to the front page, thanks for taking part, a pleasure as always.

I am a Norfolk man and i glory in being so


On the bench: Airfix 1/72nd Harrier GR.3/Fujimi 1/72nd Ju 87D-3

  • Member since
    November 2008
  • From: Central Florida
Posted by plasticjunkie on Friday, March 6, 2015 1:49 PM

Thanks guys but the fading was a bit light to my taste so I followed up with a filter of Turp and yellow ochre oil paint toning and fading it more. It even adds the dusty effect to the finish. It looks rough but it's smooth as a baby's behind. That North African sun took  a toll of most finishes.

I used my multiple hand thingies from Harbor Freight to install the aerial antenna wire then added a couple of small drops of Aleene's for the insulators.

Here is my finished B-2 in the colorful markings of 6./St.G2 "Immelmann" stationed at Tmimi Airfield, Libya, summer 1941 and flown by Lt. Hubert Polz.

My sincere thanks to Mustang for being a pal and passing down his snake decals and to Bish for extending this GB allowing me more time to complete my entry.

Bish,  please add the first picture to the completed list up front.

 GIFMaker.org_jy_Ayj_O


Too many models to build, not enough time in a lifetime!!

  • Member since
    September 2003
  • From: AandF in the Badger State
Posted by checkmateking02 on Thursday, March 5, 2015 4:03 PM

Thanks, Bish and SS.  I appreciate it.  Hope to finish up fairly soon now, but still have to mask the canopy, and it's got a lot of little windows.


  • Member since
    April 2013
Posted by SchattenSpartan on Thursday, March 5, 2015 3:01 PM

CMK: That spinner looks fantastic! Some great masking work, as usual!

Ernie: your Stuka looks amazing as well!

Well, my replacement part finally arrived! I'm not happy with how the weathering in the cockpit turned out though, so I'll use the opportunity and repaint the entire thing. I'll try to keep you guys up to date on any progress i make...

  • Member since
    December 2002
  • From: Bury St Edmunds, Suffolk, England
Posted by Bish on Wednesday, March 4, 2015 11:47 PM

That's not god having those on clear parts. Nice job fixing it.

I am a Norfolk man and i glory in being so


On the bench: Airfix 1/72nd Harrier GR.3/Fujimi 1/72nd Ju 87D-3

  • Member since
    September 2003
  • From: AandF in the Badger State
Posted by checkmateking02 on Wednesday, March 4, 2015 9:41 PM

Once I took a good look at the canopy, I noticed this.

Two nice little round circles moulded into the inside of the canopy.  I don't know if they are ejector pin marks, since they are raised, not sunken.

Anyway, it turned out for the best since I could sand down raised circles--but how do you fill sunken ones?  And, since they were inside, nothing damaged the moulded frame on the outside.

So I sanded and sanded and sanded some more, then polished everything with toothpaste, old t-shirt material and q-tips.  Finally got it some sort of presentable shape.


GAF
  • Member since
    June 2012
  • From: Anniston, AL
Posted by GAF on Tuesday, March 3, 2015 8:16 PM

Greg

Thanks for the additional feedback re using the circle template, CMK.

GAF, that's a good idea, thank you. I'll have to try that.

Speaking of templates and drafting kits, I could swear I had a very thin metal shape template when I was in drafting in college. Before plastic was invented, perhaps? Propeller

I might have to dig it out of storage and see if my mind is playing tricks on me.

Your mind is not playing tricks... maybe.  Wink

You probably are thinking of an "Erasing Shield".

http://www.amazon.com/Westcott-ES-1-Erasing-Shield-3-5-X2-25/dp/B000YQIEB2/ref=sr_1_1/187-7898787-0351236?ie=UTF8&qid=1425435224&sr=8-1&keywords=erasing+shield

And French Curves... which have nothing to do with Gaulic Females....

  • Member since
    May 2013
  • From: Indiana, USA
Posted by Greg on Tuesday, March 3, 2015 7:45 PM

Thanks for the additional feedback re using the circle template, CMK.

GAF, that's a good idea, thank you. I'll have to try that.

Speaking of templates and drafting kits, I could swear I had a very thin metal shape template when I was in drafting in college. Before plastic was invented, perhaps? Propeller

I might have to dig it out of storage and see if my mind is playing tricks on me.

GAF
  • Member since
    June 2012
  • From: Anniston, AL
Posted by GAF on Tuesday, March 3, 2015 3:53 PM

Greg,

You might also just try marking the circle out with a pencil, then cutting it out with scissors.  I have a nice, small pair of scissors for trimming.  Or you could place the tape flat on something like a glass pane and then cutting it with an X-Acto blade.

One other tool I have in my kit from my drafting days of long ago is a very nice compass (no, not the north/south variety!). 

  • Member since
    December 2002
  • From: Bury St Edmunds, Suffolk, England
Posted by Bish on Tuesday, March 3, 2015 3:47 PM

Some god info there check. I need to get myself a circle template this week before I get to the wheels of my next armour build, but nice to know it will have other use's.

I am a Norfolk man and i glory in being so


On the bench: Airfix 1/72nd Harrier GR.3/Fujimi 1/72nd Ju 87D-3

  • Member since
    September 2003
  • From: AandF in the Badger State
Posted by checkmateking02 on Tuesday, March 3, 2015 2:17 PM

Thanks, Bish and Greg.  Appreciate it.  I'm relieved to have this part of the project done.  It was a real bottleneck to progress.

Being as I assume your new circle template is plastic, did you have any trouble keeping the blade from cutting into same during the cuts?

Actually, I did, Greg.  As much as possible, I tried to keep the blade angled away from the inside of the circle cut-out to minimize shaving the circle hole bigger or peeling off little bits of plastic.  That way, only the very tip of the point comes into much contact with the plastic template.  Sometimes I had to back off and try again.  I found it helps to make only a light cut--which meant using a new (i.e., very sharp) blade.

On reflection, I think I'll try taping the template down, to hold it in place on top of the masking tape.  For this first attempt I just used finger pressure--which (I found) can lead to slippage.

It's like most of the stuff we do around here--practice, practice.  So I guess I'll be practicing a lot with it.

Thanks again for the comments.


JOIN OUR COMMUNITY!

Our community is FREE to join. To participate you must either login or register for an account.

SEARCH FORUMS
FREE NEWSLETTER
By signing up you may also receive reader surveys and occasional special offers. We do not sell, rent or trade our email lists. View our Privacy Policy.