SEARCH FINESCALE.COM

Enter keywords or a search phrase below:

Ju 87 Stuka GB

173827 views
2599 replies
1 rating 2 rating 3 rating 4 rating 5 rating
  • Member since
    April 2005
Posted by Thunderbolt379 on Sunday, October 26, 2014 6:00 AM

Thanks Bish and Mustang. It's taken a whole day, off and on, to get to this point, though that's more a concentration thing. I'm hoping I might just get to the 70 tomorrow, if I can fill the areas in a reasonably straight forward progress. I also have the spinner cone and main gear to mask, but at that point it'll be ready for the solid cover coat, and then -- fingers crossed -- not too much in the way of touch ups before I can start the finishing rounds.

M/TB379

http://worldinminiature.blogspot.com/

  • Member since
    October 2008
  • From: Georgia
Posted by Rigidrider on Sunday, October 26, 2014 6:34 AM

Greg... Excellent work on the flight deck! Very nicely detailed!

Raven, also beautiful work. I was asked at a model show once why I detailed the engines and such when it was likely they wouldnt be seen,Well,  I know its there and even if not to be seen, practice, practice, practice. Your build is going to stand out when done, cant wait to see some more.

Mike... Not long now! looking forward to the pain t phase.

Doug

When Life Hands You A Bucket Of Lemons...

Make Lemonade!

Then Sell It Back At $2 Bucks A Glass...

  • Member since
    May 2013
  • From: Indiana, USA
Posted by Greg on Sunday, October 26, 2014 11:37 AM

Mike, hope you post a shot of how you fill in the mask. Thin tape a neat idea indeed.

Clemens and Doug, thanks for your comments.

  • Member since
    May 2013
  • From: Indiana, USA
Posted by Greg on Sunday, October 26, 2014 11:48 AM

Nathan, backtracked a few pages to find your IP. I think that Italeri panel turned out great. Looks more convincing than my Eduard IMO.

  • Member since
    October 2006
  • From: Tucson, AZ
Posted by Archangel Shooter on Sunday, October 26, 2014 7:45 PM

Mike- Been following your work with interest as I'm slowly getting near to start laying down some paint. I was considering pre-shading but having tried it on a couple of previous kits, I just don't see the results as the top coat covers up the pre-shade. Guess I'm not doing it right??

Be interested to know how you come out with painting the wing flaps. I was looking at painting mine prior to final installation believing it will prevent any over spray of the top/bottom colors. But looking at your bird  I may just go ahead and glue the flaps on now.

Greg- That cockpit is looking great! Like the shading you did to it.

Me.....I been puttering on detailing the firewall by adding wiring, and plumbing to the two reservoirs. If I didn't have so many distractions (this time the Saints vs GB) I could get more accomplished. I'm going to check out those Montex masks and might get one if available. But in this scale, using regular masking tape wouldn't be too hard to do. Should have a couple of update pics by Weds.

Scott

 Your image is loading...

 On the bench: So many hanger queens.


  • Member since
    April 2005
Posted by Thunderbolt379 on Sunday, October 26, 2014 7:58 PM

Scott -- it's all about the weight of the topcoat, really. I'm working with MM Acryls which are a thin formulation and usually take two or three thin coats to build up the desired finish, so it's fairly easy to see the point where there's just enough pre-shade still showing and call it a day right there. You can also use different colours of pre-shade for different effects.

I was also concerned about overspray around the flaps but I don't think it's going to be an issue, or if it is then it should be no more then a few small brush touch-ups. I'll know soon enough...

Cheers, M/TB379

http://worldinminiature.blogspot.com/

  • Member since
    April 2005
Posted by Thunderbolt379 on Monday, October 27, 2014 2:20 AM

Today's progress: I completed masking and applied the RLM 70, so targets were achieved. First, here's the requested pic of the masking fill in progress:

As you can see, I basically fill in the areas with tape (I de-glue it on my hand first to offset any chance of a pull-up under all normal circumstances). I cut oblique/triangular sections to fit odd corners, and eventually finish off with Maskol rubber solution rather than continue to cut smaller and smaller pieces. That's the purple patches. Here' the finished mask:

And the 70 applied:

This is Acryl paint, same as the Stuka I built for RD IV last year. She looks a bit of a shaggy dog right now, but my target for tomorrow will be to remove all main masking, do touch-ups by brush, oil streaks on the underside, and get a coat of satin onto her. Hopefully I'll also get the panel accents done, which will mean I'll be decaling the day after.

Cheers, M/TB379

http://worldinminiature.blogspot.com/

  • Member since
    April 2005
Posted by Thunderbolt379 on Monday, October 27, 2014 7:34 AM

A bit more progress -- I decided to remove the masking before hitting the hay, so here she is at this point:

My first job tomorrow will be touch-ups, there are a few small flecks of 71 that lifted, not many, but the bigger touch-up will be the leading edges. it seems no matter how careful I am in masking, I have not yet got the knack of making tape actually lie down firmly and give me a sharp edge on that contour. So, I'll see what I can do, before starting the general process that is the slide to the finish line.

M/TB379

http://worldinminiature.blogspot.com/

  • Member since
    December 2002
  • From: Bury St Edmunds, Suffolk, England
Posted by Bish on Monday, October 27, 2014 1:01 PM

Nice, that's a great job on that scheme mike.

I am a Norfolk man and i glory in being so


On the bench: Airfix 1/72nd Harrier GR.3/Fujimi 1/72nd Ju 87D-3

  • Member since
    April 2005
Posted by Thunderbolt379 on Tuesday, October 28, 2014 6:39 AM

Thanks, Bish! Well, here's today's action: I did the main touch-ups (I swear I don't know what happens with the leading edge, my ability to mask and paint a sharp line on the leading edge of a wing appears to be nil... Ah well, metal chips to disguise the touch-ups!), applied the first satin coat and accented the panel lines, dark dirt below, black above. Here's the underside, with the oil wash streaking and accents:

It looks rather scruffier in real life than the photo. next, here's the topside with a second round of black applied, I'll clean it up in the morning, do any other touch-ups as appear necessary, and hopefully get a second clear coat on in plenty of time to get the decals done too. Then one last sealant coat and it's into final assembly...

I'm still hoping to have this one completed in the next two days.

Cheers, M/TB379

http://worldinminiature.blogspot.com/

  • Member since
    March 2012
  • From: Corpus Christi, Tx
Posted by mustang1989 on Tuesday, October 28, 2014 6:52 AM

YES!!!!!!!!!!!!!!!!!!! Love the paint.Yes


 Forum | Modelers Social Club Forum (proboards.com) 

  • Member since
    November 2008
  • From: Central Florida
Posted by plasticjunkie on Tuesday, October 28, 2014 8:29 AM

Hey Bish, any chance in extending this GB? I would love to get in on this one but I'm pretty full right now with other GBs. and Dec is just around the corner.

 GIFMaker.org_jy_Ayj_O


Too many models to build, not enough time in a lifetime!!

  • Member since
    December 2002
  • From: Bury St Edmunds, Suffolk, England
Posted by Bish on Tuesday, October 28, 2014 12:38 PM

That's looking really good Mike.

PJ, I was giving that some thought, but only until April, I don't want to conflict with the 109 GB to much. But as always, any builds with progress pics posted before the end date will still qualify.

I am a Norfolk man and i glory in being so


On the bench: Airfix 1/72nd Harrier GR.3/Fujimi 1/72nd Ju 87D-3

  • Member since
    November 2008
  • From: Central Florida
Posted by plasticjunkie on Tuesday, October 28, 2014 2:10 PM

Bish

April would be great if possible as it will give me a bit more elbow room.

 GIFMaker.org_jy_Ayj_O


Too many models to build, not enough time in a lifetime!!

  • Member since
    April 2005
Posted by Thunderbolt379 on Wednesday, October 29, 2014 3:08 AM

Hi guys, target almost achieved today! This morning I did the final clean-ups of the accenting and sprayed the second clear coat, then got into the decals. There are 51 decals on at the present time with seven left to do later in the finishing stage. The kit had no swastikas so I sourced a pair from an Eagle Strike sheet. Here she is at the end of work today:

The blue in the decals is actually a bit darker than it looks in photos.

Target for tomorrow -- all decals treated with Micro Sol (they can be doing that overnight), surface fully cleaned up of chemistry residues, then final sealing coat. Then I'm onto detail painting -- running lights, gun barrels, etc., and into final assembly. Get the gear under her, mount the dive brakes and add the extra decal bars; antennas and such, assemble the prop. I may not get it completely finished tomorrow, but certainly it should be in the display case the day after that.

I just noticed, the end plates of the tail planes should be in RLM 70 and they are in 65, so that's a touch-up required. Now it's just a matter of going round and doing a series of small tasks, and finally calling her done. Painting the exhausts and mounting them, adding the carbon work, that sort of thing...

Cheers, M/TB379

http://worldinminiature.blogspot.com/

  • Member since
    October 2008
  • From: Georgia
Posted by Rigidrider on Wednesday, October 29, 2014 4:51 AM

Very nicely done!

When Life Hands You A Bucket Of Lemons...

Make Lemonade!

Then Sell It Back At $2 Bucks A Glass...

  • Member since
    March 2012
  • From: Corpus Christi, Tx
Posted by mustang1989 on Wednesday, October 29, 2014 6:43 AM

Decals really set a build off don't they? Nice.


 Forum | Modelers Social Club Forum (proboards.com) 

  • Member since
    April 2005
Posted by Thunderbolt379 on Wednesday, October 29, 2014 7:03 AM

Thanks, guys! It was an all-day job, after second clear coat, to get 51 decals into place. They've had a chance to dry and there is some silver speckle to deal with tomorrow. The decals all got a good treatment with Micro Sol and seem to be pulling into surface details well, so if I can reduce the silvering I'll be happy. I'm definitely looking to post gallery pics before the weekend.

Cheers, M/TB379

http://worldinminiature.blogspot.com/

  • Member since
    November 2008
  • From: Central Florida
Posted by plasticjunkie on Wednesday, October 29, 2014 8:05 AM

Tbolt

Overall an excellent job. The paint and decals look spot on. Yes

Have you tried using Solvaset? This product is very strong and does an excellent job on the decals.

 GIFMaker.org_jy_Ayj_O


Too many models to build, not enough time in a lifetime!!

  • Member since
    December 2002
  • From: Bury St Edmunds, Suffolk, England
Posted by Bish on Wednesday, October 29, 2014 3:23 PM

Sweet Mike, looks awesome with the markings on, great work.

Ok all, because PJ asked so nicely and because I know there's still a few people who haven't started and are busy, the GB will be extended for 3 months, taking it up to 31st march. I will send out some PM's at the weekend to the guys who have been MIA for a while and hopefully it will jog some memories and we can get a few more of the builds underway.

I am a Norfolk man and i glory in being so


On the bench: Airfix 1/72nd Harrier GR.3/Fujimi 1/72nd Ju 87D-3

  • Member since
    November 2008
  • From: Central Florida
Posted by plasticjunkie on Wednesday, October 29, 2014 5:08 PM

Bish is DA MAN! :thumb:

Please throw my name in the hat with a 1/48 ROG Ju87B-2. I will be starting very soon.

 GIFMaker.org_jy_Ayj_O


Too many models to build, not enough time in a lifetime!!

  • Member since
    April 2005
Posted by Thunderbolt379 on Wednesday, October 29, 2014 5:18 PM

Thanks, PJ and Bish! PJ --  don't remember seeing Solvaset on the shelf in this country, I've heard much about it -- strong enough to melt some decals, but just what's needed for stubborn ones! These are ROJ decals and they took a long time to separate from the backing (large ones soaked four of five minutes), and did not want to slip much, but grabbed good and hard when they were in place. It sounds like you'll be doing the same kit as me -- watch out for overall alignment, the engine line-up is not great, to seat it so the seams are at their minimum means the engine is in fact twisted off to the right, and at the same time the tail surfaces, while they may form an excellent right angle with the vertical tail, are clearly several degrees out of parallel with the average line of the wing -- it doesn't show unless looking at it square-on, but it's definitely there.

A three-month extension, Bish? I suddenly have visions of a Fujimi 1:72 D-5 in winter scheme! Ahem -- I'll let you know, I have a very tight schedule to the end of the year (a completion a week!) and next year is already well rostered too...

Now, let's get this B-2 done!

M/TB379

http://worldinminiature.blogspot.com/

  • Member since
    December 2002
  • From: Bury St Edmunds, Suffolk, England
Posted by Bish on Wednesday, October 29, 2014 5:30 PM

I know what you mean Mike, and please don't feel obliged to risk over stretching things, I know how easy that can be. And I know what you mean about next year, I am already fully booked and trying to get a bit ahead of myself just so I don't risk over running.

Nice choice PJ, will add you to Kette 12.

I am a Norfolk man and i glory in being so


On the bench: Airfix 1/72nd Harrier GR.3/Fujimi 1/72nd Ju 87D-3

  • Member since
    April 2005
Posted by Thunderbolt379 on Wednesday, October 29, 2014 5:57 PM

Thanks, Bish -- this Stuka is completion number nine for the year and I have five more in an advanced state, with two extras just beginning, for 16 in the year, my most productive year ever. I have no idea what next year will bring but I'm scheduling the same and will do my best!

M/TB379

http://worldinminiature.blogspot.com/

  • Member since
    November 2008
  • From: Central Florida
Posted by plasticjunkie on Wednesday, October 29, 2014 7:39 PM

Thanks Bish for the extension. I was eyeing the 1/48 Italeri G-2 Kanonenvogel but I would have to order it and I have the ROG one in my stash.

Tbolt

Try looking in the RR section as Walthers is making Solvaset now.

 GIFMaker.org_jy_Ayj_O


Too many models to build, not enough time in a lifetime!!

  • Member since
    April 2005
Posted by Thunderbolt379 on Thursday, October 30, 2014 2:05 AM

I'm closing in on the finish -- progress today includes inspection and final touch-ups, overall wash and air dry, final clear coat to seat all decals, exhausts painted and installed, along with the warload, divebrakes, underside antennas, tailplane braces and landing gear. Slivers of insignia now being applied to the divebrakes, which may be a long process to get them to conform -- lots of setting solution required. Here she is:

I'll continue with the decal slivers and may begin unmasking the canopy today.

Remaining to do: mount the antenna mast, add two decals to it, rig the wire and paint it. Add the degree decal to the pilot's left side window. Paint the running lights, touch-up masts and antennas; paint the radiator -- this last one is confounding me. I had meant to mask and spray flat aluminium, to be followed by a dark wash, but the thought of remasking the whole front end of the plane is confounding. What did others do? It's not easy to spot techniques in photos. I can't assemble the prop to the pre-attached backplate until the radiator is dealt with. Then there's the barrels of the wing guns to add, dust and carbon work, and this beast is ready for the gallery shots.

M/TB379

http://worldinminiature.blogspot.com/

  • Member since
    October 2008
  • From: Georgia
Posted by Rigidrider on Thursday, October 30, 2014 4:56 AM

Great work Mike...

Yes I wouldnt recommend solvaset unles you run across a particular stubborn decal, it could melt or distot the look. I keep a bottle on hand but use sparingly.  Also on silvering, someting that works for me iftrouble aarises isto try setting decal into the gloss finish before it sets up. Usually works for me. Again, excellent work!

Doug

When Life Hands You A Bucket Of Lemons...

Make Lemonade!

Then Sell It Back At $2 Bucks A Glass...

  • Member since
    March 2010
  • From: MN
Posted by Nathan T on Thursday, October 30, 2014 7:43 AM

Very nice work Mike. I painted my radiator/ oil coolers on my D first. I plan on masking them off somehow, then spray my rlm 65. Do the underwing crosses go over the divebrakes, or just slide underneath them?


  • Member since
    March 2012
  • From: Corpus Christi, Tx
Posted by mustang1989 on Thursday, October 30, 2014 8:49 AM

Hey Nathan. The underwing crosses go over the dive brakes. Fun fun fun! lol


 Forum | Modelers Social Club Forum (proboards.com) 

  • Member since
    March 2010
  • From: MN
Posted by Nathan T on Thursday, October 30, 2014 8:58 AM

Progess is coming my way slowly but Shirley. The wing landing light is really giving me fits. First, the mismatch with the wing halves, but also the clear part cover does not fit the leading edge profile. I just glued it in place best I could, then shimmed around it with strip styrene, and sanded it out. I needed so much sanding that the wing leading edge has a slight wave to it if you look at it just right. I got it sanded ok now and had to rescribe around it again. Tough to do. I then realized that I drilled one too many holes in the wing leading edge for the MG guns and had to fill that, which is right next to the landing light and now I will be rescribing that again...Angry.

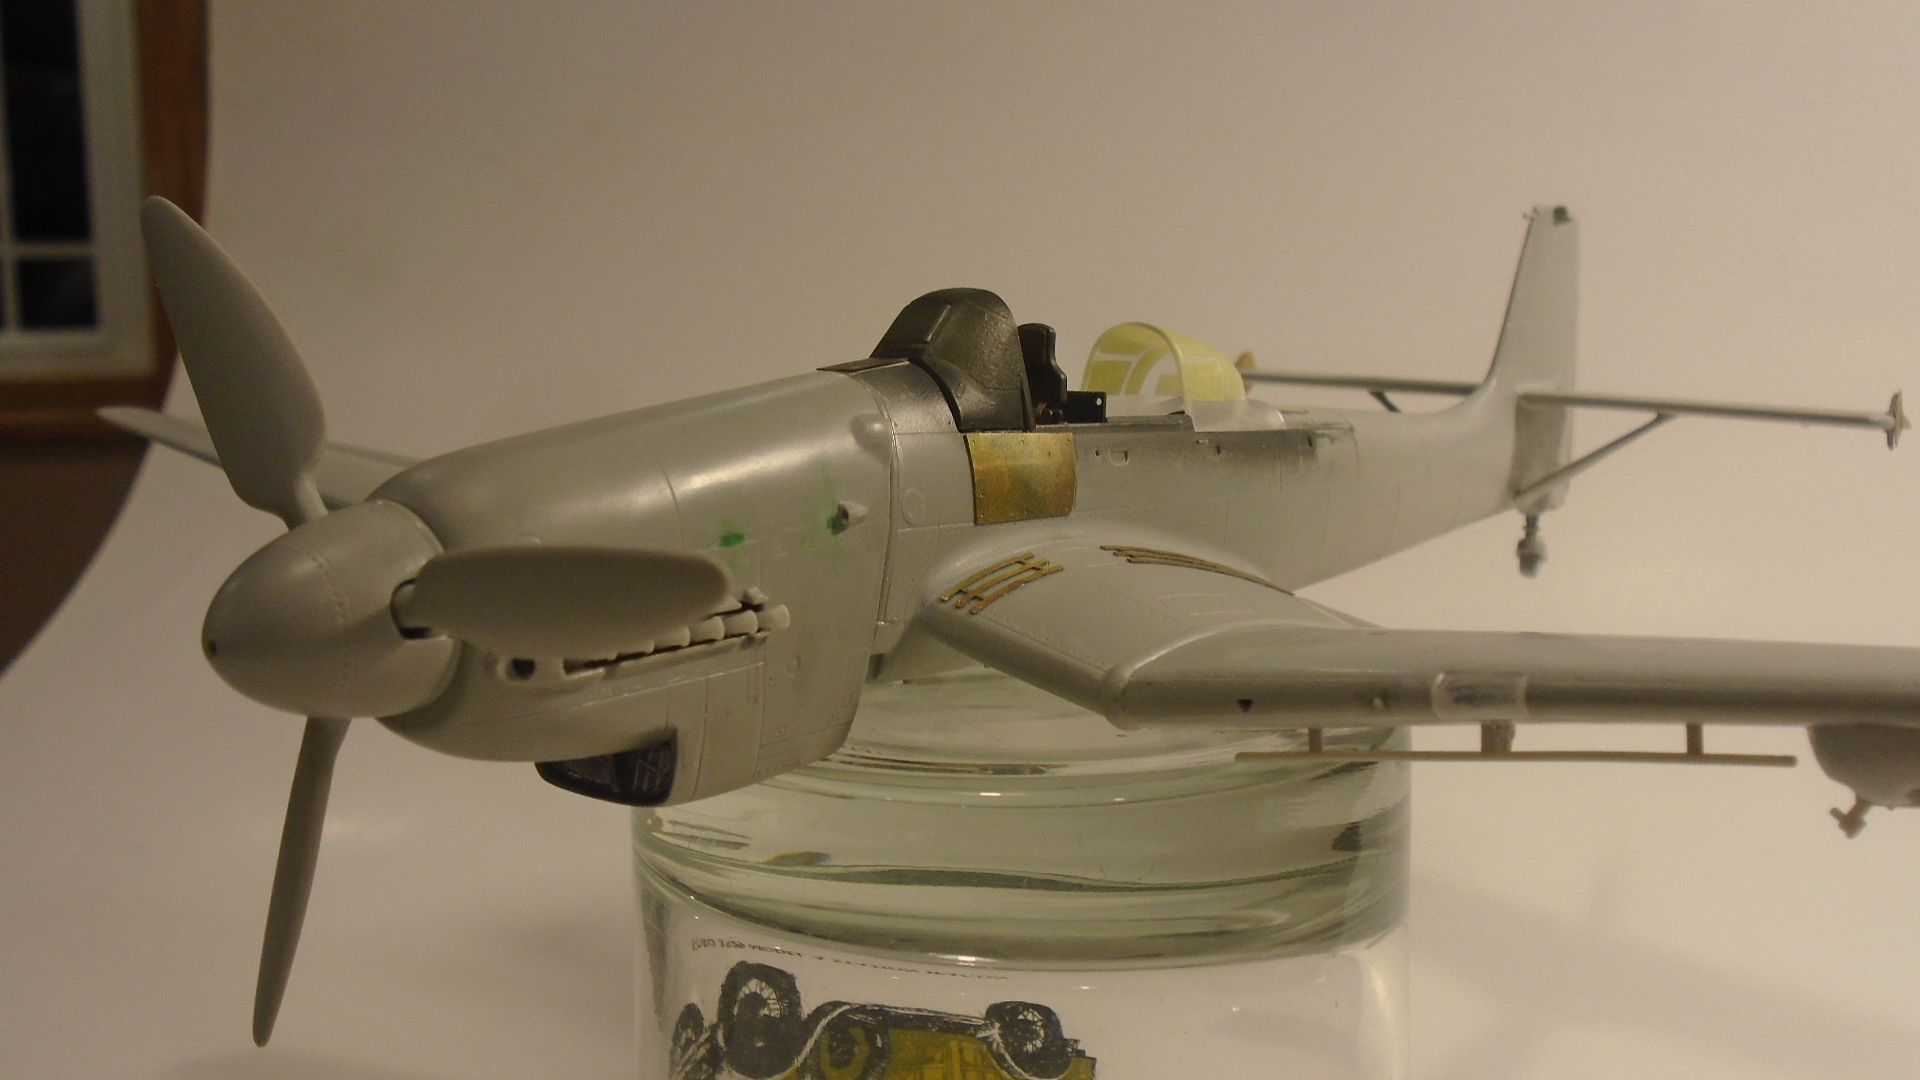
Anyway, on to the pics:

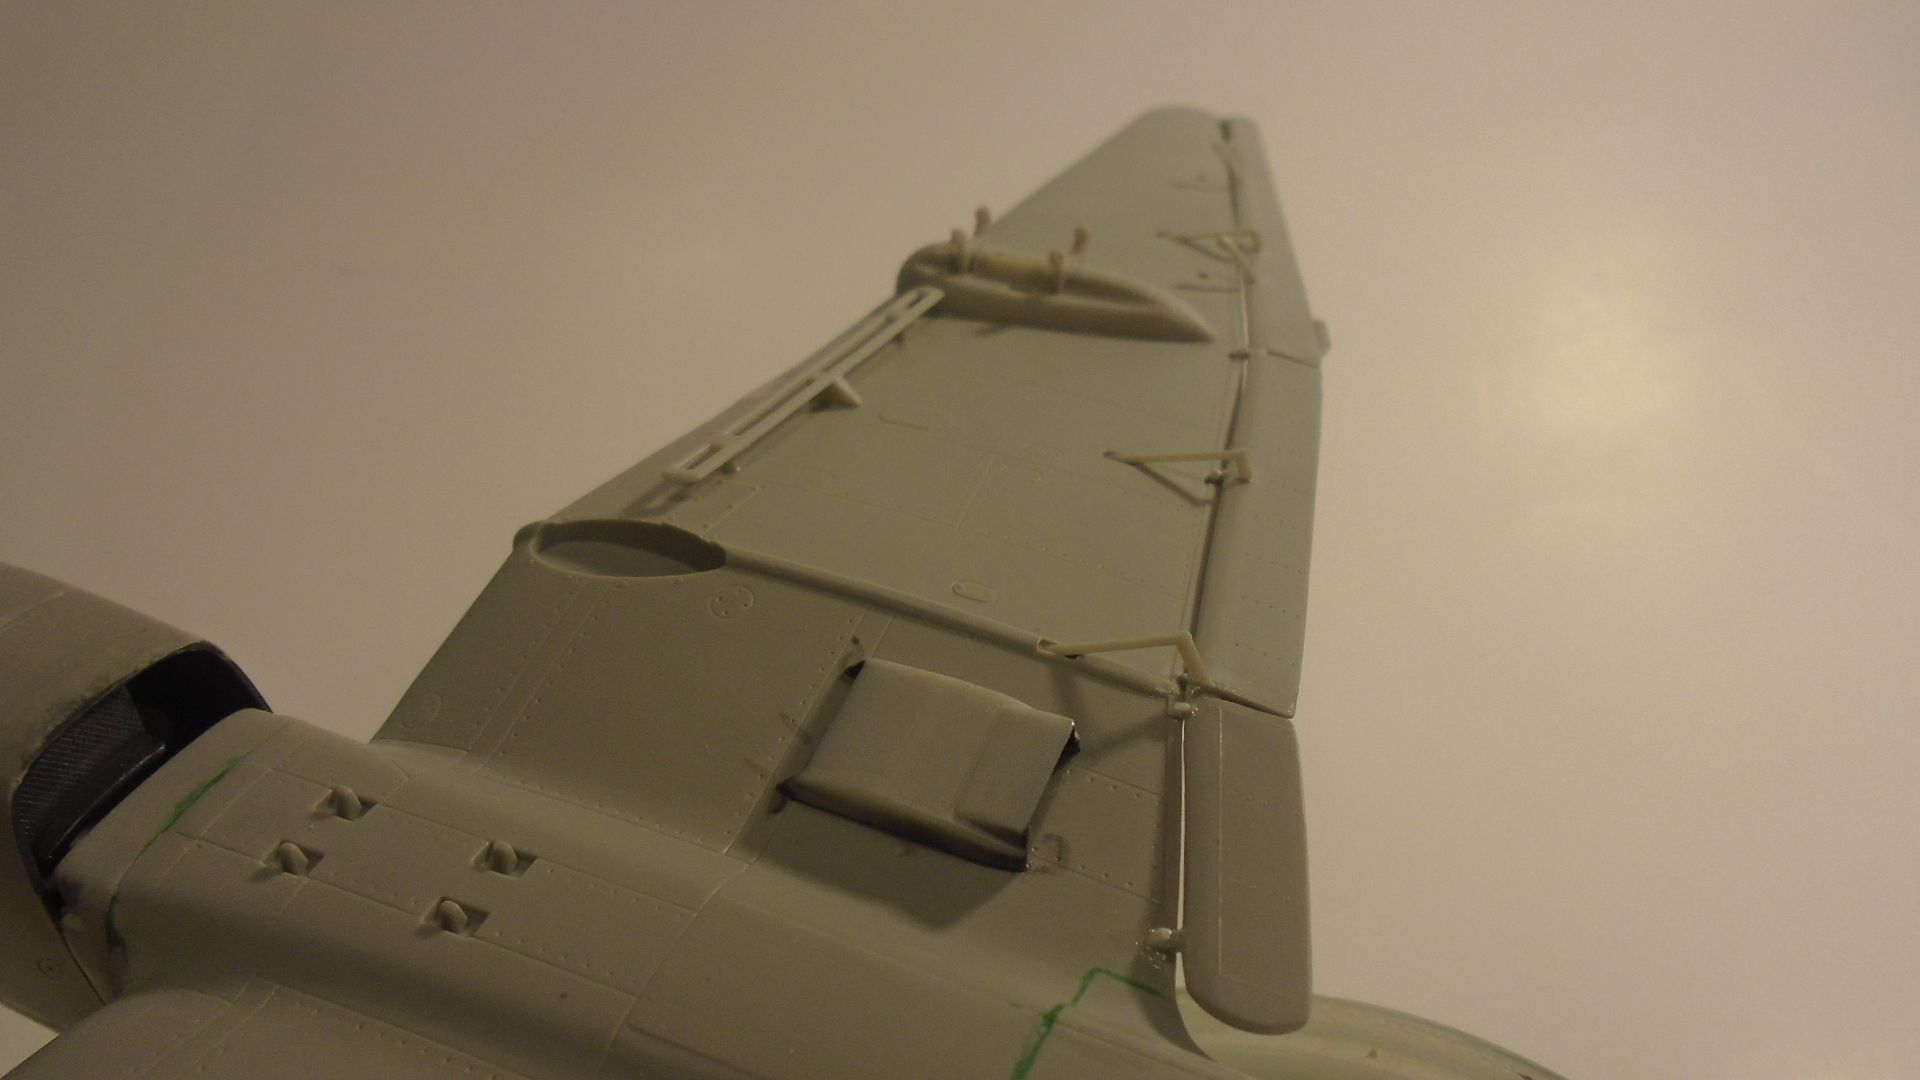
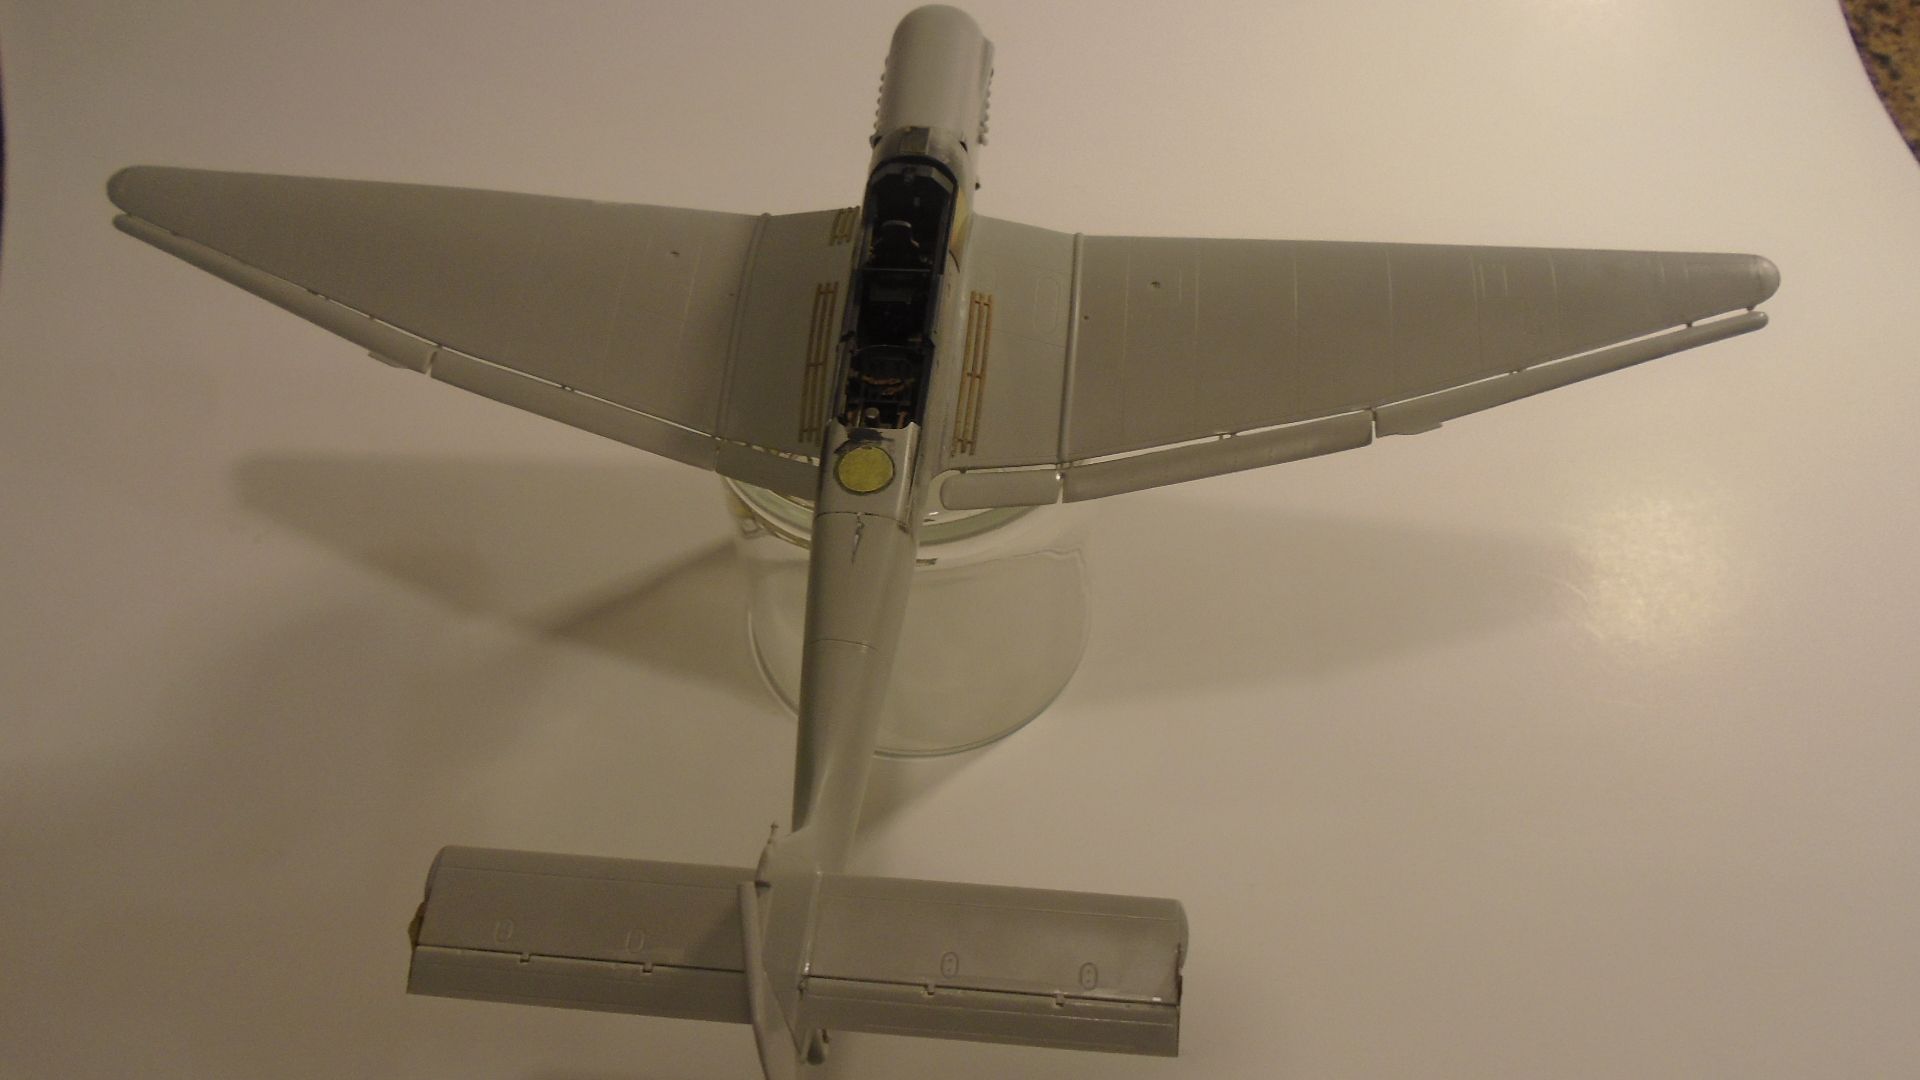
All the flaps and ailerons are glued back on now. I had to use some little pieces of sprue to make new hinge points. The balance weights and hinges were quite fiddley. Note the oil cooler is painted, but there is a rather large hole in the bottom cowl thats empty, even though the engine is in there. Maybe I should've added some piping or something?

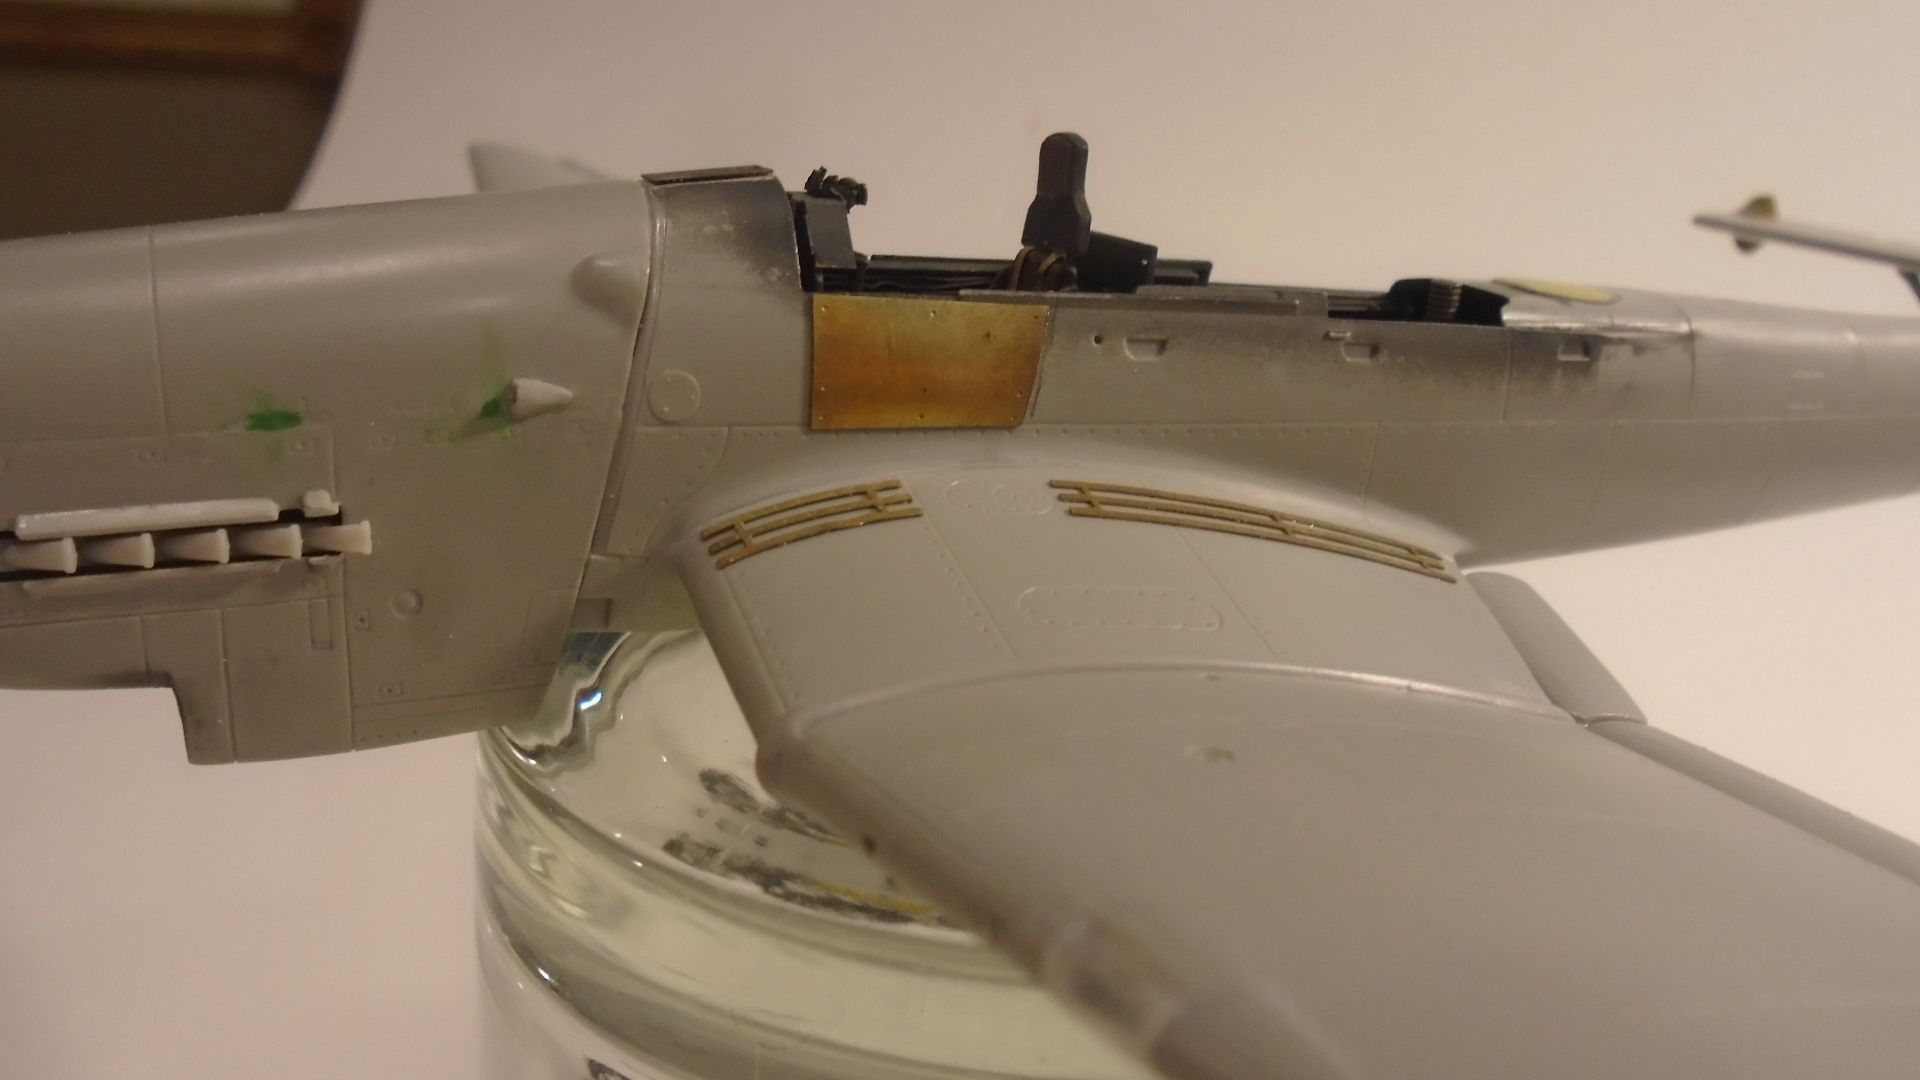
Engine cowling fit pretty well to the fuselage. Armor plate and wing walk pe is glued on. Exhausts are fitted now because I'm going with a night scheme and the flame dampers will go on over these later. 

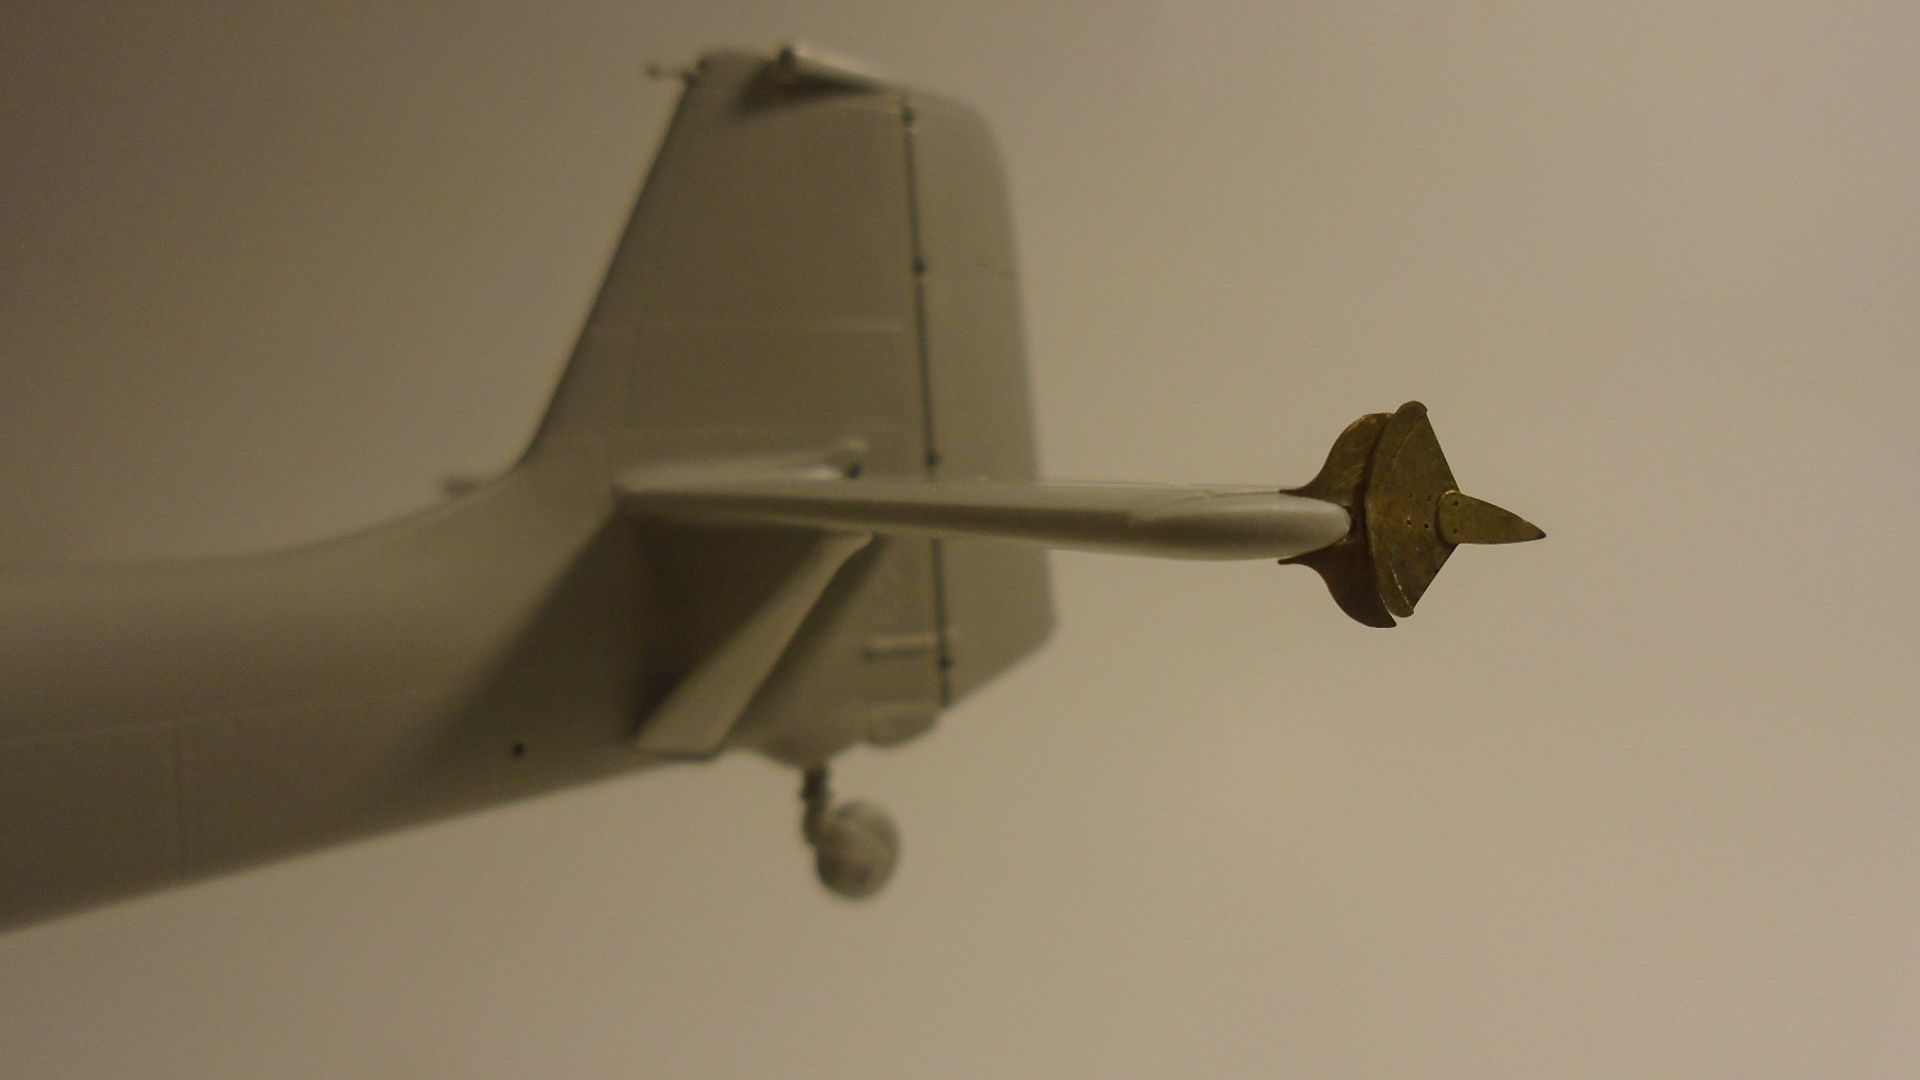
More pe balance weights on the elevators. Nice of Italeri to include this sort of stuff in the kit! It adds a nice touch.

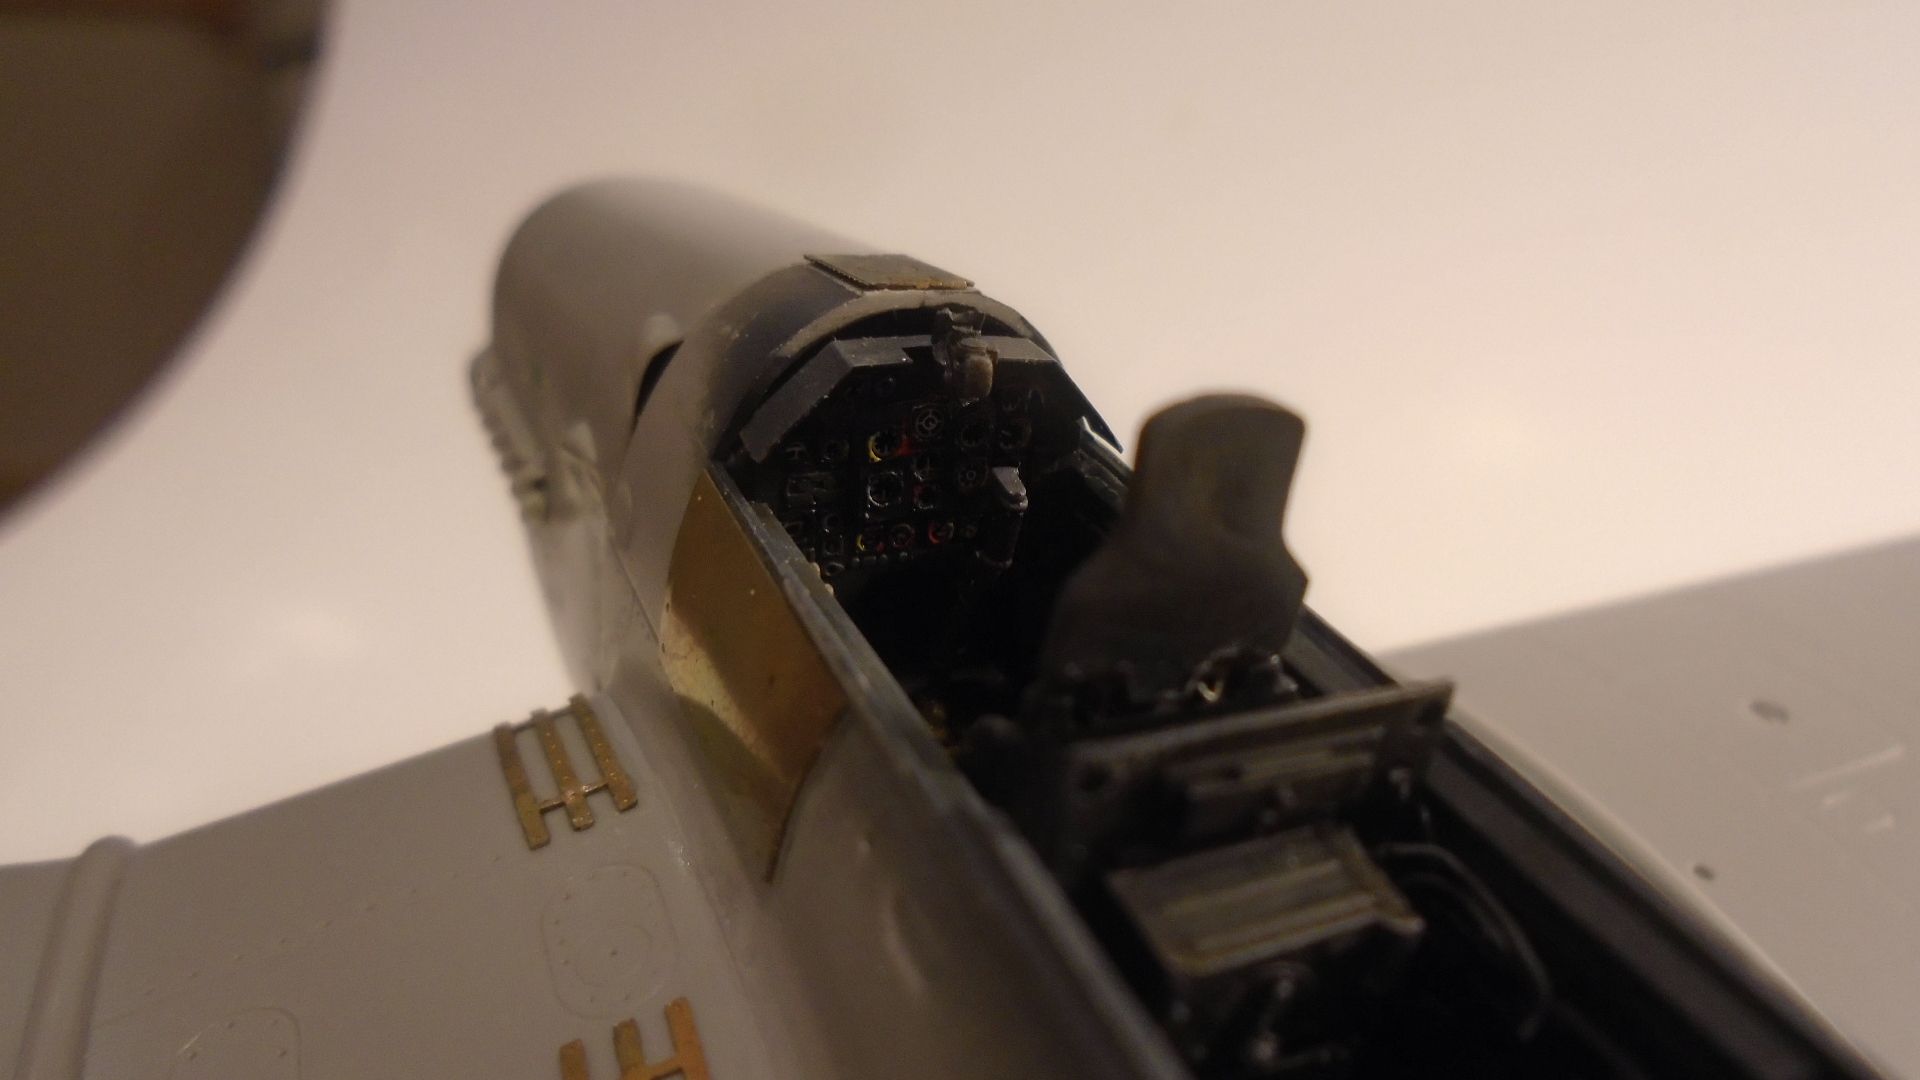
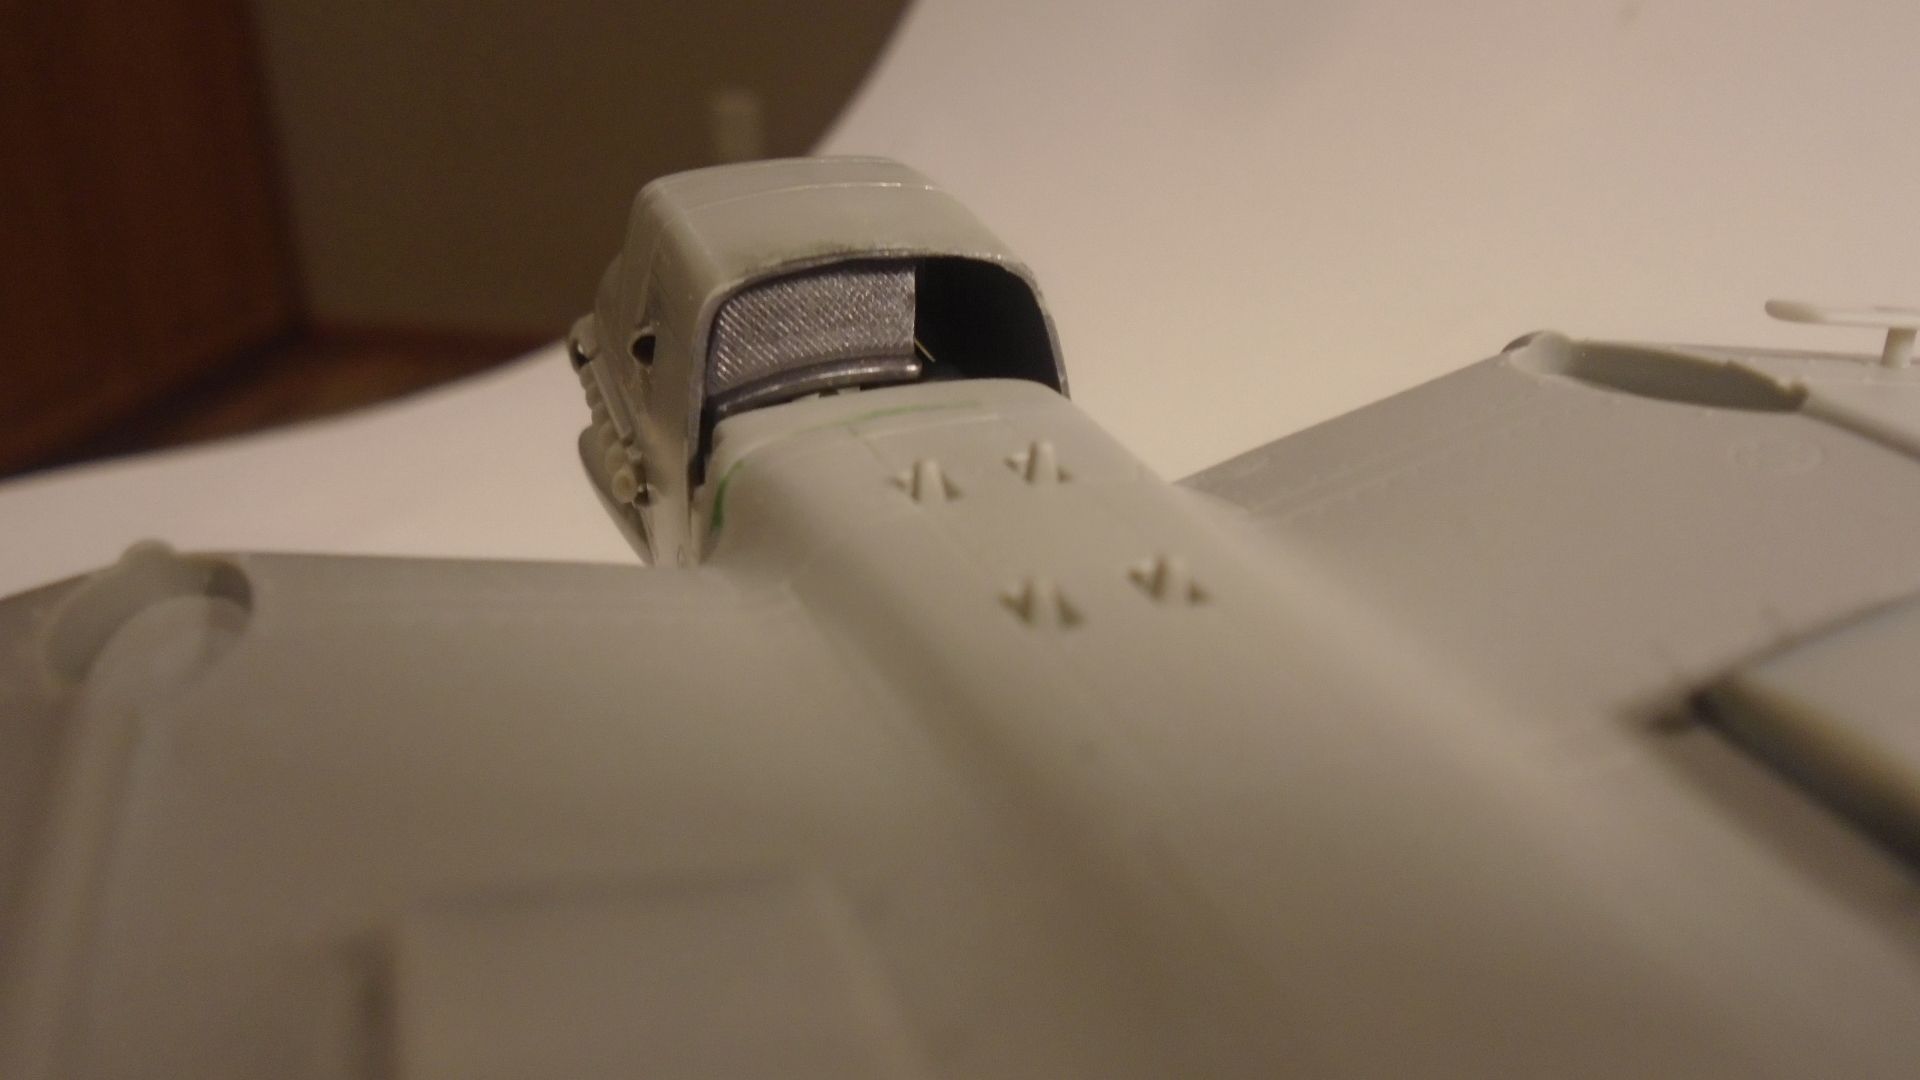
Resin gun sight added and ready for the clear part.

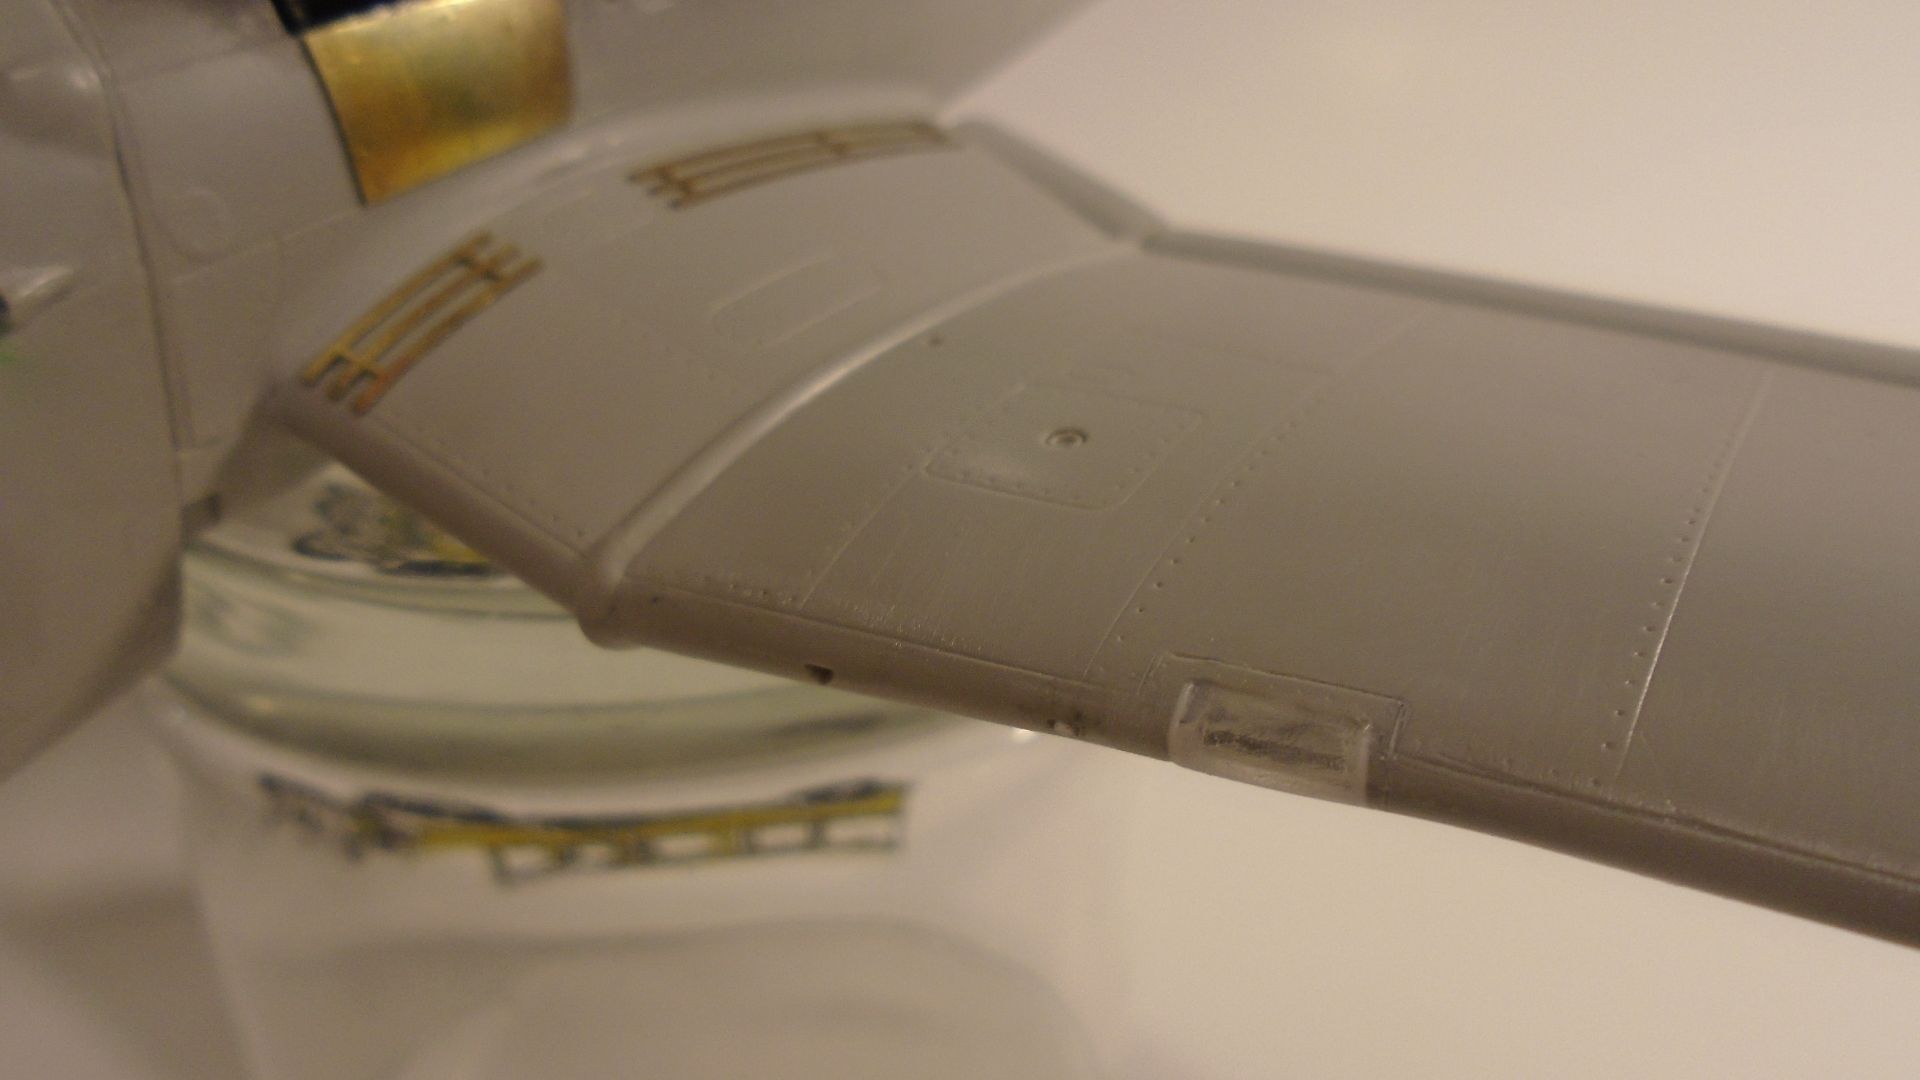
Landing light trouble...

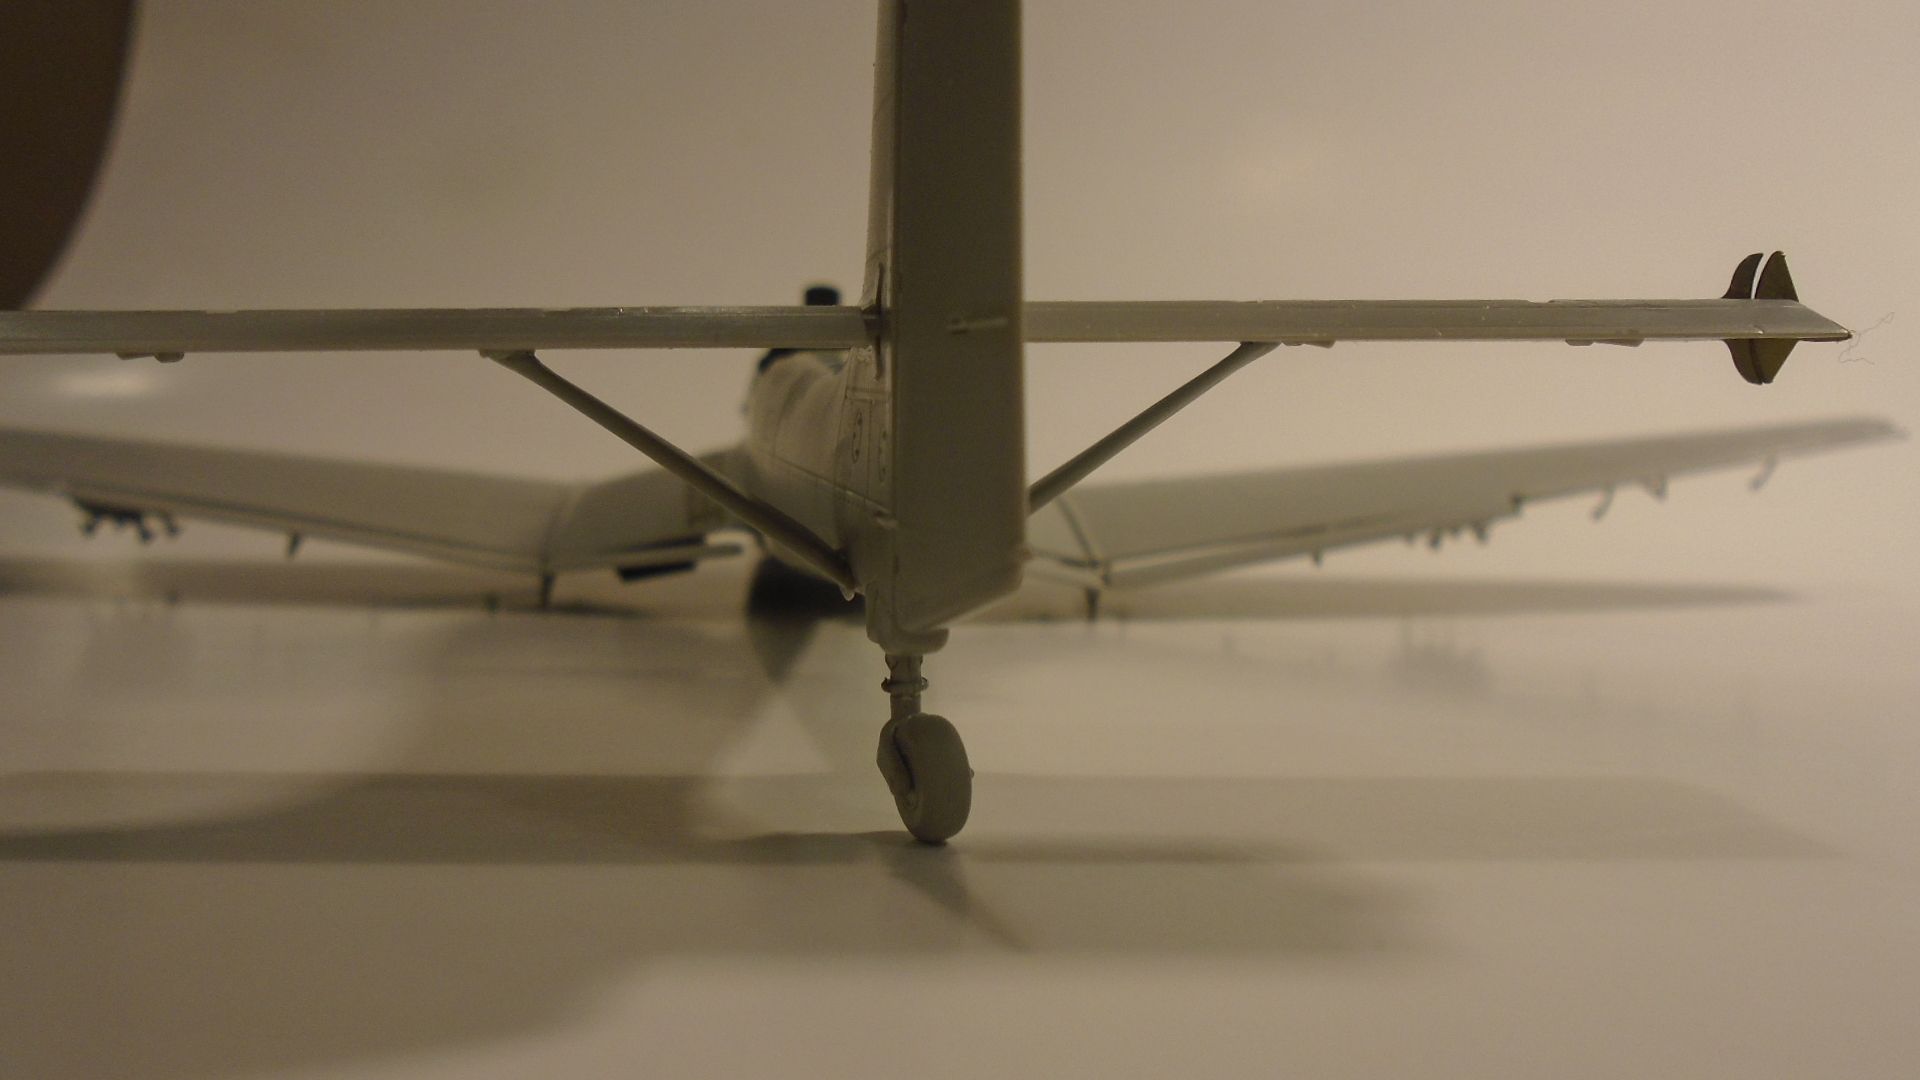
Rudder deflected without having to do any extra work. Nice job Italeri! Tailwheel canted with it. 

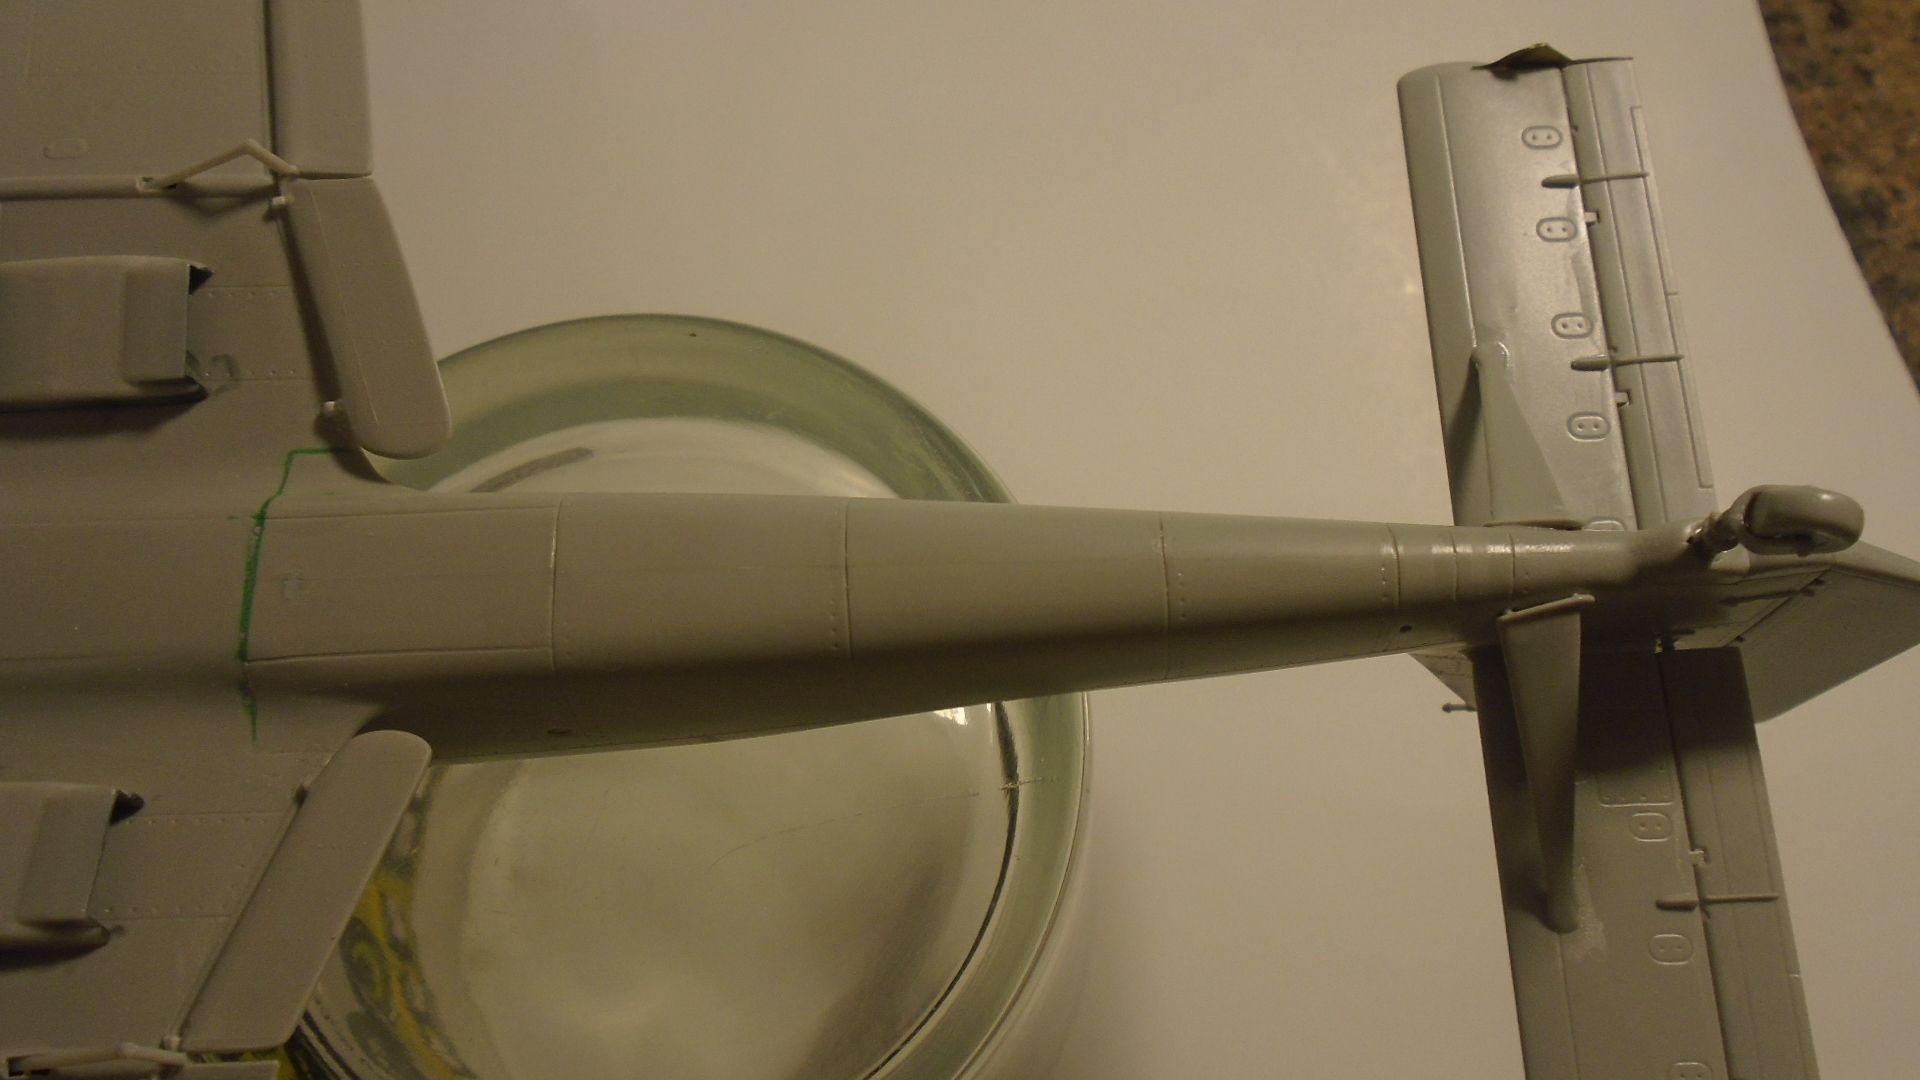
Sanding and rescribing is done on the fuselage underside. 

The blank area in the cowling I was talking about.

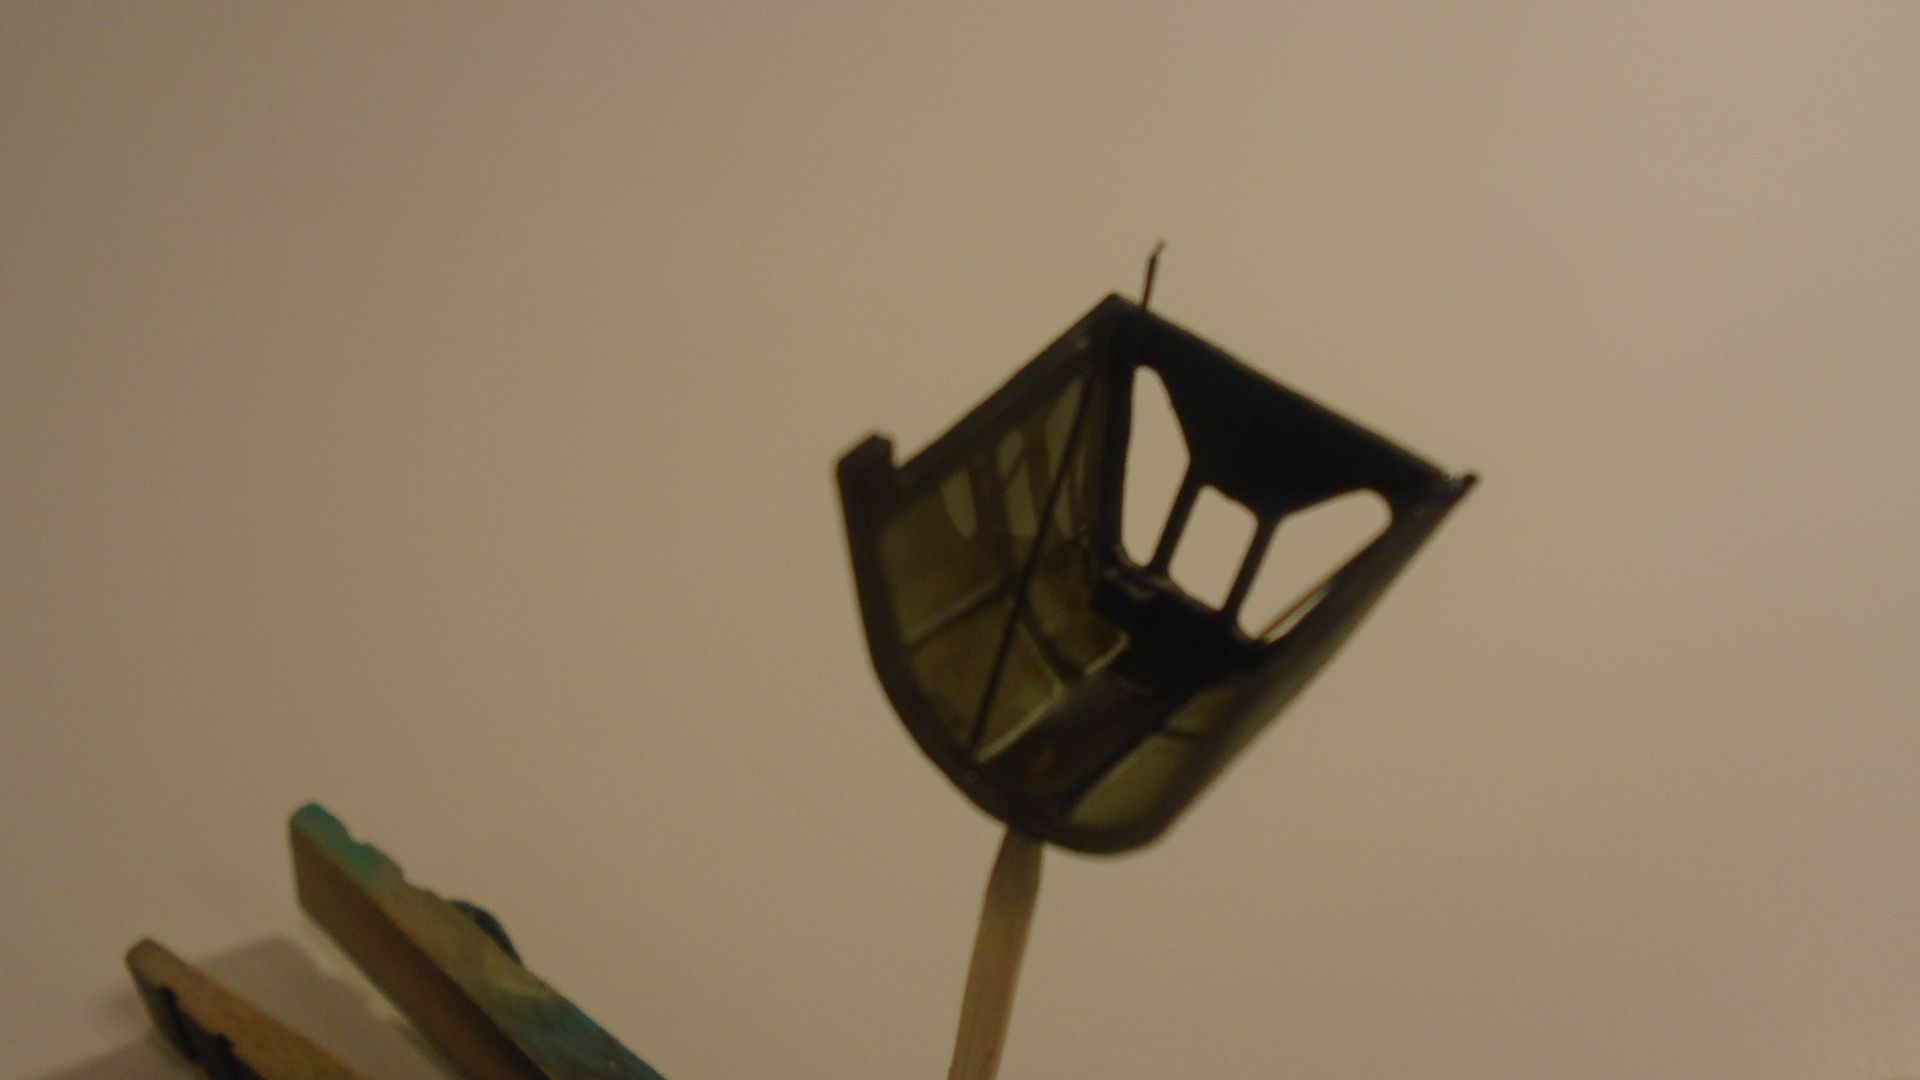
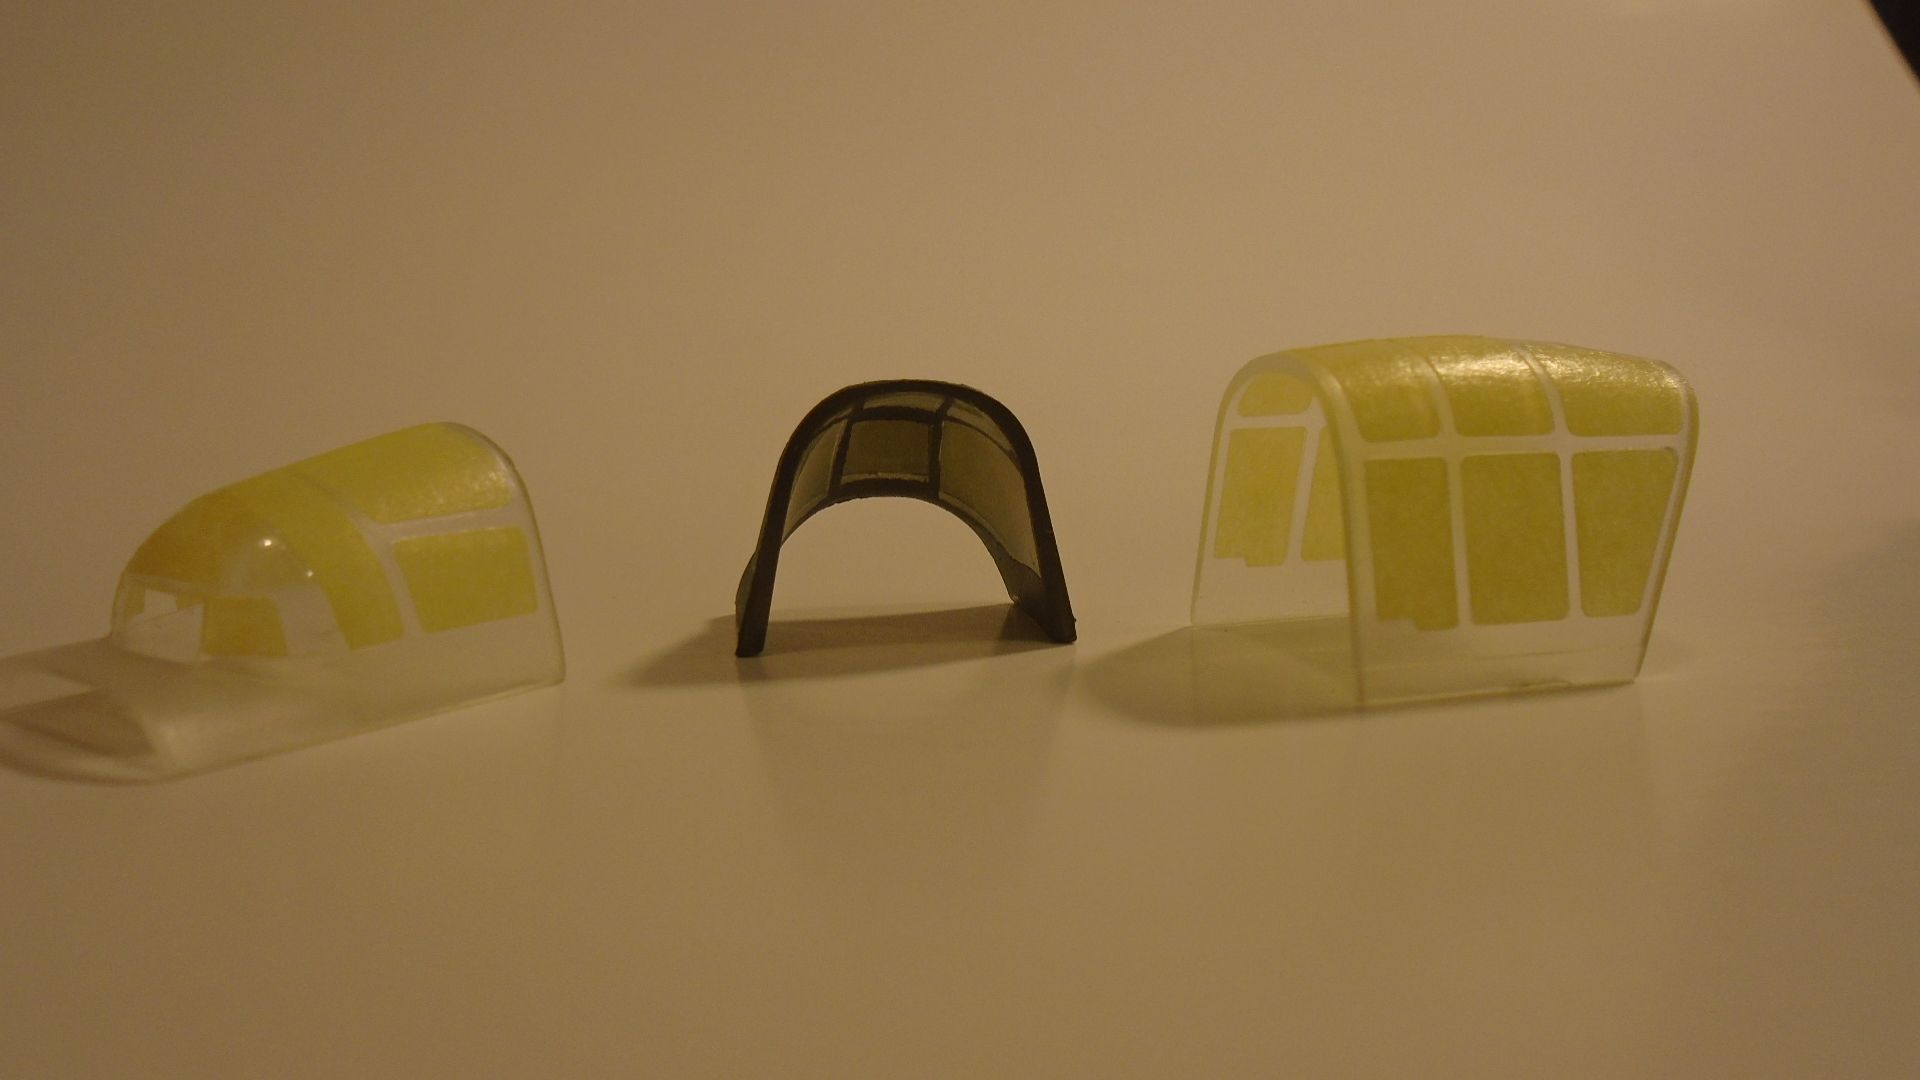
Canopy masking is done and I made some inside masks for this piece. Head armor glued in place and I added two small braces inside with micro tubing. 

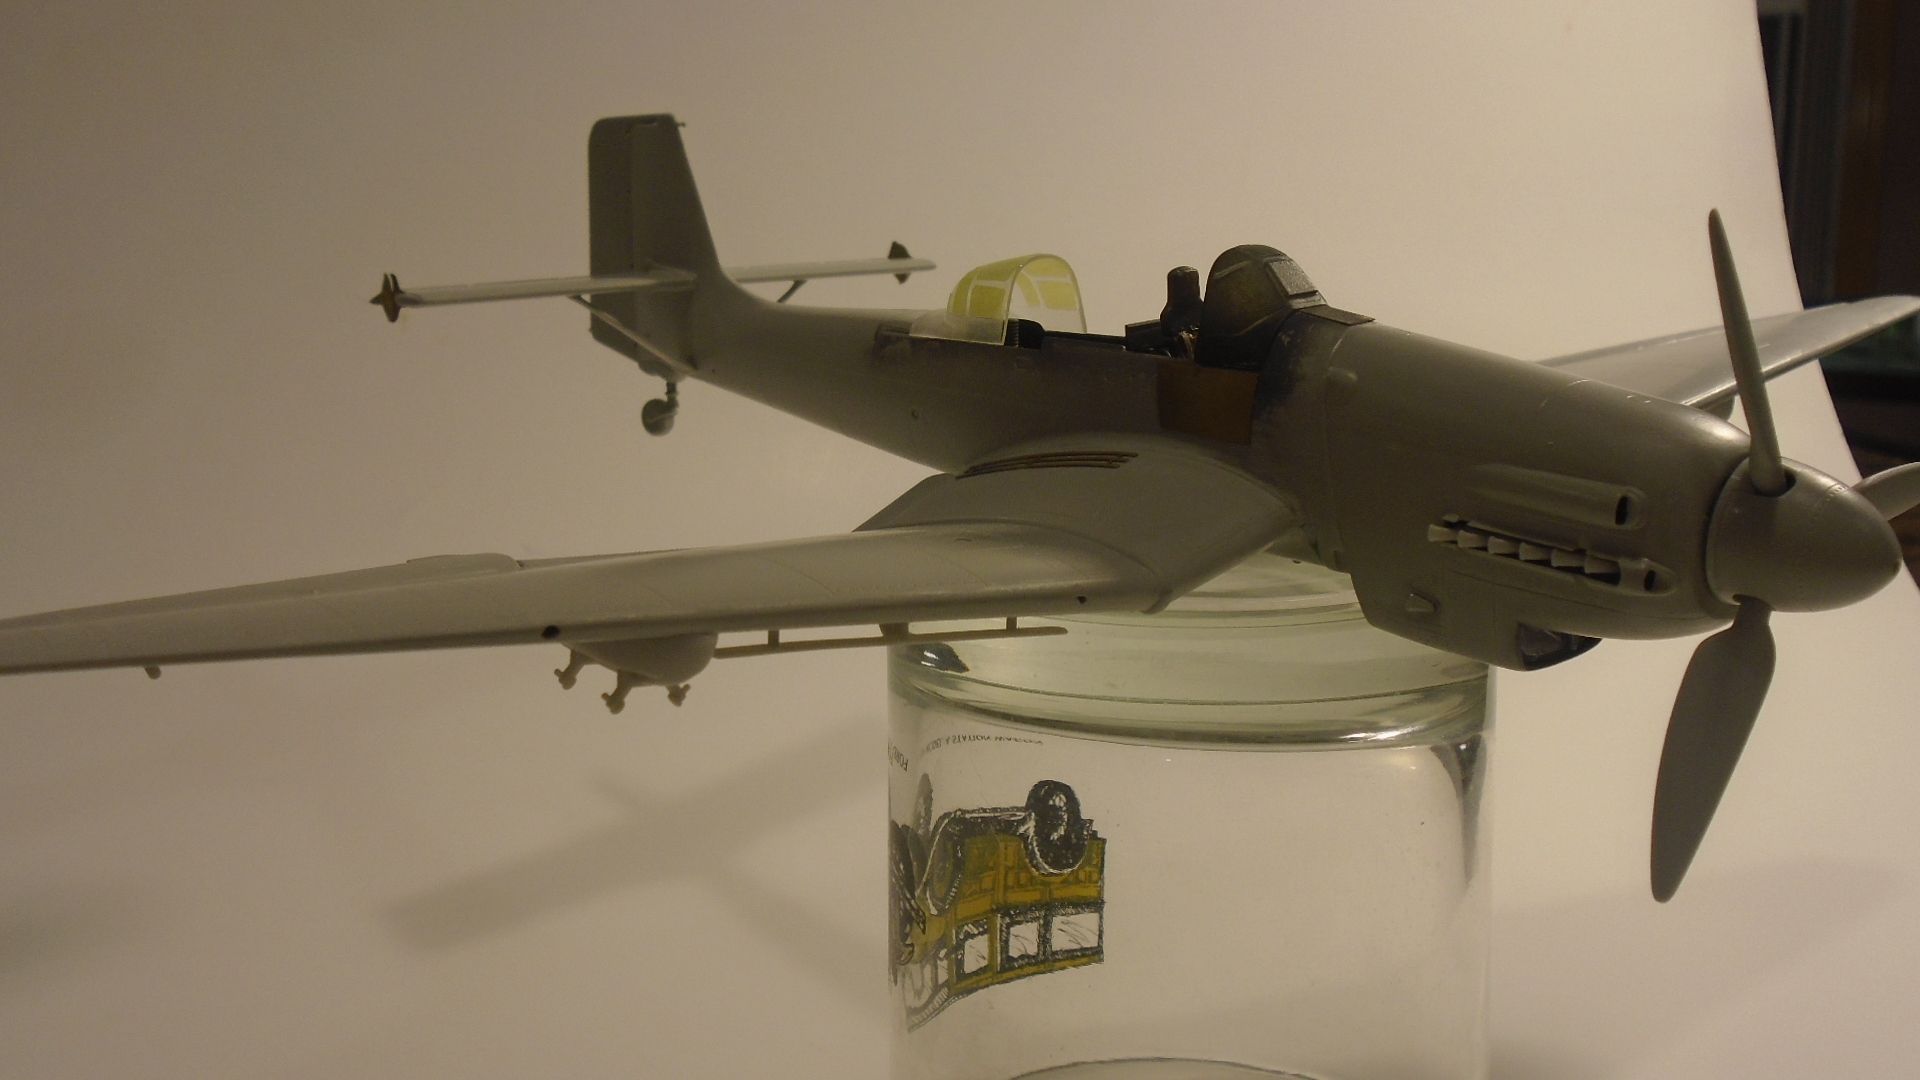
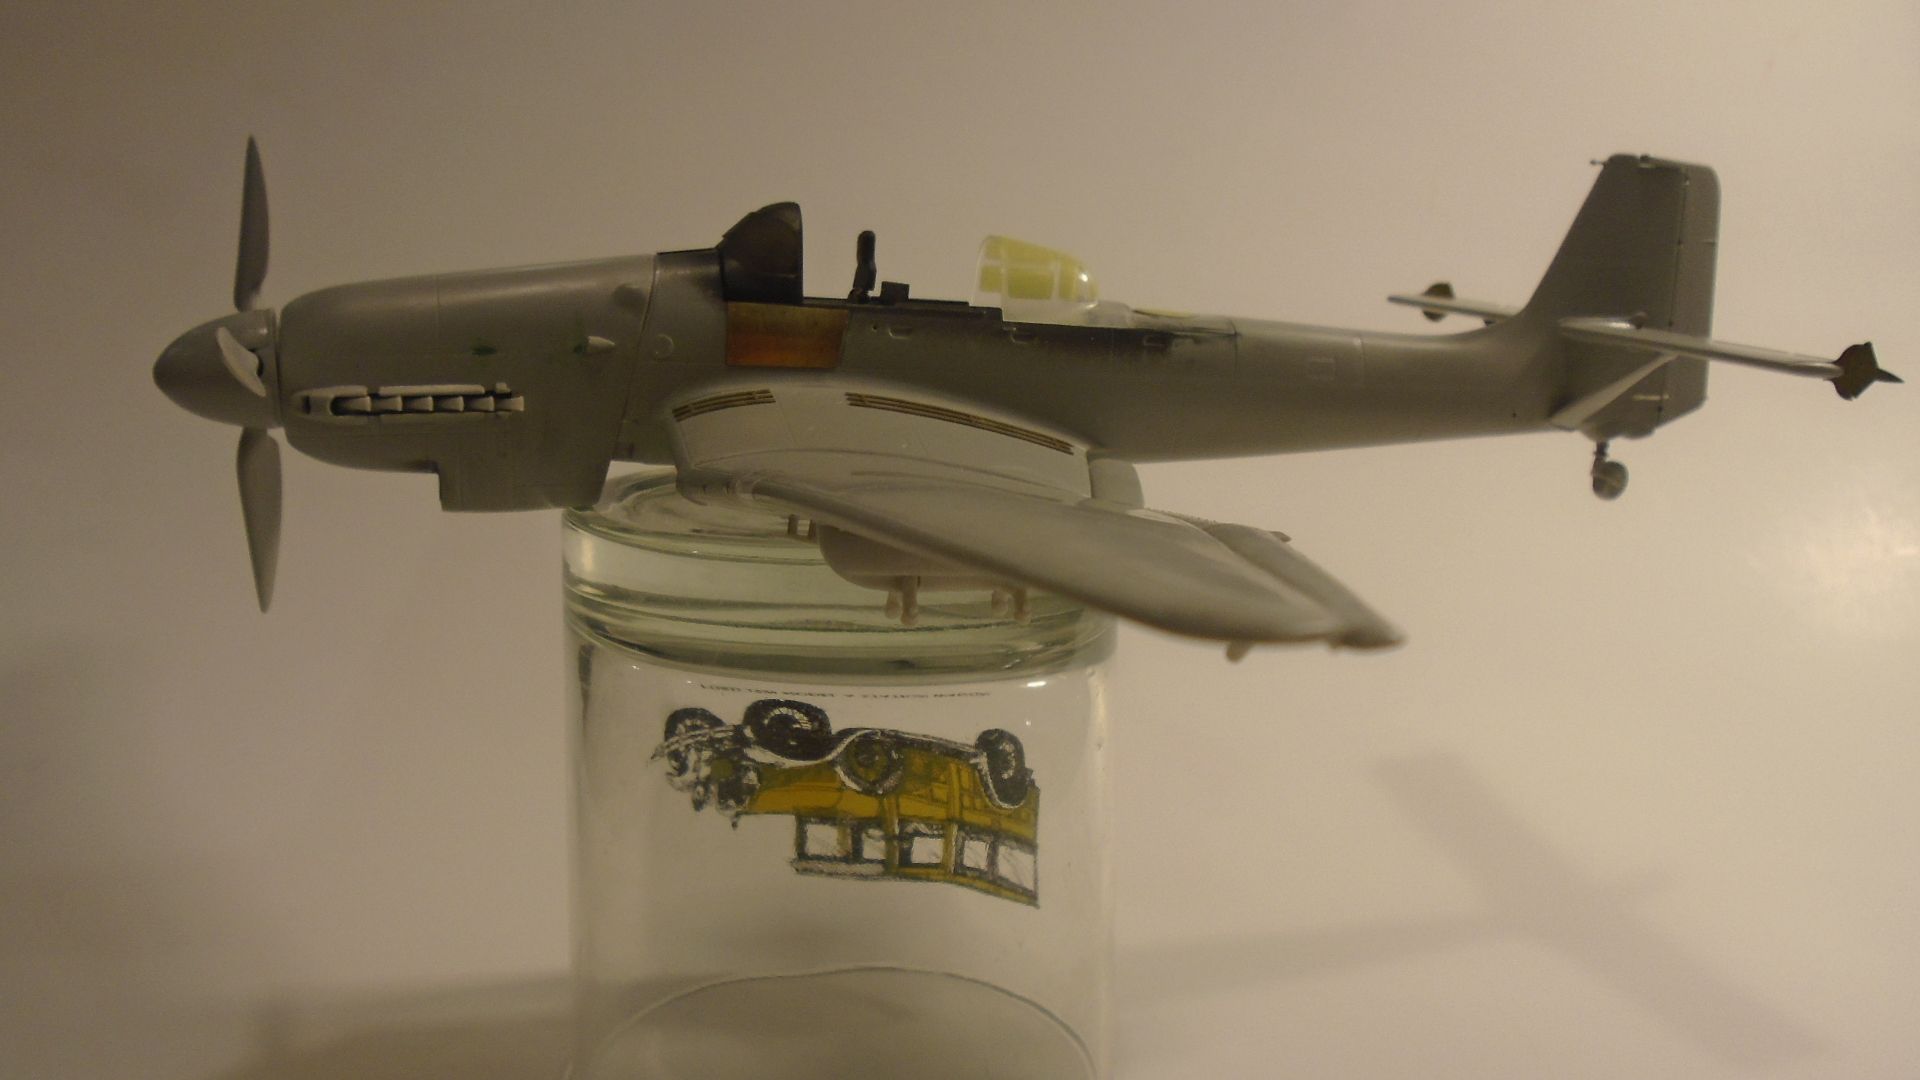
Almost ready for primer. Wheels are painted and glued inside the spats now. Feels good to get this far!


JOIN OUR COMMUNITY!

Our community is FREE to join. To participate you must either login or register for an account.

SEARCH FORUMS
FREE NEWSLETTER
By signing up you may also receive reader surveys and occasional special offers. We do not sell, rent or trade our email lists. View our Privacy Policy.