SEARCH FINESCALE.COM

Enter keywords or a search phrase below:

USMC GB : Now until Sept 2015

39543 views
499 replies
1 rating 2 rating 3 rating 4 rating 5 rating
  • Member since
    July 2014
Posted by modelcrazy on Friday, December 12, 2014 12:08 AM

I know what you mean, I'm finishing up 2 other GB's right now. I'll get back to the Phantom soon.

Steve

Steve

Building a kit from your stash is like cutting a head off a Hydra, two more take it's place.


http://www.spamodeler.com/forum/

  • Member since
    January 2014
  • From: Toronto
Posted by Rob S. on Friday, December 12, 2014 6:16 PM

Speaking of Phantoms: Back from vacation, back to work on the Phantom. Got the FS16440 down and the insignia white detail bits, and, the white underbelly. After she sets up overnight, I will clear coat:

______________________________________________________________________________


On the Bench: Nothing on the go ATM

  • Member since
    October 2004
  • From: Northern Virginia
Posted by ygmodeler4 on Friday, December 12, 2014 6:26 PM

Glad to see you back Rob! Hope the vacation went well, the Phantom is looking pretty sharp

-Josiah

  • Member since
    March 2010
  • From: MN
Posted by Nathan T on Friday, December 12, 2014 7:13 PM

Sweet looking Gull Gray machine Rob! Can't wait to see the decals.


  • Member since
    January 2014
  • From: Toronto
Posted by Rob S. on Saturday, December 13, 2014 3:12 PM

That 'bus' is looking great Jib!!

I got some bench time today, but, spent most of the day bringing back rivet details that I had previously sanded off. Also, I had an interesting time highlighting the panel lines. Because I had the primer, pre-shade, enamel Gull Grey and then two-coats of Future, I decided to re-scribe all the panel lines. Well, lo-and-behold, the re-scribing came out almost as though I did a pin-wash, SO, I decided to go with it. I will have to pin-wash the white underside, though. The biggest pain was pin-vice twisting hundreds of rivets. They were so shallow, no amount of pin-washing would have brought them out, so, again, the colour came out dark enough to allow them to stand out, if, however, they are a bit largish (I find the Hase rivet details are bit big in 1/72):

Decalling and oil pin-wash detailing starting tomorrow and then on to landing gear.

______________________________________________________________________________


On the Bench: Nothing on the go ATM

  • Member since
    January 2013
Posted by jibber on Saturday, December 13, 2014 7:19 PM

Rob, the panel lines look great and she's looking to be a fine aircraft. So I thought dealing with a couple dozen wheels was a pain but dealing with all those rivets gives me a rash.

  • Member since
    March 2010
  • From: MN
Posted by Nathan T on Saturday, December 13, 2014 7:56 PM

Awesome stuff Rob. Great job with the scriber over the painted model. I woulda slipped a hundred times and would have been repainting. I usually deepen some panel lines before I paint...(if I remember too). Only thing off I see is you forgot to remove the boiler plates on the stabs. No Navy jet had them. Did Hasegawa's instruction show them to be removed?


  • Member since
    January 2014
  • From: Toronto
Posted by Rob S. on Sunday, December 14, 2014 6:05 AM

Hey thanks Nathan...you know, now, after the fact, I believe I see what you are talking about. What are 'boiler plates' anyway? Yes, the Hase instructions did have the 'cut me off' symbol, but, I really didn't notice...my bad Sad

______________________________________________________________________________


On the Bench: Nothing on the go ATM

  • Member since
    March 2010
  • From: MN
Posted by Nathan T on Sunday, December 14, 2014 11:42 AM

Boiler plate is a slang term for that triangular shaped doubler on the top of the stabs. There were cracks developing in that area which I think is where a gear box is located...? The doubler was a temperary external fix until a later internal mod could be made. Only certain AF Jets had them.


  • Member since
    January 2014
  • From: Toronto
Posted by Rob S. on Monday, December 15, 2014 5:58 PM

Here's a quick update of just a 'few' of the hundreds (it seems) of decals. This is just the large decals...there are TONS of micro small ones to go. Also, I am in progress of sanding off the boiler plates as I missed that during assembly...oh well, thanks for the tip Nathan...I gotta pay closer attention Embarrassed. I considered saying to heck with it, but, it would bug me Angry:

______________________________________________________________________________


On the Bench: Nothing on the go ATM

  • Member since
    October 2008
  • From: Georgia
Posted by Rigidrider on Monday, December 15, 2014 6:25 PM

Rob... That Be Lookin Goood!!! Amazing detail...

Doug

When Life Hands You A Bucket Of Lemons...

Make Lemonade!

Then Sell It Back At $2 Bucks A Glass...

  • Member since
    January 2013
Posted by jibber on Monday, December 15, 2014 6:34 PM

Beautiful lines, thats a nice aircraft.

  • Member since
    June 2014
Posted by BrandonK on Tuesday, December 16, 2014 9:30 AM

It looks fantastic. I love the F-4.

On the bench:

A lot !! And I mean A LOT!!

2024 Kits on deck / in process / completed   

                         14 / 5 / 2  

                              Tongue Tied

  • Member since
    January 2014
  • From: Toronto
Posted by Rob S. on Wednesday, December 17, 2014 5:36 AM

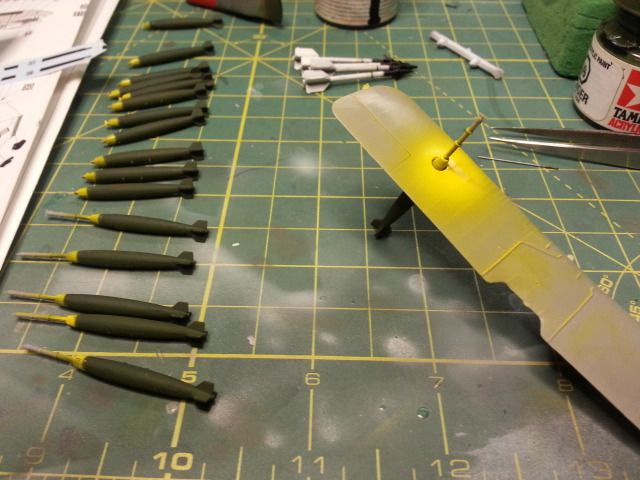
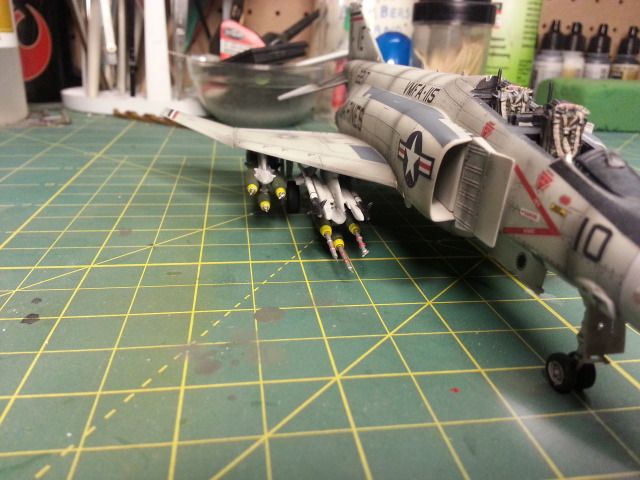
ALMOST done this build! Because it's xmas leave period (and I'm still at work for the week), and, there's literally nobody around, I got tons of bench time this week so far, thus, this F-4B is one step from done. Poured tons of time into the massive weapons load, weathering and the final matt coat (decanted Testors Dull Coat). For the bombs, each was painted Olive green, then I made a jig out of an old biplane wing with a hole drilled into it to mask each bomb's yellow nose ring. Anyway, it was great to have so much free time:

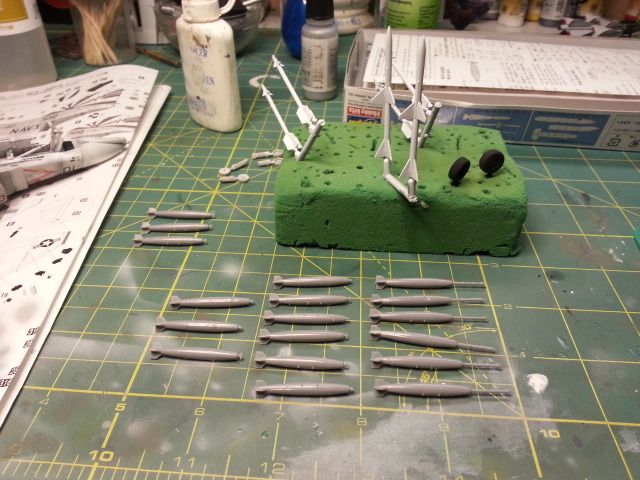
Each bomb (18 of 'em) got this treatment with the 'wing jig':

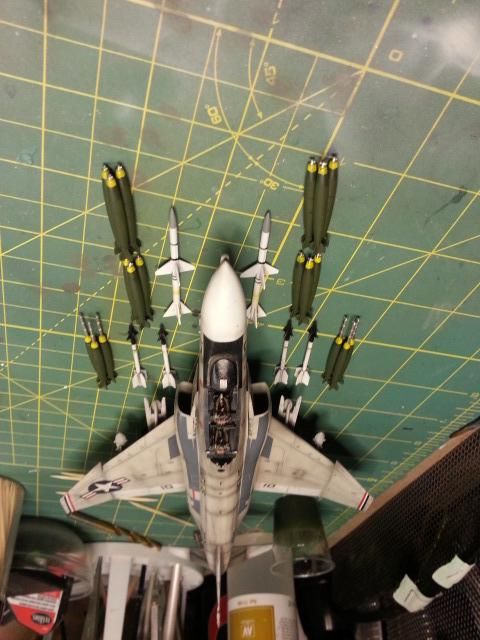
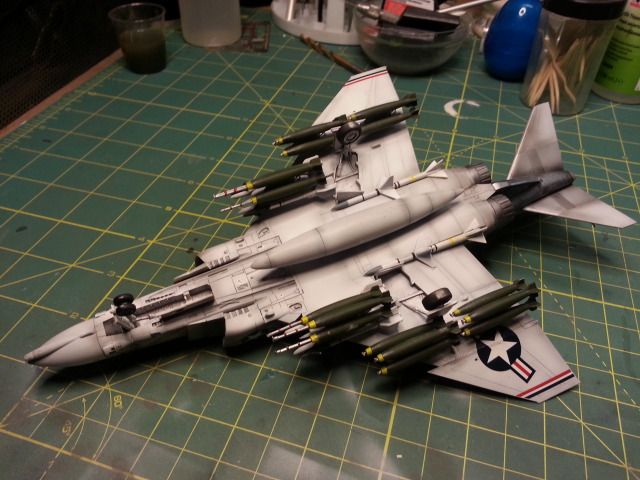
I couldn't resist doing this layout!!! (Note: NO canopy intalled yet, that's yet to come)

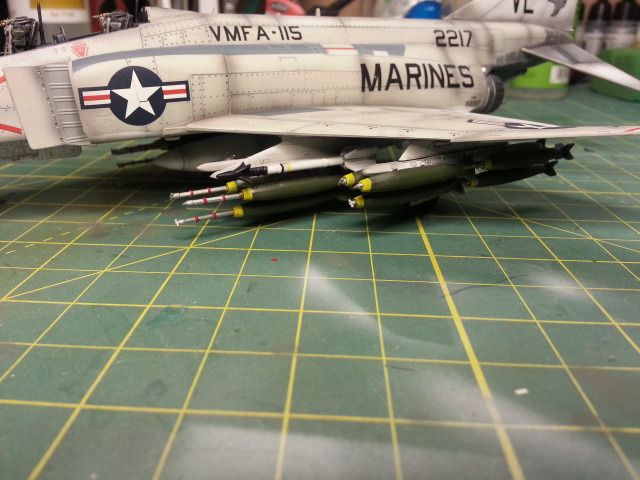
Bombs slung on left side:

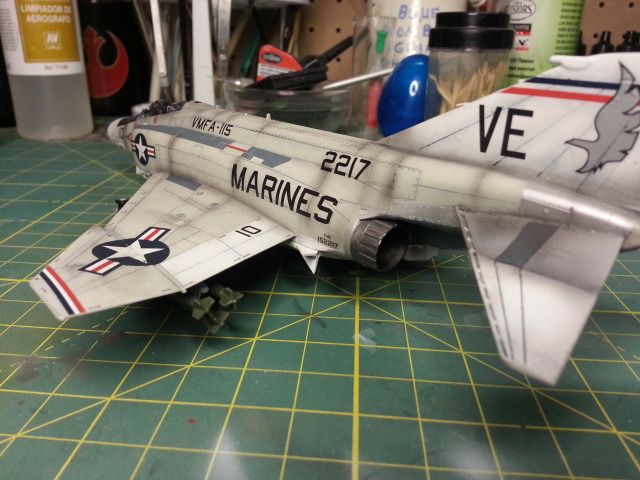
Boiler plates successfully sanded off:

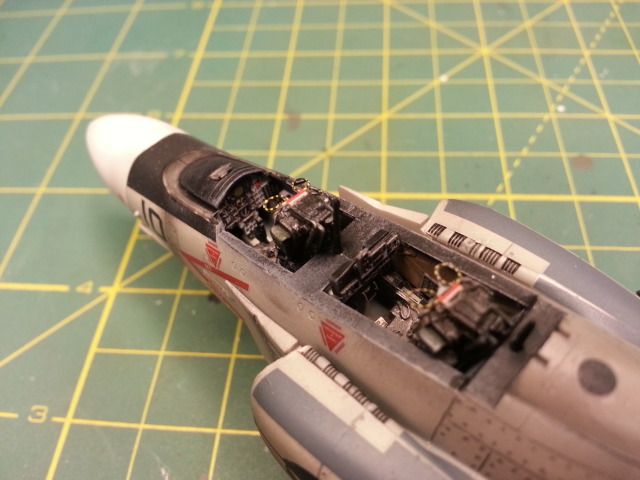
Here's what's to be done today: Canopies and windscreen to be finished and installed:

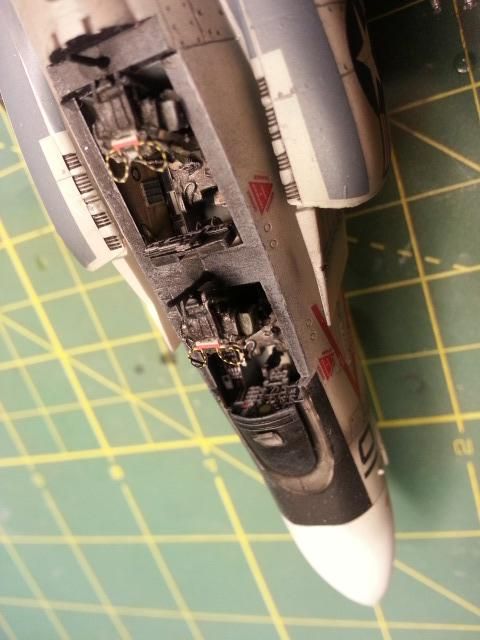
Cockpit close'er up..posted these pics now as it will be harder to see after canopy install:

Full weapons load:

Final pics, with neutral background will be up after I finish, thanks for lookin'!

______________________________________________________________________________


On the Bench: Nothing on the go ATM

  • Member since
    June 2014
Posted by BrandonK on Wednesday, December 17, 2014 9:15 AM

Rob,

The Phantom looks awesome !! Wow I wish you guys would stop building those up so nice, I want to add one to my builds but I must resist. Not enough time, must resist. AH CRAP, guess I'll start looking to add one or more to my stash. Thanks for the motivation. 

On the bench:

A lot !! And I mean A LOT!!

2024 Kits on deck / in process / completed   

                         14 / 5 / 2  

                              Tongue Tied

  • Member since
    January 2014
  • From: Toronto
Posted by Rob S. on Wednesday, December 17, 2014 3:07 PM

Come on Brandon...give in, join the 'Phantom' side, LOL...Anyway, got some time today to finish mine off:

______________________________________________________________________________


On the Bench: Nothing on the go ATM

  • Member since
    July 2014
Posted by modelcrazy on Wednesday, December 17, 2014 3:15 PM

Rob,

That is SWEET looking man! Fantastic job!

I really like the panel line shading.

Steve

Steve

Building a kit from your stash is like cutting a head off a Hydra, two more take it's place.


http://www.spamodeler.com/forum/

  • Member since
    March 2010
  • From: MN
Posted by Nathan T on Wednesday, December 17, 2014 3:16 PM

Rob, that is a phreaking phenomenal phantom! Great work on the decals, walkways, paint, weathering. Just everything looks right. Nice choice on the loadout too. You made all that 1/72nd scale details look right on!


  • Member since
    January 2014
  • From: Toronto
Posted by Rob S. on Wednesday, December 17, 2014 3:20 PM

Many thanks guys, my first ever Phantom. Dunno why? I've build hundreds of planes over the years and for some reason always looked over this one. It was a great kit, with the addition of a few AM parts. Highly recommend.

______________________________________________________________________________


On the Bench: Nothing on the go ATM

  • Member since
    October 2008
  • From: Georgia
Posted by Rigidrider on Wednesday, December 17, 2014 3:27 PM

Excellent build Rob! Very nicely done and as Nathan said Weathering... Everything, Just right! Bravo!!!

Doug

When Life Hands You A Bucket Of Lemons...

Make Lemonade!

Then Sell It Back At $2 Bucks A Glass...

  • Member since
    November 2008
  • From: Far Northern CA
Posted by mrmike on Wednesday, December 17, 2014 7:23 PM

Hard to believe that's a 72nd scale model, Rob. It reads larger in the photos - really excellent all the way around!

I'm still a TBD on the opening page, and will probably stay that way until after the first . In my wife's house there are only eleven months, January thru November, and then there's Christmas. Seriously, lot's of great work going on in here; looking forward to getting involved.

Happy Holidays to all!

Mike

  • Member since
    June 2014
Posted by BrandonK on Saturday, December 20, 2014 11:28 AM

Wow Jibber,

That thing looks awesome!! Fantastic work.

On the bench:

A lot !! And I mean A LOT!!

2024 Kits on deck / in process / completed   

                         14 / 5 / 2  

                              Tongue Tied

  • Member since
    January 2014
  • From: Toronto
Posted by Rob S. on Saturday, December 20, 2014 4:32 PM

Looks great Terry. Fantastic looking Bus, VERY Marines!! YesYes

______________________________________________________________________________


On the Bench: Nothing on the go ATM

  • Member since
    October 2008
  • From: Georgia
Posted by Rigidrider on Saturday, December 20, 2014 5:00 PM

Terry... Outstanding! Beautifully done. URRRAH!

When Life Hands You A Bucket Of Lemons...

Make Lemonade!

Then Sell It Back At $2 Bucks A Glass...

  • Member since
    January 2013
Posted by jibber on Saturday, December 20, 2014 6:49 PM

Thanks but I feel sick I couldn't fix those pieces of track and I tried everything. Stupid mistake...  

  • Member since
    January 2013
Posted by jibber on Saturday, December 20, 2014 6:52 PM

I feel bad because I dedicated this one to my cousin who's a retired Gunny, he's a great guy so i'm sure it'll be ok with him. Love the Marines…...  

  • Member since
    June 2009
  • From: Florida
Posted by STFD637 on Sunday, December 21, 2014 7:15 PM

Rob and Jibb great jobs!! That phantom is awesome! I especially liked the bomb paitning jig, might have to try that since taping is so tedious (especially in 1/72). That anphib looks like a beast and the anchor and globe is great!

I should have some pics up of my m-60 tomorrow. Finished to hull and wheels last week. I was also waiting for my Black Dog set to arrive for the stowage. Now I have all the pieces in place so the building can pick up a little.


"If a lie is told often, and long enough, it becomes reality!"

Travis/STFD637

make an avatar

  • Member since
    January 2014
  • From: Toronto
Posted by Rob S. on Sunday, December 21, 2014 8:10 PM

Thanks Travis..I couldn't tape off the bombs anyway due to the taper of each, so, that necessitated the quick jig.

______________________________________________________________________________


On the Bench: Nothing on the go ATM

JOIN OUR COMMUNITY!

Our community is FREE to join. To participate you must either login or register for an account.

SEARCH FORUMS
FREE NEWSLETTER
By signing up you may also receive reader surveys and occasional special offers. We do not sell, rent or trade our email lists. View our Privacy Policy.