SEARCH FINESCALE.COM

Enter keywords or a search phrase below:

75th Anniversary of 1944 Group Build (World at War)

37956 views
700 replies
1 rating 2 rating 3 rating 4 rating 5 rating
  • Member since
    May 2004
  • From: Land of Lakes
Posted by cbaltrin on Thursday, October 3, 2019 5:03 AM

checkmateking02

cbaltrin:  you're more than welcome.  Sometimes shelf-of-doom type builds are more work than starting with a new kit.  

What are you planning?


Honestly, no idea at this point, just know I have a lot of kits already started.. So want to know what my options are 

On the Bench: Too Much

  • Member since
    September 2003
  • From: AandF in the Badger State
Posted by checkmateking02 on Wednesday, October 2, 2019 9:22 PM

cbaltrin:  you're more than welcome.  Sometimes shelf-of-doom type builds are more work than starting with a new kit.  

What are you planning?


  • Member since
    September 2003
  • From: AandF in the Badger State
Posted by checkmateking02 on Wednesday, October 2, 2019 9:21 PM

Nice one, Bish.  Finish photos should be spectacular.  The upper surface greens are different enough to show the distinct colors.

Too bad we can't get Xtracolour this side of the ocean.


  • Member since
    May 2004
  • From: Land of Lakes
Posted by cbaltrin on Tuesday, October 1, 2019 9:48 AM

Thinking of entering this GB... Do shelf of doom kits qualify or only new builds?Hmm

On the Bench: Too Much

  • Member since
    May 2004
  • From: Land of Lakes
Posted by cbaltrin on Tuesday, October 1, 2019 9:44 AM

Great looking Condor Bish!

On the Bench: Too Much

  • Member since
    December 2002
  • From: Bury St Edmunds, Suffolk, England
Posted by Bish on Tuesday, October 1, 2019 8:47 AM

Thanks Nick. I always find the Xtracolor paints a good match.

I am a Norfolk man and i glory in being so


On the bench: Airfix 1/72nd Harrier GR.3/Fujimi 1/72nd Ju 87D-3

  • Member since
    August 2015
  • From: the redlands Fl
Posted by crown r n7 on Tuesday, October 1, 2019 6:37 AM

Nice camouflage 72/73 is a tricky one to match . 


 Nick.

  • Member since
    December 2002
  • From: Bury St Edmunds, Suffolk, England
Posted by Bish on Tuesday, October 1, 2019 5:31 AM

I seem to have missed an update. I had the pre paint pics taken and loaded onto Flickr 10 days ago but seem to have forgotten to post them. So a double update this time.

Got the underside gondola masked up and fitted.

And the same for the pit canopy and upper turret.

After some primer, the paint. RLM 65 underneath and 72/73 on top. This ofcourse included the best bit of painting German aircraft, masking for the splinter camo.

And then the decals. I do like Xtradecals, they lay down nice and i have never had any issues with them.

Just somelight weathering to add, going to give it a wash with flry and some exhaust staining.

I am a Norfolk man and i glory in being so


On the bench: Airfix 1/72nd Harrier GR.3/Fujimi 1/72nd Ju 87D-3

  • Member since
    September 2003
  • From: AandF in the Badger State
Posted by checkmateking02 on Monday, September 30, 2019 10:44 PM

That looks very good--very close to what is visible in the reference photo.  Nice work!


  • Member since
    February 2010
  • From: Berkeley CA/St. Paul MN
Posted by EBergerud on Monday, September 30, 2019 2:48 PM


More progress on the Ki-61 and more experimenting with weathering NMF. I do regret not trying some kind of prep on top of the primer - some kind of variation on black basing. But, I also wanted to see how the Vallejo Metal Color paints worked under "normal" conditions. The original coat went down fine. As noted last time I painted some panels different shades of NMF and decaled it.


 decaled by Eric Bergerud, on Flickr


Too much contrast between the panels and the main fuselage and too much uniformity all around. I got out the paint mule and tried something suggested in a Vallejo YouTube "how to" - I added some Model Air to the Metal Colors and very thinly misted new streaks and blotches. One mix had a little black in it, another a little blue and the last a little olive drab.. Both the black and blue gave some interesting different modulations of the main aluminum - I also sprayed on more MC to lessen the difference of the panels. The olive drab hue did a pretty good job evoking some exhaust. I don't know how much of this will be visible after the upcoming oils and Com.Art washes, but I'm going out of my way to experiment. When you spray misting coats over a solid NMF it will dull the effect - but I think the exchange is well worth it because I don't want something uniform and shinny. Indeed, we've got a lot left to do to give this bird the worn look I've seen on every pic of a wartime NMF Ki-61.


Eric


 irregular2 by Eric Bergerud, on Flickr


 irregular1 by Eric Bergerud, on Flickr


 ki-61met by Eric Bergerud, on Flickr


A model boat is much cheaper than a real one and won't sink with you in it.

  • Member since
    September 2003
  • From: AandF in the Badger State
Posted by checkmateking02 on Wednesday, September 25, 2019 2:41 PM

Good to know.  I've had a Tamiya Spitfire hanging around for years.  One of these days I'll get around to trying it.


  • Member since
    March 2017
Posted by Armor_Aficionado on Wednesday, September 25, 2019 12:52 PM

Thanks, it is kind of a complicated structure, but being as it is Tamiya, it went together like a charm!  Tamiya makes modelling such a pleasurable experience, with parts engineered to fit perfectly, first time, every time!

  • Member since
    September 2003
  • From: AandF in the Badger State
Posted by checkmateking02 on Tuesday, September 24, 2019 5:49 PM

Very good, AA.  The underside looks like a kind of complicated structure!


  • Member since
    March 2017
Posted by Armor_Aficionado on Monday, September 23, 2019 3:00 PM

Getting started with initial construction stages on the Greyhound:


  • Member since
    September 2003
  • From: AandF in the Badger State
Posted by checkmateking02 on Sunday, September 22, 2019 11:00 AM

Still very appealing results, Eric, despite the challenges.  It is tough to get the right variations in NMF, but your weathering should bring things all together.


  • Member since
    February 2010
  • From: Berkeley CA/St. Paul MN
Posted by EBergerud on Sunday, September 22, 2019 1:32 AM


It's time for a big think on the Ki-61. As reported the kit is brilliant. In general, the Vallejo Metal Colors are excellent - and I will be doing more NMF planes in future. That said, everything is very unforgiving and the inevitable errors do leave tracks that are very tough to hide. Many "fix" techniques like overspraying spots or drybrushing do show. Below is the bird painted and decaled. I put salt under the black/blue anti-glare panel (and the prop & hub - not shown) to get a nice chipping effect. I used a toothpick dipped into metallic paint to put some chips on the orange leading edge - looks good to me. (The anti-glare and leading edge panels were done in Golden High Flow just to remind me why they're my favorite paint.) I wanted to see how to do NMF so there will be no mottle on this kit. I also chose to use a very simple decal scheme - and managed to hide a booboo on the side. Might add that I like Tamiya decals - thick they are, but they're also hard to wreck. I was going to use Aeromaster (the tail thunderbolt is AM) - but the hinomarus were too thin and showed the darker metallic color from underneath which didn't work at all. The thick Tamiya markings covered fine - the only downside was that I didn't want a white circle around the side hinomaru. Oh well. The result is below:


 decaled by Eric Bergerud, on Flickr


As you can see, I did paint a few panels a mix of duraluminium and/or aluminium and magnesium. (The fabric control surfaces were done in "dull" alumininum - which I'd guess is the standard color mixed with matte gray: I think that's the right fit.) I also applied the Vallejo Metal Varnish which is extremely unobtrusive and I think will be helpful. The problem is that I have to get from what I have, pictured above, to something that looks like a real Ki-61 pictured below:


 tonyprofileview by Eric Bergerud, on Flickr


I'm already regretting the painting the odd panels different shades - they should have been much less different in color. Actually, I'm not really sure why I painted those panels at all - they're much too regular and I've been doing "black basing" lately and it's design to prevent symetry. So how to proceed. The plane is too tiddy by half and looks like a metal checkerboard. This is going to require some serious weathering - but of what type? I do have a paint mule all metallic now and will use it for trials. I'm sure I'll be relying on my Iwata Com.Art acrylics - they're terrific for grime. But that won't be enough. I think it's time for some serious oils. This is a challenge and I can still pretty much wreck things. However, I don't see how I'll be able to blame anything on Tamiya. I'm still working on the canopy but the clear parts look terrific and seem to fit nicely. Never made a perfect model and this won't be the first. But with luck this could be a keeper. Wish me luck.


Eric


A model boat is much cheaper than a real one and won't sink with you in it.

  • Member since
    September 2003
  • From: AandF in the Badger State
Posted by checkmateking02 on Tuesday, September 17, 2019 10:54 PM

It's still progress, Bish.  Looks good!


  • Member since
    December 2002
  • From: Bury St Edmunds, Suffolk, England
Posted by Bish on Tuesday, September 17, 2019 2:05 AM

Thanks check. ye it is, though i could have planned it better, had to get the RLM 02 and spray brush out several times. But its getting close to the paint stage now.

I am a Norfolk man and i glory in being so


On the bench: Airfix 1/72nd Harrier GR.3/Fujimi 1/72nd Ju 87D-3

  • Member since
    September 2003
  • From: AandF in the Badger State
Posted by checkmateking02 on Monday, September 16, 2019 4:51 PM

I've added your Mustang to the build roster, 68GT.  It fits right in.  Very colorful aircraft.


  • Member since
    September 2003
  • From: AandF in the Badger State
Posted by checkmateking02 on Monday, September 16, 2019 4:46 PM

Quite a kit, Bish.  It's a lot more involved and complicated than the old '60's era kit of the Condor.  It's a good looking interior.  Looks like it's moving along really well.


  • Member since
    September 2003
  • From: AandF in the Badger State
Posted by checkmateking02 on Monday, September 16, 2019 4:43 PM

Nice going, Eric.  That NMF does look more varied than a lot I've seen.  It'll make for an eye catching presentation.


  • Member since
    September 2003
  • From: AandF in the Badger State
Posted by checkmateking02 on Monday, September 16, 2019 4:41 PM

Looking good, Scott.  I haven't built a full hull version of anything yet.  It's good to see how it's done.


  • Member since
    September 2003
  • From: AandF in the Badger State
Posted by checkmateking02 on Monday, September 16, 2019 4:39 PM

Nice looking vehicle, AA.  I'll fix up the front page build roster.  It'll be an interesting build to watch developing.


  • Member since
    March 2017
Posted by Armor_Aficionado on Monday, September 16, 2019 4:37 PM

First WIP pic of the Greyhound, assembling the undercarriage:


  • Member since
    February 2010
  • From: Berkeley CA/St. Paul MN
Posted by EBergerud on Sunday, September 15, 2019 7:46 PM
Looking good Bish. I think the Condor is on my "to do" list - but I'm not sure how long that should be. (It sure includes the spanking new Tamiya 1/48 P-38G - the best possible addition to the aircraft model market. Be in the US for Xmas.) It was an important plane (being used against the Finns? Did the LW attack the Finns after their pact with Stalin in late 44?) in the Battle of the Atlantic. Some wise heads have speculated that the Germans should have figured out that the Battle of Britain was not going work (that uses a lot of hindsight - nobody knew how hard it was to knock out air bases - I wrote about the subject at great length concerning our campaign against Rabaul - one base, not a country.). Anyway, in the summer of 1940 they could have used their bombers against English shipping - Condors alone did serious damage before 1942. Might have been right.


A model boat is much cheaper than a real one and won't sink with you in it.

  • Member since
    February 2010
  • From: New Jersey
Posted by 68GT on Sunday, September 15, 2019 12:41 PM

I have a Revell P-51D (1/48) that should fit in.  Flew with the 356FG from 1944-45.  Its the one with the blue spinner and tail.  I'll start this up when my Airfix Eagle is done.

On Ed's bench, ???


  • Member since
    December 2002
  • From: Bury St Edmunds, Suffolk, England
Posted by Bish on Sunday, September 15, 2019 8:36 AM

Time to get going on my second entry, the Revell 1/72nd Fw 200C-8.

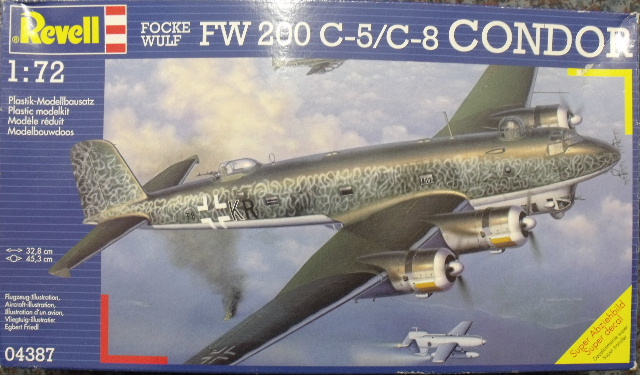
I'll be adding an Eduard Big Ed Pe set for this. And i will be useing Xtradecal Am decals. I got the decal set for the Trump C-3 kit but it included a C-8 which, like the one in the kit thats featured on the box art was used against the Finn's in 1944. But unlike the one in the kit the AM set does not have the wave pattern scheme which i am not ready to do just yet, so i took the easy route.

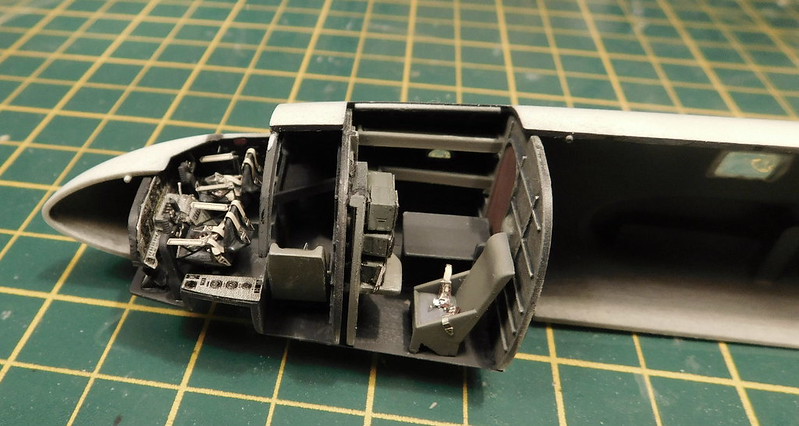
The kit has quite a nice interiour for the front and rear areas and the eduard set adds quite a bit of extra detail.

The radio compartment won't be seen at all once doen but i put it all in anyway.

I got the fuselage closed up and that went well. Then in my haste i got the wings on before taking pics. The fit is very good and there was not much to clean up on the fuselage seams.

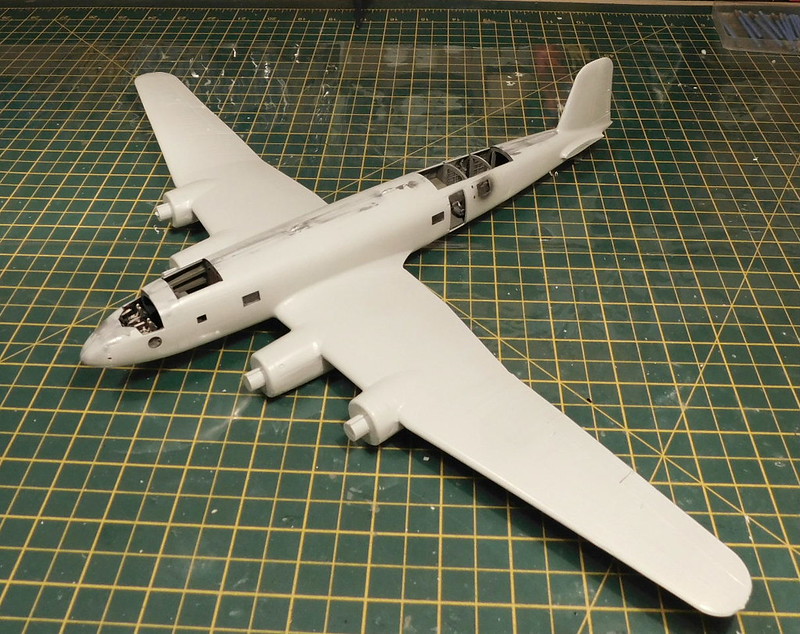
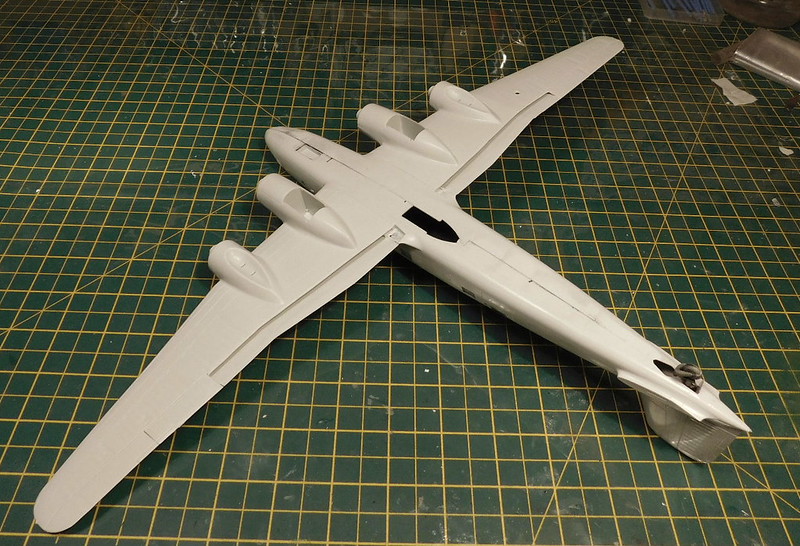
The forward gun position was then fitted along with the horizontal tail surfaces.

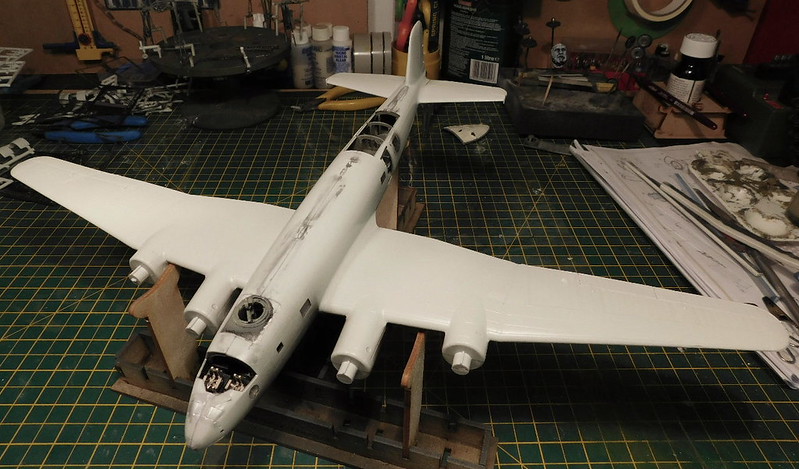
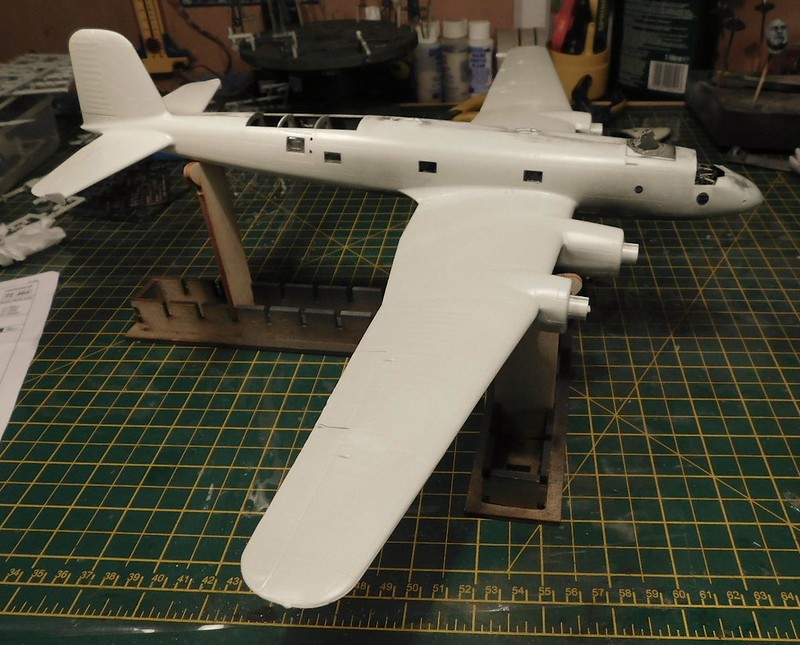
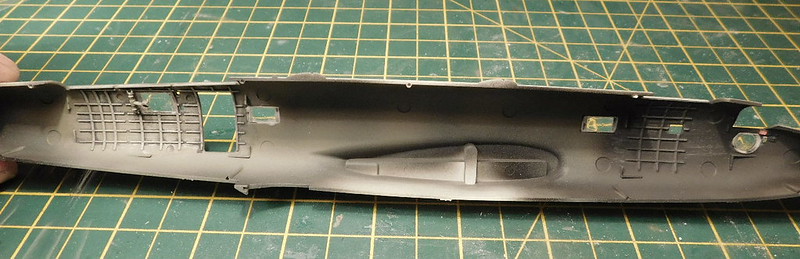
And i primes and painted the underside where the gondala will go along with the wheel wells. The Eduard set includes PE flaps. I have been at these for about 2 nights, its a lot of work but worth it. The upper sets are fitted, i stil have a bit to do on the lower flaps and will leave those off for painting.

Thats it for now. Going to get the flaps wrapped up then i can finish off the final bits before masking and painting.

I am a Norfolk man and i glory in being so


On the bench: Airfix 1/72nd Harrier GR.3/Fujimi 1/72nd Ju 87D-3

  • Member since
    February 2010
  • From: Berkeley CA/St. Paul MN
Posted by EBergerud on Tuesday, September 10, 2019 2:20 AM

Got the base coat down of Vallejo Metal Color Aluminum. There are some errors - but I always make some. For a first try, I'd give it good marks. It lays down very nicely - no thinning, used my main club the Iwata Eclipse HPC (.3mm) at about 12psi. Seems to level well. A lot more to do.

Eric

 painted by Eric Bergerud, on Flickr


A model boat is much cheaper than a real one and won't sink with you in it.

  • Member since
    February 2010
  • From: Berkeley CA/St. Paul MN
Posted by EBergerud on Monday, September 9, 2019 3:29 AM

AA: the M8 is a very nice build. I did a winter version and bought (rare for me) resin wheels with chains on them from Verlindin.


Ki-61 is mostly assembled and primed. I've used the Vallejo Metal Colors on a paint mule and I am "hopefully optimistic" (how's that for a 1980's non sequitur?). This has been an education. Tamiya makes better kits than anyone else - period. (Heard about their new tool 1/48 P-38F/G? I know what my Xmas present will be.) I decided to use gloss black stynelrez. I had good luck with it when I primed my SU-76. But I had not heard their recommendations of 20-30 psi with a .5 needle. Well, had I looked at my Paul Budzik (one of the two or three best YT modelers I think) video on nozzles, I would have remembered that .5 can mean a lot bigger or smaller depending upon the complexity of the needle. The Harder Steenbeck .5 I used is complex - a very shallow slope - which means a whopping big hole. Had this been a Paasche Talon, .5 would have been right. Stynelrez is "self-leveling" which means it should clean up when laid on thick, which you'll do with a .5 at 25psi. It didn't altogether - there were some streaks that I may or may not fix. Stylnelrez did follow the scratches on the surface too well - I had the whole fuselage very smooth but there were some very light scratches on the side - and the primer pooled on top of them. OK - time for surgery. I sanded the primer off and worked more on the scratches. Then I found out that despite claims of glory from other quarters, Stylnelrez does not sand off like a lacquer - it peels around the edges. (I've heard that a coat of future will allow Vallejo primer - famous for peeling - sand solid. That wasn't what I wanted here with NMF coming.) So, after trying to reapply the primer with a slower build up (think .20mm Harder Steenbeck at 20psi) it still didn't look right. So off it came and on went my Duplicolor Hot Rod Black Lacquer Primer. Duplicolor - being a no joke lacquer, grasps plastic like glue (but it does not damage it at all - zero). But Duplicolor is both "fillable" and "sandable" - which means small scratches disappear and you can sand the primer very nicely to give it a very smooth sating finish. I'm guessing that the Vallejo Metal Colors are opaque enough that it won't matter a bit. Anyway, stylnelrez is now for armor only - aircraft will get Duplicolor - it's great for black basing and I'm guessing it will work perfectly well for an opaque NMF. We'll see.


I've also researched some pics of the NMF Ki-61s. It looks to me that the NMF finish is more irregular than I've seen on US planes. Below are a wartime photo and one contemporary museum pic which is no doubt pitted, but still shows sign of an irregular finish. Many other photos show the same I think. (Yell if you think I'm wrong.)


Eric


 primed by Eric Bergerud, on Flickr


 MetFlight by Eric Bergerud, on Flickr


 metal2016 by Eric Bergerud, on Flickr


A model boat is much cheaper than a real one and won't sink with you in it.

  • Member since
    December 2003
  • From: 37deg 40.13' N 95deg 29.10'W
Posted by scottrc on Sunday, September 8, 2019 9:25 AM

I decided to make this a full hull and am now mating the lower hull to the assembly.

JOIN OUR COMMUNITY!

Our community is FREE to join. To participate you must either login or register for an account.

SEARCH FORUMS
FREE NEWSLETTER
By signing up you may also receive reader surveys and occasional special offers. We do not sell, rent or trade our email lists. View our Privacy Policy.