SEARCH FINESCALE.COM

Enter keywords or a search phrase below:

80 Years of Airfix GB

108328 views
1664 replies
1 rating 2 rating 3 rating 4 rating 5 rating
  • Member since
    September 2017
  • From: western North Carolina
Posted by kensar on Friday, January 11, 2019 9:48 AM

Kensar


  • Member since
    June 2017
  • From: Winter Park, FL
Posted by fotofrank on Friday, January 11, 2019 6:12 AM

Bish, when you watch the video be sure to buckle up and hang on tight.

It will be quite a ride!

OK. In the stash: Way too much to build in one lifetime...

  • Member since
    December 2002
  • From: Bury St Edmunds, Suffolk, England
Posted by Bish on Friday, January 11, 2019 5:42 AM

I'll check that video out this weekend Frank, thanks for posting it.

I am a Norfolk man and i glory in being so


On the bench: Airfix 1/72nd Harrier GR.3/Fujimi 1/72nd Ju 87D-3

  • Member since
    December 2002
  • From: Bury St Edmunds, Suffolk, England
Posted by Bish on Friday, January 11, 2019 5:41 AM

Coming on nicely there check.

I am a Norfolk man and i glory in being so


On the bench: Airfix 1/72nd Harrier GR.3/Fujimi 1/72nd Ju 87D-3

  • Member since
    December 2002
  • From: Bury St Edmunds, Suffolk, England
Posted by Bish on Friday, January 11, 2019 5:36 AM

Svenne, you can add as many as you like. I like your thinking.

I am a Norfolk man and i glory in being so


On the bench: Airfix 1/72nd Harrier GR.3/Fujimi 1/72nd Ju 87D-3

  • Member since
    December 2005
  • From: Goteborg / Sverige
Posted by Svenne Duva on Friday, January 11, 2019 4:19 AM

Hi,

You guys are up to a good start already!

Bish, thanks for hosting this. I wonder if I could add a second kit?

I have the Airfix 1/72 A02041 Hawker Typhoone in front of me now.
Going to use this as a "scout" before I move on. 

Here is my new pilot:

Slightly intimidated by the 1/24 version, need to work through that with some extensive research of the subject as such... Propeller 

@ Frank, thank you for the clip, the bigger build now goes under working name "Marie" Stick out tongue

Svenne

sic transit gloria mundi

  • Member since
    September 2003
  • From: AandF in the Badger State
Posted by checkmateking02 on Thursday, January 10, 2019 9:02 PM

Nice looking P-40's, both of them.

Interesting information, Frank.  I'd never heard of a WB-29.  Unusual subject.

Spitfire progress:

Fuselage and wings brought together.  I've used poster tack to mask the wheel wells for painting.

And the whole project overseen by Captain Archer, the cat.


  • Member since
    May 2017
  • From: Denver, Colorado
Posted by MrStecks on Thursday, January 10, 2019 11:10 AM

fotofrank
Thanks for sharing that link, very cool video.  Looking forward to seeing your WB-29 project come together.

kensar
Nice work with those gear fairings.  Lookin' good.

TWA
Great camo work on your P-40.


Cheers,
Mark


On the bench:  Revel 1/48 B-25J Mitchell

In the queue: Tamiya 1/48 F4U-1A Corsair

  • Member since
    June 2017
  • From: Winter Park, FL
Posted by fotofrank on Thursday, January 10, 2019 9:51 AM

Found this on YouTube. An old TV show called FLIGHT. Never heard of it. Typhoon Chasers. The episode aired in 1958. The WB-29 normally carried two navigators and two radio operators, hence the two ADF loops, You can clearly see the "bug catcher" on the back of the airplane and the radome on the underside. This is a pretty tense episode so fasten your lap belt and shoulder harness. It's going to be a bumpy ride!

https://youtu.be/0oBrqlAz85c


OK. In the stash: Way too much to build in one lifetime...

  • Member since
    April 2015
Posted by Mopar Madness on Wednesday, January 9, 2019 5:45 PM

What a neat idea for a B-29.

Chad

God, Family, Models...

At the plate: 1/48 Airfix Bf109 & 1/35 Tamiya Famo

On deck: Who knows!

  • Member since
    December 2002
  • From: Bury St Edmunds, Suffolk, England
Posted by Bish on Wednesday, January 9, 2019 1:46 PM

Thanks Frank, i will get that added now before i forget, again. Embarrassed

I am a Norfolk man and i glory in being so


On the bench: Airfix 1/72nd Harrier GR.3/Fujimi 1/72nd Ju 87D-3

  • Member since
    June 2017
  • From: Winter Park, FL
Posted by fotofrank on Wednesday, January 9, 2019 11:50 AM

The plan is to build a WB-29 weather recon ship sometimes deployed as hurricane hunters, with the "bug catcher" device in the upper rear turret location and a radome on the underside between the bomb bays.

OK. In the stash: Way too much to build in one lifetime...

  • Member since
    June 2017
  • From: Winter Park, FL
Posted by fotofrank on Wednesday, January 9, 2019 11:10 AM

Bish. early on I stated that I had the Boeing Clipper and the old Airfox 1/72 B-29. This is the boxing:

I had started the B-29 kit maybe a year ago but put it away because I was unhappy with it. I pulled the kit off the shelf along with the Clipper kit for the group build. If the B-29 kit doesn't qualify for this build, no problem. I'll just take it out of the line-up.

OK. In the stash: Way too much to build in one lifetime...

  • Member since
    July 2004
  • From: Sonora Desert
Posted by stikpusher on Wednesday, January 9, 2019 10:23 AM

Looking good Kensar. Those P-40 landing gear fairings can be a challenge on most any kit.


F is for FIRE, That burns down the whole town!

U is for URANIUM... BOMBS!

N is for NO SURVIVORS...

       - Plankton

LSM


  • Member since
    September 2017
  • From: western North Carolina
Posted by kensar on Wednesday, January 9, 2019 10:16 AM

Same here - I don't worry about preshading panel lines.  They simply don't show on most aircraft.

The infamous knuckles.  I found the best fit was achieved by grinding out the back side with a 1/16" burr on a Dremel tool.  Still needed putty, though.


Painted and masked the wheel wells, preparing for paint.

Kensar


  • Member since
    December 2002
  • From: Bury St Edmunds, Suffolk, England
Posted by Bish on Wednesday, January 9, 2019 6:29 AM

TWA, i can nevber get the hang of pre shading, gave up even trying. The camo does look nice even if you think its a little dark.

I am a Norfolk man and i glory in being so


On the bench: Airfix 1/72nd Harrier GR.3/Fujimi 1/72nd Ju 87D-3

  • Member since
    December 2002
  • From: Bury St Edmunds, Suffolk, England
Posted by Bish on Wednesday, January 9, 2019 6:28 AM

Frank, for some reason, i only have you down for the Clipper. Remind me, what are you turning the 29 into.

I am a Norfolk man and i glory in being so


On the bench: Airfix 1/72nd Harrier GR.3/Fujimi 1/72nd Ju 87D-3

  • Member since
    September 2016
Posted by TheWaggishAmerican on Tuesday, January 8, 2019 8:59 PM

I got the green painted tonight. Masked off, pre-shaded, sprayed. I took the masks off, and would you look at that! Preshading was basically pointless. Also, either the conversion chart from humbrol to Tamiya or the humbrol paint suggestion seems wrong- the green looks way too green to me. Looks more like a flying tigers P-40 than a North African bird, unless they carried the same paints. It'll get fixed a bit- I'll be doing a final paint coat of like 95/5 thinner/paint with Buff on the upper surfaces post decals to replicate the wear from sitting under the sun. 

Tape masks on the wings, silly putty on the fuselage. There is some kind of oily residue I've never had a problem with in the new package of Putty I was using. The border parts left pale snake patterns all over the tan paint, which I went back in and touched up, though this lightened the paint as well. I need to work the oil out of this putty somehow before I try using it again. 

Decals to come soon- I've got to finish the leading edges on my spit before I start spraying gloss coats, and I've got to get through decals this week before a college visit sucks my time away.

-TWA

youtube.com/c/thewaggishamerican

On the Bench- Tamiya 1/48 Raiden, Rufe, Buffalo, He 162; Academy 1/72 F-89, Eduard 1/48 F6F-3, Accurate Miniatures 1/48 F3F-2, Minicraft 1/48 XF5F, Academy 1/35 Hetzer, Zvezda 1/35 KV-2 (Girls Und Panzer)


Your image is loading...

 
  • Member since
    June 2017
  • From: Winter Park, FL
Posted by fotofrank on Tuesday, January 8, 2019 8:59 AM

Gonna do a little work on the WB-29 build today.

The front upper and lower turrets are coming out as is the rear lower turret. I won't know if the rear upper turret comes out until I receive the resin "bug catcher" from Lone Star Models and that will be several weeks. In the meantime I need to fashion covers for the turret openings. I'll probably need to put a few ounces of weight in the forward bomb bay as well so the airplane sits up on its landing gear.

OK. In the stash: Way too much to build in one lifetime...

  • Member since
    December 2002
  • From: Bury St Edmunds, Suffolk, England
Posted by Bish on Monday, January 7, 2019 6:53 AM

Blimey Joe, plenty of issues with that one. I have noticed on some of the newer Airfix kits i have that the sprue attachment points are on the large side. I was pleased to see that they were not so bad on the Phantom, maybe they are learning. Its good to see Airfix have not completly lost all their old habits Big Smile

I am a Norfolk man and i glory in being so


On the bench: Airfix 1/72nd Harrier GR.3/Fujimi 1/72nd Ju 87D-3

  • Member since
    September 2017
  • From: western North Carolina
Posted by kensar on Monday, January 7, 2019 6:50 AM

Joe - Good work going on there.  I find that modeling is as much about overcoming mistakes and pitfalls as it is putting things together.

Bish - Very good interior work and research!  I find researching one of the more enjoyable aspects of this hobby.


Kensar


  • Member since
    December 2002
  • From: Bury St Edmunds, Suffolk, England
Posted by Bish on Monday, January 7, 2019 2:19 AM

Thanks Joe. I agree, those Italian schemes are very nice and i am always impressed when somone does one.

This is the link to the Stormo page with the colour guide. About half way down it mentions interiors.

http://www.stormomagazine.com/RegiaAeronauticaColorsinWWII_3a.htm


I am a Norfolk man and i glory in being so


On the bench: Airfix 1/72nd Harrier GR.3/Fujimi 1/72nd Ju 87D-3

  • Member since
    September 2003
  • From: AandF in the Badger State
Posted by checkmateking02 on Sunday, January 6, 2019 9:37 PM

Thanks, Joe.

Nice work coming up with fixes for the kit's shortcomings!


  • Member since
    August 2009
  • From: MOAB, UTAH
Posted by JOE RIX on Sunday, January 6, 2019 9:28 PM

Encountering some minor issues on my A-4. First, was finding that the Quickboost ejection seat I got for this was a good bit too large for the Airfix kit. Meh, no biggee. I ordered up the very nice looking Pavla cockpit set for the Airfix kit. Had to get it from the UK via ebay so, it'll be a little while getting here. Plenty to work on until it arrives.

Second, the sprue attachment points are the size of Milwaukee! Using sprue cutters for removing parts is an act of bravey. I found out the hard way even though I knew I should be breaking out the razor saw for this operation. Result is a nice little divot in the right fuselage half.

It's easily repairable. Although, there is still a good deal of sanding involved to smooth out the nubs left behind in either case of removal. I'd hope Airfix might consider remedying this on future new molds. 

And thirdly, the fuselage halves have a fairly healthy warp to them.

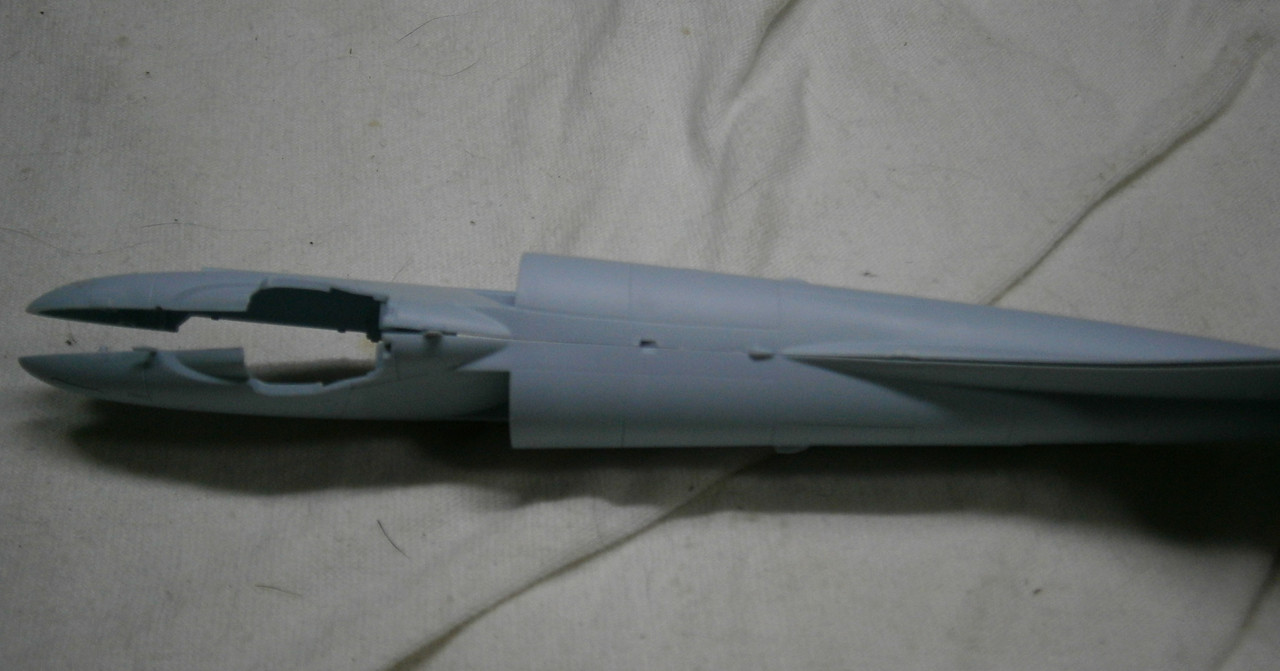
This pic is after I dipped the halves in hot water and took some of the skeehaw out of them. Again, nothing major, just an inconvenience. I'm also not sure if this is an issue with their mold or rather just with this particular kit.

All in all I'm still happily plugging along.

"Not only do I not know what's going on, I wouldn't know what to do about it if I did". George Carlin

  • Member since
    August 2009
  • From: MOAB, UTAH
Posted by JOE RIX on Sunday, January 6, 2019 8:22 PM

Check: Impressive start on the Spit cockpit. Everthing looks sharp.

"Not only do I not know what's going on, I wouldn't know what to do about it if I did". George Carlin

  • Member since
    August 2009
  • From: MOAB, UTAH
Posted by JOE RIX on Sunday, January 6, 2019 8:19 PM

Bish: Really wonderful work you've done on the SM.79. Excellent work on dressing up the interior. I've become quite a fan of Italian aircraft and have a number of kits in my stash now. That includes a couple of SM.79's. In fact I just got this Osprey book in the mail just the other day that I used some X-mas $$ on:

I have yet to try my hand at an Italian camo scheme but, I hope to develop the skills to pull some off. I believe that, although complex, they had some of the most dazzling schemes of any nation.

I'm definitely going to remember the research you've done on the interior color. I likely would have preceded with the green interior color. Very good stuff indeed.

"Not only do I not know what's going on, I wouldn't know what to do about it if I did". George Carlin

  • Member since
    September 2017
  • From: western North Carolina
Posted by kensar on Sunday, January 6, 2019 2:35 PM

Modelcrazy - let us know how you like that putty and how much it shrinks.  I'm on the lookout for something better than Tamiya white putty.  I have also used Bondo glazing putty which sands nicely, but it is primer red colored.

Great progress everyone!


Kensar


  • Member since
    September 2003
  • From: AandF in the Badger State
Posted by checkmateking02 on Sunday, January 6, 2019 12:40 PM

Thanks, Bish.  Off now to do some painting.


  • Member since
    December 2002
  • From: Bury St Edmunds, Suffolk, England
Posted by Bish on Sunday, January 6, 2019 12:16 PM

Thanks check.

So they sound more like Eduard masks.

That pit is coming along well.

I am a Norfolk man and i glory in being so


On the bench: Airfix 1/72nd Harrier GR.3/Fujimi 1/72nd Ju 87D-3

  • Member since
    September 2003
  • From: AandF in the Badger State
Posted by checkmateking02 on Sunday, January 6, 2019 12:06 PM

Nice work you've got going, Bish.  Cockpit looks great; seatbelts make a good enhancement.

It looks like the Peewit canopy masks are made from some kind of thin masking tape.  They don't look anything like a vinyl.  Years ago, I used some from an outifit called "Black Magic."  They were made from something that looked a lot like electrical tape.  Didn't stick well to curved surfaces.  Peewit's look pretty thin, but I won't know for sure till I try them.

In the progress department:

Spitfire's interior fuselage walls:

Cockpit:

Next will be working on closing up the fuselage and wings, then joining them together.


JOIN OUR COMMUNITY!

Our community is FREE to join. To participate you must either login or register for an account.

SEARCH FORUMS
FREE NEWSLETTER
By signing up you may also receive reader surveys and occasional special offers. We do not sell, rent or trade our email lists. View our Privacy Policy.