SEARCH FINESCALE.COM

Enter keywords or a search phrase below:

1/48 Armor GB - 2007

28674 views
306 replies
1 rating 2 rating 3 rating 4 rating 5 rating
  • Member since
    December 2003
  • From: Montreal
Posted by buff on Tuesday, November 27, 2007 7:56 PM
Thanks for the feedback and the tips guys.  I appreciate it.  I'm starting to get some time a little more often now, so I should be able to finish it off.

On the bench: 1/32 Spit IXc

  • Member since
    December 2002
  • From: NYC, USA
Posted by waikong on Tuesday, November 27, 2007 8:52 AM

Hey, that looks great. I agree with Darson's comment - I think it would add more interest to the kit with the dirt more concentrated in specific areas.  I do especially like the spare links and the rust in the exhaust. I have never quite got the 'exhaust' look down.

Congrats on your new baby, I'm surprised you had ANY time to build!

  • Member since
    February 2003
  • From: Melbourne, Australia
Posted by darson on Monday, November 26, 2007 9:38 PM

Wow that's some seriously nice work Buff, great job Thumbs Up [tup]

My only piece of feedback would be that might want to remove some of the dust from areas heavily trafficked by the crew such as the turret roof, just my My 2 cents [2c]

Cheers

  • Member since
    December 2003
  • From: Montreal
Posted by buff on Monday, November 26, 2007 8:12 PM
 waikong wrote:

It's never too late, please show us the pics!

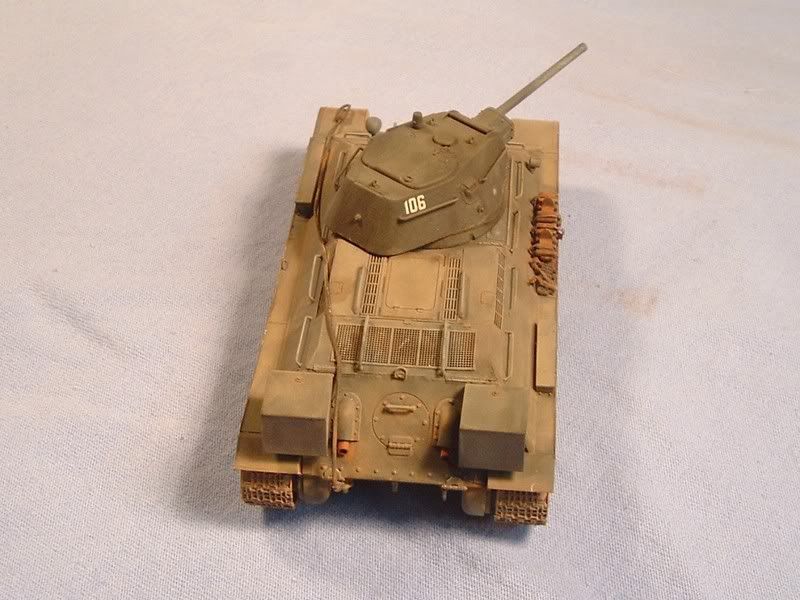
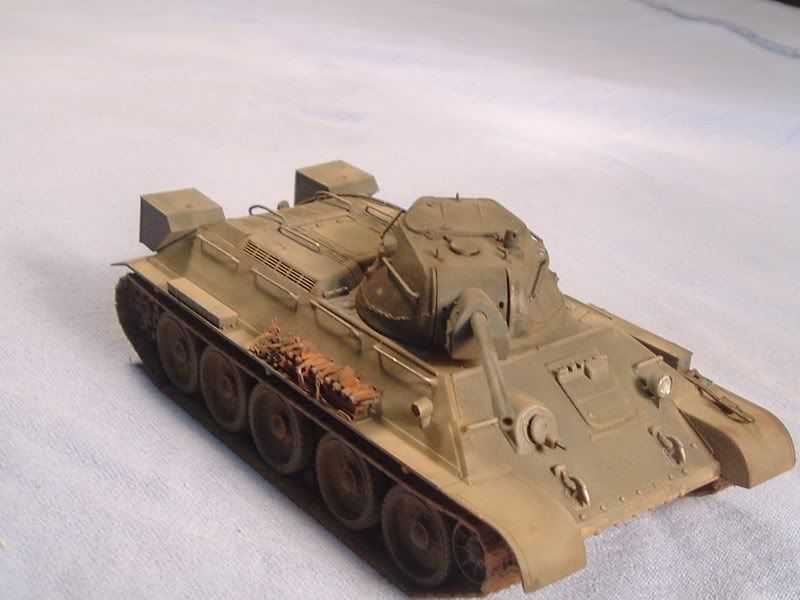
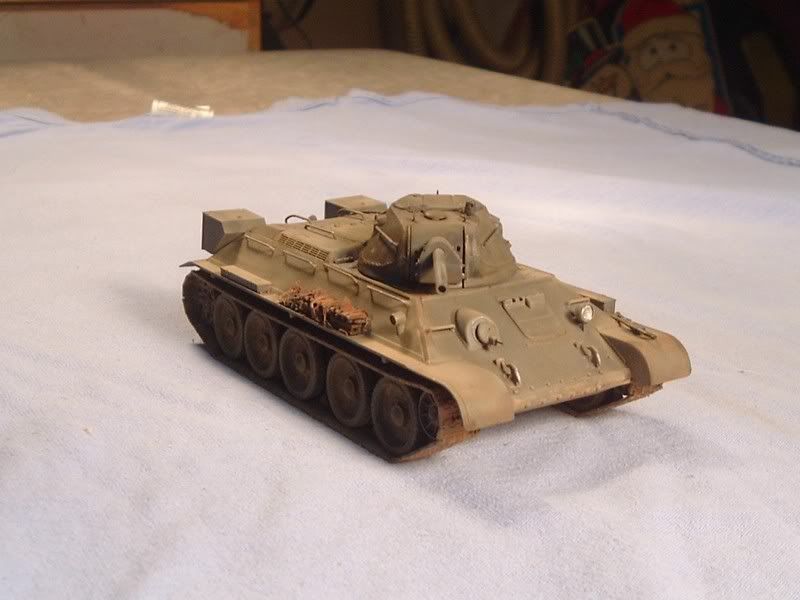
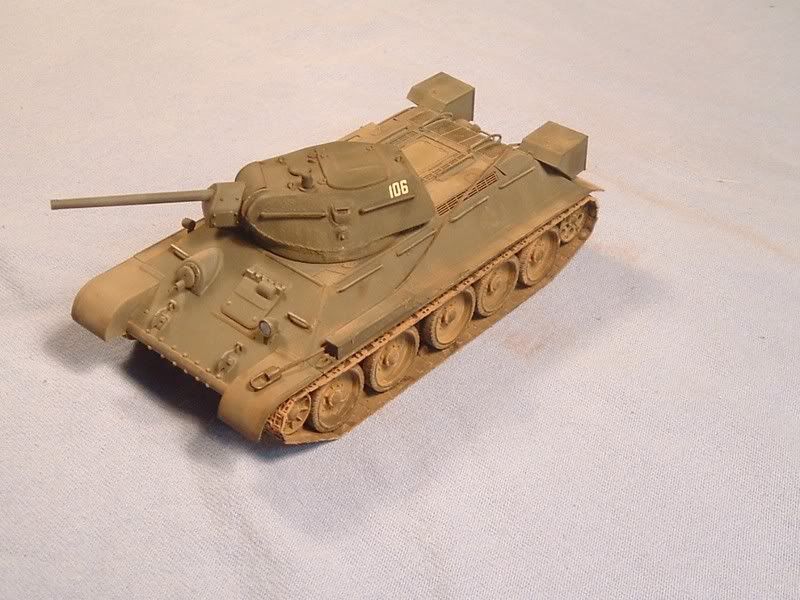
 If it really isn't too late, then here are some pics of my very overdue Tamiya T-34/76.  I was moving along quite nicely until real life, in the form of a new baby girl, got in the way.  My daughter was born in August, and there really hasn't been much time for building since.

I built the kit with the Voyager pe set, and added on some bits and pieces.  Some of the hand holds were replaced, and I used masking tape and some left over 1/35 buckles to hold down the spare tracks.  I painted it in Tamiya acrylics, and weathered it with artist water color washes and Mig pigments.  I'll have to go back and dust up the turret some more.  Some of the sink marks on the tracks still show too.  Comments are always welcome.
On the bench: 1/32 Spit IXc

  • Member since
    December 2002
  • From: NYC, USA
Posted by waikong on Friday, October 26, 2007 8:23 AM

It's never too late, please show us the pics!

  • Member since
    January 2007
  • From: Cherry valley il.
Posted by invertman on Thursday, October 25, 2007 10:31 PM

hey guys,

been buisy with work these last few months.

sorry i havent checked in.

the jagdpanther is just about done.

can i post some pics,or does it not matter now that im past the

ending date?


jason

  if you want permission for a test flight.... the answer is "no".

  • Member since
    December 2002
  • From: NYC, USA
Posted by waikong on Tuesday, October 2, 2007 10:30 PM
looks like we got about 1/2 of the builds completed. I'm bit disappointed I didn't see more HobbyBos t-34's completed though. Yeah, beens kinda quiet after the inital flurry of activity.
  • Member since
    January 2007
  • From: Regina, SK
Posted by EnamouredwithArmour on Tuesday, October 2, 2007 4:21 PM

Hey guys,

 How did we do? The GB went fairly silent for the last while and I was just curious how well we managed to fulfill our task. 

 See you around,

Dave 


  • Member since
    January 2007
  • From: Cherry valley il.
Posted by invertman on Thursday, September 20, 2007 10:33 PM

hey guys,

been real buisy at work this summer.

just getting back to the bench.

giong to try to finish the jagdpanther soon.

will post some pics soon.

jason

  if you want permission for a test flight.... the answer is "no".

  • Member since
    January 2006
  • From: Macedon, NY
Posted by 315rooster on Sunday, September 16, 2007 7:20 PM
 piwi974 wrote:
 315rooster wrote:
 
How did you paint the wooden box?  
Grant 

 Hi Grant,

In fact it's rather easy. I start by paintinf the box in brown ( Vallejo 875 ) .  When it's dry, I aaplied a oil wash with Raw sienna and a touch of Black. And at the end a dry-brush in sand and an other one lighter.

 Hope it will help you. 

Thanks...I'll give it a go on my next kit.

Grant

Member of the Rochester HSMA (IPMS local club)

  • Member since
    January 2006
  • From: France
Posted by piwi974 on Tuesday, September 11, 2007 11:44 AM
 waikong wrote:

Piwi, that does have lots of interesting details. I especially like the ammo, taking that from aircraft PE was an inspired idea. One of those 'why didn't I think of that!'!

The cast texture on the build was interesting too, was that from powders or some other technique?


Thanks Waikong.


The cast texture is made with liquid cement and an old brush.


Piwi http://maquettegarden.free.fr
  • Member since
    January 2006
  • From: France
Posted by piwi974 on Tuesday, September 11, 2007 11:41 AM
 315rooster wrote:
 
How did you paint the wooden box?  
Grant 

 Hi Grant,

In fact it's rather easy. I start by paintinf the box in brown ( Vallejo 875 ) .  When it's dry, I aaplied a oil wash with Raw sienna and a touch of Black. And at the end a dry-brush in sand and an other one lighter.

 Hope it will help you. 

Piwi http://maquettegarden.free.fr
  • Member since
    December 2002
  • From: NYC, USA
Posted by waikong on Sunday, September 9, 2007 2:15 PM

Piwi, that does have lots of interesting details. I especially like the ammo, taking that from aircraft PE was an inspired idea. One of those 'why didn't I think of that!'!

The cast texture on the build was interesting too, was that from powders or some other technique?

  • Member since
    January 2006
  • From: Macedon, NY
Posted by 315rooster on Saturday, September 8, 2007 2:26 PM
Piwi,
 
Looks great!  I love it.
 
How did you paint the wooden box?  I'm experimenting with painting these to make them authenitc looking, and I like the look of yours.
 
Grant 

Grant

Member of the Rochester HSMA (IPMS local club)

  • Member since
    January 2006
  • From: France
Posted by piwi974 on Saturday, September 8, 2007 5:22 AM

Hi all ,

Here it is ! My TD M10 is finished !

Just the antenna is missing . It will be added later.


I kept the kit's bags but all other sleeping bags and canvas are made with Tamiya putty.


The "Prong" system is hoem made.


The cal .50 is pretty poor . I started by drilling the gun. BTW, the gun's handle is added ( copper wire ) . Rather than using this uggly ammo box I used a ammo belt find ine PE set for aircrafts. 


That's conclude my participation to this nice GB.


Regards from France 

Piwi http://maquettegarden.free.fr
  • Member since
    December 2002
  • From: NYC, USA
Posted by waikong on Tuesday, September 4, 2007 8:41 AM

hkshooter, sorry to hear about your divorce.

Some call it dedication, some call it obsession. :)


  • Member since
    December 2003
  • From: Indiana
Posted by hkshooter on Monday, September 3, 2007 1:56 PM

Been a while since I visited this thread. With the divorce and the move and busy season at work I've been busy. Really a lot of nice work going on here! Darson and waikong, very nice pieces! You guys have way more dedication than I. Or more in need of therapy.Bow [bow]Big Smile [:D] Again, very nice work!


  • Member since
    December 2002
  • From: NYC, USA
Posted by waikong on Wednesday, August 15, 2007 11:56 AM
Great, looking forward to the pictures.
  • Member since
    July 2003
  • From: Bicester, England
Posted by KJ200 on Wednesday, August 15, 2007 11:30 AM

I'm still working on my Tiger.

It's been decal'd and weathered with a wash, oils and some chipping. 

Unfortunately it got pushed off the bench by another 1/48 Tiger, this time a Grumman Tigercat, however it should be done in the next few weeks, allowing me to complete the Tiger 1.

Karl 

Currently on the bench: AZ Models 1/72 Mig 17PF

  • Member since
    December 2002
  • From: NYC, USA
Posted by waikong on Tuesday, August 14, 2007 9:02 AM
Oh Man, another great idea down the drain! Well, glad to know before I commited myself to the build. Thanks.
  • Member since
    October 2003
  • From: Brittany Farwest of France
Posted by biker_fou on Tuesday, August 14, 2007 8:30 AM

the protz can't tow the 88, tooooooo big  Dunce [D)]Oops [oops]

But a 37mm or a 50mm , yes  Mischief [:-,]

I will post them after the 20 , I wil have a new PC at this time


Marc

Marc Le Bayon P.K. Owner & Sculptor
  • Member since
    December 2002
  • From: NYC, USA
Posted by waikong on Tuesday, August 14, 2007 8:20 AM

No problem, please don't think I'm rushing anyone, just wondering whether I can look forward to more builds!

 Since I've build the StugIII, I'm always looking at how others have done it and try to get better ideas on how I could have improved mine. I just bought the G version with the long barrel, so I'm definitely up for new ideas and techniques.

The Tamiya GMC sounds very interesting and I can't wait the see it. I have the Protz too, thinking it would look great towing an Bandai 88 kit that I have saved.

  • Member since
    October 2003
  • From: Brittany Farwest of France
Posted by biker_fou on Tuesday, August 14, 2007 12:53 AM

I've finished a SWB on the Tamiya GMC

I'm working on new Steel and canvas Cabs for it , 

I prepare conversion Chevrolet 1 1/2 ton Cab and Studbecker US6 Cabin , still for Tamiya GMC

The only thing I made last months is a german Biscycle and a Protz...

I will post it next week? I'm without ethernet on PC now


Marc 

Marc Le Bayon P.K. Owner & Sculptor
  • Member since
    April 2006
  • From: LaValle, Wisconsin
Posted by Hermesminiatures on Monday, August 13, 2007 9:50 PM
I'm still working on my StuG III, and it's slowly but surely nearing completion! Being a "fun" low-detail project my commisioned builds tend to take priority, but I do intend to finish it!

Jonathan

For every modeling technique that works, I have three that don't.

  • Member since
    December 2002
  • From: NYC, USA
Posted by waikong on Monday, August 13, 2007 9:47 PM

Bump!

Just wanted to see if any of the other guys in the GB have anything to show? As its been real quiet for a month now, or is this GB over?

  • Member since
    December 2002
  • From: NYC, USA
Posted by waikong on Friday, July 6, 2007 2:56 PM

Joe, welcome to the GB.

Invertman, the wash did a good job poping out the details. As for the link & length tracks, I like them, the only problem is that you have to make sure they are lined up properly or they won't 'wrap' properly. Looking forward to your set of pictures.

  • Member since
    June 2007
  • From: houston texas
Posted by berserker on Friday, July 6, 2007 2:04 PM

put me down for a tamiya tiger tank

Joe Photo Sharing and Video Hosting at Photobucket Photo Sharing and Video Hosting at Photobucket
  • Member since
    January 2007
  • From: Cherry valley il.
Posted by invertman on Friday, July 6, 2007 12:06 PM

hey all,

here are some more pics of the jagdpanther.

applied an overall wash and did some some dry brushing.

kinda hard to see with the pics i have.

working on the tracks now,then will do more weathering.

never worked with this type of track system,hope they turn out ok.

  if you want permission for a test flight.... the answer is "no".

  • Member since
    December 2002
  • From: NYC, USA
Posted by waikong on Thursday, July 5, 2007 9:36 AM
Grant, I have the same thoughts regarding the schurzen plates. I think even thin styrene sheets will work as the shapes are very simple. The aftermarket plates seems a bit expensive compared to the relatively simple scratch building one needs. I'll be very interested in your experience with this.
JOIN OUR COMMUNITY!

Our community is FREE to join. To participate you must either login or register for an account.

SEARCH FORUMS
FREE NEWSLETTER
By signing up you may also receive reader surveys and occasional special offers. We do not sell, rent or trade our email lists. View our Privacy Policy.