SEARCH FINESCALE.COM

Enter keywords or a search phrase below:

1/35 M104 1 1/2 ton trailer, WIP, 12/24/12, Complete

8775 views
24 replies
1 rating 2 rating 3 rating 4 rating 5 rating
  • Member since
    July 2006
  • From: New Jersey
Posted by redleg12 on Monday, December 24, 2012 11:54 AM

Well it is Christmas. Finally had time to finish up. I made up the bumper codes and tire pressure markings. After printing sealing and applying the decals, here is what they look like.

And the tire pressure marks

On the front, I created the “idiot” chains. These hook to the tow vehicle in case the tow pintle fails or more often, some idiot forgets to put the locking cotter pin in the pintle. I used the same chain as the rear tail gate and some hooks from the parts box.

I painted and set up the lunette. I have kept it separate for east of connection to the track. At this point I am finished and will be turning it over to my fellow modeler, Bob Burik who is doing the track so they can be weathered together.

Thanks for following this short model build. Now on to my M1009 CUCV. Hope to post some progress there shortly after Xmas.

As always, all comments are welcome

Rounds Complete!!

EOM! .... End of Mission

"The Moral High Ground....A Great Place to Emplace Artillery."

  • Member since
    July 2006
  • From: New Jersey
Posted by redleg12 on Saturday, December 15, 2012 7:59 PM

Karl - You are too kind, nice to have you dropping in. Hope to see you now and then...be well my friend

Rounds Complete!!

"The Moral High Ground....A Great Place to Emplace Artillery."

  • Member since
    January 2007
Posted by the doog on Saturday, December 15, 2012 10:39 AM

Jeez, that looks fabulous, Mike! All the little details are superb!

  • Member since
    July 2006
  • From: New Jersey
Posted by redleg12 on Saturday, December 15, 2012 7:28 AM

Jezones - Thanks for the peek. I am glad I have been of help.

Rounds Complete!!

"The Moral High Ground....A Great Place to Emplace Artillery."

  • Member since
    April 2011
Posted by jezones on Thursday, December 13, 2012 8:02 PM
Wow your build is like a how to manual on how to do it right. I have one of these to build myself and I've learned so much reading your build log. As a former member of the 3ID I can't wait to see the finished product.
  • Member since
    July 2006
  • From: New Jersey
Posted by redleg12 on Tuesday, December 11, 2012 7:30 PM

de009 - Always nice to have the new guys stop by. thanks for the peek and the comment.

Bill - Thanks for the peek old friend. Always a pleasure to have you stop by my firing point.

Rounds Complete!!

"The Moral High Ground....A Great Place to Emplace Artillery."

  • Member since
    July 2004
  • From: Texas
Posted by wbill76 on Tuesday, December 11, 2012 7:19 PM

Outstanding work as always Mike! Yes

  • Member since
    August 2009
  • From: middletown,delaware
Posted by de009 on Tuesday, December 11, 2012 3:30 PM

Great build .Can't wait to see the finished diorama

KURSK "the battle of all battles'

  • Member since
    July 2006
  • From: New Jersey
Posted by redleg12 on Sunday, December 9, 2012 9:40 PM

Gino - Thanks for the visit and the comments. Should be ready to hook up with the track shortly.

Tread -Always a pleasure to have you stop in and thanks for the comments.

Rounds Complete!!

"The Moral High Ground....A Great Place to Emplace Artillery."

  • Member since
    September 2005
  • From: beacon falls , Ct.
Posted by treadwell on Sunday, December 9, 2012 8:17 PM

Hi Mike Smile

A simple build for you ,Mike, but important in its place on the diorama. The extra bit of gloss on the vinyl  looks perfect as does the rest of the build.

great job and although you didn't mention them, the reflectors and taillights look great too ! Wink

take care

tread[H]

Ps... I was just re reading the post, and I see you did mention the lights and reflectors...Embarrassed.... I am on my 3rd game of football today and my eyes are a little bleary ....lolBig Smile     they still look nice !


  • Member since
    December 2002
  • From: Valrico, FL
Posted by HeavyArty on Sunday, December 9, 2012 7:57 PM

The trailer looks great.  Excellent job on the canvas and tires.  It will compliment SFC Smith's M113 perfectly.  Great job as usual Mike.

Gino P. Quintiliani - Field Artillery - The KING of BATTLE!!!

Check out my Gallery: https://app.photobucket.com/u/HeavyArty

"People sleep peaceably in their beds at night only because rough men stand ready to do violence on their behalf." -- George Orwell

  • Member since
    July 2006
  • From: New Jersey
Posted by redleg12 on Sunday, December 9, 2012 7:26 PM

The wheels were painted a tire mix of 50/50 NATO & Flat Black. The rims painted with Testors Acryl Sand and the brake/wheel assemblies painted with Alclad Steel.

Back on the trailer, I painted the leaf springs with Alclad Steel. The reflectors and tail lights were given a base coat of Alclad Aluminum. After drying, they were painted their respective colors of Clear Orange, Red and Smoke. Using ship modelers rope, painted Flat Black, the canvas tie down ropes were created and tied to the trailer hooks

Rear View

Using Archer Transfer placards the placards on the bow under the handle and on the body near the reflector.

Using 24 gauge wire, I made the 4 body side lifting loops and the two loops on the front bow. Also used the 24 gauge wire to make the holder for the taillight jack.

I used 16 gauge black wire to make the taillight cable. The end jack is made from 1/16 styrene rod painted Black.

The third wheel assembly is added. The assembly is painted sand while the exposed side of the wheel is painted with Alclad Steel

In the rear, I used some stock chain from Michaels, painted with Alclad Steel to make the tailgate chains.

The canvas on the trailer was made of vinyl. In order to giver the canvas a more vinyl look, I coated the canvas with Testors Acrylic Clear Semi Gloss.

The only thing left is the bumper code and tire pressure decals. I have the lunette separate to make the attachment to the carrier easier.

That is it for now.

As always, all comments are welcome

Rounds Complete!!

"The Moral High Ground....A Great Place to Emplace Artillery."

  • Member since
    November 2005
  • From: Somewhere over the rainbow
Posted by m1garand on Wednesday, November 28, 2012 4:56 PM

I'm still alive and kicking.  having 2 kids really take lots of time away from the hobby.  Trying to build few before the end of year.

How have you been Mike?  As always, good to see your build.  

  • Member since
    December 2004
  • From: ohio
Posted by vonryan on Wednesday, November 28, 2012 10:26 AM

WOW VERY COOL Mike. what are you adding it to??

Clay

  • Member since
    July 2006
  • From: New Jersey
Posted by redleg12 on Tuesday, November 27, 2012 9:21 PM

Wow.....a blast from the past. thanks for stopping by and great to see you. It is always great to hear from old friends.

Rounds Complete!!

"The Moral High Ground....A Great Place to Emplace Artillery."

  • Member since
    November 2005
  • From: Somewhere over the rainbow
Posted by m1garand on Tuesday, November 27, 2012 8:41 PM

Mike,

As always, quality of your build is superb.  

  • Member since
    September 2005
  • From: beacon falls , Ct.
Posted by treadwell on Tuesday, November 27, 2012 4:37 PM

Cool beans, Mike Smile

The last balsa project I did was a catapult launch R/C glider with a 4' span that caught a thermal and I never saw it again !   ...lack of experience on my part Embarrassed  didn't really even know how to fly Geeked

The Facebook page is down for maintenance or something, but I will check back ! 

Thanks for the link,

treadCool


  • Member since
    July 2006
  • From: New Jersey
Posted by redleg12 on Monday, November 26, 2012 7:51 PM

Tread - You slipped in while I was writing. Now as far as modeling balsa planes....yep and model rockets. Lots of experience with balsa, tissue, paper....it is a lost art and they can work well for details in the armor world.

As for the diorama, there is a Facebook page where you can see some of what is being worked on..

www.facebook.com/.../543447045683070

Hopefully when we are all done, we will publish something to show all the models in the convoy

Rounds Complete!!

"The Moral High Ground....A Great Place to Emplace Artillery."

  • Member since
    July 2006
  • From: New Jersey
Posted by redleg12 on Monday, November 26, 2012 7:25 PM

Tony - thanks for the welcome back....used this UHaul many times in my past life....you can pack a LOT of stuff in it!!

Bill - Eventually we will put something together to publish. The target is for delivery is 2014. So far there is a dozen or so of us involved including another FSM regular and 3ID veteran Heavy Arty.  

Rob - Thanks for the peek and the comments.

Marc - Thanks....after the past month, it is good to get back to normal

Rounds Complete!!

"The Moral High Ground....A Great Place to Emplace Artillery."

  • Member since
    September 2005
  • From: beacon falls , Ct.
Posted by treadwell on Monday, November 26, 2012 7:22 PM

Hiya Mike Smile

Jeez it is good to see the ' Redleg12 ' moniker up and running again ! Yeah   The trailer looks great, especially the parts you manufactured !  I would like to hear more about the diorama it is going in.

After the M4 fast tractor doors and now the canvas cover, did you build  balsa planes and cover them with tissue paper when you were a kid ?..... I did....

Nice to have ya back Mike Wink

treadCool


  • Member since
    April 2005
  • From: Piscataway, NJ!
Posted by wing_nut on Monday, November 26, 2012 5:02 PM

We know the build is going to be just fine.  More important...

GO TO SEE YA BACK

Marc  

  • Member since
    October 2009
Posted by PANZERWAFFE on Monday, November 26, 2012 4:21 PM

Really nice work !  Love that canvas cover !!

Rob

  • Member since
    July 2004
  • From: Texas
Posted by wbill76 on Monday, November 26, 2012 11:33 AM

Off and rolling Mike! Nice work on the trailer. The Thunder Run project sounds like a great effort, you'll have to post some pics up on it once it's done so we can see the 'home' this trailer will belong to when all said and done. Wink

  • Member since
    August 2008
  • From: S.W. Missouri
Posted by Pvt Mutt on Monday, November 26, 2012 10:41 AM

There he is.

The Uhaul is right on.

Tony lee

Shoot Low Boys They're Ridin Ponys

  • Member since
    July 2006
  • From: New Jersey
1/35 M104 1 1/2 ton trailer, WIP, 12/24/12, Complete
Posted by redleg12 on Sunday, November 25, 2012 10:12 PM

Fire Mission

M104 – 1 ½ Ton Trailer.

Introduction

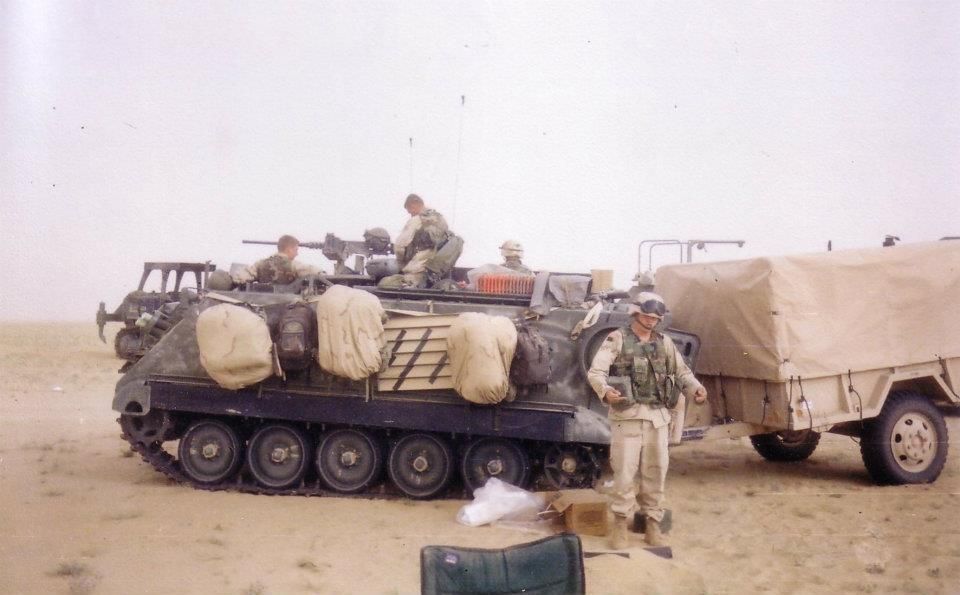
A number of AMPS members are working on a “group build” to build a diorama of the Thunder Run of the 3 Infantry Division into Bagdad for the Fort Stewart museum.  These models need to be finished by 2014.  As part of that group build I was asked to take care of a number of details and to also construct an M104 trailer for the engineer M113.  So before I begin my M1009 I thought I would get this quick build out of the way.

Background

The M104 trailer has been around from the 1960s and is the standard 1 ½ ton cargo trailer used by the US Army. It’s general dimensions are X feet long by X feet wide and X feet high with a cargo area of X cubic feet under the canvas.

Build

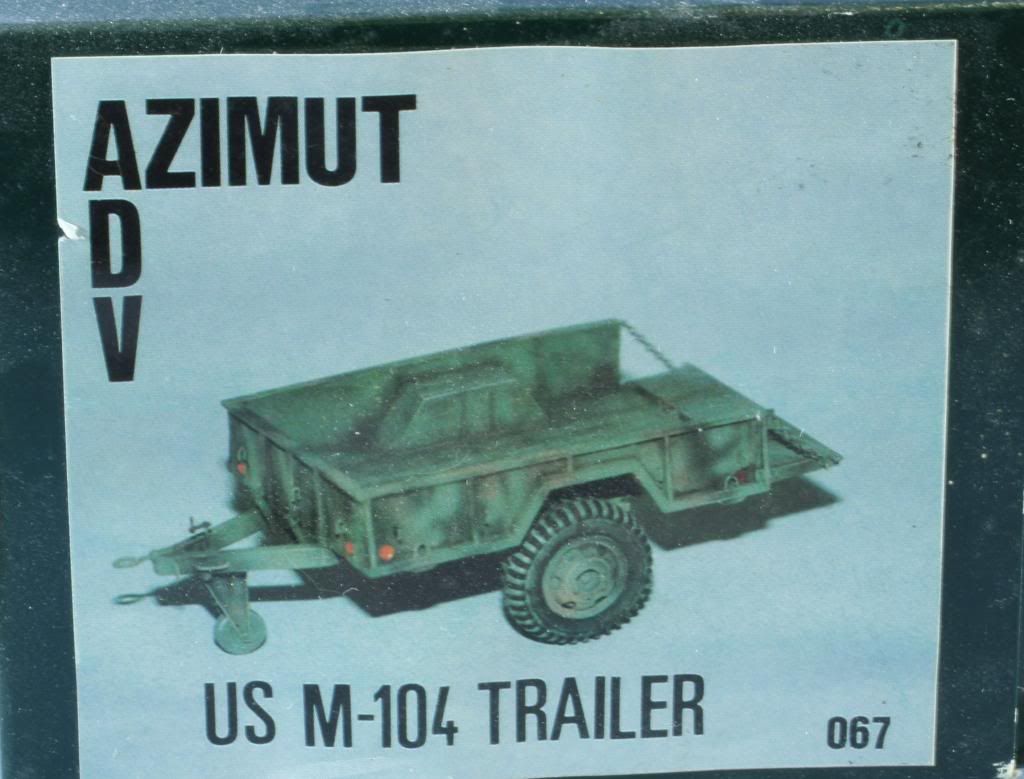
After my last build I decided to fit in this quick build as a change of pace after my last long build. For this build I will be using the Azmut M104 trailer resin kit.

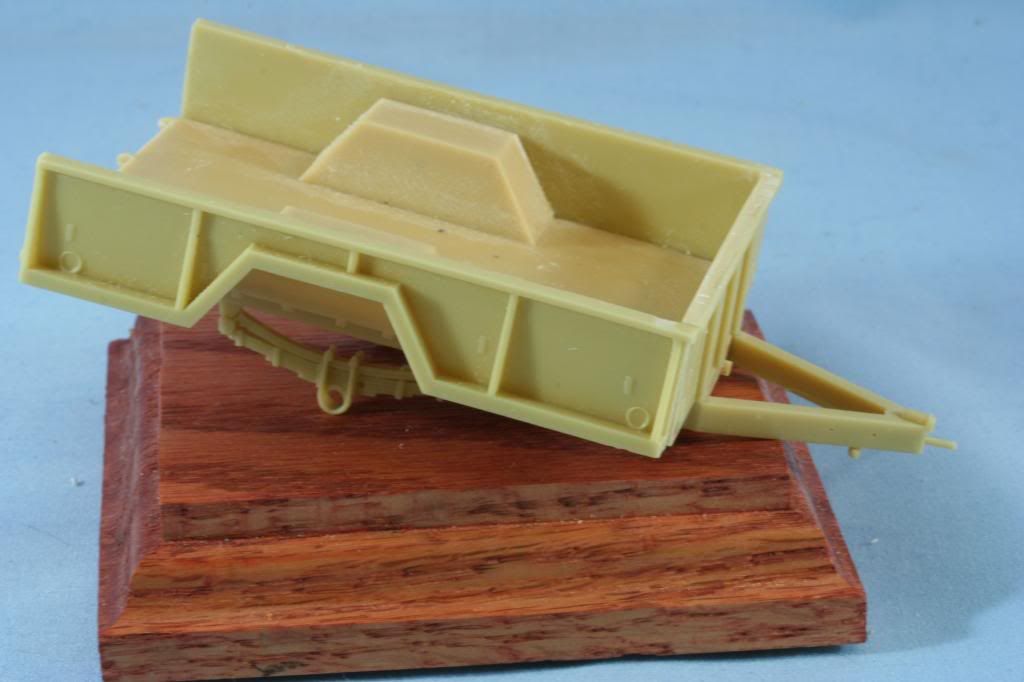
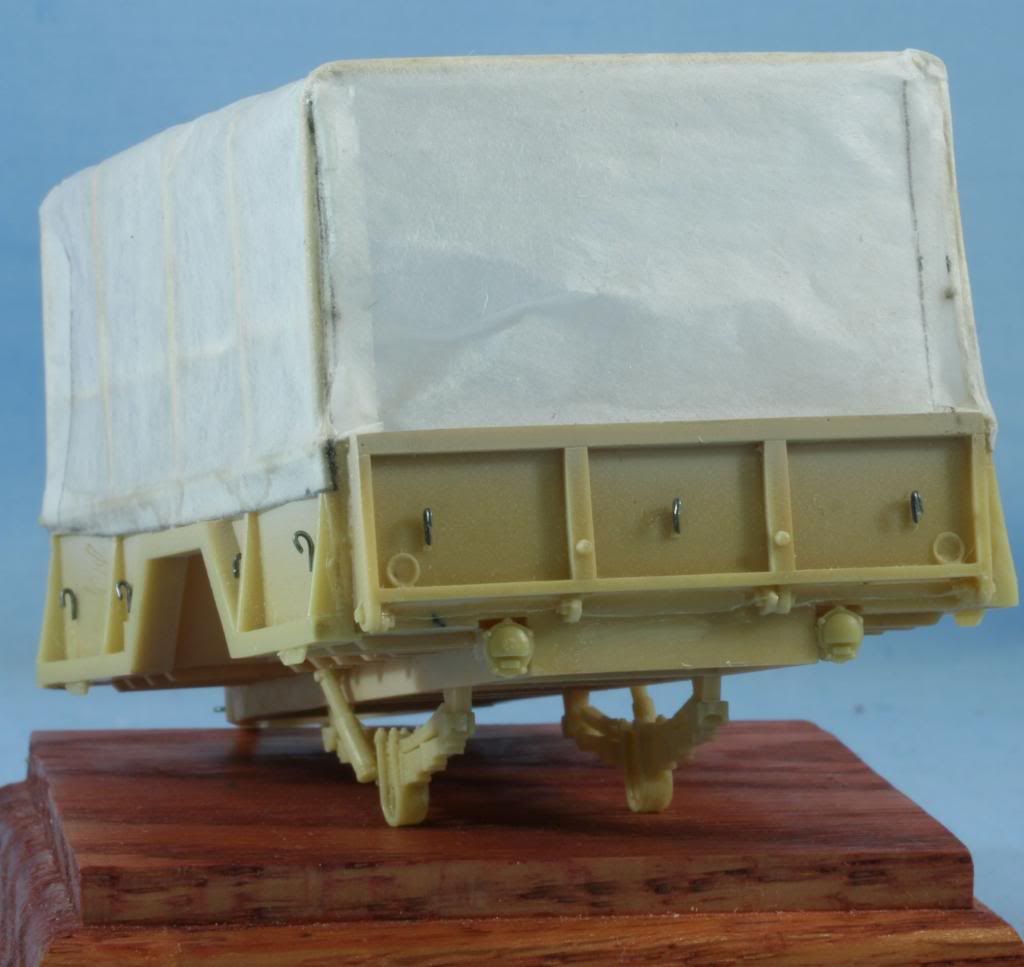
The kit itself is quite simple and contains less than 30 parts. The first steps are to assemble the main trailer itself, which consists of the trailer floor, three wall panels, tail gate and front towing bow. The resin itself is well cast but the longer side walls had a slight warp to them which required clamping to glue. After assembling the three side walls and front bow I attached the leaf spring suspension.


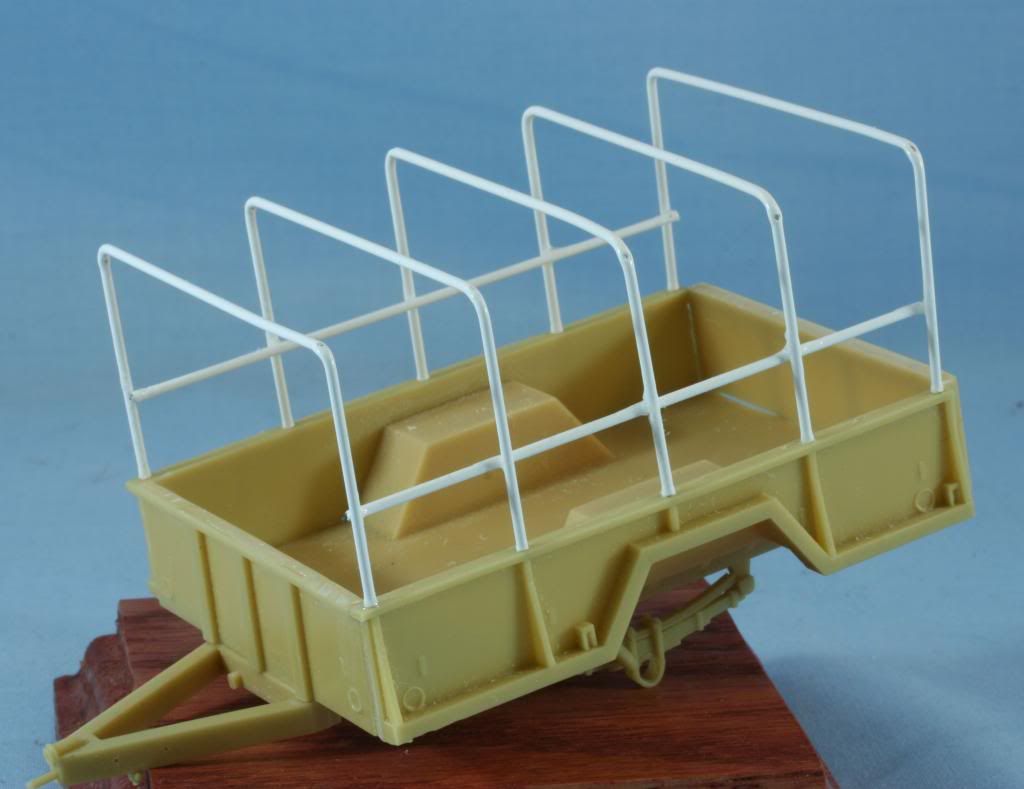
After the base assembly and attaching the tail gate I went to work scratch building the canvas cover bows. The kit does not come with bows or a canvas cover. After measuring, the bows were made using .020 styrene coated wire. Five bows are required. Prior to attachment, and after marking, I drilled .020 attachment holes along the top of the side walls and then attached the bows using CA glue. To stiffen the bow set a lateral connector was made from .020 wire and attached to each bow on each side about ½ inch from the top of the side walls.

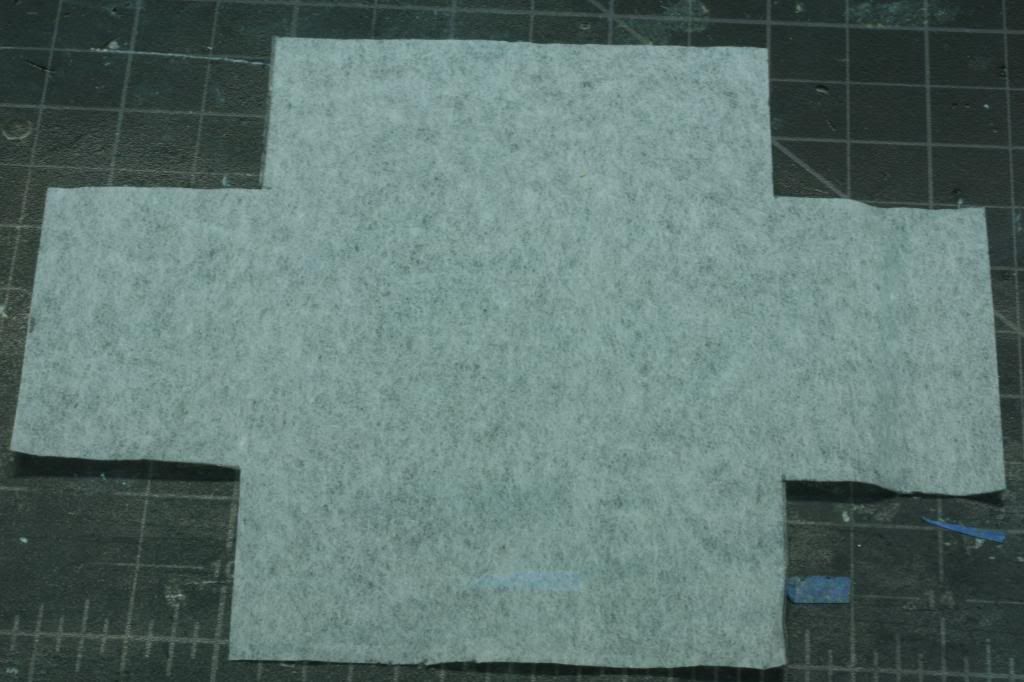
Next was the canvas cover. The actual cover is one piece so I made the model canvas in the same manner. After determining the length and width, I marked a sheet of airplane (jap) tissue allowing an extra ¼ inch in each direction. This allowed for 1/8 inch folds on all sides to crate a hem and have a clean straight line at the attachment point.


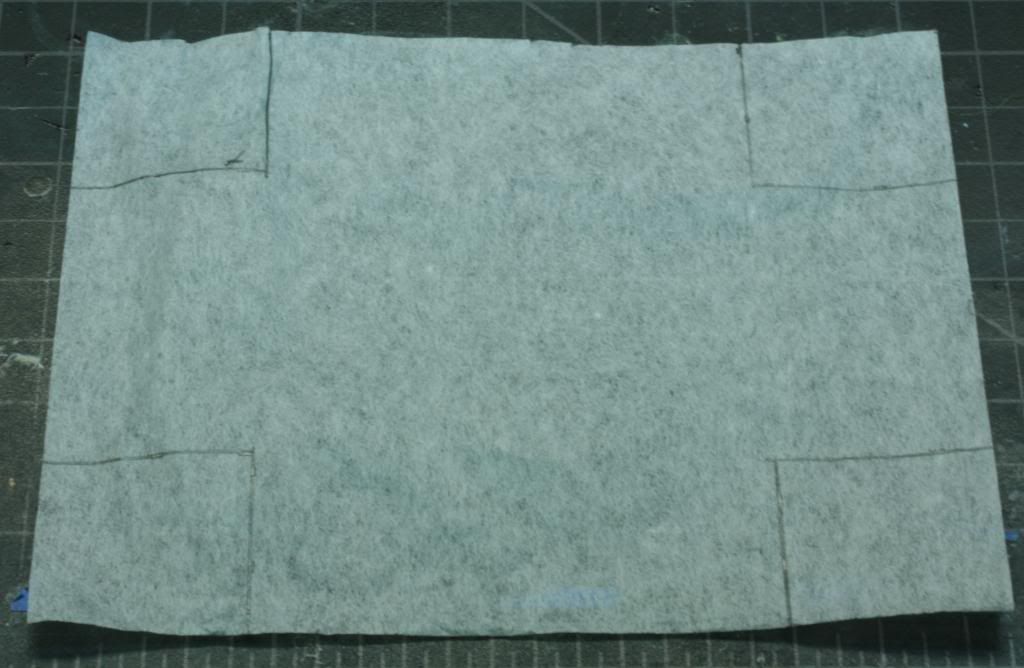
After cutting the canvas from the sheet, using a steel ruler to create the hem folds, I created the folds on all sides and coated the folds with landscape glue (watered down white glue) to hold the folds together. These folds were allowed to dry overnight before handling the canvas to apply it to the trailer.


I applied the canvas by first applying thin coat of white glue on one side wall panel and positioning the canvas. Then as I form the canvas over the bows, I applied a tin coat of white glue on the inside of the tail gate and attached the bottom of the rear cover. Now while holding the canvas in place, I applied landscape cement to the canvas in the areas of the bows and the attached the opposite side wall with a thin layer of white glue. While everything is still wet I carefully check and make minor adjustments for positioning. With everything in place the sides, top and back are completely coated with landscape cement and allowed to dry.

Once dry I applied a thin coat of white glue to the front panel and attached the forward end of the canvas. With the forward end in place the forward canvas was folded onto either side and held in place by landscape cement.  Once in place the forward end was coated with landscape cement and allowed to dry.

With everything in place, a second “sealing” coat of landscape cement was applied to the whole canvas, completing the application.

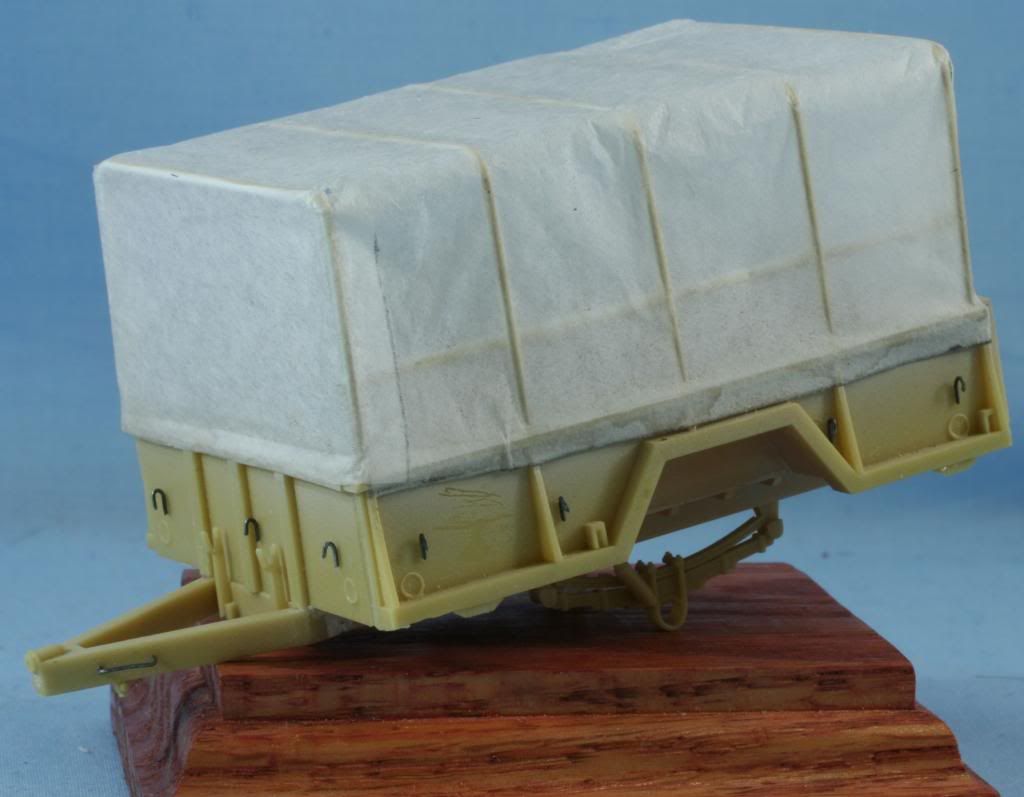
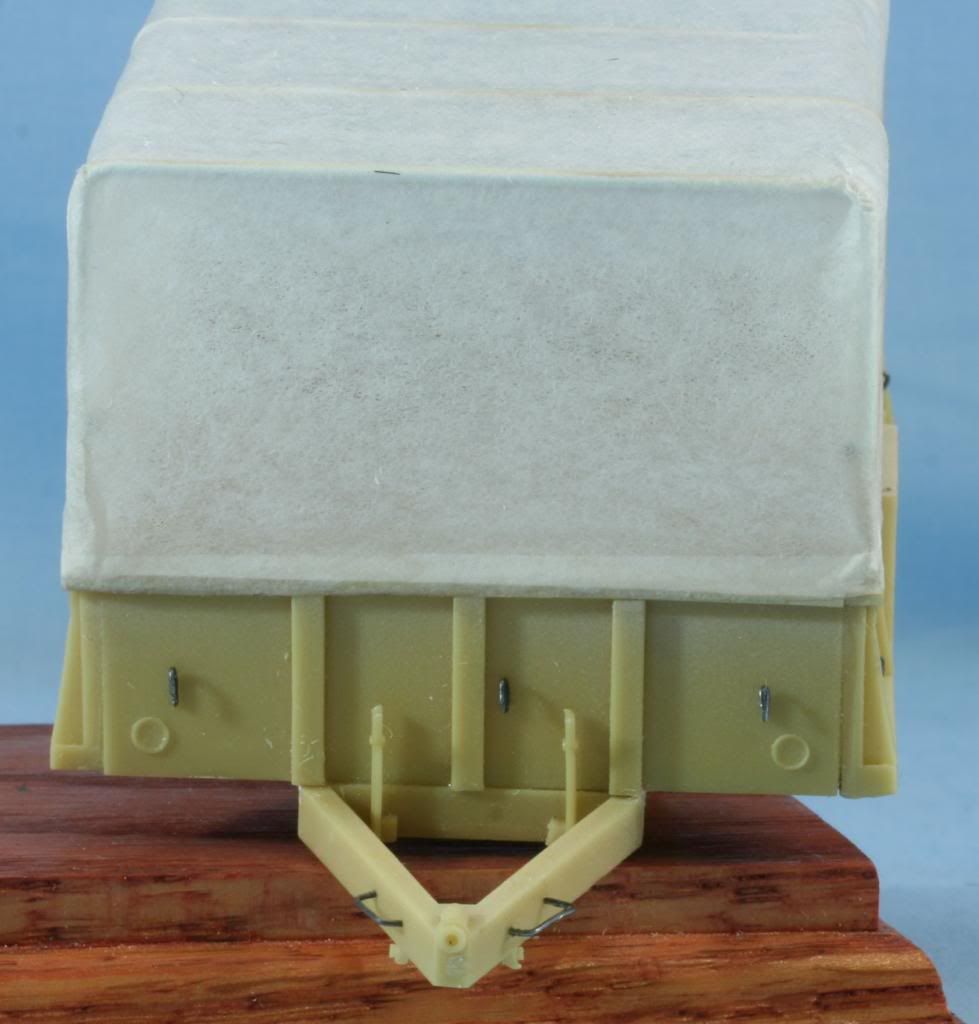
With the canvas applied I made the canvas tie down hooks from 20-gauge stainless steel wire. Fourteen are required all around and were attached using CA cement. Also four small under carriage details, which are supplied with the kit were also attached.

On the front bow there are two lifting handles, one on each side. These were also made from 20-gauge SS wire and attached with CA glue. The trailer brake handles were attached to the front of the trailer at this time also. In the rear, I applied the tail light assemblies to each side of the rear bumper.

The third wheel assembly also has lifting handles, which are also fabricated using 20-gauge wire.

At this time I also cleaned up the tires and the brake/wheel assemblies and it was time to head to the paint booth.

These trailers were usually painted NATO camouflage and then painted sand for use in Iraq. With that in mind, I primed the trailer and assemblies with Vallejo OD primer. After allowing a day to dry, I applied Testors Acryl Sand to the trailer.

That is it for now.

As always, all comments are welcome

Rounds Complete!!


"The Moral High Ground....A Great Place to Emplace Artillery."

JOIN OUR COMMUNITY!

Our community is FREE to join. To participate you must either login or register for an account.

SEARCH FORUMS
FREE NEWSLETTER
By signing up you may also receive reader surveys and occasional special offers. We do not sell, rent or trade our email lists. View our Privacy Policy.