SEARCH FINESCALE.COM

Enter keywords or a search phrase below:

FINISHED PICS--Two Leopards in Gelb Oliv :)

16796 views
99 replies
1 rating 2 rating 3 rating 4 rating 5 rating
  • Member since
    April 2006
  • From: Denver, Colorado
Posted by waynec on Saturday, May 16, 2015 6:06 PM

Model Maniac

Nice selection and add-on parts, Karl. But Leopard 2 A4 is a little outdated. Now I'm waiting for Meng or other manufacturers to offer the new Russian T-14 tank. It's my most wanted item now!:

www.youtube.com/watch

that's an interesting music mix. if you like the flute try some didgeridoo. assuming the flute music is calming for you might i suggest GANDALF and HILDEGARDE VOM BINGEN. which is choral music from the 12th century.

my bet is MENG in November for a T-14. love auto loaders on bad guy panzers. apparently there is an entire series of new AFVs. including the BMP-T Terminator. and MOS-1

Никто не Забыт    (No one is Forgotten)
Ничто не Забыто  (Nothing is Forgotten)


  • Member since
    November 2009
  • From: SW Virginia
Posted by Gamera on Saturday, May 16, 2015 6:13 PM

Very sinister in all black!

"I dream in fire but work in clay." -Arthur Machen


  • Member since
    September 2006
  • From: Dripping Springs, TX, USA
Posted by RBaer on Saturday, May 16, 2015 8:43 PM

Carlos, I've thought about the HB kit, but from what I hear, the Meng kits are outstanding, and the HB kits are , well, not.

Karl, lookin' good.

Apprentice rivet counter.

  • Member since
    July 2008
  • From: Vancouver, the "wet coast"
Posted by castelnuovo on Sunday, May 17, 2015 1:46 PM

Just wandering why did the Germans built this tank with vertical armor. Wouldn't sloped walls make more sense, a la T-34? Or is there some advantage to verticals?

  • Member since
    January 2006
  • From: California
Posted by SprueOne on Monday, May 18, 2015 10:36 AM

Hey Doog,

I love the resurrection of old kits buildses WIPs (ah grammar?) And it's a Twofer' !

Those tiny added PE will make a great improvement to the tank. 

Gamera

Very sinister in all black!

hah, So True

Anyone with a good car don't need to be justified - Hazel Motes


Iron Rails 2015 by Wayne Cassell Weekend Madness sprueone

  • Member since
    November 2012
  • From: Capon Bridge West by God Virginia
Posted by feldgrau23 on Monday, May 18, 2015 1:39 PM
Ok Karl I dont have a link but i can tell you the things i found that could be improved or could use some work to look better.
1) The smoke dischargers on the side of the turret could really be better. I should have scrounged my parts bin for better replacements.

2) The next would be the two parts that attach to the front sides of the turret. All the pics i have seen those pieces should be blended into the turret. I have contemplated using putty to blend them in.

3) The next would be the mirrors. They are awful. I still have yet to figure out a way to make them look like the pics i have scene.

Well those are the major things i found. My apoliges for no pics. I will get them to you shortly if you still want them. Didn't want you thinking i forgot you.

Rich.
  • Member since
    October 2004
  • From: Northern Virginia
Posted by ygmodeler4 on Monday, May 18, 2015 8:55 PM

Great job so far Karl, can't wait to see the other built up and paint put on plastic.

-Josiah

  • Member since
    January 2007
Posted by the doog on Wednesday, May 20, 2015 10:35 PM

Hey guys, thanks for all the nice comments, and Rich, thanks for that "to do" list. I hope I"m doing it proud on this update..!

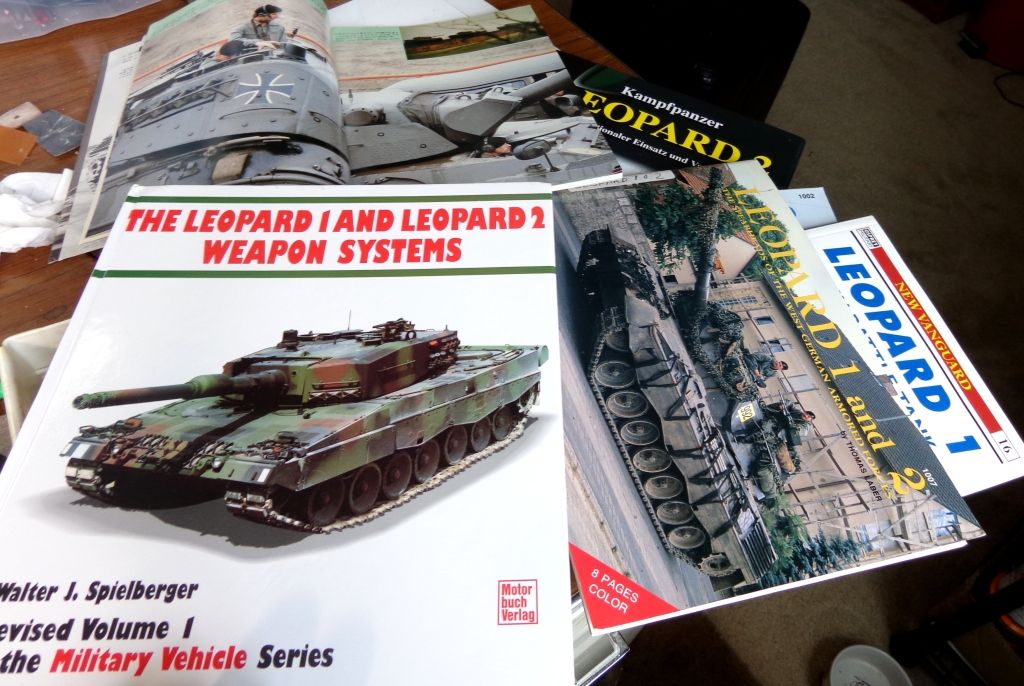
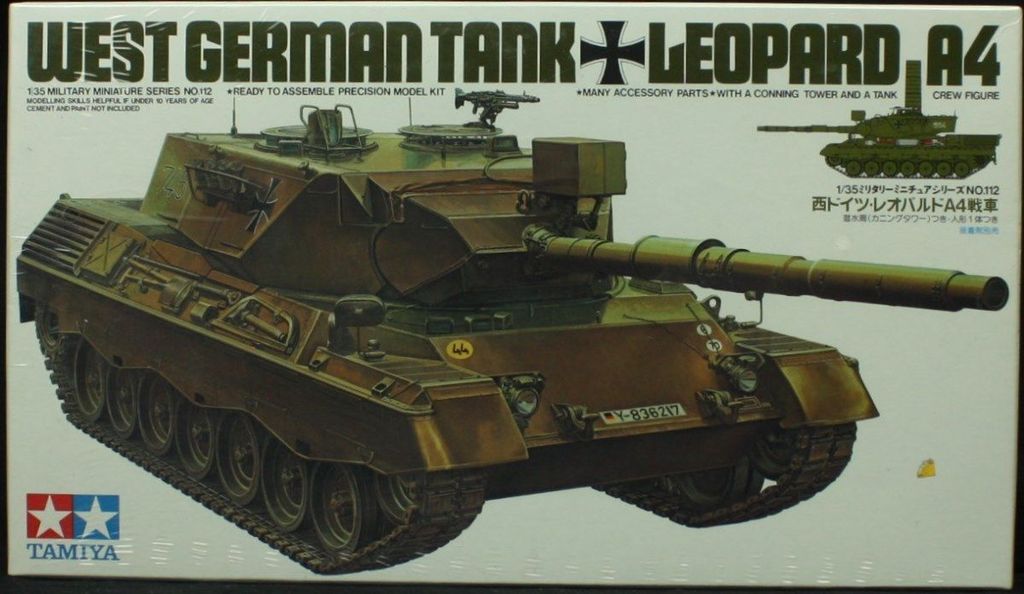
Well I've been working away on the Leopard 1. Wow, what an ancient kit! It really shows its age! I can't believe I built two of these in the past "as is"!

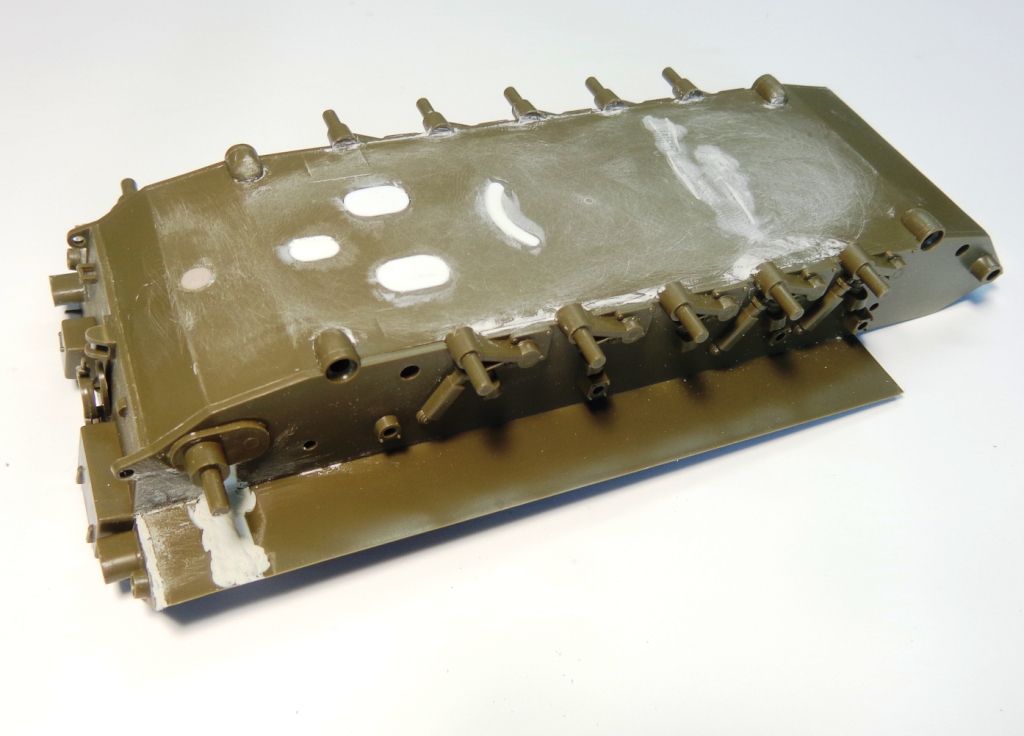
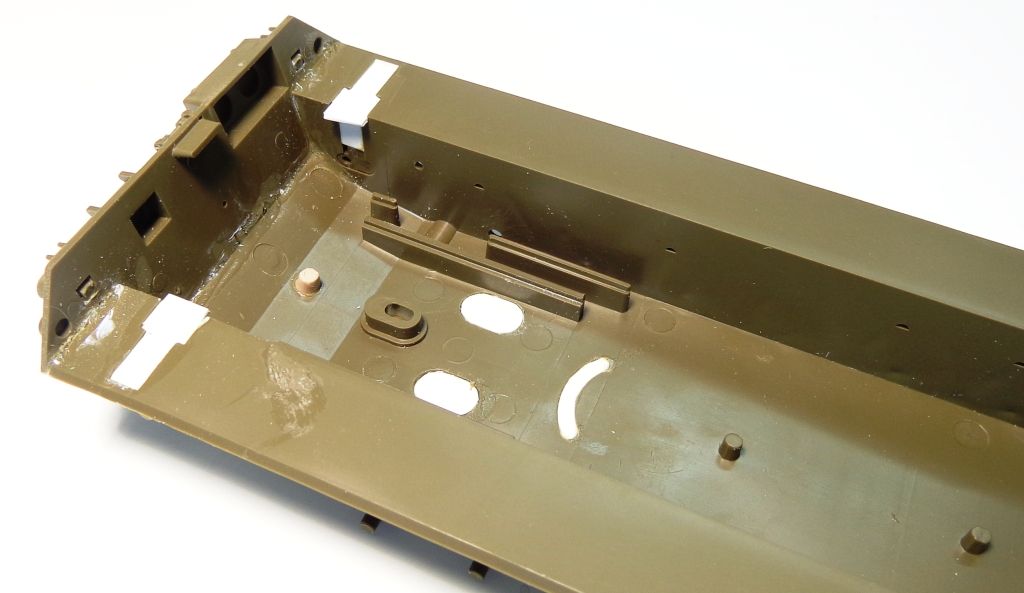
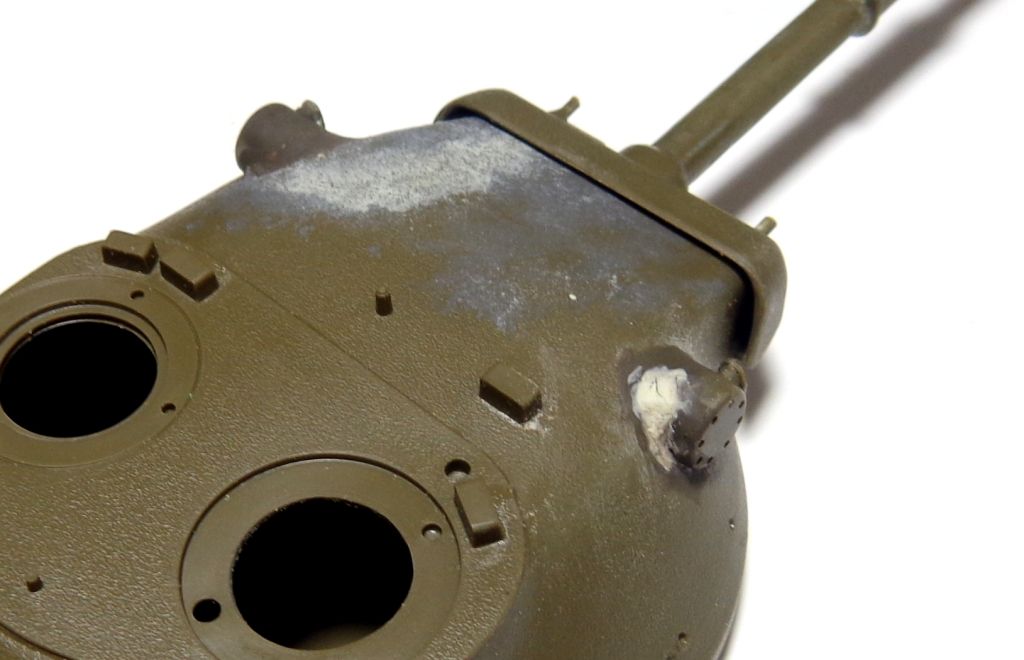
The first step is to seal all the motorization holes. Quite a bit of work here.

The barrel being glued;

The wheels. Most newbs wouldn't even think of doing anything with these, but notice how they have flash and some weird, "sharp" edges? I decided to take each one, sand the edges, and use an Exacto knife to "round" the edges a bit. It really improved the look of them. Before:

After:

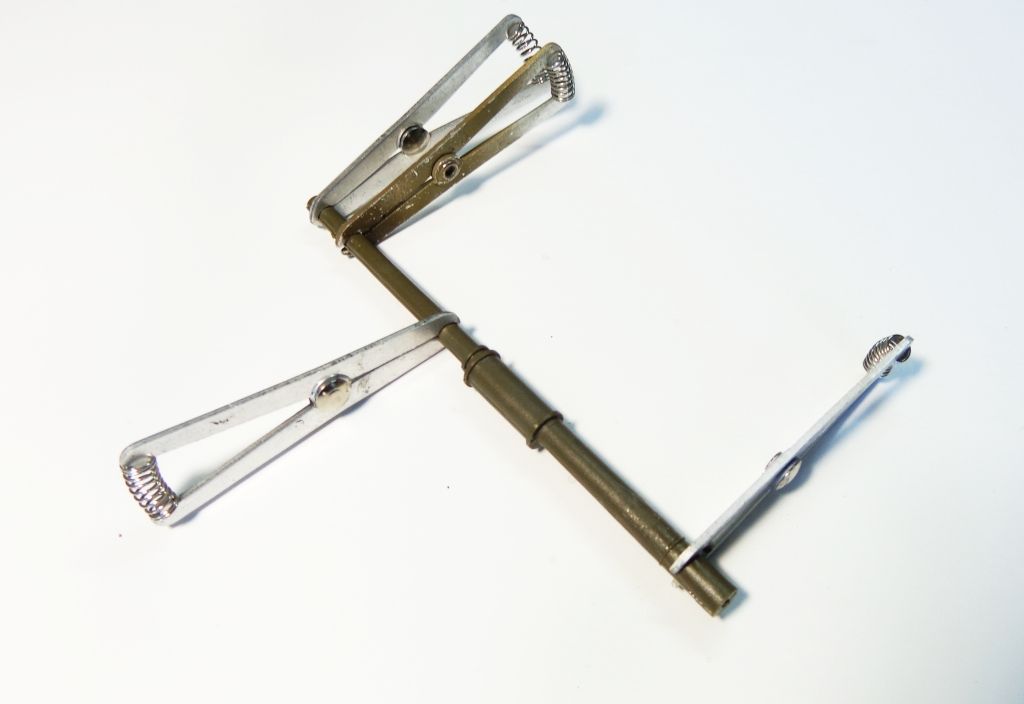
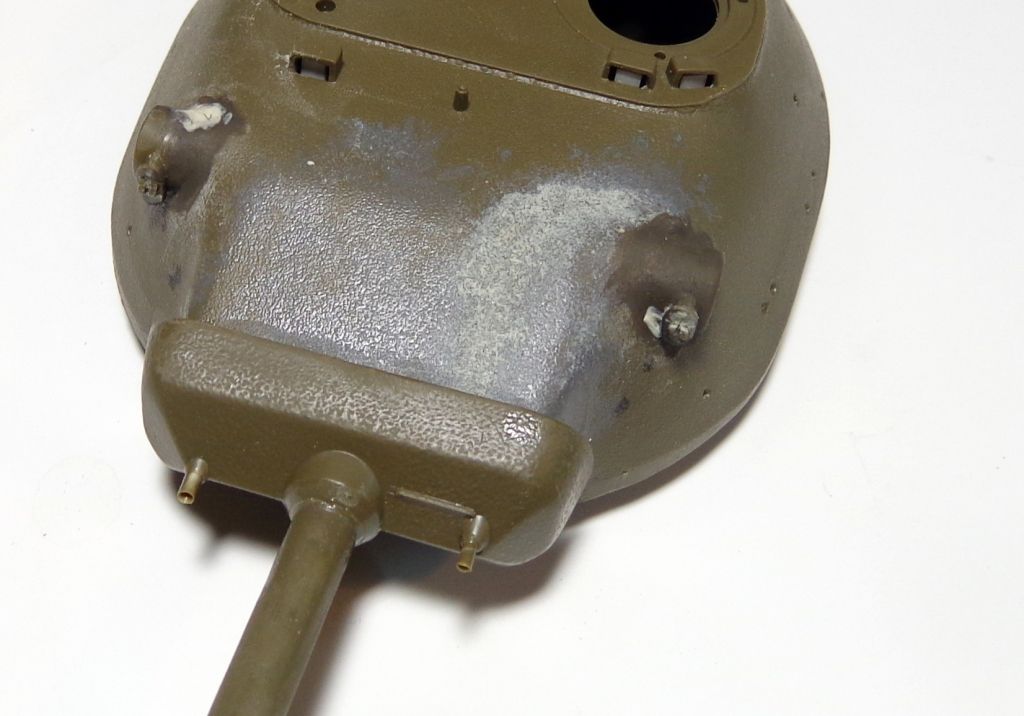
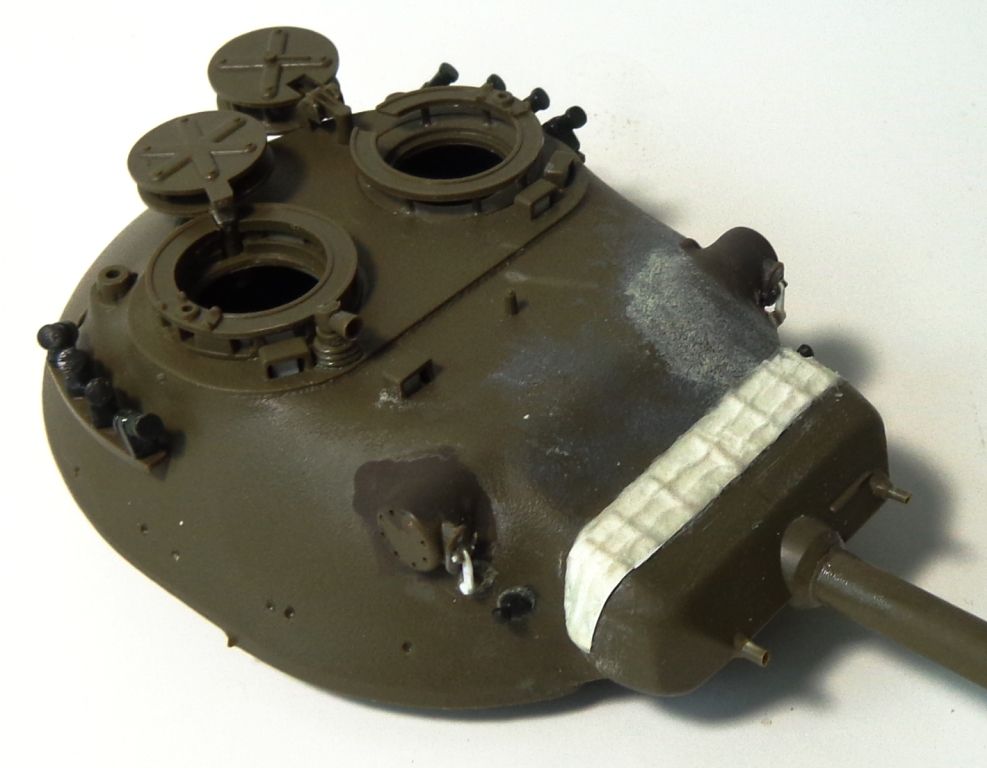
Next: these projections for the binocular targeting optics on the sides. They are protected and "closed" by something that looks like a side mirror; the problem is that they are rather thick and gnarly. Plus they don't actually attach as they should, especially the articulating arms to open the shields. I decided I could d something cool here...

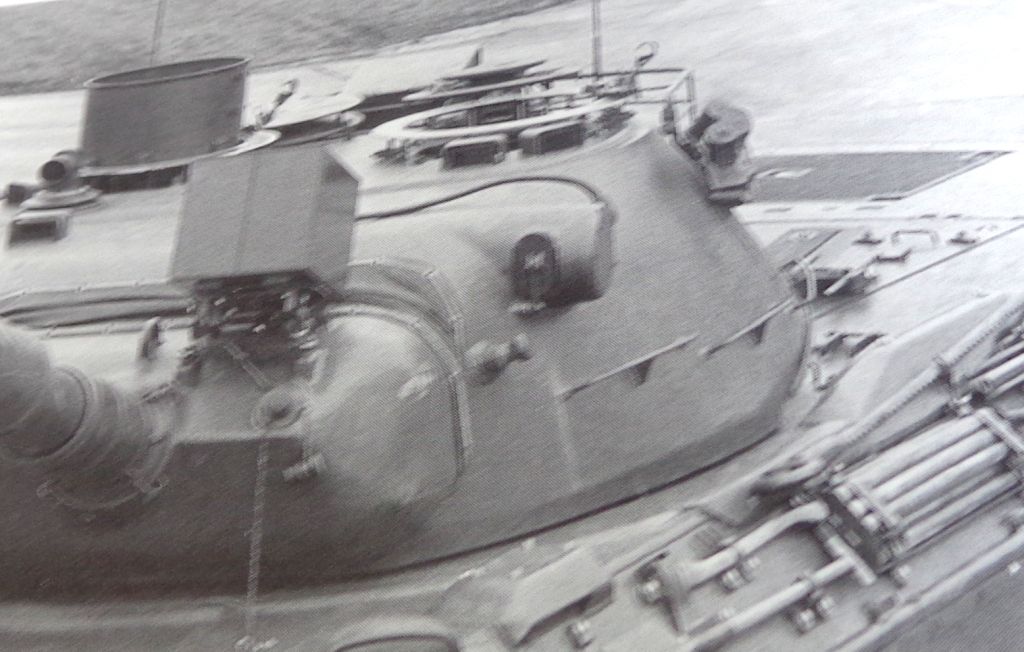
Here's what they're supposed to look like. Note how dainty they are. Note also the missing lifting lugs on the turret sides in front of them?

First step: cut off the huge arms..

Another good pic of them..

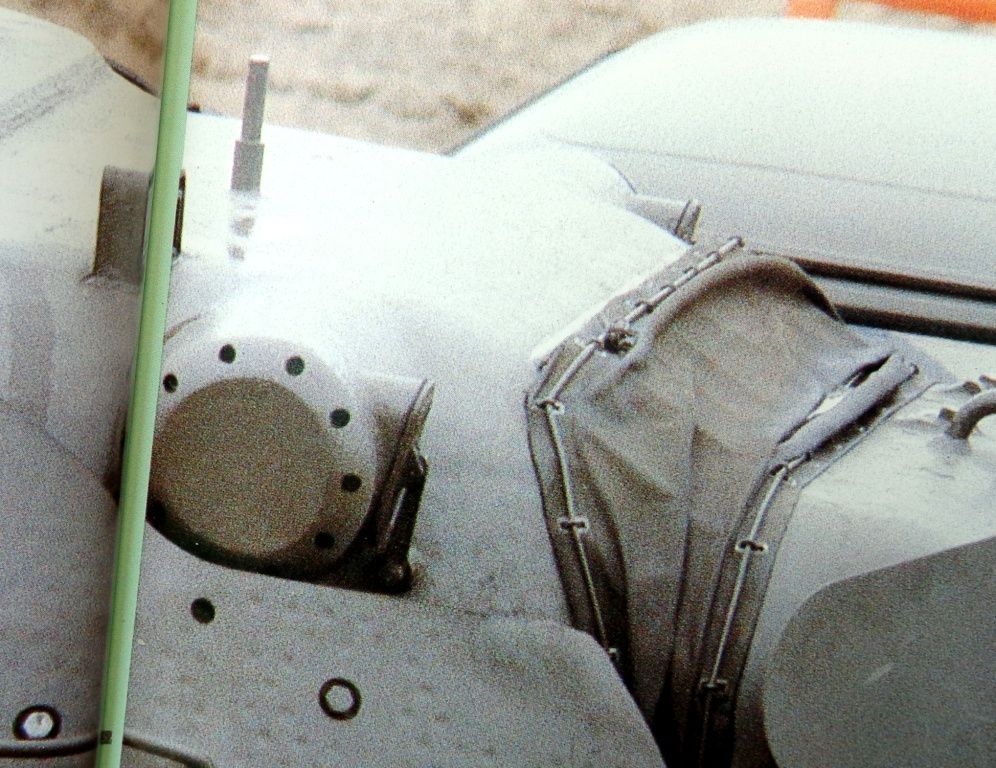
...from my excellent Bundeswehr research library! Stick out tongue

So....at this point, after wondering how I'm going to replicate those lifting lugs, I decided to raid another old favorite kit for parts. I actually have two of these; the other kit is the Testor's kit, and is actually a far better kit, so this sacrifice won't be too hard. WIth this decision, I have opened up a whole wealth of possibilities.

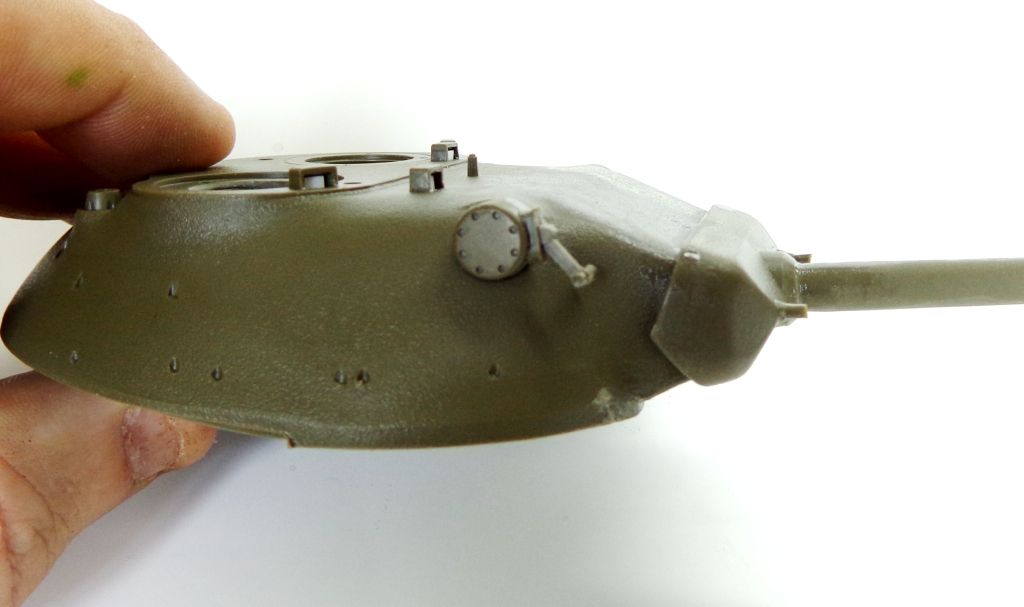
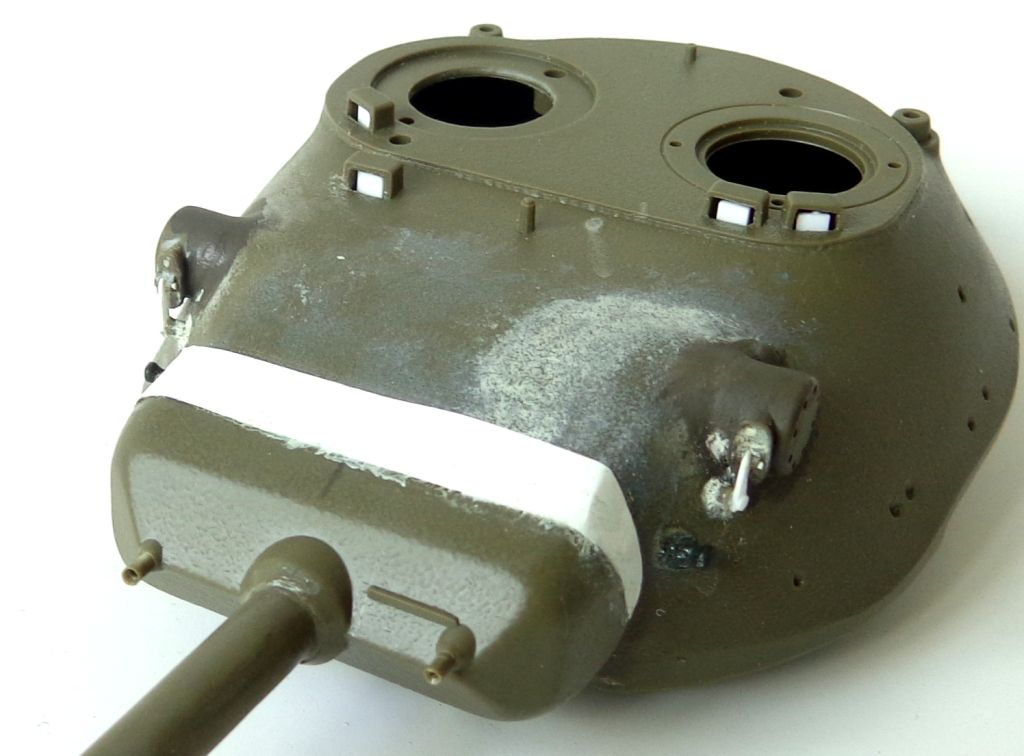
The first thing I did was glue on the parts for the scopes, and blend them into the turret with putty.You'll also note that I removed the molded-on searchlight cable, and re-stippled the turret surface to match the armor texture. 

Next, I checked the putty sanding by painting the parts to see if you could tell there was a join there..also note that I've put in periscopes in the holes there.

Here is the finished articulating arms, the lifting pintles, the periscopes, and a template for the coming mantlet cover...

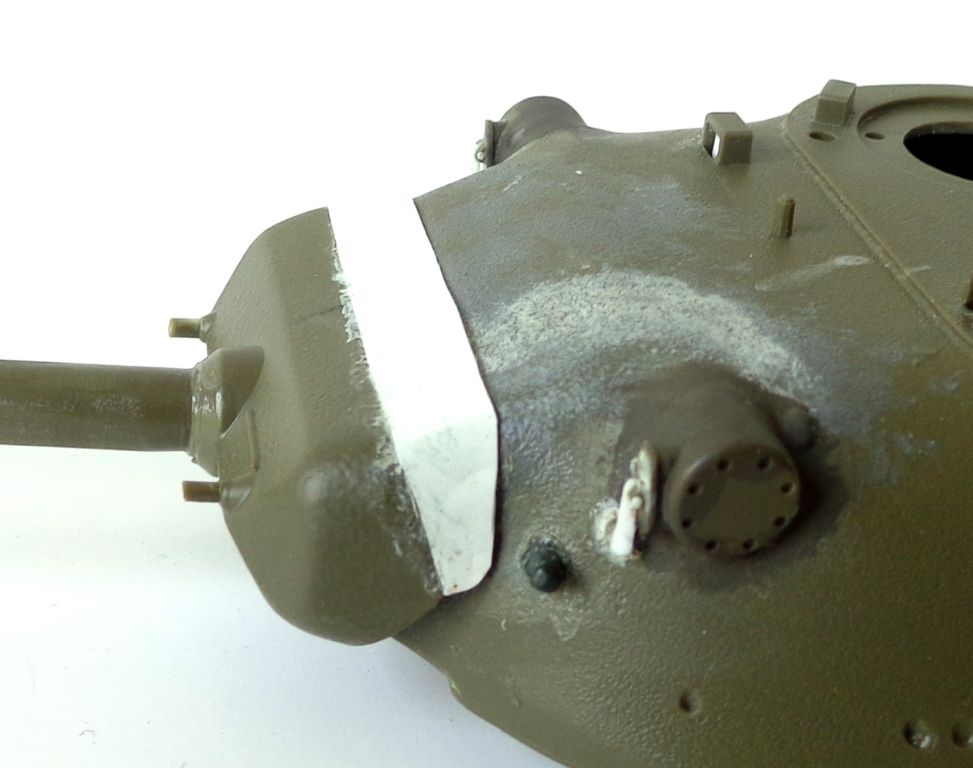
These "bars" have been put on because the mantlet cover has these kind of "lines" of sort under the fabric.

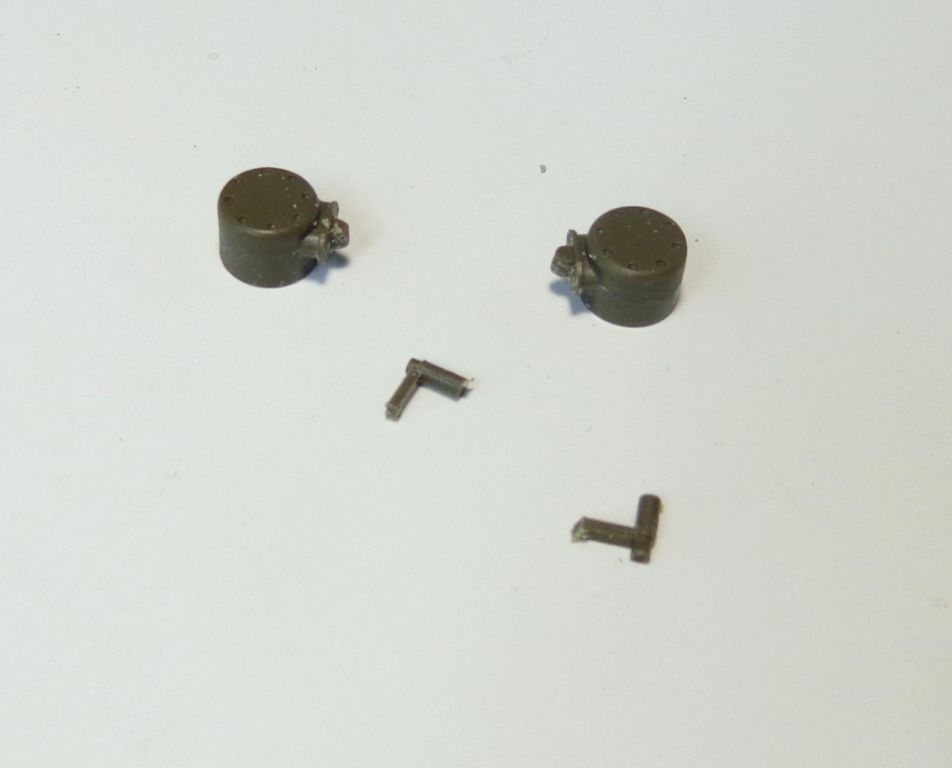
HHere, the mantlet cover has been covered in tissue, and the smoke dischargers from the Leo 1A4 stolen for the better molding. Note also that the barrel has had a "Lip" of sort put on the front. This is barely visible in many photos, but is undoubtedly there.

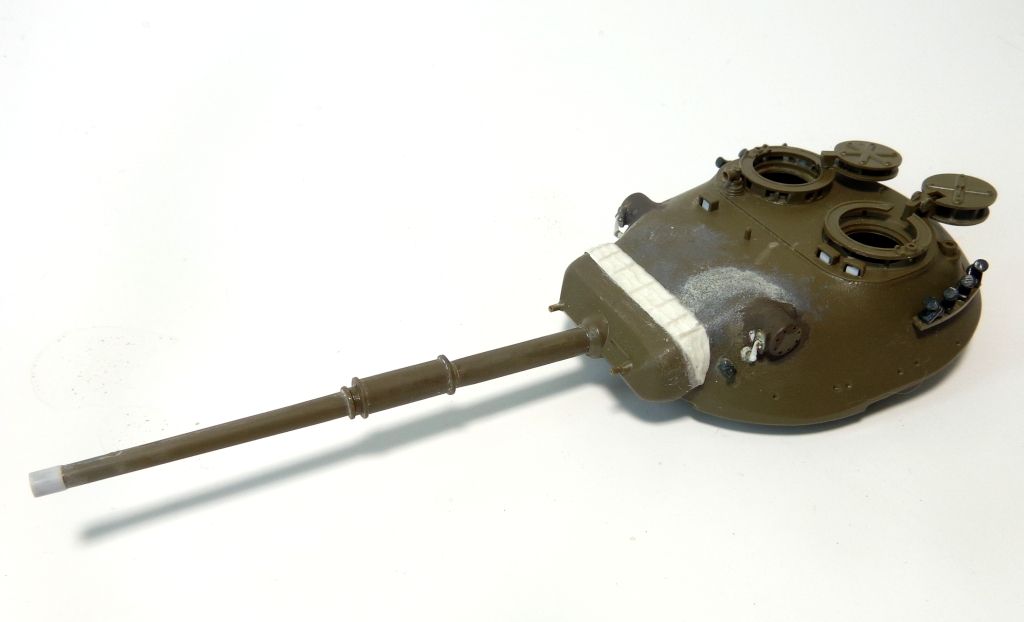
Some  of the texturing on the mantlet cover. Not done yet--I have to add wire on the outside of it and details around the edges.

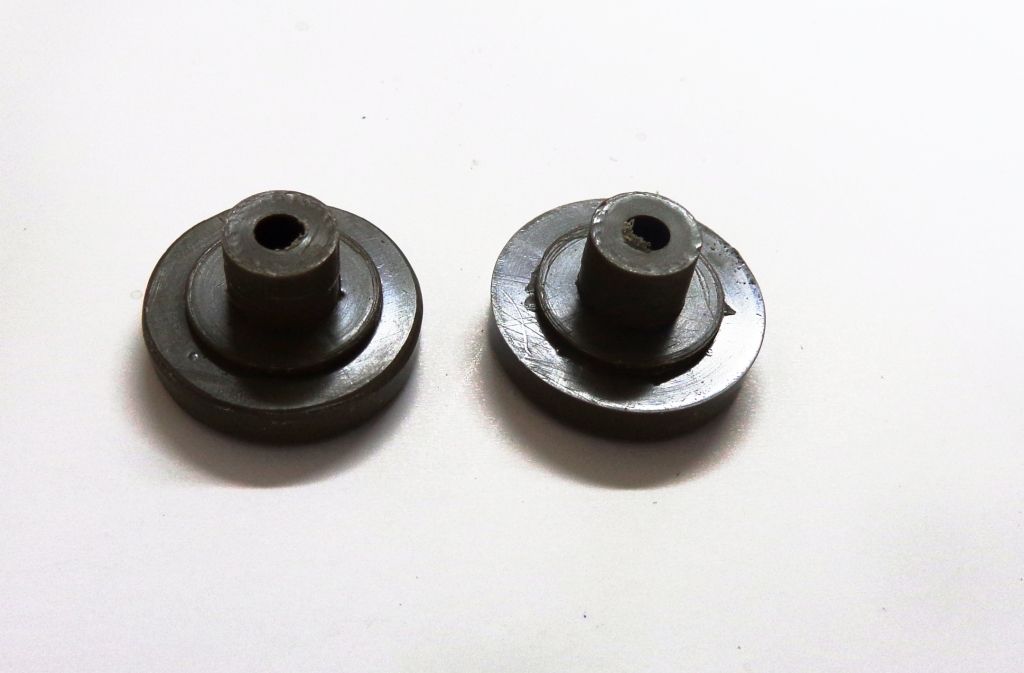
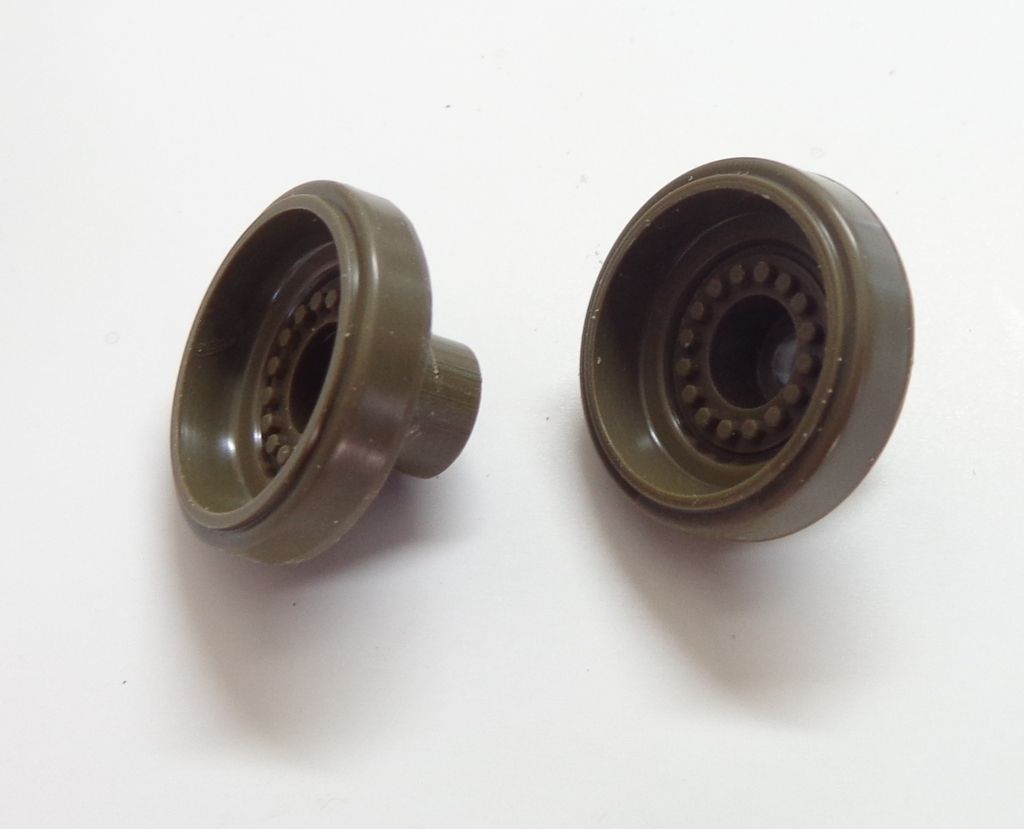
The other thing I decided is to use the Leopard 1A4 wheels, as they're far better in molding; less chunky and primitive looking. The lighter green ones are the original Leo 1 wheels.

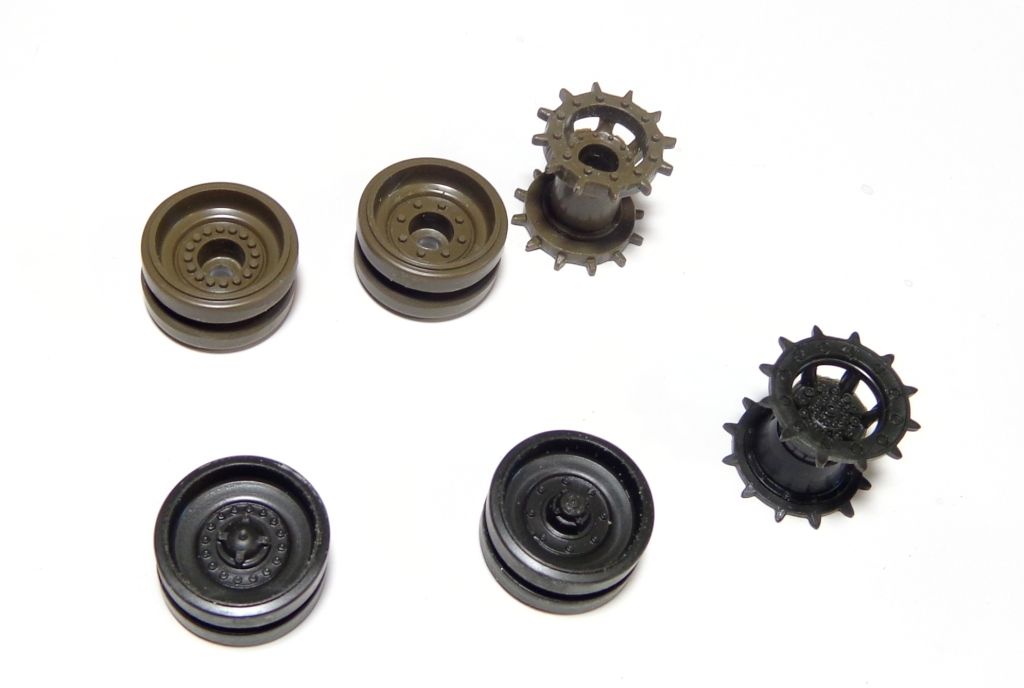
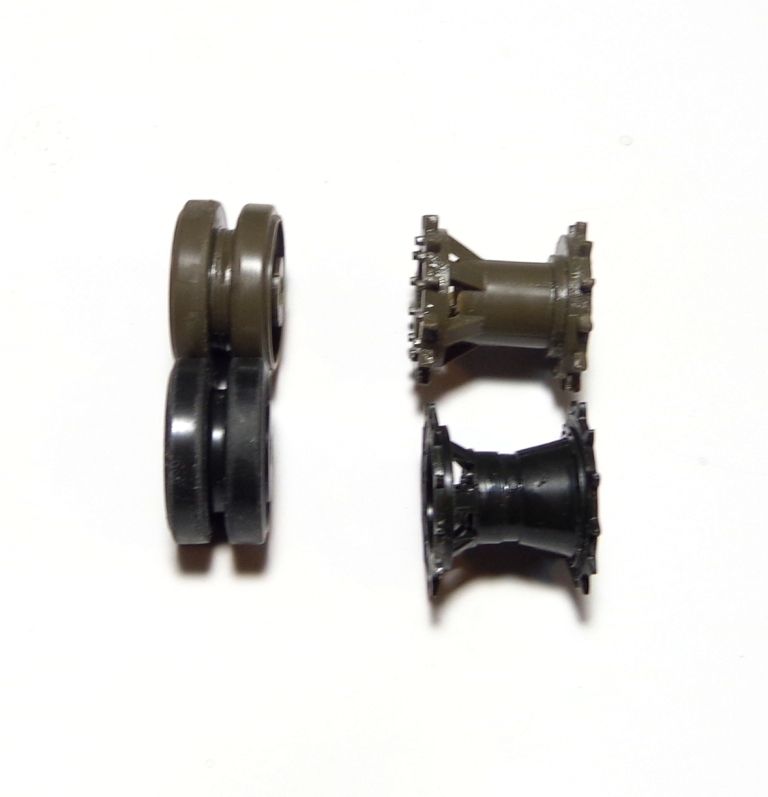
Pretty happy with how this is coming along. I willl also be using the MUCH-better tools from the A4, and possibly some other parts. The tracks, interestingly, are about an inch longer, but look pretty much the same, but with blocks instead of chevrons. Depending on my references, I may have to monkey with them...

That's all for now, guys! Thanks for looking in and commenting!!! Toast Big Smile

  • Member since
    September 2012
Posted by GMorrison on Wednesday, May 20, 2015 10:51 PM

That fabric cover really came out well.

Maybe there's a chance for you pros to do a "Tamiya: purse from a sow's ear" GB some time. I would love to watch it. Quite a few builds lately that start with "I filled in the motor holes".

I lost my armor cherry with the old Tamiya Sd.Kfz 7. But, damn, it ran and I still have it.

 Modeling is an excuse to buy books.


  • Member since
    November 2009
  • From: SW Virginia
Posted by Gamera on Thursday, May 21, 2015 8:05 AM

Karl: Very cool work there on improving the sighting port shield arms (or whatever you call them!) and the mantlet cover- nice to see an already decent kit turned into something way better!

"I dream in fire but work in clay." -Arthur Machen


  • Member since
    November 2012
  • From: Capon Bridge West by God Virginia
Posted by feldgrau23 on Thursday, May 21, 2015 8:47 AM
Karl the a1 is looking good. You nailed number two on my list perfectly. With the few pics i have of the a1 i think Tamiya would have been better served had they not molded the turret the way they did. I noticed the same thing you did.
I oppted to do a minimal clean up. Mainly because you Wont see much of the back side off the wheels any how. Looking forward to seeing more pics.
  • Member since
    July 2004
  • From: Sonora Desert
Posted by stikpusher on Thursday, May 21, 2015 10:53 AM

Very  nice work so far Karl. You are doing many of the same types of mods that I saw done to this kit here at AMPS. You may want to look at the pitch of the sprocket teeth- there appears to be some difference that will be noticed between the two track types. I believe that the rubber chevron tracks were only used on the early production runs and that all later Leopard 1s used the rubber block tracks.


F is for FIRE, That burns down the whole town!

U is for URANIUM... BOMBS!

N is for NO SURVIVORS...

       - Plankton

LSM


  • Member since
    May 2014
Posted by Sackgasse on Thursday, May 21, 2015 12:50 PM

The Leopard 1 looks very interesting, totally diffrent design concept compard with the modern version...

I know I know - the obervation of a newbie :)

Thank you Karl.

Zack

Happy Modeling! Cool

  • Member since
    January 2007
Posted by the doog on Thursday, May 21, 2015 5:42 PM

Thanks for checking it out, guys!

Rich, thanks again for the info. I saw some built-up Italeri models of this and it seems that I would have been better off with that turret, but honestly I was afraid of their horrible tracks that they usually have. They seem to have a better-molded turrret with more of the small details that I have to now fashion or rob. Wish I knew that before. Actually, the way to go would be to bash both the TAmiya kit AND the Italeri--the Italeri doesn't have the searchlight, I believe?

Carlos---thanks for that tip about the sprockets. You know, I DID notice that. The original one has much longer, thinner teeth. I have to take another look and see how big the difference is, and how much it matters.  Also, I think I'll keep the chevron tracks. They seem to go with the original, early Leopard 1 more than the later ones.

Zack, glad to have you aboard!

Just ave a few pics of the finished mantlet cover--I used these wire gauges and tools to finish it.

And here it is..

And here's with the searchlight from the 1A4 installed:

I have to put the wire on and some more lifting loops, things like that...

Stay tuned! Big Smile

  • Member since
    December 2003
  • From: Colorado
Posted by psstoff995 on Friday, May 22, 2015 1:13 PM

That mantlet cover's looking great Karl, will be real cool to see these two side by side!

-Chris

US Army Infantryman

  • Member since
    July 2004
  • From: Sonora Desert
Posted by stikpusher on Friday, May 22, 2015 1:23 PM

I think he needs to add a Leopard 1A4 to the build for a Leopard hat trick ;)


F is for FIRE, That burns down the whole town!

U is for URANIUM... BOMBS!

N is for NO SURVIVORS...

       - Plankton

LSM


  • Member since
    March 2013
  • From: Puebla, Mexico
Posted by garzonh on Friday, May 22, 2015 5:12 PM

Hey Karl, looking very good, specially building various variants at the same time makes it more interesting to watch.

I like all the details you add and modifications. I've no inmerse t into the "scratchbuilding"....and always admire the persons that would invest so much time into books and fix even the smallest details.

Great Karl.

  • Member since
    November 2012
  • From: Capon Bridge West by God Virginia
Posted by feldgrau23 on Saturday, May 23, 2015 10:19 AM

Karl that mantlet cover looks great. I'm going to use tissue paper dipped in white glue and water for mine and see how it turns out.

  • Member since
    December 2002
  • From: Bury St Edmunds, Suffolk, England
Posted by Bish on Saturday, May 23, 2015 11:36 AM

Great detailing there Karl, that mantlet cover is a real nice touch. At a guess, I would say those lines under the fabric are reinforcement to stop the cover fouling the mantlet.

I am a Norfolk man and i glory in being so


On the bench: Airfix 1/72nd Harrier GR.3/Fujimi 1/72nd Ju 87D-3

  • Member since
    January 2015
  • From: Tumwater, WA.
Posted by M. Brindos on Saturday, May 23, 2015 1:51 PM

Bish is right about those ribs. That's exactly what they're for.

I'm loving the details and the attention you're giving this one. Excellent subject!

- Mike Brindos "Lost Boy"

  • Member since
    January 2007
Posted by the doog on Monday, June 1, 2015 8:32 PM

Thanks, Chris, Carlos, Hugo, feldgrau, Bish, and Mike! It's been a long road getting this one into shape, but I'm finally ready for an update. I appreciate you all following along with this build! :)

  • Member since
    January 2007
Posted by the doog on Monday, June 1, 2015 9:39 PM

OK, big update here:

On the hull, I opened up the periscope covers--they're molded rather off-kilter. An exacto blade handles this easily. I then sunk some spare clear periscopes into them which you can see in later pics. This is the "Before" photo. Also, note the simplistic light mounts. I would also clean those off and use the ones from the Leo 1A4.

Note here the improved lights and mounts, plus the state of the periscopes.You can also see the improved mirror mounts using wire and the 1A4 lights. I added wires to the horn (?) and removed the molded chains on the hull front, to be added after paint. I also added welds to the front towing hooks.

The front of the sponsons don't go all the way to the front of the fenders and have to be filled with plastic card.

The front hull also has to be sanded smooth where it joins---there is a lip on top of it, but NOT the bottom.

The cables are contained within these strange hooks on the rear engine exhaust outlets..

I fashioned them thus..

Notice the tow hook projections here and the rudimentary pintle on the rear. I would wind up replacing these with pieces from the junked Kpz70 hull that I had..

 I also wound up adding missing welds along the top and sides of the hull, various other small projections and mounting pins on the rear. I detailed the box on the left, and added AM tow cables from a Panther, cut to proper size.

The light cable was a challenge to make; it was hard to find out how the cable came out of the hull, but I managed to find a close-up pic, and -- thank god for the spares box--found something that could replicate the tube that housed the cable end. The cable is copper alloy wire.

The original grab handles on the first production lot Leo 1's are prototypical almost; they have no inner brace and are at significantly different places than the kit would have you put them. Though this photo from a later batch shows the middle braces, I filled the old holes and marked out the new, using this photo for a guide.

I also found an Eduard PE set in the Leo 1A4 kit, and used a lot of that for the tool mountings. Not nearly as bad an experience here as with that PZ IV Vorpanzer...

Some finished photos. Interestingly, while making this post, I found a few small details that I have yet to add; esp. two lifting hooks on the front hull. The darker plastic parts are from the Tamiya Leo 1A4.  I decided to keep the early Leo 1 chevron tracks.

ALMOST ready for paint...

Once I find those lifting hooks I should be good to go. Call out if you see anything that needs attention!

Stick out tongue

  • Member since
    September 2006
  • From: Dripping Springs, TX, USA
Posted by RBaer on Wednesday, June 3, 2015 12:38 PM

This is my absolute favorite kind of modeling, bar none.

Apprentice rivet counter.

  • Member since
    September 2012
Posted by GMorrison on Wednesday, June 3, 2015 12:59 PM

Me too. That conduit connexion thing- awesome.

 Modeling is an excuse to buy books.


  • Member since
    December 2002
  • From: Bury St Edmunds, Suffolk, England
Posted by Bish on Wednesday, June 3, 2015 1:00 PM

Really nice there Karl some great detail your adding. Not seen hooks like those for the tow cable before, and its a strange place to have them right over the exhaust.

I am a Norfolk man and i glory in being so


On the bench: Airfix 1/72nd Harrier GR.3/Fujimi 1/72nd Ju 87D-3

  • Member since
    January 2015
  • From: Tumwater, WA.
Posted by M. Brindos on Wednesday, June 3, 2015 1:51 PM

This is going to look sooo sweet with paint on it. I need a napkin, I'm drooling. lol

- Mike Brindos "Lost Boy"

  • Member since
    July 2004
  • From: Sonora Desert
Posted by stikpusher on Wednesday, June 3, 2015 2:18 PM

Looking real good there Karl. You might want to check the level of the forward grab handle on the right turret side. It looks a bit off kilter in the photo. But man you have really dressed up this old Kitty kit to look proper.

(But I still think you need to add a 1A4 to this family build)


F is for FIRE, That burns down the whole town!

U is for URANIUM... BOMBS!

N is for NO SURVIVORS...

       - Plankton

LSM


  • Member since
    January 2007
Posted by the doog on Wednesday, June 3, 2015 3:38 PM

RBaer

This is my absolute favorite kind of modeling, bar none.

Cool. Thanks, Russ, I appreciate that!! Big Smile

GMorrison--thanks too, G! Thanks for noticing that conduit terminus; that was a serious birch to figure out and build!

Bish--yeah, I was amazed to to see them in the photo. But they make sense for what they do!

Mike-thanks! I've got primer coats on them right now, and am waiting for them to cure and then see what needs to be touched up.

Carlos--yeah, I saw that....grumble, grumble!  Wink I am going to have to see if I can bend it to where it needs to be because those handles are drilled and super-glued in there and I don't think they'll be an easy repair. I think I can probably ge it to where it's not so noticeable with paint on it. Thanks for pointing it out though!
Oh, and I already have a nice 1A4 in the display case! :) Here's my "Bundeswehr shelf" Smile Leo 2A5, Dutch 2A4, The 1A4, and my Jgpz Kanone that was in FSM.

  • Member since
    December 2002
  • From: Bury St Edmunds, Suffolk, England
Posted by Bish on Wednesday, June 3, 2015 3:40 PM

Ye, I can certainly see the logic behind them.

I am a Norfolk man and i glory in being so


On the bench: Airfix 1/72nd Harrier GR.3/Fujimi 1/72nd Ju 87D-3

  • Member since
    November 2009
  • From: SW Virginia
Posted by Gamera on Wednesday, June 3, 2015 10:59 PM

Always great to see stuff ready to start slapping paint!

And nice collection there, these will look great with them.

"I dream in fire but work in clay." -Arthur Machen


JOIN OUR COMMUNITY!

Our community is FREE to join. To participate you must either login or register for an account.

SEARCH FORUMS
FREE NEWSLETTER
By signing up you may also receive reader surveys and occasional special offers. We do not sell, rent or trade our email lists. View our Privacy Policy.