SEARCH FINESCALE.COM

Enter keywords or a search phrase below:

Holden HX Sandman Overlander Panel Van

5948 views
79 replies
1 rating 2 rating 3 rating 4 rating 5 rating
  • Member since
    March 2015
  • From: Streetsboro, Ohio
Posted by Toshi on Friday, December 2, 2016 4:41 AM

This is a great WIP!  Amazing detail work!

Toshi

On The Bench: Revell 1/48 B-25 Mitchell


Married to the most caring, loving, understanding, and beautiful wife in the world.  Mrs. Toshi


  • Member since
    June 2014
  • From: New Braunfels , Texas
Posted by Tanker - Builder on Wednesday, November 30, 2016 12:31 PM

Can You Say ?

"Holy Sandman , Batman " ? Trini , I have to give you a total Huzzah ! She looks nice moving around .Well Done ! T.B.

  • Member since
    June 2014
  • From: New Braunfels , Texas
Posted by Tanker - Builder on Wednesday, November 30, 2016 12:25 PM

Hmmm;

 All I can say is WOWZA !   T.B.

  • Member since
    August 2016
Posted by Trini2DBone on Wednesday, November 30, 2016 11:23 AM

With the body on...


http://youtu.be/KzBA5pVqzGs


  • Member since
    August 2016
Posted by Trini2DBone on Wednesday, November 30, 2016 11:08 AM

hope this works...lol


http://youtu.be/An9AGuhqCN8


  • Member since
    August 2016
Posted by Trini2DBone on Wednesday, November 30, 2016 11:04 AM

Got the chassis wired up with the electronics...first test run....lol


http://youtu.be/An9AGuhqCN8


  • Member since
    August 2016
Posted by Trini2DBone on Wednesday, November 30, 2016 10:57 AM

Woot..! These showed up yesterday!  Sweet!


  • Member since
    August 2016
Posted by Trini2DBone on Friday, November 25, 2016 1:10 PM
Lol...thanks TB ! This will be driven...but very lightly...and on flat open areas....lol!
  • Member since
    June 2014
  • From: New Braunfels , Texas
Posted by Tanker - Builder on Friday, November 25, 2016 11:08 AM

Aww ! WOW ;

 You have got this down ! I do still like the whole project . Now , when you get her running . Please don't scratch it ! Please ?   T.B.

  • Member since
    August 2016
Posted by Trini2DBone on Friday, November 25, 2016 10:50 AM

Didn't get as far as I hoped but did manage to make some progress...:blink:


Decided that the first thing to do was get the heat sink sunk...lol!  I found an Integy Heatsink that came with a fan, but didn't need the fan.....but the heatsink lined up pretty sweet! The only real issue was that I needed to widen the hole where the motor goes, and hollow out the oil pan the the heat sink fins fit in there...


Removed the fan from the heat sink and stripped the engine to near nekkid ... Then covered up the pulley system and grabbed my trusty proxxon rotary tool ! 


Got the ole redneck sanding cabinet out and added some high tech lighting...lol


Not bad...still needs a bi of tweaking...so that the tranny bolts up flush to the motor.


Will continue tomorrow ... Once I get it tweaked properly, will go ahead with the wiring...

  • Member since
    August 2016
Posted by Trini2DBone on Friday, November 25, 2016 10:42 AM

Hey guys.... Well...it's been a month already...: but I finally think I have everything I need to move forward....


Now I got to stick all of this..


In here....IndifferentIck!


In the meantime .... Here's a few pics while I get jiggy with it....will have a progress update later tonight...


  • Member since
    August 2016
Posted by Trini2DBone on Tuesday, November 1, 2016 9:51 PM

Tanker - Builder

Aha!

    Now , that's the way !. I will say that you have probably been thinking on it for a while . Good on you ! Now let's see it do a burnout ! I gotta say though .that grill looks like a Mercury Grand Marquis item . Did you make it or buy it ? Tanker - Builder


lol...thanks man....i made it...!

The only things on the body  that I bought were the steering wheel ( from an axial kit ) and the grille emblem which I had someone laser cut for me...!

  • Member since
    June 2014
  • From: New Braunfels , Texas
Posted by Tanker - Builder on Monday, October 31, 2016 10:55 AM

Aha!

    Now , that's the way !. I will say that you have probably been thinking on it for a while . Good on you ! Now let's see it do a burnout ! I gotta say though .that grill looks like a Mercury Grand Marquis item . Did you make it or buy it ? Tanker - Builder

  • Member since
    August 2016
Posted by Trini2DBone on Friday, October 21, 2016 8:09 PM

Tanker - Builder

Aw TRINI !

   This is getting Scary in an awesome way . Looking Good . As to the clearance , why don't you put a low profile handsome looking scoop on the bonnet to clear the stuff under it ? That is quite a chunk of engine you got in there !

 Like I said SCARY GOOOOOD !     T.B.      Sorry about that . I didn't see the scoop you had , till I went back and really looked .


hey thanks TB! 

But it's not actually a hood scoop...the hood itself has a raised section in the center, and when I was building it in the beginning, I never intended to have the hood opening, far less to have an actual engine in there! So I built that raised section at the time the only way I knew how, by adding the piece on top of the flat roof section. 

As for adding a scoop, I really want to keep the stock profile of the car, so I will be making a low profile air cleaner. i am considering filing down the top of the carburetor base on the intake, so I will gain a few more mms, but will try it on another scrap block that I have from the early molds!

  • Member since
    August 2016
Posted by Trini2DBone on Friday, October 21, 2016 8:01 PM

mustang1989

If there's one thing that I like about this larger scale stuff, it's the amount of detail that can be put into their builds. I admire the amount of work that you're throwing at this one to achieve these realistic results. Yes


Hey thanks mustang! You may not believe that when I started this build I had no intention of doing all this detail...lol! A few months after I started experimenting with scratch building ( I did a couple of interiors for lexan bodies - a Tamiya FJ40 and a Rothmans Ford Escort Mk2) I decided I wanted to build a body of a Holden Station Wagon ( I owned the sedan version years ago) that I always wanted but never bought. Then I found out about the panel vans, and I was hooked! Lol!

This was just gonna fit on a chassis the way a regular hard body does...and somewhere along the line ( I think now because of the size as you point out)  I started to think ' I wonder if I could build this part this way? or can I get this piece to function somewhat? Etc etc.  To the extent now that the build has gone on for close to three years.. And to me it seems to have evolved on its own, as none of the details you see were planned...! i think of it as experiments that worked out ok. If you look at some of the early pics when I started you can see a lot of the inexperience I had....this is the first scratch built body I have done...lol! But it has been a learning experience!

  • Member since
    June 2014
  • From: New Braunfels , Texas
Posted by Tanker - Builder on Friday, October 21, 2016 12:05 PM

Aw TRINI !

   This is getting Scary in an awesome way . Looking Good . As to the clearance , why don't you put a low profile handsome looking scoop on the bonnet to clear the stuff under it ? That is quite a chunk of engine you got in there !

 Like I said SCARY GOOOOOD !     T.B.      Sorry about that . I didn't see the scoop you had , till I went back and really looked .

  • Member since
    March 2012
  • From: Corpus Christi, Tx
Posted by mustang1989 on Friday, October 21, 2016 7:31 AM

If there's one thing that I like about this larger scale stuff, it's the amount of detail that can be put into their builds. I admire the amount of work that you're throwing at this one to achieve these realistic results. Yes


 Forum | Modelers Social Club Forum (proboards.com) 

  • Member since
    August 2016
Posted by Trini2DBone on Thursday, October 20, 2016 10:13 PM

Then I just had to mock up with the body on....! 

With the radiator in there, I have 8mms of space for the clutch fan to fit...!:facepalm:  but that should be enough...lol...!


Will have to get cracking on getting the fan sorted tonight so I can verify that it's okay! 

The battery came in today...but still waiting on the connectors so I can make the splitter cable! 

Gonna have to make a custom low profile air cleaner pan by adding some styrene so it drops down closer to the intake...only got like about 4mms clearance for the hood to close properly....


Anywho...some more pics...and some more to come soon!


  • Member since
    August 2016
Posted by Trini2DBone on Thursday, October 20, 2016 10:11 PM

Hey guys...another small update..! 


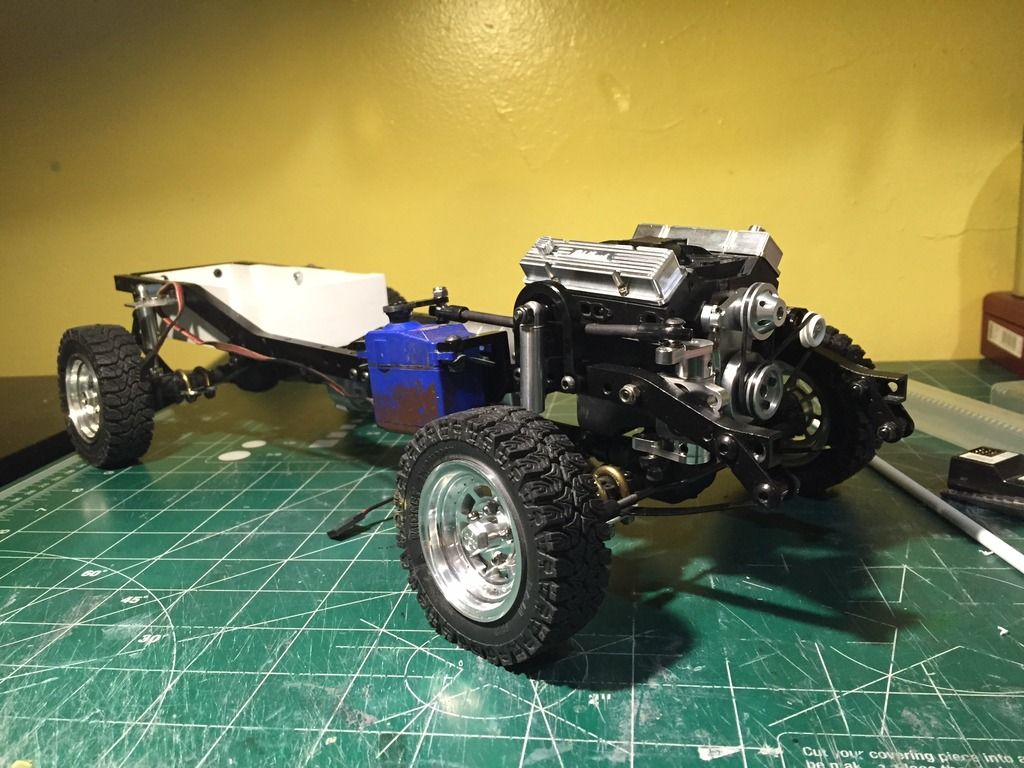
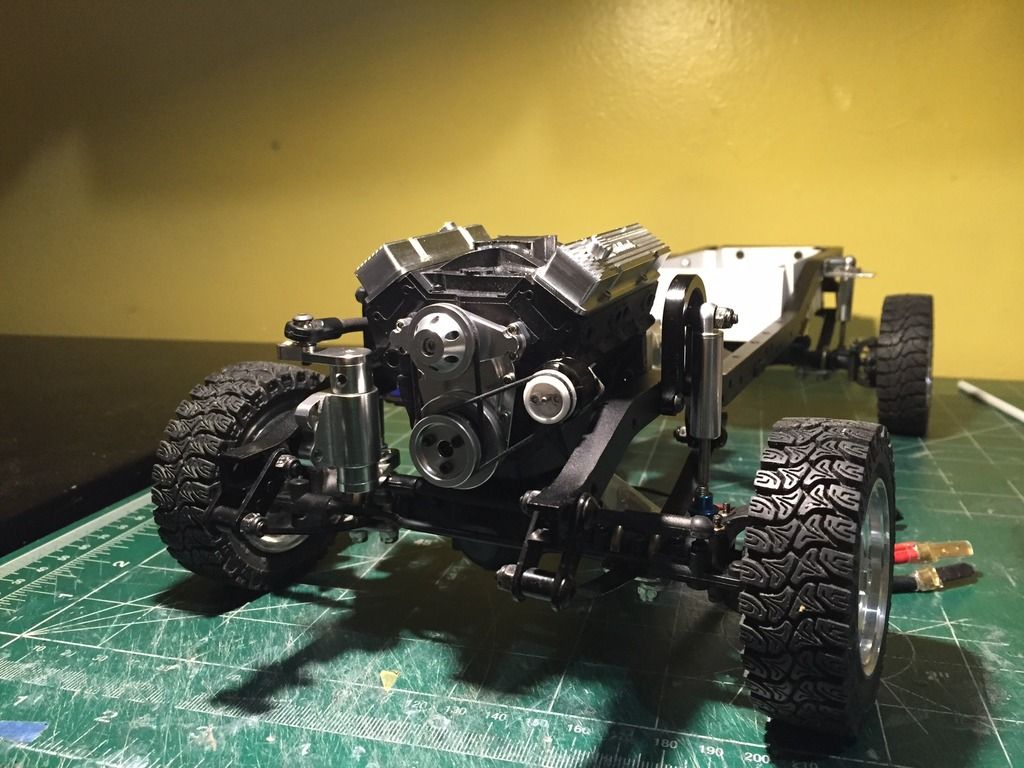
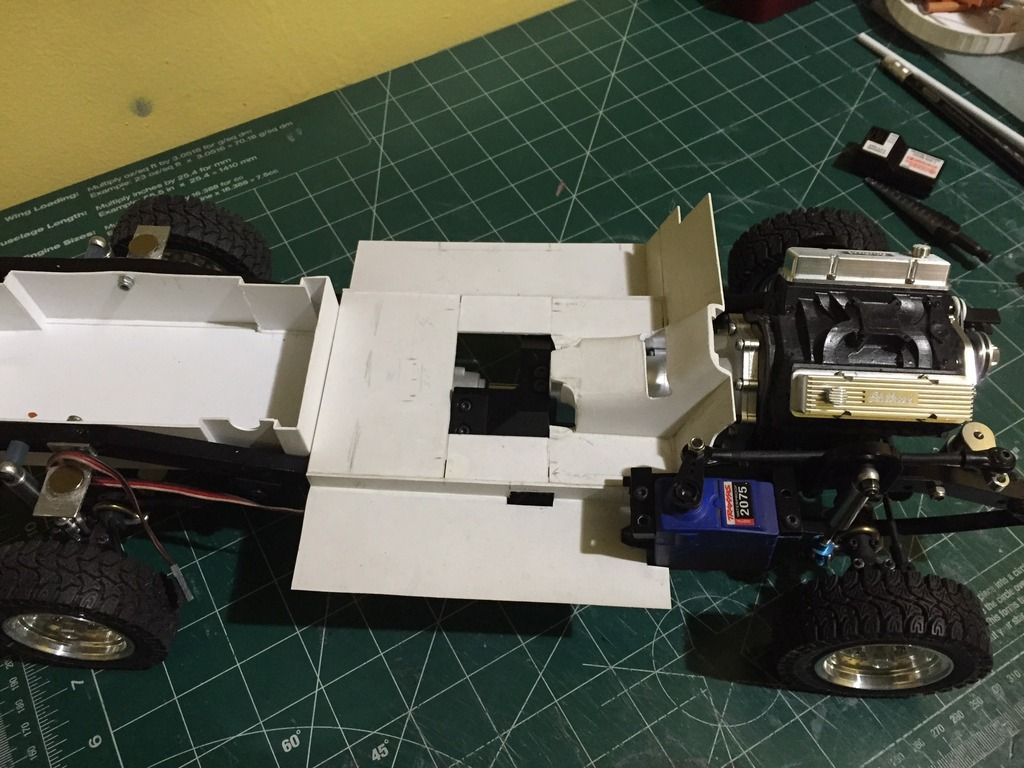
So....managed to figure out how the engine is bolting to the tranny...:p....then got the whole drive train mocked up in the chassis...


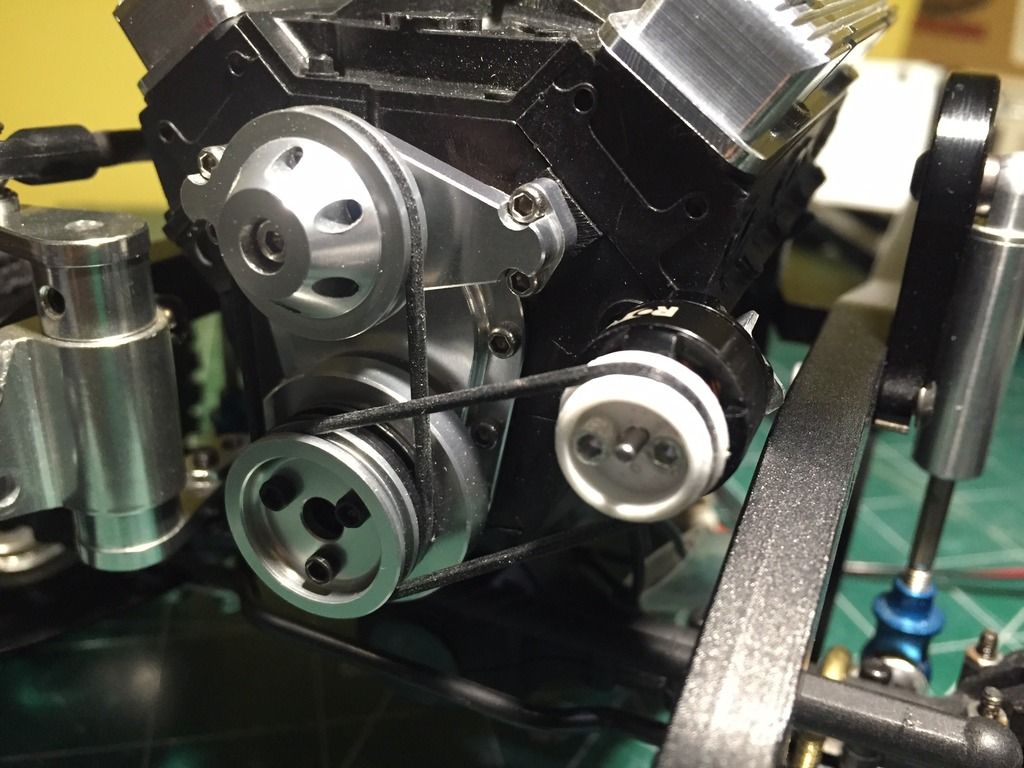
The Good news...the steering linkage clears the block and the exhaust manifolds, forgot to take a pic with the manifold on the block ...  may need to shave a couple mms off the inside of the manifold to give a bit more room, but no biggie as its got enough 'meat' on there to lose it...lol! 

The drag link also clears the crankshaft pulley nicely! So I will think that the steering is good to go...;)

The alternator also clears the frame rail by about 2mms....


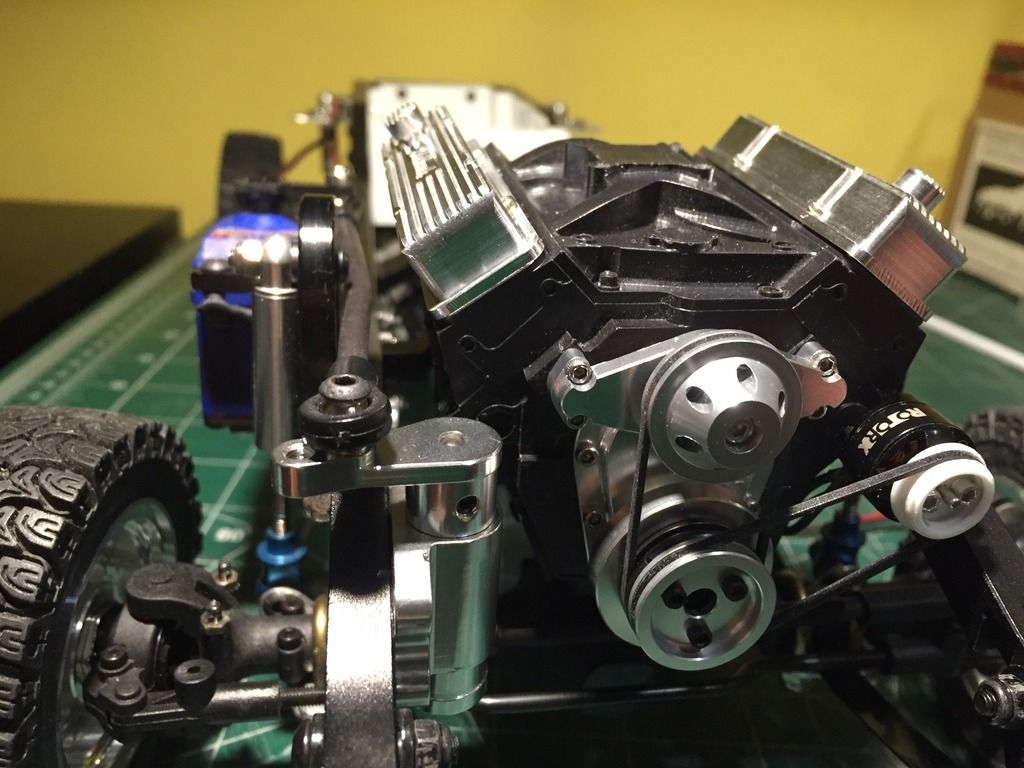
The bad news...with the weight of the motor, and the different motor mounts for the tranny, there's like 1-2mm clearance between the oil pan and the diff casing :facepalm: , but it's not really a big issue and the entire oil pan is solid polyurethane resin, so I can shave a couple of mms off in that area without too much trouble....!


Also...ran into an issue connecting the driveshafts to the diffs.......the diffs are the SDIs which have a 4mm output shaft and the driveshafts are the TF2s, which has an inner bore of 5mm...so I managed to make some spacers to fit...hopefully they will work out and last a while......lol!

So anywho some pics....Watcha think?


  • Member since
    March 2012
  • From: Corpus Christi, Tx
Posted by mustang1989 on Sunday, October 16, 2016 7:18 AM

Nice move on switching that engine out. That does look better! Great work going on with your build.Yes


 Forum | Modelers Social Club Forum (proboards.com) 

  • Member since
    June 2010
  • From: Australia
Posted by OctaneOrange on Saturday, October 15, 2016 10:35 PM
nice, just add a sound card for a v8 engine noise and you're set.
  • Member since
    August 2016
Posted by Trini2DBone on Saturday, October 8, 2016 12:25 AM

holey crapola!! It worked !!


http://youtu.be/p7FJs-m6Lhc


  • Member since
    August 2016
Posted by Trini2DBone on Thursday, October 6, 2016 6:09 PM
Lol...thanks TB! The 'alternator' is actually a tiny brushless motor that I hope will be able to spin the other pulleys...lol! Will connect the esc tonight and test it out...also need to mold and cast the clutch fan and pulley as they are styrene. Will be using a polyurethane resin as that's a lot stronger ( same as I made the engine with...! )
  • Member since
    June 2014
  • From: New Braunfels , Texas
Posted by Tanker - Builder on Thursday, October 6, 2016 5:47 PM

Trini !

   I hope you are a better R.C. Driver than some I know ! .  T.B.

  • Member since
    August 2016
Posted by Trini2DBone on Wednesday, October 5, 2016 9:48 PM
Okay...buckle your seat belts and grab on to your socks...lol ! Teaser pic.....lol....
  • Member since
    August 2016
Posted by Trini2DBone on Sunday, September 25, 2016 11:16 AM

Hey guys...not much of an update.... :o


Got the first mockups of the graphics on pics of the car...the blue looks awesome! Hoping to see soon what the orange combo and the purple combo will look like!  


  • Member since
    June 2014
  • From: New Braunfels , Texas
Posted by Tanker - Builder on Wednesday, September 21, 2016 1:24 PM

Oh Gosh ;

 I just have to say it . Trini , this build is getting awesomer and awesomer  ! ! ! !  I know poor diction , but who cares , it's da trut !  T.B.

  • Member since
    August 2016
Posted by Trini2DBone on Sunday, September 18, 2016 11:12 AM

Tanker - Builder

Trini ;

    I am curious .heve you ever tried to hide the electric motor inside the scale engine and set it up so all the gear including batteries is hidden ? With the kind of work you do it would be Kick Butt !  T.B.


Hey Tanker, actually the aluminum engine ( the orange colored one) does in fact house the electric motor, which is bolted to the tranny. The tranny is a working tranny...I forget the ratio...lol ..

i thought that there was too much orange in the engine bay, so decided to try to build my own engine...and yes, the electric motor does fit inside it and it will be used to drive the car...the battery and electronics are hidden in a compartment between the chassis rails under the rear floor.

this is the engine I'm using..I will be building an alternator with a tiny motor inside that I'm hoping will be able to drive the pulley belt and the other pulleys! Will also have to build an old school clutch fan for the upper pulley.


  • Member since
    August 2016
Posted by Trini2DBone on Sunday, September 18, 2016 11:05 AM

Pawel

Trini - lookin' good with that paint on! I knew from the beginning this is one seriously cool project! Good luck with your build and have a nice day

Paweł


Thanks Pawel!

JOIN OUR COMMUNITY!

Our community is FREE to join. To participate you must either login or register for an account.

SEARCH FORUMS
FREE NEWSLETTER
By signing up you may also receive reader surveys and occasional special offers. We do not sell, rent or trade our email lists. View our Privacy Policy.