SEARCH FINESCALE.COM

Enter keywords or a search phrase below:

1:24 Volkswagen T1 Van (Beetle bus) dropped suspension

8809 views
39 replies
1 rating 2 rating 3 rating 4 rating 5 rating
  • Member since
    August 2007
  • From: back country of SO-CAL, at the birth place of Naval Aviation
Posted by DUSTER on Friday, September 30, 2016 8:35 AM

Pawel Good to see your work again. The blue colo(u)r will be great.

Wish I had a magic bullet for the roof; my only thought is that with the work history of what you have done, may be to strip it back down to the original plastic then after another sanding with fine grade sandpaper; cover the whole roof with something like milliput,  thinned to a paste like consistency.  Or perhaps some of the "Perfect Putty” The idea would be to coat the original plastic so that following coats of primer and paint would be kept separate from the plastic (in your photo the scratches look, to me, like a chemical reaction not sanding scratches).

No doubt you will win out in the end; giving me another high goal to try to attain…. just as I've  figured out how to get the Tamiya Thin open without spilling it-sigh


Steve

Building the perfect model---just not quite yet  Confused

  • Member since
    May 2009
  • From: Poland
Posted by Pawel on Wednesday, September 28, 2016 3:06 PM

Hello Capn! So nice to hear from you!

I wonder what that word might have been, that our nanny-bot just had to censor!

I'm pretty sure a real-life VW Van roof wouldn't be perfectly straight but rather a little wavy from the strain, guys hopping on it and stuff, but I'm comitted to get my roof a little smoother than it is now.

Those old VW's sure were something special! The legend of them still lives on, also in the factories where new VW's are being built - but the new VW's got carried away with features variants and so on, so it's an entirely different story!

I myself drive a "grand son" of the beetle bus - it's a Transporter 4 (T4). That bus has something like a million kilometers on the odometer (I mean literally - just can't say for sure because I have bought it used and the odo has been "turned back"...).

Thanks for your comment and have a nice day

Paweł

All comments and critique welcomed. Thanks for your honest opinions!

www.vietnam.net.pl

  • Member since
    November 2005
  • From: Formerly Bryan, now Arlington, Texas
Posted by CapnMac82 on Tuesday, September 27, 2016 9:23 PM

Ouch.  I wish I had some *** for you on those scratches.

But, I also have to admit that they bring back memories of the self-same VW van I bought used in '77--there were some "wavy" spots on the roof that memory wants to say match what you have there.  But, I'll wager that's fickle memory meeting nostalgia.

My '67 Van had the gasoline heater rather than the manifold heater.  Did not use it much in Texas.  The add-on a/c unit, though . . .

Sold that van after fixing it up to get a '72 Alpine Micro Bus with the itty-bitty transom glazing.  Got that one pretty enough to get offerred enough to sell it.  Turned around and bought a Karman-Ghia.

That Karman-Ghia needed a lot of Bondo.  And Primer.  And more Bondo.  And primer.  Three colors of each, until everything buffed out nice.

  • Member since
    May 2009
  • From: Poland
Posted by Pawel on Tuesday, September 27, 2016 3:46 PM

Hello!

I could definitely use some help here...

I have sanded the roof of my VW and let it sit for two - three days to get rid of most of the solvent... It looked like this:

Then I have put on a coat of Motip primer-filler. All the imperfecions that were there before the sanding came out again:

 I know that even if I sand it nice and smooth and put the color on those will come out again... What to do? Any help appreciated! Thanks in advance and have a nice day

Paweł

All comments and critique welcomed. Thanks for your honest opinions!

www.vietnam.net.pl

  • Member since
    May 2009
  • From: Poland
Posted by Pawel on Monday, September 26, 2016 4:09 PM

Thanks a lot!

All comments and critique welcomed. Thanks for your honest opinions!

www.vietnam.net.pl

  • Member since
    August 2015
  • From: the redlands Fl
Posted by crown r n7 on Monday, September 26, 2016 10:46 AM

very cool vw!


 Nick.

  • Member since
    May 2009
  • From: Poland
Posted by Pawel on Sunday, September 25, 2016 2:14 PM

Hello!

I've got a small update. I have painted the bench seat:

I have also modified and painted the dashboard. The Hasegawa dashboard doesn't show the distinctive shelf in its lower part, so I added it. The indicator lever was also missing, as was the high beam switch. Hasegawa supplies nice decals that go on the gauges and for the steering wheel center. I have cut off the handle and replaced it with wire:

I'm still working on the engine - paint and weathering - and on the body. For now I have sanded the roof so that it's nice and smooth but without penetrating through the primer. I could bet those damn surface marks will show through when I spray the nest layer. If they do, I'll post the photos of it.

For now, thanks for looking and have a nice day

Paweł

All comments and critique welcomed. Thanks for your honest opinions!

www.vietnam.net.pl

  • Member since
    May 2009
  • From: Poland
Posted by Pawel on Tuesday, September 20, 2016 2:21 PM

Hello Mike!

Thanks a lot, it's good to be posting again. I'm just trying the Surfacer right now. I have applied it two days ago, lightly sanded it yesterday and today I noticed those damn scratches are showing through the surfacer! Now I'll sand it a little more and let's see if those scratches come back tomorrow - I just feel like they might! Damn, it would be good to understand the science behind this effect...

'Till next time!

Paweł

All comments and critique welcomed. Thanks for your honest opinions!

www.vietnam.net.pl

  • Member since
    November 2008
  • From: Far Northern CA
Posted by mrmike on Monday, September 19, 2016 5:03 PM

Good to see you back Pawel. Have you considered using Mr. Surfacer 1200 or 1500? Works great for filling those little defects.

Best regards;

Mike

  • Member since
    May 2009
  • From: Poland
Posted by Pawel on Monday, September 19, 2016 3:53 PM

Hello!

Here's what I did this year, after getting back to this project:

I have finally completed the front suspension - I had to build the horizontal arms from scratch. I painted them babies using Mr. Hobby metalizers:

I have also strted to work on the interior - it's pretty bare in the Hasegawa model, only has the shifter stick, so I have scratchbuilt the pedals, together with a moon-style gas pedal, and an emergency brake handle:

The rear deck is also painted:

The blue paint will also be the exterior colour.

By the way, can somebody help me? I'm painting the body using Motip car paint from a spray can. I had some minor scratches on the roof from sanding, so I have put a coat of grey primer on the roof and it kinda increased the scratches. So I have sanded it and recoated, maybe three times now and the scratches keep coming back after the paint dries... How can I help that?

Thanks for reading and have a nice day

Paweł

All comments and critique welcomed. Thanks for your honest opinions!

www.vietnam.net.pl

  • Member since
    May 2009
  • From: Poland
1:24 Volkswagen T1 Van (Beetle bus) dropped suspension
Posted by Pawel on Monday, September 19, 2016 3:39 PM

Hello Everybody!

It's been over two years now since I'm working for VW in Poland. To have something nice to put on my desk at work I started building a Volkswagen T1.

At first I started to build it for "The 2015 /16 Red Hot and Rollin Automotive Group Build" - but I updated the build so seldom, that it's just a nightmare to try to keep track of it there - so I'm posting it in parallel here.

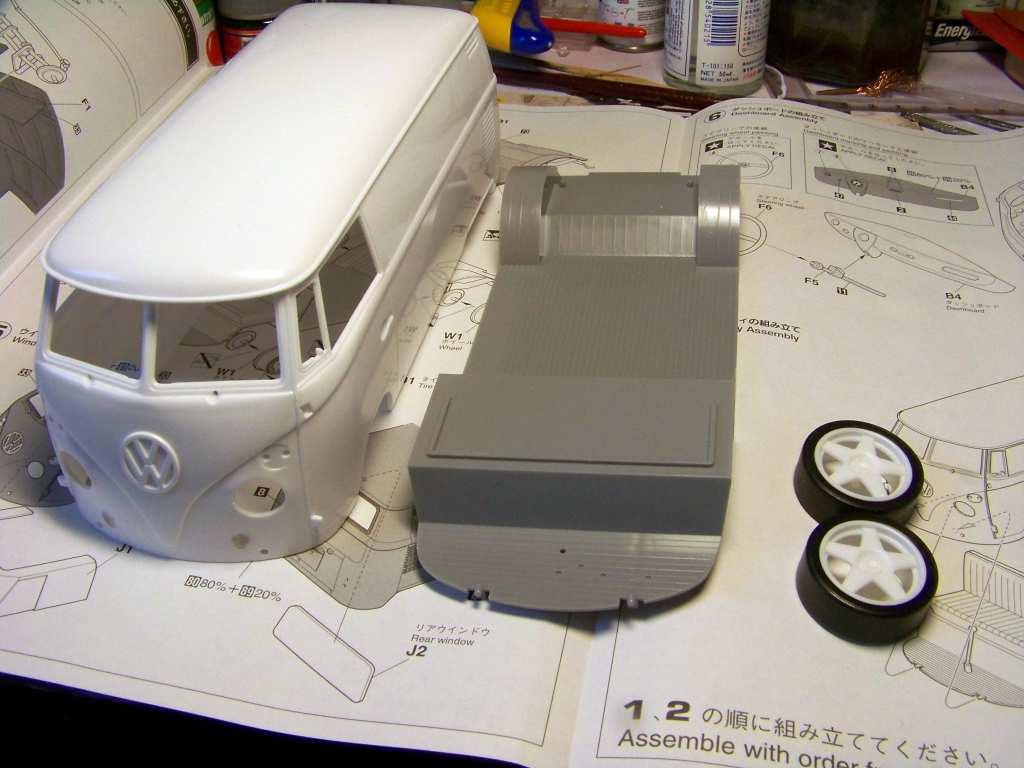
Of course I can't build OOB any more - I have lost that somewhere underway... I got this kit:


I thought since it has this cool paint scheme, it would just be wrong to let it sit on that prehistoric stock suspension and wheels. So I planed to drop the suspension here - put in the suspension and wheels from a BMW like this:


I got this kit (BMW) on a yard sale, years ago - there were actually ona and half kits and have cost me 2$ - so now I've found out what to do with the leftover parts :-)


Here's a photo for a good start:


I've been working on the chassis of that Bus - did some cleanup, filled some gaps and I cut up the front wheel wells to meke some room for the drop:


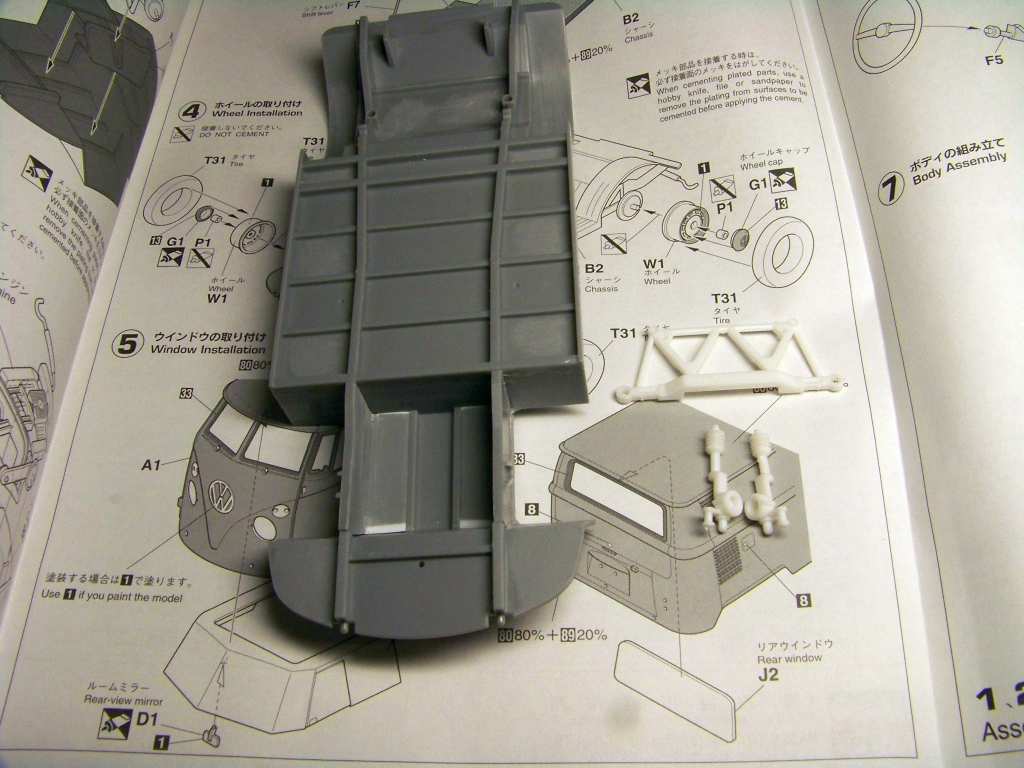
You can also see some parts of the sport Beemer front suspension that will work in my bus - after some mods.

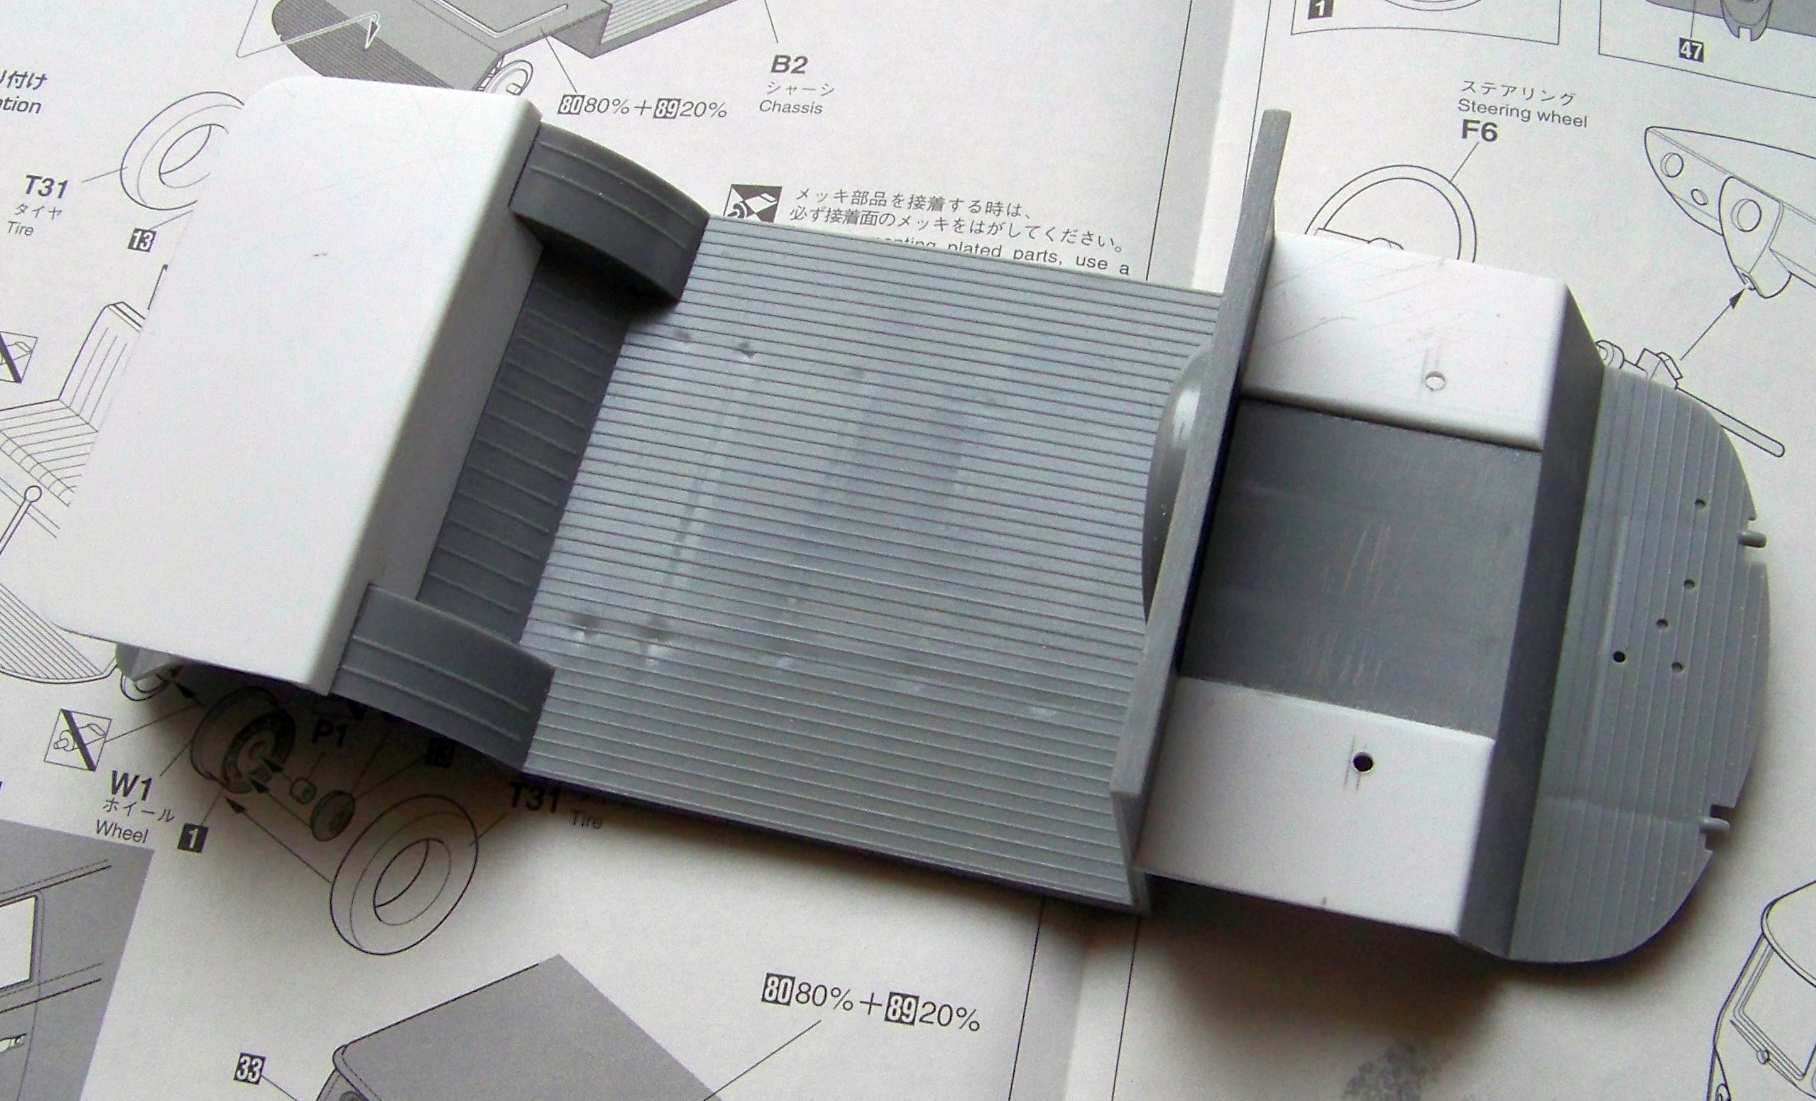
I have deepened the wheel wells and drilled the holes for the shock columns. I also scratchbuilt the engine deck in the rear - it's missing from the van kit, although it's there in Hasegawa's bus kit. The floor now looks like this:


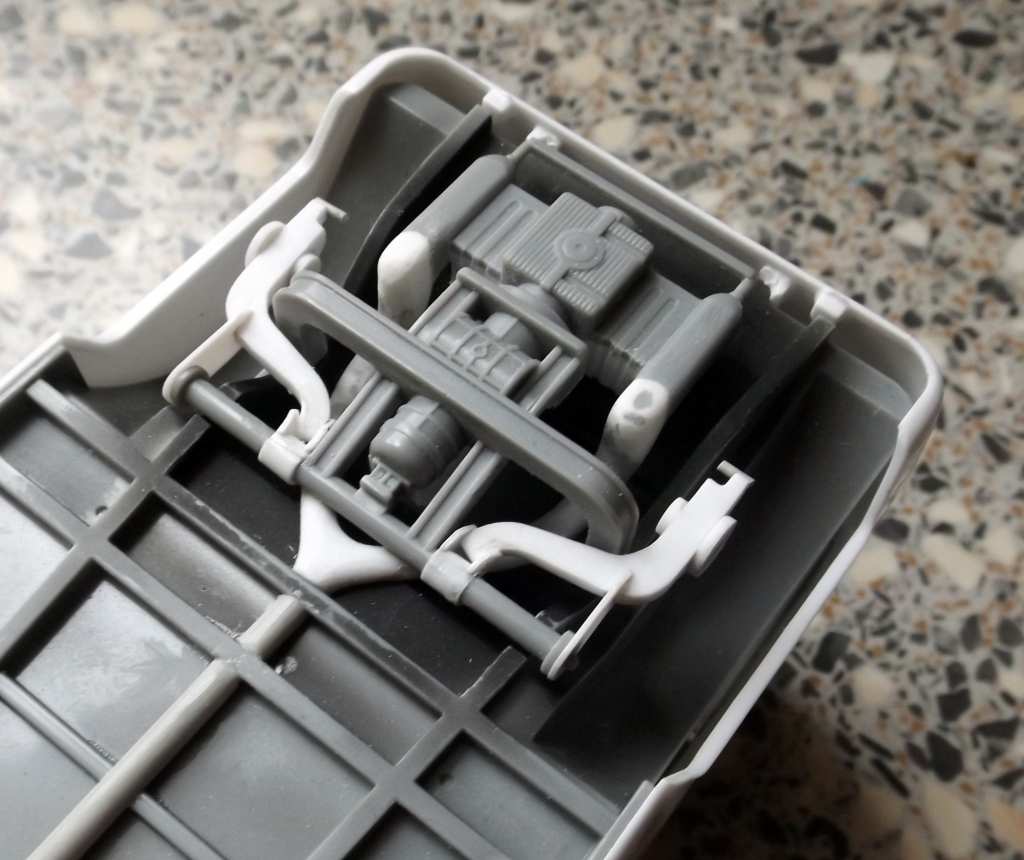
This is how the test fit of the front suspension and the engine looked like:


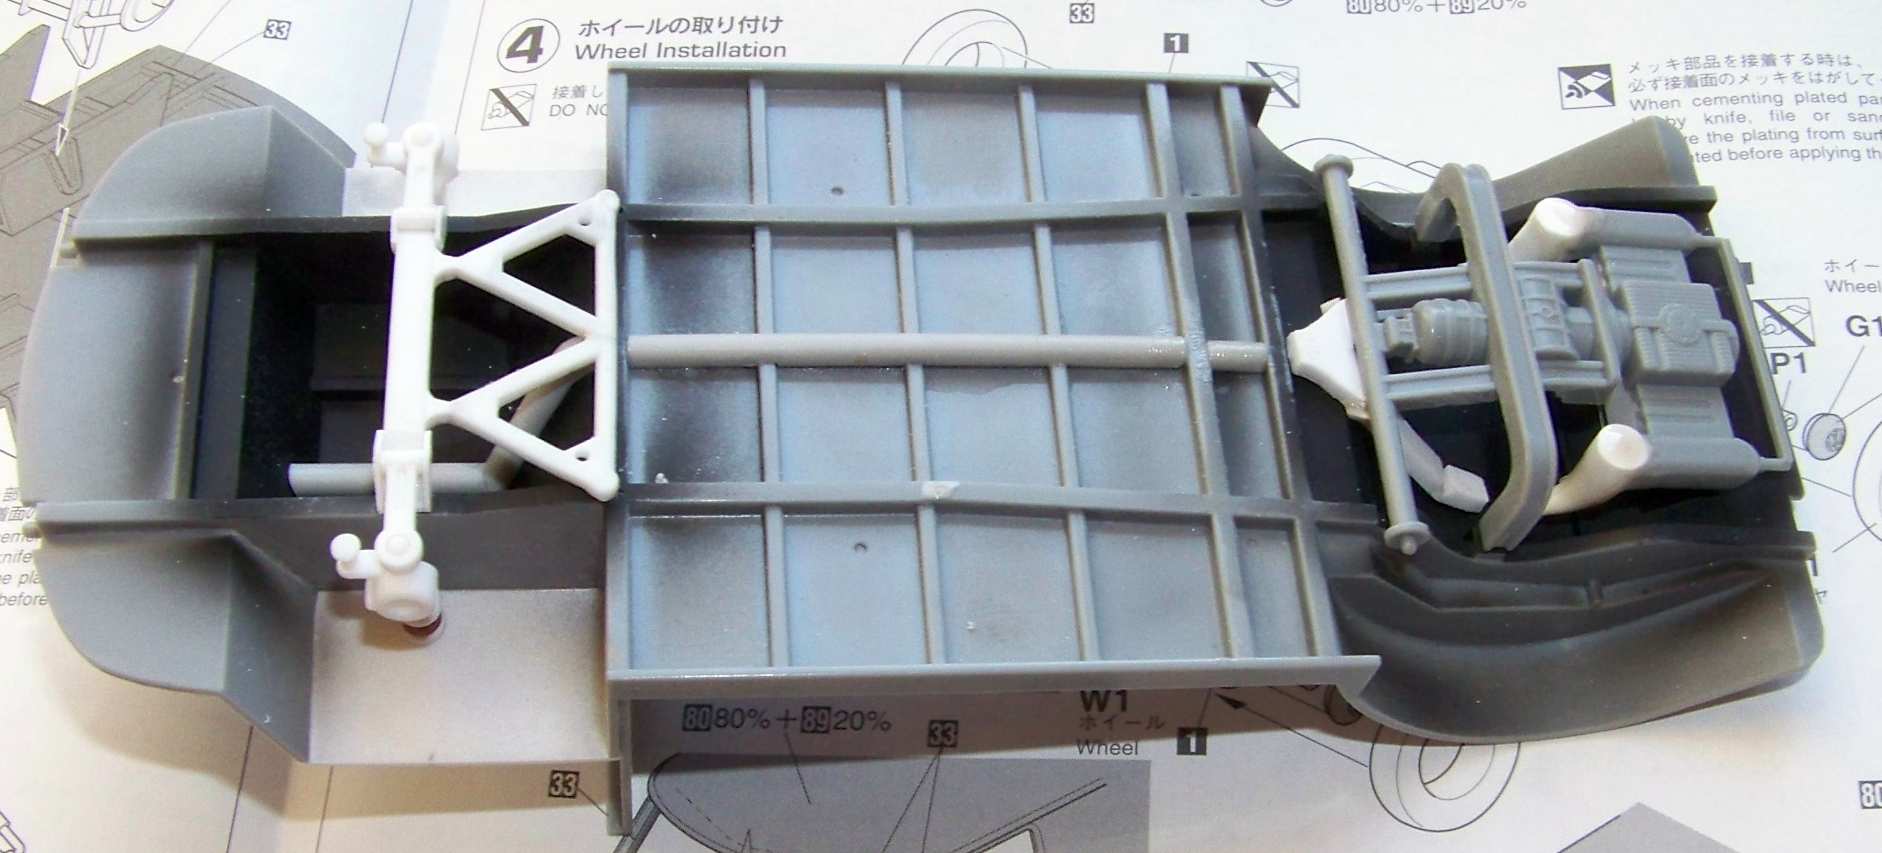
As you can see I've got the front suspension almost done, with only the track bar to be narrowed some 4mm and springs replaced with copper wire. A prominent feature missing from the Tamiya model was the hot air pipe running from around the engine exhaust to the front of the vehicle for heating. On air-cooled vehicle this was a way to provide heat for the cab and in theory it's a very cool concept - gives you hot air just seconds after starting the engine - if it would only be operable.


I'm also trying to give the enigine some volume by building side walls to it, because Tamiya only gives you the underside, and after looking slightly from the side you notice there's nothing there!

I decided against putting the BMW rear suspension in this one and went for something more VW - I have built a T2 style rear suspension here. In order to do that I had to do some eengineering - check out this drawing of mine:


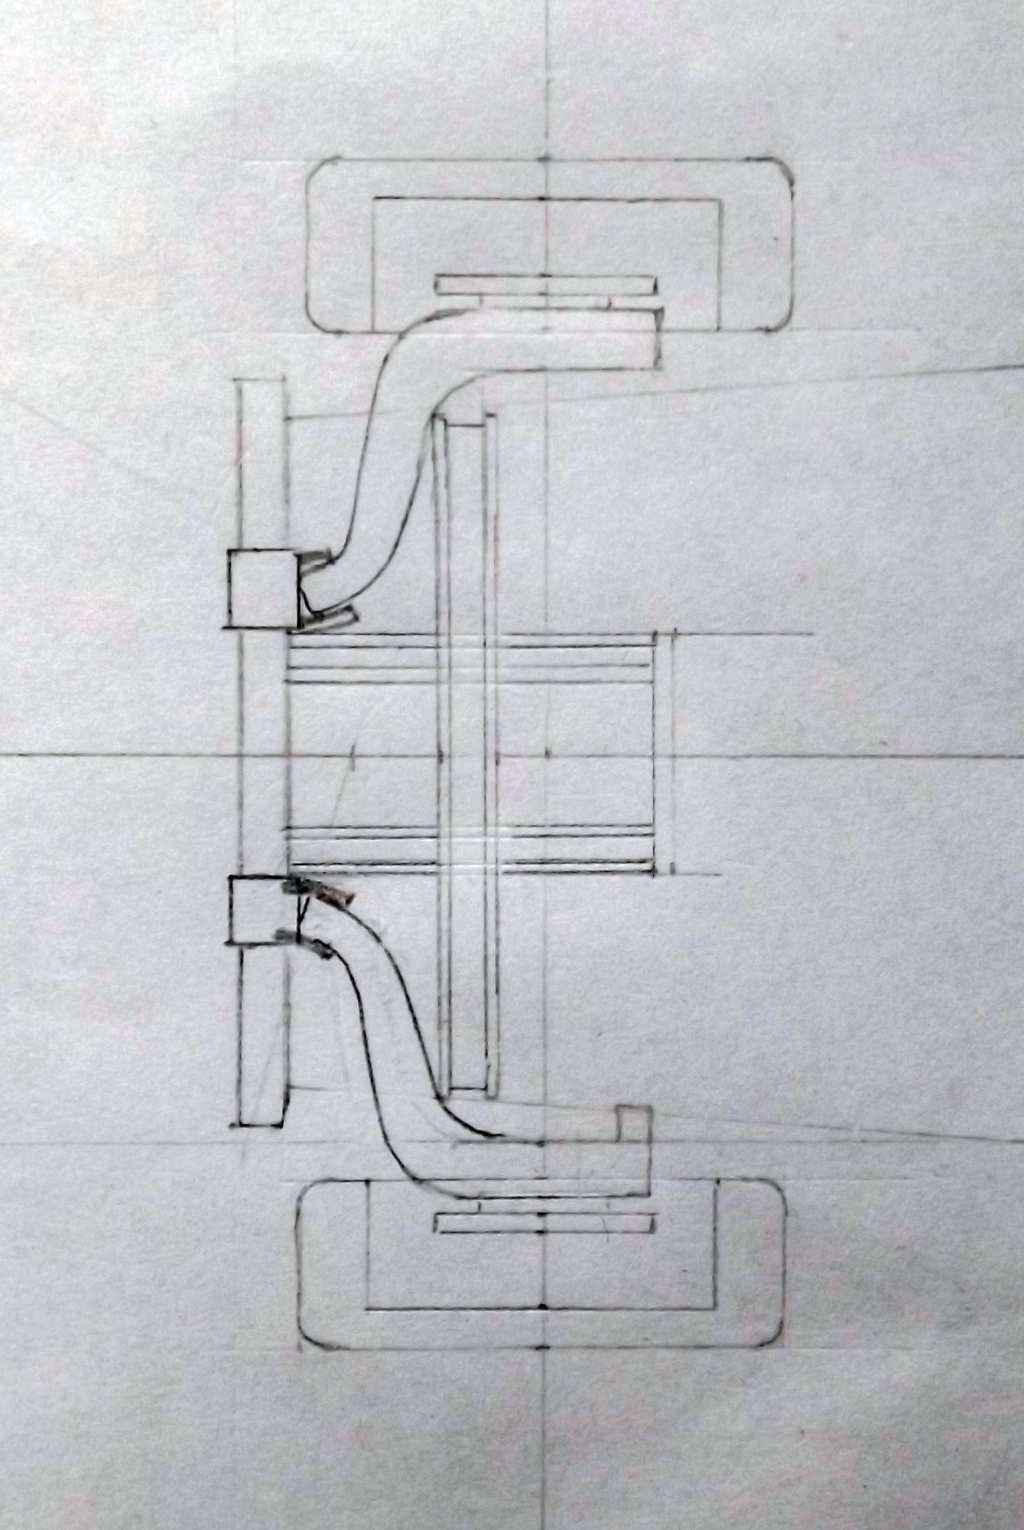
According to this drawing I've built the rear suspension:


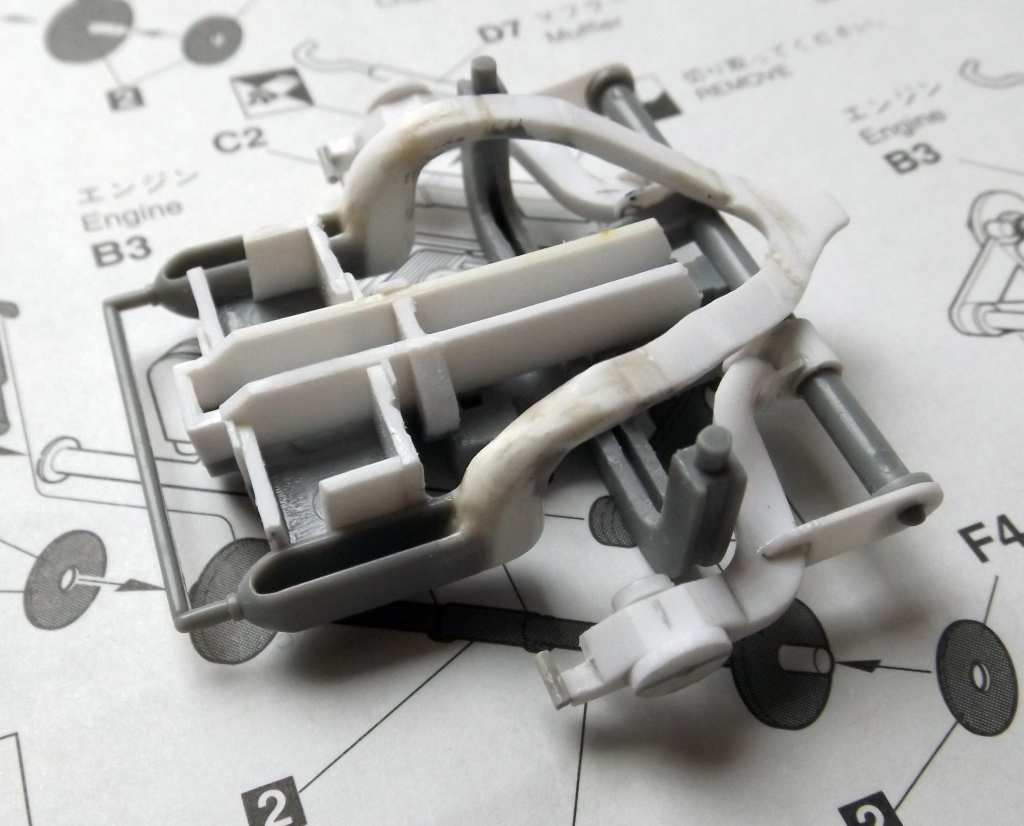
Also note the completed hot air tubing. To give you an idea how I simulated the "depth" of the engine, here's a shot from the side that will later not be visible:


And this is what I got done in 2015 - scattered over 20 pages of 50 page Group build thread. In the time I have built that, people were turning out 4-5 beautiful car models!

Thanks for reading and I hope you liked it - have a nice day

Paweł


All comments and critique welcomed. Thanks for your honest opinions!

www.vietnam.net.pl

JOIN OUR COMMUNITY!

Our community is FREE to join. To participate you must either login or register for an account.

SEARCH FORUMS
FREE NEWSLETTER
By signing up you may also receive reader surveys and occasional special offers. We do not sell, rent or trade our email lists. View our Privacy Policy.