Due to the success of cobbling together a set of "scale-like" non-operable hood hinges for my Ford Fairlane GTA out of styrene, I was asked by the owner of our local hobby shop, Scale Reproductions, Inc., if I could make a set for the car he's building. Brian Bunger, besides running one of the finest hobby shops I've even been in, is one heck of a fine model builder (probably why the shop is sooooo good), and he's building a replica of the 1958 Chevey Impala coupe that was featured in "American Grafitti". He even simulated tuck-and-roll upholstery using 1/2 round strips of Evergreen Styrene.
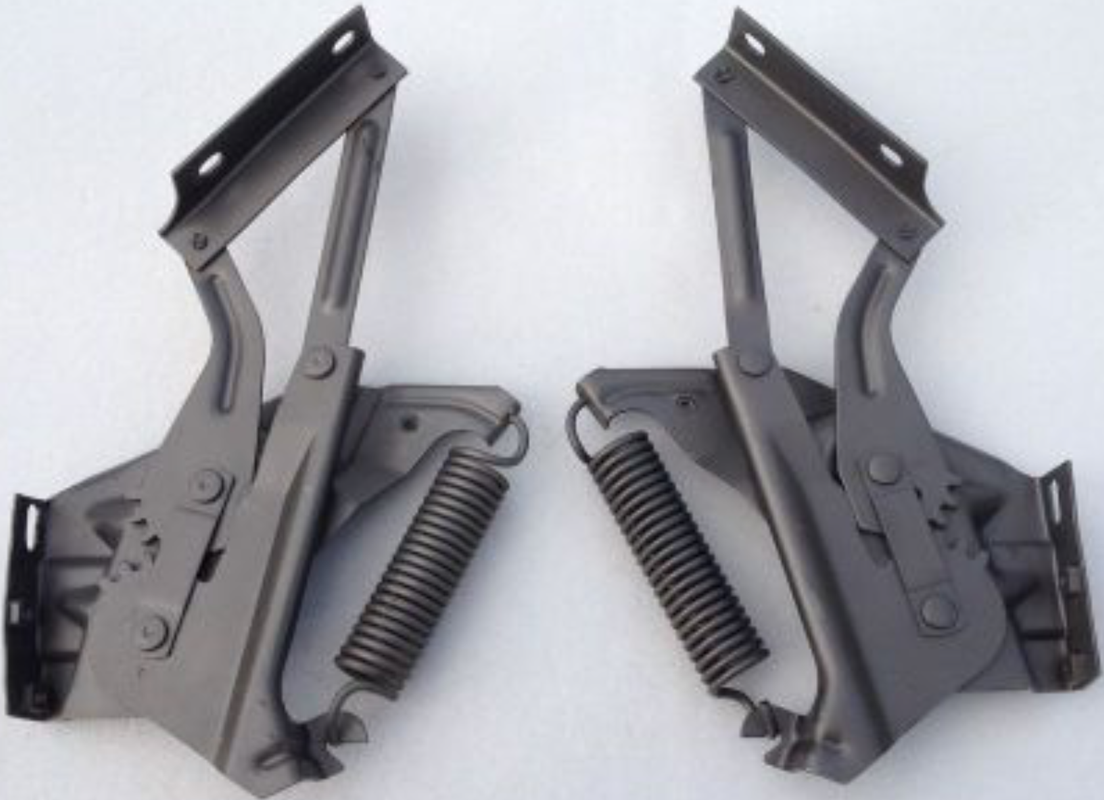
Like the GTA, I searched eBay to see if someone was selling a 1:1 set of '58 hinges and there were many. And I was able to find a great pictue clearly showing all the linkages and their relationship.

Unlike the Ford's, the Chevy hinges bolt to the firewall and not the fender, and have a bracket with a 90° bend. There is also this interesting gear-tooth mesh between the two big swing arms WHICH I AM NOT MODELING IN 1:24.
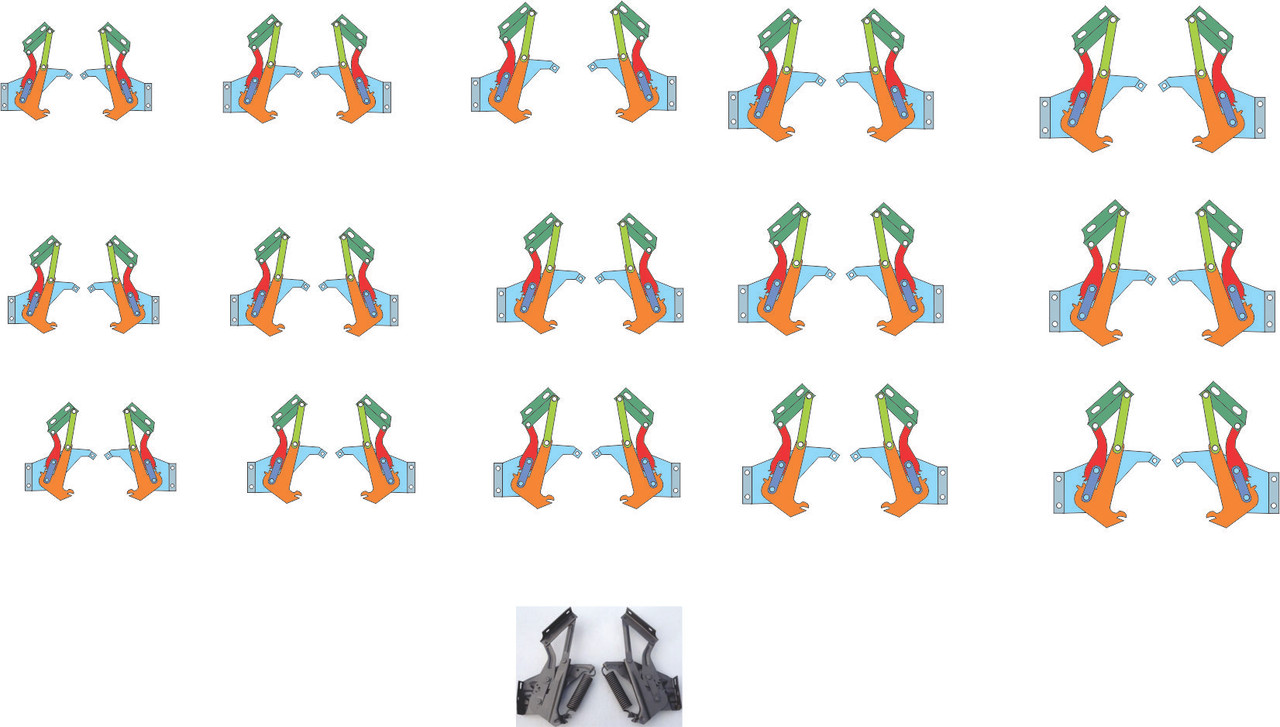
I imported the image into CorelDraw and drew the various pieces over the drawing. But I first had to decide on how big it was going to be. There was no way to be sure, so I guessed that the overall width was 8", and using that dimension drew some guidelines at that scale distance in 1:24, and shrunk the JPEG to fit between those lines. I drew all the pieces making different layers do I could draw them one on top of the other.
I drew each piece in color so I could clearly see how the elements overlap.
I then made two versions slightly bigger by 10% each and then another two reduced by 10%. I printed out this sheet of right and left hinges and worked with Brian to pick the size that most closely would work in the model. Luckily, the hood has simulated bolts where the bracket would attach. We just had to pick the set of drawings where the bolt holes on the drawing (taken from the real hinges) matched the model hood. It turns out that the second largest was the closest size. In the drawing, angle brackets are laid out flat to properly locate the holes. They're also drilled in the flat and then folded.

I didn't draw the springs and I may not add them to the model since they would be too small to be working and if not working, would impede the hinge motion. That said, I'll bet there's a miniature spring out there that could work. Perhaps I do some research. I could make a dummy spring and if the hood is not going to close, that could work. Round-wound guitar strings would work as fake ones.
To build the real hinges, I printed multople copies of the correctly-sized hinge since it takes a few to build the whole hinge. Each overlapping piece has to be cut out using the drawing as a guide and that destroys the drawing that lies below.

I put some pressure sensitive adhesive on the drawing's back and cut them out for sticking them to some 0.010" brass sheet. First thing I do when making these small parts is to accurately center punch each hole location for that part. You have to pay attention that you're picking holes that actually lie on just that part. I then drilled them with a #76 drill. I was using my carbide drills, but was having trouble with the cutting edges shattering. Brass is tough to drill, not because it's hard, but because it's gummy. I grabs drills. High speed steel is forgiving, but carbide is not. When it grabs, it often shatters the edge. I'm using 0.010" phosphor bronze wire for the pins. These are soldered on one end to stabilize the assembly.
After drilling, I cut the pieces out. If the part is basically rectangular, I use a nice pair of Xuron photo-etch fret scissiors. For the curved pieces I use a very fine tooth jeweler's saw on a bench hook of my own construction. Rule of thumb: you need a blade with fine enough teeth so that two are lieing on the material's cross-section. Someday, I'll buy a real hardwood, jeweler's bench hook for using a jeweler's saw. The main bracket and the top brackect have a right-angle bend in them. I used my little, Small-Tools Hold-n-Fold to make the bends on the large piece and a pair of old Vice Grips which makes an excellent bendng break for modeling in metal.
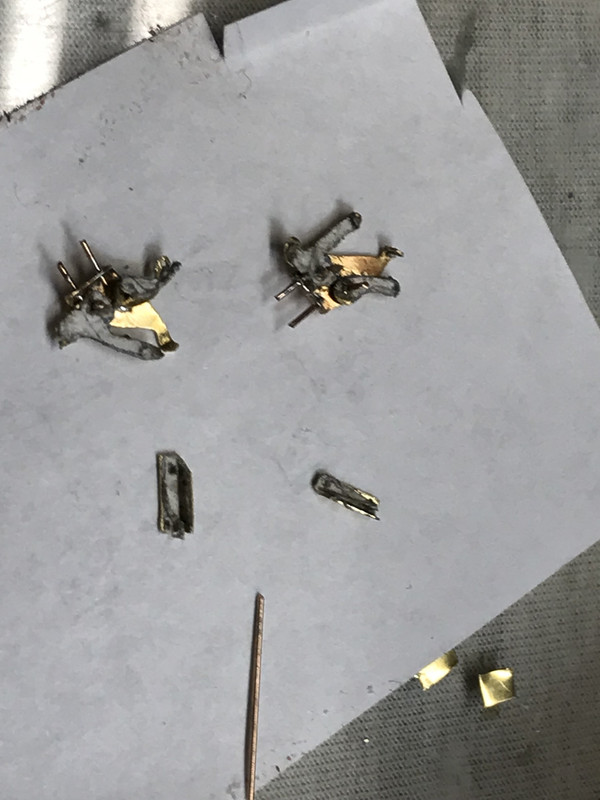
Here's the result of today's work. The paper is still attached to the small arms and gets pretty grubby during the process, but the main pins are in place. There're two more small arms; one goes across the two main pins and acts as a guide for the arms, and the other is the fourth link that forms the parallelogram. I've soldered pins on the bracket that will go into holes on the firewall to reinforce the fixture to the car. I won't pin the hood since it would impossible to drill the hood for the pins without passing right through. If CA doesn't hold well enough epoxy might work (or J-B Weld), but it would have to be supported overnight to cure properly.
