SEARCH FINESCALE.COM

Enter keywords or a search phrase below:

Amodel Ka-18 1/72 diorama !! the most (un)know chopper in the world (helo finished page 3)

23634 views
52 replies
1 rating 2 rating 3 rating 4 rating 5 rating
  • Member since
    February 2003
  • From: Rothesay, NB Canada
Posted by VanceCrozier on Friday, June 17, 2011 10:32 AM

No problem, sprue photos are here:

The clear parts for the windscreen & the side doors, the portions that are to be painted actually have some texture molded on to help the painting process along.

On the bench: Airfix 1/72 Wildcat; Airfix 1/72 Vampire T11; Airfix 1/72 Fouga Magister

  • Member since
    October 2008
  • From: italy
Posted by bsyamato on Friday, June 17, 2011 10:05 AM

VanceCrozier

Wow! I'm not surprised at the detail you're able to squeeze in there! I recently found Airfix's Ka-25 1/72 kit. I've never built a helicopter before, but this one was just too odd-looking for me to leave behind. It actually seems like a decent little kit, and I'm hoping to steal some tips from this thread!!

Put some sprue pics of the little 25, i'm curious. Unfortunately he's not on the airfix offers i found Sad

For tips steal what you want friend but this ka-18 is a short run kit. Helicopter ,out of rorors are not so different as build a plane.

  • Member since
    February 2003
  • From: Rothesay, NB Canada
Posted by VanceCrozier on Friday, June 17, 2011 6:58 AM

Wow! I'm not surprised at the detail you're able to squeeze in there! I recently found Airfix's Ka-25 1/72 kit. I've never built a helicopter before, but this one was just too odd-looking for me to leave behind. It actually seems like a decent little kit, and I'm hoping to steal some tips from this thread!!

On the bench: Airfix 1/72 Wildcat; Airfix 1/72 Vampire T11; Airfix 1/72 Fouga Magister

  • Member since
    October 2008
  • From: italy
Posted by bsyamato on Friday, June 17, 2011 6:26 AM

some update:

also added the little copter to Made In USSR GB !

Added an ip panel on the canopy celing

gluing canopy to the fuselage with white glue (vinyl glue) and all other pieces for preparing to the paint stage

Started the diorama terrain, modelling clay textured with a brushtooth

first layer of 140 humbrol as primer

Lots of putty again needed on the canopy, also the semicircular pieces on it was shaped with cutter in different way, original shapes was wrong.

that's all

thanx for viewing


  • Member since
    October 2008
  • From: italy
Posted by bsyamato on Monday, June 13, 2011 5:27 AM

More update!

Finished to paint the figures and closed fuselage

under tape tension

and good point progress

now need a good putty work

  • Member since
    October 2008
  • From: italy
Posted by bsyamato on Friday, June 10, 2011 3:40 PM

thanx Herc Big Smile

  • Member since
    March 2010
  • From: Democratic Peoples Republic of Illinois
Posted by Hercmech on Friday, June 10, 2011 3:11 PM

You are making great progress. One cool little whirly bird!


13151015

  • Member since
    October 2008
  • From: italy
Posted by bsyamato on Friday, June 10, 2011 3:07 PM

thanx for cooments Andrew, hope finish soon me too Cool

Just bring priority on some gb i'm ivolved

  • Member since
    May 2009
  • From: Riverton, Wyoming
Posted by Andrew Magoo on Tuesday, June 7, 2011 7:17 PM

Building helicopters in 1/72 scale is a challenge no matter the subject. That being said you sure have a handle on this subject. So far excellent work, I'm waiting to see the finished product, Magoo


  • Member since
    October 2008
  • From: italy
Posted by bsyamato on Monday, June 6, 2011 7:03 PM

some update

finally painted and glued the ip

only the two people i put inside avoid me to glue fuselage Big Smile 

looking at the main cockpit i drammatically decided to heatform one better Sad 

after 5 attempt get a good result surely better than original

put the original on a support

and one of tries

comparing to original

lots of cuts needed but this is the result, also graved the frames.

too clear Indifferent now can see all inside Cool

at the next

  • Member since
    October 2008
  • From: italy
Posted by bsyamato on Sunday, May 29, 2011 10:27 AM

kermit

My apologies sirZip it! I do know who you are referring tooSmile . You are planning prop blades out of balsa in 1/72?? Can't wait to see you pull that one offYes Have fun my friend.

Richard

no no! not prop blades Big Smile calling props as some object in diorama, some wall or something other Yes

  • Member since
    June 2009
  • From: Netherlands
Posted by kermit on Sunday, May 29, 2011 10:13 AM

My apologies sirZip it! I do know who you are referring tooSmile . You are planning prop blades out of balsa in 1/72?? Can't wait to see you pull that one offYes Have fun my friend.

Richard

"Success is the ability to go from one failure to another with no loss of enthusiasm." - Sir Winston Churchill

  • Member since
    October 2008
  • From: italy
Posted by bsyamato on Sunday, May 29, 2011 9:56 AM

thanx for comments richard Big Smile but here refere to me just as bsyamato Embarrassed actually someone mud this name in italy!

i have lots of things to build a diorama, unfortunately not foun actually 1/72 civilian figures Surprise

I choice this little helicoptes because i like the strange old desing and.. i don't know it before i see in amodel catalog!

For the diorama in mind to do a rural setting, this as others russian copter ,was used to connect lands hard to reach with other veichles.

then no airfield, probably some little concrete surface ,but most grass. Then a sort of irregular surface.

The two figures are in 1/87 scale and fit really hard inside. Also have some animal and some other figure i can obtain from airfix/preiser/esci/revell 1/72 figures i have.

Recenlty someone give to me some balsa wood stips that can be used as prop build!

At the next update Big Smile

  • Member since
    June 2009
  • From: Netherlands
Posted by kermit on Saturday, May 28, 2011 10:49 PM

Silvio,

EXCELLENT scratchwork, as always!YesYes. I just love how you take cheap, ill fitting models and double the parts count by adding your styrene nand metal bits. On top of that i think you have chosen a very interesting, seldom modeled subject. I just love the double rotors on the kamov choppersBig Smile

Your idea for a diorama is very interesting too. And shouldn't be that much work since this is a very small model. Have you got the figures and stuff for it already? 

The only sensible thing i can say about that right now is that if you should decide on a concrete airfield setting, make it look like grass is coming up inbetween the concrete slabs, cracked concrete and worn painted lines on it. From what i have seen in books and films i know that most russian gear is built to take a beating and be used on terrain just like that... 

Good luck on your build and i will be watchingWink

Richard

"Success is the ability to go from one failure to another with no loss of enthusiasm." - Sir Winston Churchill

  • Member since
    October 2008
  • From: italy
Posted by bsyamato on Thursday, May 26, 2011 7:14 PM

little update, last pieces on the ip

at the end needed 3 plastic sheet pieces

and added a metal handler... probably an holder for passengers Big Smile

  • Member since
    October 2008
  • From: italy
Posted by bsyamato on Tuesday, May 17, 2011 7:13 PM

good metaphor to describe the two Manufacturers Cool thanx for comments.

Started to study diorama and modded two little figures (shhh Whisper are 1/87 not in 1/72) from preiser, i'll put two passengers in the cockpit :

and painted other pieces


one of few pictures on web of the little kamov is the cockpit, after study a litte the original ip is wrong Crying

then under with evergreen sheets

main error is in eight, i'll used 3 layer to give rigth thickness to the ip

that's all for now

  • Member since
    May 2009
  • From: Poland
Posted by Pawel on Friday, May 13, 2011 7:22 PM

Oh yeah, I heard Kamov OKB (design bureau) was to Mil OKB what Caddilac was to a Buick :D

Keep up your excellent work!

Paweł

All comments and critique welcomed. Thanks for your honest opinions!

www.vietnam.net.pl

  • Member since
    October 2008
  • From: italy
Posted by bsyamato on Friday, May 13, 2011 7:11 PM

Stage_Left

Very nice work....

Thanx! 

Some update

sanded some frame on clear parts to aid paint grip

and finally start painting

Seats need to be darked with drybrush and black washing.

ip is the original part, is not too different from real, so i can save some scratch.


  • Member since
    February 2010
  • From: Maine
Posted by Stage_Left on Monday, May 9, 2011 6:51 PM

Very nice work....

  • Member since
    October 2008
  • From: italy
Posted by bsyamato on Sunday, May 8, 2011 5:01 PM

updates

glued second rotor

these are others pieces that i should glue on the rotors Hmm mh... in mind to replace something

all seats with seams to test fittings

sanded the rear central consolles, withouth this the rear seat was touch the fuselage walls

with the eighted seats the rotor bar touch the pilot seat then i replaced original pieces with brass rod , tape and replaced pedals too

for now that's all, today counting to start painting


  • Member since
    October 2008
  • From: italy
Posted by bsyamato on Saturday, May 7, 2011 7:04 PM

thanx Mike , this little one will give me more problems that as usual,

but want to see it finished!!!

thinking at a little diorama like this picture

then little copter little update

added some piece of brass to increase the height of seats and try to put the seams of padding


and glued the first rotor, the strange plastic used in this kit mades blade hard to break easily ,and glue good ! (point for amodel) but lots of work needed to remove flashes, one of trims and a pin in the blades (a balancer i presume) was not molded!! need to scrath after

at the next


  • Member since
    February 2011
  • From: San Antonio
Posted by MAJ Mike on Saturday, May 7, 2011 11:37 AM

As usual, it looks great.


 "I'd "I'd rather be historically accurate than politically correct."

"Sic gorgiamus allos subjectatos nunc!"

  • Member since
    October 2008
  • From: italy
Posted by bsyamato on Saturday, May 7, 2011 11:10 AM

little update

putty on

seat shaped compared to the original

details of pieces on sprue a little merged with Tongue Tied

go down to made more!


  • Member since
    October 2008
  • From: italy
Amodel Ka-18 1/72 diorama !! the most (un)know chopper in the world (helo finished page 3)
Posted by bsyamato on Wednesday, May 4, 2011 7:11 PM

long time not write something in this section.

Finally bought another two helicopter , the unknow wasp from airfix and this famous russian helicopter...

... i confess , before to see the amodel catalog never see it in other places Tongue Tied

but was love at first sight Embarrassed

it remind me my daddy old fiat 500 giardinetta. Even the doors is hinged on rear!

it's a civilian copter developed from the smaller ka-15 and used as taxy service (used even by russian army but not in combat missions)

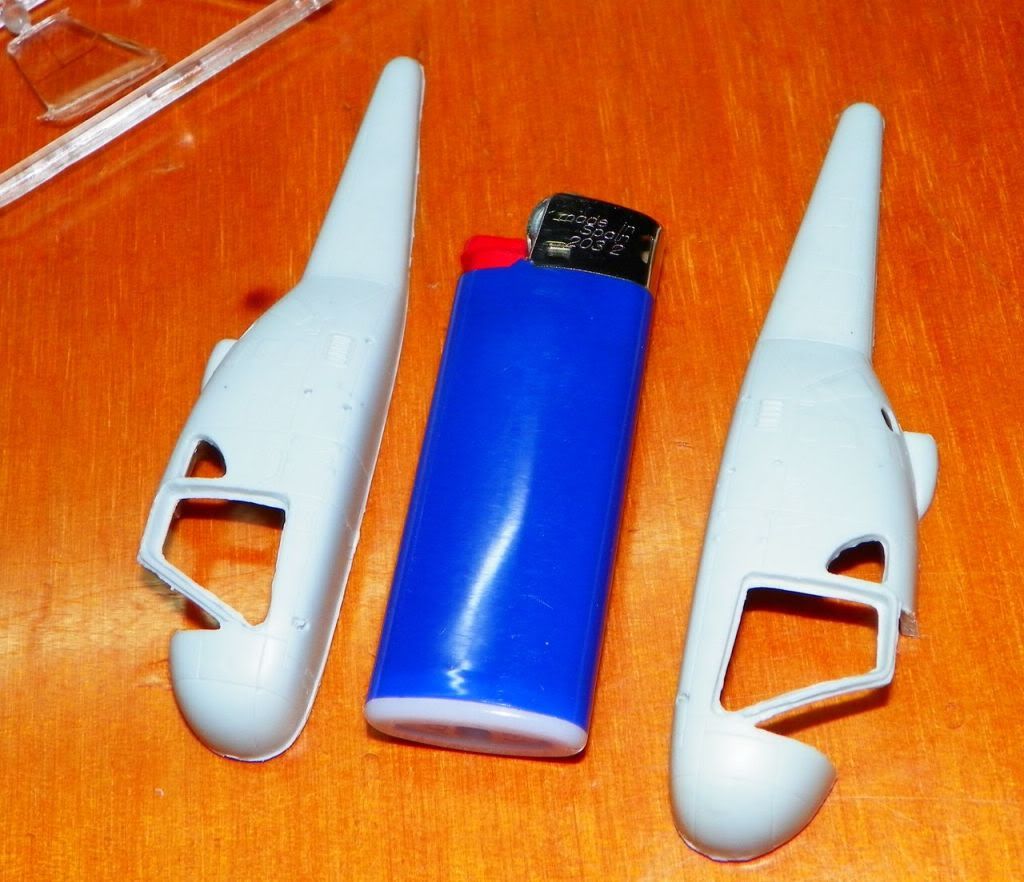
then this is the kit out of box
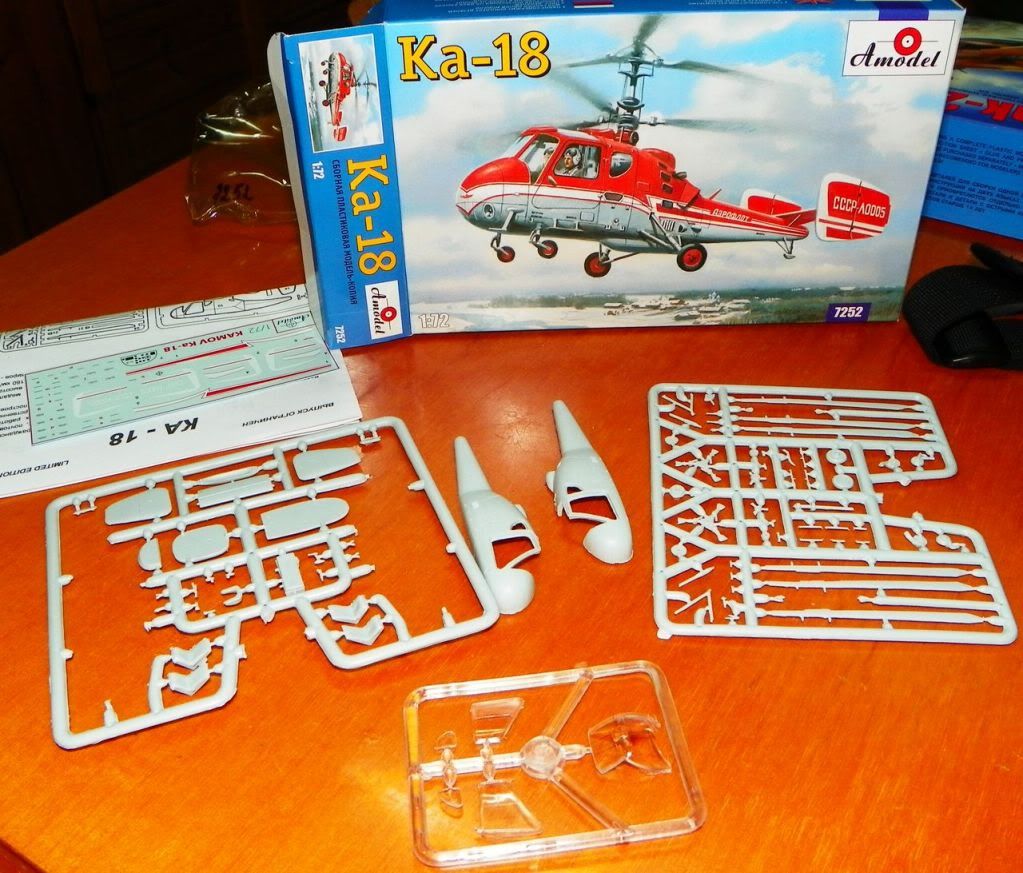
Photobucket

i realized the real size of the kit only when i opened the box Indifferent

Photobucket

Photobucket

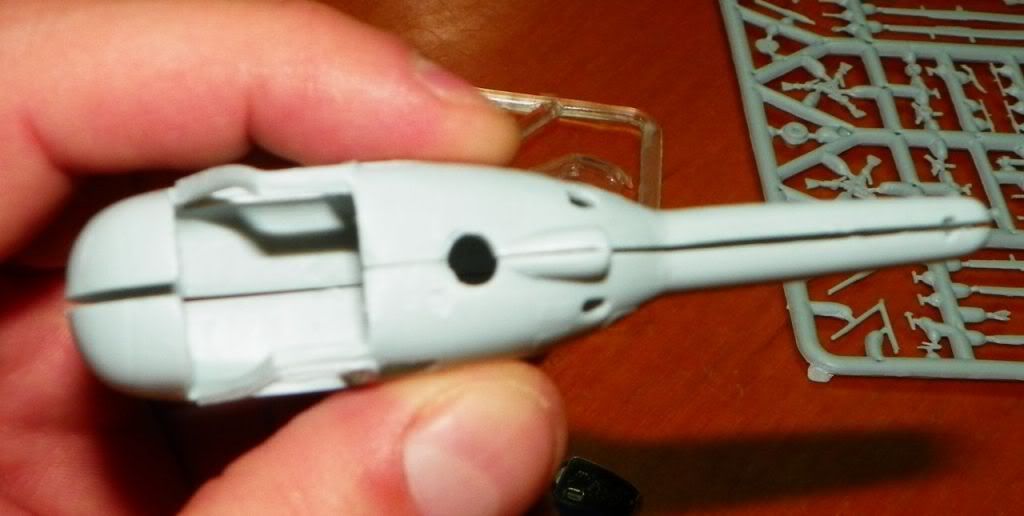
the quality of kit are greater than a short run, but less than a good mass production kit.

fitting is not so good and lots of flashes on pieces, but nothing that can fear an averaged modeller.

decals are good printed but a good final test will only after used it.
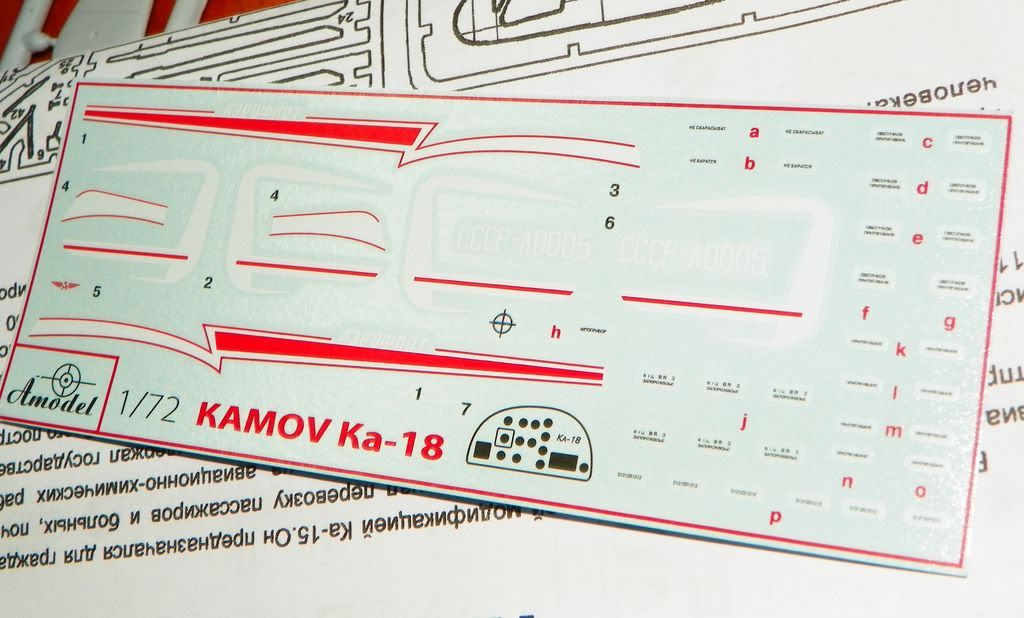
Photobucket

Few references on the web but on airliners.net i found even a picture of the ip.

Actually i'm very busy with four group build but i'm too fashinated by this subject then go on with works!

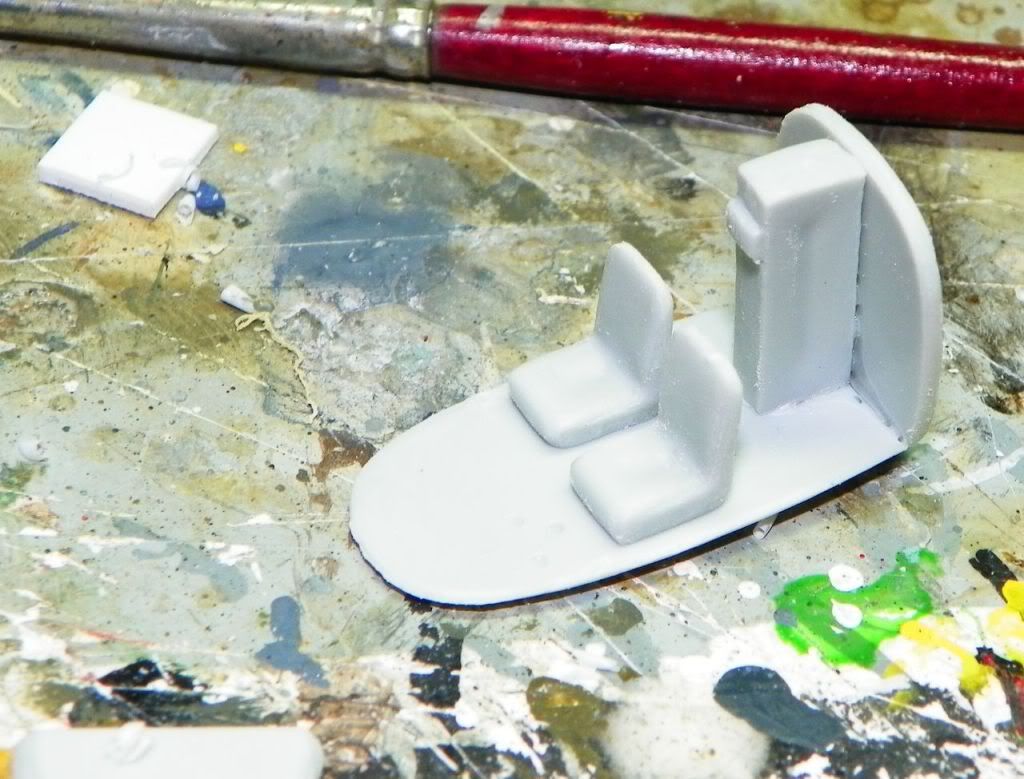
glued the cockpit floor to the rear bulkheads and the (avionics or gearbox) box in the middle,

used the two fuselages to aid the right position for the pieces.
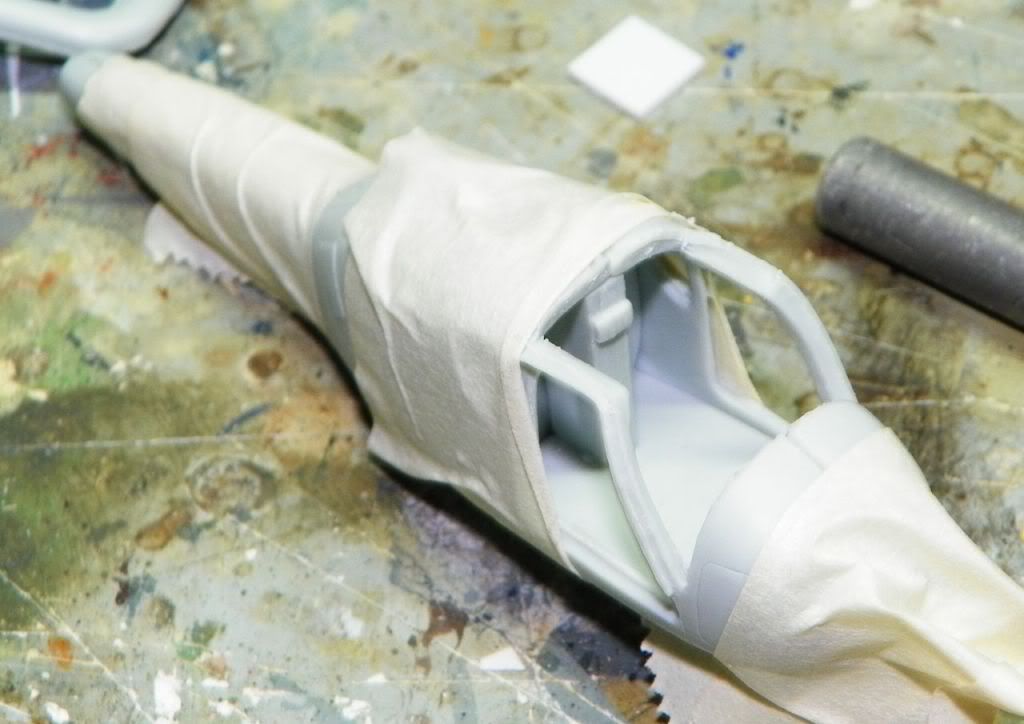
Photobucket

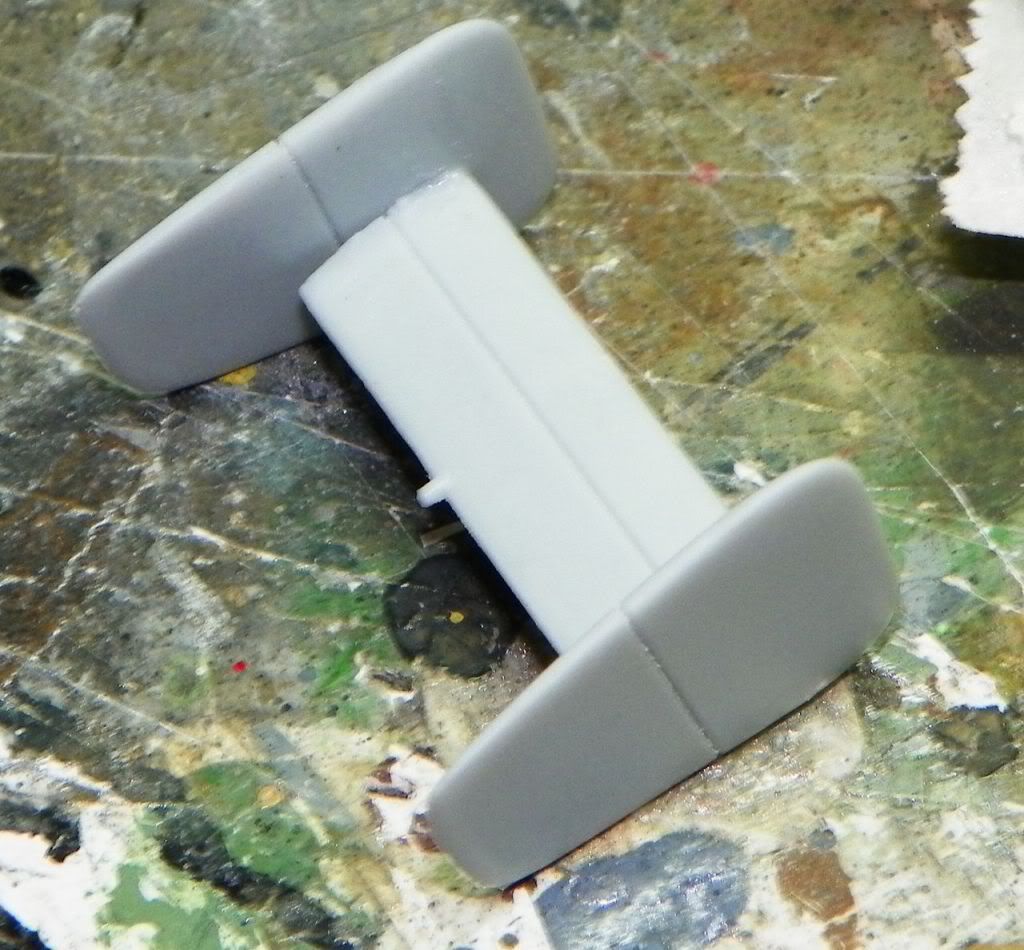
and after released the pieces from sprues and lots of flashes glued the tail pieces
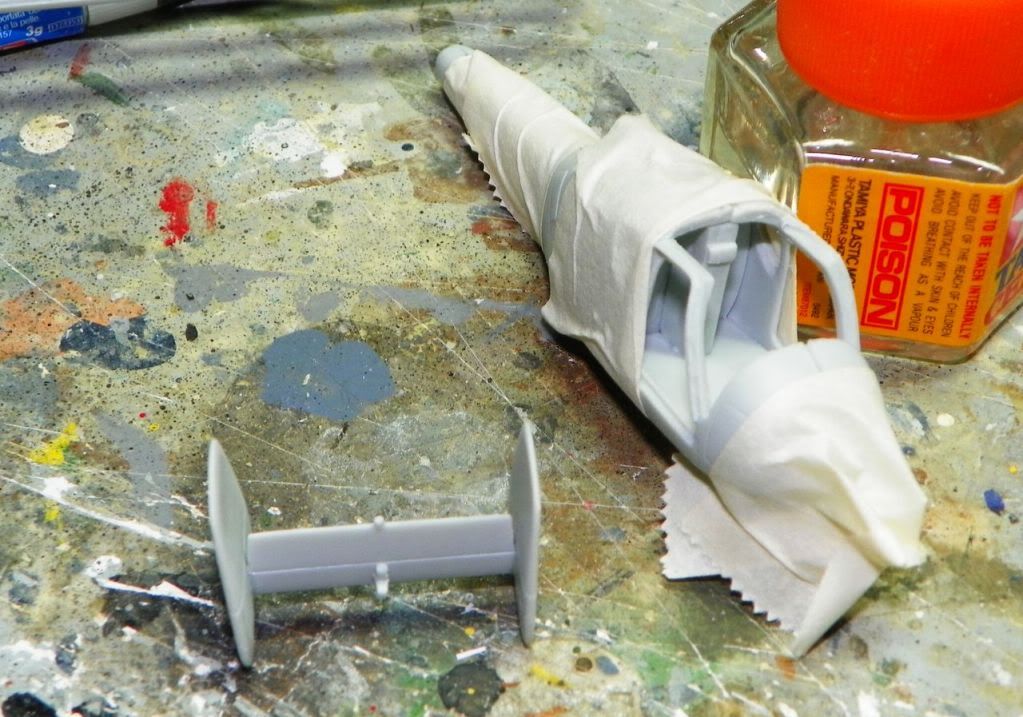
Photobucket

Photobucket

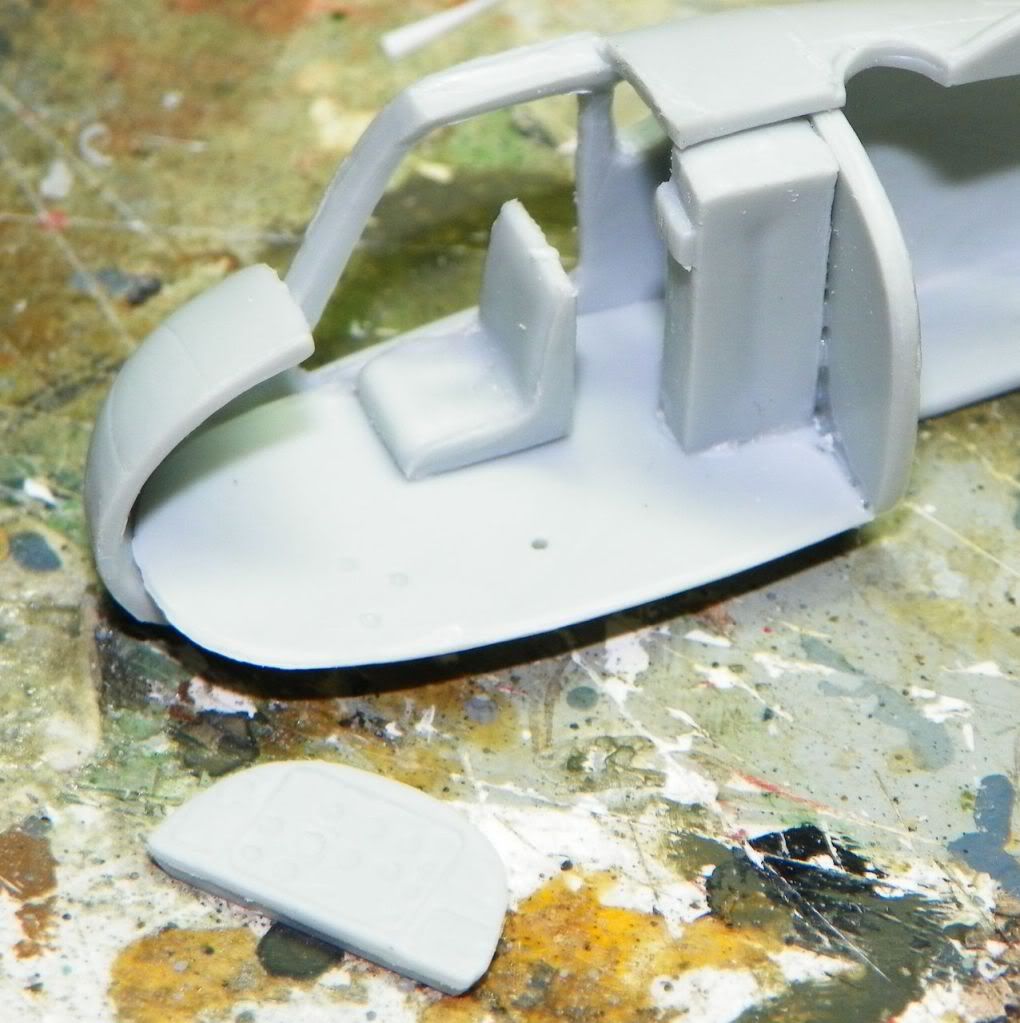
test ftting for forward seats, the ip panel is in acceptable detail level, but not have pins for easy fixing.. Tongue Tied

seats need to be lifted few millimeters, and need to be shaped correctly
Photobucket

Photobucket

that's all for now, i hope to do a speed built but some scratchbuilt is needed


Tags: ka-18 kamov
JOIN OUR COMMUNITY!

Our community is FREE to join. To participate you must either login or register for an account.

SEARCH FORUMS
FREE NEWSLETTER
By signing up you may also receive reader surveys and occasional special offers. We do not sell, rent or trade our email lists. View our Privacy Policy.