SEARCH FINESCALE.COM

Enter keywords or a search phrase below:

BIG Russian Jet Groupie GB

186758 views
1790 replies
1 rating 2 rating 3 rating 4 rating 5 rating
  • Member since
    June 2007
Posted by Porkbits on Wednesday, December 26, 2012 9:21 PM

That worked. Thanks!

Dre
  • Member since
    June 2007
  • From: here, not over there
Posted by Dre on Tuesday, January 1, 2013 3:50 PM

All the decals are on this thing and hopefully all the major painting and shading is finished.  I need to do a little more detail painting and weathering before a final flat coating.

I've gone in and delicately sanded almost all the decals with 2000 grit paper to better blend them with the worn and weary paint....  some decals worked out better than others but overall they look much better than fresh.   There's somewhere around 200 decals on this aircraft and its weapons....

all that's left is ....   details, details details.Stick out tongue

  • Member since
    June 2007
Posted by Porkbits on Tuesday, January 1, 2013 9:31 PM

Looks awesome! Your weathering/paintwork is subtle but very effective. I kowtow.

I hope to have the wings on my Su-25 in a few days. Will post pics.

Dre
  • Member since
    June 2007
  • From: here, not over there
Posted by Dre on Wednesday, January 2, 2013 1:48 PM

Ah, I'm just figuring it out along the way.   I have an idea of what I want it to look like and no clear plan on how to get there.    This finish was inspired by a photo of a very tired and weathered MiG-29 that Dean posted some weeks back....  I want thing to look like it is run hard and put up wet.

  • Member since
    February 2003
  • From: Rothesay, NB Canada
Posted by VanceCrozier on Wednesday, January 2, 2013 2:07 PM

Frogfoot is looking good Dre. I'm starting to pick up some steam on the Su22 as I put the wraps on other kits. I managed to spend some time removing & cleaning up some parts, and have actually started assembly on the underwing stores...

On the bench: Airfix 1/72 Wildcat; Airfix 1/72 Vampire T11; Airfix 1/72 Fouga Magister

  • Member since
    November 2005
Posted by Anonymous on Friday, January 4, 2013 7:41 AM

Happy New Year all hope you all had a great Christmas too, I have just got back into the Mig, now there's no Spitfire to get in the way thank goodness! Anyhow the Mig is looking great and you all could see it but Photobucket will not upload my pictures it just keeps saying Error Loading, anyway I will get them sorted somehow, I might as well just say what Ive done and when I get the pictures up I'll go through them and explain. So I ordered the Scale Aircraft Conversions landing gear as the model was really quite heavy especially with a bunch of pennies glued together in the nose as weight. the landing gear was detailed with hydraulic hoses, break lines, and electrical wires. also the rear landing gear bays are getting the same treatment as this model is quite bare in terms of what detail should be there, but I like to make my own detail I get a lot of satisfaction from it, that's not to say that I would ever rule out resin, it's just how I do it. Hope to see how everyone is doing with their builds soon.

  • Member since
    November 2005
Posted by Anonymous on Friday, January 4, 2013 7:44 AM

I am going to ues your idea of sanding the decals as that's a very good looking finish on them, I usually paint over them to fade them and use a brush to break up the lettering but this seem much simpler.

Dre
  • Member since
    June 2007
  • From: here, not over there
Posted by Dre on Friday, January 4, 2013 11:49 AM

Hope it works out for you- this frogfoot is inspired by that run-down MiG.

Happy New Year!

  • Member since
    February 2003
  • From: Rothesay, NB Canada
Posted by VanceCrozier on Friday, January 4, 2013 2:24 PM

Hey Dean - looking forward to your pics!  

I hope to have my cockpit and payload dealt with this weekend, (as this is my next GB deadline due!) maybe even fuselage work done. I really like this Italeri/Bilek kit so far. Really nice details, low parts count. The cockpit itself could benefit from some aftermarket, but.... not much will be seen once closed up anyway, which is my plan.

Dre - sanding the decals... did you encounter any where you sanded off a layer of colour & exposed a white layer beneath?? Just wondering what would/could happen, depending on the decal manufacturer of course.

On the bench: Airfix 1/72 Wildcat; Airfix 1/72 Vampire T11; Airfix 1/72 Fouga Magister

Dre
  • Member since
    June 2007
  • From: here, not over there
Posted by Dre on Friday, January 4, 2013 2:58 PM

Vance, no- there's enough paint on her to prevent that, but it was a concern of mine to expose the underlying darker tones.   And thankfully, these Authentic Decals were printed on some of the thinnest carrier film I've dealt with so they didn't stand too proud of the paint.   I think that the ink was thicker than the film...

I'm not so sure that this would work well on thicker decals like those from Tamiya or Hasegawa.

The biggest issue is making big polished areas around the decals, making an overall surface polish a necessity so that there wasn't any glaring differences in the surface appearance.   If you have a high shine glossy paint job, then it shouldn't be an issue.

  • Member since
    November 2005
Posted by Anonymous on Friday, January 4, 2013 3:45 PM

Okay so here we are, I know the image is not the best but for now its the best I can do, this is an over all view, the paint has been weathered as best as I can without overdoing it

  • Member since
    November 2005
Posted by Anonymous on Friday, January 4, 2013 3:48 PM

This is the Scale Aircraft Conversions landing gear, these are basic struts any detail you will have to add yourself

  • Member since
    November 2005
Posted by Anonymous on Friday, January 4, 2013 3:49 PM

Dre
  • Member since
    June 2007
  • From: here, not over there
Posted by Dre on Friday, January 4, 2013 3:49 PM

Looks good and grubby, Dean.   I've got a couple of those SAC landing gear sets and none of them are that nicely detailed.   How odd...

  • Member since
    November 2005
Posted by Anonymous on Friday, January 4, 2013 3:51 PM

I tried my best to make plastic look like scorched metal, my best attempt yet I think.

  • Member since
    November 2005
Posted by Anonymous on Friday, January 4, 2013 3:53 PM

This is the gear bays, I have to add more detail though.

  • Member since
    November 2005
Posted by Anonymous on Friday, January 4, 2013 4:28 PM

No Dre there was no detail on the SAC landing gear, I used wire and stretched sprue.

Dre
  • Member since
    June 2007
  • From: here, not over there
Posted by Dre on Friday, January 4, 2013 4:55 PM

Oh, right.   I had misread your post about them.  

Anyhow, they look good.

  • Member since
    November 2005
Posted by Anonymous on Friday, January 4, 2013 5:50 PM

Well they will certainly do the job but when I got them some arts were slightly bent out of shape, but it was easy to put them right. Also something I did, which you cannot do with plastic is I sprayed them with primer which I will keep as the colour then after it dried I filed the oleos, as it is metal they file to a bright shine like chrome, looked really good, after all what looks more like metal than metal.

Dre
  • Member since
    June 2007
  • From: here, not over there
Posted by Dre on Saturday, January 5, 2013 10:59 AM

You might want to seal in that bright, shiny goodness with something to help prevent oxidation...  I've done the same thing on some metal legs.

  • Member since
    June 2007
Posted by Porkbits on Saturday, January 5, 2013 12:33 PM

Hey, guys:

Great looking build, Dean! I love that scheme. You guys are good.

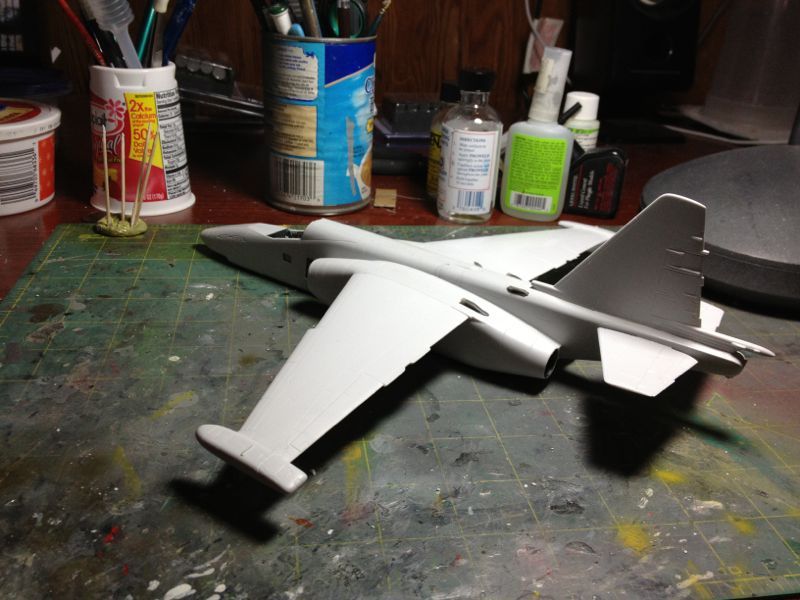
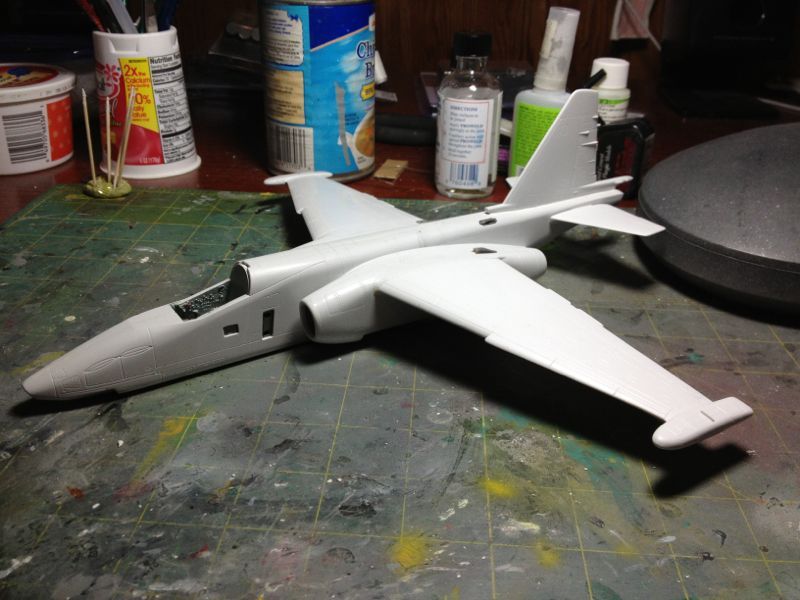
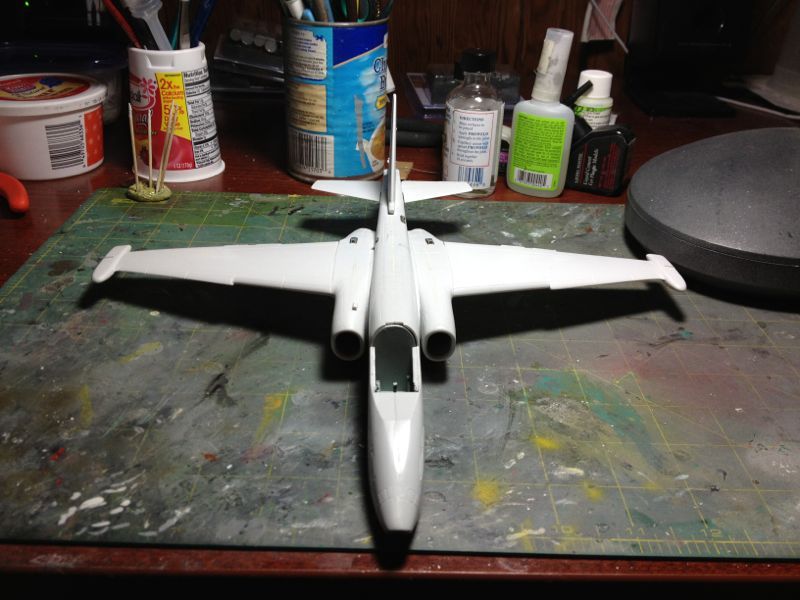
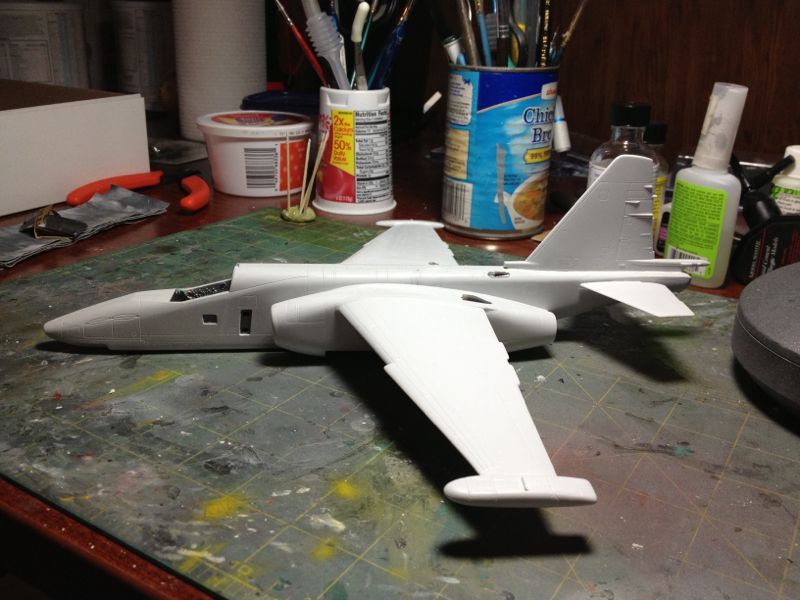
As for me, finally got the airframe together, Phew. Wasn't kidding when I said I was slow. :-)

In any event, not a shake 'n' bake kit, but not horrible, either.

Pit: Had to saw off the front of the cockpit consoles to get the Eduard instrument panel to fit. Glued the side panels to the fuselage halves, rather than to the cockpit itself (per instructions). This ensured the top of the canopy rails were flush with the fuselage, allowing for a good fit for the PE rails.

Nacelles: Bit tricky making sure the wheel wells and intakes were all lined up while gluing nacelle halves together. Could have used a third arm. :-) Then the usual filling of intake seams. Good times.

Fuselage halves: No real problems here, other than some of the panel lines didn't match up. Removed the alignment pins to make assembly easier, then the usual seam-filling, which was minor.

Wings: Top and bottom wing halves went together with no issues. Wing-to-fuselage fit not particularly great, and also have to make sure you get dihedral correct. Gaps and steps on wing root bottoms, so had to use CA and putty to fill. But figure since it's the bottom, doesn't have to be perfect.

Rear stab: No problem with left and right halves, stab-to-fuselage fit was fine, just required a little filler along bottom. Since there isn't a locating tab, you have to make sure alignment is good along all axes. Despite my best efforts, ended up with some lean to the right (if viewing dead-on from front, can probably see in pic), but not a build-killer by any means.

Horz stabs: No big issues here, other than making sure you get the upward dihedral correct.

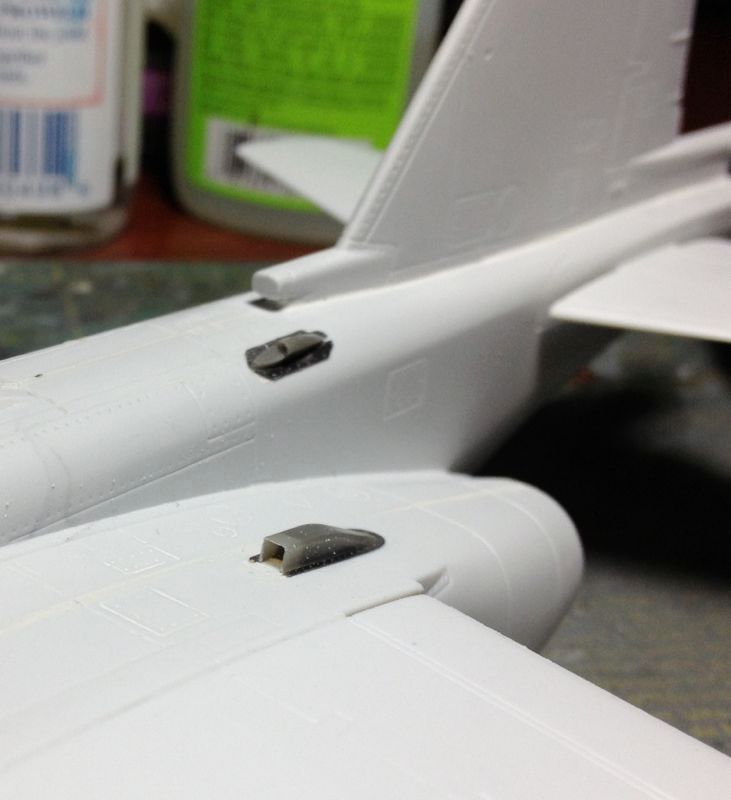
Eduard bits: Scoops went on fine, although I had some issues with the smallest one because it's, well, small. Tried and discarded the actuator for the rear stab. Too small to bend properly without a electron microscope. I tried!

So that's it for now. Next: landing gear, wheels, and gear doors. Then I get into the grind of it--all the Eduard Brassin ordnance, the Eduard bang seat (which is a kit unto itself), and then painting.

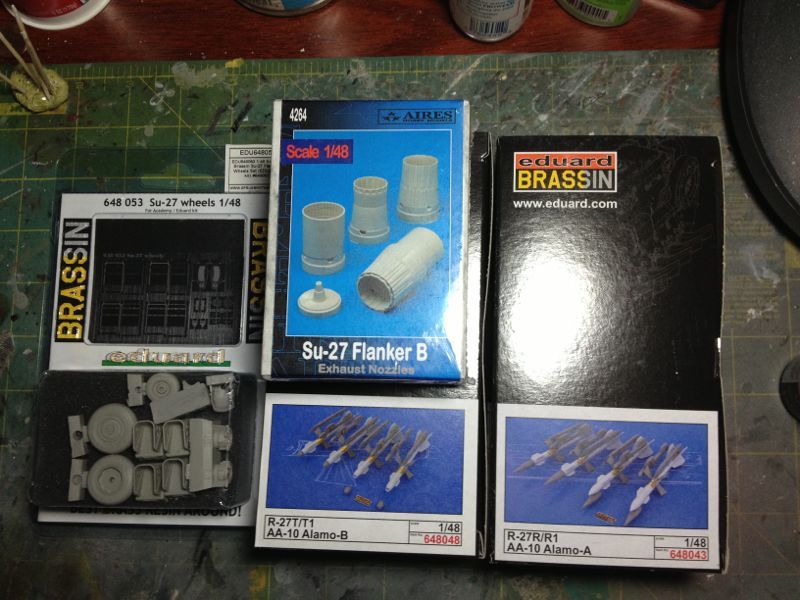
Pics below, including a shot of all the goodies that arrived today for my Su-27. :-) :-)

Thanks for looking!

PB
  • Member since
    November 2005
Posted by Anonymous on Saturday, January 5, 2013 3:14 PM

That is looking good Porkbits, I too have a 1/48 su 27 to build the Academy kit, I received a voucher fot the Academy 1/48 SU27, one thing to point out about this kit, (Academy's SU27) is that I have made the SU30 in 1/48, and it was an awesome kit, and it was £34.99 which is about right, even a bit of a bargain, but the SU27 is £27.99 which when you consider the competition is really very good value, until you compare them to Revell's 1/32 Fulcrum Which cost me £33.99 which is either bargain of the century or Academy have over priced kits I don't know well whatever the weather I like all these kits and if I have time I will add the SU27 to this GB if not I'm sure we can do another one similar to this like a Sukhoi GB or something along these lines. Also I wanted to say Porkbits you said you have a bit of a step underneath the wings and you have filled it with putty, well in order to make this labour free, simply buy nail polish remover, and get cotton buds, then wipe the excess putty away, easy, no sanding and re-scribing you cant leave these details out Porkbits gotta do it all right lol.

  • Member since
    November 2005
Posted by Anonymous on Saturday, January 5, 2013 3:17 PM

Sorry a voucher for the Belfast Model Shop, is what I meant, also I learned that the shop has been there since 1939! A long time. Probably see virtually all the models ever produced there as a friend of mine used to manage the shop and about 9 years ago the annual turnover was close to 3 million which for plastic I found absolutely incredible.

  • Member since
    November 2005
Posted by Anonymous on Saturday, January 5, 2013 3:23 PM

I did Dre I anticipated that happening, I read about it when I saw a Mirage III in NMF the guy used foil.

Dre
  • Member since
    June 2007
  • From: here, not over there
Posted by Dre on Saturday, January 5, 2013 4:11 PM

That looks great so far, Porkbits.   I'm so used to looking at my own two-seater that your single-seat Frogger looks odd!

I'd really like it if you guys with Flanker-family kits would enter them in the Flanker GB as well as here, but do as you see fit.

  • Member since
    November 2005
Posted by Anonymous on Saturday, January 5, 2013 4:17 PM

Well sure Dre I will defo if the finish date is far enough away, when is it exactly? If I have at least until after Easter I will join the Flanker GB. I have to finish this Fulcrum, I am not one of those people who likes to do two kits I tried it before, didnt work.

  • Member since
    November 2005
Posted by Anonymous on Saturday, January 5, 2013 5:12 PM

I was wondering if anyone knew if any manufacturers were bringing out an su33 or su35/37 in 1/48th, I have literally just seen a company called mini hobby who have released a 1/48th kit of the su 37 and I have to say it looks simply awful, literally completely and utterly terrible, I don't usually pick holes in kits to this extent I normally 9 times out of 10 am very happy, as they have teams of people Im sure to design the kit, but Mini Hobby? Looks like someone described what an SU35/37 looks like down the phone to a guy who was designing the kit and had never seen one before, so bad its funny.

  • Member since
    November 2005
Posted by Anonymous on Saturday, January 5, 2013 5:30 PM

Also I have seen that Hobby Boss is releasing a 1/48 scale flanker, this should be a good one!!!

  • Member since
    November 2005
Posted by Anonymous on Saturday, January 5, 2013 7:27 PM

This is the nose landing gear finally attached it looks good I think the SAC landing gear is nice and strong, a little wonky but the glue sorted that, so hopefully in the morning it will be a rock solid attachment, all the work I put into the additional detail is in my opinion a good result, I also washed the engines with a black flat wash, I thought the pigments would wash away but they were there a few days and they are still only now the engines have a more flat finish which is a bit more realistic I think.

  • Member since
    June 2007
Posted by Porkbits on Saturday, January 5, 2013 10:37 PM

Thanks, guys! Looking good, Dean. Hard to believe that any model shop would be around that long. 1939--that's amazing (as is the millions of kits sold yearly).

I'm also building the Academy Su-27. Well, it's actually the Eduard limited edition re-issue of the Academy kit, but close enough, I guess. Way overpriced so nothing I would buy myself, but was a Christmas gift. :-)

Dre, will join the Fulcrum GB at some point. Sorry, just couldn't resist throwing in a pic of the Eduard bits that arrived today. ;-) I also can't work on more than one kit at a time (I obsess enough over one, I would probably end up in a mental ward if I tried two), so will sign up for the Fulcrum GB as soon as I'm finished the the Frogfoot. Can't wait to sink my teeth in the Su-27.

Also watching the HB Su-27 release with interest. HB kits seem to be hit or miss these days, so curious as to how it'll turn out.

JOIN OUR COMMUNITY!

Our community is FREE to join. To participate you must either login or register for an account.

SEARCH FORUMS
FREE NEWSLETTER
By signing up you may also receive reader surveys and occasional special offers. We do not sell, rent or trade our email lists. View our Privacy Policy.